It’s prepped and on the table in 20 minutes!
This simple and delicious Neapolitan Italian dish is popular all over Naples (and Rome) but it’s a cinch to make at home with basic pantry staples. Trust us, you’re going to be hooked!
What is Aglio Olio Sauce made of? Its main ingredients are simple ingredients: Aglio (garlic) and Olio (oil) are the foundations of this recipe.
The traditional pasta is a basic spaghetti noodle. The secret to its deliciousness is using the hot pasta water in the sauce, which is combined with the hot olive oil. The added starch in the water creates an emulsion for a silky sauce.
Get ready to peel some garlic!
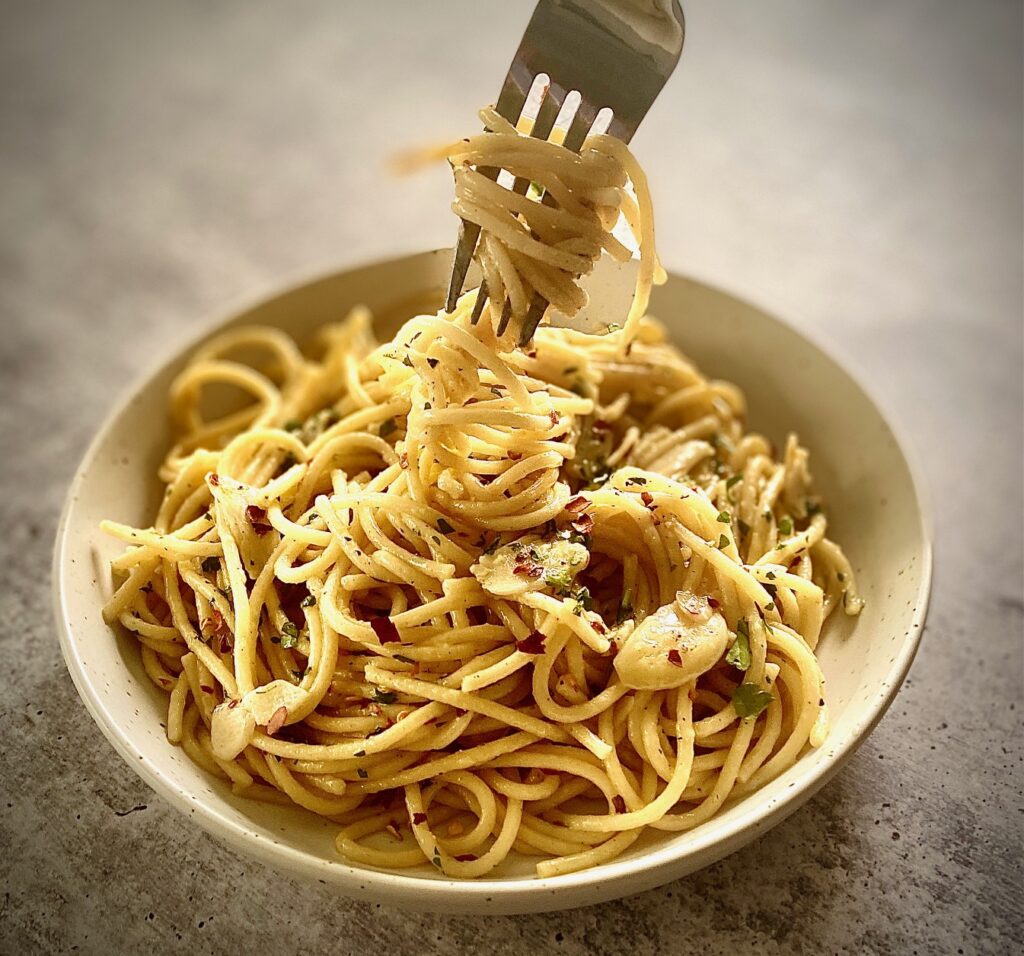
Ingredients
For the exact quantities and full recipe see the recipe card below.
- Spaghetti – Dried pasta works best for this recipe and while spaghetti is traditional you can use fettuccine or linguine
- Extra Virgin Olive Oil – we recommend using your best extra-virgin olive oil for this recipe because olive oil is the star of the show here!
- Garlic – we LOVE a lot of garlic so we use 10-12 cloves of garlic. If that seems like a lot for your taste it’s okay to cut back to 6-8 cloves
- Crushed Red Pepper Flakes – traditionally, in Italy, they use fresh peperoncini (red chile peppers) for spaghetti aglio e olio, but they can be hard to find in the U.S., so we’ve substituted red pepper flakes. Add more or less depending on your desired spice level
- Sea Salt and Black Pepper – the pasta water needs a generous seasoning of salt (a must for a tasty finished sauce), and we’ll use it in the sauce too. You can substitute kosher salt, as well
- OPTIONAL, Fresh Lemon Juice – just a small amount but it really brightens up this dish so we highly recommend it
- OPTIONAL, but recommended – Grated Parmesan Cheese and Fresh Parsley – neither are traditional, or required, but…cheese…need we say more?

How to make easy Pasta Aglio e Olio
This dish comes together quickly so have all the ingredients prepped and ready before the cooking starts. We’ll make the sauce while the pasta is boiling.
- COOK THE PASTA: Bring a large pot of salted water to a boil. Be sure to salt the water generously (trust us, don’t skip this step!). Add the pasta to the boiling water and cook for about 8-10 minutes or until al dente (do not drain).
- PREP: Peel and thinly slice the garlic cloves (use 8-12 depending on your personal taste, we use 10). Roughly chop the parsley leaves and grate the Parmesan. Set aside.
- MAKE THE SAUCE: While the pasta cooks you will make the garlic oil by heating the olive oil over medium-low in a large sauté pan or heavy-bottomed large skillet.
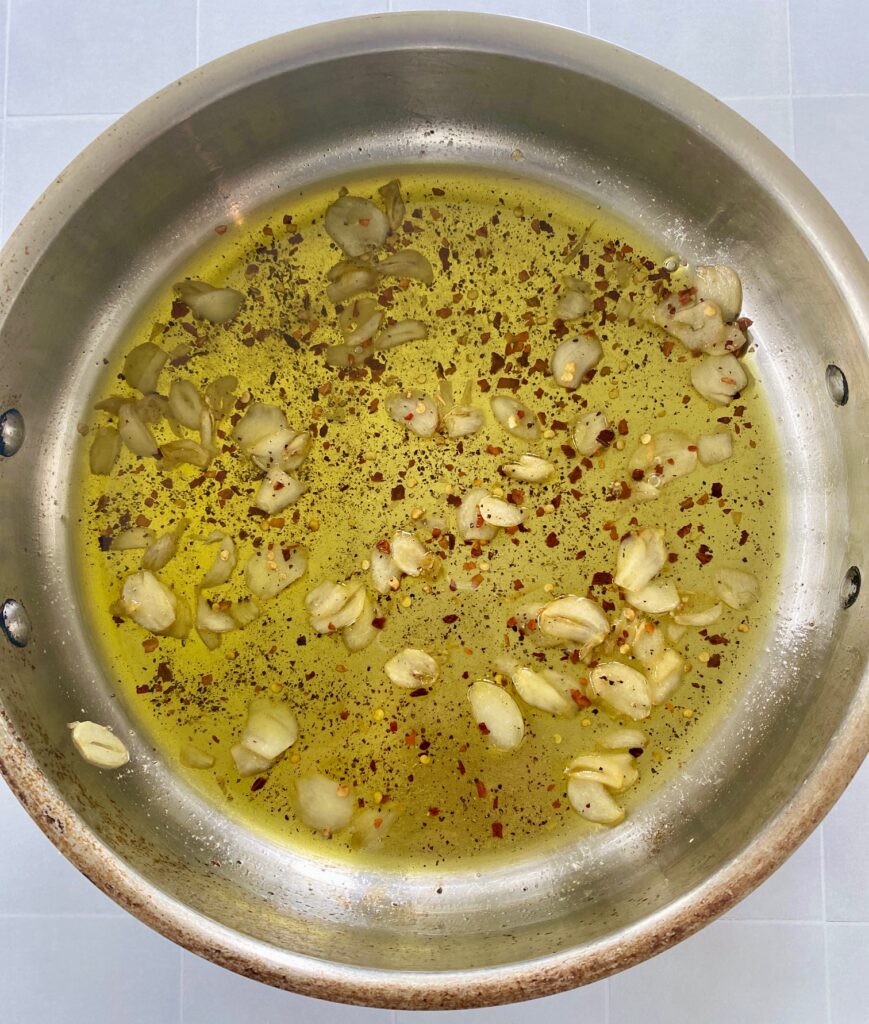
- Once oil is heated add the sliced garlic cloves and cook them for 3-4 minutes, or until they are lightly golden. It’s IMPORTANT to stir constantly during this time to ensure they don’t burn or overcook, so don’t walk away. You’re going to babysit them, but trust us, it’s the best smell and it’s worth it!
- Add red pepper flakes, 1 teaspoon salt, and 1 teaspoon pepper to the garlic and cook another 30-45 seconds, stirring constantly.
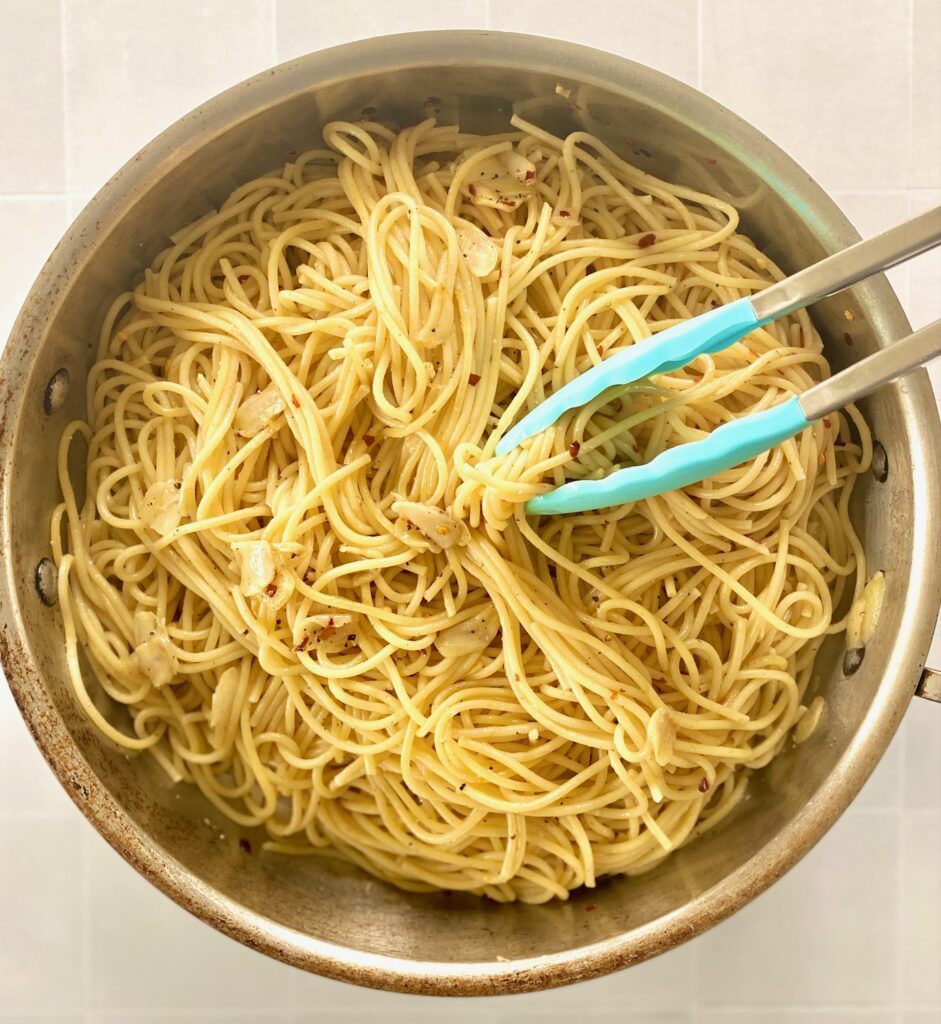
- ADD THE PASTA: Using tongs remove the al dente cooked pasta from the pot and add directly to the sauté pan. Turn up to medium heat.
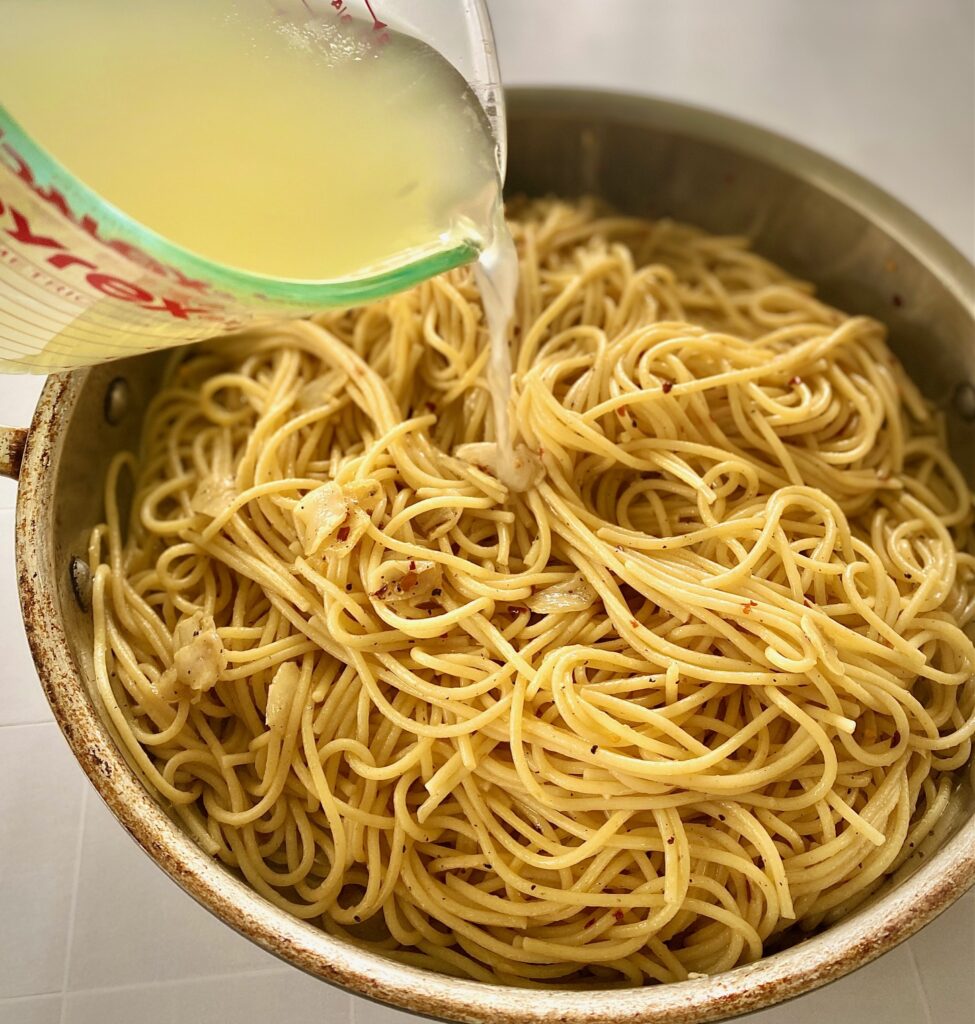
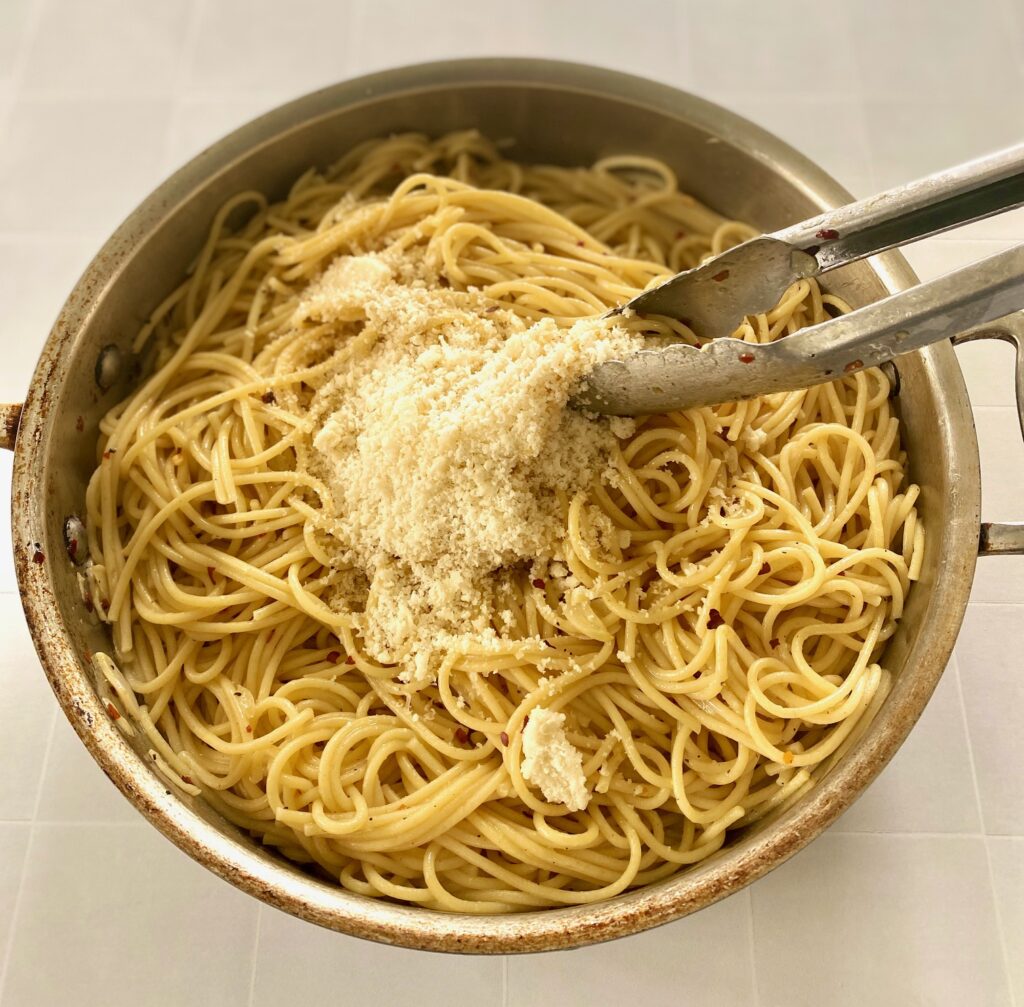
- Stir to completely coat the pasta with the oil and garlic and then add 1/2 cup of the hot starchy pasta water to the pan. Toss everything together and cook slightly to create a silky sauce.
- If needed, add up to 1/4 cup more of hot reserved pasta water to get the consistency you need.
- FINISHING THE DISH AND GARNISH: Turn off the heat, and if desired, add the lemon juice, grated Parmesan, and chopped parsley. Taste the pasta to see if any additional salt, pepper, or red pepper flakes are needed.
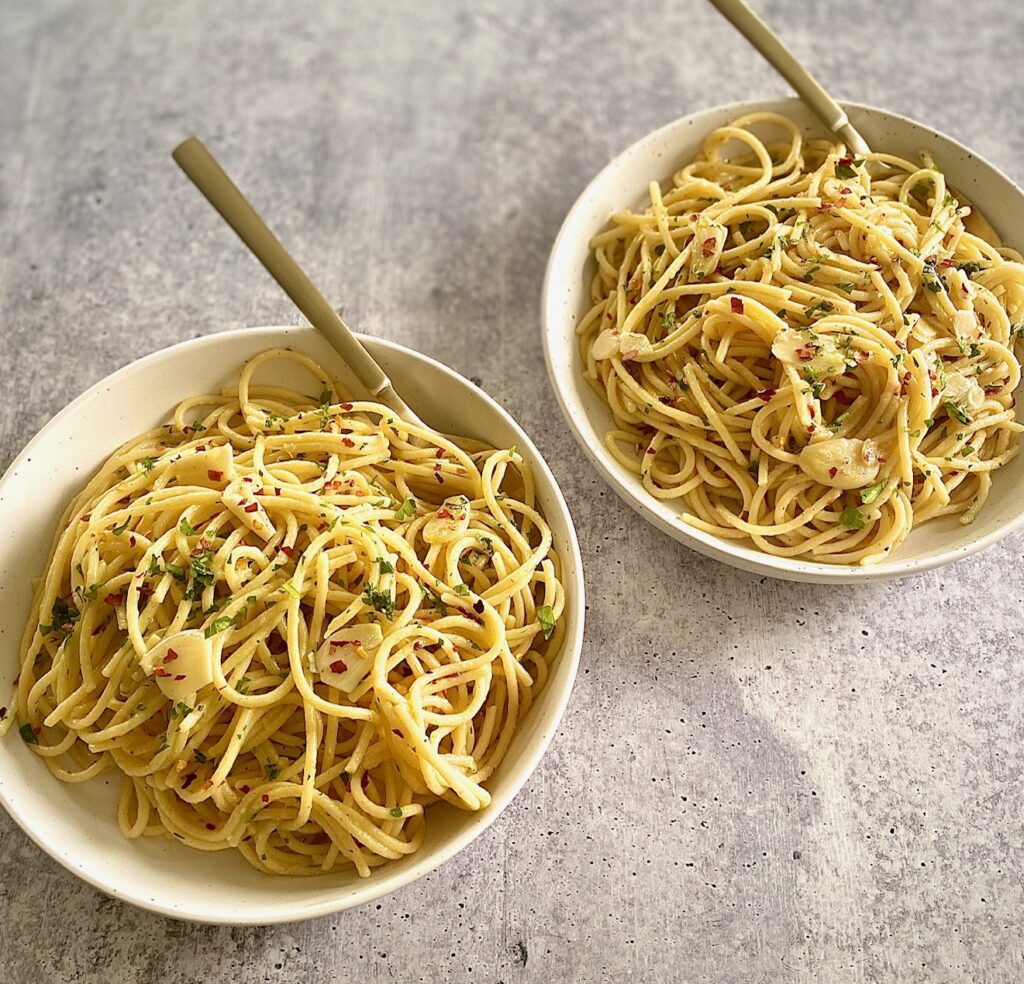
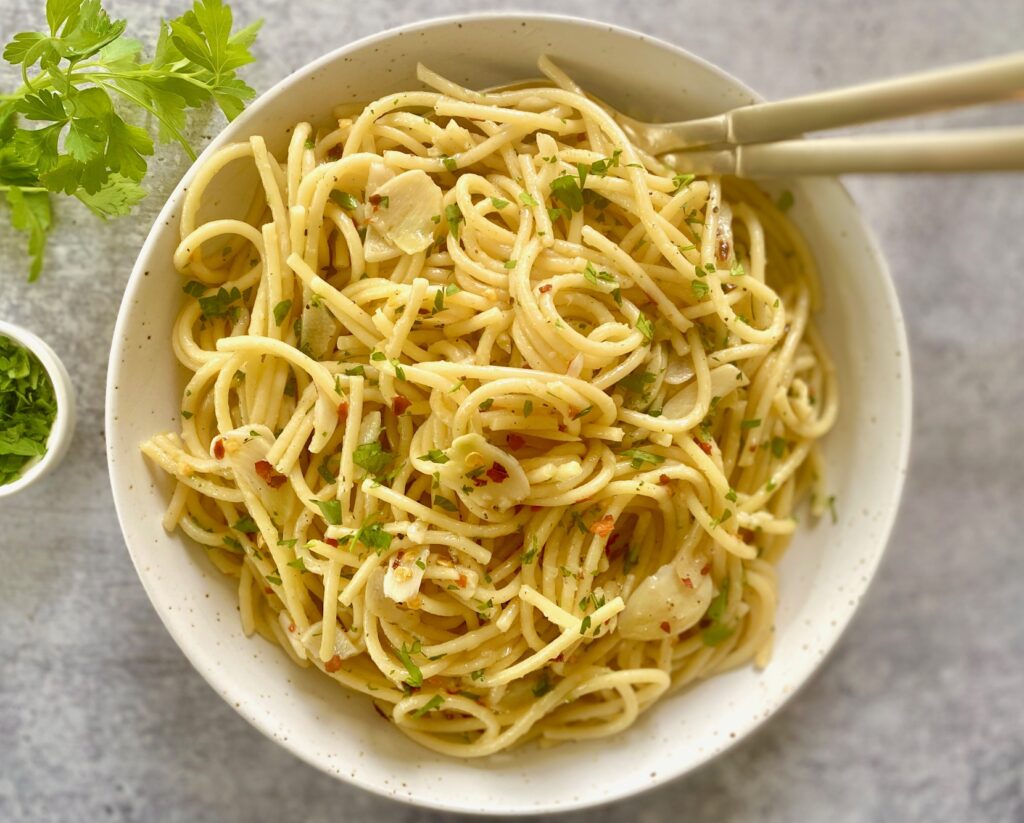
- Serve piping hot in shallow bowls.


Storage and Leftovers
Have leftovers? Lucky you! This traditional Italian pasta dish easily reheats.
- Store in an airtight container in the refrigerator for up to 3 days.
- Gently reheat again before serving.
Chefs Tips
- Use grated cheese rather than shredded because it will blend better
- Generously salt the pasta water. It is essential to the flavor of the finished dish!
- Be sure the garlic is cooked just until golden but not browned. Depending on your individual stove top and sauté pan this can take anywhere between 3-6 minutes.
Additions and Substitution Ideas
- Add 2 finely chopped anchovies to the cooked garlic for an umami flavor bomb!
- Any cooked protein can be added for a complete meal. We love garlic shrimp or shredded chicken
- Boost your nutrients with added veggies, such as cherry tomatoes, oven-dried tomatoes, sliced zucchini, sliced mushrooms, cooked broccoli, kale, or arugula. (Just toss them into the hot oil before the pasta so they cook lightly)
- If you prefer the texture of chopped garlic, instead of sliced, that works too. We’ve had success using smashed garlic cloves, as well
- Use lemon zest along with the lemon juice for added flavor and brightness
Your Sommelier suggestions for wine pairings
When pairing this Spaghetti Aglio e Olio recipe it’s best to keep in mind the spicy nature of this dish and match it with a dry wine. You could also consider your side dishes when pairing. Here are our favorite varietals.
- WHITE VARIETALS: Pinot Grigio or Sauvignon Blanc
- RED VARIETALS: Zinfandel or an Italian Primitivo
What to serve with Pasta Aglio e Olio
This classic pasta dish is like a blank slate but it’s slightly rich, so we like to keep our sides simple. Our favorite pairings:
- Grilled Vegetables, Oven Roasted Brussel Sprouts or Asparagus
- Our sunny Tricolore Salad with Oranges, a fresh arugula salad with the world’s best Lemon Vinaigrette, or fresh Citrus Salad
Other great easy Main Dishes and easy Pasta Recipes to try
- Homemade Marinara Sauce – perfect over any pasta
- Pesto Gnocchi – full of fresh herb flavor
- Garlic Mushroom Pasta – great as a meatless option for dinner
- Classic Bolognese Sauce – easy to make in the Instant Pot or on the stovetop

Pasta Aglio e Olio
Ingredients
- 16 ounces dried spaghetti
- 4 ounces extra virgin olive oil
- 8 -10 cloves garlic peeled and cut into thin slivers
- 1 teaspoon crushed red pepper flakes (add more or less to taste)
- 1 teaspoon sea salt
- 1 teaspoon black pepper
Optional, but recommended:
- ½ cup Parmesan, grated
- ⅓ cup Flat leaf Italian parsley, roughly chopped
- 1 Tablespoon lemon juice, freshly squeezed
Instructions
- Bring a large pot of very generously salted water to a boil.
- Peel and thinly slice garlic cloves. Roughly chop parsley. Squeeze lemon juice. Set aside.
- Once water is boiling add the spaghetti and cook until al dente, 8-10 minutes.
- While pasta is boiling heat olive oil in a large saute pan or heavy-bottomed skillet over medium-low heat. Add garlic slices, stir frequently to prevent any burning, and cook for about 3-4 minutes, until the garlic turns golden in color.
- Stir in red pepper flakes, sea salt, and black pepper and cook for 30-45 seconds, stirring continuously.
- Using tongs, add cooked pasta to the garlic oil mixture, stir to coat completely.Turn the heat up to medium and add 1/2 cup of the hot pasta water to the pan. Toss to coat and stir until the sauce becomes silky. Add a little more pasta water if needed.
- Turn off the heat and stir in the optional lemon juice, parsley, and Parmesan, if desired. Toss again to coat. Check seasonings and add more red pepper flakes, salt, or pepper if needed.
- Serve hot in shallow bowls with extra grated Parmesan, if desired.
Notes
- Nutritional information does not include optional Parmesan, parsley, and lemon juice.
- Store leftovers in the refrigerator in an airtight container for up to 3 days and gently reheat to serve.
- We use 10-12 cloves of garlic, but you can use as few as 8, to suit your taste.
- The traditional Italian version is made without cheese and with fresh red peperoncini instead of red pepper flakes, so feel free to substitute these sliced peppers if they are available in your area.
- If preferred, use smashed or chopped garlic cloves.
Nutrition
This dish looks fancy but it’s a simple recipe to prepare!
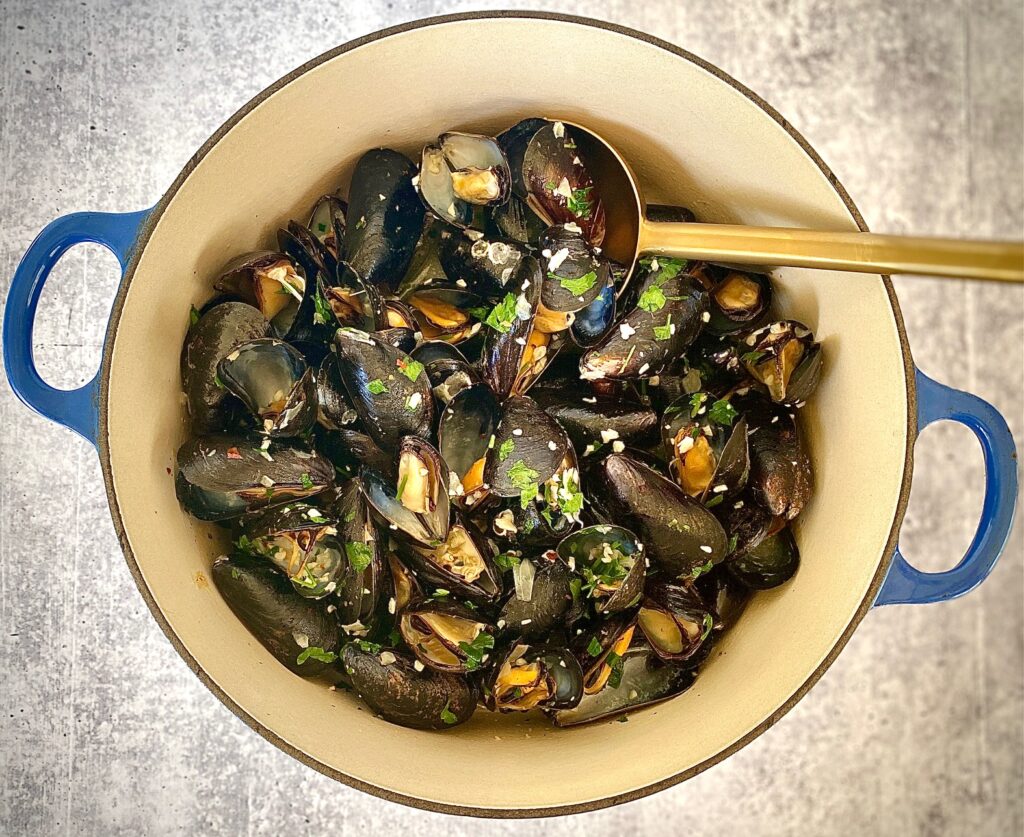
Pair these delicious mussels with plenty of rustic toasted garlic bread for dipping in the delicious white wine garlic sauce. It’s the ideal dinner but also makes a great appetizer.
Ingredients Needed
Plan on 1 pound of mussels per person, for a main course, or 1/2 pound per person for an appetizer portion. See the exact quantities in the recipe card below.

- Mussels – we used 4 pounds for this mussels recipe. See below for choosing the best mussels and how to clean them
- Olive Oil – we chose extra virgin olive oil
- Shallots and Garlic Cloves – Both of these aromatic add traditional flavors
- Salt, Black Pepper, Italian Seasoning, Red Pepper Flakes – we use sea salt
- Dry White Wine – such as Sauvignon Blanc, Pinot Grigio, or a crisp Chardonnay. This is the primary steaming liquid for white wine mussels so pick one you would actually drink, as well.
- Vegetable Stock or Chicken Stock – both work well for additional cooking liquid
- Butter – unsalted is best, but it’s okay to use salted if that’s all you have on hand
- Fresh Parsley – be sure to use flat-leaf fresh parsley for a great pop of color and freshness
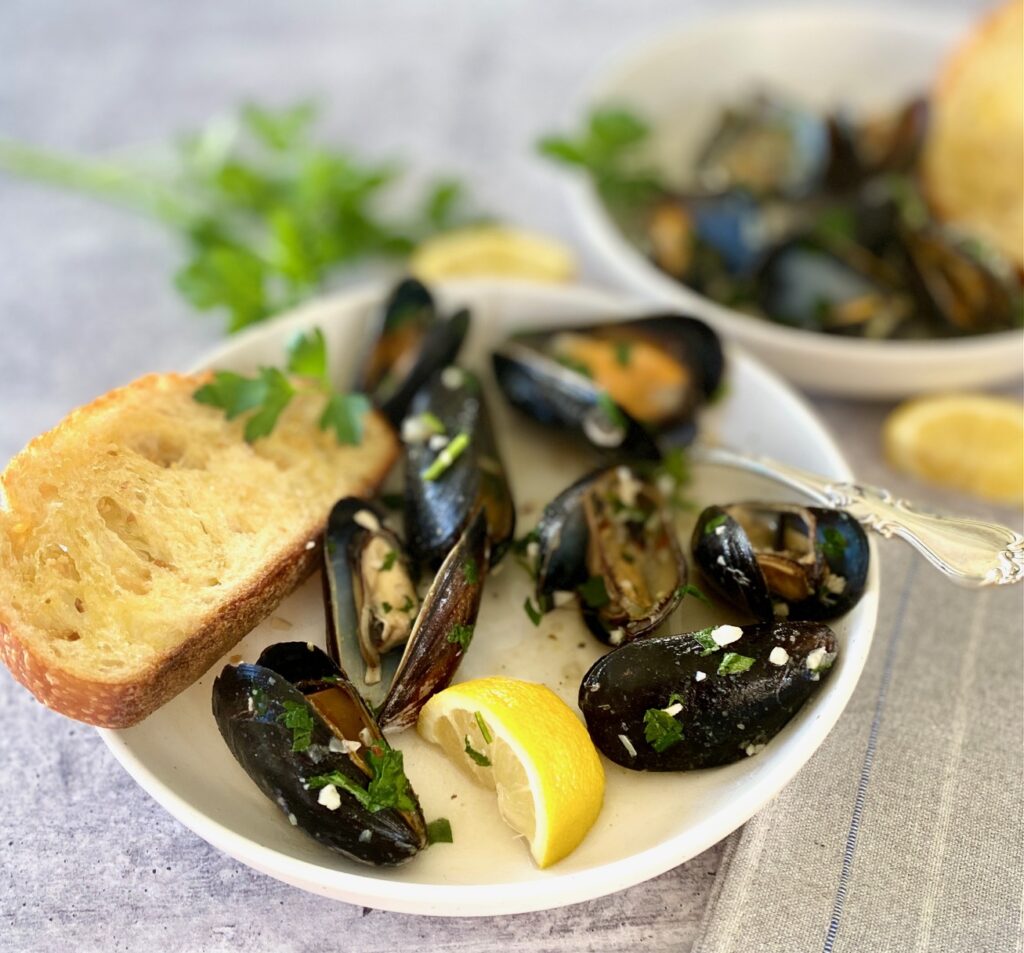
- Rustic Bread – crusty bread with garlic, for dunking, is a must for getting every last drop of all the garlicky white wine broth!
Make the Garlic Bread First
- Preheat the oven to 375˚F.
- Prep the garlic bread by brushing with olive oil and topping with chopped garlic.
- Cook bread while steaming the mussels so that everything is ready to serve at the same time.


How to make Steamed Mussels in White Wine Sauce
Prep the mussels and other ingredients
- Clean and scrub the mussels under very cold water in a colander and drain.
- If any mussels are open tap the open shells lightly and if they do not close discard them. See below for more details about choosing and cleaning mussels.
- Chop the shallots, garlic, and parsley leaves. Cube the 3 tbsp of butter.
Cook the Mussels
- In a deep large pot or Dutch oven (with a lid), heat 2 Tablespoons of olive oil over medium heat until it is shimmering.
- Add the chopped shallots, and sauté for 1 minute, stirring to coat.
- Sprinkle in salt, pepper, Italian seasoning, red pepper flakes, and garlic. Cook for 2 more minutes, until garlic is golden, stirring to prevent burning.
- Add the cleaned mussels and stir gently to coat in the garlic mixture.
- Pour in the broth and white wine, stir again to coat, and then cover with a lid.

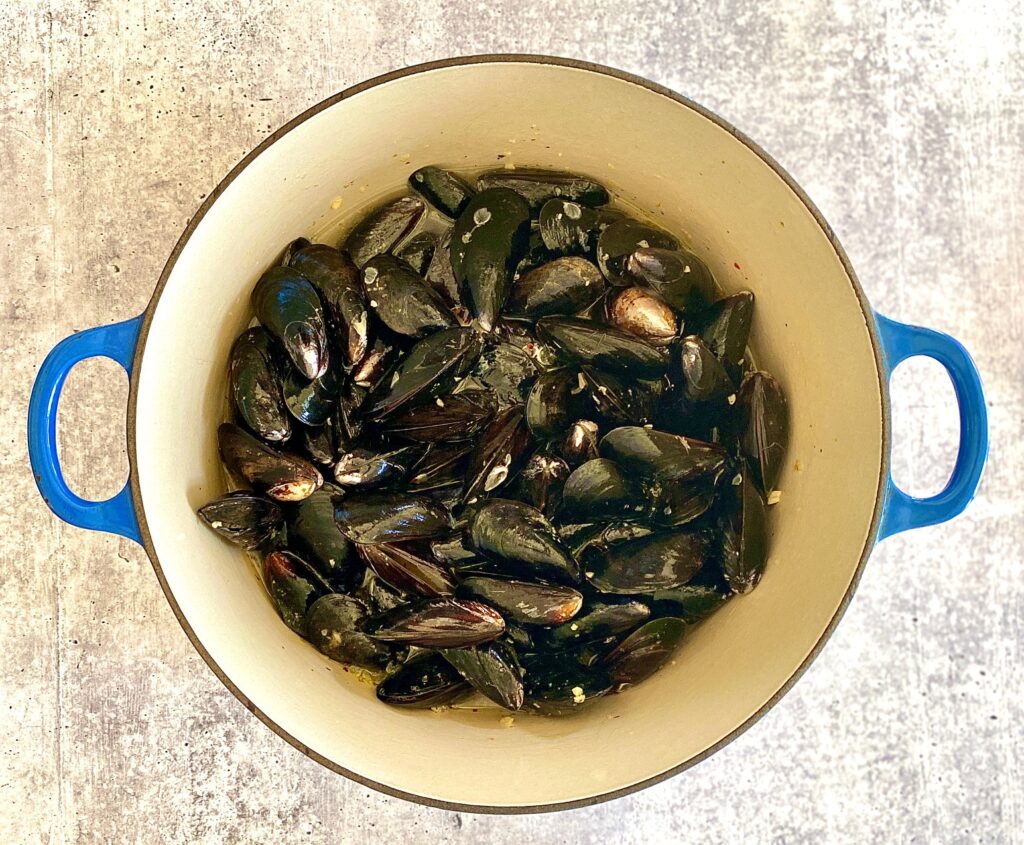
- Steam for 5-7 minutes on medium-high heat. Check to make sure the mussels have popped open, and if needed cover and cook another 1-2 minutes.
- Turn heat to medium and scoop mussels out with a slotted spoon, evenly dividing them into 4 wide bowls for serving.
- Stir parsley and butter into the broth. Cook for about 2 minutes to melt butter
- Pour or ladle sauce evenly over the bowls.
- Remove bread from the oven and serve a slice alongside each bowl.
- The other serving option is leaving them in the large pan and serving at the table, or putting all of the mussels in a large bowl for the whole table.

Choosing and Cleaning Mussels
There is so much to love about mussels. They are quick-cooking, versatile, readily available, and one of the least expensive seafood. Also, they are simply delicious!
Grocery Store Bought:
- When buying mussels look for shells that are wet, shiny, and clean, and smell like the sea. The shells should be closed, and not chipped. A good fishmonger should pick over the shells to be sure they are closed.
- Mussels are best stored in mesh bags. If they are in a plastic bag be sure to open it once home so the mussels can “breathe” and store them in the refrigerator for up to 24-hours. Cover with a damp paper towel.
- Most mussels sold at the market are farm-raised mussels and have been cleaned and debearded, but you should always rinse them in cold water to remove any remaining sand or debris.
- If the shell is open tap it lightly with your fingernail, if the hinge of the shell closes it is still alive and okay to use. Otherwise, discard it. If in doubt, always toss it out.
- If they need to be debearded (the fibers from around the shell) simply tug the fibers with your thumb and forefinger and discard them.
Fresh Mussels (Wild Mussels):
- If you are lucky enough to get fresh live mussels you’ll need to soak them in very cold water before using them. Peak season is October through March. Wild mussels are sandy and still bearded!
- If any of the mussel shells are open tap lightly, if the hinge of the shells closes it is still alive. Otherwise, discard open mussels because they are dead and should never be eaten.
- Place mussels gently in a bowl of cold water for 20 minutes. This will help the bivalves filter out some of their sand. Scrape off any barnacles with a firm brush and remove the beard.
- Place cleaned mussels in a bowl of fresh cool water for an additional 10 minutes and then give them a final rinse before cooking.
- For further info check out this detailed step-by-step from Global Seafoods

Leftovers and Storage
- REFRIGERATOR: Store leftovers in an airtight container for one day. Gently reheat.
What is Moules Marinières?
- This is it! The French name translates to “mussels fishermen style” and is popular in the Northern regions of France (and in Belgium).
- This preparation is traditionally mussels steamed with a dry white wine and aromatics, such as onion, shallots, and garlic. Parsley is usually part of the dish as well.
Variations
- Keep it Pescatarian – use vegetable broth (instead of chicken broth) to keep this easy recipe meat-free
- Add french fries for dunking for a moules frites version
- Creamy Mussels – to make a white wine cream sauce whisk in 1 cup of heavy cream with the butter before serving, or try coconut cream
- Mussels over Pasta – Serving these delicious mussels over pasta makes this a full dinner. Boil 3/4 pound of your favorite spaghetti or linguine. Add the mussels sauce into the pan and stir until the pasta is well coated. Transfer to serving bowls and top with the steamed mussels
- Lemon Juice – a squeeze of lemon juice or sprinkling of lemon zest at the end of cooking is always a good idea with seafood recipes
Your Sommelier Recommends
A simple and smart pairing is to use the wine varietal used in making the dish.
- For these savory mussels, a beautiful pairing could include a Sauvignon Blanc, an unoaked Chardonnay, a crisp Chablis, or a Chenin Blanc.
- Looking for an old-world French wine? You can’t miss with a Pouilly-Fuissé or a Sancerre.

Looking for other simple savory seafood ideas?
- Steamed Clams with Garlic Butter and Wine are similar and a simple weeknight dinner
- Miso Glazed Seabass (or use cod) has a delicate flavor but is easy to make
- Step-by-step for Perfect Pan Seared Scallops
- Sheet Pan Asian Salmon with Asparagus ready in just 30-minutes on one pan

Mussels in White Wine Sauce
Equipment
- 1 Large Pot or Dutch Oven with lid
Ingredients
For Mussels
- 2 Tablespoons olive oil
- 4 Tablespoons shallots, roughly chopped
- 4 Tablespoons garlic cloves, chopped
- 1 generous pinch sea salt
- 1 generous pinch black pepper, freshly ground
- 1 teaspoon dried Italian seasonings
- ½ teaspoon red pepper flakes
- 4 pounds mussels, scrubbed
- 8 ounces dry white wine, such as Sauvignon Blanc, Chardonnay, or Chablis
- 4 ounces vegetable broth or chicken broth
- 3 Tablespoons butter, cut into pieces
- ¼ cup flat leaf parsley leaves, coarsely chopped
Garlic Bread
- 4 slices thick rustic bread
- 2 Tablespoons extra virgin olive oil
- 1 Tablespoon garlic, chopped (or 1 tsp garlic powder)
Instructions
Garlic Bread:
- Preheat oven to 375℉.
- Brush the olive oil on the bread slices and spread with garlic. Transfer to a baking sheet and bake for 10 minutes while preparing the mussels. Bread should be toasted and crusty.
Mussels:
- Clean and scrub mussels under very cold running water. If any mussels are open tap them lightly and if they do not close discard them.
- In a large, deep pot, heat 2 Tablespoons of olive oil over medium heat until hot and shimmering.
- Add shallots and sauté for one minute, stirring constantly. Sprinkle in salt, pepper, garlic, Italian seasoning, and red pepper flakes. Cook for about 2 more minutes, until garlic is golden, stirring to prevent burning.
- Add the cleaned mussels, stir gently to coat in the garlic mixture and pour in the broth and white wine, stir again to coat, and then cover the pan.Steam the mussels for about 5-7 minutes over medium-high heat, or until they open up. Check to make sure the mussels have popped open, and if needed cover and cook another 1-2 minutes.Turn the heat down to medium.
- Using a slotted spoon transfer the mussels into 4 serving bowls. Always discard any mussels that don't open.
- Add the butter and chopped parsley to the broth and cook for 2 minutes, stirring to combine, until the butter is completely melted.
- Spoon the broth over the mussels into each of the four bowls.
- Remove the garlic bread from the oven and serve alongside the mussels.
Notes
- VARIATION: If you want creamy mussels whisk in 1 cup of cream along with the butter.
- Always discard mussels that don’t open after cooking.
- Store leftovers for 1 day in the refrigerator.
Nutrition
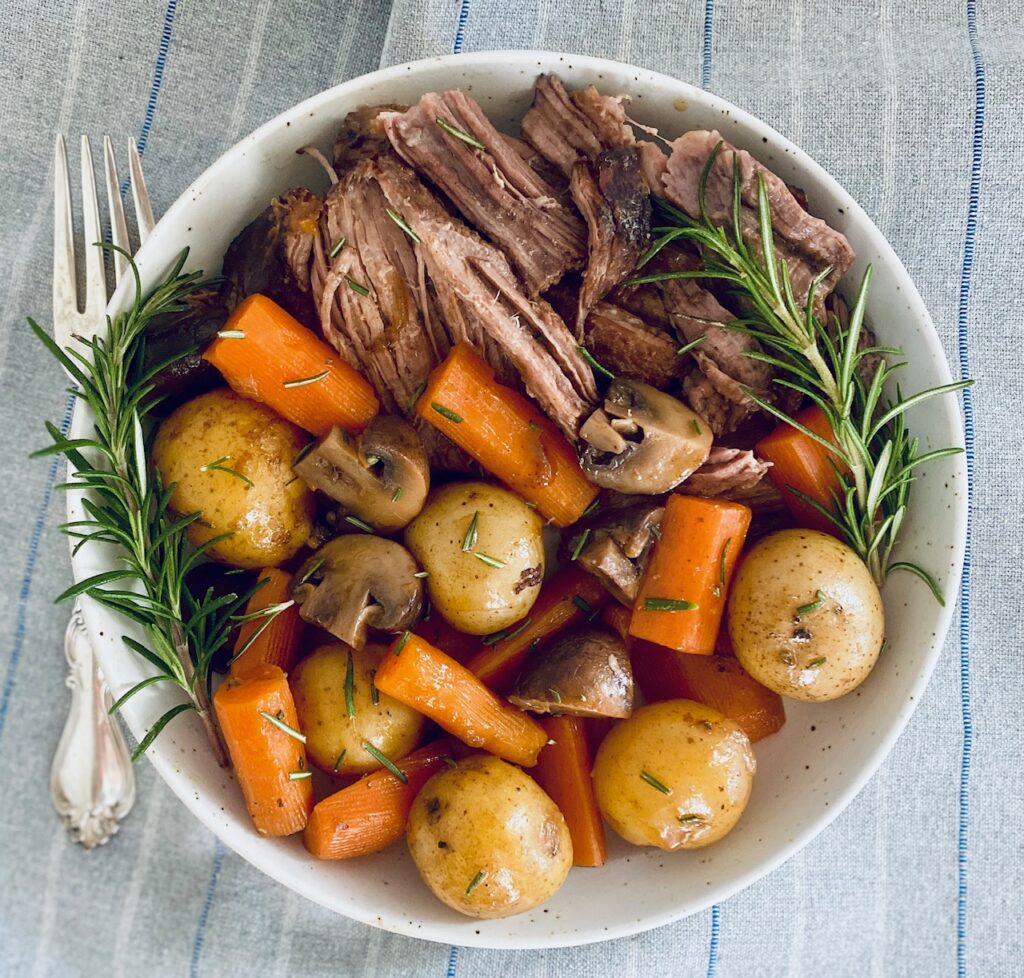
If you grew up in the Midwest, like I did, chances are you had a version of this traditional pot roast for almost every Sunday dinner.
It’s easy to see why: it’s a scrumptious complete meal for the whole family, practically fail-proof, and made with inexpensive ingredients.
This is a Dutch oven pot roast but it’s also adaptable to the crock pot using the same step-by-step instructions in our popular slow cooker Guinness Irish Pot Roast recipe
Ingredients Needed
Don’t be put off by the long list because it’s mostly simple ingredients that you probably already have on hand or can get at any grocery store. See the recipe card below for exact quantities.
- Beef Roast – for the best results we use a marbled boneless beef chuck roast. However, top-round roast, or rump roast will also work for this dish
- Flour – dredging the meat in flour helps develop a great crust
- Olive Oil and Butter – for searing the meat and obtaining a golden crust that seals in the juices before the low and slow cooking time
- Onions – we recommend yellow or white onions. Pearl onions are a great choice too.
- Carrots – use baby carrots or cut larger ones into 2″ pieces
- Potatoes – baby yellow or red potatoes are ideal because they don’t need to be peeled. Cut in half if they are on the bigger side. Yukon golds work well too. Be sure to use a waxy potato. (Russets are not recommended for this dish because they will fall apart during the extended cooking)
- Mushrooms – optional, but they add lots of flavor. We use baby Bellas
- Garlic – we love the subtle flavor whole garlic cloves bring during cooking. In a pinch, use garlic powder.
- Tomato Paste – helps intensify the flavors and develop the rich sauce
- Worcestershire Sauce – always an umami bomb and adds to the rich flavor
- Red Wine – Dry red wine is best, such as Merlot, Chianti, Cabernet Sauvignon, or Pinot Noir. Or use additional beef broth if you want a non-alcoholic substitute.
- Beef Broth or Beef Stock – this is the braising liquid so choose a good quality brand
- Herbs – fresh rosemary or fresh thyme work best. You could also add bay leaves. Dried herbs can be used instead of fresh.
- Salt and Black Pepper – for seasoning the meat before cooking

How to make the perfect Pot Roast (oven method)
- Preheat the oven to 275˚F and make sure the oven rack is in the lower third of the oven.
- Chop the onions
- Dry the beef roast with a paper towel. Combine flour, salt, and pepper on a shallow plate and dredge the roast on all sides.
- Heat the olive oil and butter in a large Dutch Oven (or other heavy-duty high-sided pan) over high heat. You want a very hot pan but not smoking.
- Add the dredged roast and sear for about 3 minutes on each side, until the meat is golden brown. These extra steps help seal in the juices during the slow cooking method as well as develop an extra depth of flavor in the bits at the bottom of the pan.
- Remove the seared meat and place it on a plate
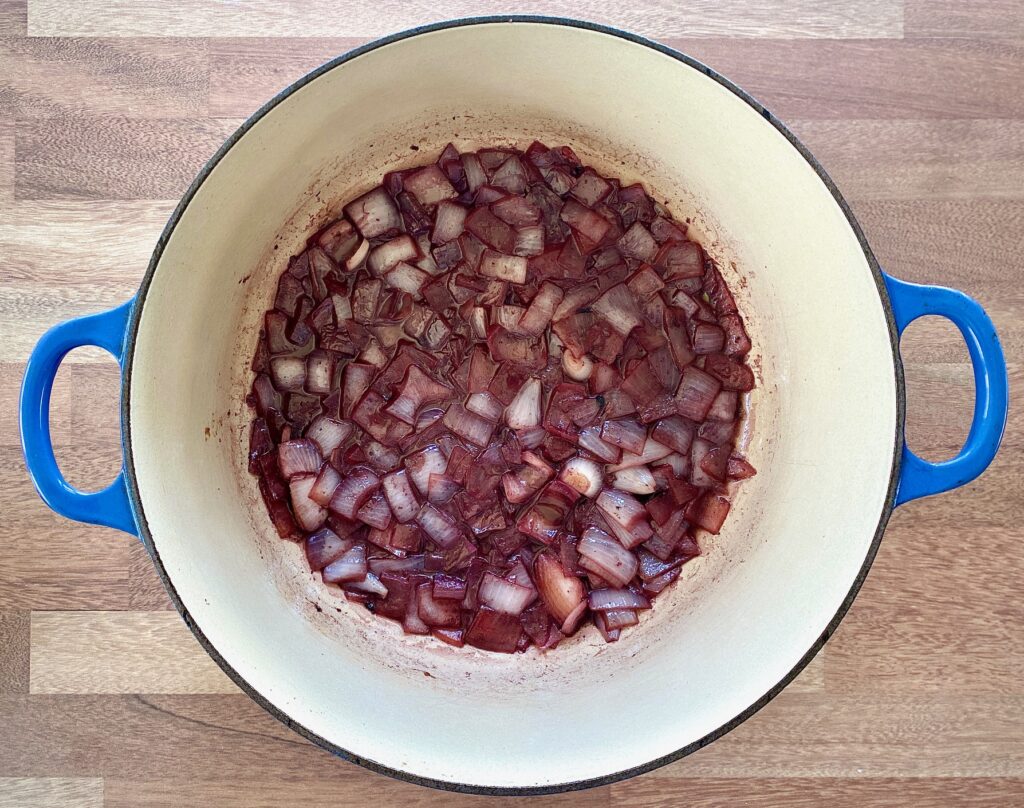
- Reduce to medium high heat and add the onions. Saute for about 2 minutes.


- Add the wine, cooking, and scraping the bottom of the pan with a flat wooden spoon to scrape up the brown bits on the bottom (SO much flavor in those bits!). Reduce the liquid by about half.
- Add the beef broth, tomato paste, Worcestershire sauce, garlic cloves, and rosemary sprigs. Stir to combine
- Add the seared meat and any accumulated juices, back to the Dutch oven
- Cover and place in the oven for 90 minutes

Finishing the pot roast
- While the pot roast cooks cut the carrots, potatoes, and optional mushrooms
- Check the meat after 90 minutes. It should be starting to become fork-tender
- Add the carrots and potatoes to the pot, stirring lightly to submerge and combine
- Cover the pan and return to the oven
- At the 3-hour mark mix in the mushrooms and continue cooking until the roast reaches an internal temperature of 200˚F
- The meat should shred very easily and be falling apart. The potatoes should be easily pieced with a fork. If not, return to the oven and continue cooking
- Remove from the oven and discard the rosemary branches

How to serve a traditional pot roast
- Serve directly from the pan into shallow serving bowls, lading some of everything, plus a small amount of pan juices
- Remove everything to a large platter for a family-style ultimate comfort food dinner
- Pair with a light green salad and lemon vinaigrette and easy no yeast homemade Irish Soda Bread
How to make Pot Roast Gravy
If you want to serve this flavorful sauce as a rich gravy (yum!) it’s really simple!
- Remove everything from the pan, and put on a platter, except the braising liquids. Bring liquid to a simmer on the stovetop.
- In a small bowl make a cornstarch slurry, which is just 3 Tablespoons of cold water and 3 Tablespoons of cornstarch mixed together until smooth.
- If you don’t have cornstarch you can use all-purpose flour.
- Whisk the slurry into the hot braising juices and simmer about 3-5 minutes or until thickened. Simmer longer for a thicker gravy.
- Add everything back to the pan or just serve spoonfuls of the gravy over the meat and vegetables.
How long to cook a Pot Roast
- For this recipe, we used a 4-pound well-marbled chuck roast. Cooking times will vary based on the cut and the size of the roast and each individual oven.
- The most important part is to cook the roast low and slow. The long cook time allows the heat to break down the tough connective tissues.
- Pot Roast becomes fork tender at an internal temperature of about 195˚F. However, we think it becomes even better if you let it cook to 205˚F when it really is falling-apart tender.
- Here is a general guide:
3 lb roast cooks for about 3-3.5 hours
4 lb roast cooks for about 3.5-4 hours
5 lb roast cooks for about 4-4.5 hours

Storage for Leftovers
- REFRIGERATOR: store in an airtight container in the refrigerator for up to 3 days and reheated either in the oven or on the stovetop (or microwave)
- FREEZER: let cool and store in a freezer-safe container for up to 3 months. Thaw overnight in the refrigerator before reheating.
Other family meal ideas
- Slow Cooker Irish Pot Roast
- Slow Cooker Ribs
- Instant Pot Greek Lemon Chicken Soup
- Sheet Pan Asian Salmon and Asparagus
- Garlic Shrimp with Roasted Tomatoes

Classic Pot Roast
Equipment
- 1 Dutch oven pan with lid
Ingredients
- 4 lbs chuck roast boneless, trimmed of excess fat
- ¼ cup all-purpose flour
- 1 teaspoon salt
- 1 teaspoon black pepper
- 2 Tablespoon olive oil
- 1 Tablespoon butter
- 1 large onion cuts into chunks
- 1 cup dry red wine
- 2 cups beef broth
- 2 Tablespoon tomato paste
- 2 Tablespoon Worcestershire sauce
- 3 sprigs fresh rosemary or 6 fresh thyme, or 1 teaspoon dried herbs
- 5 cloves garlic, peeled or 1 TBSP garlic powder
- 4 medium carrots, peeled, and chopped into 2-inch pieces, or 8 ounces baby carrots
- 1 pound baby gold potatoes, whole or halved or large Yukon golds cut into cubes
- ½ pound mushrooms, optional, cut in half or quarters
Instructions
- Preheat oven to 275℉
- Dry the chuck roast with a paper towel. On a shallow plate combine the flour, salt, and black pepper. Dredge the chuck roast on all sides into the flour mixture.
- In a large Dutch oven, heat the olive oil and butter on high heat (not smoking). Sear all sides of the chuck roast until browned, approximately 3-4 minutes per side. Transfer the beef to a plate.
- Reduce to medium-high heat. Add onions and saute for 2 minutes. Add wine, and deglaze the pan by scraping the brown bits on the bottom of the pan with a flat wooden spoon. Cook to reduce the wine by half.
- Add broth, tomato paste, Worcestershire sauce, rosemary, and garlic cloves. Stir to combine. Add the seared meat, and its accumulated juices, back to the pan.
- Cover and put in the oven for 90 minutes.
- Remove the pot from the oven. The beef should be beginning to become fork tender.Add the carrots and potatoes, stirring lightly, to combine and coat in liquid. Cover pot and return to the oven
- At the 3-hour mark add the mushrooms, if using, and return to the oven.
- Cook until the pot roast is easily shredded and the potatoes are fork-tender. 3 lb roast cooks for about 3-3.5 hours4 lb roast cooks for about 3.5-4 hours5 lb roast cooks for about 4-4.5 hoursCooking times can vary based on the type of roast and each oven.Chuck roast should be cooked to an internal temperature of 195℉ – 205℉ to be fall-apart tender. If the meat is not falling apart, it needs to be cooked longer.
- See Notes below for how to make optional Pot Roast Gravy
Notes
-
-
- Remove everything from the pan, and put on a platter, except the braising liquids. Bring liquid to a simmer on the stovetop.
-
- In a small bowl make a cornstarch slurry of 3 Tablespoons of cold water and 3 Tablespoons of cornstarch mixed until smooth.
-
- If you don’t have cornstarch you can use all-purpose flour.
-
- Whisk the slurry into the hot braising juices and simmer until thickened.
-
Nutrition
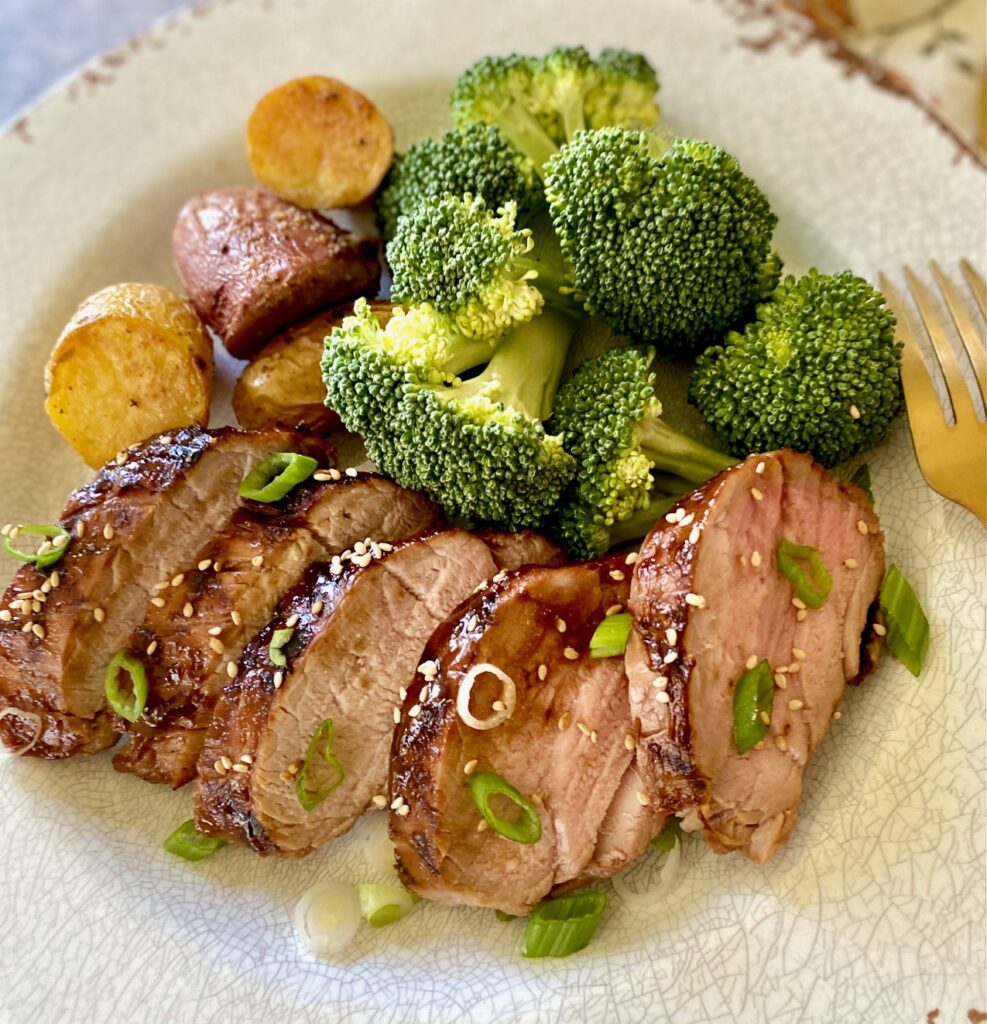
This is one of our regular go-to family dinners because it comes out perfect every time! The marinade and quick cooking method, on the grill, on the stovetop, or in the oven, keep this pork tenderloin moist and flavorful.
It’s great as a “make-ahead” dinner because you can marinate it and then cook it later. Pair it with a cool Asian Coleslaw, Grilled Vegetables, Oven Roasted Potatoes, white rice, roasted Brussels Sprouts, or Rice Pilaf and you’ve got dinner!
Ingredients Needed
MARINADE SAUCE INGREDIENTS:
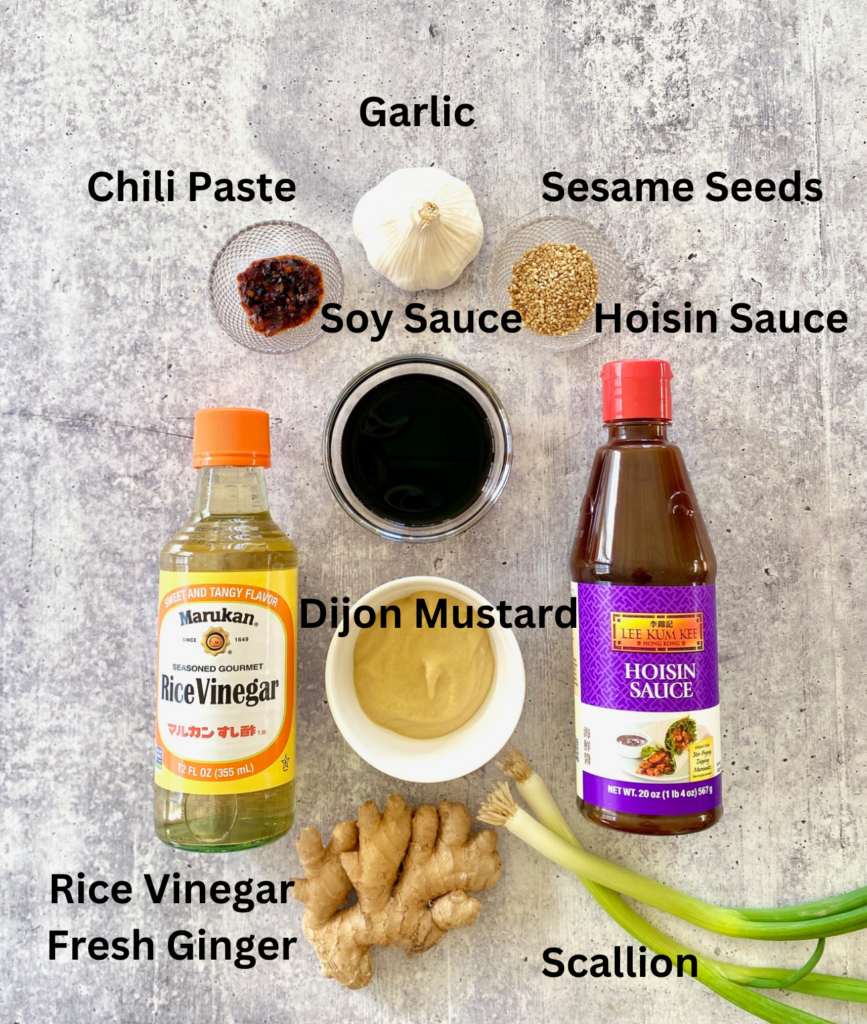
- Hoison Sauce – this thick gorgeous sauce is sweet and salty, and a staple in Asian foods. We use hoisin sauce instead of brown sugar.
- Rice Vinegar – the acid in vinegar helps relax the fibers in meat
- Soy Sauce – substitute tamari for a gluten-free sauce, or use light soy sauce
- Dijon-style Mustard – any brand will work and we love the intense flavor it adds
- Fresh Ginger – or substitute ginger powder
- Fresh Garlic Cloves – or use garlic powder
- Chili Paste – add more or less to suit your individual taste, but we love the added punch this paste gives to the finished Asian sauce. Red pepper flakes make a good substitute.
OPTIONAL GARNISH:
- Toasted Sesame Seeds – if you don’t have the toasted version just toast them yourself in a dry pan over medium heat for about 2 minutes
- Scallion – (aka green onions) we like to use the white part and some of the green part, sliced on the bias, for a great pop of color
PORK:
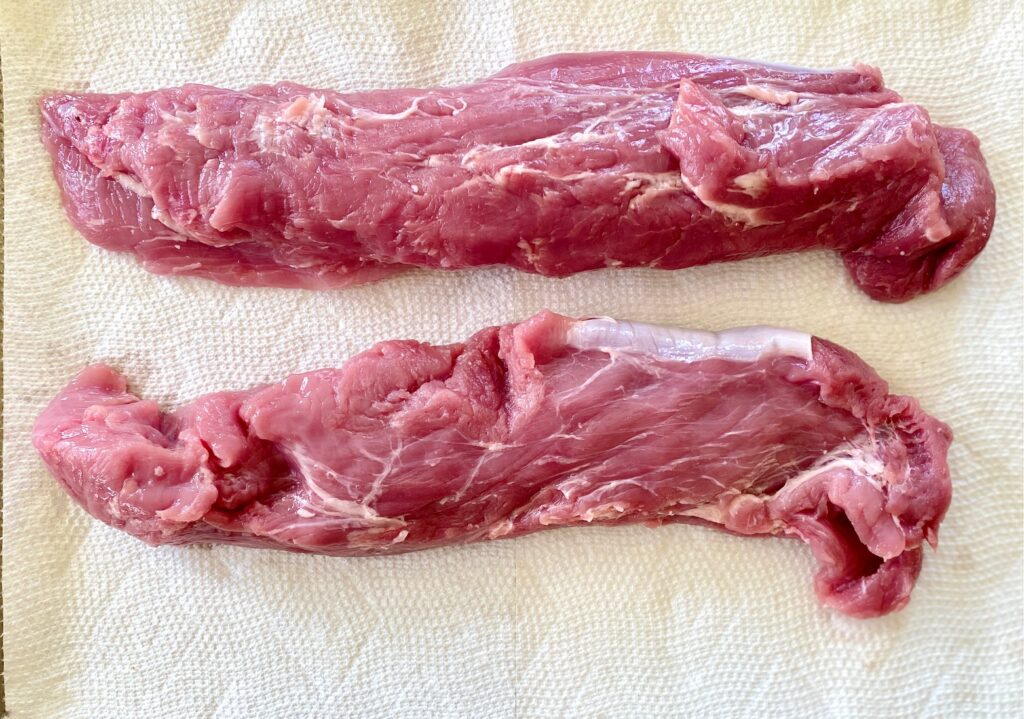
- Pork Tenderloins – generally they are sold in packs of 2, so this marinade is enough for two 1.5-pound tenderloins (make sure you are using pork tenderloins, not a pork loin). Be sure to trim off the excess fat and, if needed, the silverskin
How to prepare Asian Pork Tenderloin
This simple recipe delivers big flavor in just a few easy steps thanks to the simple Asian pork tenderloin marinade.
- Make the Asian Marinade – whisk all of the marinade ingredients in a medium saucepan. Heat on medium-low, stirring occasionally, for 10 minutes. The sauce should thicken slightly and intensify in flavor. Remove the sauce from the heat, give it a good stir, and let marinade cool to room temperature.
- Reserve 4-5 Tablespoons to use for basting the pork while it’s grilling.
- Slice the scallion and set aside for garnish
- Make-Ahead Tip: You can make the sauce up to one week ahead of time and store it in the refrigerator until ready to use.
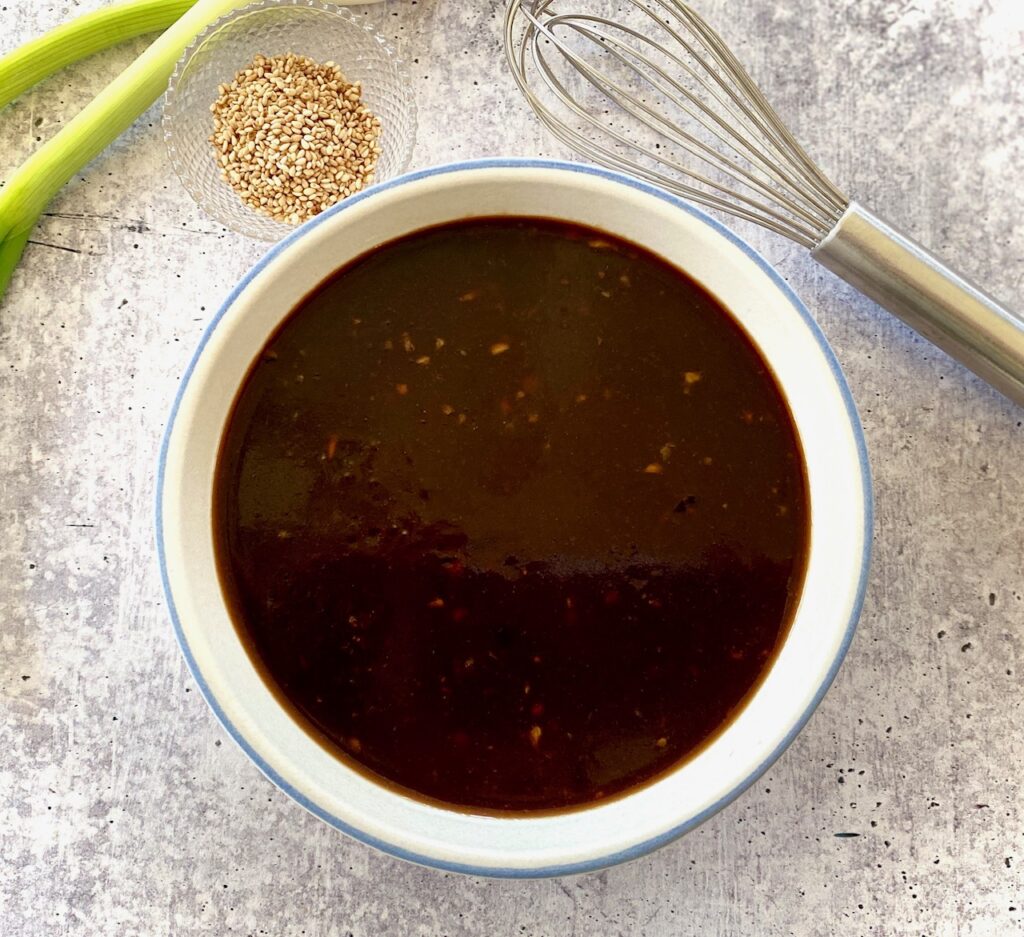
- Trim the Tenderloins – Most packages are sold with 2 tenderloins per package. Remove and rinse the tenderloins, then pat dry with paper towels.
- If needed, trim any excess fat and remove the tough silver skin.
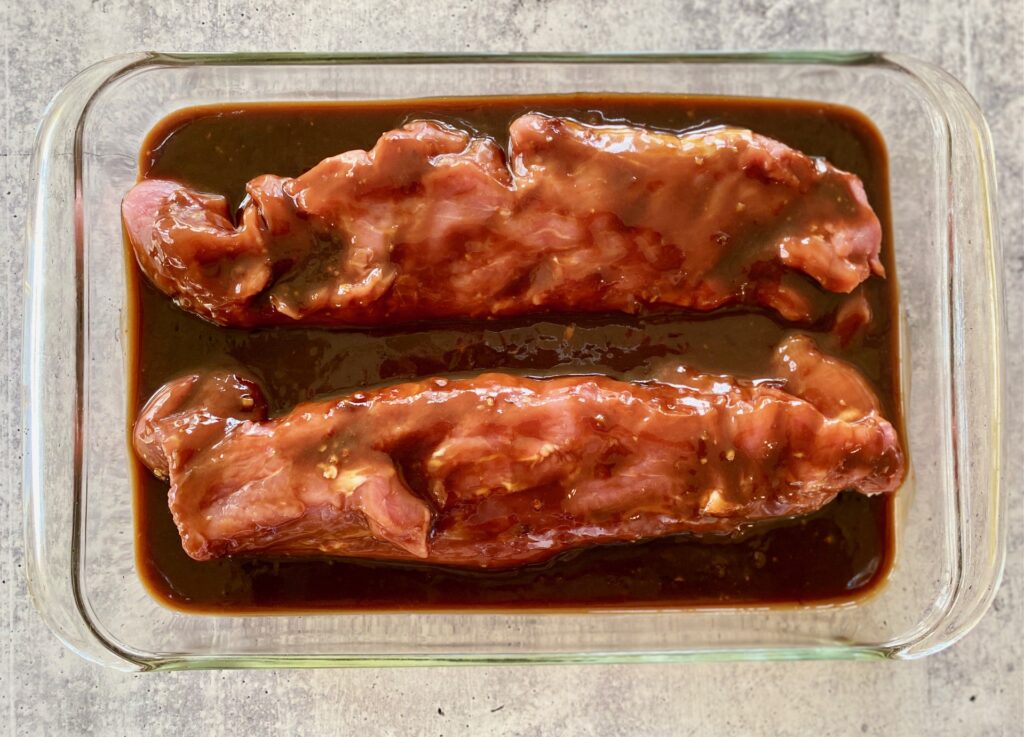
- Marinate the Pork – Add to a shallow dish or a gallon-sized ziptop freezer bag
- Pour cooled marinade over the top of the pork and let it marinate for 30 minutes in the refrigerator.
- NOTE: If not cooking right away, seal tightly in an airtight container, and refrigerate for up to 2 days, or freeze for up to 3 months.
Cooking Pork Tenderloin
There are 3 ways to cook this amazingly easy pork. Our favorite is the grilling method because it imparts an extra bit of smoky flavor. Whichever cooking method you choose it is best to remove the marinated pork from the refrigerator 30 minutes before heating to ensure even cooking.
GRILLING and STOVE TOP GRILLING:
- Preheat the grill or grill pan to medium-high heat. If using a stovetop grill pan it is helpful to brush it with a small amount of sesame oil before cooking to prevent sticking.
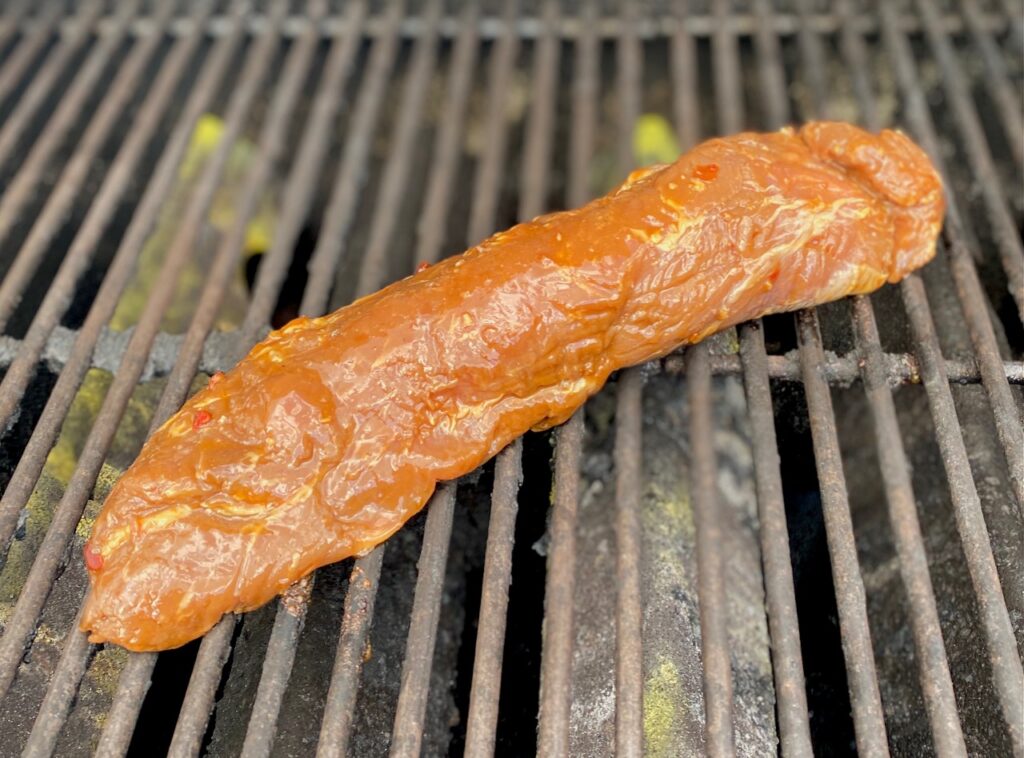
- Remove from the pork marinade and place the tenderloins on the hot grill.
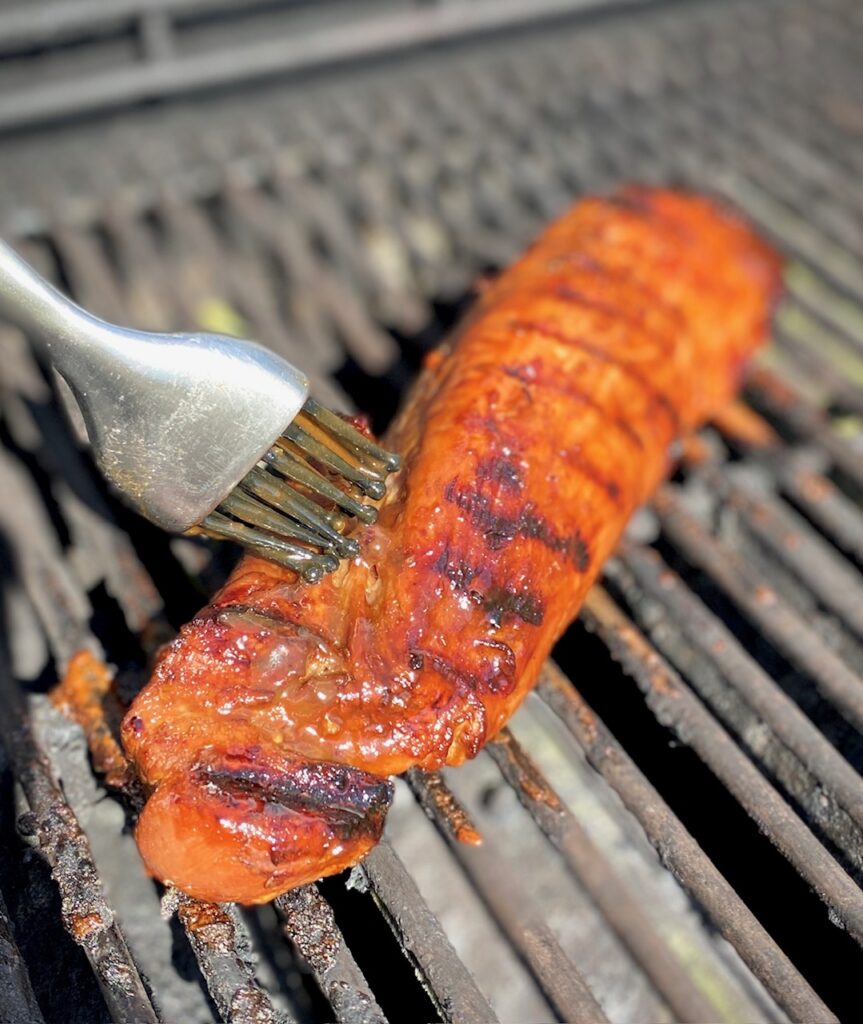
- Flip about every 7 minutes and baste with some of the reserved marinade each time you turn it.
- Pork is done when an instant-read thermometer, inserted into the center, reaches 145˚-150˚ F. This generally takes 18-22 minutes but cooking time can vary based on your grill. Tenderloin should be golden brown and seared but still slightly pink on the inside.
BAKING:
- Preheat the oven to 400˚F. Line a baking sheet with aluminum foil or parchment paper.
- Remove pork from the marinade and place on the prepared sheet pan.
- Bake in a preheated oven for about 20 minutes, turn the pork over at the ten-minute mark, and baste it every 5 minutes with reserved sauce.
- Pork is done when it reaches an internal temperature of 145˚-150˚ F.
For all methods:
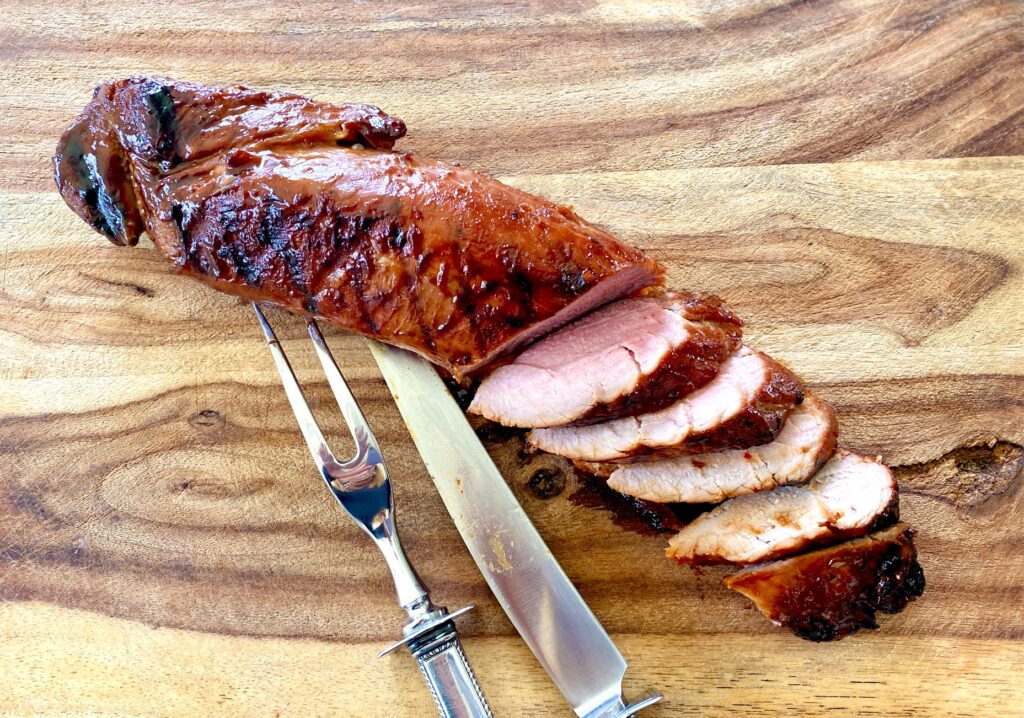
- Remove pork from the heat at an internal temperature of 145˚-150˚ F on a meat thermometer and place on a cutting board. Cover loosely with foil and allow the pork to rest for 5 minutes to allow the juices to redistribute. Don’t skip the resting step because this will give you the juiciest results.
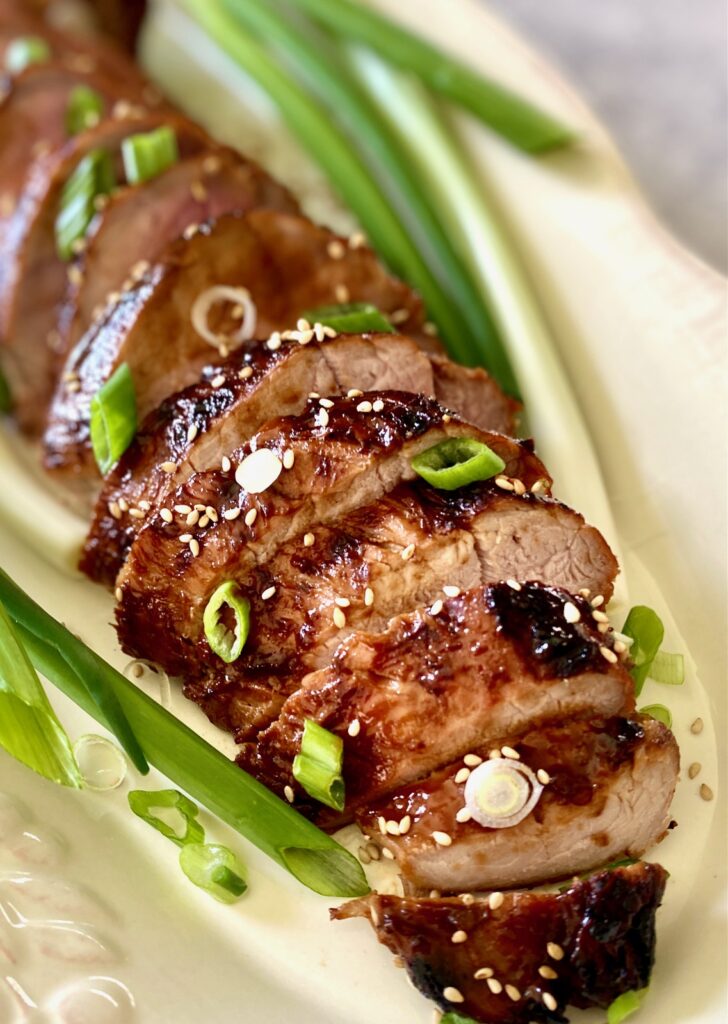
- Slice into pork medallions. Sprinkle sesame seeds and scallions over the sliced pork before serving.
Make Ahead
This dish is the ultimate make-ahead! Every part can be prepped in advance, making it an easy meal.
- Make the marinade up to one week ahead and store it in the refrigerator until ready to use.
- Marinate the pork for a minimum of 30 minutes, but up to 2 days, in advance.
- Each pork tenderloin will feed 3-4 people so if you have a smaller group then make one and freeze one for later.
Freezer Option
- Place pork in an airtight container, or zip-top freezer bag, and pour in marinade to coat. Freeze for up to 3 months. Allow to thaw in the refrigerator before cooking and then proceed as directed above.

Storing Leftovers
- Allow the cooked pork to cool
- Place in an airtight container for up to 3 days in the refrigerator or up to 2 months in the freezer
- Reheat in the oven, at 350˚F, covered with foil, for about 10 minutes.
Best Cooking Temperature for Pork
- Pork is a lean meat so to ensure you have juicy Asian pork tenderloin we recommend removing it from the grill or oven at 145˚-150˚Farenheit
- The very best way to check is to use an instant-read thermometer inserted into the thickest part of the pork.
- For a great visual guide check out this cooking guide from Pork.org
Love Pork? Try these pork favorites
- This Pork Loin with Garlic and Herbs is simple and flavorful!
- Juicy and authentic Carnitas are ideal on their own but great for tacos, burritos, and nachos.
- Grilled Chili Lime Pork Tenderloin has a tangy and citrusy flavor.
Asian Pork Tenderloin
Ingredients
- 2 (1.5 pound) pork tenderloins trimmed of fat and silverskin
Marinade
- 4 ounces Hoison sauce
- 2 ounces rice vinegar
- 1 ounces soy sauce (low sodium recommended)
- 1 Tablespoons Dijon style mustard
- 1 teaspoons fresh ginger peeled and finely minced (or ½ teaspoon ground ginger)
- 1 teaspoon garlic minced (or ½ teaspoon garlic powder)
- ½ teaspoon chili paste (or red pepper flakes)
Garnish (optional)
- 1 Tablespoon toasted sesame seeds
- 1 scallion, sliced into rounds sliced on the bias, white and green part
Instructions
Marinade:
- Combine all of the ingredients for the marinade in a medium saucepan and heat on medium-low for about 10 minutes (do not boil) until the sauce begins to thicken a little.Remove from heat and cool to room temperature. Reserve 4 Tablespoons for basting the pork while its cooking.Make-ahead Tip: Prepare marinade, cool, and store it in the refrigerator for up to one week.
Marinating the Pork:
- Rinse, pat dry, trim the pork of excess fat, and remove the silver skin.Add the pork to a gallon-size freezer bag, or a shallow glass dish, and cover with the cooled marinade.Allow the pork to marinate for 30 minutes in the refrigerator.If not cooking right away, seal tightly, and refrigerate for up to 2 days, or freeze for up to 3 months. If frozen thaw before cooking.
Cooking / Grilling:
- Stovetop:Heat a grill pan to medium. Once the pan is hot add the marinated tenderloin.Grill:Heat the grill to medium-high and add the tenderloins. Bake:Preheat the oven to 400℉. Line a baking sheet with foil or parchment paper.Bake for 18-20 minutes, turning after 10 minutes and basting. Pork is done when it reaches an internal temperature of 145˚-150˚ F.Discard the remaining marinade.
- Cook for about 7 minutes and flip the meat over. Baste with some of the reserved marinade.Continue cooking, and turning every 6-7 minutes, for about 18-22 minutes, or until the pork reaches an internal temperature of 145-150℉, basting each time you turn the pork.
- Remove from the heat, place on a cutting board, and loosely tent with foil for 5 minutes to allow the juices to reabsorb.
- Slice pork into medallions, sprinkle with sesame seeds and scallions, and serve.
Notes
- Marinate both tenderloins and freeze them separately. Each tenderloin will serve 3-4 people.
- Once ready to cook, defrost overnight in the refrigerator before cooking.
- Cut the marinade recipe in half if you have just one pork tenderloin to marinate.
Nutrition
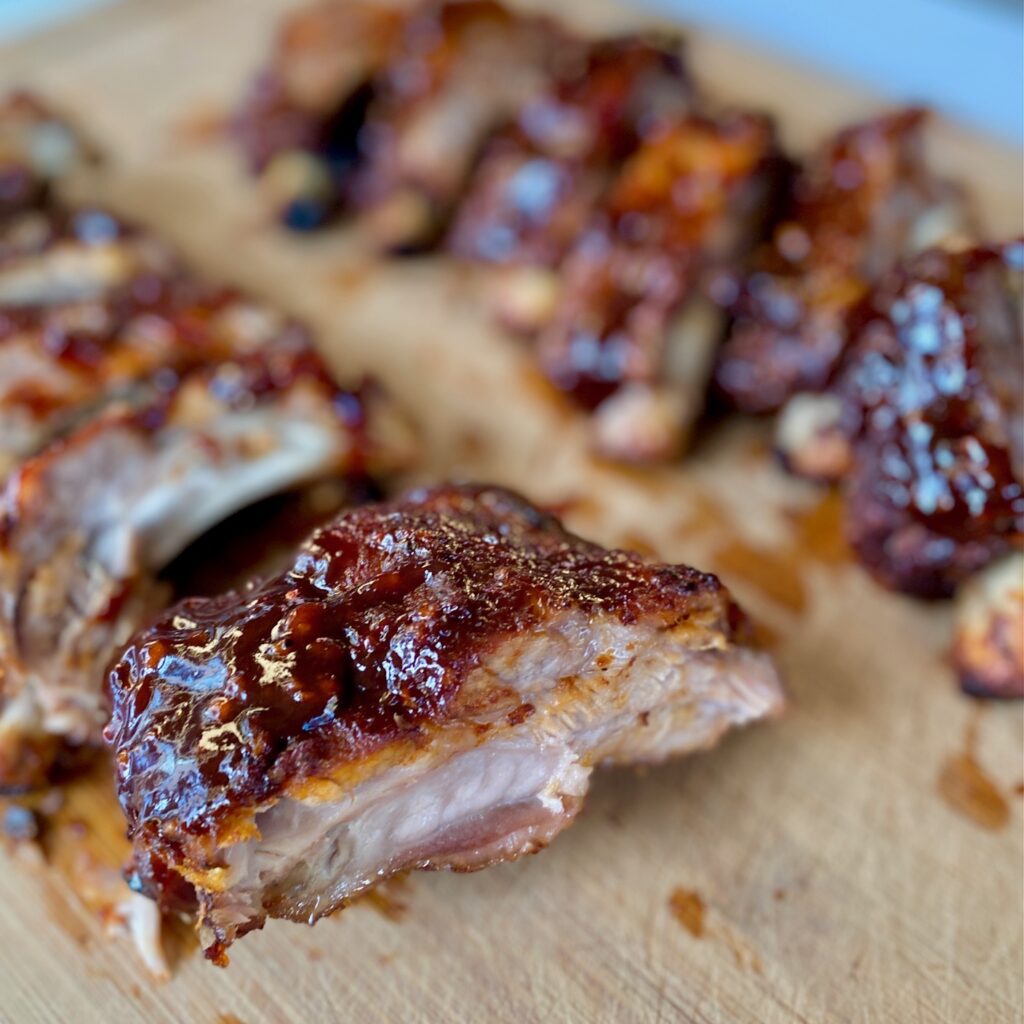
These tender ribs are fall off the bone tender and everything you want in an easy and delicious dinner for the whole family
Baby back ribs are coated in a spicy rib rub, covered in rich and tangy barbecue sauce, then slow-cooked to perfection. We are big fans of Oven Baked Ribs and Smoked Ribs but the beauty of this method is that it’s a simple recipe for any time of the year
Slow cooking ribs in the crock pot is perfect for weeknights. Meat becomes melt in your mouth tender after cooking in a slow cooker. We rely on slow cooker recipes, such as our Slow Cooker Pulled Chicken and Irish Pot Roast, because it makes life so easy.
Prep the ribs quickly in the morning (or even the night before), let them cook low and slow all day, and enjoy a delicious dinner.
Ingredients Needed for Slow Cooker Ribs
(See the recipe card below for the exact quantities)
Ribs – One rack of ribs. Our favorite is baby back ribs, but feel free to pick your favorite kind of ribs because any type, such as pork spare ribs, St. Louis style ribs, or beef ribs, will work for crockpot ribs.
Barbecue Sauce – Make our 15-minute Homemade BBQ Sauce or use your favorite grocery store brand
Dry Rib Rub – we use our favorite homemade Dry Rub for Ribs recipe blend, which includes dark brown sugar, paprika, chili powder, garlic powder, onion powder, oregano, cumin, salt, and black pepper. You can also keep it simple and use just salt and pepper.


How to Make Slow Cooker BBQ Ribs
Prep:
- Blend the spice rub mixture in a small bowl and set aside.
- Prepare the ribs by patting them dry with a paper towel. Trim excess fat.
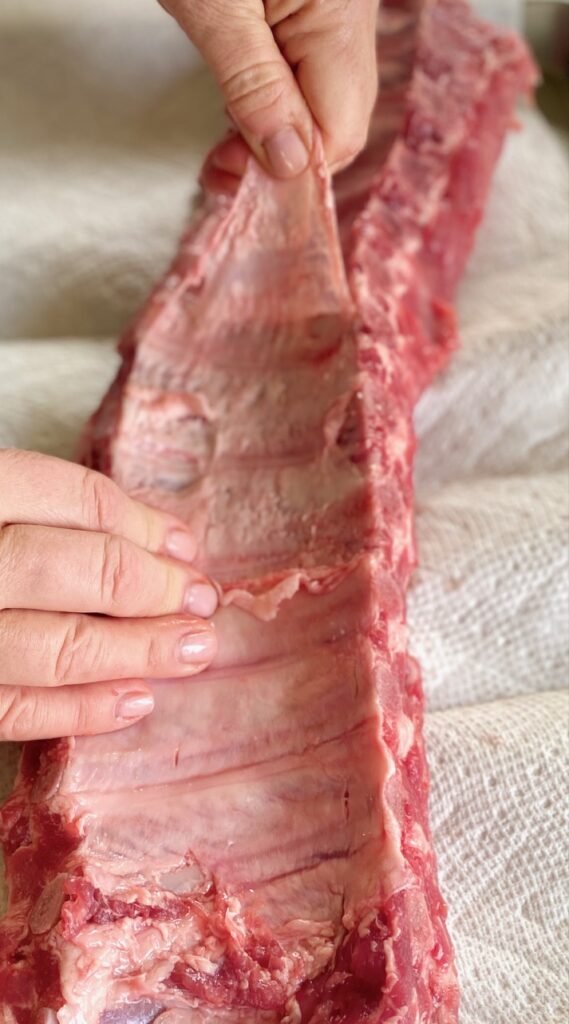
- Turn the ribs over and remove the thin membrane from the back of the ribs (see photos and the How-To below).
- Rub the ribs all over with the rib rub, including the sides of the ribs. Make sure they are well coated.

- Cut the rack in half and place them in the slow cooker.
- If using a large crockpot you can stand the ribs up on their side and wrap them around the inside of the slow cooker bowl. If you are using a smaller slow cooker you can cut the racks into 4 pieces instead of 2 to make sure they fit in the pot.
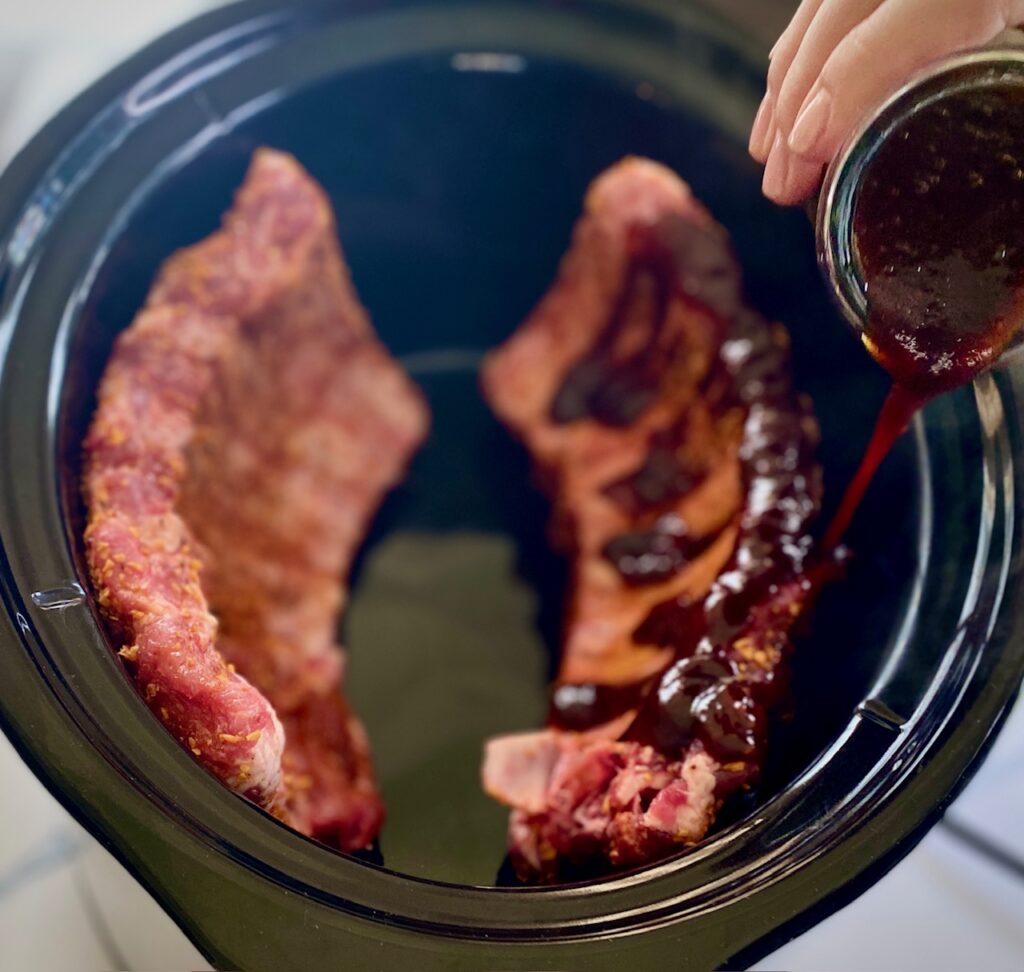
- Pour your favorite BBQ Sauce all over the ribs, making sure they are coated all over.

Cook:
- Cover the slow cooker with the lid.
- For baby back ribs cook for 6-7 hours on low, or about 3 ½ hours on high, until the ribs are tender. Other types of ribs may have a longer cooking time. Cooking them on low will result in the most tender ribs.
- Ribs are ready when they reach an internal temperature of 190˚- 200˚F, and they are falling off and pulling away from the bone.
- Preheat the oven broiler. Line a baking sheet with aluminum foil.
- Remove the ribs from the slow cooker and place them on the prepared baking sheet.
- Spoon or brush some of the sauce from the crock pot over the ribs.
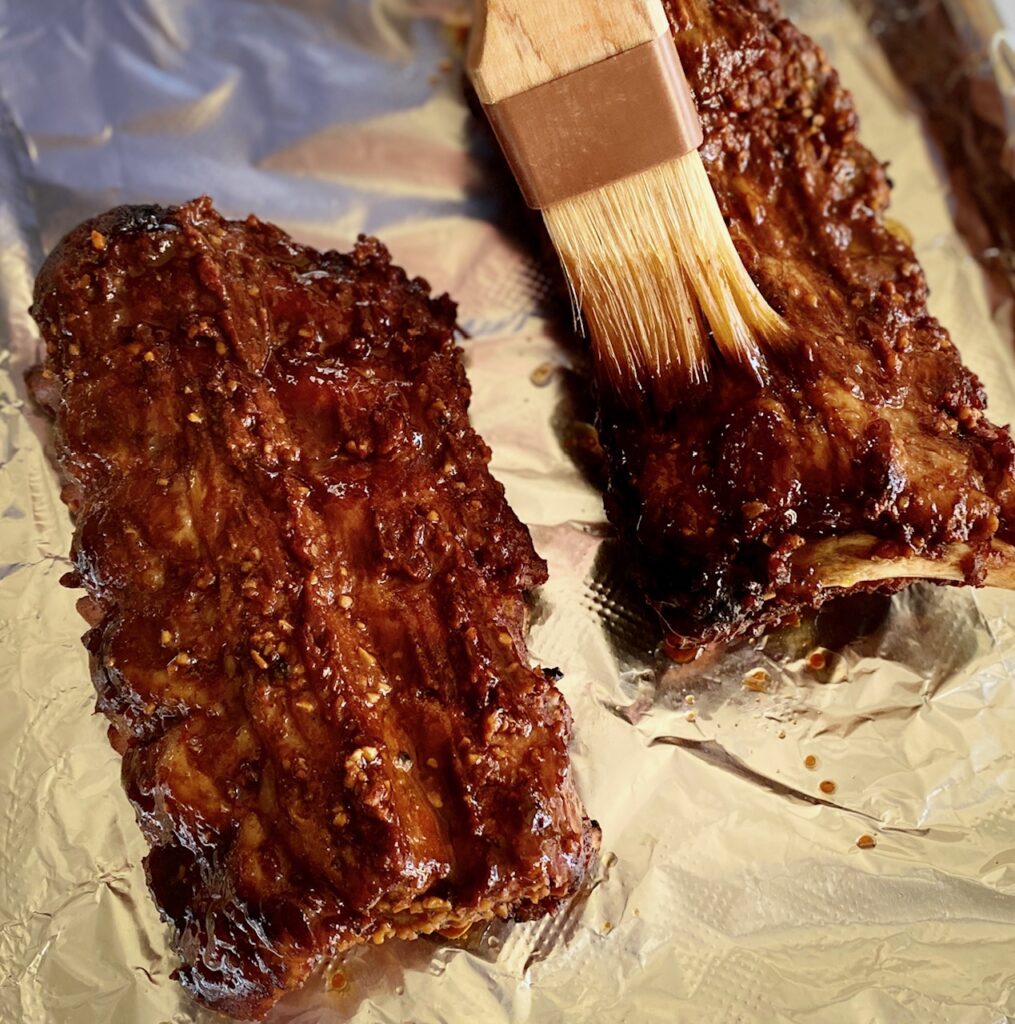
- Broil for about 5 minutes until the sauce on the ribs starts to caramelize.
- Remove from the broiler. Place on a cutting board and let cool for 5 minutes.
- Cut the racks into individual riblets.
- If desired, brush some more of the leftover sauce from the slow cooker onto the ribs and serve.
How to Store
These make a great make-ahead meal which saves you a lot of time.
Once cooked and cooled the ribs can be stored in an airtight container or freezer bag in the refrigerator for 3-4 days or can be frozen for up to 3 months.
How to Reheat Ribs
- Preheat the oven to 250˚F
- Place the ribs in an oven-safe baking dish. Brush with BBQ sauce and cover tightly with foil. Bake for 15-20 minutes.
- If frozen bake for about 30 minutes. No need to thaw.
Variation Ideas
- Instead of traditional BBQ sauce substitute an Asian based BBQ sauce
- Use a simple salt and pepper rub in place of our Dry Rub mixture
- Want your ribs spicier? Try adding a pinch of cayenne pepper to the rib rub mixture
- Love a smoky flavor? Use smoked paprika and chipotle chile powder
- If you have a large slow cooker you can easily cook 2 racks of ribs instead of 1

How to Remove the Membrane from Ribs
Ribs come with a thin white membrane that runs along the back side of the rack. It can become tough and chewy when cooked so it’s best to remove it. This also allows the seasonings and BBQ sauce to fully flavor the meat.
To remove it run a knife under the membrane in one spot to loosen it, then grasp it and pull it off in a sheet. Use a paper towel if needed to get a better grip on the membrane. The membrane should come off in one or two whole pieces but you may need to remove it in smaller pieces. Discard the membrane once removed.

What to Serve with Crock Pot Ribs
These ribs are so versatile and here are some of our favorite side dishes to serve alongside them.
- Baked Beans
- Asian Coleslaw with Peanut Dressing
- Grilled Vegetables or Grilled Corn on the Cob
- Black Bean and Corn Salad (aka Cowboy Caviar)
- Rice Pilaf or Oven Roasted Potatoes

Slow Cooker Baby Back Ribs (with BBQ Sauce)
Equipment
- 1 Slow Cooker
Ingredients
- 4 pounds baby back ribs (1 large rack)
- 2 cups BBQ sauce, homemade or store-bought
Dry Rib Rub
- 2 Tablespoons dark brown sugar
- 1 Tablespoon paprika
- 1 Tablespoon chili powder
- 1 Tablespoon garlic powder
- 1 Tablespoon onion powder
- 2 teaspoons black pepper, freshly ground
- 2 teaspoons Kosher salt (or 1 teaspoon regular salt)
- ½ teaspoon dried oregano
- ¼ teaspoon cumin
Instructions
- Blend together the spice rub mixture and set aside.
- Prepare the ribs by patting them dry with a paper towel and removing the membrane.
- Coat the ribs all over with prepared spice rub mixture. Cut the rack in half.
- Add the rib racks to the slow cooker. Pour half of the BBQ sauce on top to coat and then flip the racks over and pour in the remaining BBQ sauce on the ribs. If your crock pot is large enough, you can stand the ribs on their side and wrap them around the inside of the crock pot.
- Cover the slow cooker with the lid.Cook the ribs for about 6 hours on low or 3½ hours on highThe ribs are ready when the internal temperature is 190-200℉ and they are beginning to fall off the bone. If possible use an instant read thermometer. The ribs should be pulling away from the bone and easy to shred.
- Preheat the oven broiler to high and line a baking sheet with foil.
- Remove the ribs from the crockpot and lay them on the prepared baking sheet. Spoon some of the sauce from the slow cooker on top of the ribs.
- Broil for 5 minutes or until the sauce is beginning to caramelize.Remove from the oven, place on a cutting board, let cool for 5 minutes, and slice the ribs into individual riblets. Serve with additional sauce if desired.
Notes
- Instead of traditional BBQ sauce substitute an Asian based BBQ sauce
- Use a simple salt and pepper rub in place of our dry rub mixture
- Want your ribs spicier? Try adding a pinch of cayenne pepper to the rib rub mixture
- Love a smoky flavor? Use smoked paprika and chipotle chile powder
- If you have a large slow cooker you can easily cook 2 racks of ribs instead of 1 rack
Nutrition
These chops are juicy, tender, and lightly spicy thanks to a flavorful seasoning mix using common seasonings
15 minutes and no more dry pork chops ~ Hurray!
Ready to get started? Just click the “jump to recipe” button below or keep reading for more tips and ideas. This post may contain affiliate links. Please see our affiliate disclosure for more details. We only recommend products we love and use.
Jump to RecipeIn addition, these air fryer pork chops have no breading which makes them a protein bomb!

Ingredients Needed:
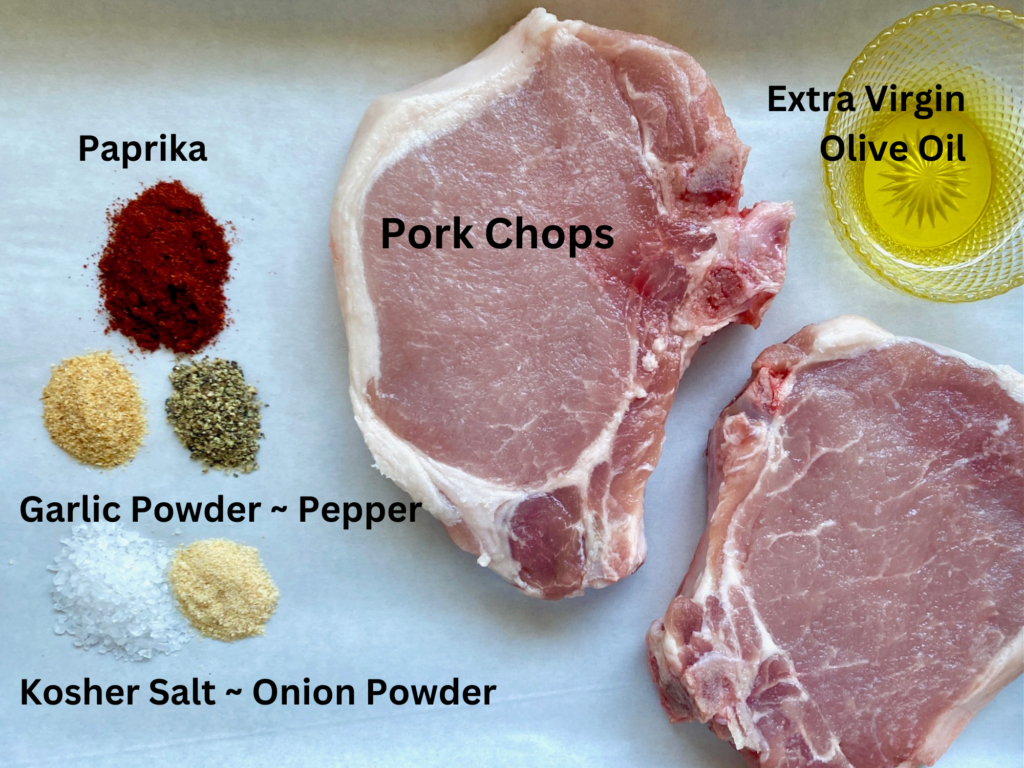
- 2 Bone-in Pork Chops – each chop should weigh 7-8 ounces, and measure about 1.5 inches thick. We prefer to use pork chops with a small bone because they tend to be juicier than boneless pork chops. Our top choice is “rib eye chops” which have a curved rib bone (see more below about choosing pork chops)
- Olive Oil – any oil will work but we like the flavor of olive oil
- Paprika – you could also use smoked paprika if you like the smoky flavor
- Kosher or Sea Salt – any type of salt will work but we prefer flaky Kosher salt, or sea salt because it enhances the flavor of food rather than making it taste salty, and it sticks well to meat
- Garlic Powder and Onion Powder – if you need to use garlic salt or onion salt then delete the Kosher salt
- Black Pepper – freshly ground pepper is always best
You can also substitute our popular Dry Rub for Ribs if you want a spicier pork chop.
How to make Air Fryer Pork Chops (bone in):
This recipe is super simple. The important part is the timing when cooking in the air fryer. The high heat and quick cooking time makes the air fryer ideal for pork chops.
NOTE: Our air fryer fits 2 bone-in pork chops perfectly so we cook 2 at a time. If your air fryer is larger you can cook 4 at a time by simply doubling this recipe. Our chops were at room temperature (65˚F) when we started cooking.
- Set the air fryer to 400˚F and preheat it for 5 minutes while preparing the chops.
- Combine the seasoning ingredients together in a small bowl (paprika, kosher salt, garlic powder, onion powder, and pepper).
- Pat the pork chops dry and coat them with olive oil on both sides and on the edges.


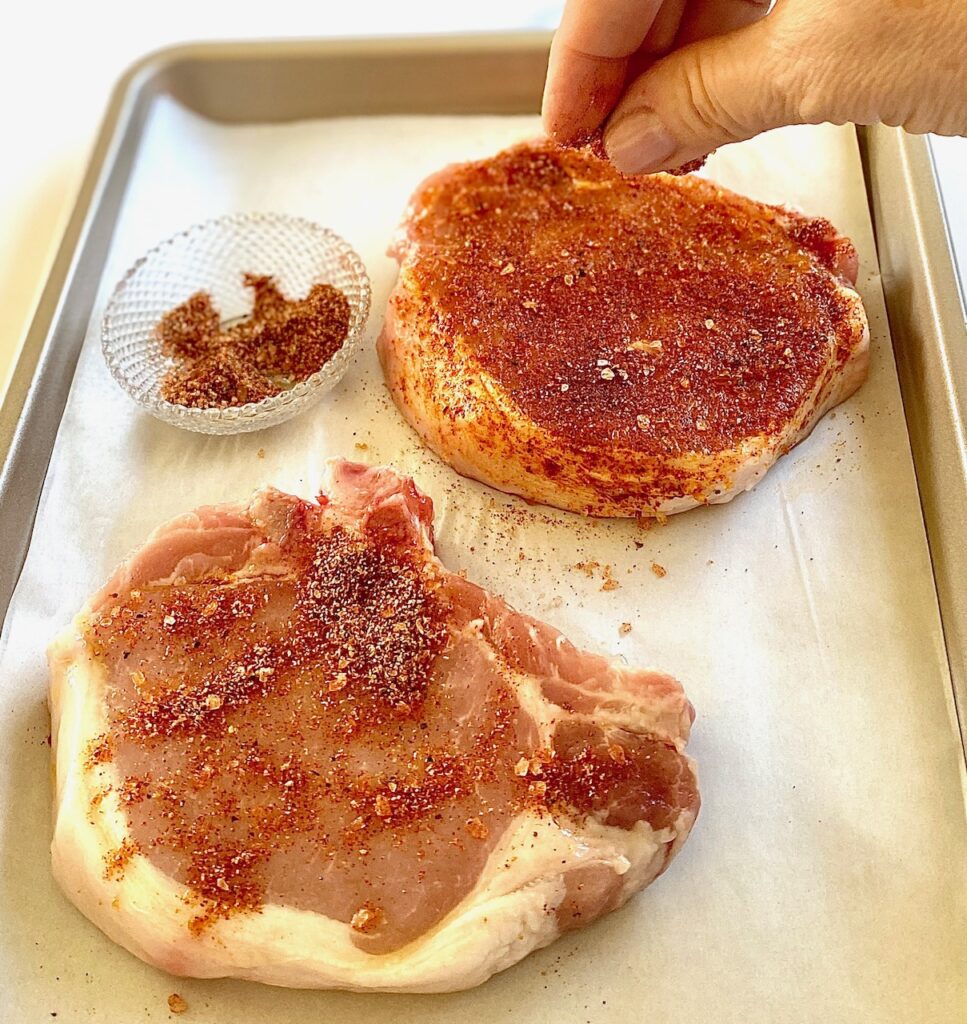
- Generously coat the pork chops, including the sides, with the seasoning blend. Pat the seasonings on to make sure they stick and that the chops are well coated.
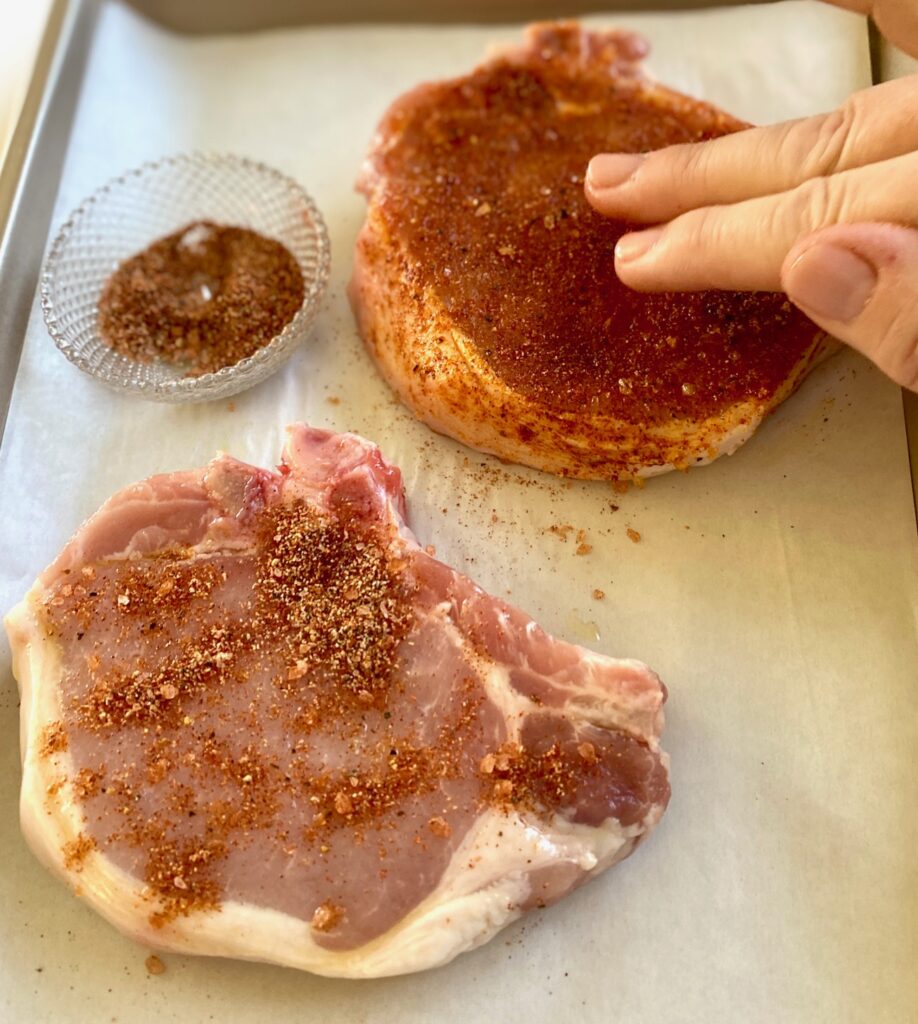
- Remove the air fryer basket and spray generously with non-stick spray, or add an air fryer parchment liner to the basket, which makes for much easier cleanup.
- NOTE: If using parchment paper do not add it until you are ready to add the food because the air in an air fryer will cause the parchment to fly around and and can cause the paper to burn. Use parchment with holes in it (we buy them this way) or cut a few holes in yours. This is necessary for proper air circulation.
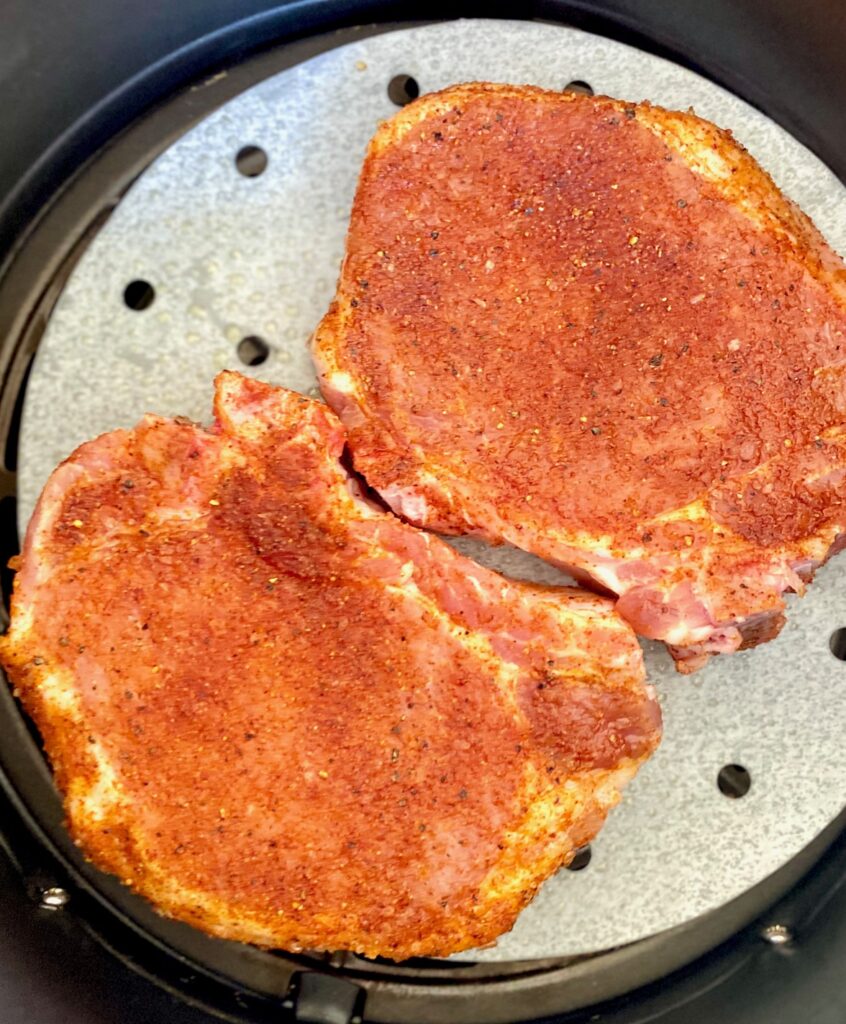

- Place the chops in the air fryer basket side by side, and cook for 7-9 minutes, flipping halfway through.
- Remove when the pork chops reach an internal temperature of 140˚F. Pork chops will continue to cook slightly while resting.

- Let rest, uncovered, for 3-5 minutes, or until the pork chops reach an internal temperature of 145˚F.
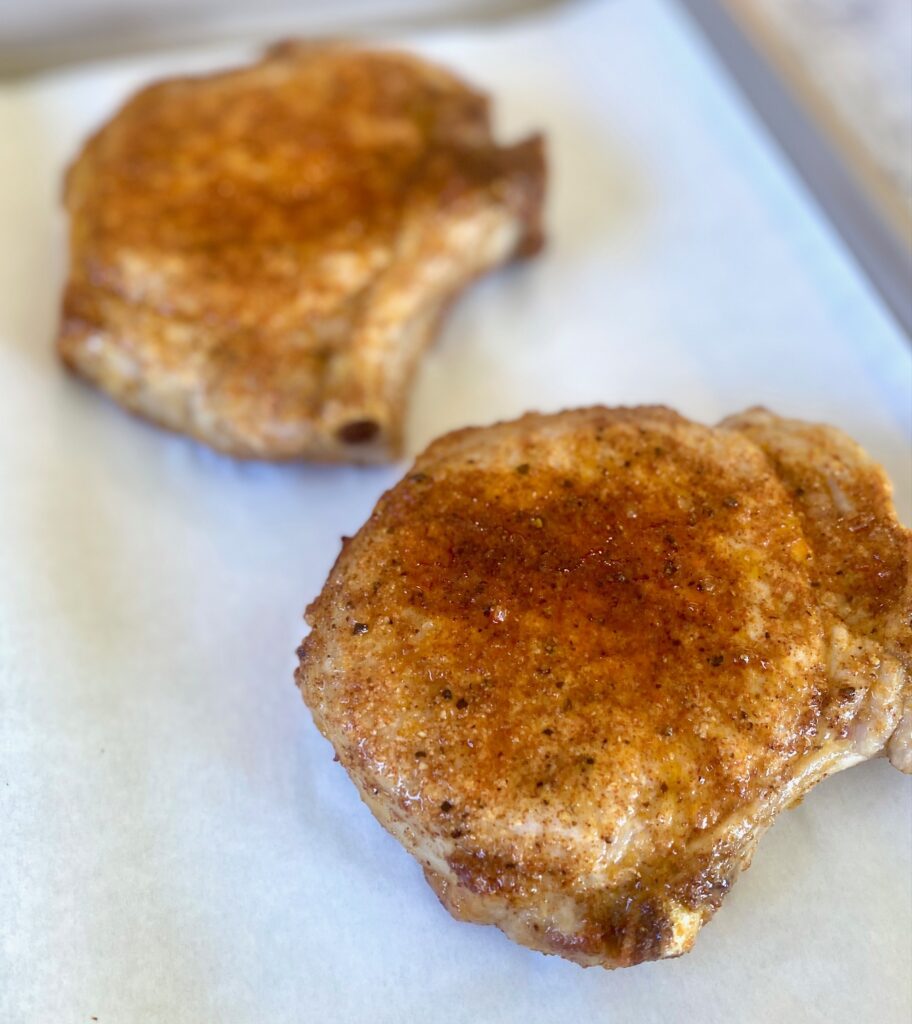
How long to cook pork chops in the air fryer:
- Cooking times will always vary based on the model of your air fryer and the size of your pork chops.
- We highly recommend using an instant-read digital cooking thermometer for the most accurate results. They are an inexpensive, but highly valuable, kitchen tool.
- Cook pork chops until they reach 140˚F, remove, and let rest for a few minutes until the internal temperature reaches 145˚F (3-5 minutes)
Checking doneness without a thermometer
If you don’t have a thermometer there a two good ways to check for doneness.
- Prick the pork chops with a fork and check to see if the juices run clear
- Press the top of the chop with your fingertip (or tongs). The pork should feel firm but spring back to shape with clear juices
Slicing and serving:
These chops can be served whole, or sliced on the bias, and served along with their bone. We love to serve them with Lemon Vinaigrette mixed greens and easy oven Roasted Asparagus for a quick weeknight dinner. If pairing with wine we suggest a buttery Chardonnay, a light Pinot Noir, or a crisp Rosé.

Choosing pork chops for the air fryer:
Pork chops are a lean, mild-flavored, and ultra-versatile cut of meat. They lend themselves to so many flavor combinations but can also overcook quickly and become dry. For that reason, it’s important to consider which cut of chops is best for each cooking method.
For the juiciest air fryer pork chops we like bone-in pork chops. They have so much flavor, thanks to a little fat around the bone. The Ribeye Pork Chop is our top choice. They contain some rib and back bone in them which keeps them juicy.
Learn more about cuts of pork chops from the pork.org website.
A few things to keep in mind:
- Boneless pork chops – cook faster and are ultra lean
- Bone-in pork chops – fuller flavor but slightly higher in calories

Looking for other pork recipes?
- This Pork Loin Roast with garlic and herbs is simple but so flavorful
- Juicy and authentic Carnitas are also ideal for the air fryer. Great for tacos, burritos and nachos.
- Grilled Chili Lime Pork Tenderloin has a tangy and citrusy flavor.

Air Fryer Pork Chops
Equipment
- Air Fryer
Ingredients
- 2 8 ounce pork chops bone-in, 1.5" thick, rib eye cut
- 1 Tablespoon olive oil
- ½ teaspoon paprika
- ½ teaspoon salt (preferably kosher salt)
- ¼ teaspoon garlic powder
- ¼ teaspoon onion powder
- ¼ teaspoon black pepper, freshly ground
Instructions
- Preheat the air fryer to 400℉ for 5 minutes.
- Pat the pork chops dry, place on a plate, and coat all over with the olive oil.
- In a small bowl combine all the seasonings (paprika, salt, garlic powder, onion powder, and pepper) and mix well to blend.
- Generously coat the pork chops, including the sides, with the seasoning blend.
- Spray the air fryer basket with non-stick spray or line it with a parchment air fryer liner.
- Place the pork chops in the air fryer basket side by side, and cook for 7-8 minutes, flipping halfway through cooking. Remove when the internal temperature is 140℉. Let the pork chops rest, uncovered, for 3-4 minutes until they reach an internal temperature of 145℉.
Notes
- Prick with a fork and check that the juices run clear
- Press the top of the meat with your fingertip (or tongs). The pork should feel firm but spring back to shape with clear juices
Nutrition
Turn this zesty chicken into a sandwich by piling it high on a bun and topping it with our Asian Coleslaw for a cool twist
The magic of the slow cooker is that you can prep everything in the morning and have dinner ready without much hassle. Win-win, right? This one takes just 15 minutes of prep time!
There are only 5 basic ingredients for this crockpot BBQ chicken recipe and you probably have them in your refrigerator and pantry right now.
This post may contain affiliate links. Please see our affiliate disclosure for details. We only recommend products to you that we love and use.
Ingredients for Pulled Chicken:
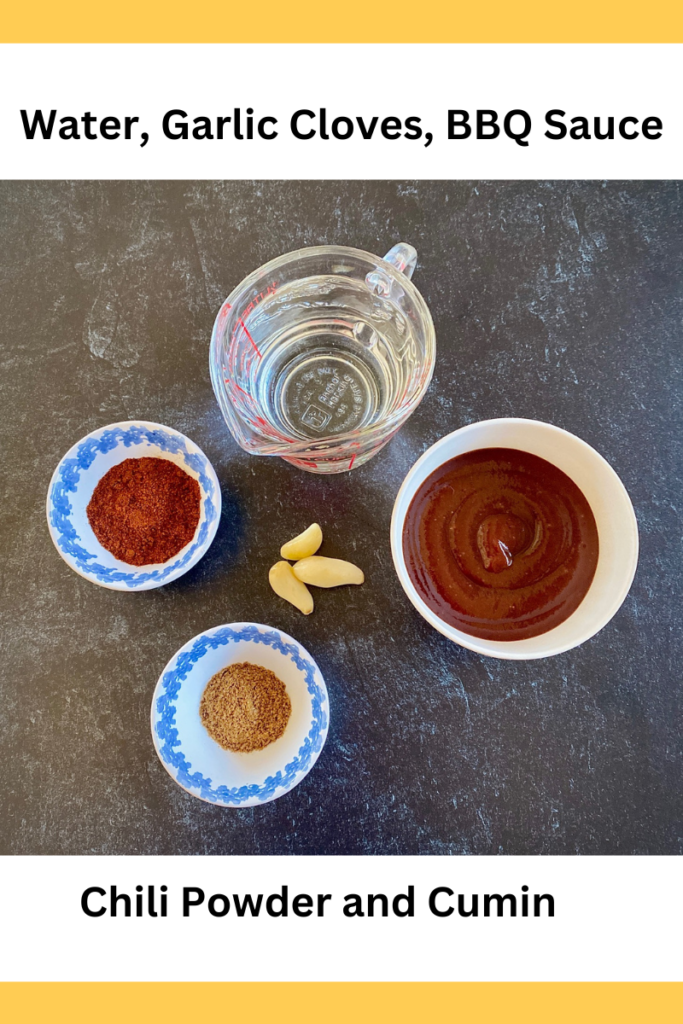
- BBQ Sauce – pick your favorite brand or make our 15-minute Homemade BBQ Sauce
- Garlic Cloves – we use 3 cloves but add a few more if you love garlic
- Cumin – this spice has an earthy flavor and is a great flavor boost
- Chili Powder – this is where the kick of spice comes in but you can tone it down by adding a little less if desired
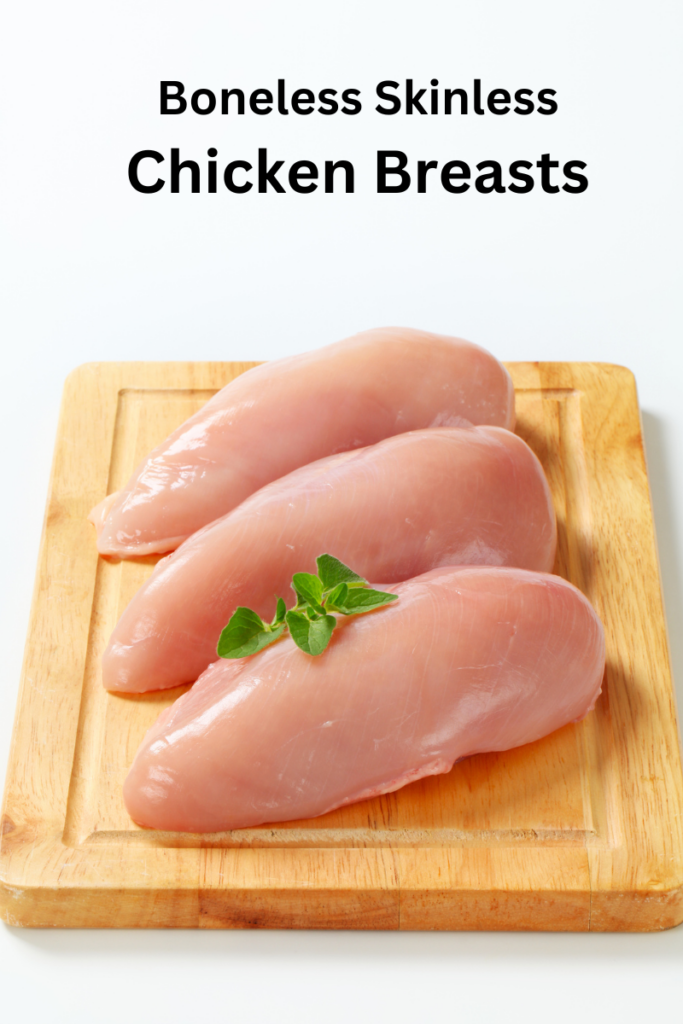
- Chicken Breasts – 2 pounds of boneless and skinless breasts
If making Pulled Chicken Sandwiches or Pulled Chicken Sliders add:
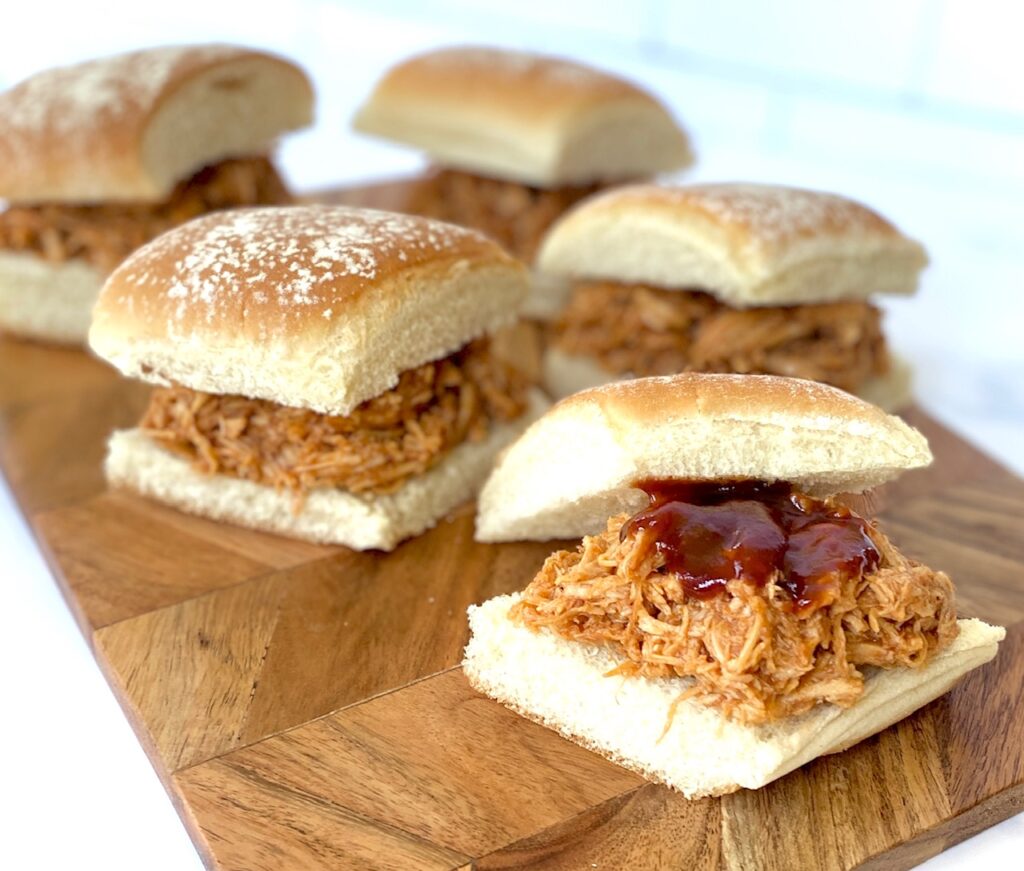
- 6 large or 12 slider buns
- Asian Coleslaw with Peanut Dressing
How to make Slow Cooker Pulled Chicken:
This recipe is super simple with just a few steps:
- Whisk all of the sauce ingredients together in a bowl
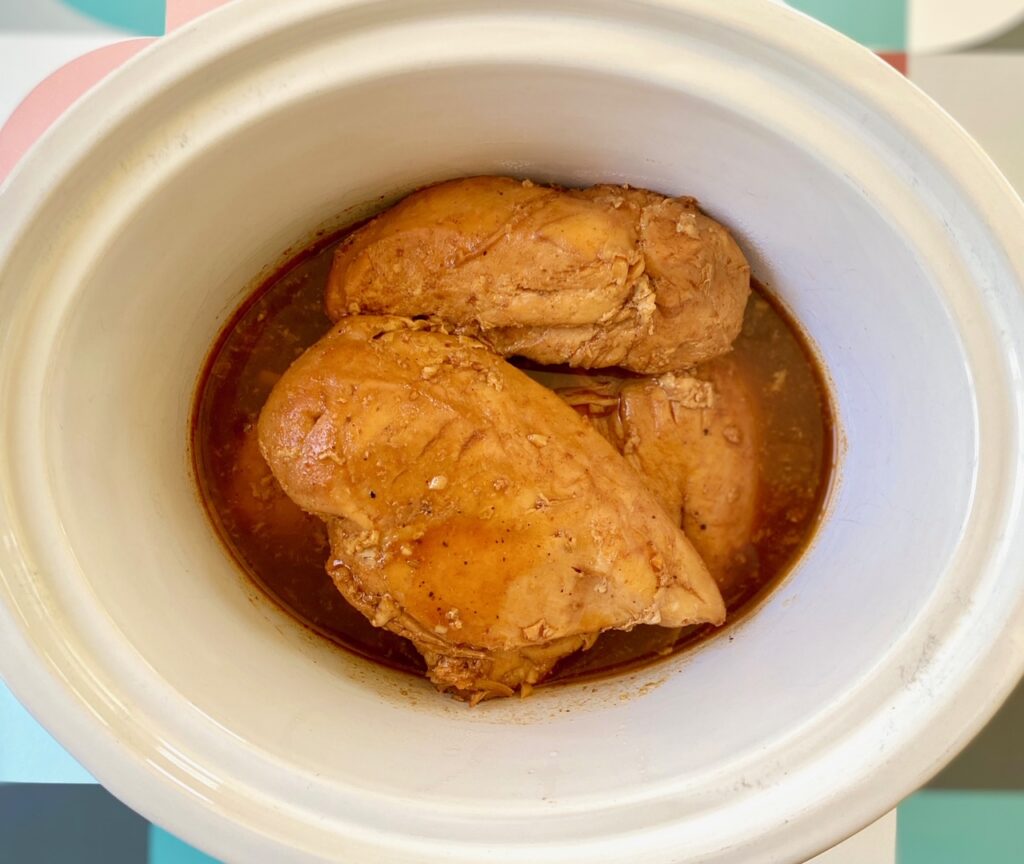
- Place whole skinless, boneless chicken breasts in the slow cooker
- Pour the BBQ Sauce mixture over the chicken and make sure it is well-covered
- Put the cover on the slow cooker
- If you have all day you can cook the chicken on low for about 8 hours, but if time is an issue it can be cooked on high for 4 hours
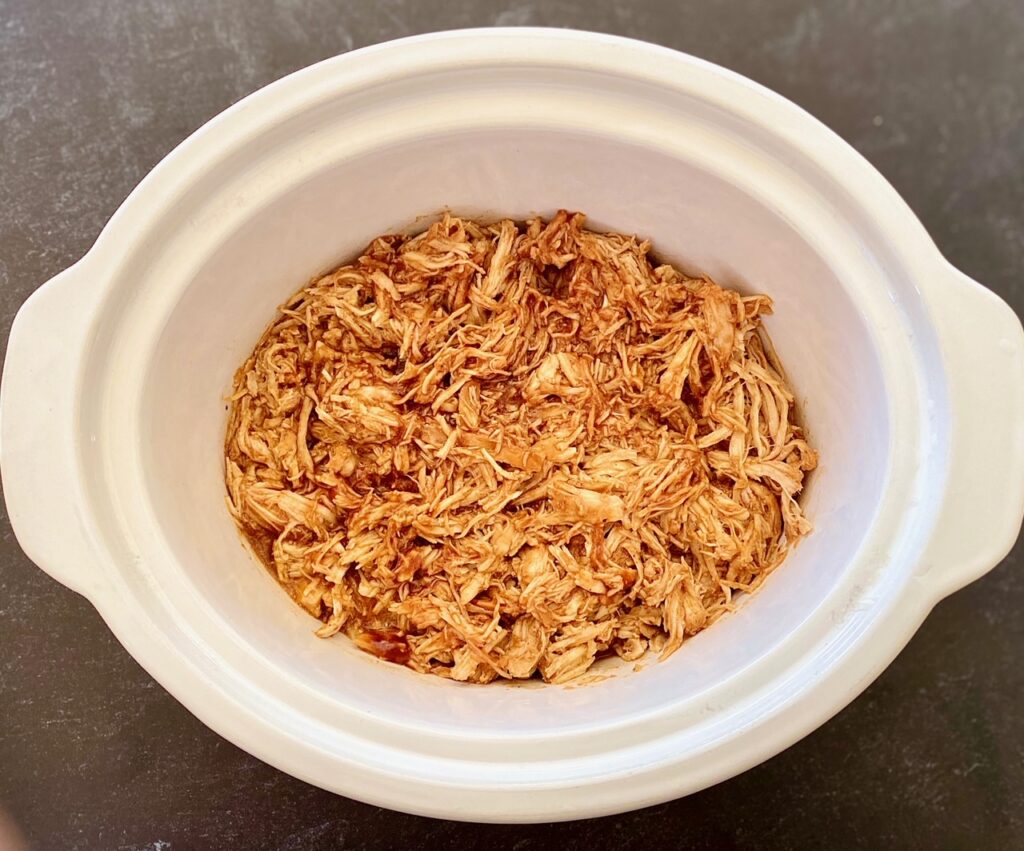
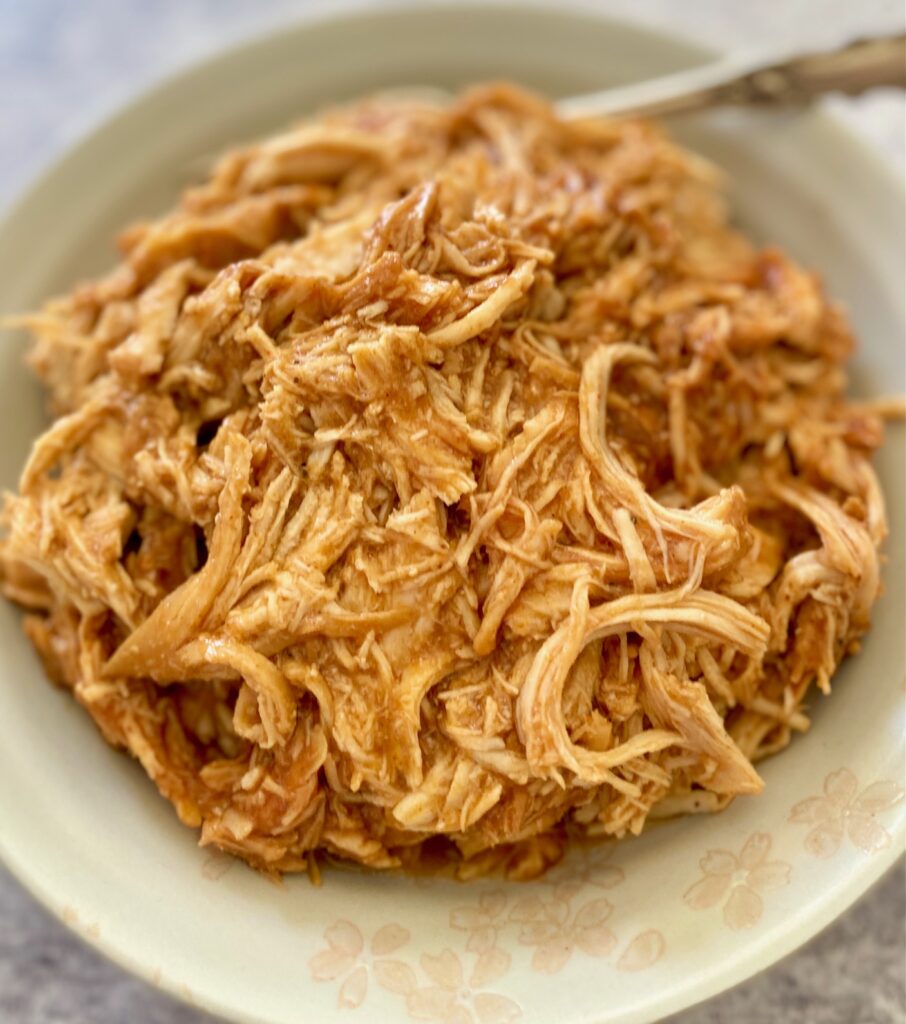
- Once the chicken is finished cooking (165˚F recommended), and tender, take it out of the slow cooker and shred it on a cutting board using two forks to pull it apart


- Return the shredded chicken back to the slow cooker, mix it thoroughly with the sauce, and heat for another 15 minutes. If needed, add more BBQ sauce.
- Serve as is or as sandwiches or sliders
Different ways to use Slow Cooker Pulled Chicken:
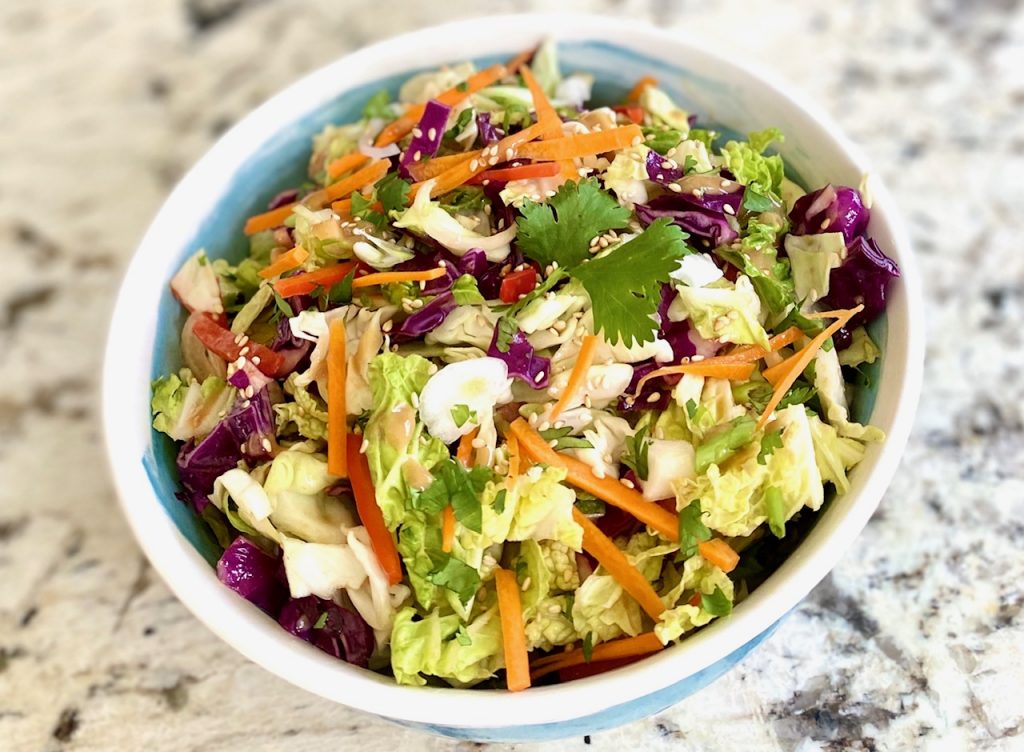
My favorite way to eat this chicken is to create a pulled chicken slider or sandwich topped with our cool Asian Coleslaw.
To make:
- Start with a bun that is sturdy enough to hold both the chicken and the slaw. I like a poppy seed, sesame seed, or an onion bun, but whole wheat works well too.
- Top the shredded chicken with about 1/3 cup of Asian Coleslaw. The flavors really meld well together.
Other Variation Ideas:
- If you don’t want to use a bun you could also wrap this amazing chicken up in a big piece of sturdy lettuce for a tasty chicken lettuce wrap
- Put it right on your plate and top it with any coleslaw!
- Use the chicken as the protein base in a rice bowl
- Make a burrito or use the mix in tacos or nachos
Storing leftover Pulled Chicken:
FREEZER: Pulled chicken freezes very well which makes it great for meal prep. Be sure to let it cool completely, then separate it into serving sizes that work for you, and store tightly sealed in the freezer for up to 3 months.
REFRIGERATOR: Store in a sealed container for up to 3 days
Suggestions for beverage pairing:
- Our Spicy Mango Margarita or refreshing Paloma Cocktail are both great matches
- Asian beer is a great accompaniment for a pulled chicken sandwich
- Light to medium-bodied Chenin Blanc or Rose is a good contrast to the sweet and salty flavors in the BBQ sauce
Other easy main dishes to try:
- Asian Baked Chicken
- Sheet Pan Salmon
- Skirt Steak with Mustard Sauce
- Garlic Shrimp with Roasted Tomatoes
Perfect side dishes to pair with pulled chicken
- Refreshing Citrus Salad is a light side
- Try our zesty Black Bean and Corn Salad
- An easy Grilled Caesar Salad adds a smoky touch to dinner
- Grilled Corn with Sweet Chili Sauce adds a spicy touch to match the chicken
Read more about making the perfect Shredded Chicken, which is a great technique to have on hand!
Slow Cooker Pulled Chicken
Equipment
- Slow Cooker or Crock Pot
Ingredients
- 1 cup BBQ sauce
- 3 garlic cloves, minced
- 1 -2 Tablespoon chili powder (depending on the spice level wanted)
- 2 teaspoon ground cumin
- 2 pounds chicken breasts, boneless and skinless
- 1 cup water
Optional for Sandwich:
- 6 large buns, such as poppy seed, onion or sesame seed
- 2 cups Asian coleslaw, See recipe link below
Instructions
Prepare Sauce:
- In medium bowl, whisk BBQ sauce, garlic, cumin, chili powder and water.
Slow Cooker Directions:
- In a 4-6 quart slow cooker add whole chicken breasts and cover with BBQ mixture.
- Cover and cook on high for 4 hours or on low for 8 hours, or until chicken is very tender. (chicken pieces should be cooked to an internal temperature of 165℉)
- Transfer the cooked chicken to a cutting board. Shred the chicken by pulling it apart with 2 forks and then add the chicken back into the slow cooker, stirring to combine with the sauce, and cook for an additional 15 minutes. Keep warm until ready to serve.
To Make Sandwiches
- Prepare your favorite Asian slaw or use our recipe for Asian Coleslaw with Peanut Dressing
- Serve shredded chicken on buns and top with about 1/3 cup slaw.
Notes
- Use boneless pork instead of chicken
- Use small rolls, such as Hawaiian Rolls, to make 12 sliders
Nutrition
In just 15 minutes you can make an easy and delicious weeknight dinner
Making salmon in the air fryer is about to become your new favorite way to prepare salmon. Like most air fryer recipes, it’s fast and practically fail-proof. The results are amazing!
This recipe is perfect for those days when dinner needs to get on the table fast (did we mention 15 minutes?), because the salmon cooks quickly. It’s also perfect for days when firing up the barbeque isn’t an option
We love the versatility of salmon, from grilled Cedar Plank Salmon, with its crispy skin, or easy side of Baked Salmon with a creamy mustard dill sauce. It adapts to almost any seasoning or sauce.
This post may contain affiliate links. Please see our affiliate disclosure policy for details. We only recommend products we love and use.
Ingredients for Salmon in the Air Fryer
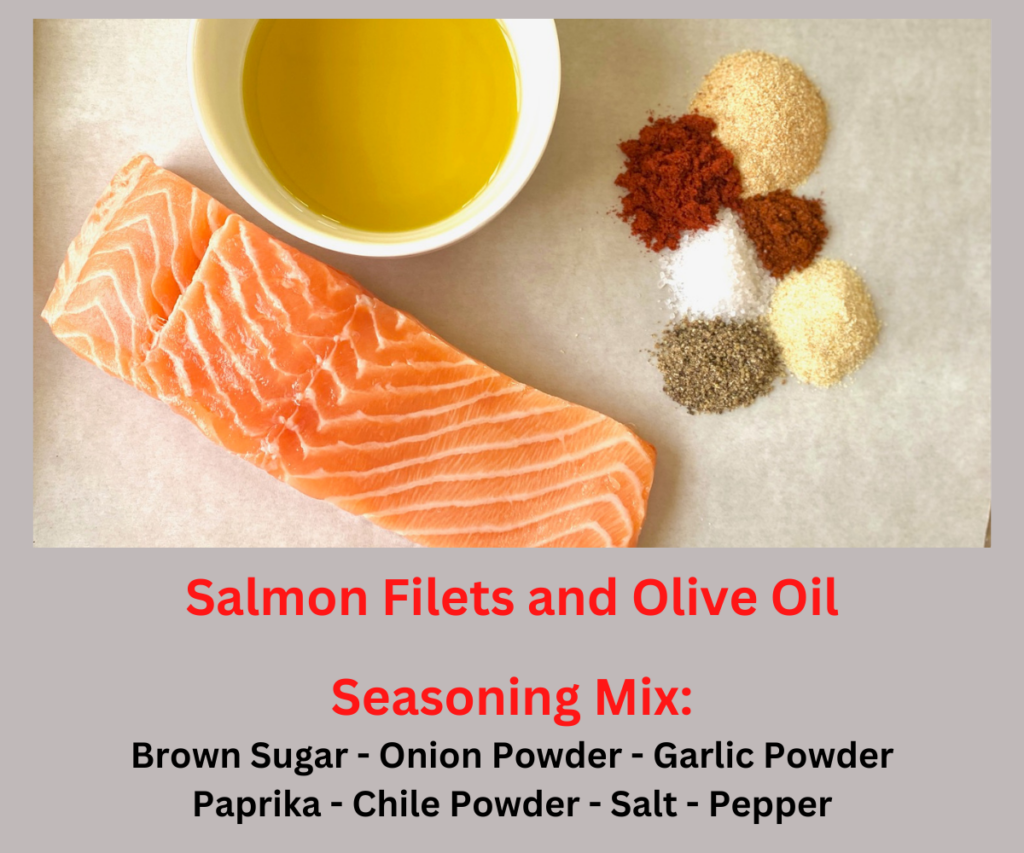
- 2 Salmon fillets – skin-on fillets are highly recommended for best results. Even if you don’t plan to eat the salmon skin it protects the fish during the high cooking temp and the end result is juicy salmon
- Olive Oil – or melted coconut oil
- Simple Ingredients for Salmon Seasoning:
- Light Brown Sugar – helps the salmon develop a gorgeous light crust
- Garlic Powder – if using garlic salt omit the regular salt
- Onion Powder – if using onion salt you can omit the regular salt
- Paprika – use regular or smoked paprika
- Salt and Black Pepper
- Chile Powder – looking for less spice? Leave this spice out
- For variation season with our Potlatch for Fish seasoning blend which is perfect for salmon, or try a sassy cajun seasoning.
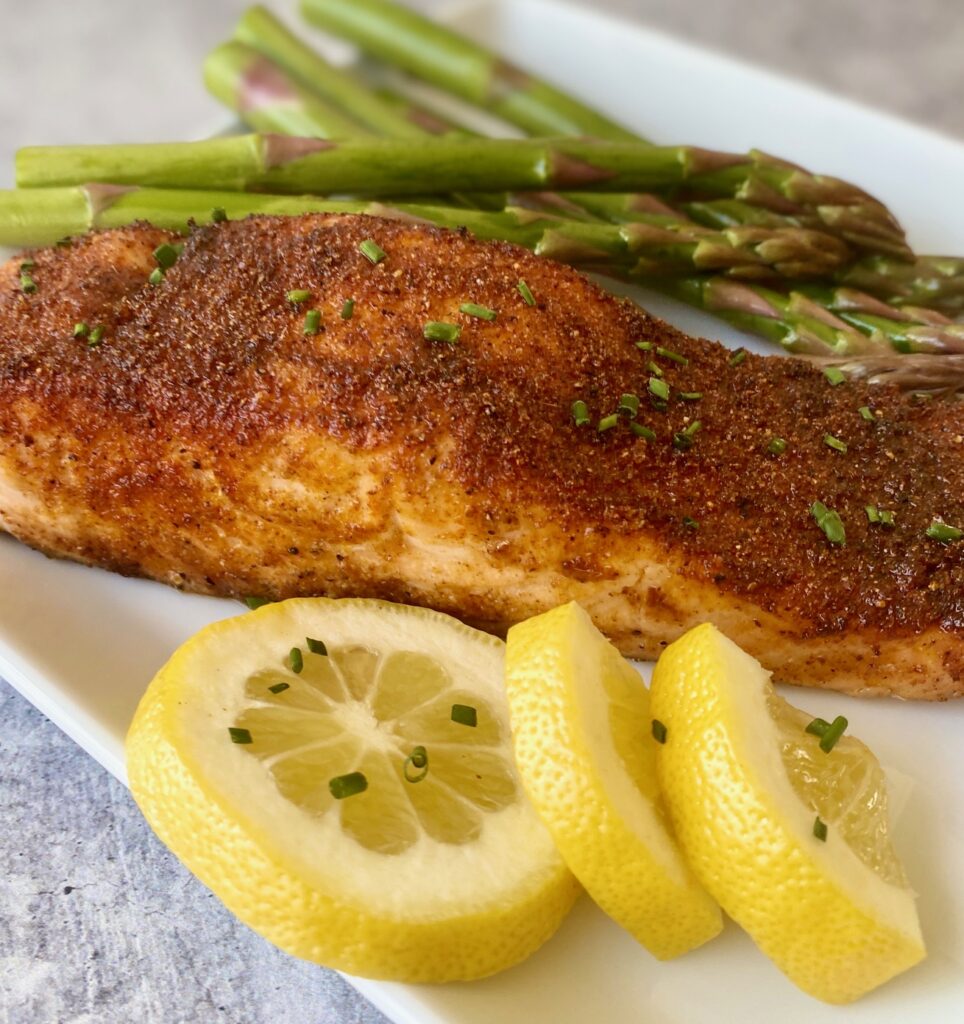
How to make Air Fryer Salmon:
This method could not be easier! Below (and in the recipe card) are the step-by-step tips for perfect salmon.
Chefs Tip: Blend the seasoning mix ahead of time and store in an airtight container, for an even quicker dinner prep.
Preparing the salmon
- Preheat the air fryer to 400 degrees F for about 5 minutes while you are prepping the ingredients
- Pat the salmon dry with a paper towel – this helps give the salmon a nice crispy exterior
- Blend all of the seasoning ingredients in a small bowl
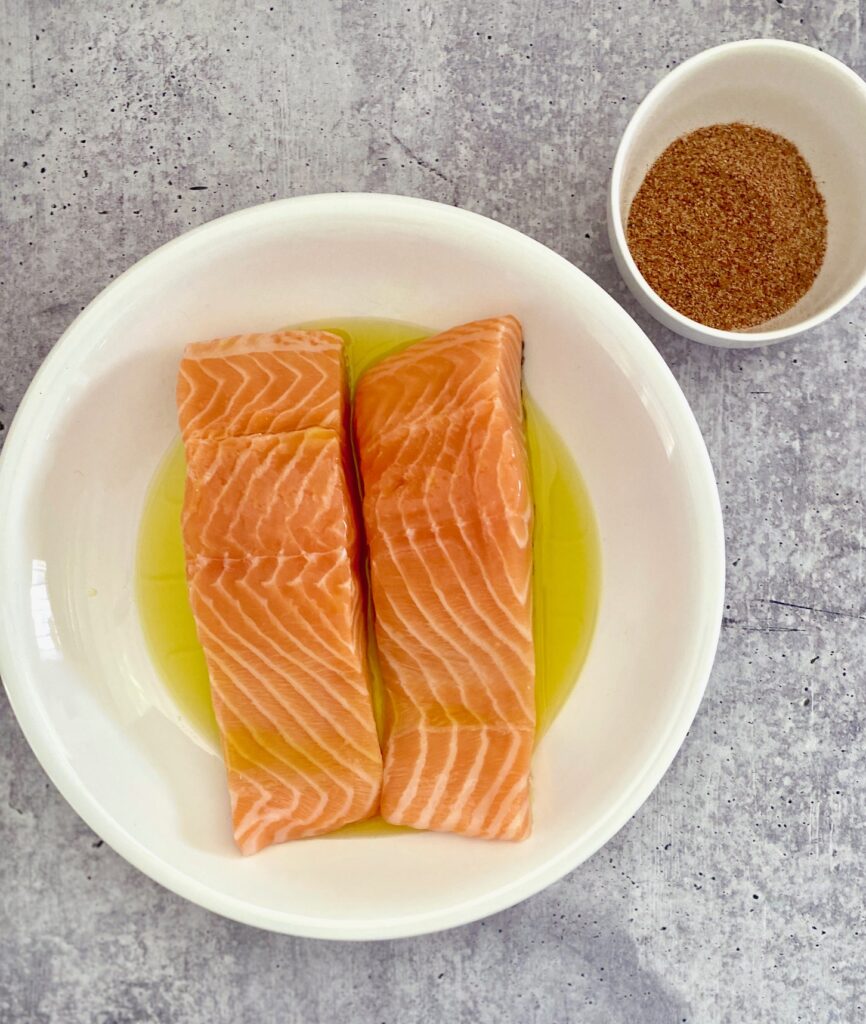
- In a shallow bowl (such as a pasta bowl) add the olive oil
- Coat both pieces of salmon all over by dredging them through the olive oil
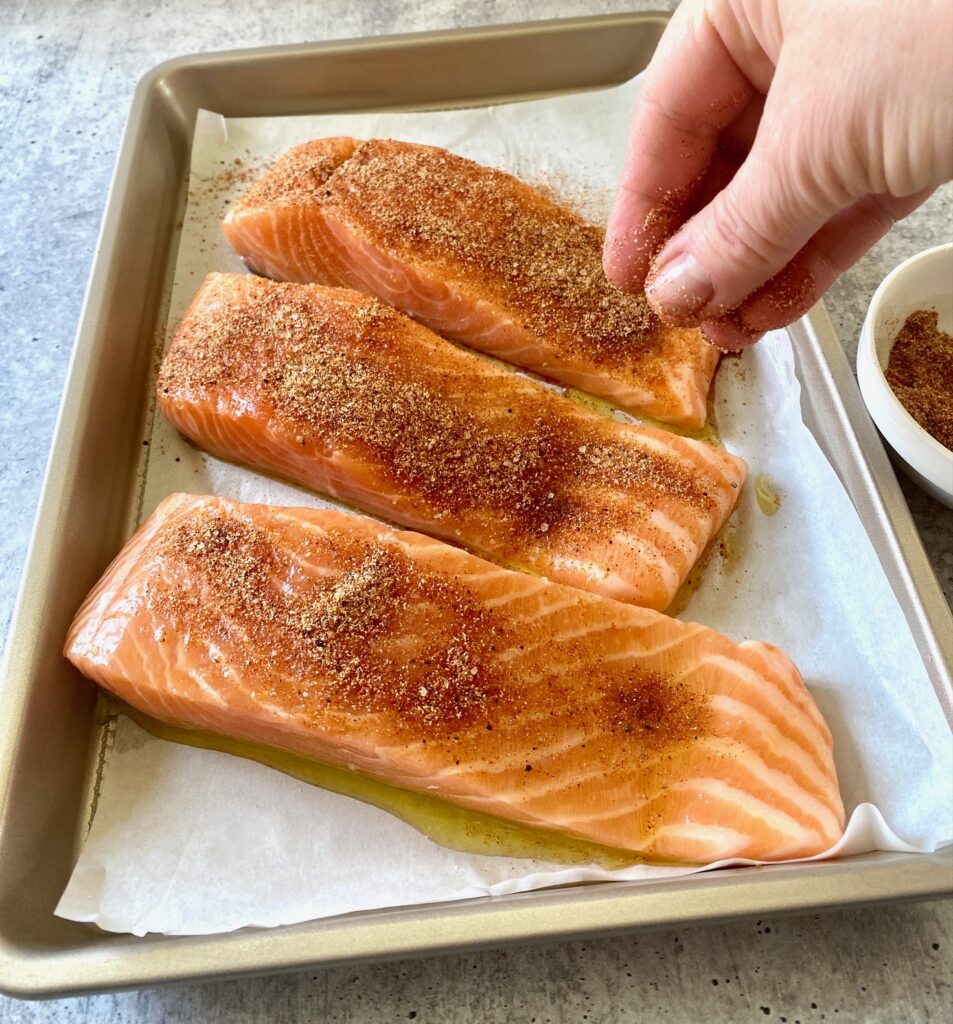
- Place salmon on a plate or tray lined with aluminum foil or parchment paper
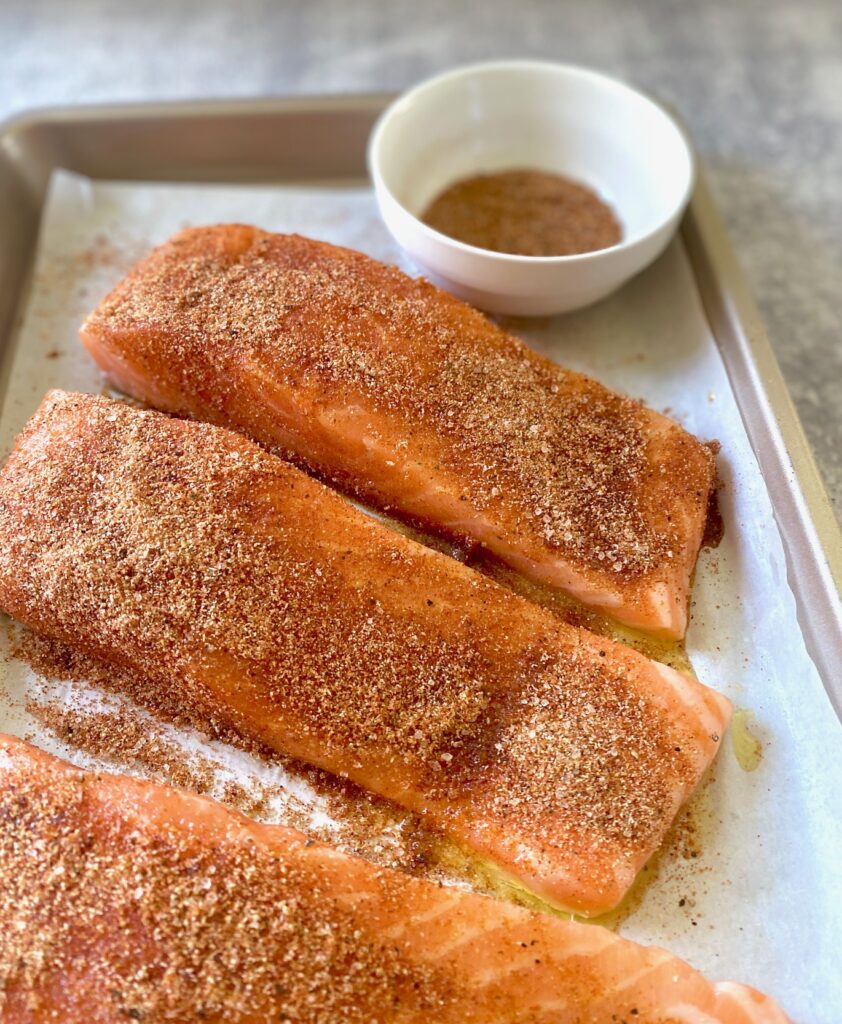
- Sprinkle the salmon pieces generously all over with the spice mixture
Preparing easy air fryer salmon:
There are 2 methods for cooking salmon in the air fryer – with OR without parchment paper
- Without Parchment: Remove the preheated basket from the air fryer and generously coat the basket with non-stick cooking spray or brush it with oil
- With Parchment: After preheating remove the basket and add the parchment to the basket of the air fryer. Use parchment with small holes (I buy mine with the holes already punched out – see photo below) or snip some little holes with scissors. It’s important to have these holes so that the air can properly circulate in the air fryer because the hot air is what cooks the salmon. I also recommend lightly spraying the parchment with nonstick spray too.
Important Safety Note: Do not add the parchment liner during the preheating. The air in the air fryer will lift the paper up and around the heating element which will cause the paper burn!
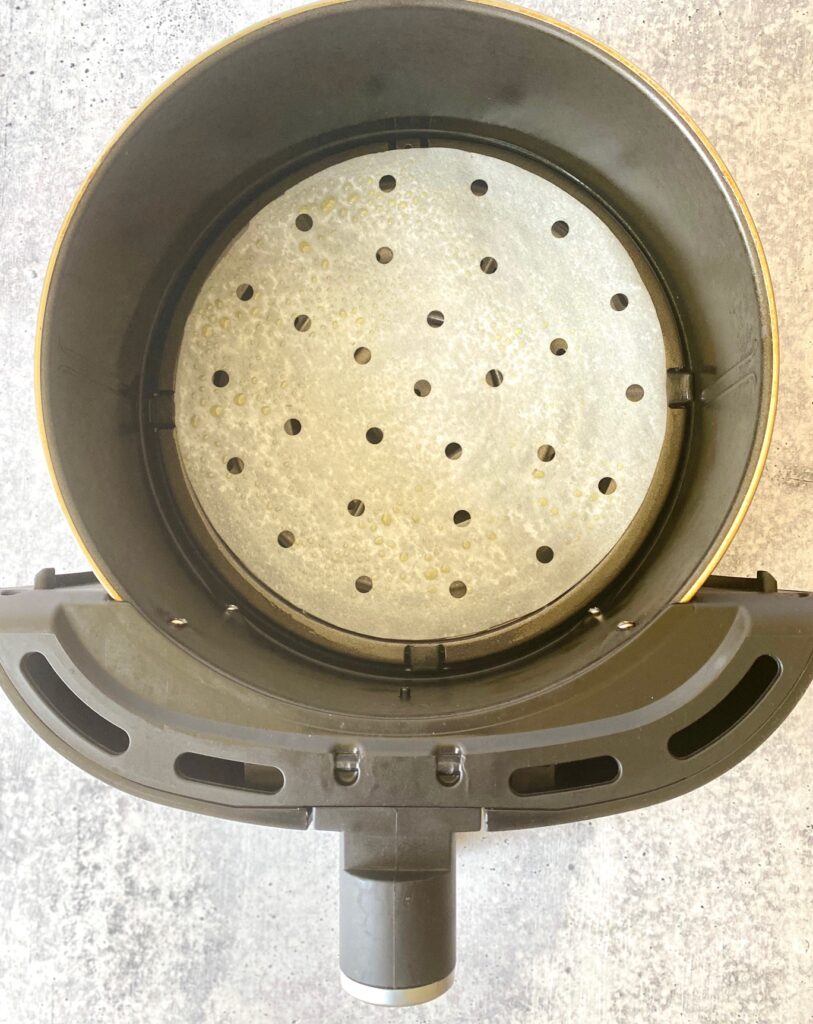
Cooking the Salmon:
- Place the prepared salmon fillet’s skin side down in the air-fryer basket in a single layer. To ensure the best airflow the pieces should not be touching each other.
- Air fry at 400˚F for 9-11 minutes, or until the thickest part of the salmon reaches an internal temperature of 130˚F on a meat thermometer. The easiest way to test the temperature of the salmon is by using a instant-read thermometer.
- Remove the pieces from the basket and let rest for 3-5 minutes so that the finished temperature is 135˚F. Serve with lemon slices for garnish.
- If you like your salmon a little more rare just adjust the cooking time slightly. The actual cook time will vary based on the thickest part of the fillet.
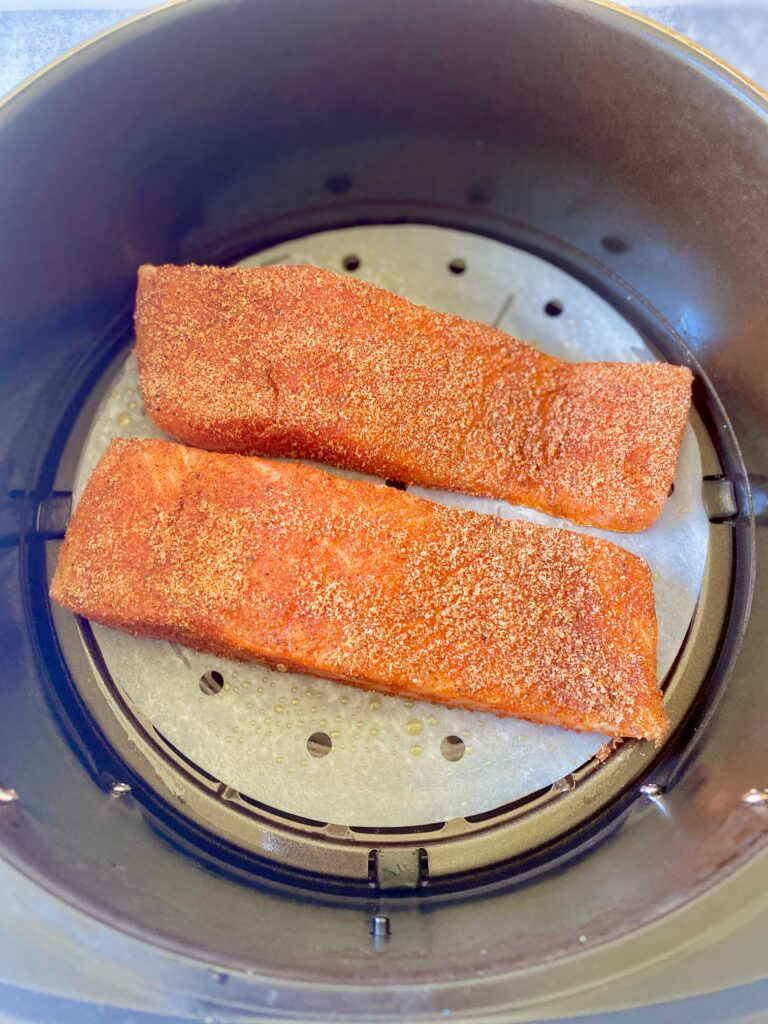
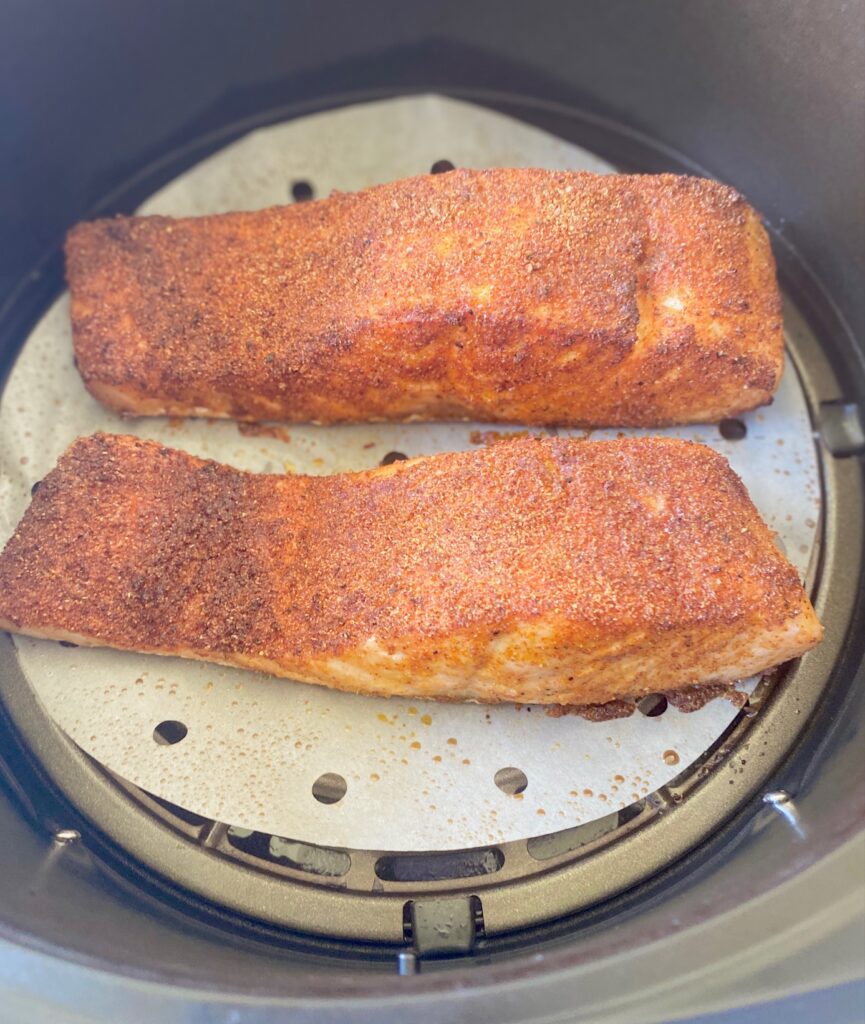
Frequently Asked Questions:
Do you need to flip salmon in the air fryer?
Nope! Just start it skin side down and let the air fryer do all the work. Because the air circulates all around the cooking remains even every single time without flipping it. Even if you don’t plan to eat the skin we recommend cooking with it on because it keeps the whole filet more moist.
What is the best temperature for cooking air fryer salmon?
We have found, after testing salmon at a few different temperatures, that 400˚F created the best salmon with a perfectly done center and a nice crispy exterior in our air fryer. Keep in mind that air fryer results can vary based on the air fryer model, so you may need to adjust the temperature in your model.
How do you cook air fryer salmon without it sticking?
- Use parchment with holes – this is our method of choice for easy clean up too!
- Without parchment, the best way is to generously spray or brush the basket with oil before adding salmon
What is the perfect temperature for cooked salmon?
What temperature salmon is “done” cooking depends on your personal consumption preference. It’s important to remember that salmon continues to cook internally for a few minutes after it is removed from the heat. Here’s a guide to help you decide.
- The FDA recommends cooking salmon to an internal 145˚F, but many think that this results in overcooked, dry salmon (and we agree). The salmon will be very firm.
- The well-regarded Cooks Illustrated advises cooking salmon to an internal temperature of 120˚- 125˚F. This will result in mostly firm flaky salmon with a silky interior
- After many tests we liked the results of salmon cooked to 130˚F, then resting for 5 minutes to reach a finished temperature of 135˚F.
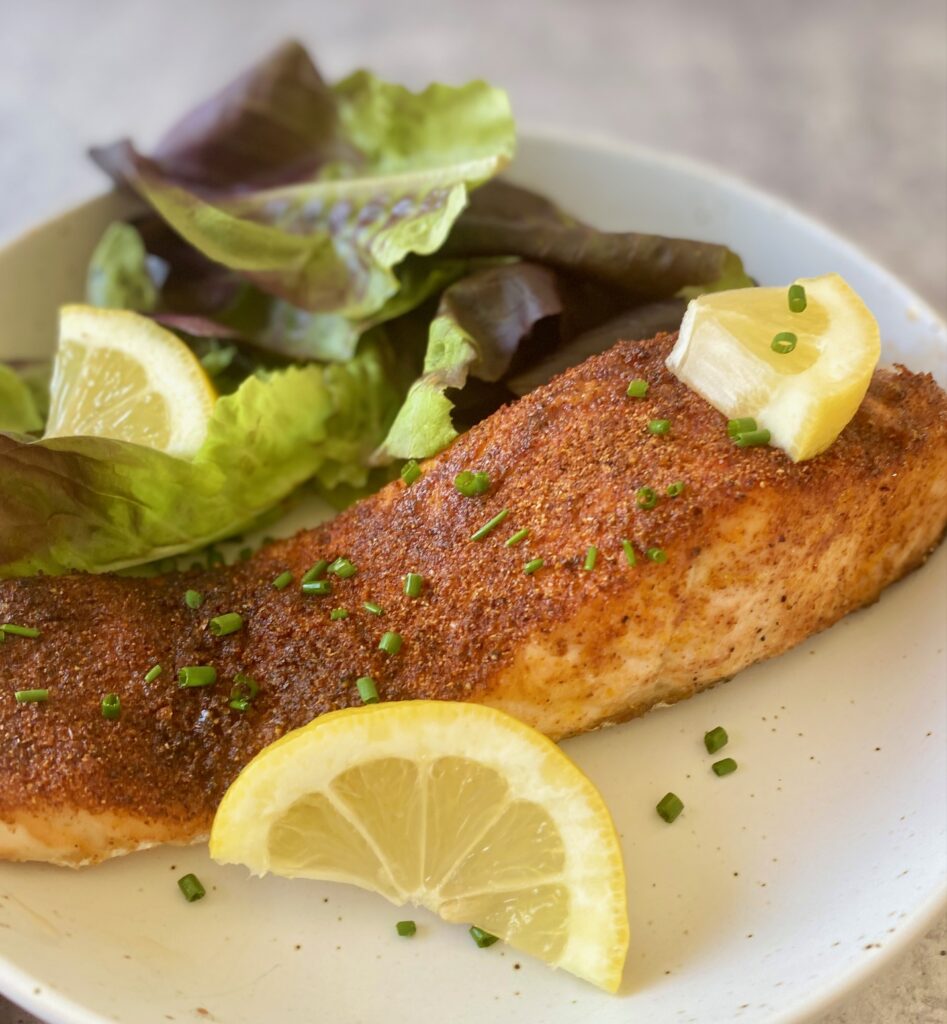
How to Store Leftovers
Leftover air fryer salmon is the best! It can be stored, tightly sealed, in the refrigerator for up to 2 days. Gently reheat, serve at room temperature, or serve chilled, on top of salad greens for a great next-day lunch.
If you have a large air fryer you can easily double this recipe. Be sure to add some delicious sides, such as garlic mashed potatoes and a simple green salad with tangy lemon juice vinaigrette.
Easy substitutions:
- We love the flavor combo of this dry rub spice mix but feel free to add and delete seasonings based on your personal taste
- We often season this salmon with our popular Potlatch Seasoning Blend for Fish because we always have some on hand.
- Want to make it more Asian Style? Skip the seasoning and brush the fish with our easy Teriyaki Sauce or Sweet Chili Sauce. (Both are gluten-free). Or pop it in the oven with veggies, like we do, in our Asian-style Sheet Pan Salmon with Asparagus.
Other scrumptious Air Fryer recipes
- Air Fryer Chicken Wings – Finished with a Szechuan soy sauce marinade
- Air Fryer Pork Chops – Juicy and tender every time! Great for busy weeknights because they are ready in 7-9 minutes.
Air Fryer Salmon Recipe
Equipment
- Air Fryer
Ingredients
- 2 salmon fillets, 6 ounces, skin on
- 1½ Tablespoons olive oil
- 2 teaspoons light brown sugar
- 1 teaspoon garlic powder
- ½ teaspoon onion powder
- ½ teaspoon paprika
- ½ teaspoon salt
- ½ teaspoon black pepper, freshly ground
- ¼ teaspoon chili powder (optional)
Instructions
- Spray the basket of an air fryer with non-stick spray. Preheat for about 5 minutes at 400℉
- in a small bowl combine brown sugar, garlic powder, onion powder, paprika, salt, pepper, and chile powder.2 teaspoons light brown sugar, 1 teaspoon garlic powder, ½ teaspoon onion powder, ½ teaspoon paprika, ½ teaspoon salt, ½ teaspoon black pepper, freshly ground, ¼ teaspoon chili powder
- Coat salmon fillets all over with olive oil and then coat the fillets with the spice mixture.1½ Tablespoons olive oil, 2 salmon fillets, 6 ounces, skin on
- If lining the air fryer basket with parchment paper add it and place the fillets skin side down on the parchment.
- Air fry the salmon for 9-11 minutes, or until the salmon reaches an internal temperature of 130℉ (use an instant-read thermometer for best results). Remove salmon fillets from the air fryer and allow them to rest for 3-5 minutes until they reach an internal temperature of 135℉.If you like your salmon rarer just reduce the cooking time slightly.
Notes
- This recipe can easily be doubled
- Looking for spicier salmon? Try our Potlatch Seasoning rub instead
- Skip the chile powder for a less spicy version
Nutrition
Dinner has never been this easy. With just 15 minutes of prep time, using common ingredients, this meal is music to a busy cook’s ears and super family-friendly.
You’ll love this fail-proof, never-dry, recipe for lean roast pork loin!
Ready to get started? Just click on our “jump to recipe” button below to go straight to the recipe card. For tips and processes read the full post below.
Jump to RecipePork is actually quite easy to prepare but it often ends up dry and lacking flavor because it’s surprisingly lean (which is why it is nicknamed the “other white meat”).
Not this version! This method will ensure your pork is perfectly cooked and perfectly juicy every time. Most of the cooking time is hands-off which frees you up to prepare some delicious sides.
Since the oven will already be hot how about a batch of Roasted Brussels Sprouts, Hasselback Baked Potatoes, or super easy Oven Roasted Potatoes?
Some of our other favorite pairings with pork are Garlic Mashed Potatoes or Rice Pilaf with Green Beans Almondine and a zesty Citrus Salad.
We’ve also provided directions for preparing it in the slow cooker.
This post may contain affiliate links. Please see our affiliate disclosure for more details. We only recommend products we love and use.
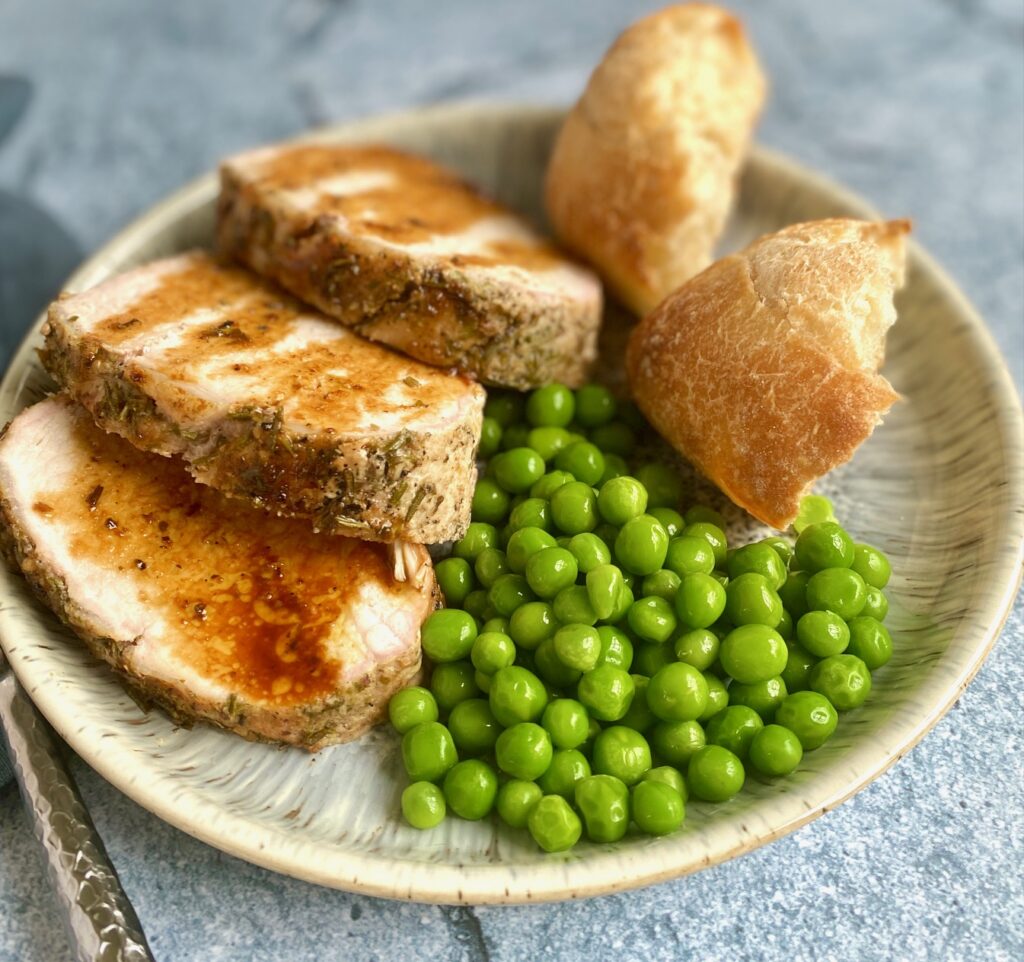
Ingredients needed:
- 3-4 pound boneless Pork Loin Roast – Usually available in 3-5 pound pieces (the one pictured below is 3.5 lbs).
- Olive Oil – For the herb paste and for searing the roast to a golden brown before cooking. You could also use vegetable oil.
- Garlic – Fresh garlic is our favorite choice, but in a pinch, you could use garlic powder instead.
- Herbs – We like Rosemary, Oregano, and Thyme for our blend, but you could use any combination of these based on what you have on hand. Fresh or dried (or a combo of both) will work. Mixed dried Italian herbs work perfectly too. Feel free to get creative.
- Onion Powder – if you only have onion salt you can use that but you’ll want to omit the extra regular salt.
- Salt and Pepper – To round out the seasonings.

How to prepare the pork:
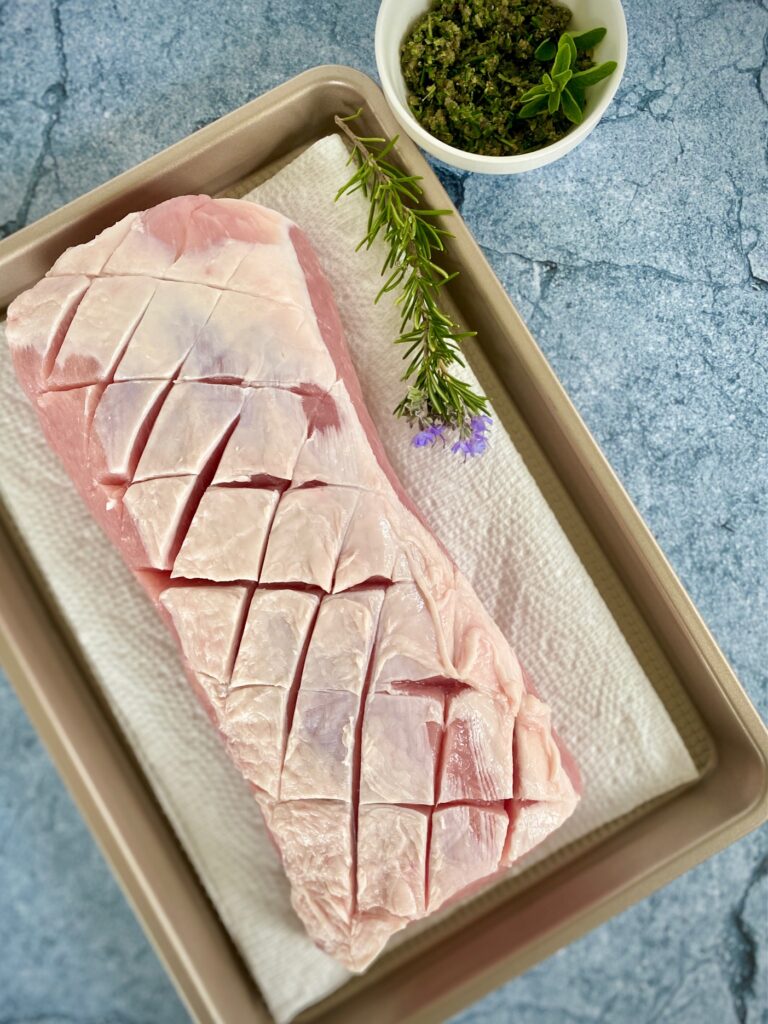
- In order to get the maximum flavor from the pork roast it’s best to score the fat cap on top.
- To score a pork roast simply make long slices, with a sharp slicing knife, in 1/2-inch intervals across the fat. Then repeat in the other direction so that you have a diamond pattern. See the photo below for an example.
- Cut through the fat until just past the point where you reach the meat.
- Scoring helps keep the pork tender by allowing the fat to self-baste the meat as it cooks. It also helps the heat penetrate the fat as it bubbles up through the cut marks.
- Scoring will also allow the seasonings to penetrate into the meat.
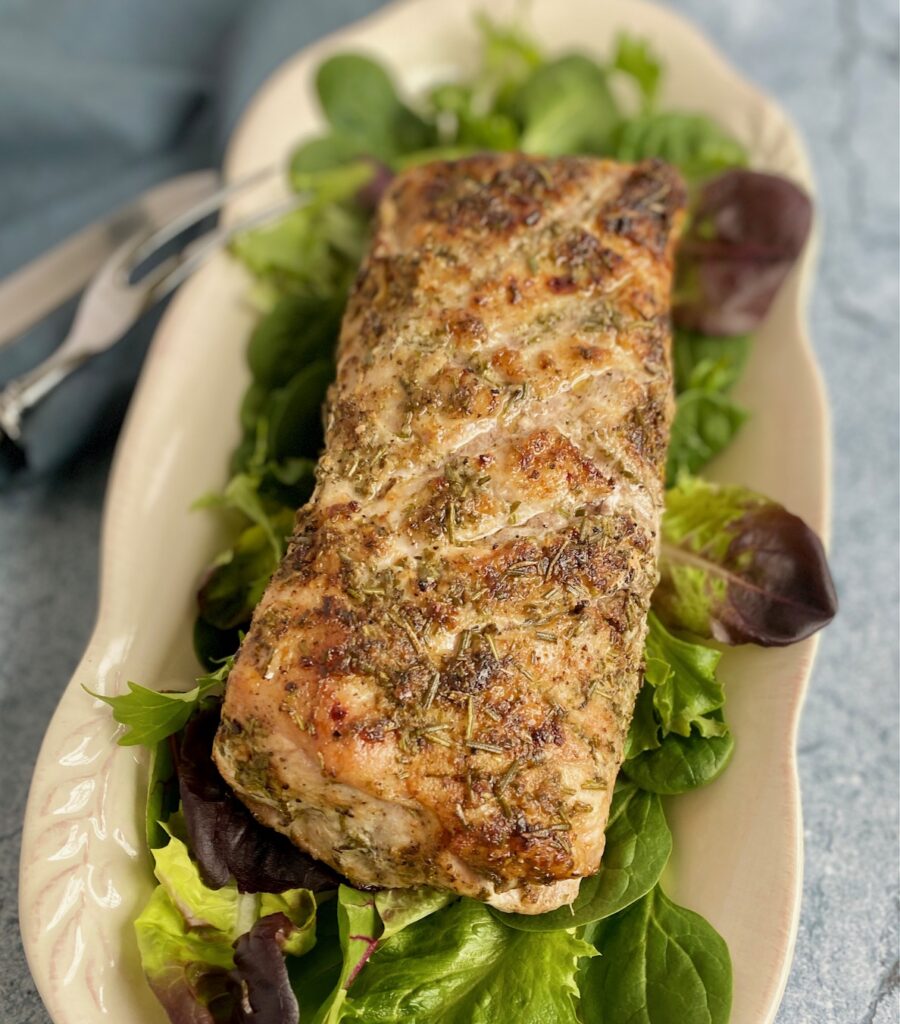
How to cook a Pork Loin Roast:
- For more even cooking take the pork out of the refrigerator about 30 minutes before cooking.
- Preheat the oven to 350˚F.
- To prepare the herb paste mixture: combine all of the herbs (chopped fresh or dried), minced garlic, onion powder, salt, pepper, and 1 Tablespoon of olive oil together in a bowl. You can also combine everything in a mini food processor which makes it fast and easy.
- Score the pork (see above for details on how-to score meat).
- Coat the pork all over, including the sides, with the herb paste mixture.

- Heat the remaining 1 Tablespoon of olive oil in a heavy oven-proof pan, such as a Dutch oven, over medium heat, until the oil is hot and shimmering.
- Add the pork roast and sear on both sides, as well as the ends, until golden brown (about 2 minutes on each side).

- Place the pork in the oven, uncovered, and cook until the pork reaches an internal temperature between 145-150˚ F. This will generally be about 20-22 minutes per pound.
- Remove from the oven, place the pork on a cutting board, and cover loosely with aluminum foil for 10-15 minutes. It’s important to let the pork rest in order for the juices to settle and redistribute.
- Slice and serve. Drizzle with remaining pan juices if desired.
Slow Cooker Instructions:
Making crock pot pork roast is a great way to “set it and forget it” and this pork loin roast recipe adapts well to it.
- Prepare the herb paste and score the roast as described in the directions above.
- If time allows, sear the pork roast in oil to give it a nice golden color and extra flavor.
- Place the pork, fat side up, in a slow cooker, add 1/4 cup water or vegetable/chicken broth, cover, and cook on low for 4-6 hours (time depends on the size of your roast).
What is the difference between a pork loin roast and a pork tenderloin?
Pork Loin:
- This is the most common name but the more accurate term is actually pork loin roast.
- This cut is generally 3-5 pounds, is wider than tenderloin, and must be cooked slowly in order for the meat to become tender.
- It is sold both bone-in and boneless (this recipe uses boneless)
- Generally, this cut has a “fat cap” on top. You can trim the fat cap off after cooking if desired, but it definitely adds flavor so you’ll want to leave it on for the cooking process
- Other names that pork loin roast can be called: Center cut pork loin roast, center cut pork roast, pork loin center cut, and pork loin roast center cut.
Pork Tenderloin:
- This is a completely different cut of pork and is not interchangeable in recipes.
- Tenderloins generally weigh 1 to 1.5 pounds and are long and narrow in shape.
- Because tenderloins are smaller they work well on the grill or with any quick cooking methods, at high heat. Our Chili Lime Pork Tenderloin is cooked this way.

How long to cook Pork Loin Roast:
- Cook for 20-22 minutes per pound, as a general rule, at 350˚F.
- The National Pork Board recommends a minimum internal temperature of 145˚F
- The best way to cook to the ideal temperature is to use an instant read thermometer. They are inexpensive and worth every penny! If you cook a lot of meat we highly recommend (and use) the Meater brand wireless thermometer.
Here is a general chart that may be helpful:
- Medium-Rare = 145-150˚F – lightly pink inside and still moist
- Medium = 150-155˚F – inside will be a little pink and moist
- Medium-Well = 155-160˚F – no pink color remaining and very little moisture
- Well Done = 160-165˚F – overall brown and dry inside (overcooked)
- Here’s a link to a visual to help you see the color more clearly
Leftovers? How to store:
- Let pork cool completely and store in a sealed container in the refrigerator for up to 3-days.
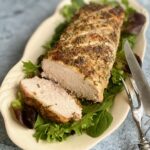
Pork Loin Roast with Garlic and Herbs
Ingredients
- 3-4 pound boneless pork loin roast (not a tenderloin), tied
- 2 Tablespoons Extra Virgin Olive Oil, divided
- 2-3 cloves fresh garlic, minced
- 2 Tablespoons Fresh rosemary, chopped (or 1 Tbsp dried)
- 2 Tablespoons fresh thyme, chopped (or 1 Tbsp dried)
- 1 Tablespoon fresh oregano, chopped (or 1 tsp dried)
- 1 teaspoon onion powder
- 1 teaspoon salt
- 1 teaspoon black pepper
Instructions
- TIP: About 30 minutes before cooking take the pork out of the refrigerator. This will ensure even cooking. Preheat oven to 375° F
- In a small bowl prepare the herb coating paste by combining 1 Tablespoon of olive oil, garlic, rosemary, thyme, oregano, onion powder, salt, and pepper. Set aside.
- Prepare the pork by rinsing and patting it dry with paper towels. "Score" pork roast by creating shallow diagonal lines making a diamond pattern on the surface. Scoring the meat helps ensure even cooking as well as helping the herbs and spices settle into the pork for a more flavorful end result.
- Pat the roast all over with the herb paste.
- Heat a large oven-proof heavy-bottom skillet, cast iron skillet, or Dutch oven over medium heat. Add and heat the remaining 1 Tablespoon of olive oil until shimmering.
- Add the pork and sear it on all sides until golden brown (including the ends). This should take about 2 minutes on each side.
- Place the pork in the oven and cook, uncovered, until the pork reaches an internal temperature of 150˚F. (If you don't have a thermometer plan on about 20-22 minutes per pound of pork).
- Remove from the oven and place on a cutting board, loosely tented with aluminum foil, for 10 minutes to allow all of the juices to redistribute in the meat.
- Slice and serve. For added flavor spoon the pan juices that have accumulated in the pan over the pork
For Slow Cooker / Crock Pot Pork Roast
- Prepare meat and herb blend as instructed above. Sear meat in a pan and then place fat cap side up in a slow cooker. Add ¼ cup water (or broth) and cook on low for 4-6 hours (actual time depends on the size of roast), or to internal temperature of 150°F. Remove and rest for 10 minutes before slicing.
Notes
- If you don’t have a cooking thermometer, a good rule of thumb, is to cook a pork loin roast for 20-22 minutes per pound at 350˚ F (177˚ C).
- The internal temperature should be at least 145˚F (63˚ C)
- Pork can become dry if overcooked. Here is a general chart:
- Medium-Rare = 145-150˚ – lightly pink inside and still moist
- Medium = 150-155˚ – inside will be a little pink and moist
- Medium-Well = 155-160˚- no pink color remaining and not much moisture
- Well Done = 160-165˚ – overall brown, dry inside (overcooked – please don’t!)
Nutrition
The key to perfect ribs is to season liberally and cook them slowly!
Our Dry Rub for Ribs which we use to season these ribs is easy to make and is a collection of basic pantry spices that can be used for any type of dry rub ribs
We will walk you through the simple, but important, steps to creating succulent, flavorful, and nearly falling-off-the-bone ribs
This is a weekend project for slow smoked ribs, so if you need a quicker method head over to our easy Oven Baked Ribs which are basically hands-off and loaded with flavor too!
Grab your BBQ apron and let’s get cooking!
This post contains affiliate links. Please see our affiliate disclosure for more details.

Ingredients needed:
(See the recipe card below for the exact quantities of ingredients)
Spice Rub ingredients for dry rub smoked ribs
- Paprika, Chili Powder, and Cayenne – these spices bring some heat
- Brown Sugar – we prefer dark brown for added sweetness
- Black Pepper and Kosher Salt – or use table or sea salt
- Garlic Powder and Onion Powder – essential for most meat rubs
- Dried Oregano – or use dried Italian seasonings
- Dry Mustard – for a light touch of spicy
- Ground Cumin – helps balance the heat and sweetness

Ingredients for the Ribs:
- Pork Ribs – 4 slabs, we recommend Baby backs or St. Louis style ribs
- Kosher Salt – or sea/table salt, but large flake is best
- Black Pepper – for a hit of spiciness
- Beer (or water) – we like the flavor beer imparts but you can also just use water
- Rosemary sprigs – optional but imparts a great herby flavor
- Mop Sauce – 1/2 cup rib rub + 16 ounces blended liquid (i.e. beer, brewed coffee, apple cider or juice, apple cider vinegar)

Step 1: Prepping the Ribs:
Preparing the ribs is an easy but important step:
- Wash the ribs and pat them dry
- Remove the membrane. This is optional in smoked ribs. The membrane helps hold the ribs together when cooking but can make them harder to cut later. Here’s how to do it: Gently slide a paring knife under the membrane itself, but not into the meat, to loosen the membrane sheet. Using your fingers, pull the membrane away from the bones. It should come off in a sheet. If it is difficult to remove, try sliding the knife under to loosen it again and use a paper towel to hold the membrane, and pull. (Here is an expert video from Weber to show you how it’s done)
- Season liberally with salt and pepper

Step 2: Steaming Ribs:
- To the bottom of a large roasting pan add the beer (or water) and a fresh rosemary sprig (optional). Use enough water to fill the bottom of the pan, but the water should not be touching the ribs
- Add a cooking rack to the pan, spray with nonstick spray, and then place the ribs on top of the rack in a single layer (with 4 racks you will likely need to repeat the process twice since most pans will only accommodate 2 racks – or use 2 pans)
- Lay a few sprigs of rosemary on top of the ribs
- Seal the ribs tightly with aluminum foil and steam over medium heat for about 30 minutes, flip the ribs, reseal the foil, and steam additional 30 minutes
- If needed reduce the temperature as the water should be steaming but NOT boiling
- While the ribs are steaming mix the dry rib rub spice mix in a small bowl
Step 3: Dry Rubbing Ribs:
- Remove from the heat, uncover, and allow the ribs to come to room temperature
- Rub the ribs with the prepared seasoning rub mix and liberally coat the ribs all over
- Place on a baking sheet and rest in the refrigerator, uncovered, for 8 hours or overnight

Step 4: Preparing Grill or Smoker:
Instructions below include 2 methods for smoking ribs:
- Smoking ribs on a charcoal grill
- Cooking on a traditional smoker
Remove the ribs from the refrigerator and allow them to come to room temperature while you prepare your smoker or charcoal grill (30-45 minutes ahead of time)
Prepare the Mop Sauce
Using a charcoal grill for smoking ribs
- This method, called the Indirect Method, uses lump charcoal, not pre-formed charcoal briquets. Consult the owner’s manual for your specific grill, if needed, since all grills are different
- Preheat the chunks until white hot (we suggest using a charcoal chimney starter)
- Arrange hot coals evenly on either side of the charcoal grate
- Place a drip pan in the center of the charcoal grate between the coals. Adding water to the pan helps prevent flare-ups and provides additional moisture to the ribs while cooking and is highly recommended
- Next, add one layer of hardwood pieces (these are different than the charcoal chunks) on top of the hot charcoal. We recommend hickory or oak. Don’t use wood chips because they burn out too quickly. Heat the wood for 5 minutes with the lid on
- The internal grill temperature should be 225-240˚F and the smoke should be light grey
- Place the cooking grate over the coals and lay the ribs meat side up on the cooking grate, centered over the drip pan.
- Place the lid on the grill
- Check and replenish the hardwood pieces as needed. Replenishing helps maintain a constant temperature and provides a steady stream of light grey to white smoke

Preparing a smoker for cooking ribs
- Every smoker is different so prepare each model as recommended by the manufacturer for the indirect cooking method. Use a combination of charcoal and hardwood. We recommend hickory or oak pieces for the best flavor
- Preheat the smoker to between 225˚- 240˚ F. Add a steamer pan inside the smoker for more moist ribs
- Replenish with hardwood as needed to maintain temperature and smoke production
- Lay the ribs meat side up, in a single layer, on the smoker grate and close the lid
Step 5: How to Smoke Ribs
- The following instructions are for both a charcoal grill and a traditional smoker
- Once ribs are on the smoker or grill, check them every 30-45 minutes and flip and rotate them to ensure even cooking
- If mopping, apply the mop sauce every time you flip the ribs (see below for more about mop sauce)
- Ribs are finished cooking when they reach an internal temperature of 195˚- 200˚F. This normally takes about 5-6 hours, depending on your individual grill or smoker. The best way to check is by using a digital meat thermometer.
- Remove rib racks from the smoker and let rest for 15 minutes. If adding BBQ sauce brush it on now while the ribs are still hot
- Cut slabs into individual pieces for serving
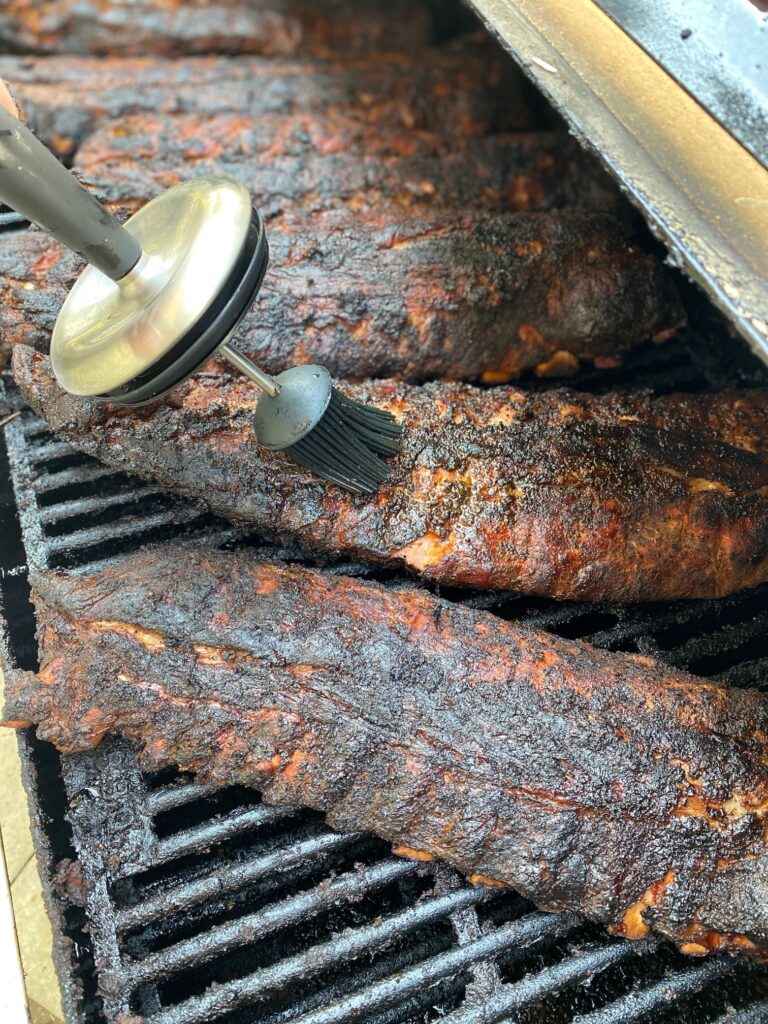
Optional Mop Sauce:
What is Mop Sauce? Mop sauce is a thin spice-flavored liquid used to moisturize low slow-cooking meats. It adds flavor and helps develop a light crust (sometimes called a “bark”) on the ribs.
We use a silicone mop brush (like the one pictured above) because it can withstand higher heat and is super easy to clean, however, any kitchen brush will work.
There are many choices when preparing a mop but you will want about 2 cups of total liquid for this recipe. The moisture from a mop sauce can also help attract smoke to the ribs during cooking.
Here’s our favorite mop rub combination for smoked ribs
- 1/2 cup of our dry rib rub
- 16 ounces liquid – we use half brewed coffee and half beer. You can also use apple cider or juice, or choose half apple cider vinegar and half water. Any combination of these liquids will work so feel free to get creative and use what you have on hand
Tips:
- Be sure ribs are at room temperature before smoking to ensure even cooking
- Using a meat thermometer to check the internal temperature of the ribs is the safest way to make sure they are ready
- Ribs with membrane left on will be easier to grill but a bit harder to cut when finished
- We suggest brushing BBQ sauce on after cooking so that it doesn’t burn, but if you want a caramelized BBQ taste then brush the sauce on about 5 minutes before the end of cooking
How long does it take to smoke ribs at 225˚F?
Ribs will be fully cooked in about 5-6 hours. They need to reach an internal temperature of 195˚- 200˚F
Why do you cook ribs low and slow?
Low and slow works best for ribs (and any other tougher cut of meat) because it gives the meat plenty of time to break down and become more tender without losing all of its moisture in the process. Ribs come out tough when you cook them on high heat too quickly.
Storage Tips
Refrigerator: Cooked ribs can be stored sealed in the refrigerator for up to 3 days and gently reheated in the oven
Freezer: Cooked, cooled, and tightly sealed ribs can be frozen for up to 3 months. You can gently reheat them in the oven from a frozen state. Ribs freeze beautifully and make a great quick dinner.
Our favorite side dishes for ribs
- Since the BBQ is hot try Grilled Caesar Salad for a fun twist on a classic or easy Grilled Corn on the Cob
- Baked Beans, Green Beans Almondine, and Oven Roasted Potatoes are perfect pairings
- Looking for a light salad? This Citrus Salad is a great contrast to rich smoked ribs
If you like these, try these:
- Oven Baked Ribs – these ribs are simple, hands off, and “fall off the bone” in about 2-3 hours
- Carne Asada is a quick BBQ meal with flank or skirt steak
- Try the king of steaks: The Tomahawk Steak


Smoked Ribs
Equipment
- 1 Smoker (or charcoal grill)
- 1 Roasting pan (or sheet pan)
Ingredients
Ribs:
- 4 slabs Pork ribs (St Louis or baby back ribs)
- ½ cup kosher salt
- ¼ cup black pepper, ground
- 24 ounces beer, optional for steaming
- 3 Fresh rosemary sprigs
Ingredients for rib rub mix:
- ½ cup paprika
- ⅓ cup chili powder
- ¼ cup dark brown sugar
- ¼ cup black pepper, ground
- ¼ cup kosher salt
- 3 Tablespoons garlic powder
- 1 Tablespoon dried oregano
- 1 teaspoon dry mustard
- ½ teaspoon cumin
- ½ teaspoon onion powder
- 1 pinch cayenne
Optional Mop Sauce:
- ½ cup rib rub mixture (or a salt, pepper and paprika combination)
- 16 ounces liquids – including vinegar, apple juice, water, coffee, beer, apple cider
Instructions
For the rib rub mixture:
- Blend all of the rub ingredients together in a medium bowl and set aside
Prepping the Ribs – Step 1
- Remove the racks of ribs from the packaging, rinse, and pat dry.If desired, pull the thin membrane off the back of the ribs. (This is optional but easy to do and makes the ribs easier to cut and eat. It usually pulls off in one big sheet).
Steaming the Ribs – Step 2
- Once the ribs have been seasoned place them on an oiled rack and into a roasting pan. Add the beer and enough water to fill bottom of pan, but water should not be touching the ribs. Lay the rosemary sprigs over the top of the ribs, and tuck one below in the beer-water mixture. Cover tightly with foil and steam on medium heat for 30 minutes. Flip the ribs over, reseal foil, and steam for an additional 30 minutes.
Dry Rubbing the Ribs – Step 3
- Remove from the heat, uncover, and allow the ribs to come to room temperature.Rub the ribs with the prepared seasoning rub mix and liberally coat the ribs.Place on a baking sheet and rest in the refrigerator, uncovered, for 8 hours or overnight.
- After resting: Remove the ribs from the refrigerator and allow them to come to room temperature while you prepare your smoker or charcoal grill. This will take about 30-45 minutes.Prepare the mop sauce and set aside
Preparing Grill or Smoker – Step 4
- Prepare your grill or smoker for the "Indirect Method" of cooking with lump charcoal and hard wood pieces (such as oak or hickory) and a drip pan with water.Every grill/smoker is different so please refer to your manual and the post above for more details. Internal temperature of the grill or smoker should be between 225° – 240° F.
- Be sure to replenish the hardwood as needed to maintain the temperature and smoke level.
- Place the cooking grate over the coals (grill only) and lay the ribs meat side up on the cooking grate, centered over the drip pan. Close the lid.
Smoking Ribs – Step 5
- Check the ribs every 30-45 minutes, flip over, rotate, and mop them each time.Cook until ribs reach an internal temperature of 195°-200° F. (typically 5-6 hours)
- Remove rib racks and allow ribs to rest for 15 minutes. Cut into individual ribs.If adding BBQ sauce brush on while the ribs are still hot.
Notes
- Be sure ribs are at room temperature before smoking to ensure even cooking
- Using a meat thermometer to check the internal temperature of the ribs is the easiest way to make sure they are fully cooked
- Always check the manufacturer’s directions for your individual BBQ or smoker because each model is different