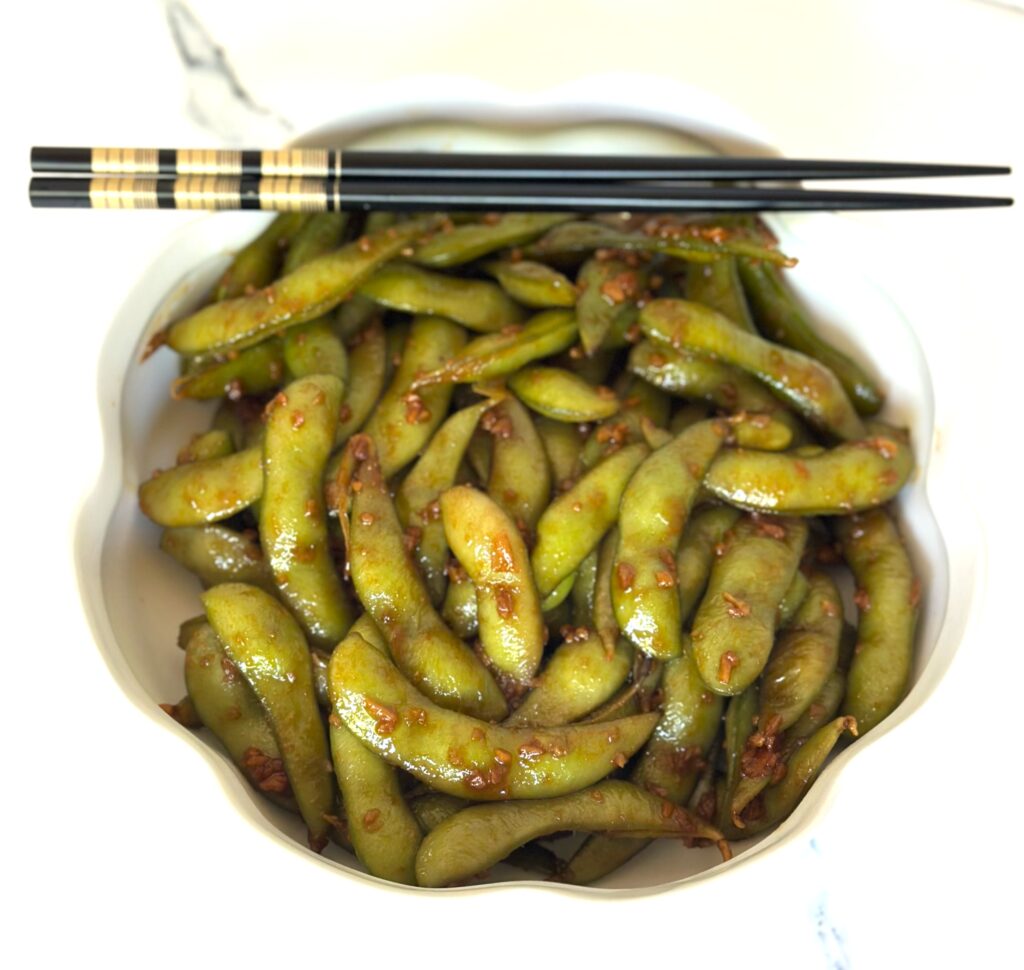
These spicy treats make a great appetizer, side dish, or snack that you can have on the table in just 10 minutes. With all its savory garlicy goodness, it will keep your guests asking for more!
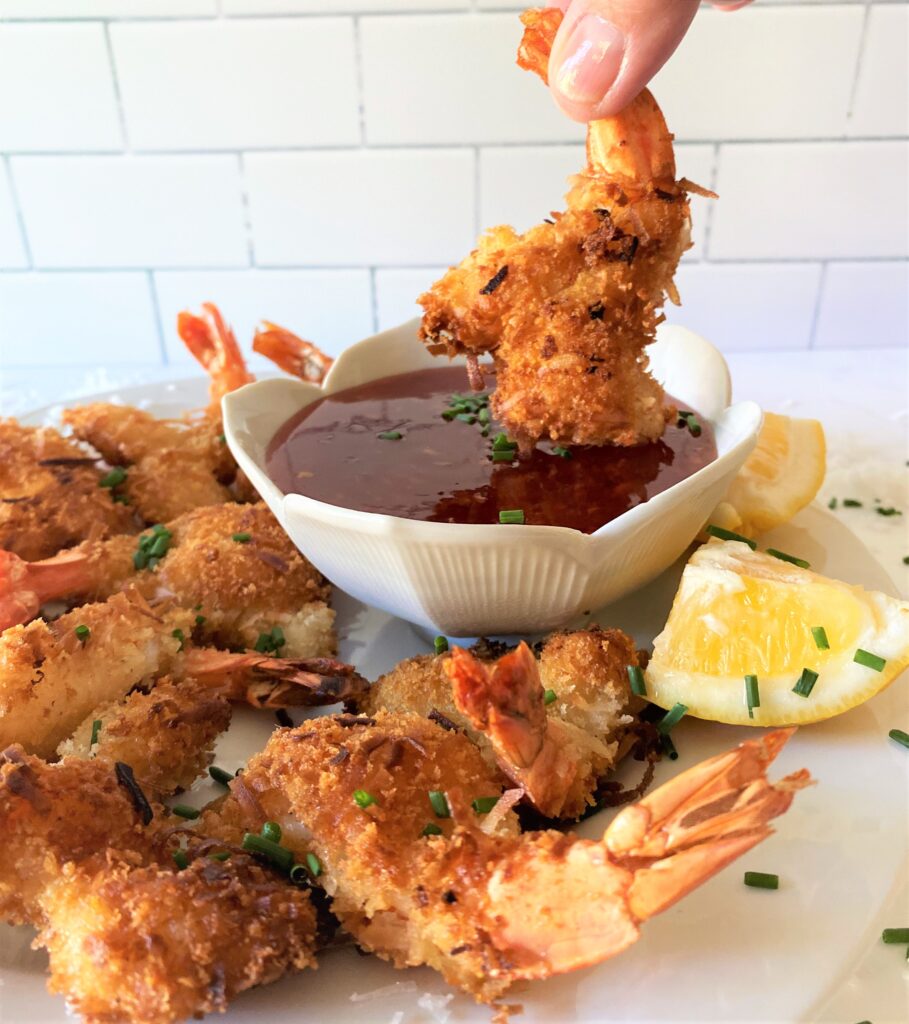
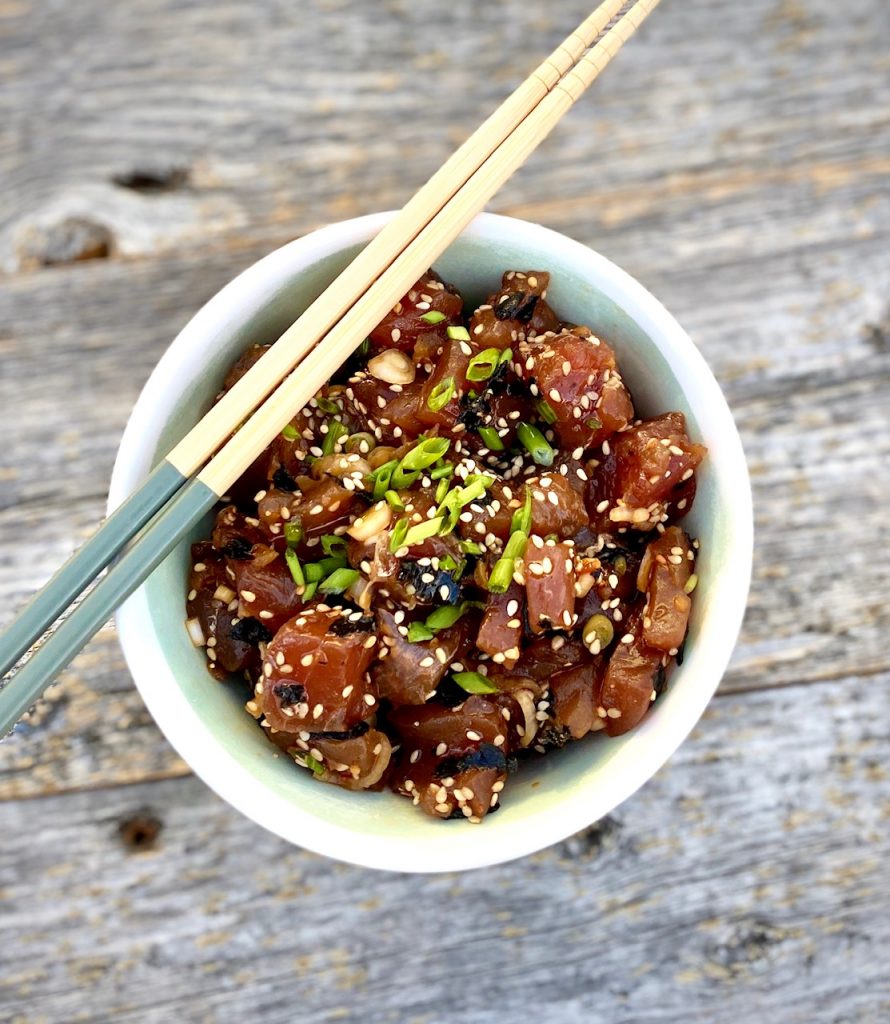
We love to serve them with our Coconut Shrimp, Ahi Poke, or Chicken Skewers with Peanut Sauce.
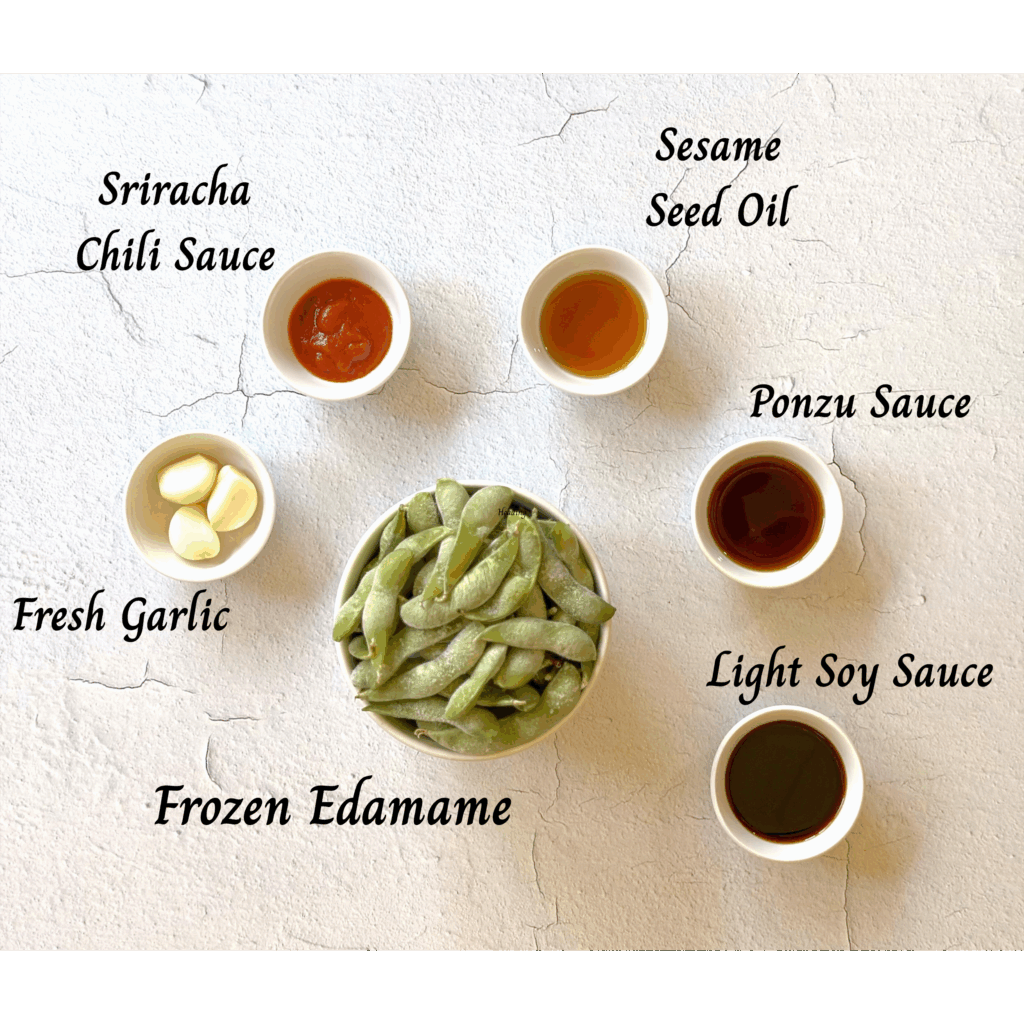
Ingredients needed for Spicy Garlic Edamame
- Frozen edamame – one package
- Fresh minced garlic
- Soy sauce – we use light soy sauce
- Ponzu sauce – an Asian condiment with a light citrus flavor
- Sesame seed oil – found in the Asian section of the supermarket
- Siracha sauce or chili oil
- Cooking oil – use for browning garlic
How to make Spicy Garlic Edamame
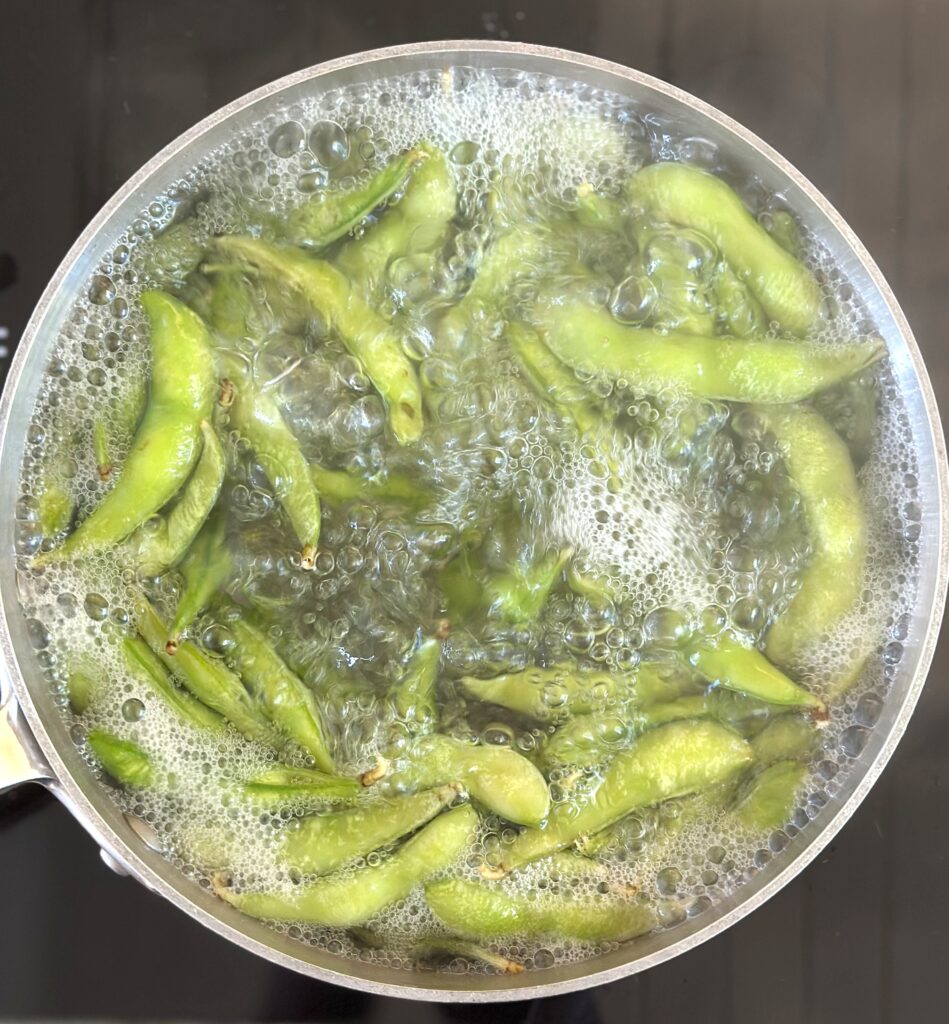
- Fill a medium saucepan 3/4 full of water and add 1 teaspoon salt. Bring to a boil. Add frozen edamame and follow the cooking instructions on the package.
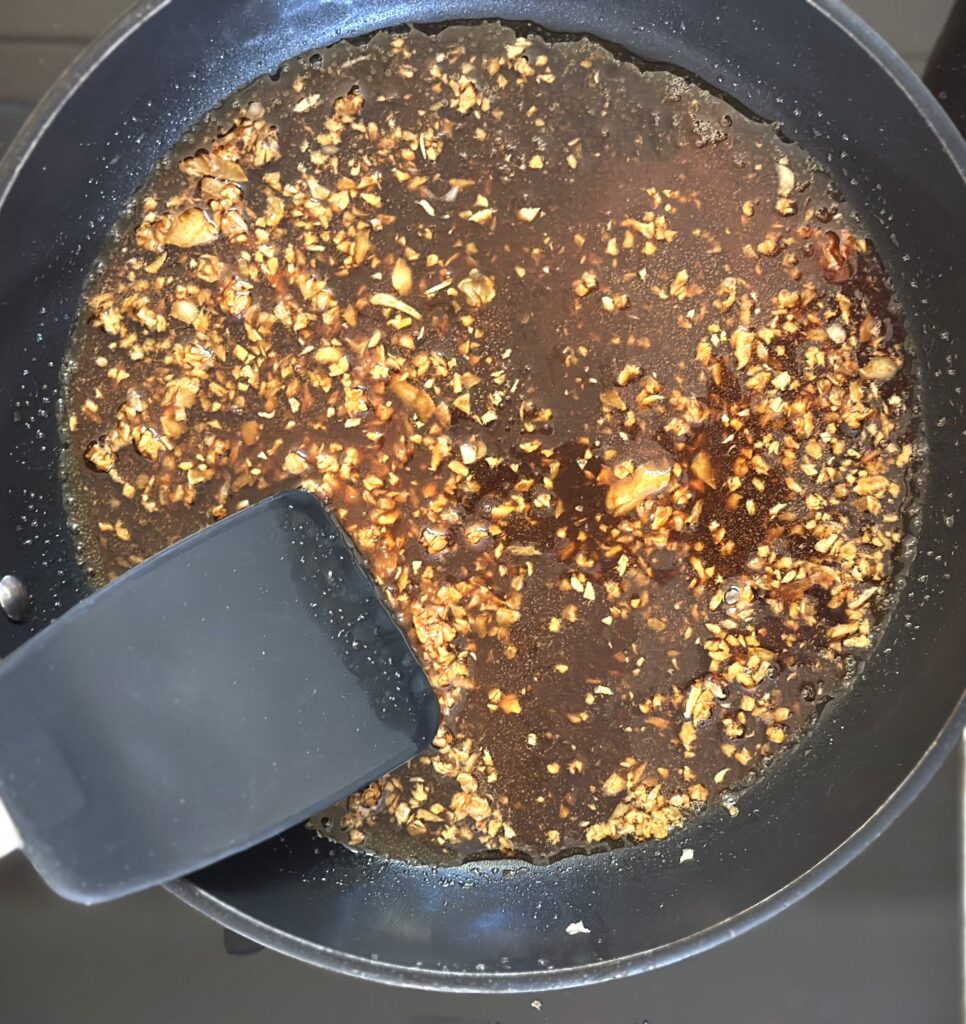
- While the edamame are cooking, add 1 Tablespoon of cooking oil to a small skillet. Heat the oil over medium heat, and then add minced garlic.
- Sauté until garlic is light brown and fragrant.
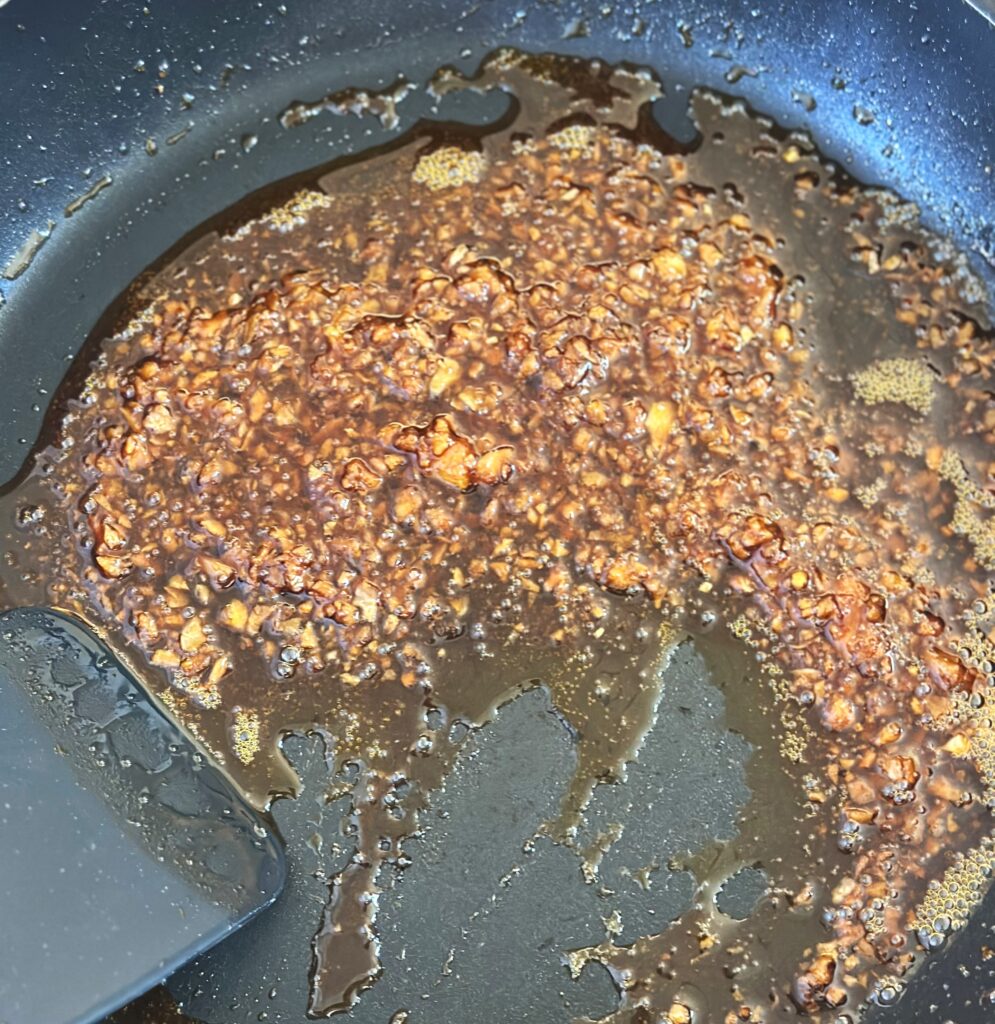
- Add all of the additional ingredients: soy sauce, ponzu sauce, sesame seed oil, and sriracha or chili oil.
- Bring the mixture to a low boil, and continue cooking to reduce the mixture down until it thickens. This takes about 2 to 3 minutes. Remove from heat.
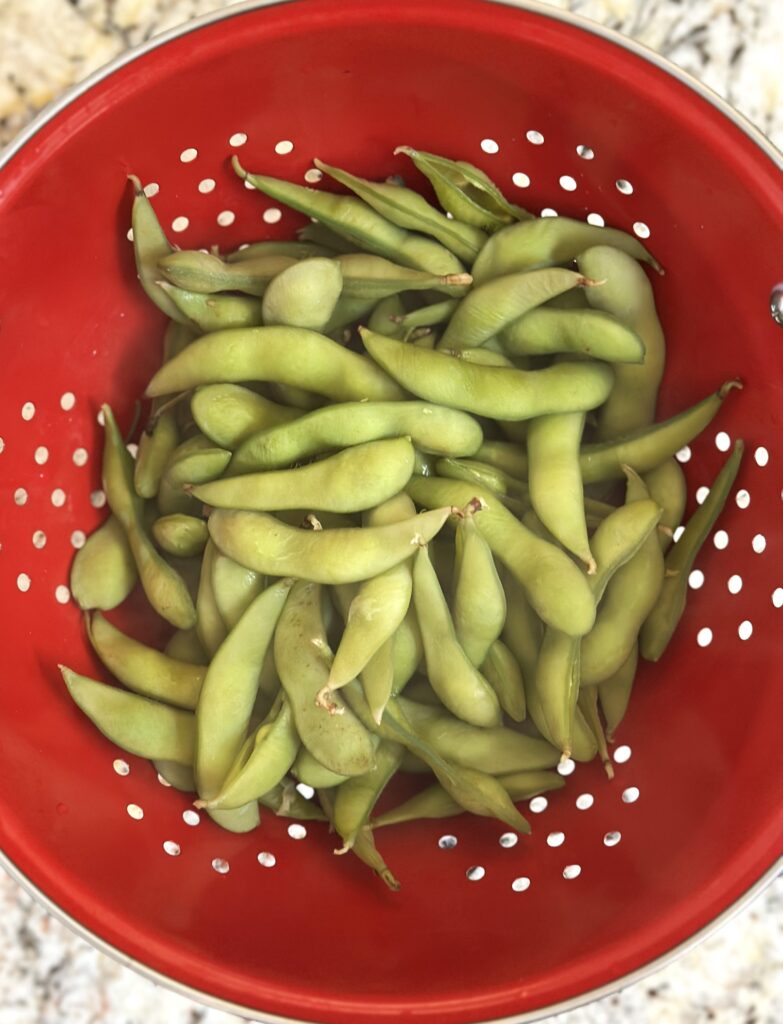
- Once edamame have finished cooking, drain them in a colander while you finish preparing the spicy garlic sauce.
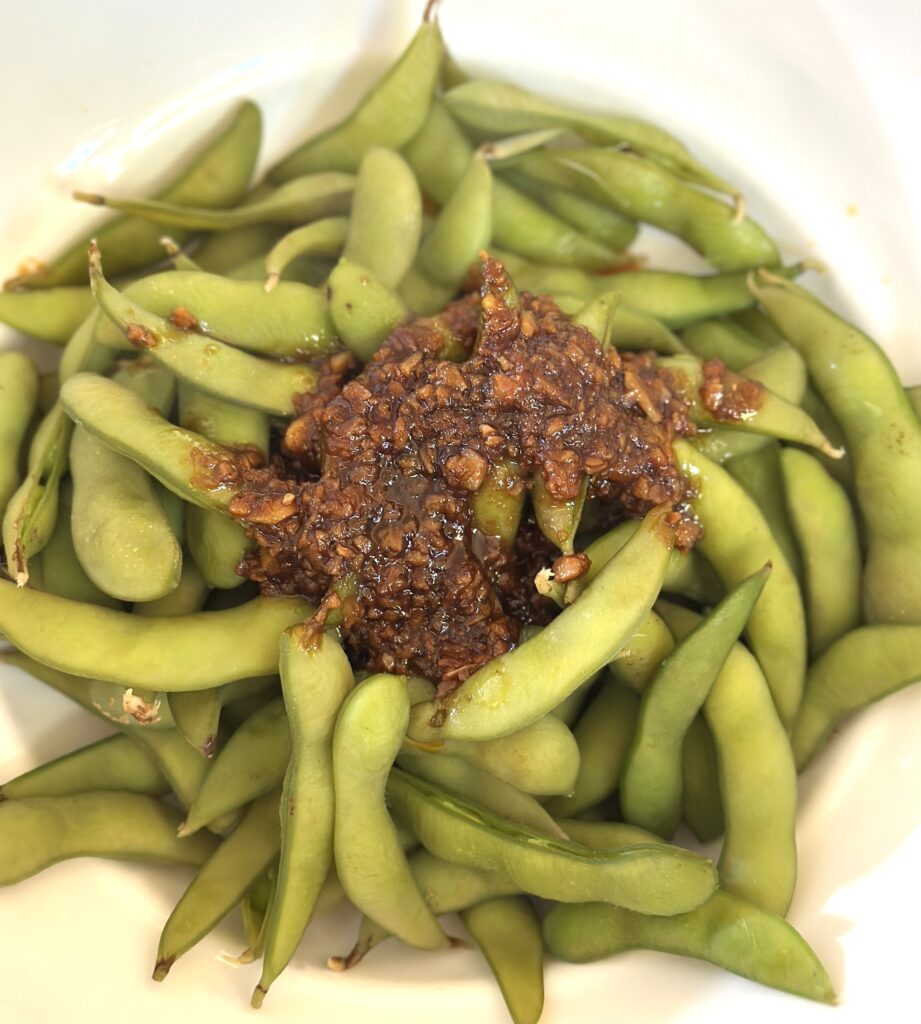
- Add edamame to a serving bowl and top with the spicy garlic sauce.
- Toss edamame to coat them with sauce and serve warm.
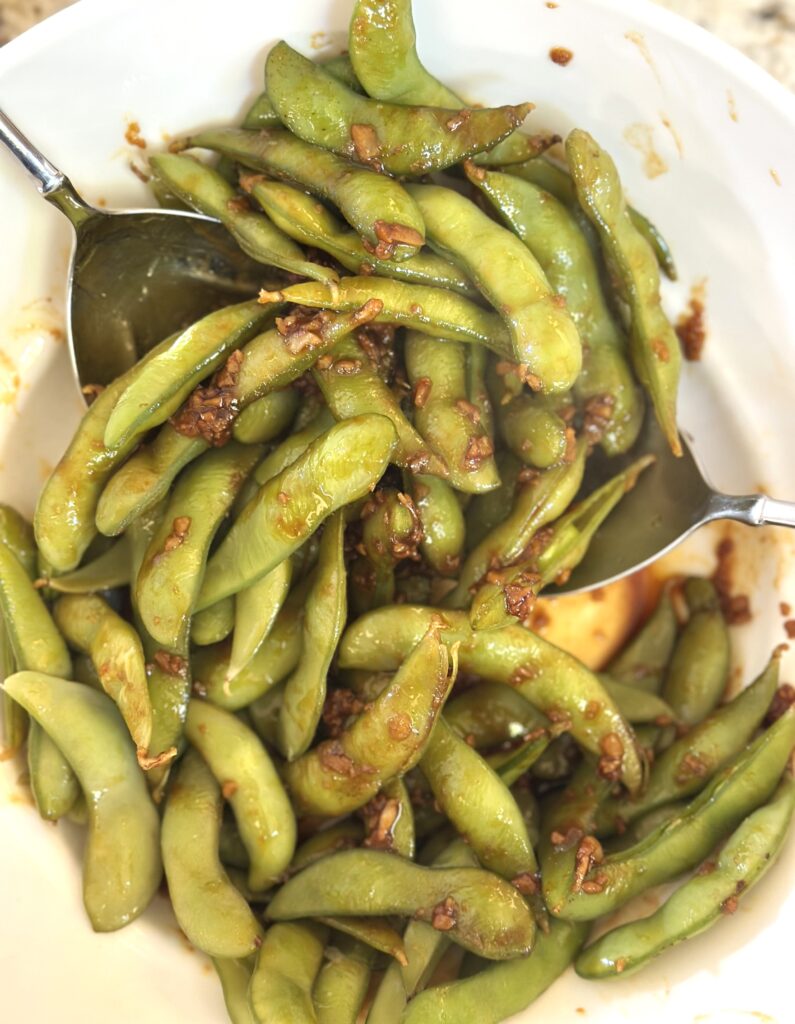
- Want more heat add additional sriracha. Want less heat, cut back on the sriracha or chili oil.
What is Edamame?
Edamame is simply the Japanese name for young soybeans which are harvested before they reach full maturity. They are still green and have not hardened yet. They have a nutty flavor and are a little on the sweet side. Soybeans grow naturally in a pod, but are often served shelled.
You can find edamame in the frozen food section of your grocery store next to other bean varieties, along with other vegetables.
You can boil, steam, or even cook them in a microwave. Often they are seasoned with salt, but our recipe takes these snacks to an entirely new level!

What are the health benefits of Edamame?
Edamame is part of the legume family and is low in carbohydrates. They are a wonderful source of protein and a good source of fiber.
This little bean contains a wealth of antioxidants and is rich in vitamins and minerals, including vitamin K, vitamin E, folate, zinc, potassium, and magnesium to name a few.
Potential health benefits include improving blood sugar levels, helping to lower cholesterol, and promoting heart health.
Here are some variations of Spicy Edamame:
Get creative here! This recipe can include a wide range of variations, so let yourself explore new tastes and combinations. There are endless sweet and savory ingredient substitutions to add to create this tasty dish.
Here are a few ideas. Any combination of these ingredients will work.
- Maple syrup, brown sugar, miso paste, or oyster sauce.
- Want some heat? Add red pepper flakes, sambal oelek, or fresh ginger.
- For garnish, you can add black or white sesame seeds.
Leftovers and reheating instructions:
This dish is best served warm. You can reheat any leftovers over medium heat in a small skillet. You can add a little water to the skillet to keep the beans moist.
Refrigerate any leftovers in a sealed container for up to 3 days.
Serve these tasty dishes alongside Spicy Edamame:
- Korean Beef Bulgogi
- Beef and Broccoli Stir Fry
- Tofu Rice Bowl with Vegetables
- Asian Cucumber Salad
- Coconut Shrimp
- Ahi Poke Recipe
Spicy Garlic Edamame
Equipment
- 1 Medium sauce pan
- 1 Small skillet
- 1 Colander to drain cooked edamame
Ingredients
- 1 Package Frozen Whole Edamame
- 1 Tablespoon Cooking Oil, such as canola oil
- 1½ Tablespoons Fresh Garlic, Minced
- 2 Tablespoons Soy Sauce (light soy sauce preferred)
- 2 Tablespoons Ponzu Sauce
- 2 teaspoons Sesame Seed Oil
- 1 Tablespoon Sriracha Sauce or Chili Sauce (more or less to taste)
Instructions
- Fill a medium saucepan 3/4 full of water and add 1 teaspoon salt. Bring to a boil. Add frozen edamame and follow the cooking instructions on the package.
- While the edamame are cooking, add 1 Tablespoon of cooking oil to a small skillet. Heat the oil over medium heat, and then add minced garlic. Sauté until garlic is light brown and fragrant.
- Once edamame have finished cooking drain them in a colander while you finish preparing the spicy garlic sauce topping..
- Add in all remaining ingredients: soy sauce, ponzu sauce, sesame seed oil and sriracha. or chili oil Bring the mixture to a low boil, and continue cooking to reduce the mixture until it thickens. This takes about 2 to 3 minutes. Remove from heat.
- Add edamame to a serving bowl and top with spicy garlic sauce. Toss edamame to coat completely with sauce and serve.
Notes
- To tame the heat, use less sriracha or chili oil.
- This dish is best served warm. You can reheat leftovers over medium heat in a small skillet.
- Refrigerate any leftovers in a sealed container for up to 3 days.
Nutrition
By following this step by step-by-step to make authentic ricotta cheese you will find it hard to purchase store-bought ricotta cheese again. It’s an easy recipe with simple ingredients using a traditional method.
Honestly, we could eat it for breakfast, lunch, and dinner. It’s that good!

Ingredients for making fresh Ricotta cheese
There are just a few basic ingredients for making this homemade ricotta cheese recipe.
- Whole Milk – do not use skim milk or nonfat milk
- Heavy Cream – this makes a rich and creamy ricotta, also called heavy whipping cream
- Distilled White Vinegar – plain vinegar is recommended as opposed to apple cider vinegar
- Fresh Lemon Juice – freshly squeezed is best, rather than bottled juice
- Kosher Salt
See the recipe card below for the exact quantities needed

How to make Ricotta Cheese (Step-by-Step)
Ricotta cheese is easy to make in a stock pot with a lid.
Here is the equipment needed:
- Use an enamel Dutch oven, copper pot, or stainless steel stock pot with a lid to get the best results when making your cheese.
- You will also need a skimmer or slotted spoon and fine cheesecloth.
- Instant read or regular thermometer
First Step
- Add the milk and cream to the pot and cook over medium heat until the mixture reaches 200˚F. Stir frequently to avoid sticking or burning at the bottom of the large pot.
- Mix the lemon juice and vinegar in a small bowl and set aside.
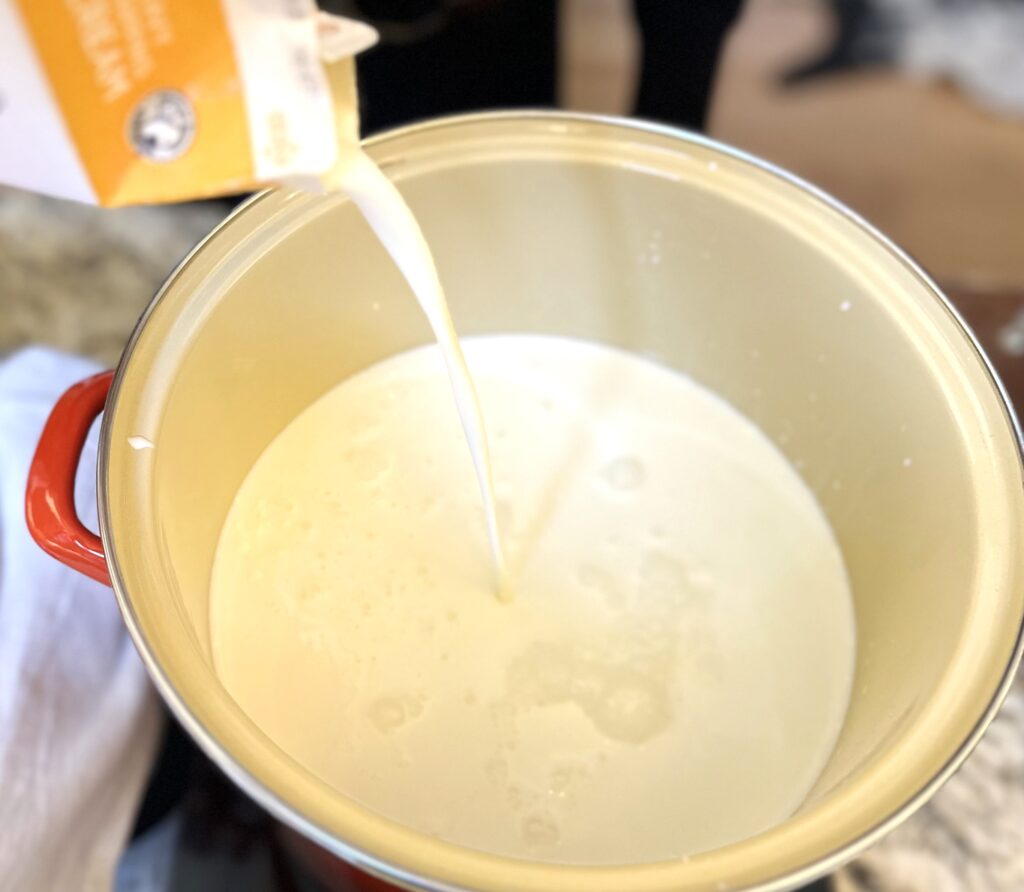

- Once the mixture reaches 200˚F turn off the heat completely.
- Keep stirring constantly while adding in the salt and lemon juice-vinegar mixture.
- Stir 1-2 times to combine. The cream mixture will immediately begin to coagulate. This is normal.
- Cover with the lid.


- Allow the cheese to rest for 10 minutes without removing the lid or stirring. This is important so DO NOT BE CURIOUS.
- While the mixture rests it will continue to coagulate and white curds will form and float on the surface.
- While waiting for the cheese to finish line a colander with a fine cheese cloth, and place the colander into a large bowl. Set to the side of the pot.
Second Step
- After 10 minutes remove the lid from the pot. Gently rest your skimmer on the curds. If the skimmer does not sink all the way below the curds you are ready to scoop out the cheese.

- Scoop from the middle of the pot to the sides of the pot. Lift out the cheese and place it into the cheesecloth-lined colander.

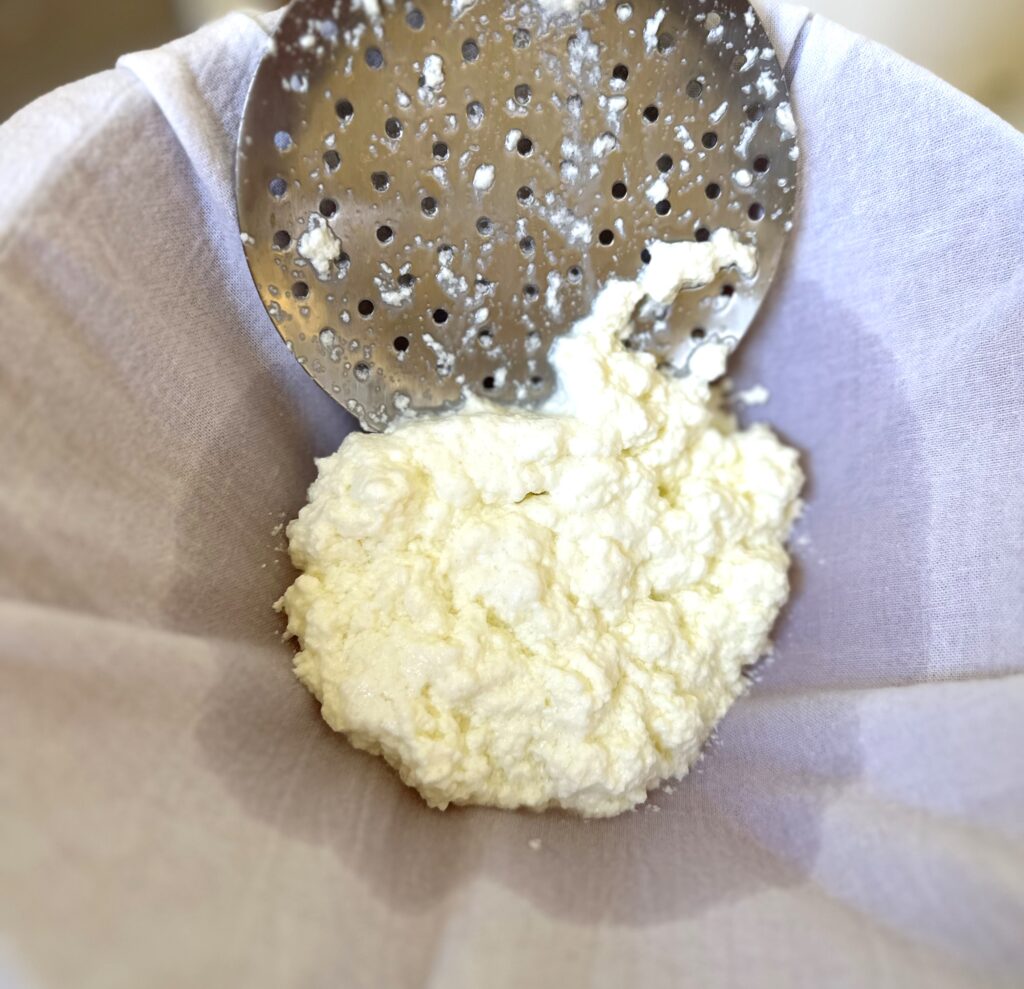
- Scoop out as much of the curds as you can until all that’s remaining is a liquid called “whey”. (See below for ways to use the leftover whey proteins)
- Allow cheese to drain completely. This will take around 30 minutes.
- Retain any liquid whey that drains from the cheese.
- Remove the cheese from the cheesecloth.


- Cheese can be placed in molds to shape to your favorite shape, or placed in glass jars or an airtight container.
- You can serve the finished cheese on its own or add flavors, spices, or herbs. See below for ideas.
- This recipe makes approximately 2 1/2 cups of ricotta cheese
Adding flavors, spices, or herbs to homemade cheese
Here comes the fun part of making your own cheese because you can get bold and creative!
Adding flavors to this cheese is simple. Anything, from a drizzle of honey to olive oils, herbs, vegetables, or fruits works. You can personalize your favorite cheese flavors. Try placing the finished cheese in molds for an added touch.
Here are a few easy examples: These additions make the cheese beyond delicious!
- Lemon Zest – Zest one lemon and then squeeze the fresh juice. Put 1/2 to 3/4 cups ricotta cheese in a small bowl. Drizzle 1 tablespoon of lemon olive oil over the cheese, then add the zest and lemon juice. Add a teaspoon of each at a time until you get the desired flavor. Blend the ingredients thoroughly into the cheese until you have a smooth and creamy cheese.
- Blood Orange Zest – Use the recipe and instructions above but replace the lemon with a blood orange. You can use any variety of orange or citrus.


- Truffle Zest – The principles for making truffle cheese are basically the same as Lemon Zest, however, instead of adding a fruit you will use powdered truffle zest. Start with a bowl of ricotta cheese, then drizzle in truffle olive oil, sprinkle with truffle zest, and then blend until creamy and smooth. You can add the truffle zest a little at a time until you have your desired flavor. We like to sprinkle this version with chopped chives for garnish, color, and flavor.


Simplest ways to use your own Ricotta Cheese
Homemade ricotta cheese is delicious with pasta or in ravioli and lasagna. But, let’s go beyond! Use ricotta cheese as a cream cheese substitute in many recipes.
Here are a few examples:
- Ricotta cheese is delicious on top of toast, crackers, or bagels. Drizzling with honey adds a wonderful sweet kick.
- Sprinkle with chopped fresh herbs like chives, basil, parsley, oregano, thyme, or rosemary, and serve with crackers or crostini. (see note below)
- Top with fresh fruit, sliced strawberries, apples, pineapple wedges, or blueberries on a crostini, toast, or a bagel.
- Serve this cheese with smoked salmon and capers for a delicious breakfast or snack.
Note: When adding fresh herbs to the cheese it is best top the cheese with chopped fresh herbs and serve right away. Herbs will turn brown over time when cheese is stored with the fresh herbs.

How long can you store Homemade Ricotta
- REFRIGERATOR: Finished cheese can be stored in the refrigerator in a sealed container for up to 7 days.
- FREEZER: Cheese can be frozen for up to one year in a resealable container. Please remember to label and date your container before freezing. Thaw in the refrigerator for 5-6 hours, and then gently stir before using for best results.
What is Whey?
So, what are whey proteins?
It’s the liquid remaining after the milk curds have been strained and curdled. This is the leftover liquid from the ricotta-making process and it’s got a lot of uses in recipes.
Whey can be frozen for up to one year and used for future recipes. When freezing whey pour it into a freezer-safe airtight container. It’s best to use a container that will represent one serving size because you can not refreeze whey once it’s been thawed.
Let the liquid whey thaw for 24 hours in the refrigerator before using and gently stir it.
What are some uses for leftover Whey?
There are many uses for leftover whey including yogurt, bread, soups, and a variety of other amazing recipes.
Whey can also be used as a substitute for buttermilk in pancakes or quick breads like our buttermilk banana bread. It can also be used as a milk substitute in homemade mac and cheese, waffles, or our berry banana smoothie bowl.
What is the difference between Ricotta cheese and Cottage cheese?
Ricotta cheese is made from leftover whey while cottage cheese is made from curds. This makes cottage cheese a more dense slightly lumpy cheese while ricotta is smooth. Both cheeses are soft, but one is lumpy and one is more smooth.
Wondering which cheese is healthier? Cottage cheese has a lower fat content. However, Ricotta cheese is higher in calcium and is high in vitamins A, E, D, and B2. It is a great addition to a low-carb diet and has less carbohydrates than cottage cheese.

Here are some additional light snacks to try!

How to make Ricotta cheese
Equipment
- Stock pot
- cheesecloth
- cheese ladle
Ingredients
- 1 gallon Whole milk
- 4 cups Heavy cream
- 1½ cups Distilled white vinegar
- ½ cup Fresh squeezed lemon juice
- 2 tsp Kosher salt
Instructions
- Heat the milk and cream over medium heat until it reaches 200˚F. Stir frequently to avoid sticking or burning at the bottom of the large pot.
- Mix the lemon juice and vinegar together in a small bowl and set aside.
- Once the mixture reaches 200˚F turn off the heat completely.
- Keep stirring consistently while you add in the salt and lemon juice vinegar mixture.
- Mix 1-2 times to completely combine. The cream mixture will begin to coagulate immediately. This is normal. Cover with the lid.
- Allow the cheese to rest for 10 minutes without removing the lid or stirring. This is important so DO NOT BE CURIOUS.
- While the mixture is resting it will coagulate and white curds will form and float on the surface.
- While you are waiting for the cheese to finish line a colander with a fine cheese cloth, and place the colander into a large bowl. Set to the side of the pot.
- After 10 minutes remove the lid from the pot. Gently rest your skimmer on the curds. If the skimmer does not sink all the way below the curds you are ready to scoop out the cheese.
- Scoop from the middle of the pot to the sides of the pot. Lift out the cheese and place it into the cheesecloth-lined colander.
- Scoop out as much of the curds as you can until all that is remaining is a liquid called "whey". See below for all the ways you can use the leftover whey proteins.
- Allow cheese to drain completely. This will take around 30 minutes.
- Retain any liquid whey draining from the cheese for future uses.
- Remove the cheese from the cheesecloth. Cheese can be placed in molds or shaped to your favorite shape.
- You can serve the cheese or add flavors. Cheese is now ready to add to your favorite recipes.
Nutrition
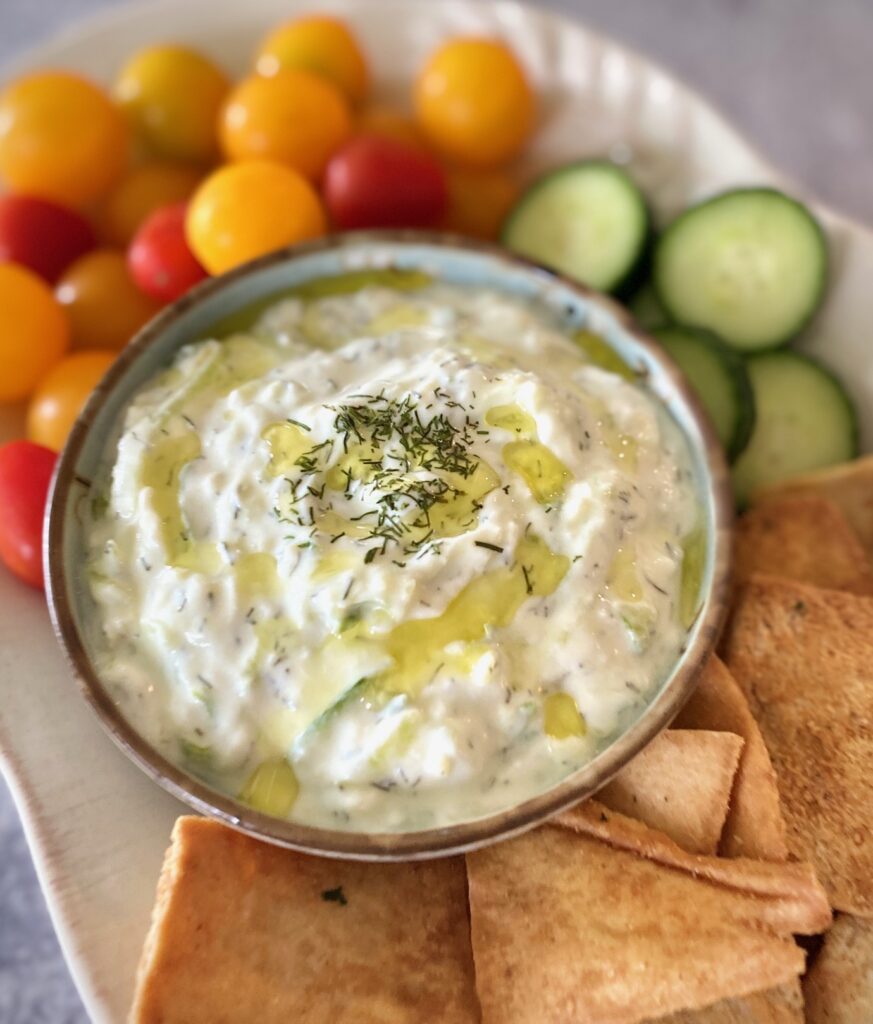
It’s delicious on grilled meats or vegetables, in wraps, and perfect as a dip for crudités or pita chips
Ready to get started? Just click on our “jump to recipe” button directly below to go straight to the recipe card. For tips and process ideas read the full post below. This post may contain affiliate links. Please see our affiliate disclosure for details. We only recommend products to you that we love and use.
Jump to RecipeWhat is Tzatziki?
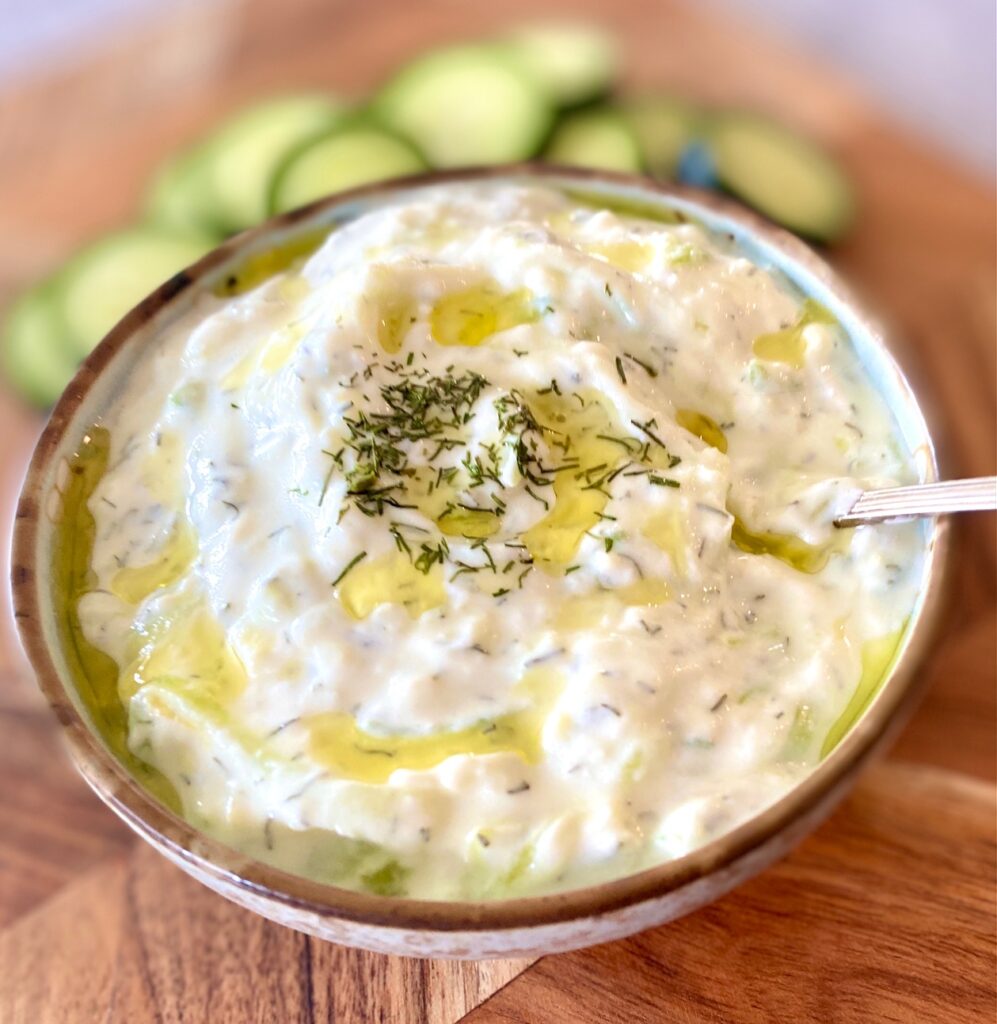
Tzatziki sauce or dip is a cool, creamy sauce made of cucumbers, yogurt, lemon juice, olive oil, garlic, and fresh herbs, such as dill. It originates from the Greek island of Paros and is popular all over the Mediterranean.
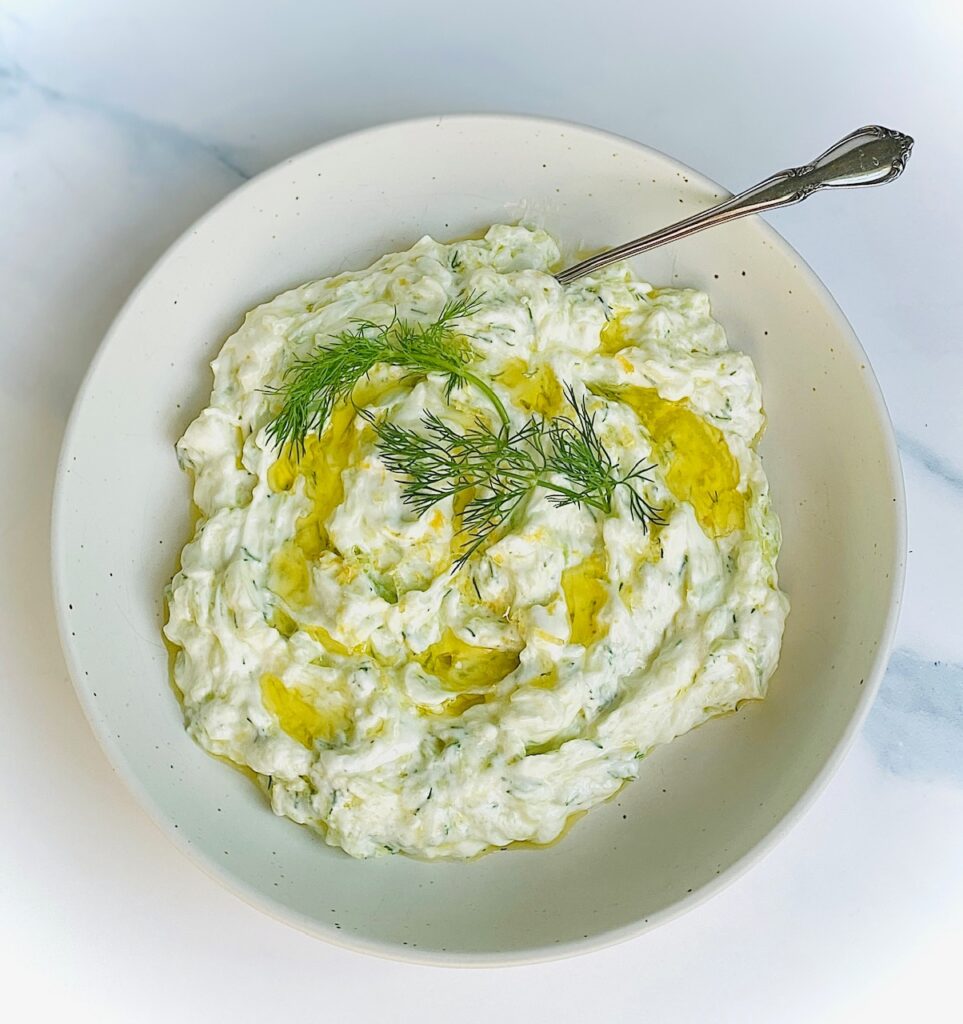
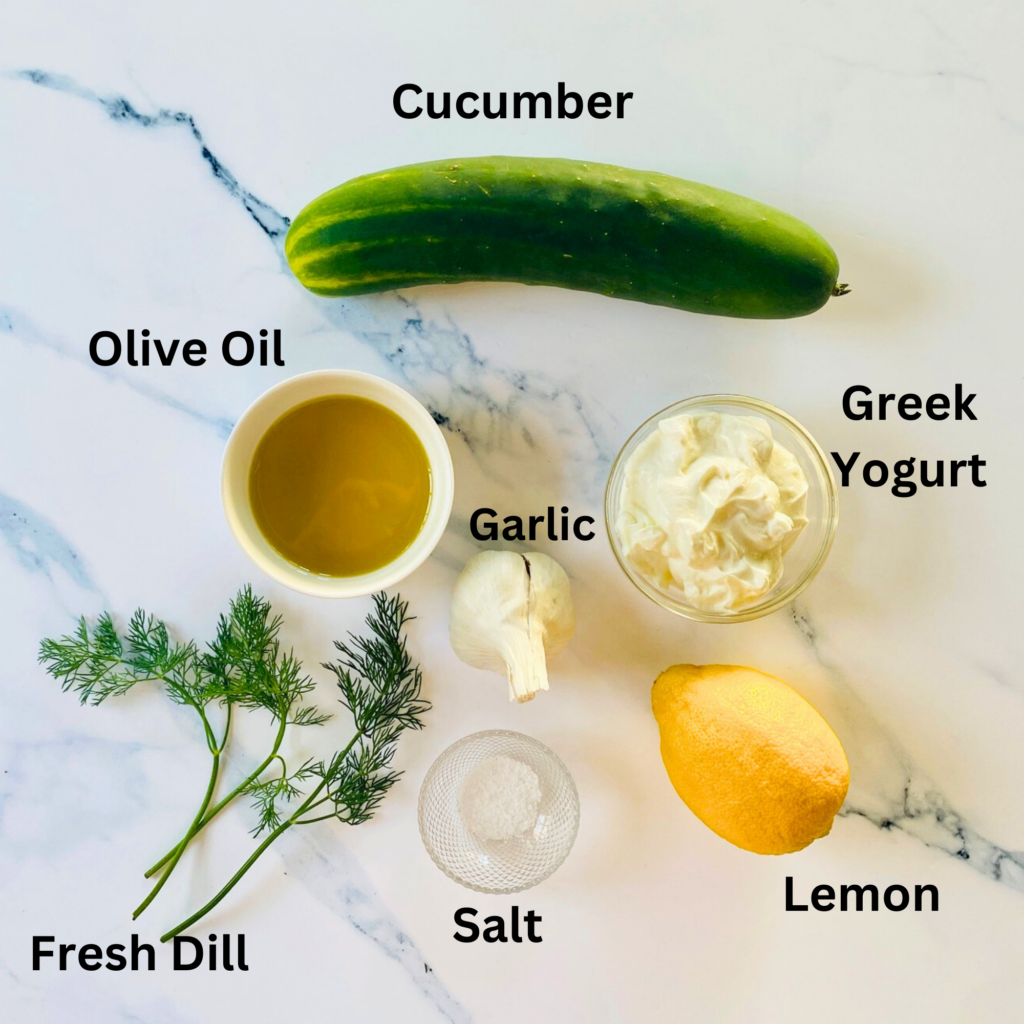
Ingredients needed:
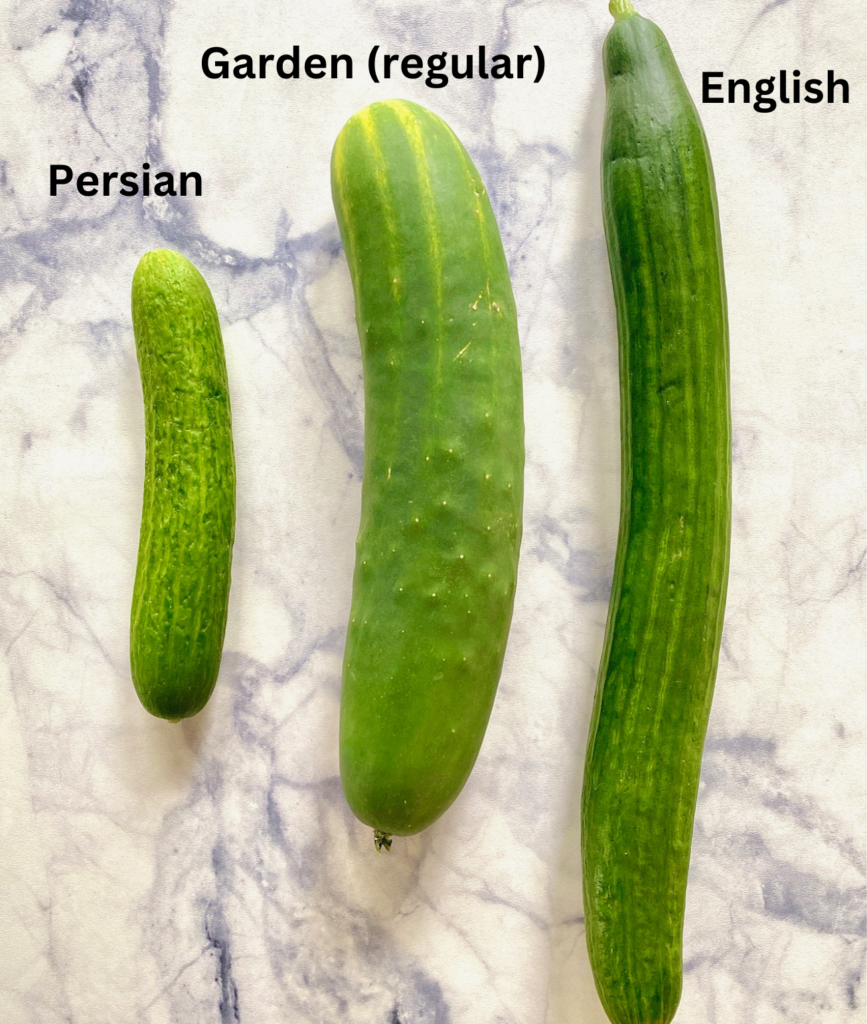
- Cucumber – Use regular garden cucumbers, English, or small Persian cucumbers
- Whole Greek Yogurt – Plain full-fat or reduced-fat Greek yogurt. Don’t substitute regular plain yogurt, because it isn’t pre-strained, and then the dip will be too watery
- Fresh Lemon Juice and Zest – Just a touch brings a bright flavor to the sauce
- Extra Virgin Olive Oil – adds creaminess to the sauce
- Grated or Minced Garlic Clove – we love ours garlicky but use as much or little as you would like
- Sea Salt – Adds a tangy touch
- Chopped Fresh Dill – the amazing finishing touch that also adds gorgeous color. Mint is another choice of herbs for this dip (or add both)
How to make traditional Tzatziki
- Peel and then mince or grate the garlic clove. Finely chop the dill. Zest the lemon and then squeeze out the lemon juice.
- Peel the cucumber, cut it in half lengthwise, and scrape the seeds (if using a regular cucumber). If using English or Persian cucumbers there’s no need to peel.
- Grate the cucumber using the largest holes of a box grater until you have 1 cup.
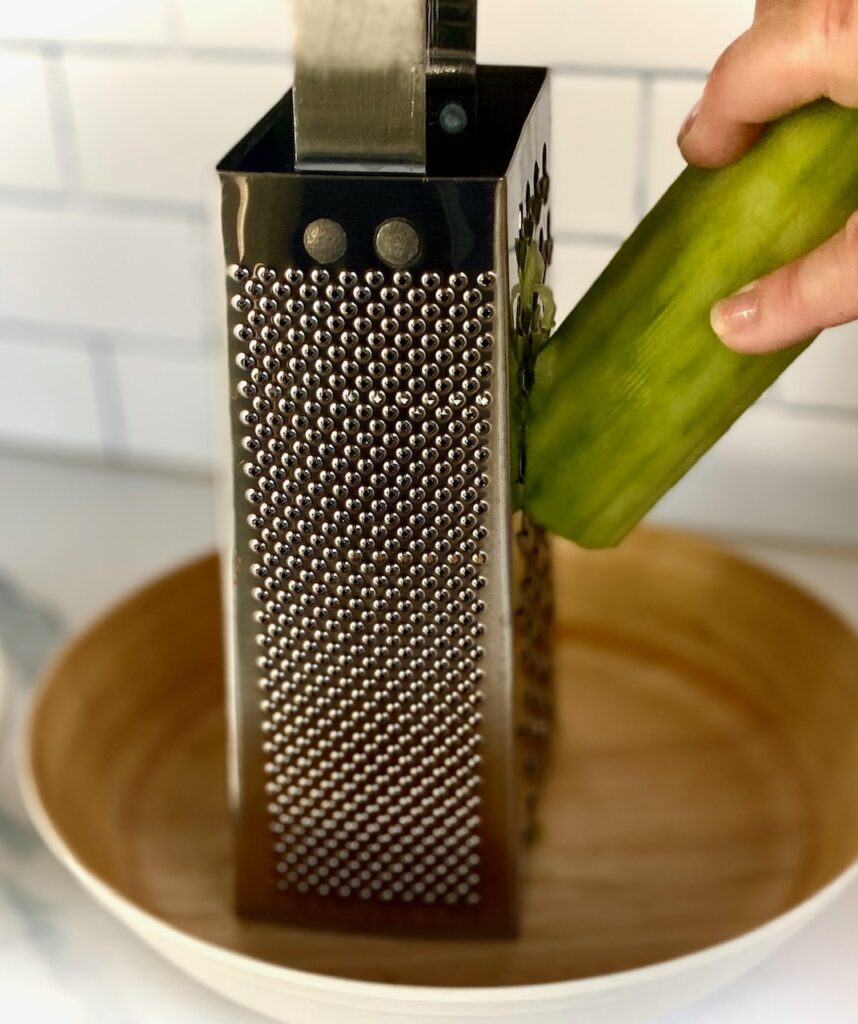

- Squeeze the grated cucumber between a few paper towels over the sink to remove the excess water. **Don’t skip this step – it’s crucial. If you don’t squeeze the excess water out you’ll end up with watery sauce instead of delicious creamy sauce!
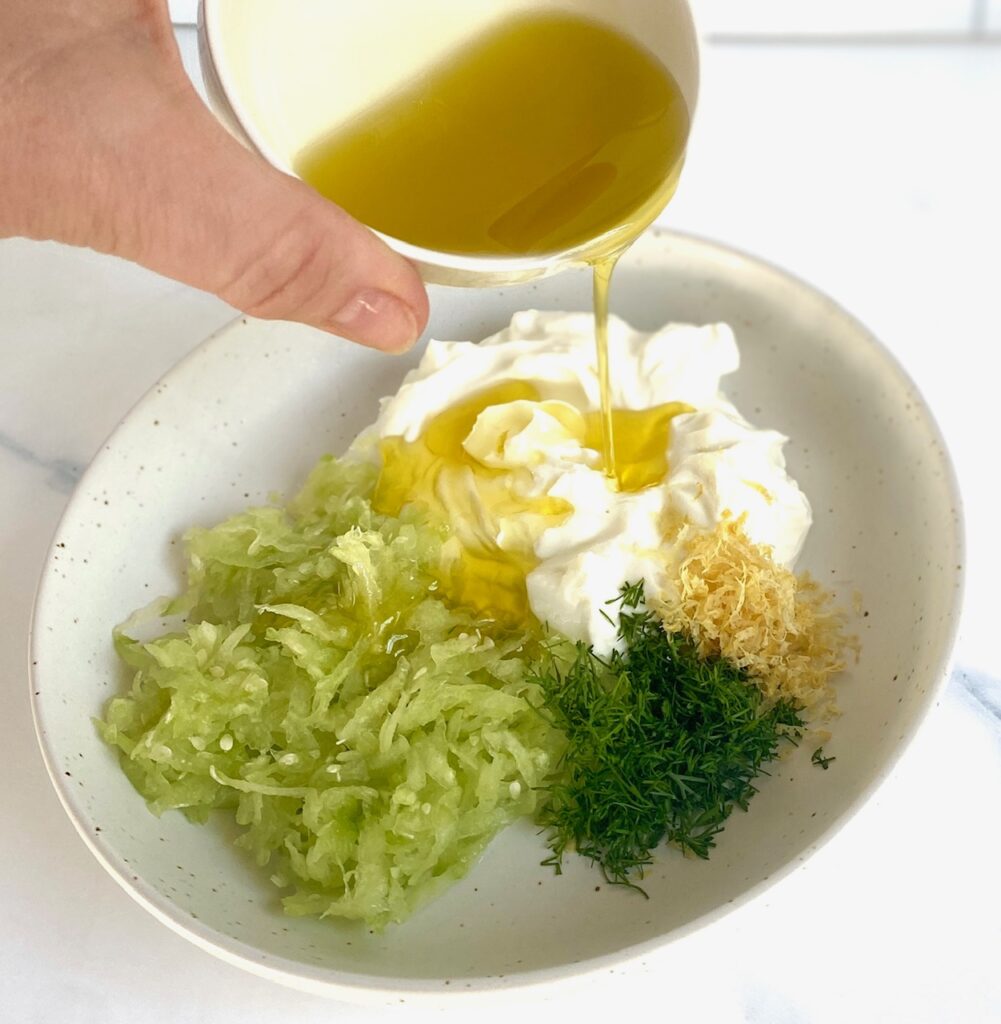
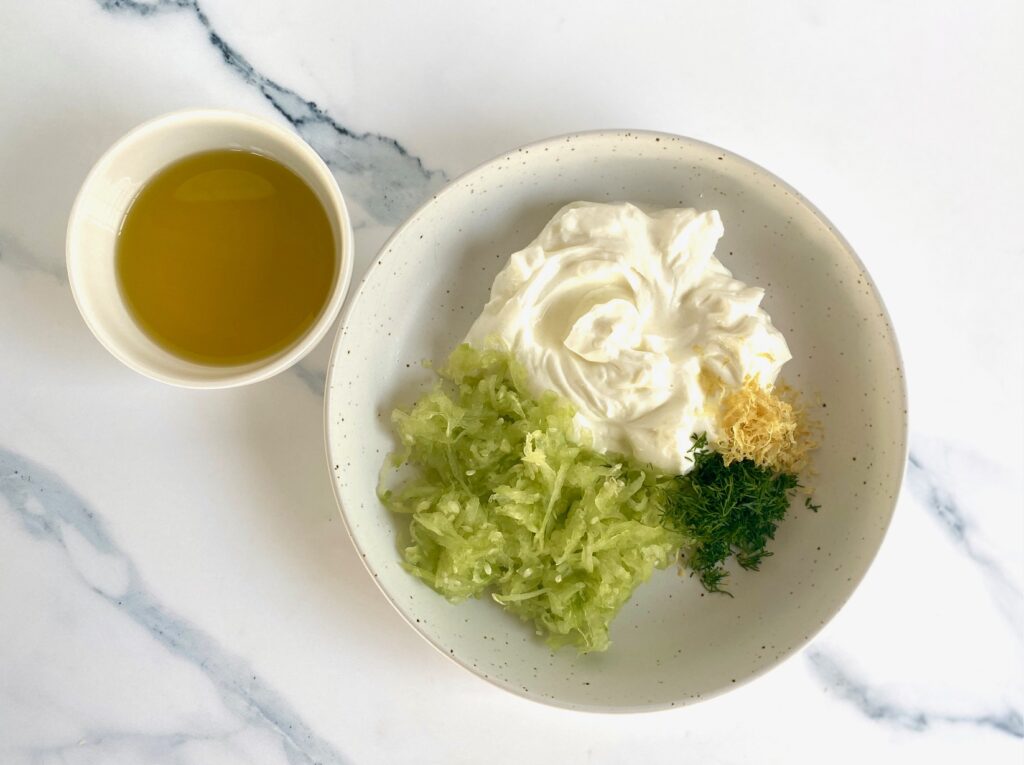
- Add the cucumber to a bowl, along with all of the remaining ingredients, but reserve 1 Tablespoon of the olive oil
- Stir well to combine and then drizzle with the remaining olive oil and sprinkle with additional chopped dill if desired, lightly stir, and serve.
- If not serving right away, cover, and refrigerate until ready to use.
What is the difference between Greek and Turkish Tzatziki?
- Traditional Greek Tzatziki is made with finely grated cucumbers which are squeezed to remove the water content. Removing the water makes for a thicker more spreadable sauce. It has a lemon, garlicky flavor and is added to thick Greek yogurt.
- Turkish cacik uses most of the same ingredients but does include additional herbs resulting in more of a spicy herby sauce.
What pairs well with Tzatziki?
In short, everything! The choices are endless but here are a few of the most popular ways to use Tzatziki:
- Ideal as an accompaniment for grilled beef, lamb, and chicken
- As a Dip – great for dipping pita chips or fresh naan or pita bread and any type of raw veggies
- With Roasted Potatoes or Asparagus
- The perfect sauce for wraps or in gyros
- A must with any type of Kebabs
- Delicious for dipping and dunking French fries
- Try it on your hamburger, turkey burger, or lamb burger
- Drizzle on our Oven Baked Salmon or Air Fryer Salmon
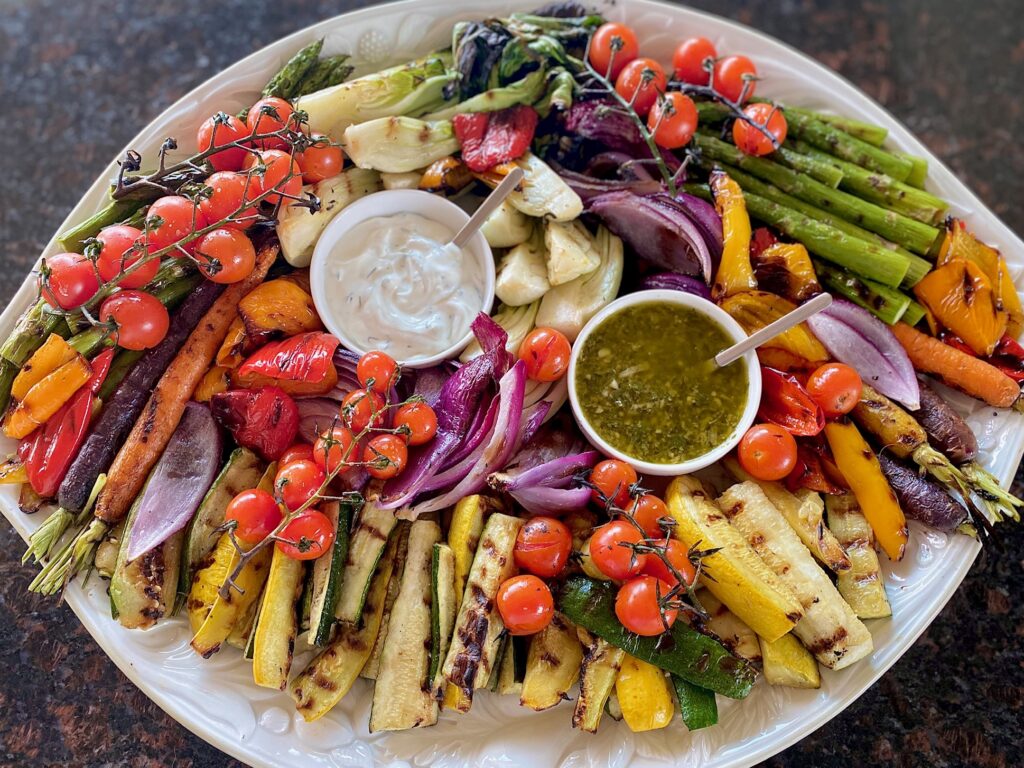
One of our favorite ways to dress up a Grilled Vegetable Platter is with Tzatziki Sauce and Pesto Sauce
Types of Cucumbers for Tzatziki
Any variety of cucumbers will work but here are a few tips to keep in mind
- Regular Cucumbers: This varietal has a thicker, waxier skin so you’ll need to peel them completely and also scrape out the large seeds. The seeds can make the dip watery if they aren’t scraped out prior to grating.
- Persian Cucumbers and English Cucumbers: Both of these varietals are seedless and have thin skin, therefore they don’t need to be peeled before grating. Persians are small in size and English are larger.
Is Tzatziki good for you?
The simple answer is YES! Tzatziki is made with healthy fresh Meditteranean ingredients that are high in proteins, calcium, and vitamins. Tzatziki is naturally low in calories and fat making it a wonderfully healthy dip or sauce.
Leftovers and Storage
Have leftovers? Lucky you! Store in a tightly covered container in the refrigerator for up to 3 days.
More easy-to-make Dips and Sauces
Tzatziki Sauce
Equipment
- box grater
Ingredients
- 1 cup cucumber, grated (peeled and seeded, if needed)
- 1 cup Greek Yogurt plain
- 1 clove garlic minced, pressed, or finely grated
- 2 Tablespoons lemon juice + 1 Tablespoon lemon zest (more to taste)
- 3 Tablespoons olive oil, divided
- 2 Tablespoons fresh dill, finely chopped (or 2 teaspoons dried)
- ¼ teaspoon sea salt
Instructions
- Peel the cucumber, and de-seed (necessary, if using a regular garden cucumber).
- Grate the cucumber using the largest holes of a box grater until you have 1 cup. Squeeze the grated cucumber with a paper towel to remove as much excess water as possible.
- Peel and then mince, or grate, the garlic clove. Finely chop the dill. Zest the lemon and squeeze the lemon juice.
- Transfer cucumber, dill, lemon juice, and zest to a medium bowl. Add the Greek yogurt, 2 Tablespoons olive oil, salt, and dill.Stir everything together, check the seasonings, and add additional lemon juice or salt.
- When ready to serve drizzle remaining olive oil over the top.
- If not serving immediately chill the Tzatziki for up to 24 hours.
Notes
- Tzatziki can be stored for up to 3 days in the refrigerator
- This recipe can be doubled
- Use regular garden, Persian, or English cucumbers for best results. If using regular cucumber peel and de-seed first.
- Be sure to use Greek Yogurt. Other types are not thick enough and will result in a watery sauce
Nutrition
This recipe could not be simpler and you’ll want to make it over and over. The total time is 45 minutes but 30 minutes of that is hands-off!
This post may contain affiliate links. Please see our affiliate disclosure for details. We only recommend products to you that we love and use.

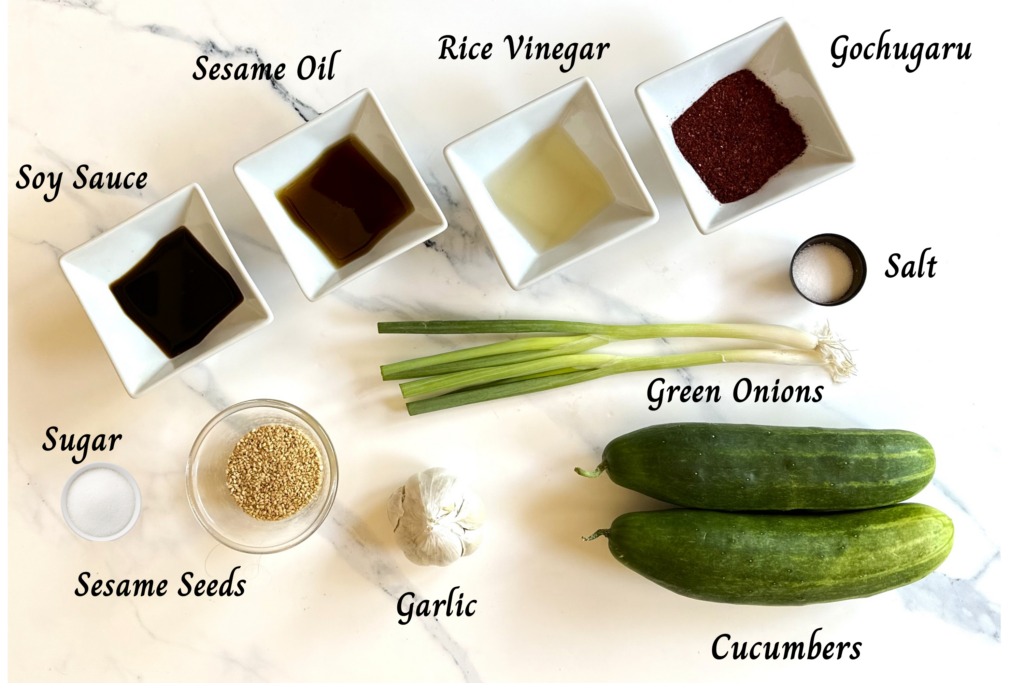
Ingredients for Korean Cucumber Salad
- 1 – 2 Cucumbers – we used 2 average garden-grown cucumbers. Keep in mind you’ll need 2 cups of thinly sliced cucumbers for this recipe
- 2 Green Onions – also known as scallions
- Garlic – a must in Korean cooking
- Gochugaru – this amazing Korean chili powder has a unique flavor with smoky notes. See below for more information on this spicy powerhouse
- Rice Wine Vinegar – Compared to plain white vinegar, rice vinegar is less acidic with a delicate, mild, and somewhat sweet flavor
- Soy Sauce – regular or low-sodium both work equally well
- Sesame Oil – regular or toasted both works in this salad
- Sugar – adds a little touch of sweetness
- Salt – just a pinch balances the flavors
- Sesame Seeds – buy the roasted variety if you can for the best flavor
How to make a Korean Cucumber Salad
In Korea, this salad is known as Oi Muchim. The word “Oi” means cucumber, and “muchim” means mixed with seasonings. Making this spicy salad is an everyday staple in the Korean kitchen and the most popular banchan side dish.
Making this salad could not be easier and requires no cooking, so let’s get started:
- Slice cucumbers into thin slices, about 1/8-inch thick.

- Toss them with 1 teaspoon salt and place them in a colander to drain. The salt helps draw out the water in the cucumbers. Let the colander drain over a bowl for 30 minutes. This is a very important step so don’t skip it!

- In a medium-size bowl blend the minced garlic, soy sauce, rice wine vinegar, sesame oil, and sugar and whisk to combine. Set aside.
- In a small bowl blend the Gochugaru and sesame seeds together.

- Add the Gochugaru and sesame seed mixture to the soy sauce mixture, one teaspoon at a time, blending after each addition.
- Taste test after you have added each teaspoon to get your desired spice/heat level.
- Adding slowly will help you control the spice/heat level of the salad. Add up to 4 teaspoons, if desired. Some of us like it hot and some do not!
- Slice two green onions, white and part of the green, into 1/4-inch pieces and add to the sauce.
- Pour the sauce over the cucumbers, stir together, and serve.

Which cucumbers to use for Korean salad?
Cucumbers come in many interesting varieties. They are botanically a fruit with high water content, which is why you’ll want to salt them before using to eliminate some of the water (nobody wants watery salad!).
One choice for this salad is to use Korean cucumbers which are on the crunchy side with fewer seeds. The best place to find these beauties is in a specialty Asian market or at your local farmers market. This cucumber was developed in Korea and is typically longer and more slender than other cucumber varieties.
Other delicious varieties you could use for this salad include English, Persian, Japanese, and of course, Kirby.
We like to use whatever cucumbers are growing in our garden during the summer. Keep in mind, any variety will work to make this amazing Korean Cucumber Salad.
What is Gochugaru?


To start, “Gochugaru” is not misspelled! However, it is commonly confused with “gochujang” paste which has become much more popular recently.
The differences are easy to understand once you dissect each word. The Korean meaning for “gochu” includes a variety of red chili peppers or Korean chili peppers. The word “garu” means flakes or a powder. While the word “jang” translates to a paste or a sauce.
Gochugaru is characterized by its deep red color and lightly smoky spice.
Lastly, but most important, “Gochugaru” comes in different spice levels which can be confusing. When purchasing a bottle of Gochugaru it’s important to check the spice level which is usually listed on the package. Here is a quick reference:
- “dol maewoon” is moderately spicy to mild
- “maewoon” will be hotter
So, in conclusion, it’s best to taste-test your Gochugaru for spiciness so you can adjust the ingredient measurement for your personal spice level preference.

Pro tips, tricks, and questions:
Is there a substitute for Gochugaru?
When it comes to this unique smoky spice you have a few substitute options that will work and may already be in your kitchen cabinet.
- Crushed Red Pepper – About 1/4 teaspoon of crushed red pepper is equal to 1 teaspoon of gochugaru.
- Paprika – 1 teaspoon of smoked paprika is equal to 1 teaspoon of gochugaru. When swapping we like to use smoked hot paprika as the closest substitute
- Cayenne Pepper – A great spice substitute is fiery Cayenne pepper. 3/4 teaspoon will be equal to 1 teaspoon of gochugaru.
- Cayenne and Smoked Paprika – blend 1/2 teaspoon cayenne and 1/4 teaspoon smoked paprika for the ideal combination
Storing Cucumber Salad:
How long can you store Cucumber Salad?
This salad can be stored in the refrigerator for up to 4 days in a tightly sealed container. We suggest draining off any excess liquid and adding a few freshly chopped green onions and a sprinkle of sesame seeds to freshen it up.
Perfect Dinner pairings with Cucumber Salad Recipe

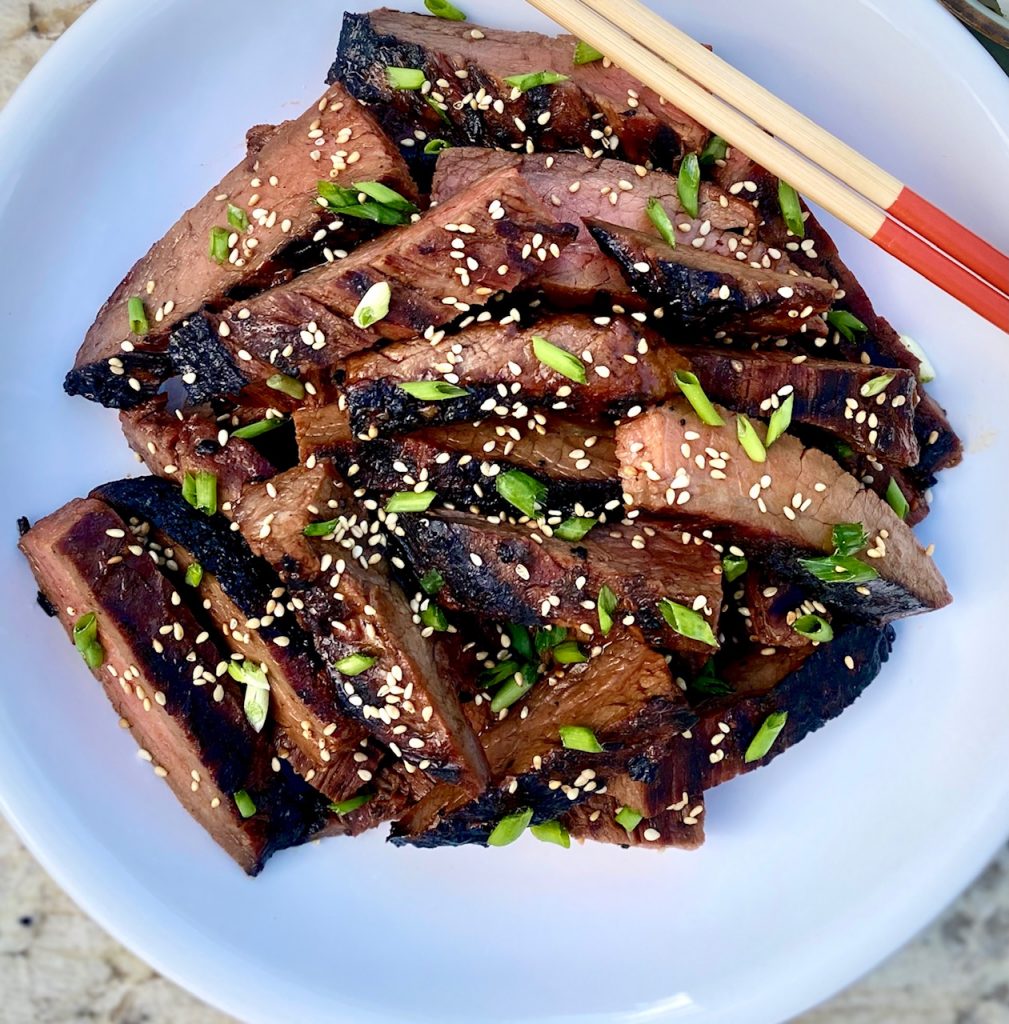
We love to pair our Cucumber Salad with two great Korean dishes on our site.
- Our Korean Scallion Pancakes are a great starter or side dish and are simple to make at home. We pair them with a Ginger Soy Dipping Sauce.
- Korean Beef Bulgogi – bulgogi means “fire meat” and is Korean-style marinated beef or pork with sweet, smoky flavors.
Wine pairing for Korean inspired dishes:
Korean-based dishes pair well with a light-bodied Sauvignon Blanc or German Riesling. It helps to remember that both of these wine varietals help cut the heat in spicy dishes.
Other great salad recipes to try:
- Arugula Beet and Goat cheese Salad
- Asian Cucumber Salad
- Asian Coleslaw with Peanut Dressing
- Spinach Salad with Warm Bacon Dressing
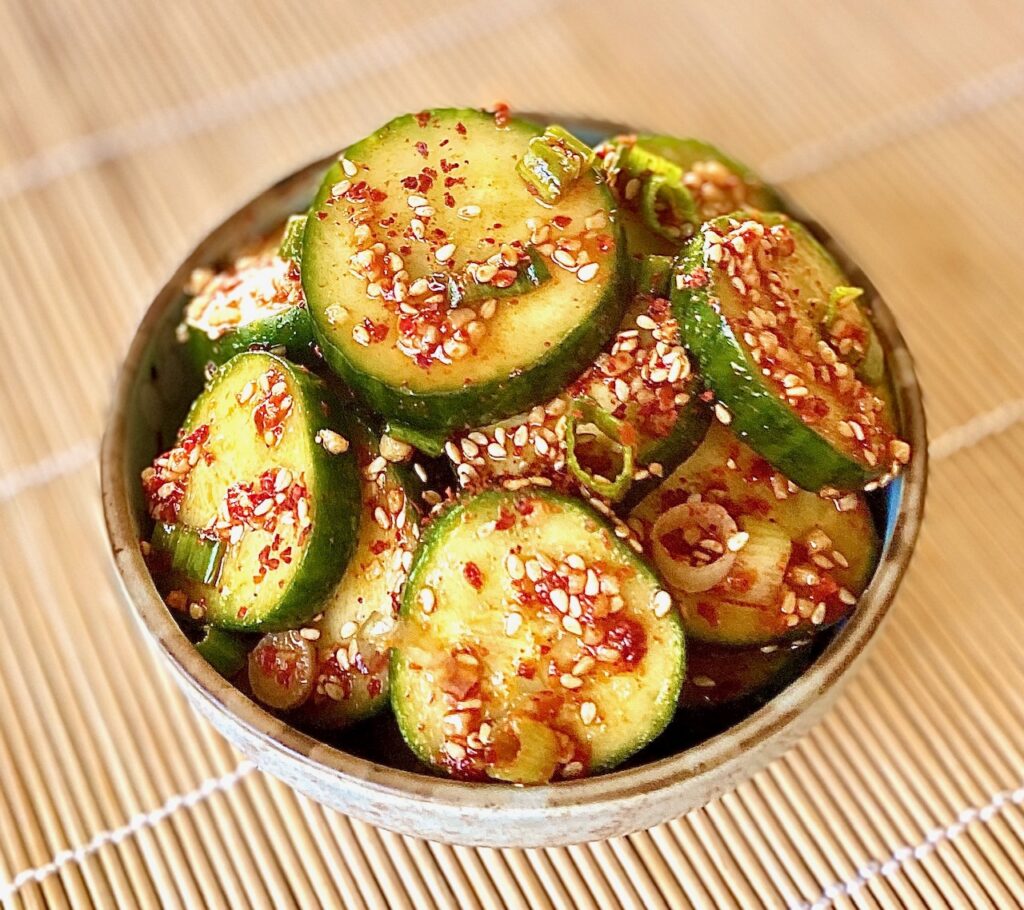

Korean Cucumber Salad (Oi Muchim)
Ingredients
- 2 cups Cucumbers – sliced 1/8 inch thick 1-2 cucumbers depending on size
- 1 teaspoon salt
- 2 teaspoons garlic, minced
- 2 teaspoons soy sauce
- 2 teaspoons rice wine vinegar
- 2 teaspoons sesame oil
- 1 teaspoon sugar
- 1 – 4 teaspoons gochugaru depending on desired heat level
- 1 – 4 teaspoons sesame seeds add as desired for flavor
- 2 Green onions, white and green part, sliced 1/4 inch thick around
Instructions
- Slice cucumbers into thin slices, about 1/8 inch thick. Toss them with 1 teaspoon of salt and place in a colander, and let it rest over a bowl for 30 minutes.The salt will help to draw out the water in the cucumbers. Do not skip this step.
- In a medium bowl blend minced garlic, soy sauce, rice wine vinegar, sesame oil, and sugar. Mix and set aside.
- In a small bowl add gochugaru and sesame seeds and mix together.
- Add gochugaru sesame seed mixture one teaspoon at a time to the soy sauce mixture, blend, then taste test. This will help you to control the heat level of your salad. Then add one teaspoon at a time, taste after each additional, until you have your desired spice/heat level.
- Add the sliced green onions to the mixture and mix them in.
- Blot any excess salt off of the cucumbers.Pour over the cucumbers, stir everything together, and serve.
Notes
- Crushed Red Pepper – About 1/4 teaspoon of crushed red pepper is equal to 1 teaspoon of gochugaru.
- Paprika – A teaspoon of paprika is equal to 1 teaspoon of gochugaru. When substituting with paprika we like to use a hot paprika.
- Cayenne Pepper – 3/4 of a teaspoon will be equal to 1 teaspoon of gochugaru.
- Cayenne Pepper + Smoked Paprika – use 1/2 tsp cayenne plus 1/4 tsp smoked paprika
Nutrition
Building the perfect cheese board is a lot of fun because no two really ever really need to be the same. This is a great time to get creative!
We will walk you through the building blocks and help you create a party showpiece that is simple yet elegant.
This is an easy and stress-free appetizer to assemble and you just need a small amount of each for a beautiful platter. Having a variety of colors and textures is the key.
There is no ‘best’ way to create the perfect cheese board but here are a few different ideas and the building blocks you need:
Jump to Recipe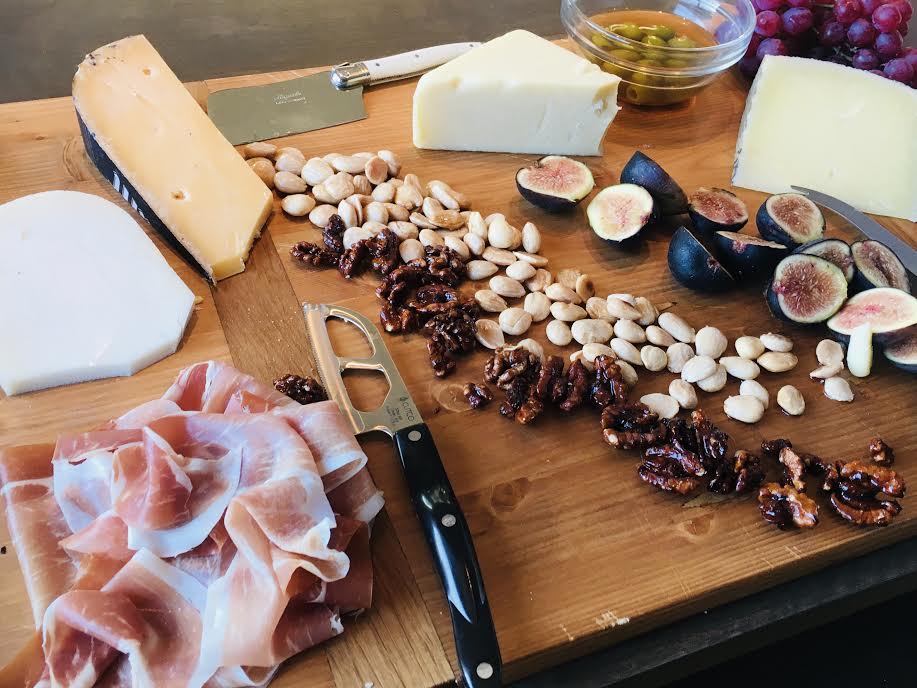
Building blocks of a great cheese tray:
These are the basics and we’ll get more specific below.
- The Platter – Get creative based on the size of your party. We love a wooden board because guests are comfortable cutting on it, but any beautiful flat surface will do!
- Small knives – Use a sharp knife for hard cheeses and another knife for soft cheeses
- Cheeses – The star of the show! Variety is the key but you only need small pieces
- Meats – Optional if you want a heartier board. 2 or 3 varieties are the perfect amount
- Spreads – Put these in small bowls to give the platter some height – be sure to add a small spreading knife or spoon
- Crackers and Bread – There are so many choices so, again, look for texture and variety
- Fruits and Nuts – Adds color and ties it all together
Ready to get started creating the perfect Cheese Board for your next party?

What is needed for a cheese board:
Grab this list and head to any grocery to find your favorites.
Here is what we suggest you include. Be sure to adjust based on party size:
- 1-2 hard varieties of cheese – choices include: cheddar, gouda, small bits of Parmesan, Manchego, and Swiss. Buy a block and cut some in slices and some in chunks for great visual variety
- 1-2 soft cheeses – goat cheese, Boursin, brie, Camembert, fontina
- 1 pungent cheese – such as Blue or gorgonzola
- 2-3 meats – cured thinly sliced favorites include: genoa salami, prosciutto, and speck
- Fresh or dried fruits – green or red grapes, any type of berries, apples, pears, cherries, nectarines, figs
- A few handfuls of nuts – we like pistachios, Marcona almonds, candied pecans, and cashews
- Olives – it’s fun to get some green and some dark olives for color contrast
- Crackers and Bread – it’s great to have 2-4 types on the board. We like rosemary crackers, parmesan crackers, and crunchy pita crackers. Sliced sourdough or French baguette work perfectly
- Savory and/or sweet spreads – Black Olive paste, Cherry tomato paste, fig jam, black cherry jam, honey, or oven dried tomatoes packed in olive oil are great options
- Artichoke Hearts – Optional. Choose small quartered hearts packed in olive oil
Want to learn more about cheeses? We love this guide.

One of the great things about building a perfect cheese board is that it’s easy if you have most of the staples on hand and just need to fill in a few pieces.
Many upscale groceries sell small wedges of cheese which allows for a good variety on your cheese platter. Keep a few varieties of crackers, nuts, and olives on hand in the pantry and refrigerator for a fast last minute party appetizer.

Helpful Hints
- To make it easier for your guests, precut some hard cheeses and cut the brie into wedges. This makes it simple for guests to grab a slice off of the board.
- The cheese platter can be made in advance, with the exception of the crackers, bread, and nuts, wrapped in foil or saran wrap and refrigerated.
- Before serving add the crackers, breads, and nuts. (If added and refrigerated ahead of time they will get soft, stale and soggy)
- Cheese tastes better at room temperature, so remember to bring your cheese out of the refrigerator about 30-minutes ahead of serving.
- Aim for 3-5 cheese for a party platter

How to Make a Cheese Board
Equipment
- 1 large platter
Ingredients
- 8 ounces Hard cheeses, sliced gouda, cheddar, manchego, parmesan
- 8 ounces soft cheeses, brie, fontina, Boursin, goat
- 4 ounces pungent cheeses, blue or gorgonzola
- 2-3 ounces nuts cashews, pistachios, pecans, Marcona almonds
- 2 ounces olives
- 3-4 ounces meats, thinly sliced prosciutto, salami, speck
- 1 ounces dried fruit cherries, cranberries
- 1 handful berries or cherries
- 3 ounces spreads fig jam, olive paste, oven dried tomatoes in oil
- 2 packages Crackers any variety
- 2 ounces sliced sourdough or French baguette
- Fresh fruit figs, nectarines grapes
Instructions
- Start with a clean dry platter or board
- Add any small bowls to the board and fill with spreads and olives
- Place hard cheese slices or chunks in rows or bunches on the board
- Add soft and pungent cheeses to fill in
- Add fruits, both fresh and dried, to fill in spaces
- Sprinkle the nuts around to fill in the remaining spaces
- Add crackers and bread around the outside edges of the platter
- Include and spoon or knives for spreading
Notes
- To make it easier for your guests, precut some hard cheeses and cut the brie into wedges.
- Add any additional crackers or bread in a small bowl on the side.
- Calorie count is approximate and based on 12 – 16 servings
Nutrition
When you make shrimp cocktail it’s the little things that count. This is an easy recipe to master, with just a few ingredients, so every step makes a difference.
This classic appetizer is a favorite for a reason. It’s easy, it’s delicious, and it’s also low in calories (yea!). Add a zesty cocktail sauce to serve alongside these plump shrimp and watch them disappear!
Below you will find tips on:
- The right size and type of shrimp for a shrimp cocktail
- How to perfectly cook shrimp
- How to make a classic, balanced, and zesty seafood cocktail sauce

Ingredients needed
There are 2 parts to this homemade shrimp cocktail recipe – the shrimp (and its poaching liquid) and the zesty shrimp cocktail sauce
Shrimp:
- Shrimp – large raw shrimp with the tails on. Use 16/20’s, 21/25’s, or 26/30’s for best results. See below for more info on sizing. We prefer 21/25’s which are also called Jumbo Shrimp. Smaller shrimp are not recommended.
- Lemons – both for cooking the shrimp, making the cocktail sauce and for garnish
- Bay Leaf – when used in poaching Bay leaves add a subtle herb-like flavor
- Salt and Black Peppercorns – peppercorns are full of flavor but easy to strain out later
- Old Bay Seasoning – or something similar to give the shrimp added flavor
- Parsley – optional garnish. We prefer flat-leaf parsley

Seafood Cocktail Sauce:
See our full post and instructions on making this shrimp cocktail sauce, which couldn’t be easier. Here are the ingredients:
- Ketchup – the base of the sauce
- Worcestershire Sauce – gives great added flavor
- Lemon Juice – adds a bright flavor
- Horseradish and Hot Sauce – Adds the heat and allows you to make this sauce as mild or spicy as you would like

How to Make restaurant-quality Shrimp Cocktail
Make the Homemade Shrimp Cocktail Sauce:
- Prepare the cocktail sauce by whisking all of the ingredients together. Set aside if using right away or refrigerate for up to 7 days.
- If you don’t have time to make your own cocktail sauce be sure to buy a high quality version at the grocery store.
Preparing the Shrimp:
- Remove the shrimp shells but leave the tails on (makes a great handle for dipping!)
- Devein shrimp, if needed, and rinse. (see below for tips on deveining shrimp)
Cooking the Shrimp:
- Fill a large pot 3/4 full with water.
- Cut a lemon in half and squeeze the juice into the water. (Save the other half for garnish) Add the squeezed lemon half to the water.
- Add Bay leaf, salt, black peppercorns, and Old Bay seasoning. This is called a “court bouillon”.
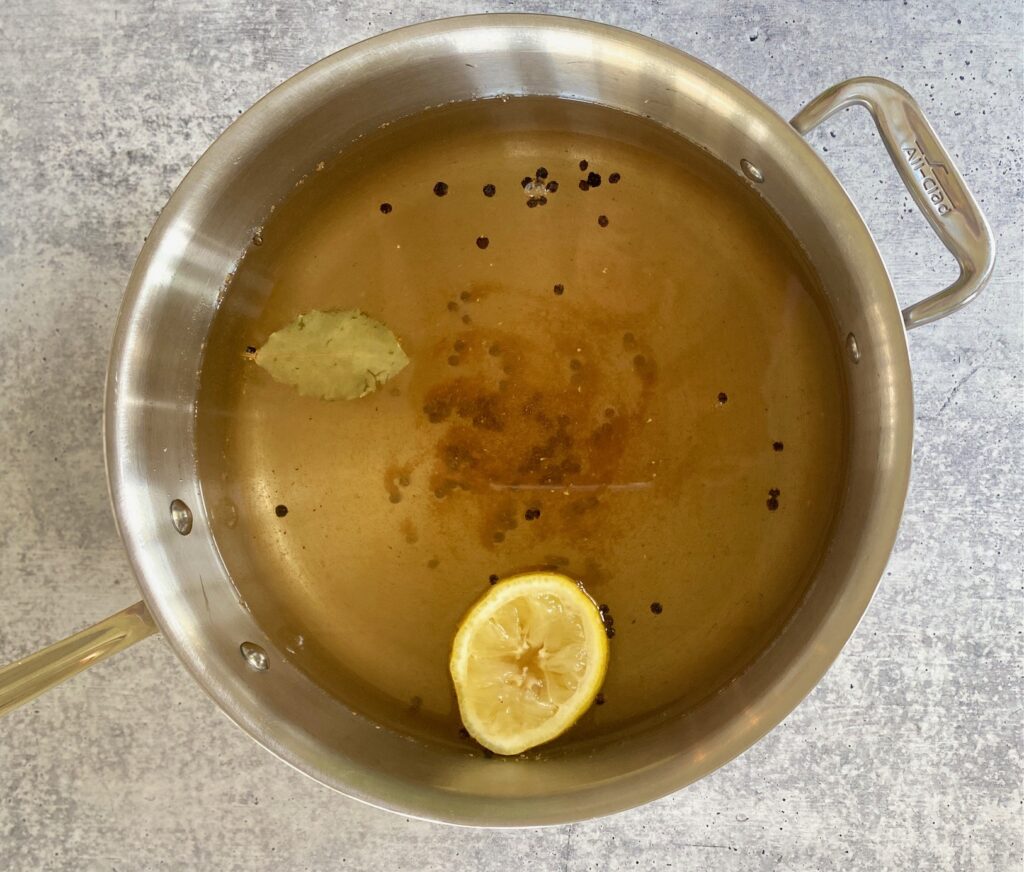
- Bring mixture to a boil and then reduce to a simmer and cook for 15 minutes to infuse the water.
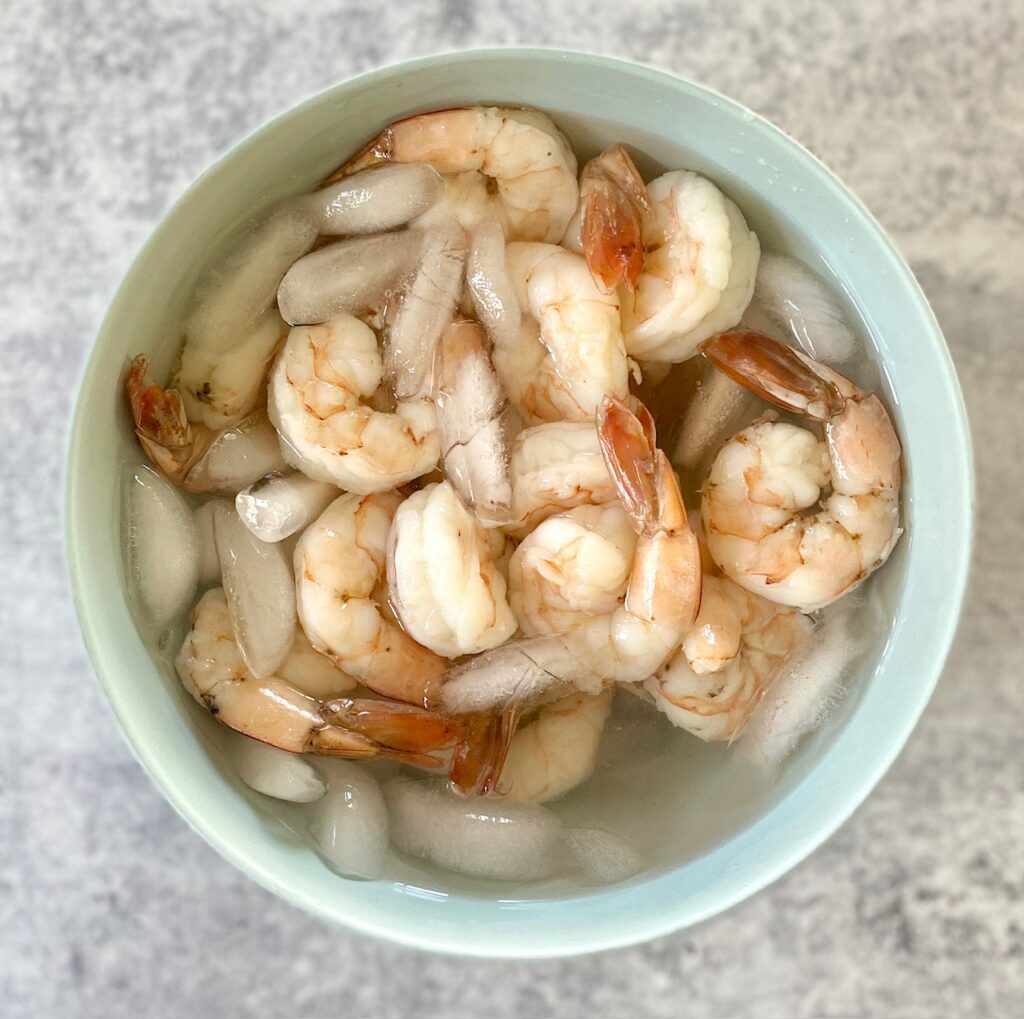
- Prepare a bowl of ice water by filling a medium bowl with 2 cups of ice and filling halfway up with cold water. Be sure to do this before cooking the shrimp.
- Remove the pan from the heat and drop in the cleaned shrimp.
- Cook, stirring occasionally, until the shrimp begin to curl (see time chart below) and they have turned pink. Jumbo shrimp is perfectly cooked in 2 minutes.
- Once cooked, strain the shrimp, or remove them with a slotted spoon, and then quickly add them to the ice bath to cool them and stop the cooking.
- Once cooled strain again and pat the shrimp dry.
- If not serving right away store the cooked shrimp in the refrigerator for up to 24 hours

2 Ways to Serve Classic Shrimp Cocktail
- 1. INDIVIDUAL SERVINGS:
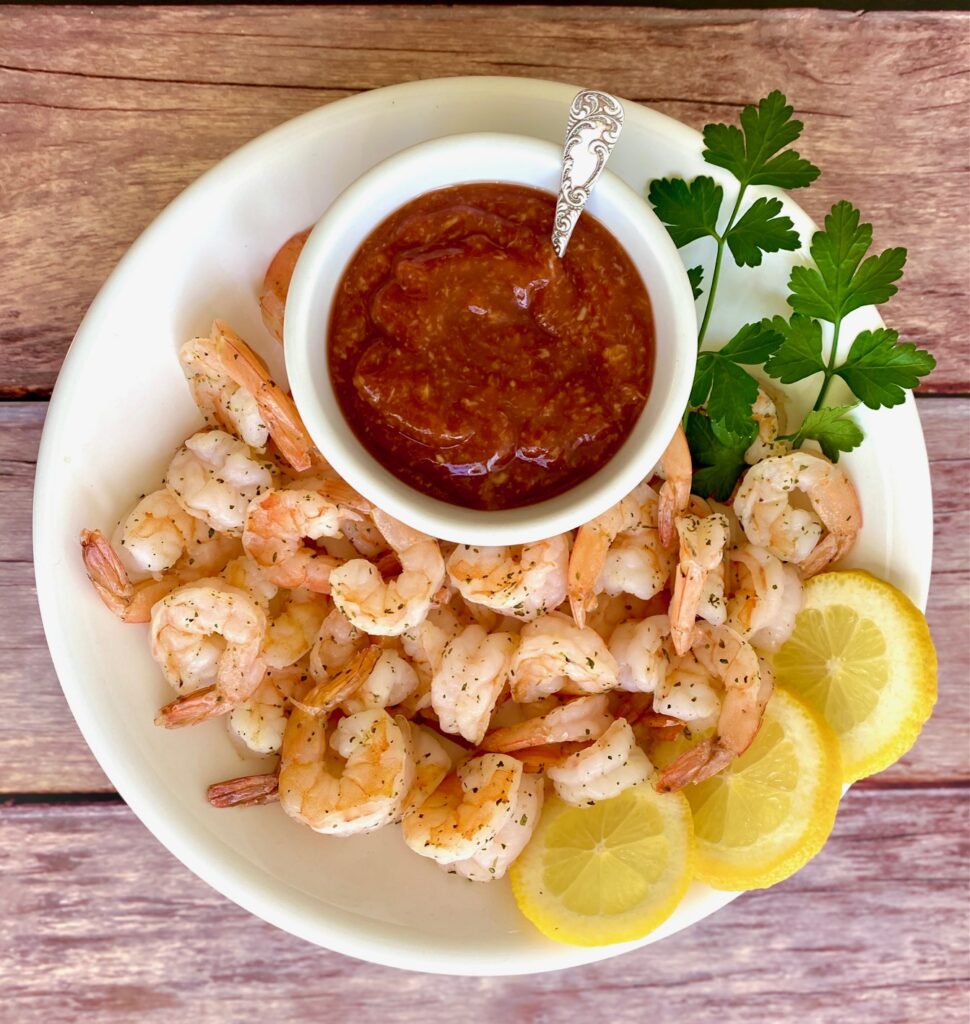
Fill a small dish or martini glass with a few Tablespoons of cocktail sauce. Hang 3-5 pieces of prepared shrimp over the edge, then add a sprig of parsley or a wedge of lemon (or both) for garnish. A sprinkling of lemon zest is also pretty.

- 2. PLATTER
Add prepared cocktail sauce to a small bowl and place on a platter. Scatter the prepared shrimp around the bowl of sauce and garnish with fresh lemon wedges and parsley.
What do the numbers on shrimp mean?
- Shrimp sold in the U.S. are labeled with numbers that tell you approximately how many shrimp are in a pound.
- For example, 21/25 means there will be 21-25 pieces per pound.
- Shrimp often has names, but that is not as accurate, so using the number system is best.
How long to poach shrimp
Here’s a timing guide for raw shrimp, but as always, use your eyes to tell you when they are done. Shrimp cook quickly so be sure to have the ice bath ready. These are the 3 best sizes for a classic shrimp cocktail.
- Size 16/20 – poach for 3.5-4 minutes
- Size 21/25 – poach for 2 minutes
- Size 26/30 – poach for 1.5 minutes
NOTE: If using frozen shrimp add approximately 1 minute to the cooking time.
Make-Ahead and Storage Tips
- The shrimp can be poached and chilled 24 hours ahead of serving
- Seafood cocktail sauce can be prepared up to 7 days ahead of time and stored in an airtight container in the refrigerator

Can I Use Frozen Shrimp?
YES! Either thaw overnight in the refrigerator and cook as directed above, or cook frozen but add about 1 minute to the cooking time.
How to Devein Shrimp
- Hold the shrimp between your thumb and forefinger with the rounded side (back of the shrimp) upward.
- Place the pointed end of a wooden skewer, or tip of a knife, between the second and third segments of the shrimp, about 1/8-inch down from the top.
- Gently push the skewer, or knife tip, through the skin and then lift up to remove the vein.
- Discard and repeat with each shrimp. Rinse the deveined shrimp before using them.
What pairs with Shrimp Cocktail?
- Shrimp cocktail pairs well with nearly any type of salad such as our Arugula Beet Salad with Goat Cheese, Strawberry Spinach Salad, or Fresh Citrus Salad
- Serve with a bowl of Honey Roasted Cashews, or Candied Pecans
- Don’t forget a cool classic cocktail: Lemon Drop Martini, Moscow Mule, or French Martini
- Serve alongside Mini Caprese Skewers

How to Make Shrimp Cocktail
Ingredients
Shrimp:
- 1 pound raw shrimp, extra large (21-25 or 16-20 count) peeled, deveinded, tails on
- ½ lemon
- 1 Bay leaf
- 1 Tablespoon black peppercorns
- 1 teaspoon Old Bay seasoning, optional
- 1 pinch salt
- 4 sprigs flat leaf parsley
Shrimp Cocktail Sauce
- 1 cup ketchup
- 1 Tablespoon Worcestershire sauce
- 3 Tablespoons fresh lemon juice
- 3 Tablespoons prepared horseradish (more or less depending on personal taste)
- 1 Dash hot sauce
Instructions
Cocktail Sauce:
- Prepare the cocktail sauce by combining all ingredients and set aside. This sauce can be made ahead of time and refrigerated for up to 7 days
Prep the Shrimp:
- Remove shells from the shrimp, but leave tails on. Rinse and then devein the shrimp, if needed.
How to devein shrimp:
- To devein the shrimp before cooking, hold the shrimp between your thumb and forefinger with the rounded side of the shrimp upward. Place the pointed end of a wooden skewer, or tip of a knife, between the second and third segments of the shrimp, about 1/8-inch down from the top. Gently push the skewer or knife tip through the shell and then lift up to remove the vein. Discard and repeat with each shrimp.
Cook the shrimp:
- Fill a large pot 3/4 full with water. Cut the lemon in half and squeeze in the juice and then add the lemon half to the water. Cut remaining half into wedges for serving.Add the Bay leaf, peppercorns, Old Bay, and salt.Bring to a boil, reduce to a simmer, and let cook for 15 minutes to infuse the water with flavor.
- Prepare an ice bath for the shrimp: In a large bowl add 2 cups of ice cubes and then fill halfway up with water.
- Remove pan from the heat and drop in the cleaned shrimp. Cook, stirring occasionally, until they curl and turn pink. (See the cooking chart below)Note: different size shrimp will cook at various times. Here is a guide, but watch them and use your best judgment. Size 26/30's – poach for 1½ minutesSize 21/25's – poach for 2 minutesSize 16 /20's – poach for 3 ½- 4 minutes
- Once cooked, strain the shrimp, and then add them to the prepared ice bath. Leave shrimp in the ice bath for a few minutes to stop the cooking and let them cool completely. Strain again and pat dry.
2 ways to serve Shrimp Cocktail
- 1. INDIVIDUAL– Fill a small serving dish or martini glass with cocktail sauce. Hang 3-5 shrimp over the edge, add a wedge of lemon or parsley, and serve.2. PLATTER – Add prepared cocktail sauce to a small dish or ramekin and place on a platter. Scatter cooked shrimp around the dish of sauce. Garnish with lemon wedges and parsley.
Notes
- Making your own cocktail sauce is the way to go! For full instructions visit our post on Seafood Cocktail Sauce.
- If using frozen shrimp be sure to thaw it overnight in the refrigerator, or in a cool water bath for at least 30 minutes before poaching. If cooking from frozen add one minute to the cooking time.
- Looking for similar serving glasses? Try these from Amazon: https://amzn.to/4oNR7ci
Nutrition
It’s loaded with corn, black beans, avocado, red bell peppers, and red onion and topped with a zesty lemon vinaigrette dressing!
This zesty combo is also called Cowboy Caviar or Texas Caviar, which is a scrumptious dip made by simply chopping the pieces a little smaller and serving it with tortilla chips
Ready to try this super flavorful 15-minute recipe that works as both a side dish and a salad? You’re going to love it! No real cooking is required – always a win-win!
This salad is dairy-free which makes it perfect for BBQs, picnics, and beach days. Add a protein, like shredded chicken, and you’ve got a full meal.
Ready to get started? Just click on our “Jump to Recipe” button below to go straight to the recipe card. For tips, processes, and substitutions keep reading. This post may contain affiliate links. Please see our affiliate disclosure for details. We only recommend products we love and use.
Jump to Recipe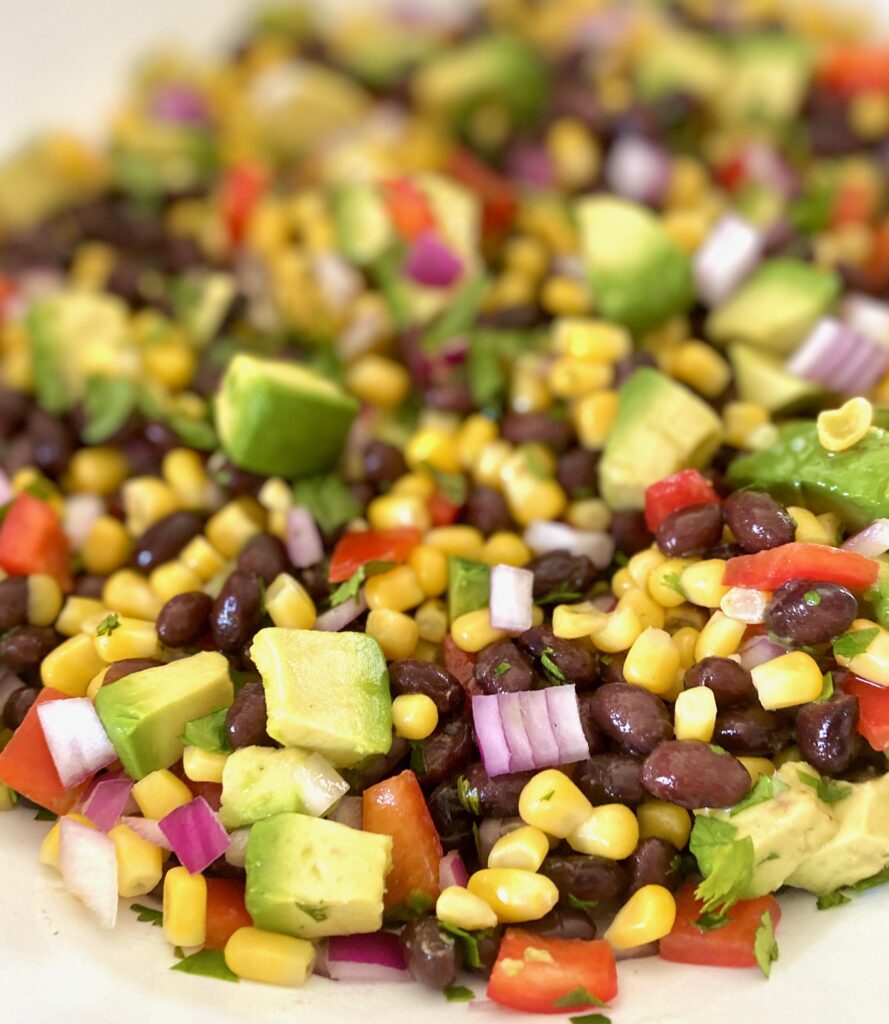
Ingredients needed:
This salad has 2 parts: The salad ingredients and the simple lemon dressing ingredients
The Salad:
- Corn Kernels – we prefer frozen (so easy!) or fresh corn. But you can use canned.
- Black Beans – canned beans make it simple but you could also make your own homemade beans
- Red Bell Pepper – or try yellow, orange, or green peppers (or a little of each!)
- Red Onion – or use sliced scallions
- Avocado – adds a creamy touch that is a great contrast with the pepper and onion
- Cilantro – use flat leaf parsley if you’re not a cilantro fan

The Lemon Dressing:
- Lemon Juice – use freshly squeezed (you just need one lemon)
- Olive Oil – we recommend extra virgin olive oil for the best flavor
- Garlic – optional but highly recommended (substitute garlic powder/salt in a pinch)
- Salt and Pepper – both help balance the flavors of the dressing
- Cayenne – just a pinch really gives this salad dressing a kick

How to make Black Bean and Corn Salad (or cowboy caviar)
- Cook frozen corn by steaming it in the microwave or on the stovetop for about 3 minutes, drain, and let it cool. Fresh corn, just off the cob, will likely take closer to 5 minutes. If using canned corn simply drain, rinse, and set aside.
- Drain black beans and rinse them with cool water in a colander. Let them drain completely.
- Chop the red pepper, red onion, and avocado into medium dice for the salad or small dice for cowboy caviar.
- Trim the cilantro leaves from the stems and roughly chop them.
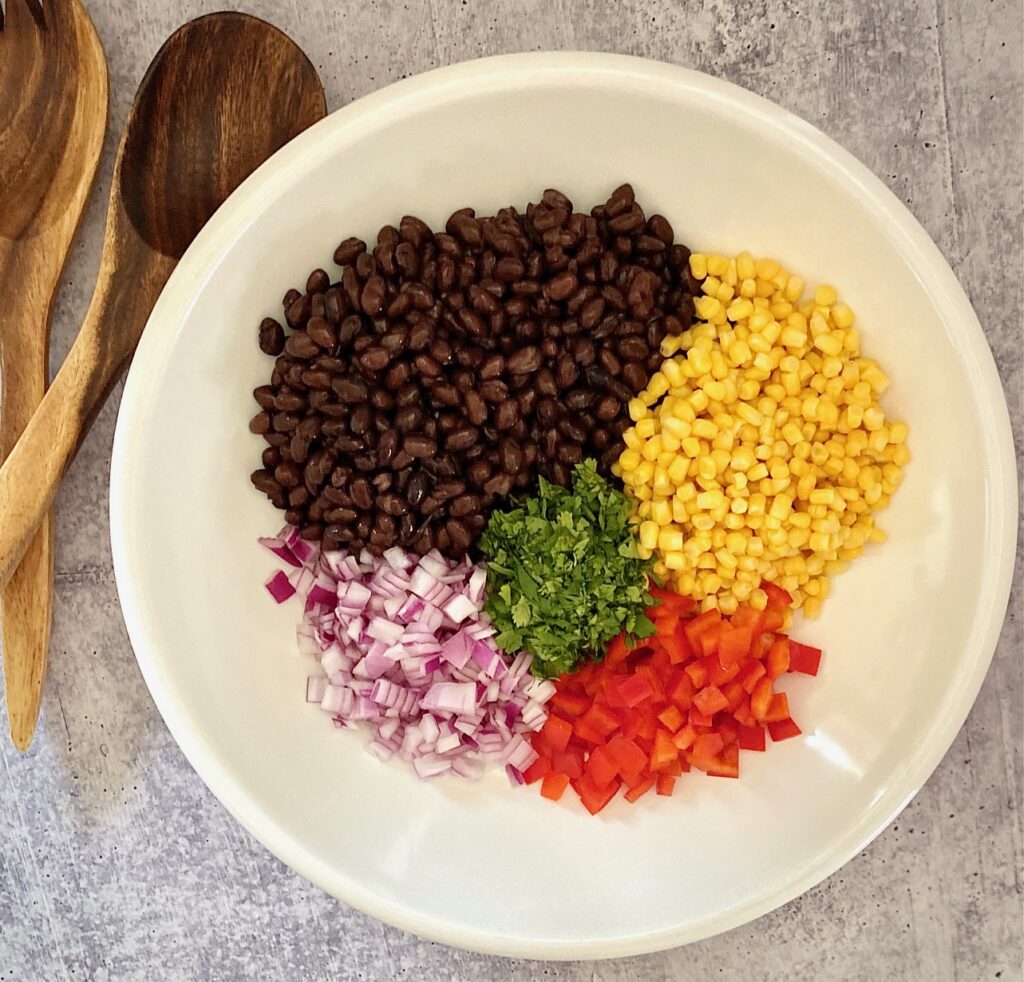
- Add corn, beans, red onions, red peppers, and cilantro to a large salad bowl.
- Whisk all of the lemon vinaigrette dressing ingredients together in a small bowl
- Drizzle the dressing onto the salad and toss until well combined
- Add the avocado and gently mix everything together
- Best served slightly chilled or at room temperature
- If serving as Cowboy Caviar dip add some tortilla chips on the side!

Types of corn to use:
This recipe is very flexible so use what is easiest for you!
- Frozen – It’s easy peasy and only needs a quick 3-minute steam because frozen corn is pre-cooked. It can be cooked ahead of time and chilled.
- Fresh – Perfect when fresh corn on the cob is in season. Better yet, grill it up for an extra punch of flavor!
- Canned – Great in a pinch but be sure to drain well
How to Store Corn Salad:
This salad stores well, covered, in the refrigerator for about 3 days. Keep in mind that cut avocado turns brown pretty quickly, although it will still taste fine.
Make ahead tips
Everything can be prepped up to 3 days ahead of time, except the avocado, and then assembled when ready to serve.

Variations and add-in ideas:
We LOVE the flexibility of this fresh black bean corn salad. A salad that can also be a dip? How much better can it get?
Feel free to make some substitutions/additions to mix it up based on what’s in your fridge. Here are some ideas:
- Replace the red onion with scallions or white onion
- Use flat-leaf parsley instead of cilantro
- Substitute lime for the lemon in the dressing
- Make a big batch of our Classic Lemon Vinaigrette to use all week and dress the salad with that instead of the dressing below
- Add chopped tomatoes (especially great in the cowboy caviar version)
- This salad is dairy-free as written, but adding crumbled feta or goat cheese is delicious
- Any cooked protein would make this a complete meal. Try shredded chicken or turkey, tofu, or shrimp
Perfect pairings with Corn Salad
As a side dish, this salad pairs especially well with BBQ mains such as Carne Asada, Jerk Chicken, or Cedar Plank Salmon.


Black Bean and Corn Salad
Ingredients
Salad
- 3 cups Corn kernels Fresh or frozen
- 2 15 ounce cans Black beans, drained and rinsed
- 1 medium Red bell pepper stemmed, seeded and diced
- 1 cup Red Onion diced
- 1 avocado diced
- ⅓ cup cilantro leaves roughly chopped
Lemon Dressing
- ¼ cup Lemon juice, freshly squeezed
- ¼ cup Extra Virgin Olive Oil
- 1 Tablespoon garlic, minced
- 1 generous pinch salt
- 1 generous pinch black pepper, freshly ground
- 1 generous pinch cayenne pepper (or red pepper flakes)
Instructions
Making Corn Salad (or Cowboy Caviar):
- Cook frozen corn by steaming it in the microwave or on the stovetop for about 3 minutes. Drain and let cool to room temperature while preparing the rest of the salad. if using canned corn simply drain, rinse, and set aside. (Fresh corn may need about 5 minutes to be fully cooked)
- Drain and rinse the black beans with cool water. Let drain well.
- Chop the red pepper, red onion, and avocado into medium dice for the salad or small dice for cowboy caviar.
- Strip cilantro from the stems and roughly chop.
Dressing:
- In a small bowl whisk together lemon juice, garlic, olive oil, salt, pepper, and cayenne.
Assembly:
- In a large bowl combine corn, black beans, red peppers, red onions, and cilantro and toss until well mixed. Drizzle on lemon dressing and toss again to coat.Add avocado and gently mix to combine.
- Best served slightly chilled or at room temperature.
- If serving as cowboy caviar add tortilla chips on the side for dipping.
Notes
- Common substitutions:
- Swap red onion for white onion or scallions
- Use lime instead of lemon for the dressing
- Not a fan of cilantro? Just substitute parsley or leave it out altogether
- Use roasted corn for added depth of flavor
- Other add-in ideas
- Add chopped tomatoes
- Feta or goat cheese crumbles work well in this salad
- Top with grilled or roasted chicken, pork, tofu, or shrimp for a complete meal
- If making ahead: Prepare all of the ingredients and toss when ready to serve.
- Don’t cut the avocado until ready to use because they turn brown pretty quickly once they’ve been cut.
Nutrition
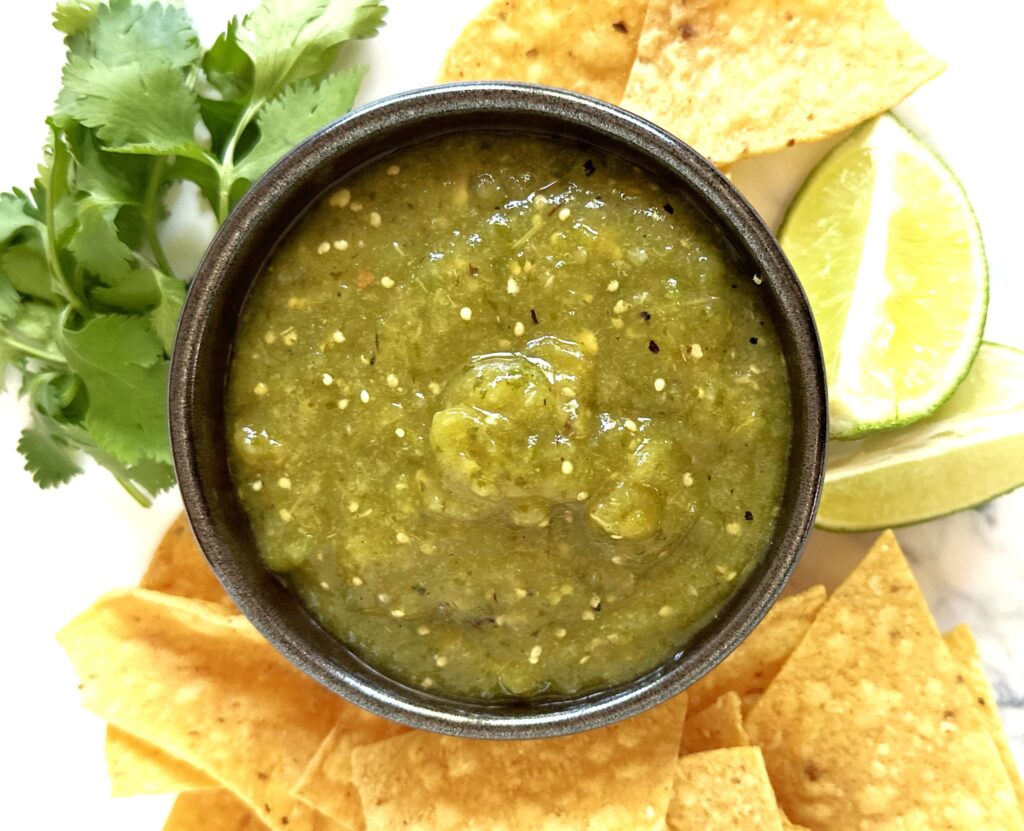
Our Salsa Verde Recipe is slow roasted for a zesty salsa packed full of amazing flavors!
Ready to get started? Just click on our “jump to recipe” button below to go straight to the recipe card. For tips, processes, and substitutions keep reading. This post may contain affiliate links. Please see our affiliate disclosure for details. We only recommend products we love and use.
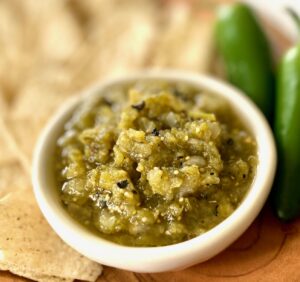
Jump to RecipeYou’ll be dipping chips all day with this sunny salsa or use it to top our Turkey Tacos or Carne Asada. Whip up a refreshing Paloma cocktail and you’ve got the perfect meal!
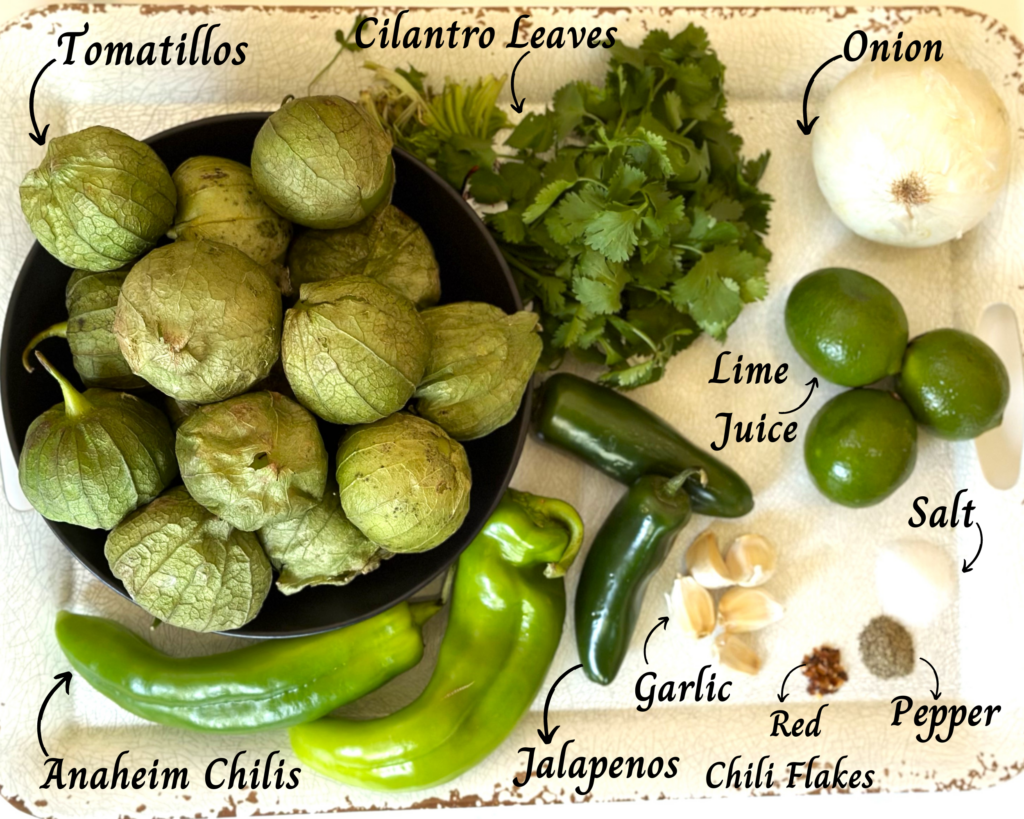
Ingredients for our Salsa Verde Recipe
- Tomatillos
- Garlic
- White Onion
- Anaheim Chilis
- Jalapenos
- One Bunch of Cilantro Leaves
- Fresh Lime Juice
- Salt and Pepper
- Red Chili Flakes (optional)
Is Tomatillo Salsa the same as Verde?
Yes, it’s true! Salsa Verde is also called Tomatillo Salsa or Green Salsa. Those names help to differentiate this from the Italian version of “Salsa Verde” but the ingredients are different and include olive oil, parsley and capers.
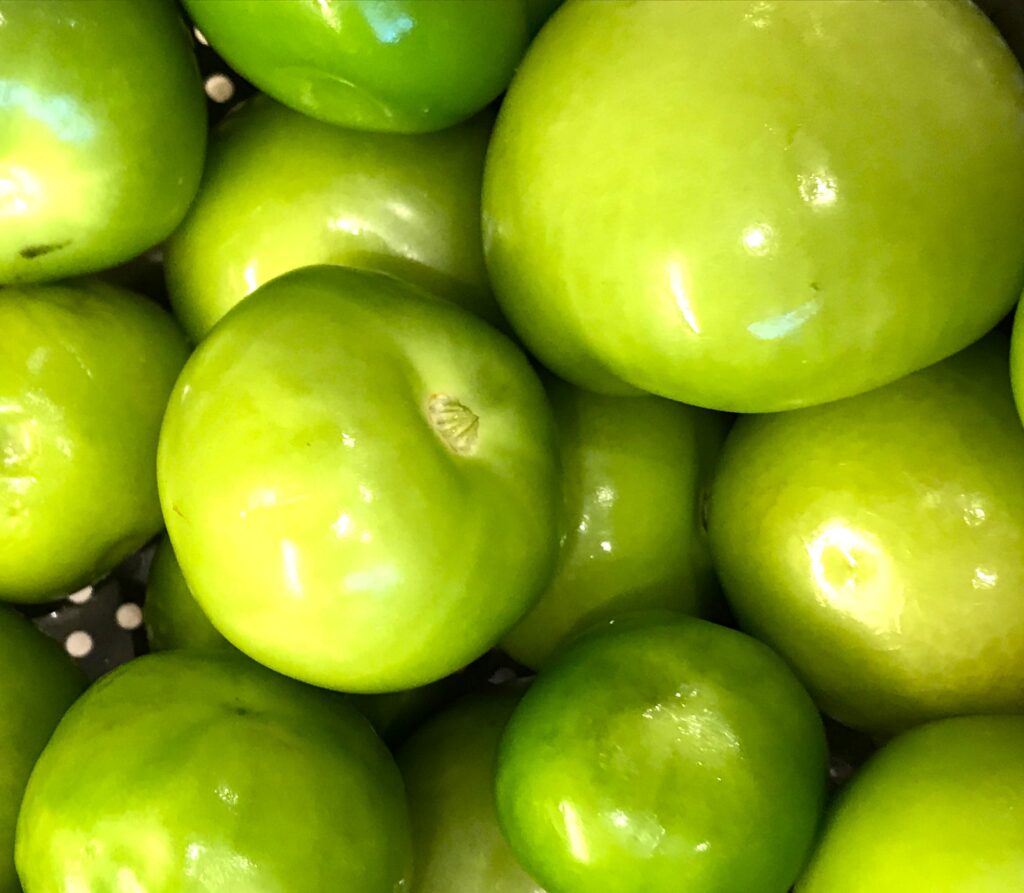
Tomatillos are the main ingredient in Mexican Salsa Verde. They resemble small tomatoes but have a papery husk. Tomatillos are often roasted when added to salsas or a variety of other recipes.
How to make Verde Salsa or Green Salsa
First Step:
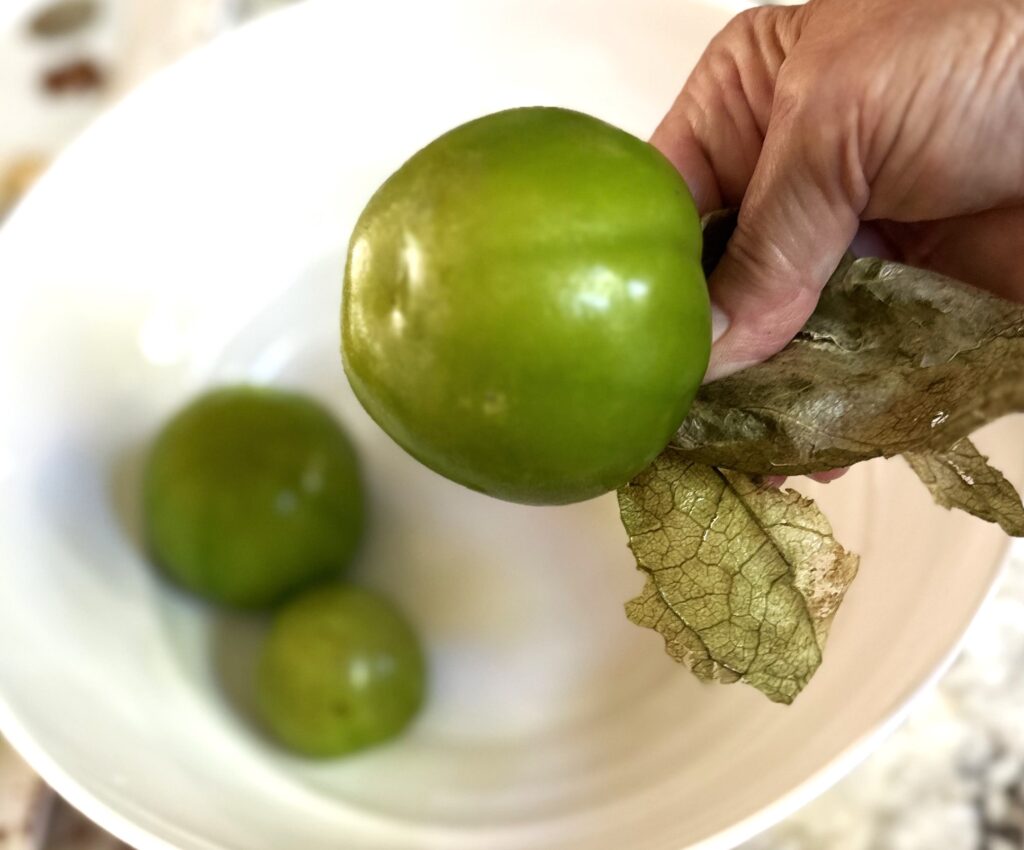
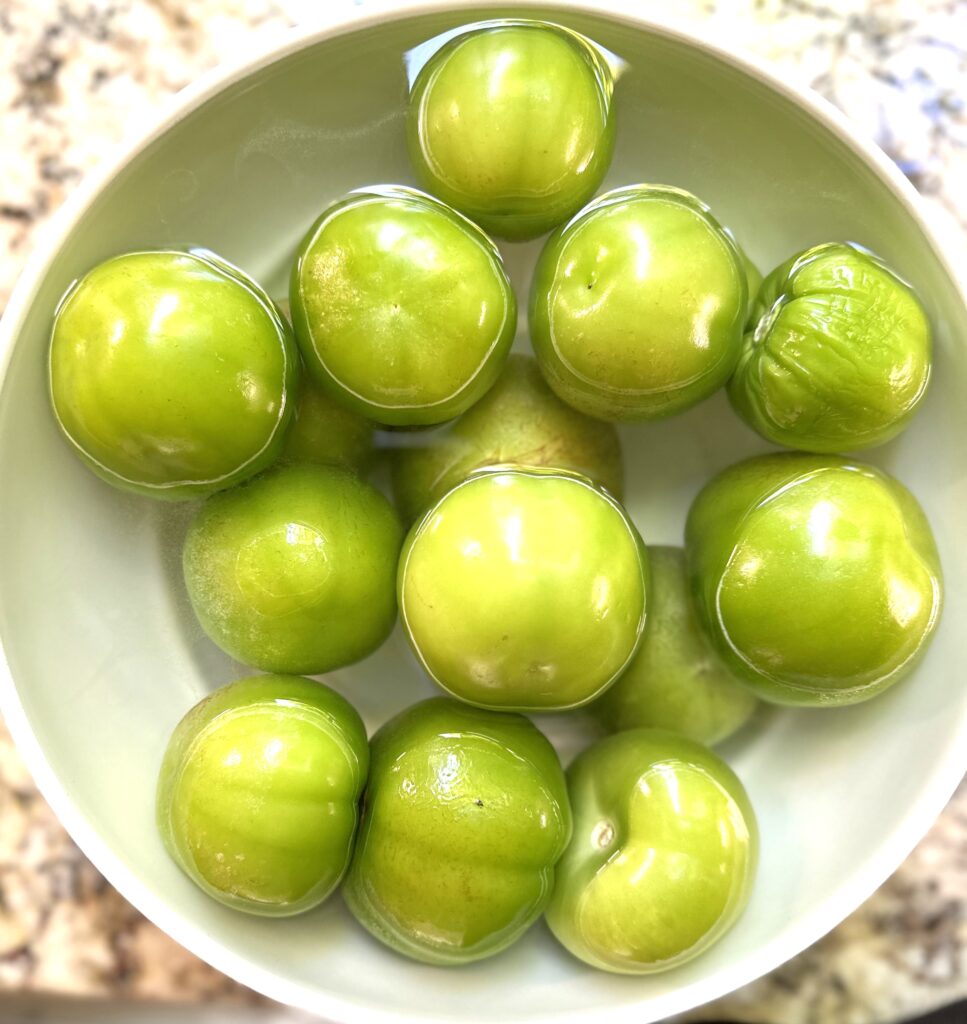
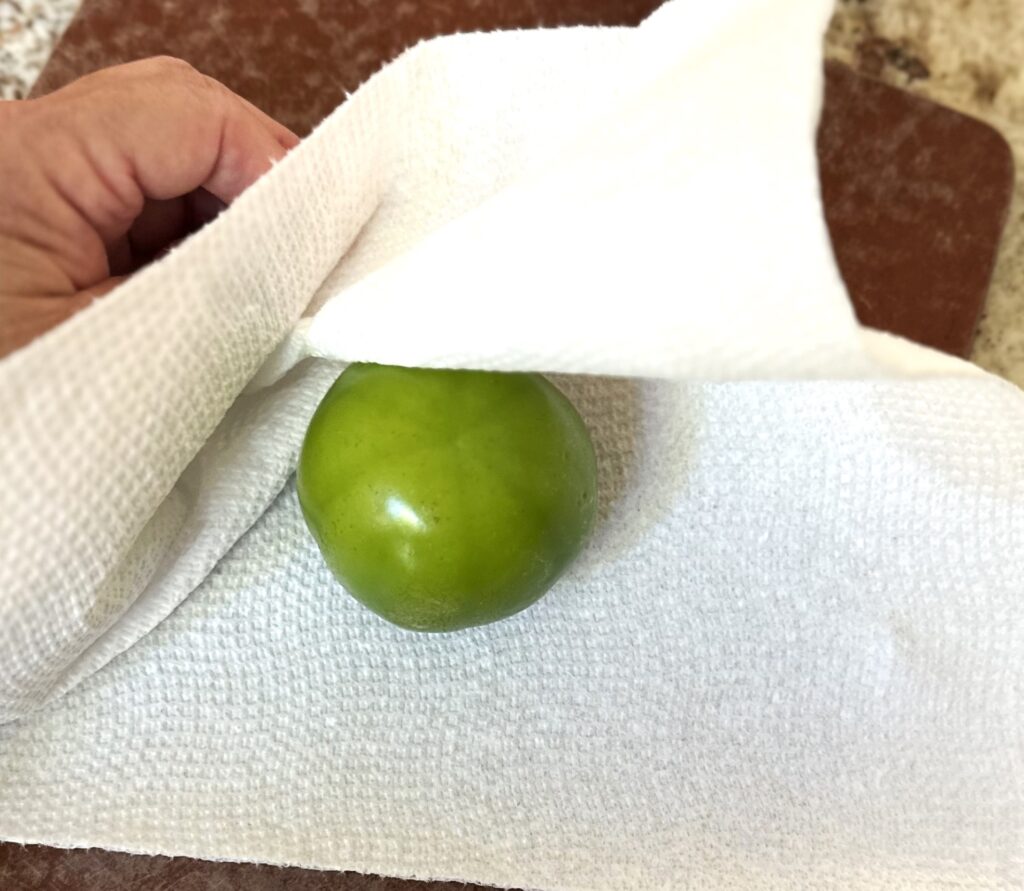
- Remove the papery husks from the tomatillos. Tomatillos have a sticky coating under the papery husk. Remove the husk and soak the tomatillos in warm water for about 50 seconds. Afterward, rinse them by hand. This is an important part of making the finished salsa so don’t skip it!
- Pat each tomatillo dry with a paper towel and set aside.
- Preheat the oven to the high broil setting.
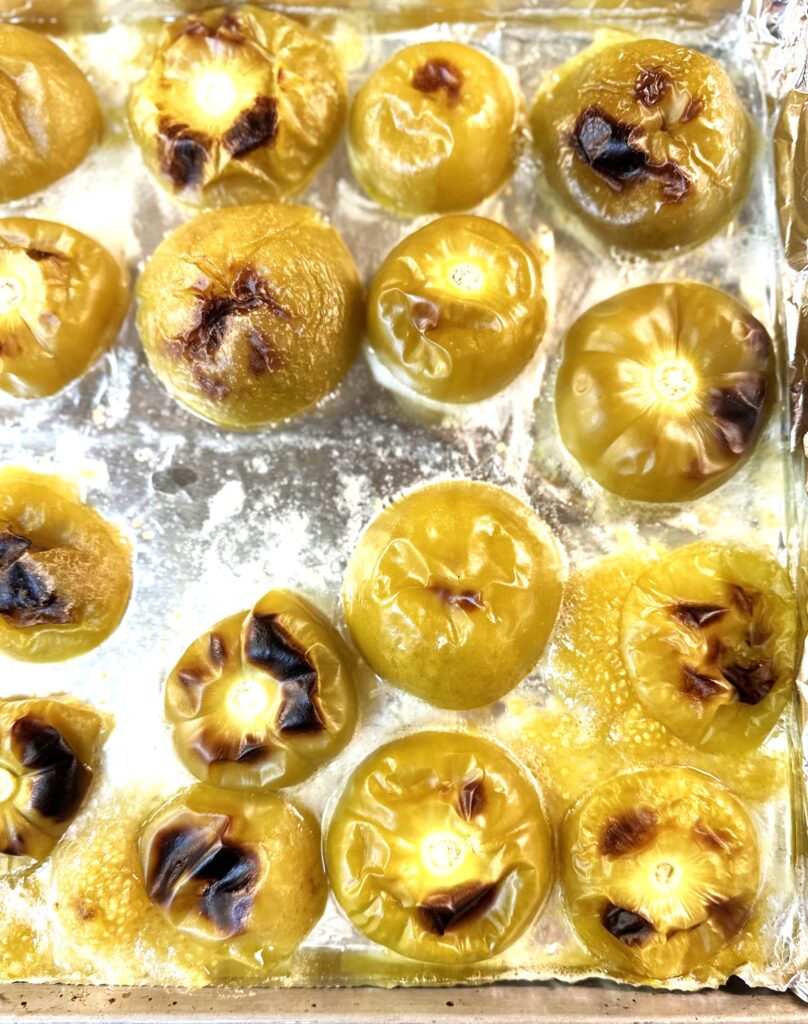
- Cut tomatillos in half and place them cut side down on a foil-lined baking sheet.
- Broil tomatillos in the oven on high for 5-7 minutes. When tomatillos are done the outer skin will have a slightly blackened appearance and look charred and toasty.
- Remove from the oven and let the tomatillos rest until completely cooled. Reserve all the juices that have collected during cooking on the foil. This is another important part of making the finished salsa.
Second Step:
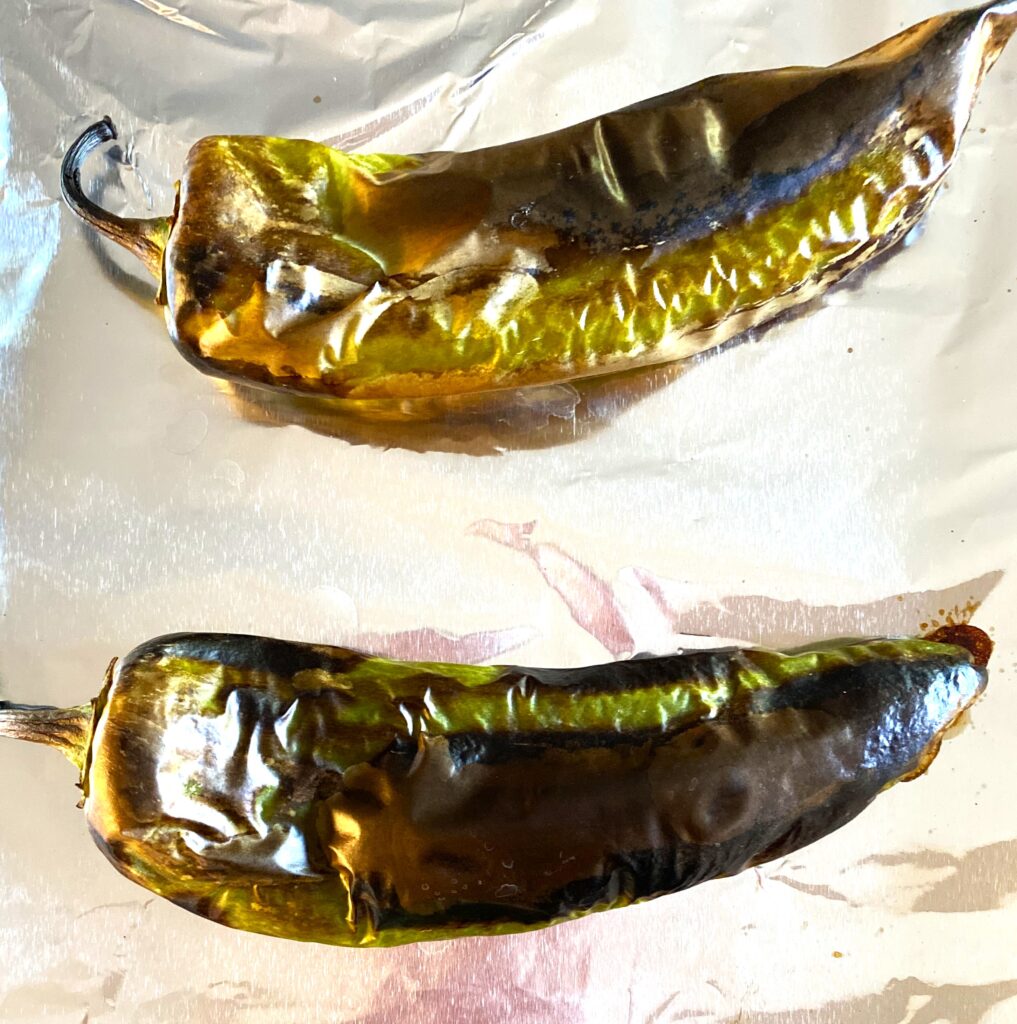
- On another sheet pan broil the whole Anaheim chilis along with the garlic cloves (still in their skin) in the oven, turning once until blackened on both sides and the skin appears to lift. This will take about 3-5 minutes per side.
- Let the chilis and garlic cool completely, then remove the skin, seeds, and stems from the chilis, and remove the skin from the garlic. Set both aside.
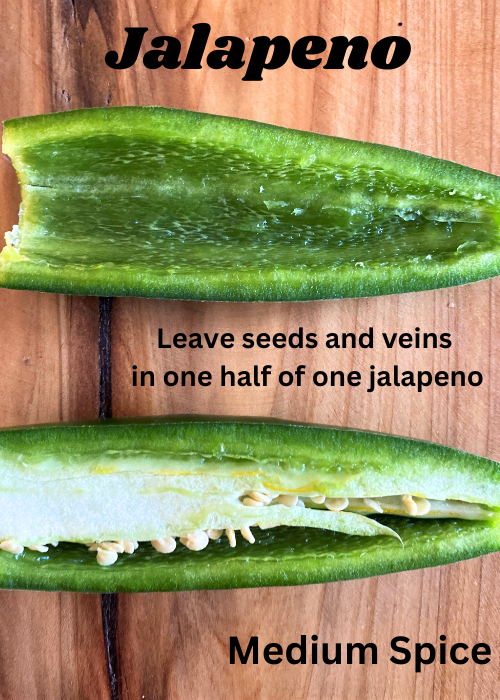
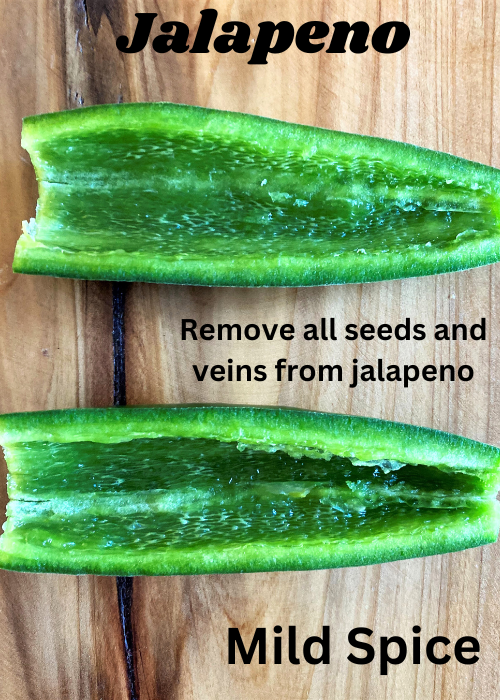
- Halve the jalapenos, remove seeds and ribs to the spice level desired, (see chart below to choose your spice level), roughly chop, and set aside.
- Clean, dry, and chop off the stems from the cilantro, and set aside.

Third Step:
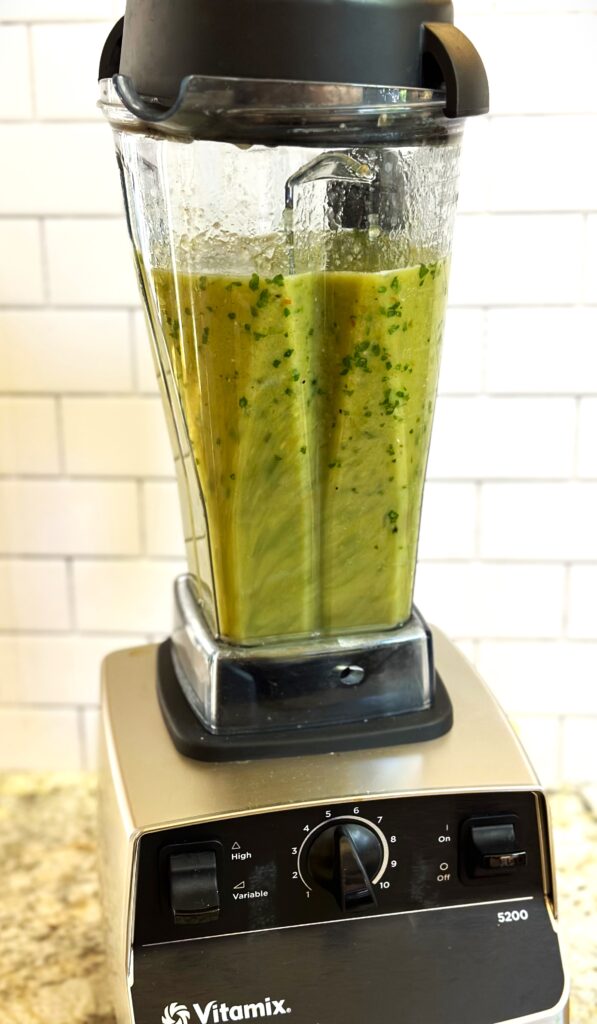
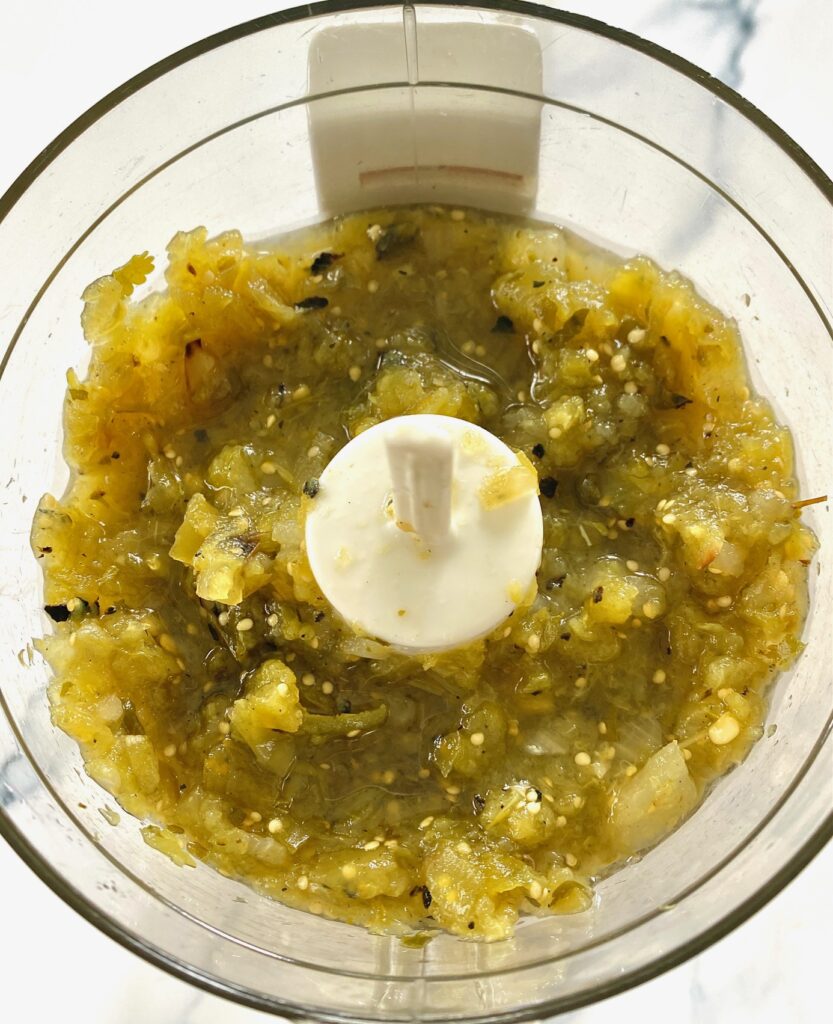
- In a blender or food processor place roasted cooled tomatillos with skin, accumulated juices, chilis, jalapenos, garlic, onion, cilantro, lime juice, salt, pepper, and red chili flakes.
- Turn blender or processor on low for a few seconds, then turn it up to high and blend well until all ingredients are mixed together.
- This salsa is best when you make it ahead of time because that allows all the flavors to meld and pop which makes an incredible tasting Salsa Verde!
What is the difference between salsa and salsa verde?
Besides color, there are a few key differences between the two. Salsa is traditionally red in color and made with a tomato base. Verde salsa is green and made with tomatillos, peppers, and green chilis.
Is verde spicier than regular salsas?
Traditional red salsas have a sweeter flavor and are generally hotter than green verde salsa. Red salsas are traditionally served chilled. Green salsas are best when served either at room temperature or warm, and generally are less spicy.
How to adjust the spice levels in salsas and sauces:
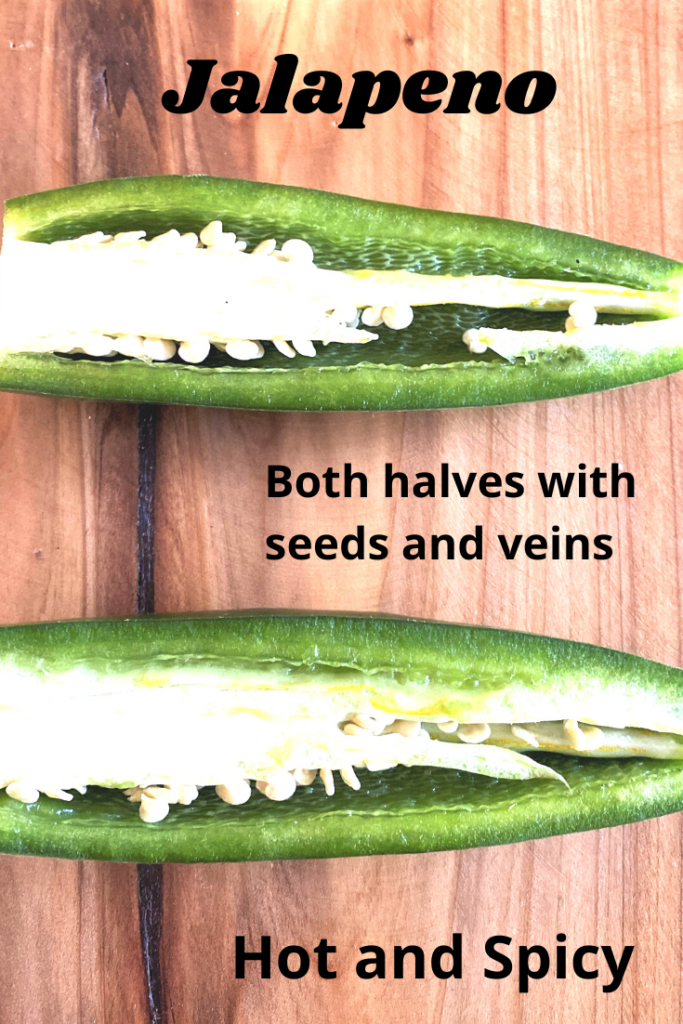
- Hot and spicy – Do not remove the seeds and veins from the jalapenos and add it all to the sauce.
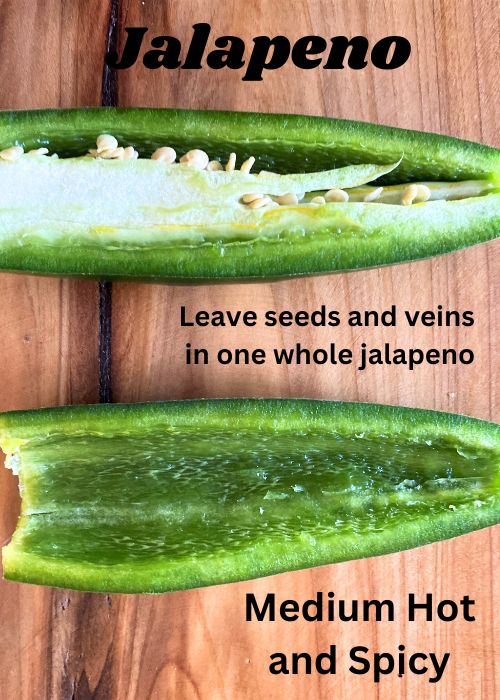
- Medium hot and spicy – Leave the seeds and veins in just one of the two jalapenos that will be added to a sauce.
- Medium spice – Leave the seeds and veins in just one-half of one jalapeno that will be added to the sauce.
- Mild spice – Remove all seeds and veins from the jalapenos that will be added to the sauce.
How long can you store Salsa Verde?
REFRIGERATING: Salsa Verde can be stored in the refrigerator for one week in a covered container. We suggest bringing the salsa to room temperature after refrigerating.
FREEZING: Salsa Verde will also freeze well for up to 2 months. The smoother version freezes better than a chunkier style version. Freeze in a tightly sealed container. When ready to serve allow the salsa to come to room temperature and stir well before serving.
Pro Tips for Making the Perfect Salsa
- Tomatillos are high in pectin, which can result in your salsa tasting soapy or becoming jellied when refrigerated. For this reason, it’s important to soak the tomatillos for about 50 seconds and then rinse them with warm water, before broiling, this is to remove the sticky coating on the tomatillo.
- Pat the tomatillos dry with a paper towel before roasting.
- Let tomatillos, chilis and garlic cool completely before adding to the blender.
- Don’t overprocess any type of salsa in the blender because you want the salsa to have some texture.
- If time allows make the salsa ahead of time and let the flavors marinate in the refrigerator
What are tomatillos?
The tomatillo is also known as the Mexican Husk Tomato and is part of the nightshade family. Tomatillos are small, spherical, and green or green-purple and have a slightly sour flavor. They originated in Mexico and are best known for their use in Salsa Verde and Chili Verde.

Other delicious salsas and sauces to make at home:
- Pineapple Salsa – also perfect with chips
- Cocktail Sauce – great with any seafood
- Sweet Chili Sauce – lightly spicy and sweet – we love it on Grilled Corn on the Cob
- Teriyaki Sauce – a favorite all-around sauce and the perfect sauce for a touch of Asian flavor
Salsa Verde Recipe
Ingredients
- 1½ pounds Tomatillos, skinned and washed
- 1 bunch Cilantro, stems removed
- ½ cup white onion, roughly chopped
- 5 cloves whole garlic
- 2 large Anaheim chiles,
- 2 medium Jalapeno peppers
- 4 Tablespoons Lime juice, freshly squeezed
- ½ teaspoon Kosher salt
- ¼ teaspoon pepper
- 1 pinch red pepper flakes, optional
Instructions
- Remove the papery husks from the tomatillos. Tomatillos have a sticky coating under the papery husk. Remove the husk and soak the tomatillos in warm water for about 50 seconds. Afterward, rinse them by hand. This is an important part of making the finished salsa so don't skip it!
- Pat each tomatillo dry with a paper towel and set aside.
- Preheat the oven to the high broil setting.
- Cut tomatillos in half and place them cut side down on a foil-lined baking sheet.
- Broil tomatillos in the oven on high for 5-7 minutes. When tomatillos are done the outer skin will have a slightly blackened appearance and look charred and toasty.
- Remove from the oven and let the tomatillos rest until completely cooled. Reserve all the juices that have collected during cooking on the foil. This is another important part of making the finished salsa.
- On another sheet pan broil the whole Anaheim chilis along with the garlic cloves (still in their skin) in the oven, turning once until blackened on both sides and the skin appears to lift. This will take about 3-5 minutes per side.
- Let the chilis and garlic cool completely, then remove the skin, seeds, and stems from the chilis, and remove the skin from the garlic. Set both aside.
- Halve the jalapenos, remove seeds and ribs to the spice level desired, (see chart in post to choose your spice level), roughly chop, and set aside.
- Clean, dry, and chop off the stems from the cilantro, and set aside.
- In a blender or food processor place roasted cooled tomatillos with skin, accumulated juices, chilis, jalapenos, garlic, onion, cilantro, lime juice, salt, pepper, and red chili flakes.
- Turn blender or processor on low for a few seconds, then turn it up to high and blend well until all ingredients are mixed together.
- This salsa is best when you make it ahead of time because that allows all the flavors to meld and pop which makes an incredible tasting Salsa Verde!
Notes
- Want to cut the spice a little? Cut back to 1 Jalapeno pepper
- Salsa Verde can solidify when refrigerated. Let come to room temperature before serving and if too thick drizzle in one Tablespoon of water at a time
- Red pepper flakes are optional if you want a little extra heat
Nutrition
Softer than sun-dried tomatoes, they make a great nibble or appetizer but are also perfect for adding to pasta, salads, and other recipes
I fell hard for these flavor-packed oven dried tomatoes on my last trip to Italy. They are more tender than sundried tomatoes and were part of nearly every appetizer and salad I ate while traveling to different Italian regions.
They are irresistible and SO easy to make at home. I’ve been making them regularly and am a little obsessed! There is only about 10 minutes of hands-on work to make these tasty morsels.
No dehydrator is needed and there are just 3 ingredients: Tomatoes, olive oil, and sea salt (plus optional herbs)!
This post may contain affiliate links. Please see our affiliate disclosure for more details.
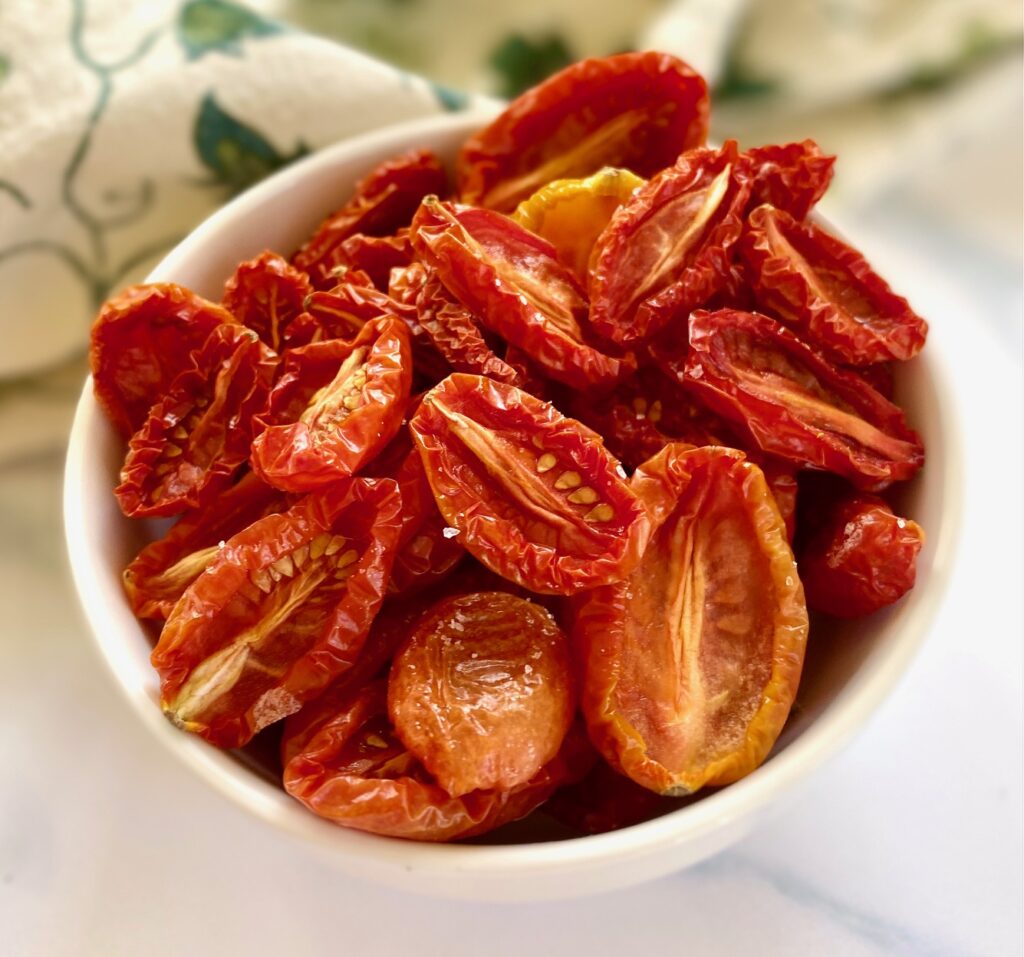
Ingredients needed:
- Tomatoes – cherry, grape, or Roma’s
- Extra Virgin Olive Oil – use the best quality you have on hand
- Sea Salt – this helps pull extra moisture out of the tomatoes as they bake and helps deepen the flavor
- Optional, Italian Herbs – we like rosemary, thyme, oregano, and basil. You can use fresh finely chopped or store-bought dried herbs

How to make Sun Dried Tomatoes in the oven:
- Preheat the oven to 250˚F and position the oven rack in the middle of the oven
- Line a baking sheet with parchment paper or a Silpat-style mat
- Wash and pat the tomatoes dry
- Cut the tomatoes in half from stem to end. If using Roma’s or other larger tomatoes you will need to remove some of the pulp inside and the core at the top near the stem
- Toss the tomatoes with extra virgin olive oil and salt in a large bowl
- Place the tomatoes cut side up on the baking sheet in a single layer
- Bake for one hour, then rotate the tray, to ensure even cooking
- If adding herbs sprinkle them on the tomatoes now and continue cooking for up to one more hour
- The tomatoes are done when they are dried but still soft and flexible. The timing will be different for every batch and every size of tomatoes. Very small tomatoes can be finished cooking in as short as 60-70 minutes so be sure to peek in at them occasionally
- As the tomatoes cook check and remove any smaller tomatoes because they will be finished cooking quicker
- Remove from the oven and allow the tomatoes to cool completely on the tray

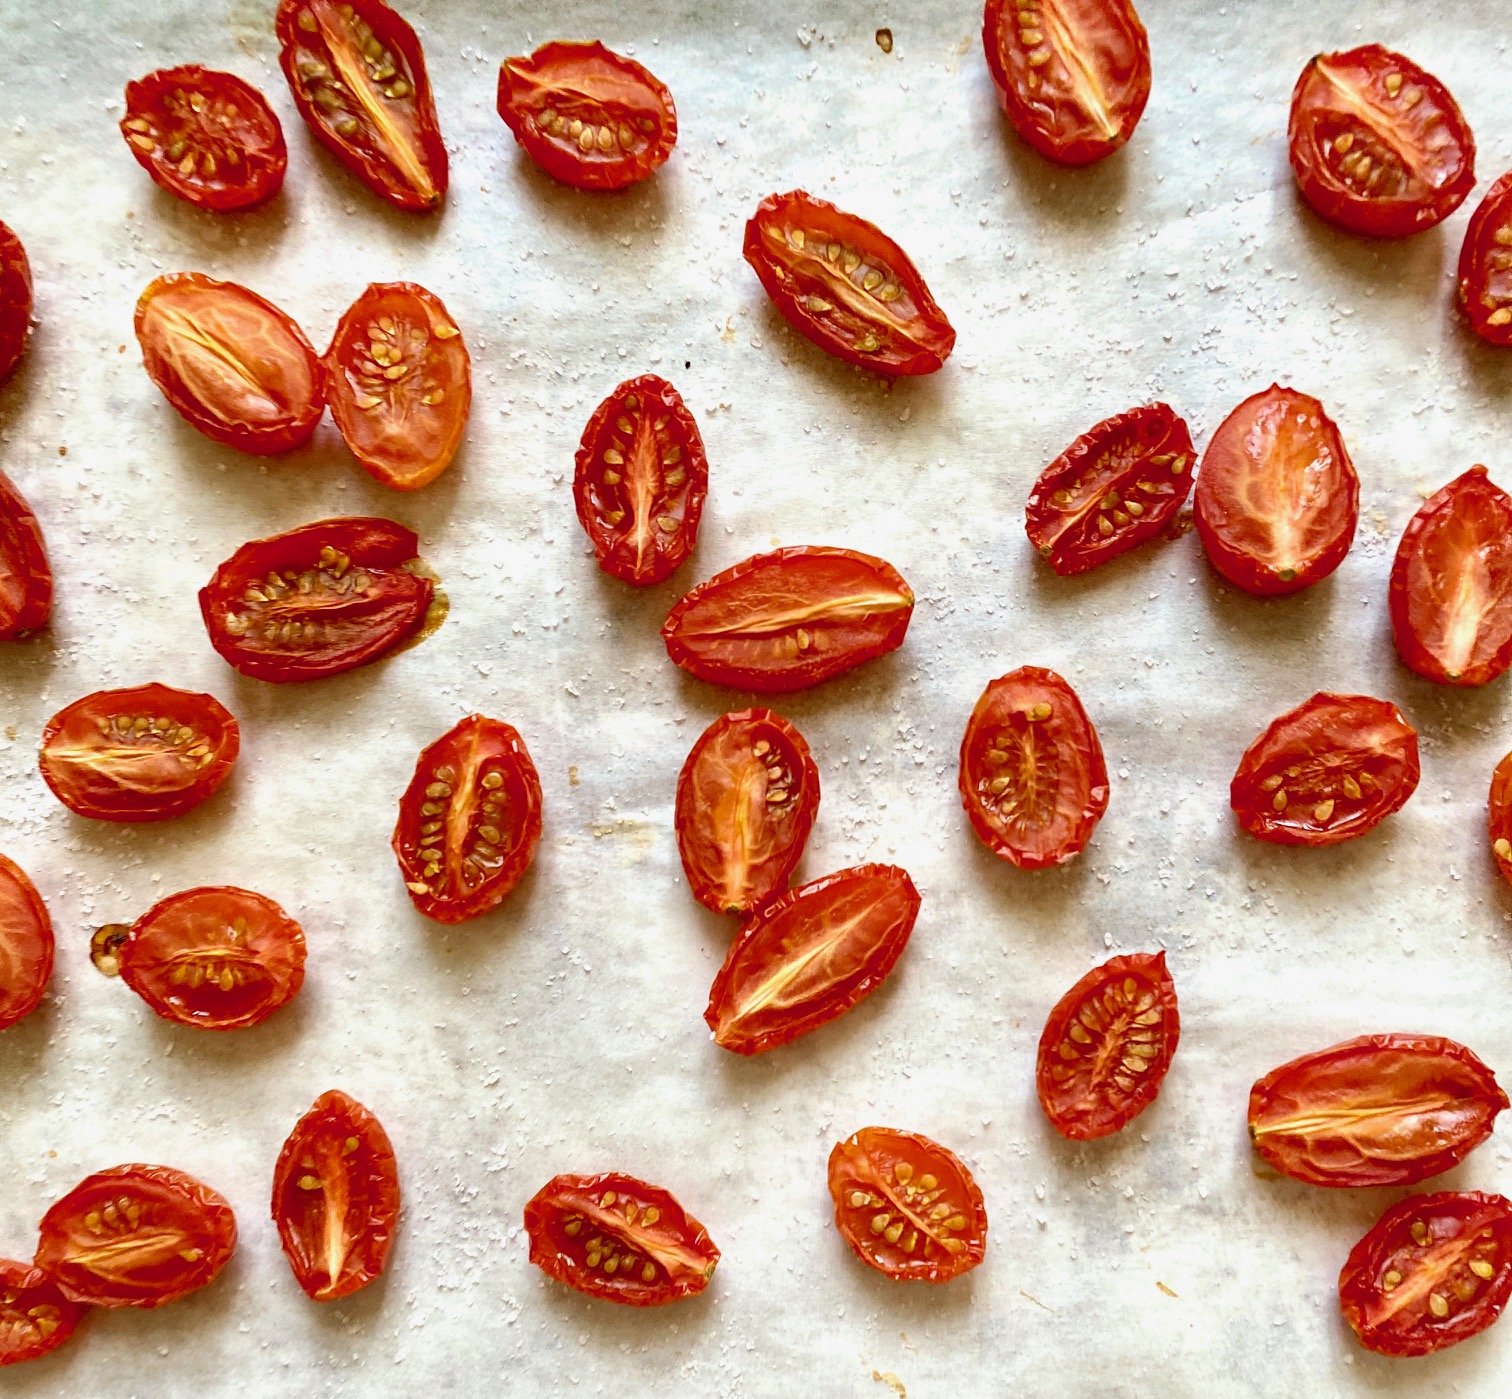
How to store and preserve oven dried tomatoes
Unlike sun-dried tomatoes, these tomatoes still have some moisture remaining so they will need to be correctly stored.
Storing in the refrigerator:
- Place dried tomatoes in a glass jar (or resealable bag) and store in the refrigerator for up to 1 week
- We like to submerge our tomatoes in extra virgin olive oil and keep them in a wide mouth glass jar. The jars make it easy to package the tomatoes as a gift, as well.
- Covering in oil extends the refrigerator life to 3 months
Storing in the freezer:
- Oven-dried tomatoes freeze well. Place them in an airtight freezer bag or container with a touch of olive oil to coat them and then seal the bag and freeze them for 2-3 months. Allow to thaw at room temperature before using

Are oven-roasted tomatoes the same as sundried tomatoes?
Yes and no. They have almost the same ingredients but different cooking times.
Sundried tomatoes are traditionally dried over many days in the sun or can be cooked at a low oven temperature for about 10 hours. As a result, most of the tomato juices are completely dried up. Sundried tomatoes are also chewier than roasted tomatoes.
You may have also heard roasted tomatoes referred to as ‘tomatoes confit‘, which is similar but usually includes cooking them in a larger amount of olive oil. The French term “confit” simply refers to something that has been slowly and gently cooked in oil.

Tips for Success
- The best way to preserve your baking sheet is to line it with parchment paper. This also makes clean-up super quick. The tomatoes won’t stick to parchment which makes it easy to remove them
- Look for tomatoes that are roughly the same size for even cooking
- Always cook the tomatoes cut side up
- Dried or fresh herbs both work well but be sure to finely chop the fresh herbs
- Be careful not to over-salt the tomatoes since the flavor will intensify as they cook. You can always add more after cooking, if needed
- Always keep the tomatoes submerged in oil for the longest shelf life in the refrigerator
How to use:
Now that you’ve created these amazing tomatoes how do you use them? There are so many ways!
- Perfect on a charcuterie board or with any snack board
- Add to salads or soups
- Top your pasta or pizza
- Serve with fresh crusty Italian-style bread
- Great in sandwiches or on top of a burger
Looking for more easy appetizer ideas?
- Baked Brie with Garlic would be even more amazing with these tomatoes drizzled on top
- Use these tomatoes atop our Perfect Bruschetta
- Pair with crunchy Honey Roasted Cashews or Candied Pecans
Make it Tuscan style
The inspiration for these tomatoes came from a simple but flavorful salad I enjoyed at Ristorante La Castellana. It’s located in the picture-perfect hills above Greve, Italy (Tuscany) in a village called Montefioralle. Everything was prepared beautifully and this simple combination of artichoke hearts, sun-kissed tomatoes, and olives was one of my favorites!


Oven Dried Tomatoes
Equipment
- Sheet Pan
Ingredients
- 4 cups tomatoes cherry, grape or plum variety
- 1 Tablespoon sea salt (or to taste)
- 2 Tablespoons extra virgin olive oil
- mixed herbs optional, dried or fresh
Instructions
- Preheat the oven to 250 °F. Position the oven rack in the center of oven.Line a baking sheet with parchment paper or silpat mat
- Wash the tomatoes and pat dry. Slice the tomatoes in half (from stem to end). Put the tomatoes in a large bowl and toss gently with the olive oil, and sea salt. Place the tomatoes cut side up, in a single layer, on the baking sheet.
- Bake for 1 hour, rotate the tray, add herbs now if using, and bake for an additional 30-60 minutes. Baking times will vary based on the actual size of the tomatoes. Larger tomatoes, such as Roma's, can take up to 3.5 hours in total. Cherry tomatoes can take as little as one hour.
- The tomatoes are done when they are dried but still soft and flexible. If there are smaller tomatoes be sure to remove them toward the end of the cooking time to be sure that they don't burn.
- Remove from the oven and allow to cool completely on the tray.
- If not using immediately, store tightly sealed in the refrigerator for up to 1 week. Alternately, pack the cooled tomatoes in jars and submerge them with olive oil (and more herbs if desired), and store, sealed, in the refrigerator for up to 3 months.
Adding seasoning:
- If planning to add seasonings while cooking, such as dried herbs or spices, sprinkle them on the tomatoes around the 1-hour cooking mark.
Notes
- Tomatoes will shrink in half during cooking. Therefore, 4 cups of uncooked tomatoes will end up as about 2 cups of soft oven-dried tomatoes.
- This recipe can be doubled
- If using larger tomatoes, such as Roma’s, slice in half and remove some of the insides of the tomatoes for more even cooking
Nutrition
Making crab stuffed mushrooms is actually a very easy process and can also be done ahead of time. With just a few simple ingredients this decadent appetizer that will having your guests raving and asking for the recipe!
With just six main ingredients, plus a garnish, this is one of those easy recipes that comes together quickly. It is a special occasion appetizer that looks like you have been in the kitchen for hours!
This post may contain affiliate links. Please see our affiliate disclosure for more details

Ingredients to make Crab-Stuffed Mushrooms
- Cremini mushrooms or baby bellas – we like to use a combination of smaller mushrooms and large mushrooms
- Fresh crabmeat – we recommend real crab meat, not imitation crab
- Shredded mozzarella cheese – you can shred your mozzarella or purchase it shredded from the grocery store
- Seasoned Italian breadcrumbs – pre-seasoned breadcrumbs will add more flavor to the finished dish
- Garlic salt – you can also use minced fresh garlic
- Cayenne pepper – gives the recipe an extra kick of flavor
- Olive oil– Use a high-quality olive oil for best flavor
- Garnish – either chopped Italian fresh parsley or chopped fresh chives

How to make easy Crab Stuffed Mushrooms
- Preheat the oven to 450°F.
- Line a baking sheet with parchment paper, or brush a sheet pan lightly with olive oil.
- Clean the mushrooms (see our recommended method below).
- Remove the mushroom stems and gills. The gills are the inner papery fibers and you can easily scrape them out with a spoon.
- Place mushroom caps hollow side up on a prepared baking sheet.
- Finely chop the mushroom stems to add to the filling and set aside in a small bowl.
- Check the crab mixture for any small pieces of shell. Set aside.
- Shred the mozzarella cheese.
- In a medium skillet, over medium heat, warm olive oil and cook the chopped stems until tender, about 10 minutes.
- Add in the crab meat, garlic salt, and cayenne pepper. Stir to ensure all spices are well mixed into the crab mixture.
- Add shredded cheese evenly over the mixture and then do the same with the bread crumbs.
- For best results mix all ingredients thoroughly as the cheese melts making sure to fold the crab and spices into the cheesy filling until evenly blended. Remove from the heat.
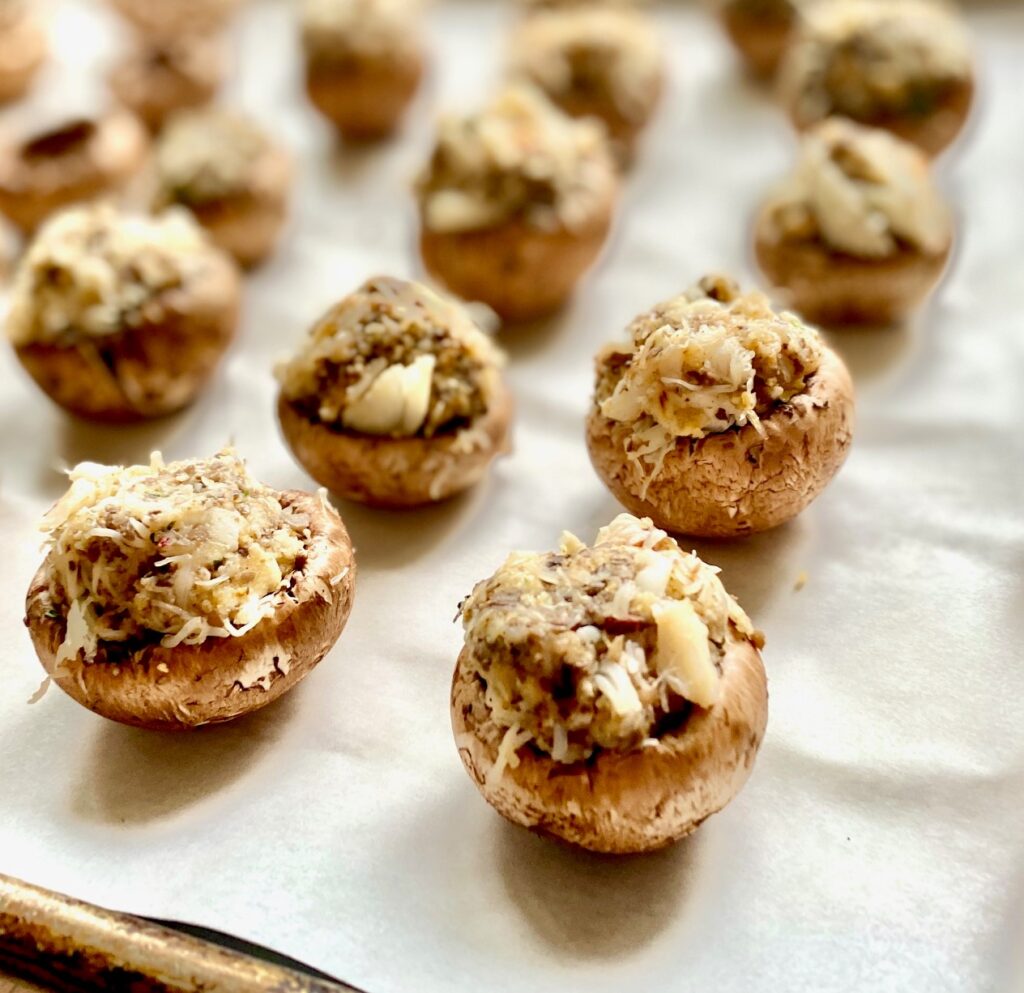
- With a spoon take a small scoop of the crab filling and place it in each mushroom cap. Make sure the cap is heaping full with the crab filling.
- Place crab filled mushrooms in the hot oven. Baking time is about 15 minutes.
- Remove from the oven, garnish with chopped parsley or chives, and serve warm.
Removing Stems and Gill from mushroom:
We recommend removing both the stems and the gills for two reasons. Most importantly, this allows for more surface area to add in the delicious crab mixture!
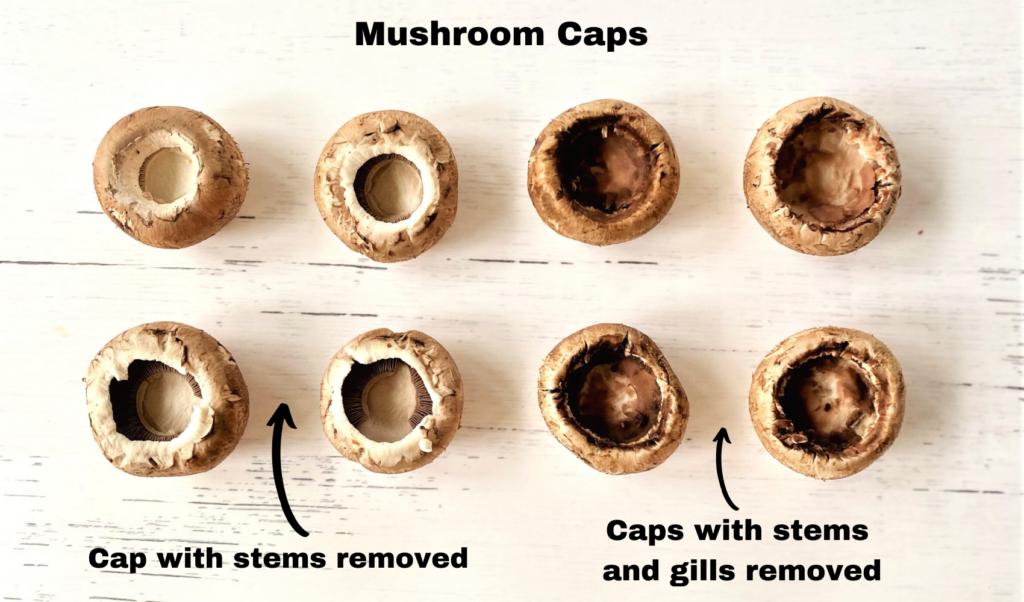
Secondly, the gills sometimes hide a little sand from when the mushrooms were grown, so scooping them out prevents any grittiness. See the photo above for an example of mushrooms with the gills removed.
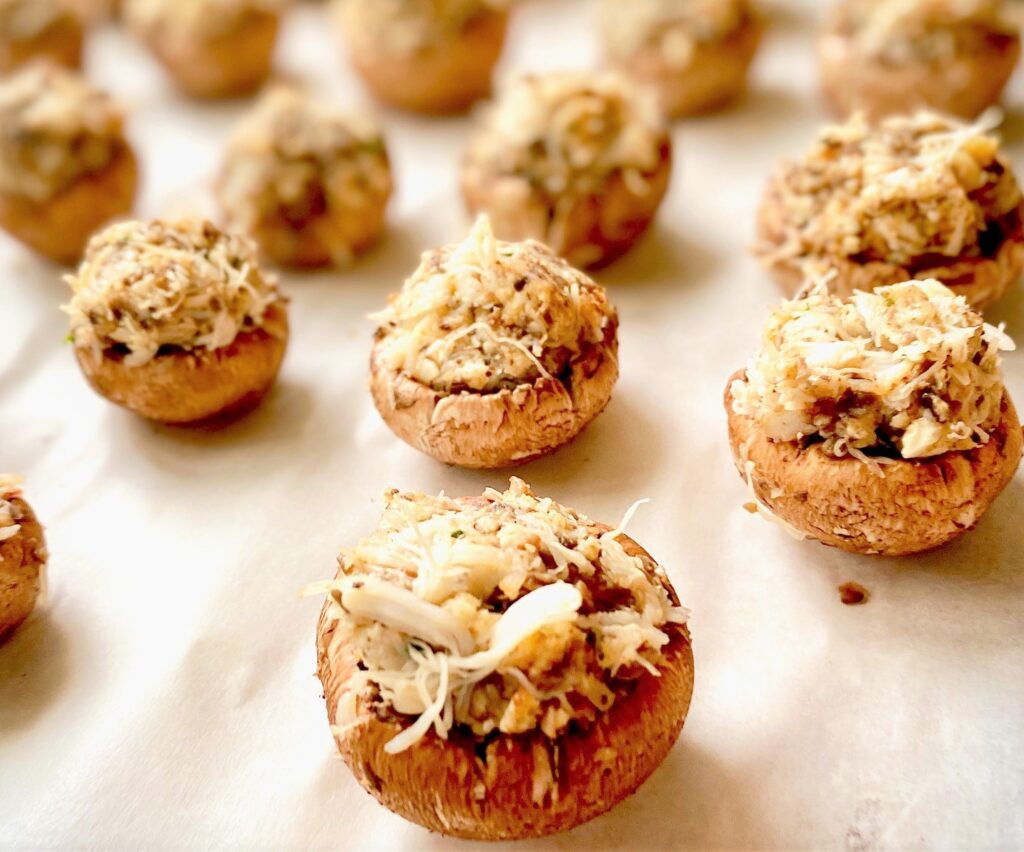
What is the best type of crab to use for stuffed mushrooms?
Even though we highly recommend you only use fresh or fresh frozen crabmeat to make these crab stuffed mushrooms we understand that fresh crab meat is not always available in all locations. So, if you cannot locate fresh tender crab meat you can substitute cooked Italian sausage in its place. We do not recommend using imitation crab meat.
What to serve with Crab Stuffed Mushrooms:
We recommend serving this easy stuffed mushroom recipe as a perfect appetizer for the holiday season or a light side dish along with a main dish entree.
We love serving them alongside our Tomahawk Steak or Beef Wellingtons for a surf and turf combo. They also make the perfect light lunch when paired with our Strawberry Spinach Salad or our Arugula Beet Salad with Goat Cheese.
Wine pairing recommendations
These decadent mushroom bites pair well with:
- A light-bodied German Reisling or a buttery California Chardonnay
- For a red pairing we recommend an Argentinian Malbec
How to clean mushrooms:
Mushrooms naturally have some sand and/or dirt on them and inside the gills. Mushrooms are like little sponges so never soak or submerge them or you will end up with very watery mushrooms!
The best way to clean them is to give them a quick rinse in cold water. Then gently brush them clean with a brush, or use a damp paper towel to wipe mushrooms clean and pat them dry.
Tips to keep your mushrooms from becoming soggy
- Bake mushrooms at a high temperature. We bake our mushroom at 450˚F degrees for this recipe which keeps them firm
- Mushrooms absorb water like a sponge. So, as we shared above, when cleaning, don’t soak in water, just use a damp paper towel or brush to wipe mushrooms clean.
Why are my mushrooms rubbery?
If your mushrooms are damp the heat from the oven will cause them to steam. The steam is what creates a rubbery or chewy texture to finished mushrooms. So, be sure to pat them dry before baking.
We recommend that you use parchment paper on your baking sheet when cooking. This will help to absorb any excess moisture (as well as make clean up a breeze!).

Can Crab Stuffed Mushrooms be frozen?
The simple answer is YES!
However, you can not freeze cooked stuffed mushrooms. Stuffed mushrooms with crab meat can be frozen once they have been fully prepared but not yet baked. This is a great way to get a head start on any party appetizers!
Freeze prepared crab stuffed mushrooms on a sheet pan, once they are frozen you can transfer them to an airtight container or a freezer bag and store them for up to 3 months.
When you are ready to serve the mushrooms, remove them from the freezer. Place on a lined sheet pan and let the mushrooms completely thaw. Then cook as normal, garnish, and serve right away.


Easy Variations for Stuffed Mushrooms
Here are a few fun variation ideas for making delicious and easy stuffed mushrooms. Just substitute any of these ingredients for the crab in our recipe. The remainder of the instruction will stay the same.
- Cooked sausage or Italian sausage
- Chopped, cooked lobster or cooked shrimp
- Ground turkey or chicken, precooked
- Portobello mushrooms, chopped and cooked
Additional Appetizers for your next get-together
- Coconut Shrimp Recipe served with zesty Pineapple Salsa

Crab Stuffed Mushrooms
Ingredients
- 30 medium mushrooms (baby bellas, crimini)
- ⅓ pound crab meat
- ½ cup mozzarella cheese shredded
- ¼ cup seasoned breadcrumbs
- 1 pinch garlic salt
- 1 dash cayenne pepper
- 1 Tablespoon Italian parsley, for garnish (or chopped chives)
- 2 Tablespoons olive oil
Instructions
- Preheat oven to 450°F. Line a baking sheet with parchment paper, or brush a pan lightly with olive oil.
- Remove stems and gills from mushrooms. Chop stems for filling and set aside. Place prepared caps on the baking sheet.
- Check crab mixture for any pieces of shell. Set aside.
- Shred mozzarella cheese.
- In medium skillet, over medium heat, heat olive oil and cook chopped stems until tender, about 10 minutes.
- Stir in crab meat, garlic salt, cayenne pepper, blend together.
- Add in shredded cheese and bread crumbs. Folding into crab filling. Blend together well. Remove from heat.
- With a spoon scoop crab mixture and place in mushroom cap. Make sure the cap is heaping full with the crab mixture
- Place on prepared baking sheet. Bake for 15 minutes
- Remove from oven, garnish with chopped parsley or chives, and serve warm
Notes
- Be sure to pat mushrooms dry after cleaning
- Need a crab substitution? Try cooked crumbled Italian sausage, turkey, chopped mushrooms, chopped shrimp or lobster, or additional breadcrumbs