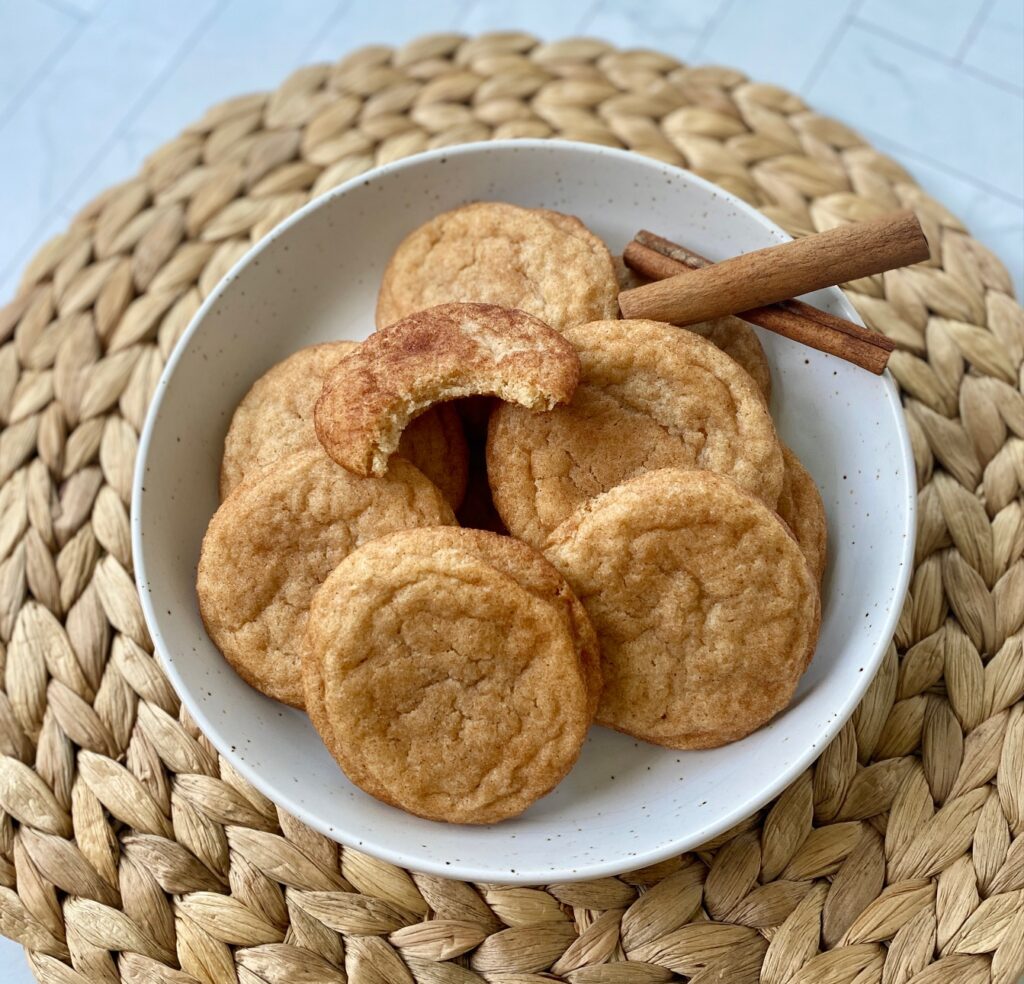
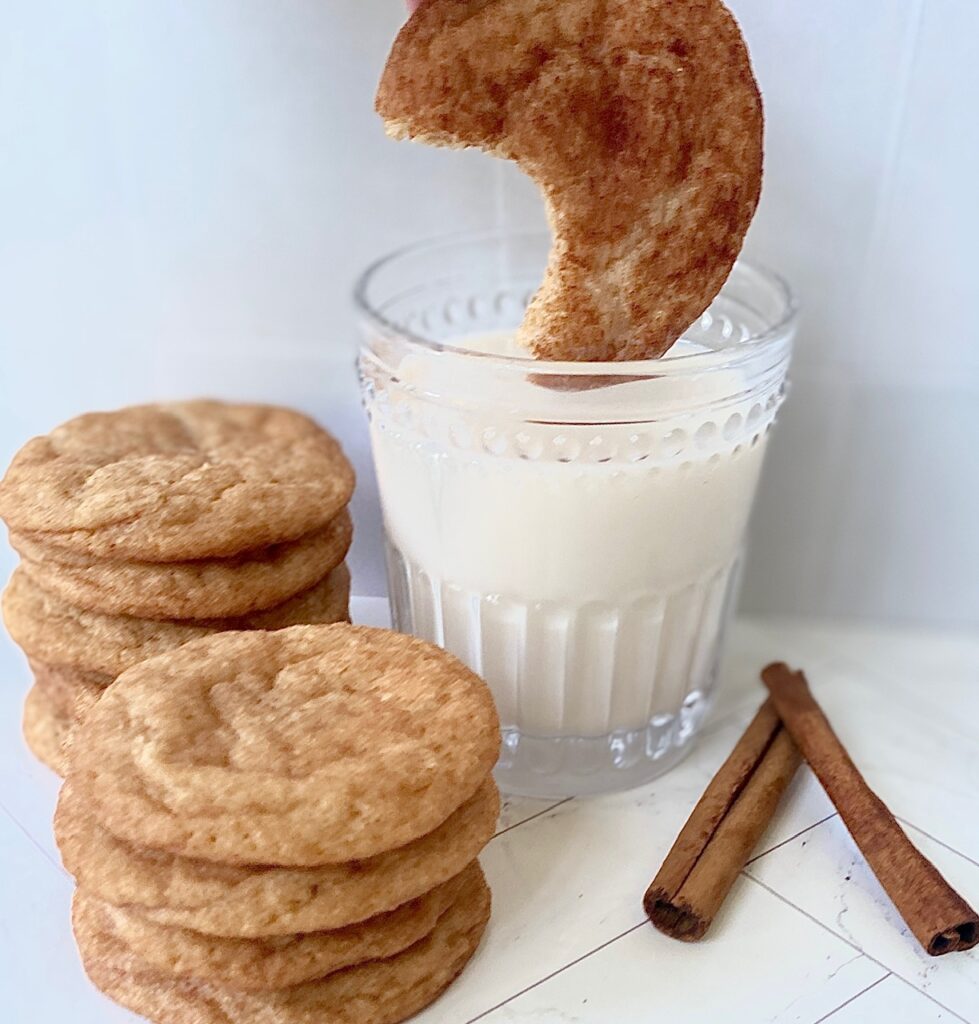
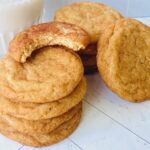
A classic cookie, with a chewy texture and a light tang, we think these are the perfect Snickerdoodle Cookie! What’s not to love? They are easy, full of flavor, use simple ingredients, are soft, and ready in less than 30 minutes.
Every bite is so satisfying! Cookie perfection!
This post may contain affiliate links. Read our affiliate disclosure policy for more details.
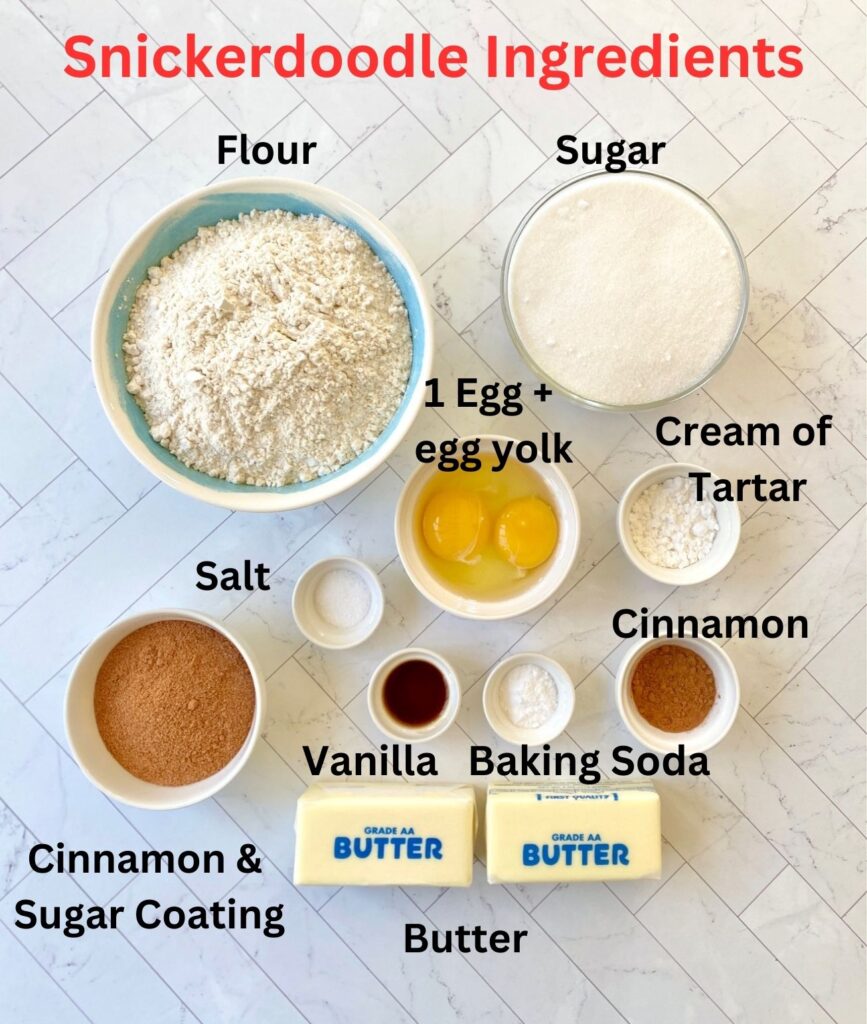
Ingredients Needed
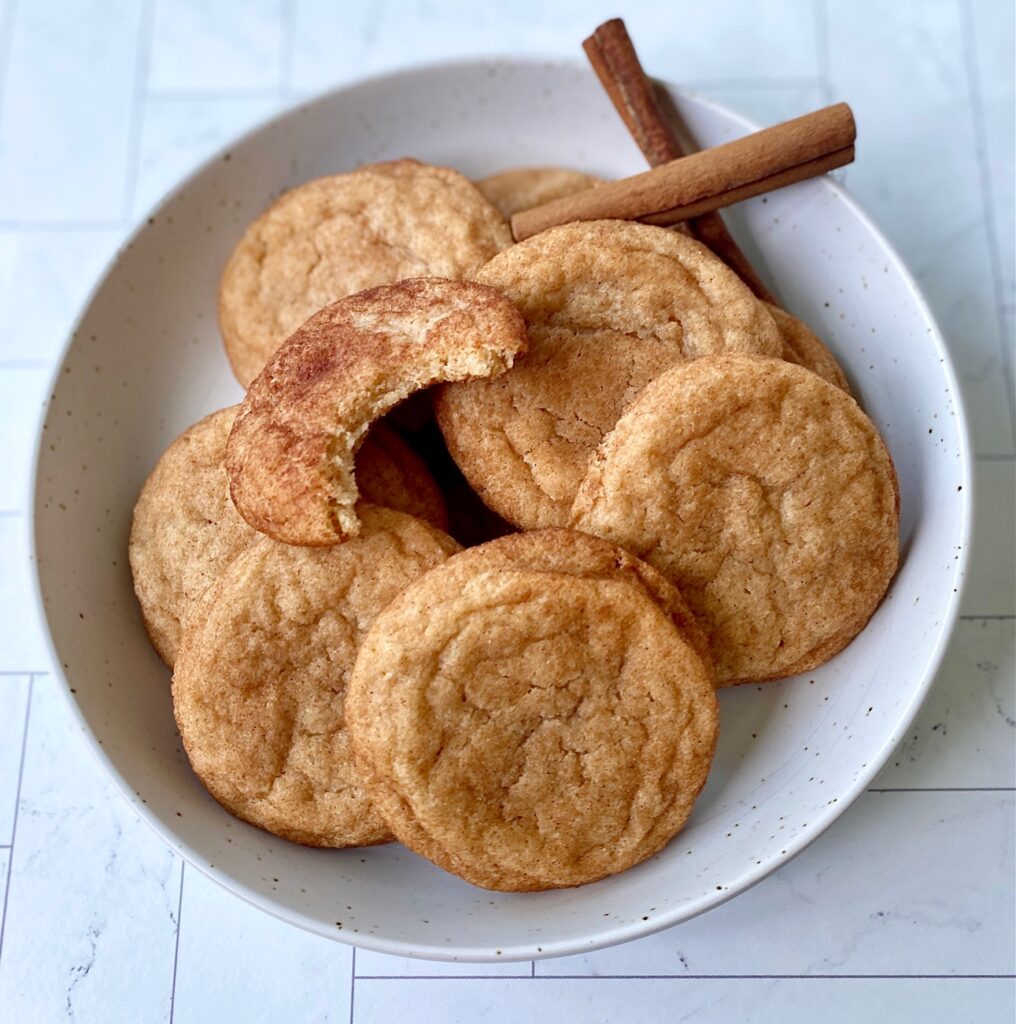
Homemade Snickerdoodle Cookies are comforting favorite cookies for a reason. They are easy to prepare and you probably already have all 9 ingredients needed to make them in your pantry and refrigerator right now!
- FLOUR – use all-purpose flour for the best structure
- CREAM OF TARTAR – the key to giving Snickerdoodles that classic tangy flavor. An essential ingredient that works in combination with baking soda to create an acidic chemical reaction
- BAKING SODA – this leavening agent works in conjunction with the cream of tartar. Without it, the cookies would be flat and lack the beautiful crackle on top
- CINNAMON – this separates Snickerdoodles from sugar cookies! Make sure to use your best cinnamon for this recipe because it’s the star of the show and it’s used in both the dough and the cinnamon sugar coating
- SALT – helps balance sweetness and enhance any baked good
- BUTTER – we use unsalted butter, and it should be room temperature but not warm
- SUGAR – regular granulated sugar which is used in both the dough and the cinnamon sugar mixture for the coating
- EGG + EGG YOLK – the added egg yolk makes these cookies beautifully soft. Room-temperature large eggs work best
- VANILLA EXTRACT – use pure extract. Have you tried making Homemade Vanilla yet? It’s easy and there are only two ingredients.
How to make the perfect Snickerdoodle Cookie
You can make these cookies fast without chilling the dough, so if you’re planning to bake them right away, preheat the oven to 375˚F before you get started mixing.
TIP: Use a handheld mixer or a stand mixer with the paddle attachment. You could also mix the dough by hand with a wooden spoon as my mother-in-law does, however, it’s a bit of a workout creaming the sugar and butter!
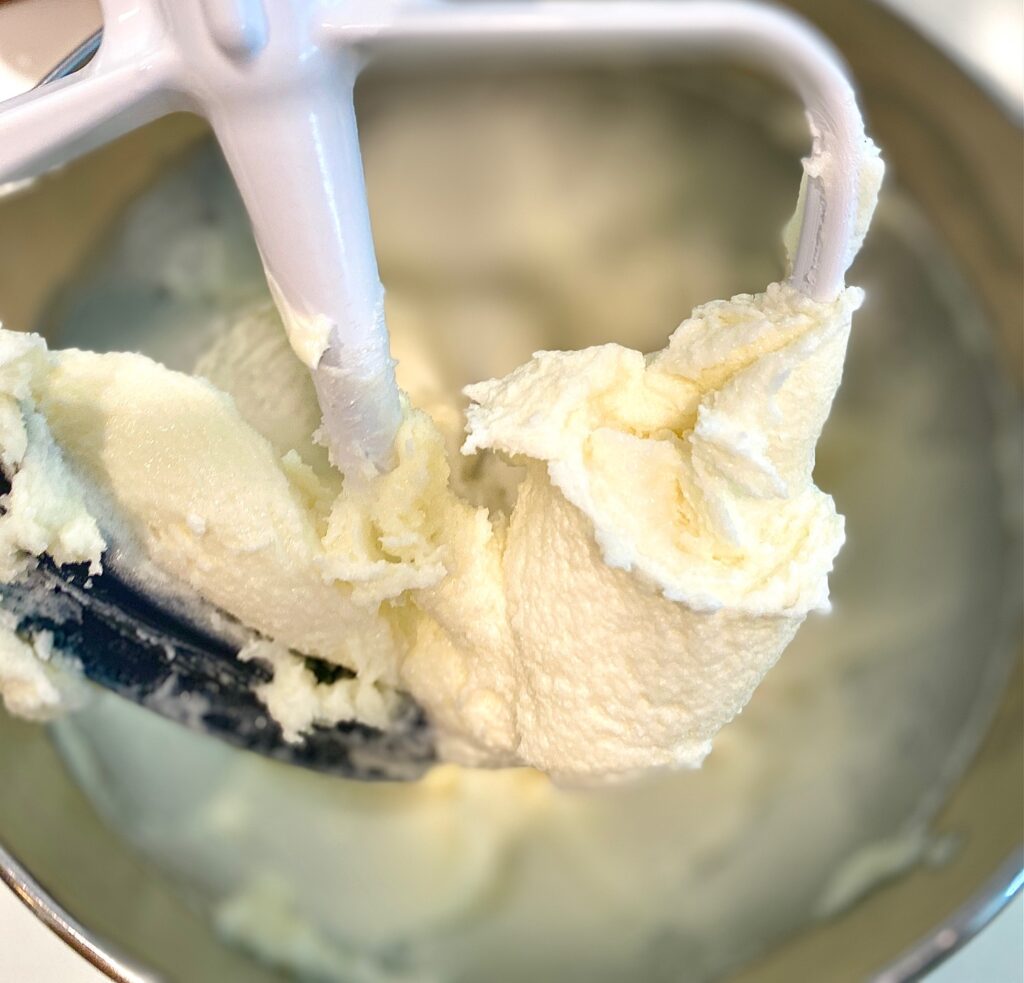
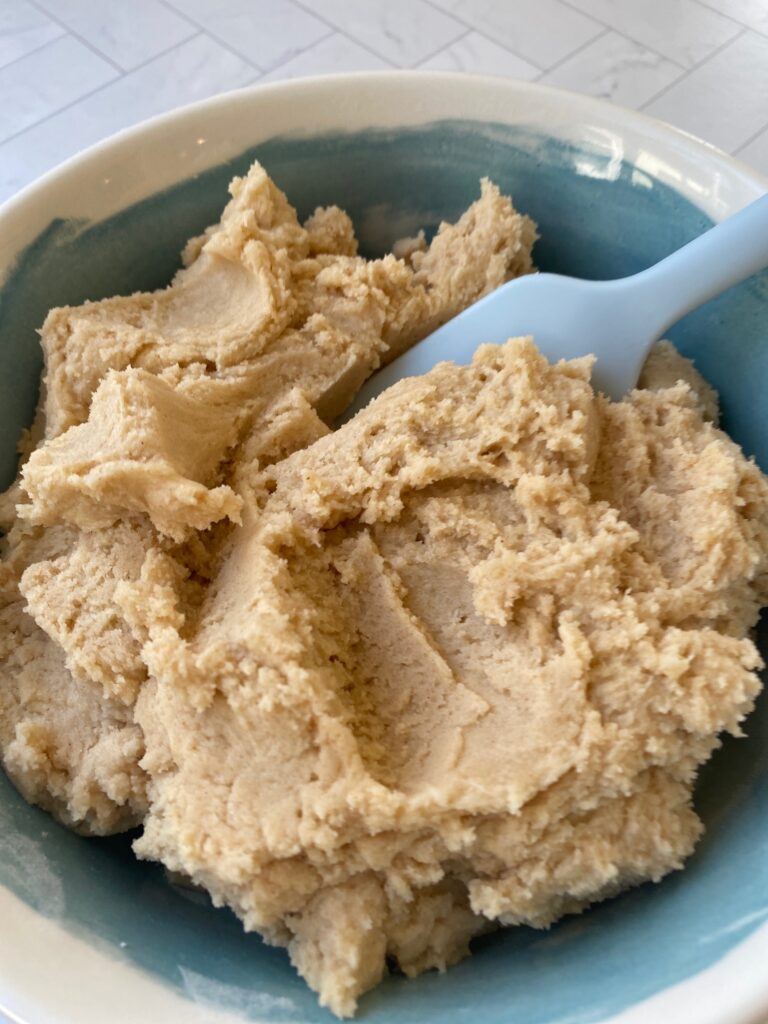
- CREAMING: In the large bowl of a stand mixer fitted with a paddle attachment, or a hand mixer, begin creaming the butter and the sugar together on medium speed.
- This will take about 3 minutes and is important for whipping air into the cookie dough and helping the butter coat the sugar. Scrape the sides of the bowl once or twice while mixing.
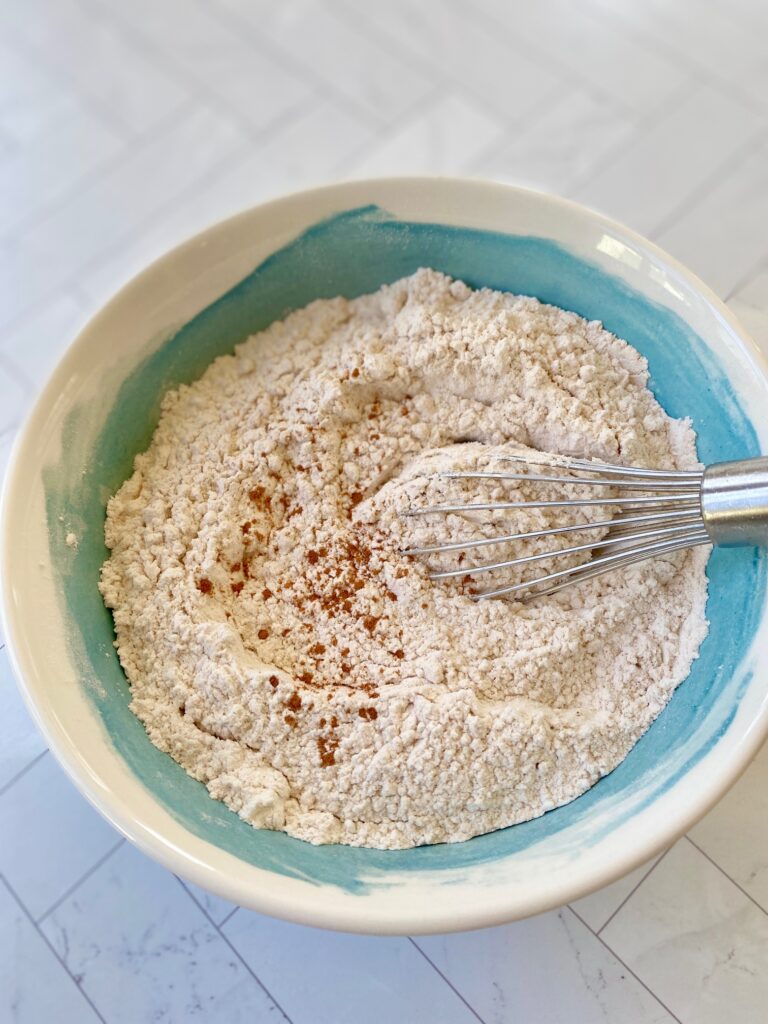
- DRY INGREDIENTS: While the butter/sugar mixture is creaming blend in a separate medium bowl: flour, cream of tartar, cinnamon, baking soda, and salt. Set aside.
- COMBINE: Add the egg, egg yolk, and vanilla extract to the butter/sugar mixture and blend on medium speed until combined.
- MIX: Add half of the reserved flour mixture to the wet ingredients and mix on low speed until combined. Add the remaining flour mixture and blend until no streaks remain.
- OPTIONAL CHILLING: Cover and chill the dough for 30 minutes (or up to 24 hours). Chilling will result in a puffier cookie.
- PREP PAN: Line a baking sheet with parchment paper, if desired
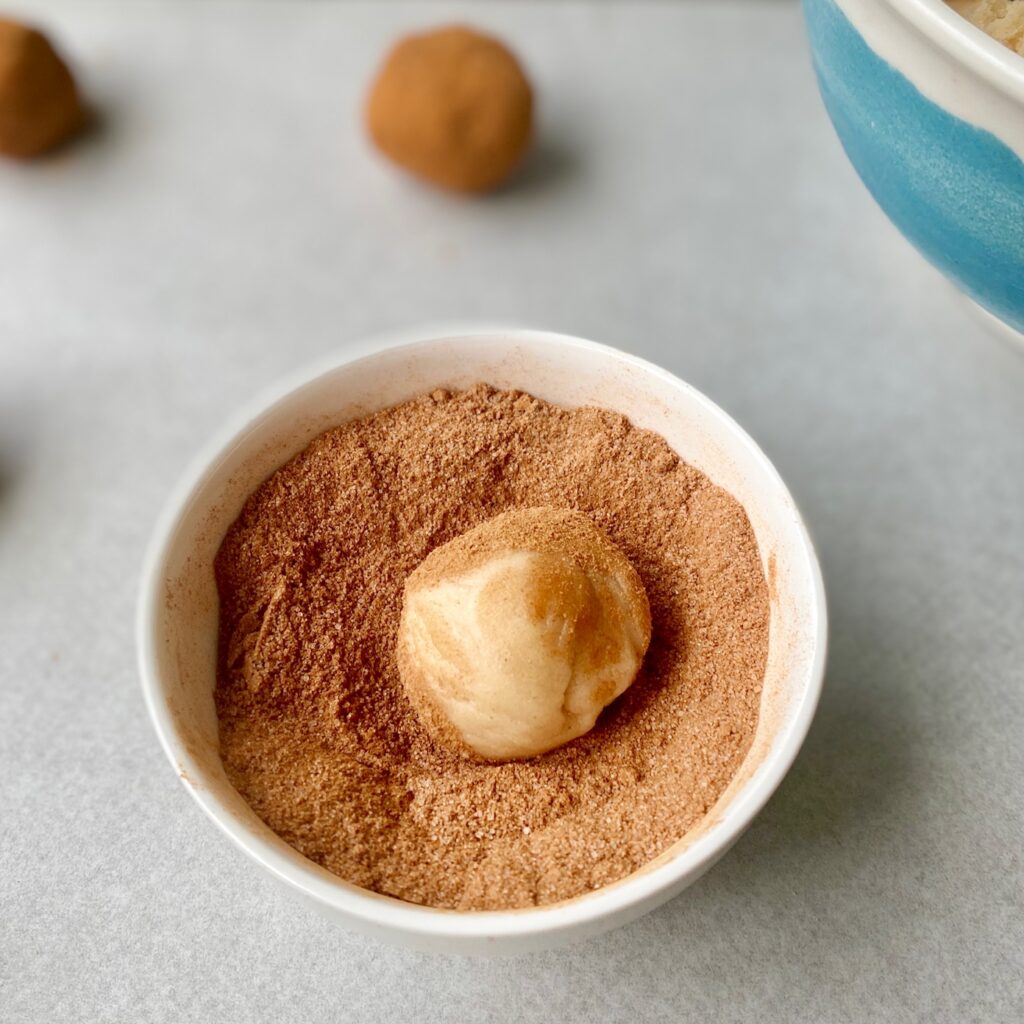
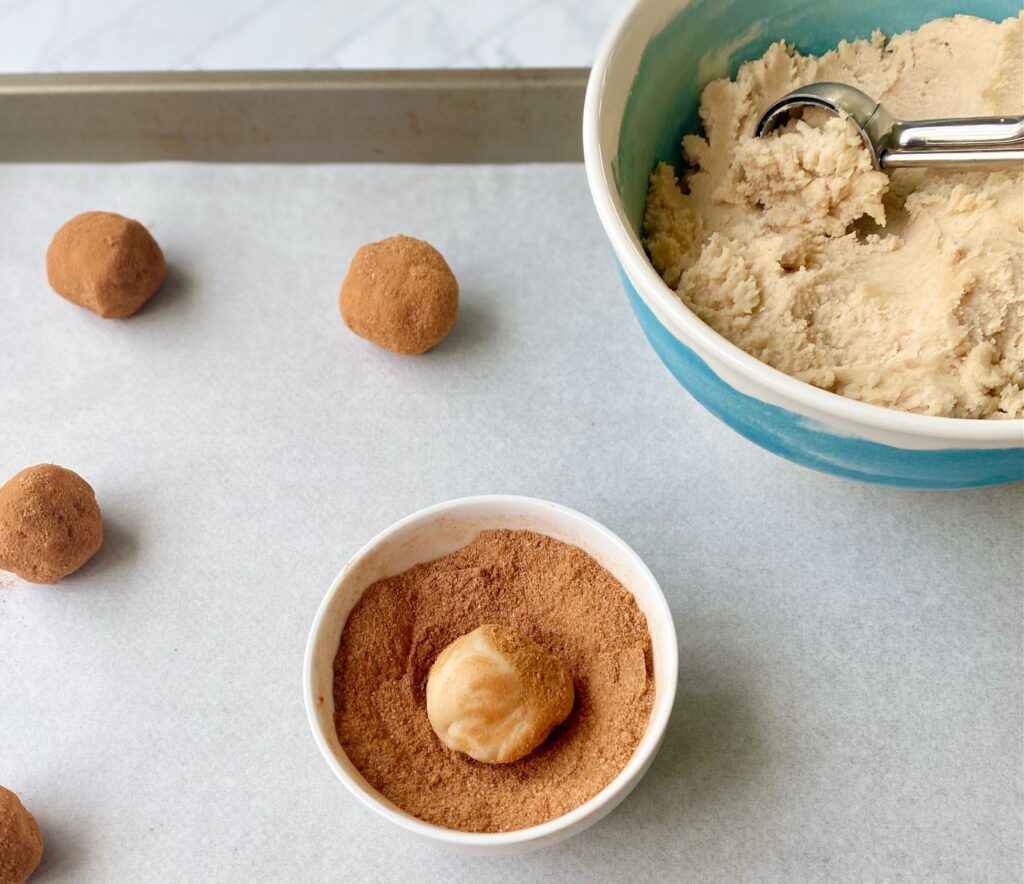
- CINNAMON SUGAR COATING: Mix 1/4 cup sugar and 2 teaspoons cinnamon in a small bowl to make the coating
- SCOOP THE DOUGH: Scoop cookies and roll them into smooth, round balls (we make ours about 2 inches around using a cookie scoop)
- COATING: Drop the rounded balls into the cinnamon-sugar mixture and coat the entire cookie twice to ensure they are heavily coated
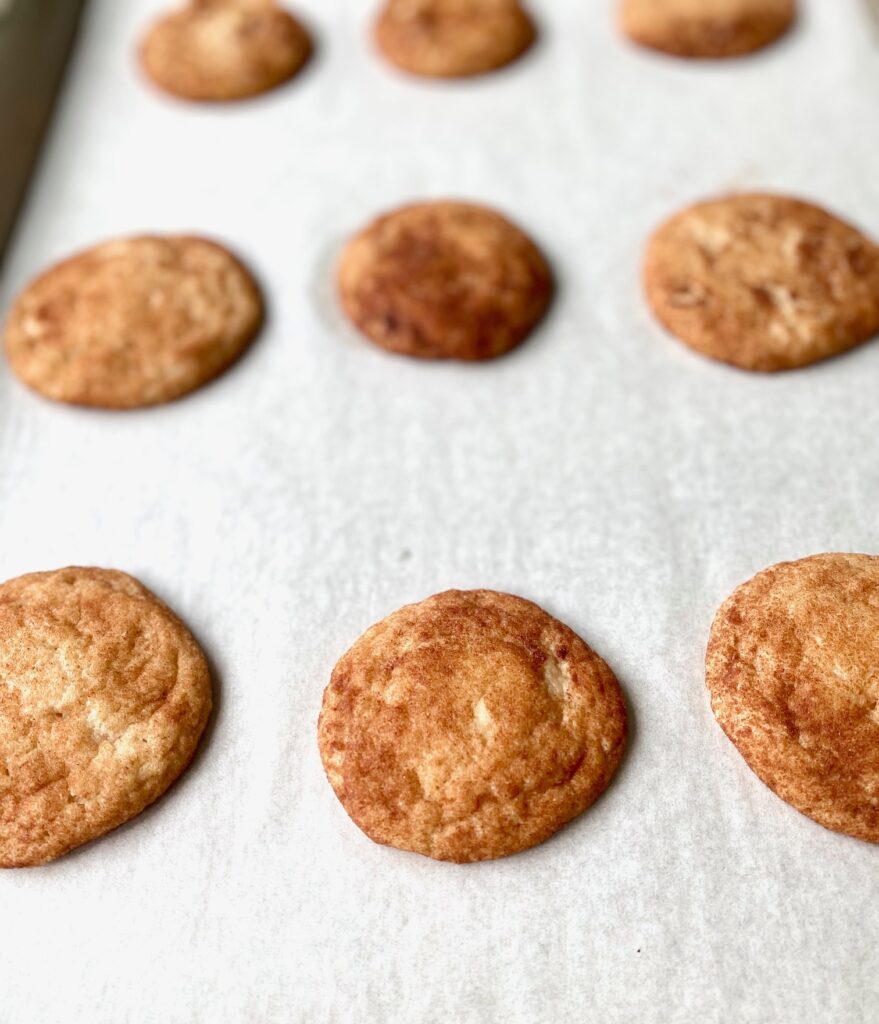
- BAKE: Place the coated cookie dough balls on the prepared pan, spaced evenly apart (about 3 inches), and bake for 8-11 minutes.
- CHECKING FOR DONENESS: The edges will be set and the middle of the cookie will still be a bit soft and crackly. The color should be light golden, but not pale. The cookies will puff up in the oven and settle back down while cooling.
- COOL: Let the cookies rest on the pan for 1-2 minutes and then remove to a wire rack for at least 5 minutes to allow them to firm up.
How to Store Baked Snickerdoodles
- ROOM TEMPERATURE: Store the cooled cookies in an airtight container for 4-5 days (we’ll be surprised if there are any leftovers after the first day – we had to hide a few to test this part!)
- FREEZER: These cookies freeze beautifully! Store cooled baked cookies in a freezer-safe bag or container for up to 3 months. Allow to thaw at room temperature for 30 minutes before serving.
- FREEZING DOUGH: Roll cookies into balls and freeze for up to 3 months, remove from freezer when ready to bake and let thaw for 30 minutes, then roll in cinnamon sugar coating and bake.
Do I need to chill Snickerdoodle cookie dough?
- Nope! This easy recipe doesn’t require chilling because of the high flour content.
- You can chill the dough, covered, for up to 24 hours before baking. The result will be a puffier cookie with less crinkly tops.
- If it’s a very hot day (or just hot in your kitchen) you can chill the dough for 10 -15 minutes and this will help the cookies retain their shape.
Tips & Hints
- Why are my Snickerdoodles dry? Dry cookies usually indicate too much flour in the dough. Be sure to lightly add flour to a measuring cup with a spoon. Never scoop flour directly from the container because that will compress it and you will end up with extra flour.
- Why are my Snickerdoodles hard? They’ve been overbaked. Start checking them at the 8-minute mark and remove them when they are still a little soft because they will continue cooking slightly on the pan while they cool. Slightly underbaked is the way to go!
- We always use parchment paper when we bake cookies to line our baking sheets. It makes clean up a breeze!
- Use room-temperature butter and eggs for the best results
- Check your cream of tartar and baking soda for freshness before using
- Want a flatter cookie? Rap the cookie sheet gently at the end of the bake to help deflate the cookies.
More fun cookie recipes and dessert ideas
- Good old-fashioned Drop Sugar Cookies with no rolling or cutting are a cinch. Frosting optional!
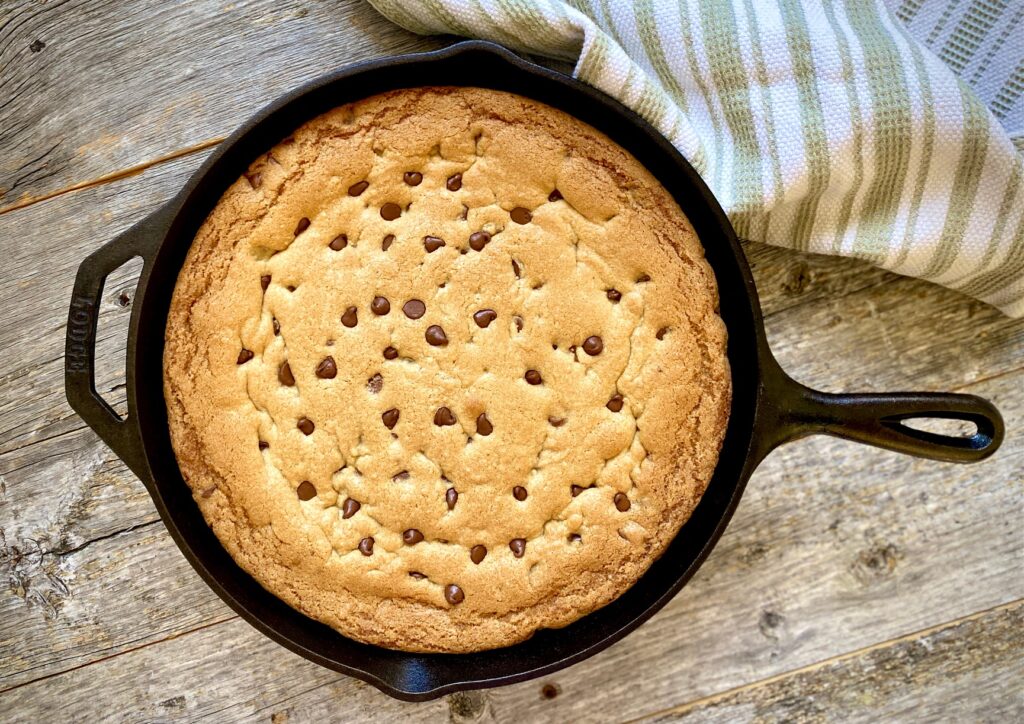
- A gooey Chocolate Chip Skillet Cookie is fun for a crowd
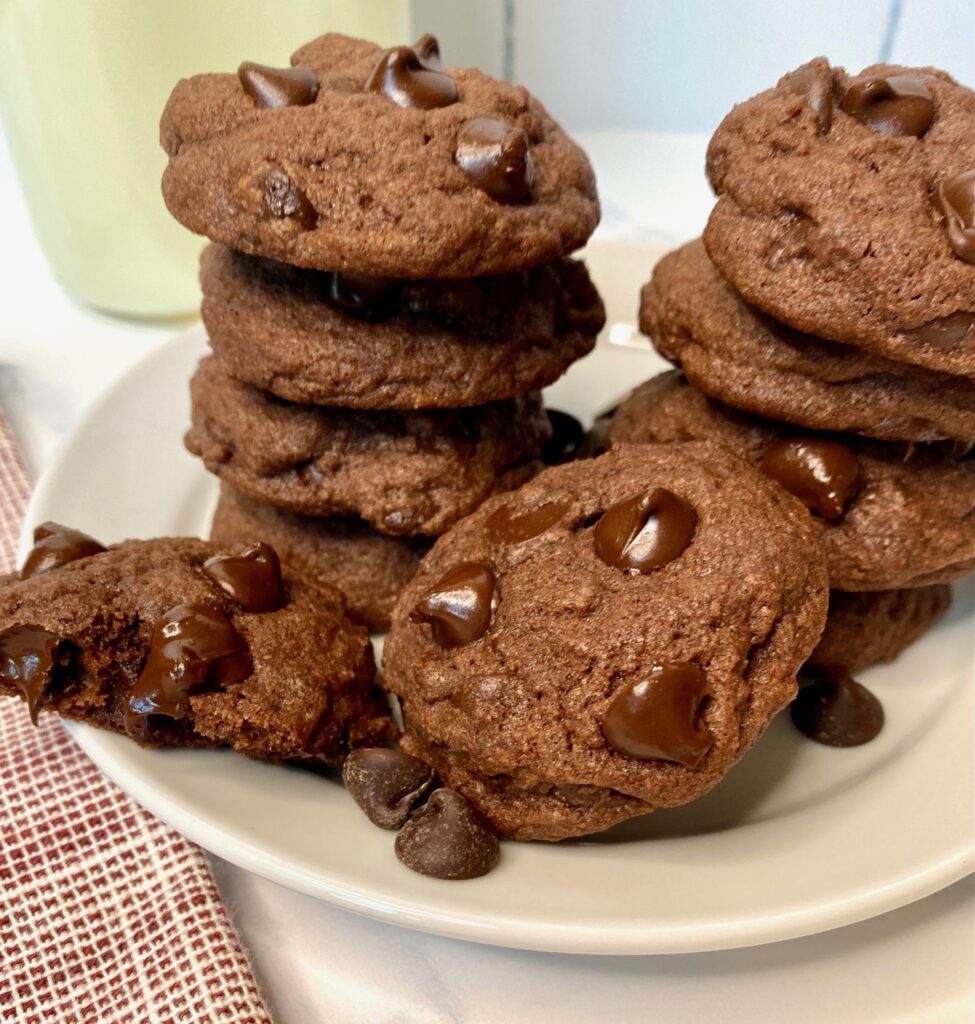
- Double Chocolate Chip Cookies are ideal for the dark chocolate lover
- Sugar Cookie Bars are simple and delicious. Add sprinkles for the kids!

Snickerdoodle Cookie Recipe
Ingredients
Cookie Dough:
- 2 ¾ cup all-purpose flour (spooned and leveled)
- 2 teaspoons cream of tartar
- 1½ teaspoons cinnamon
- 1 teaspoon baking soda
- ¼ teaspoon salt
- 1 cup unsalted butter, (soft but not warm)
- 1 ½ cups sugar
- 1 whole egg + 1 egg yolk (room temperature)
- 1 teaspoon vanilla extract
Cinnamon Sugar Coating:
- ¼ cup sugar
- 2 teaspoons cinnamon
Instructions
- Preheat oven to 375°F. Line baking sheets with parchment paper, if desired.
- In a stand mixer (or using a handheld mixer) cream together butter and sugar for about 3 minutes on medium speed. Add egg, egg yolk, and vanilla and blend until combined. Scrape bowl if needed.1 cup unsalted butter,, 1 ½ cups sugar, 1 whole egg + 1 egg yolk, 1 teaspoon vanilla extract
- In a medium bowl, mix the flour, cream of tartar, cinnamon, baking soda, and salt, until blended. Set aside.2 ¾ cup all-purpose flour, 2 teaspoons cream of tartar, 1 teaspoon baking soda, 1½ teaspoons cinnamon, ¼ teaspoon salt
- Add half of the dry ingredients to the creamed ingredients and gently mix on low until blended. Add remaining dry ingredients and mix until combined.
- OPTIONAL: Cover and chill dough for 30 minutes (for a thicker, puffier cookie).
- In a small bowl, mix together the Cinnamon Sugar coating.¼ cup sugar, 2 teaspoons cinnamon
- Roll dough into 2-inch balls and roll in the cinnamon sugar mixture twice to ensure they are evenly coated. A medium-size (also called #50) cookie scoop works well for 2-inch cookies.
- Place cookie balls 2 inches apart on a prepared (or ungreased) cookie sheet.
- Bake for 8-10 minutes. Let cool on a baking sheet for 2 minutes. Remove and let cool completely on a wire rack.
- Store in an airtight container for 4-5 days.
Notes
- The dough can be prepared and chilled in an airtight container for up to 24 hours before baking.
- Store baked cookies in an airtight container at room temperature for 4-5 days.
- Freeze the cooked and cooled cookies for up to 3 months.
- Freeze cookie dough, preportioned in balls for up to 3 months, thaw for 30 minutes, roll in cinnamon sugar, and bake as directed.
Nutrition
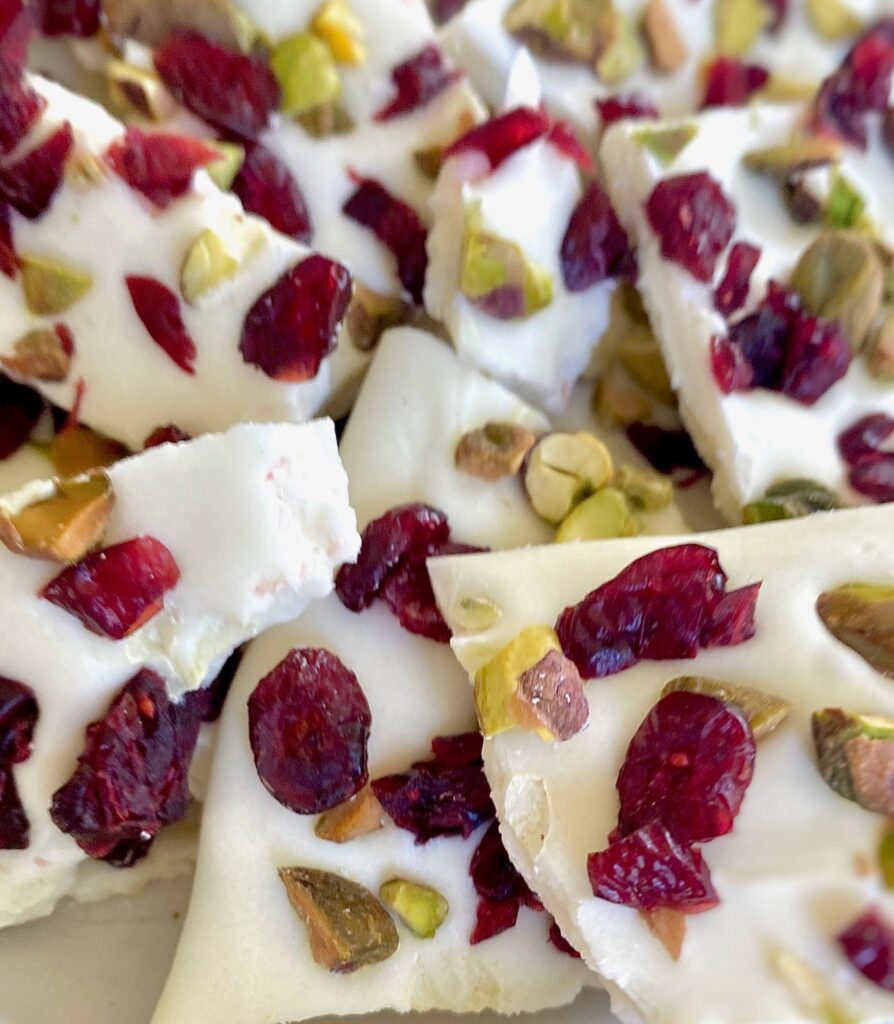
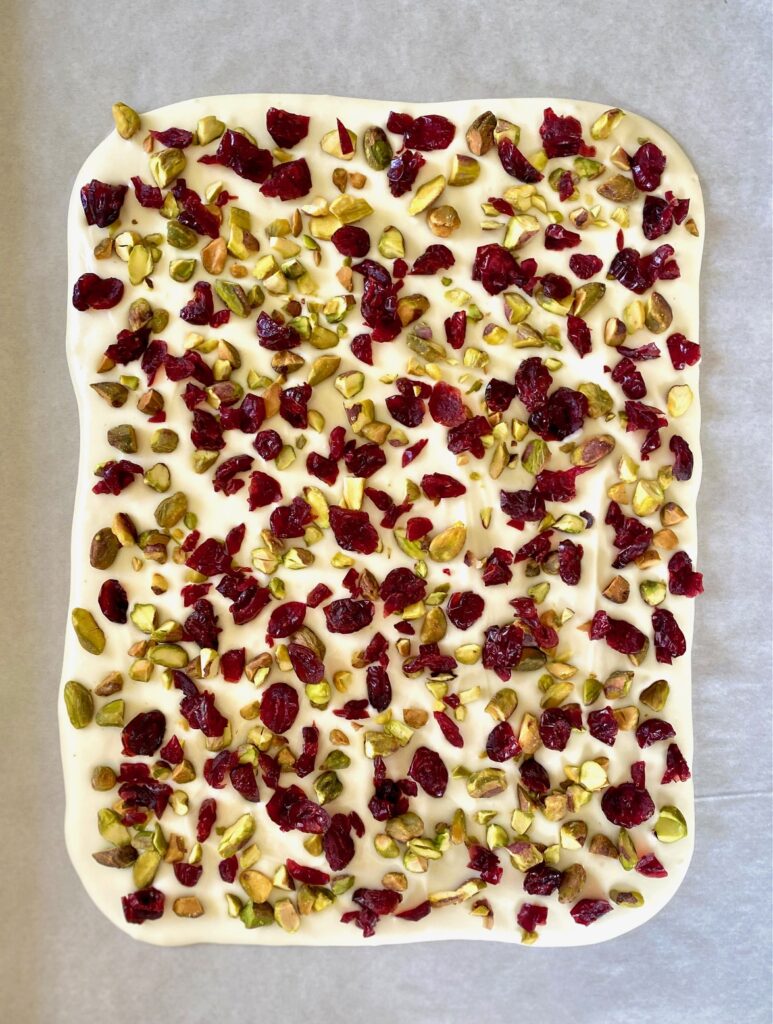
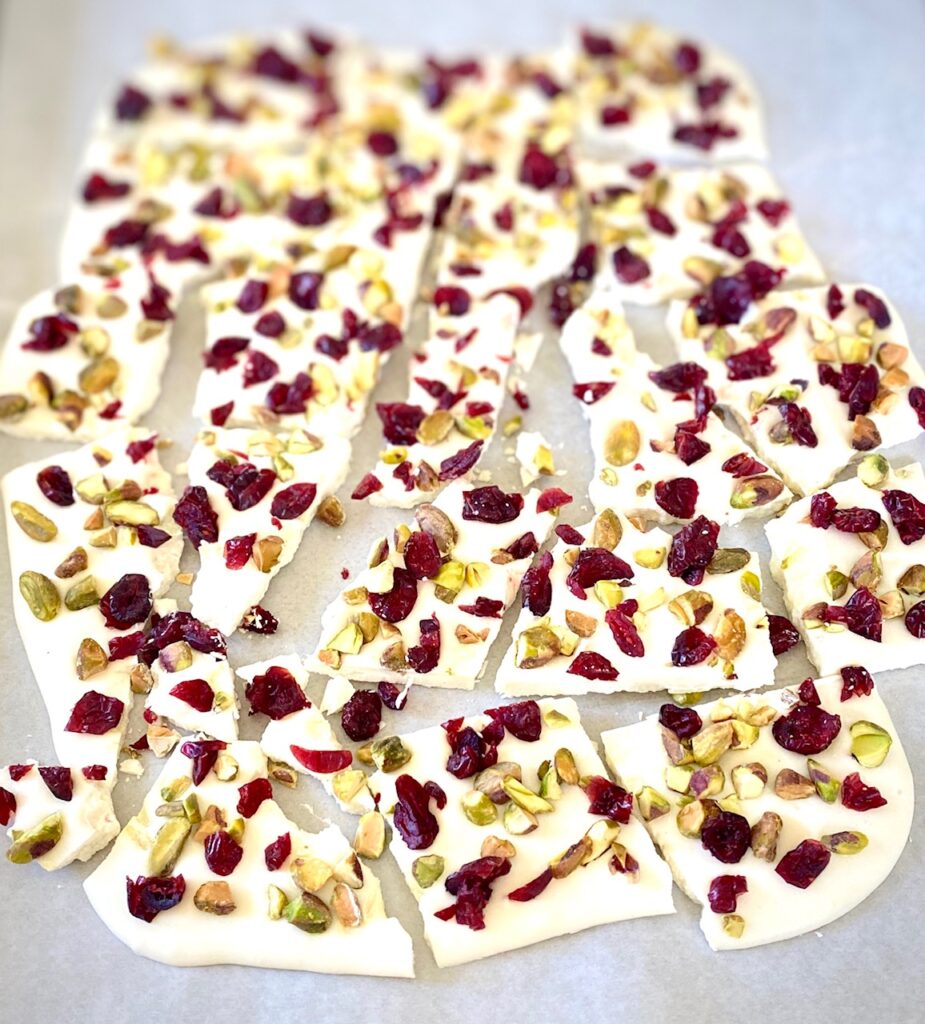
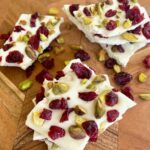
Dreamy white chocolate, salty crunchy pistachios, and dark red tart dried cranberries make a gorgeous and simple snack
This fun treat is always a huge hit so you may need to make a double batch or add a batch of our festive and easy dark chocolate Peppermint Bark too
This post may contain affiliate links. Please see our affiliate disclosure for details. We only recommend products to you that we love ♥️ and use.
Ingredients Needed
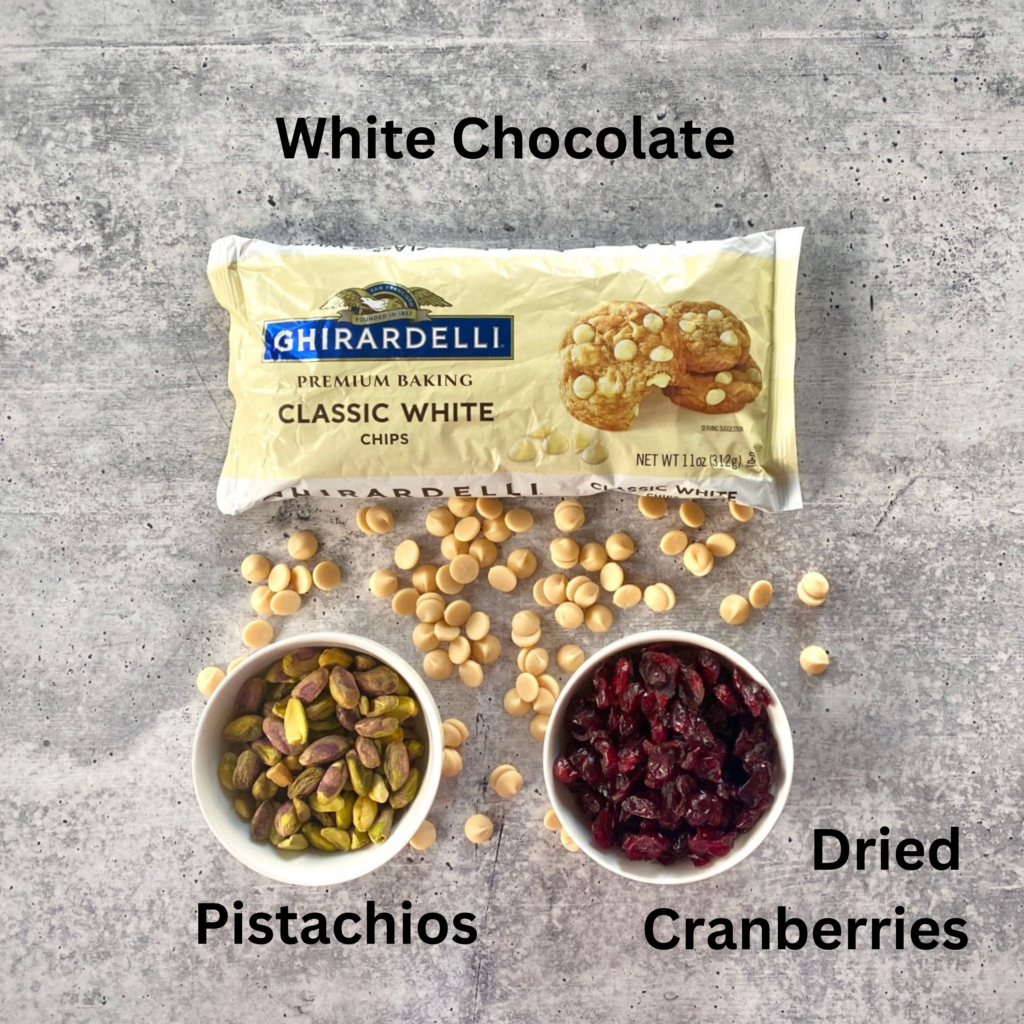
Just 3 simple ingredients make this the easiest dessert you’ll ever make! The pistachios and cranberries are optional and interchangeable. See below for lots of substitution suggestions.
- WHITE CHOCOLATE CHIPS OR WAFERS – 16 ounces – This is the star of the show so now is the time to choose the very best chocolate. We use Guittard or Ghiradelli brands for superior taste and texture.
- PISTACHIOS – 2 ounces- We love the taste of salted pistachios because they contrast so well with the sweet white chocolate. Buy them shelled and give them a light chop before adding. You can also use unsalted pistachios if you prefer.
- DRIED CRANBERRIES – 2 ounces – Dried cranberries are the perfect tart contrast to sweet chocolate and salty nuts. The pop of red makes this bark extra gorgeous!
How to make White Chocolate Bark
Step 1
- Line a baking sheet with foil, parchment, or a silicon baking mat.
- Lightly chop the nuts and set aside. Separate any dried cranberries that are stuck together. It’s okay to leave some fruit and nuts whole for variety.
Step 2
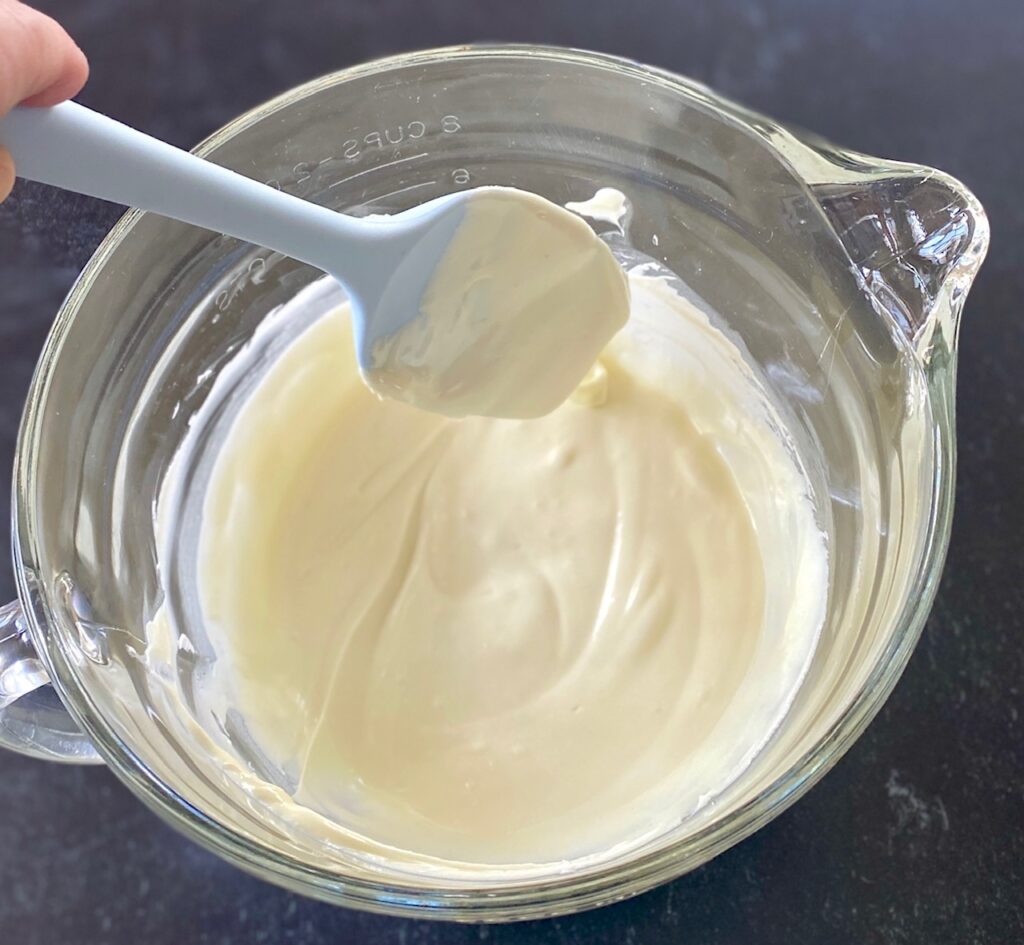
- Melt the chocolate either in a microwave or in a double boiler.
- MICROWAVE METHOD: In a heat-proof glass bowl microwave 12 ounces (all but 1/2 cup) of white chocolate, stirring every 30 seconds, until melted (about 90 seconds to 2 minutes total).
- Stir well after each 30-second increment to blend and encourage melting. Add the remaining 1/2 cup of white chocolate and stir until completely melted and blended.
- STOVE TOP DOUBLE BOILER METHOD: Set up a double boiler and heat over medium-low heat. Add 12 ounces of chocolate to the top portion and stir continuously until smooth and melted. Remove the top pan or bowl immediately from the heat. Stir in the remaining 4 ounces and stir until completely smooth.
Step 3
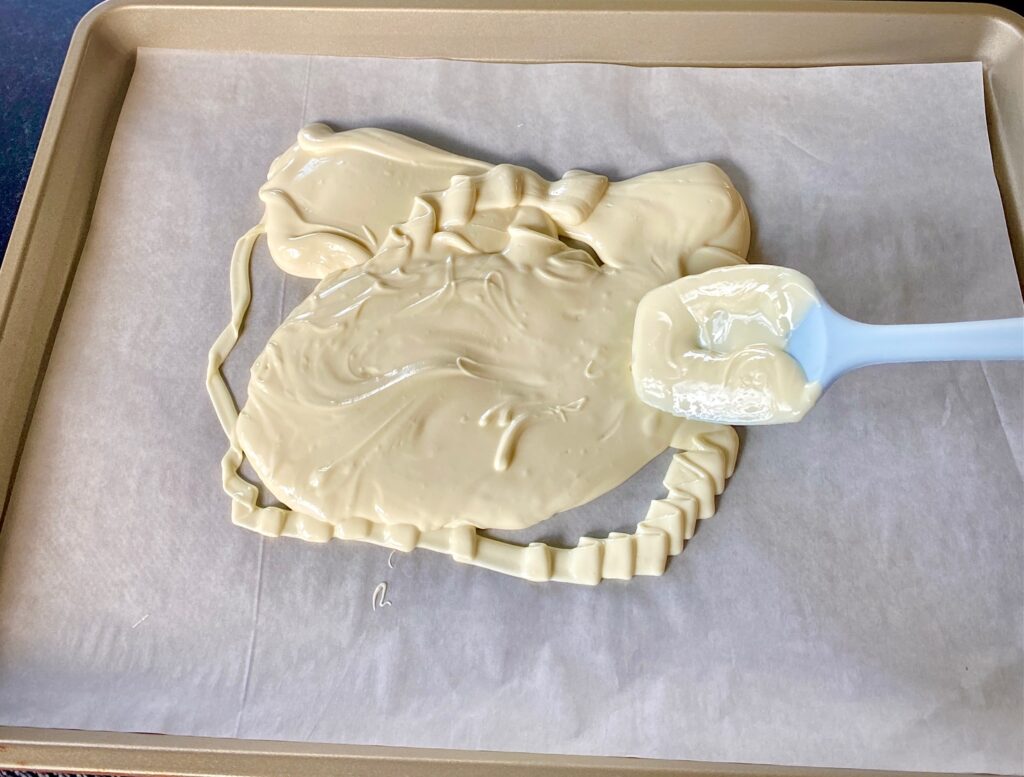
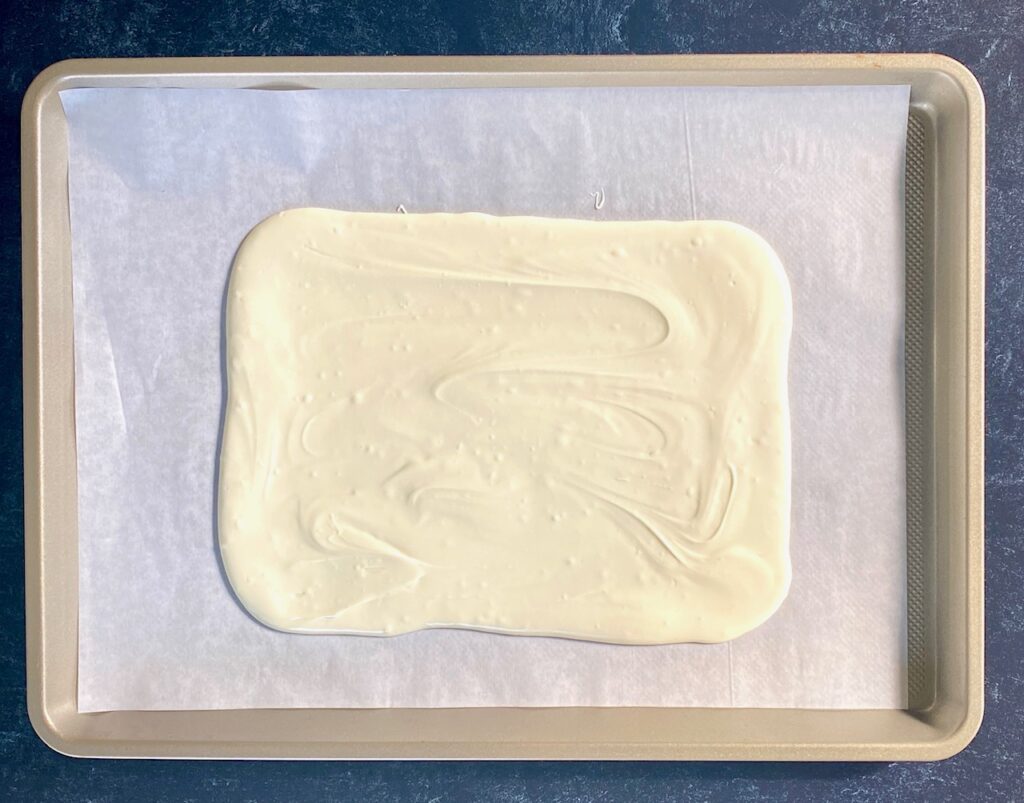
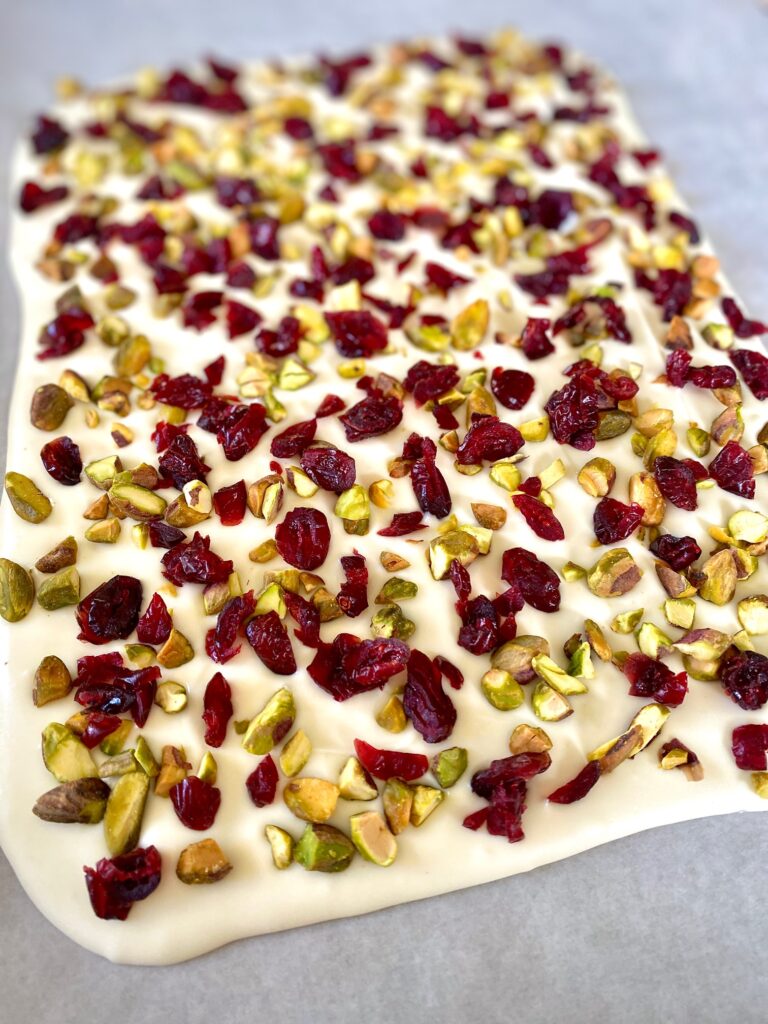
- Immediately pour melted chocolate evenly onto the prepared baking sheet in a rectangular shape. The bark should be about 1/4 inch thick. If needed, you can smooth it with a spatula.
Step 4
- Sprinkle all over with chopped nuts and fruit and pat the pieces gently into the chocolate to help them stick. Sprinkle the toppings on the chocolate right away because the chocolate will set quickly.
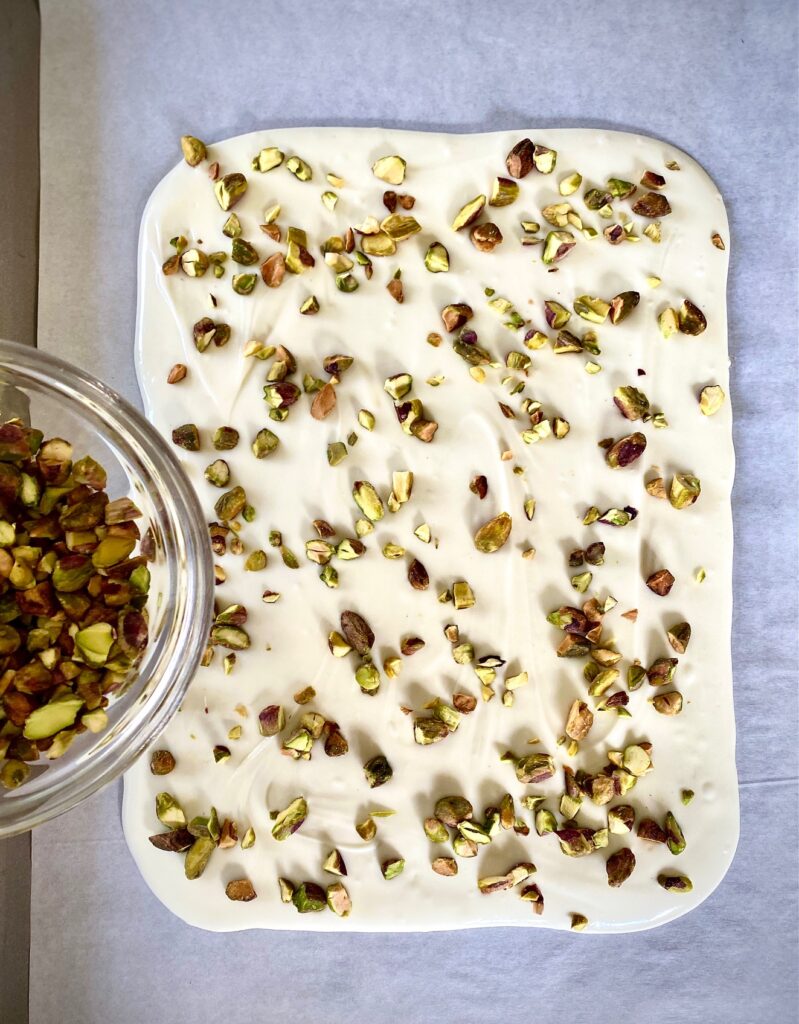
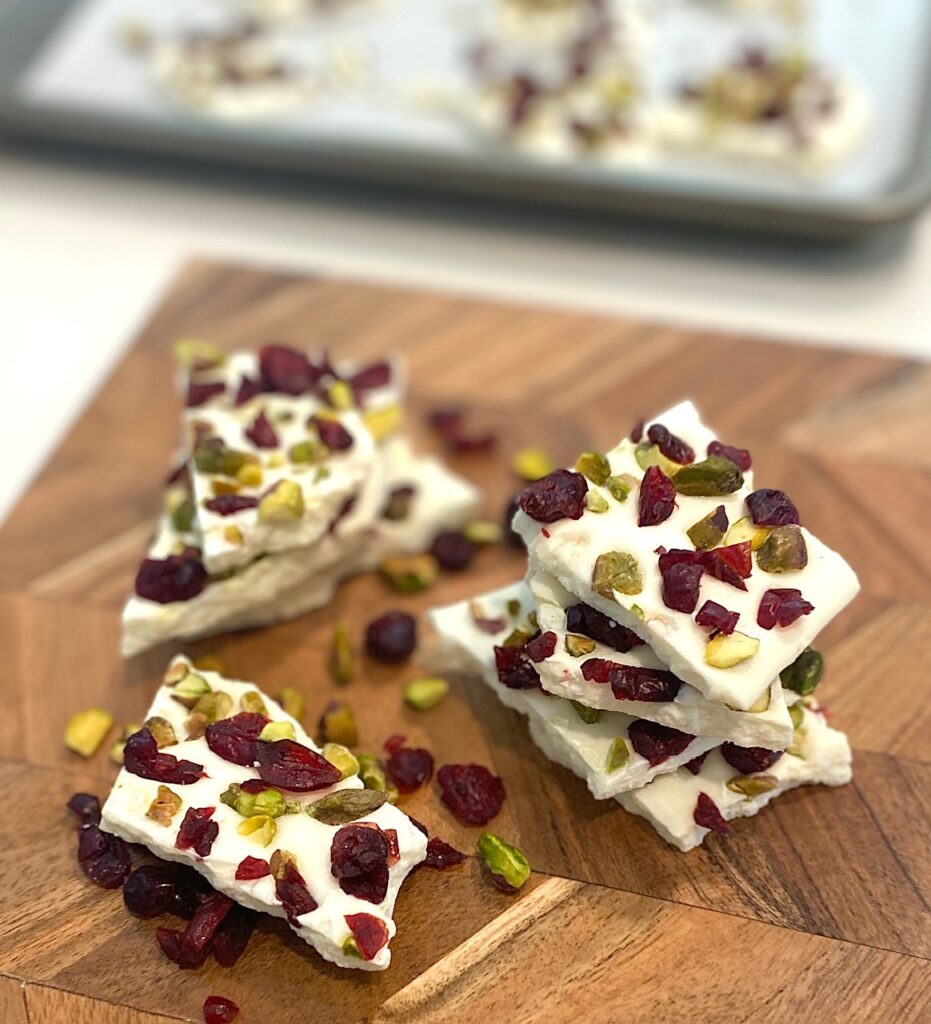
- Allow to set for at least one hour at room temperature.
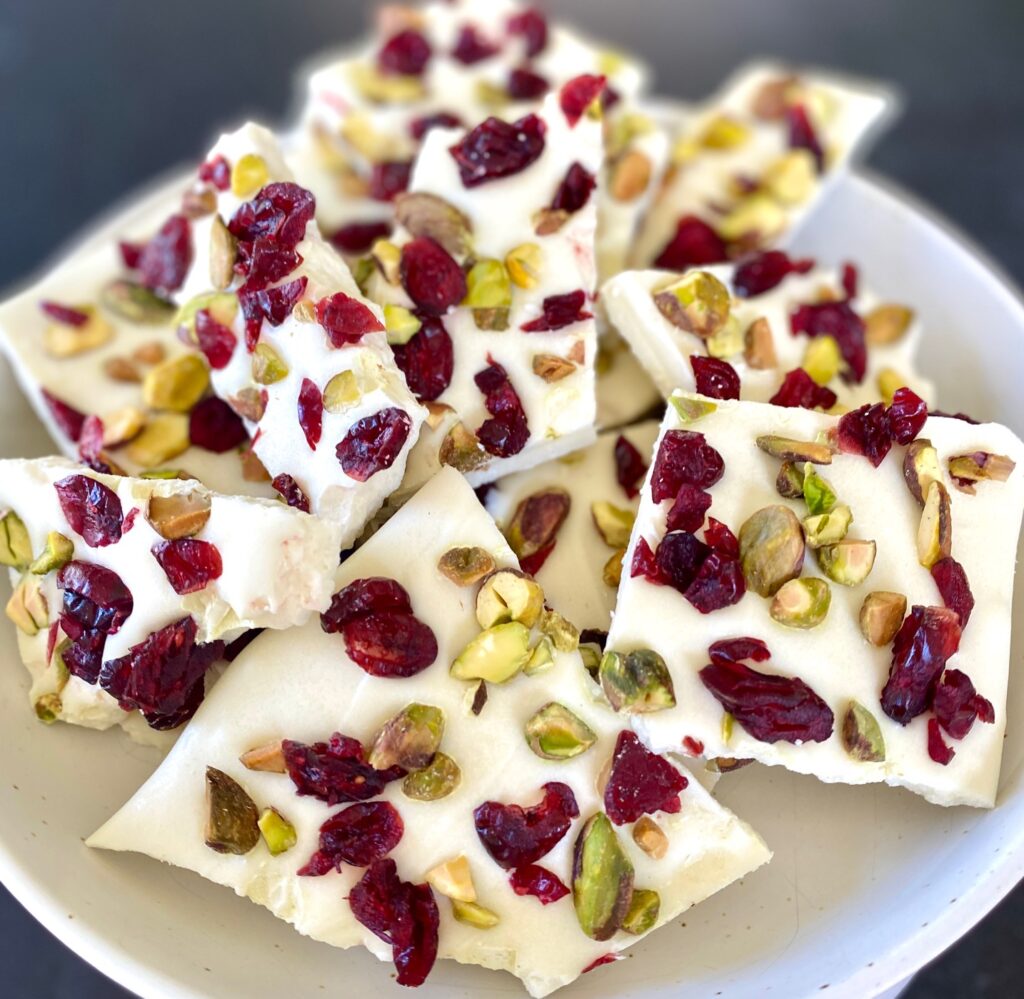
- Once the bark is completely set and firm break it into snack-size pieces and serve.
How to Store White Bark
Room Temperature: Store bark in an airtight container at room temperature. It should last about three weeks. We don’t recommend storing in the refrigerator because the bark will develop condensation and the nuts will become soft.
Freezer: Bark can be frozen in an airtight container for up to 2 months. However, be aware that certain toppings may develop condensation.
Thinking of gifting your bark? The best way to preserve it is in plastic or metal containers. It makes a delicious gift!
Substitution Ideas
One of the best things about white bark is how easy it is to customize, so let’s get creative!
Instead of Cranberries:
- Dried cherries also add a gorgeous pop of red against white chocolate which makes them perfect for holiday bark or Valentine’s Day bark
- Use any sweet dried fruit such as apricots, pineapple, mango, ginger, blackberries, or blueberries. Make sure to chop bigger fruit into pieces that are the equivalent size of dried cranberries. A combination of different fruits is delicious too.
Pistachios Variations:
- Any salted, roasted nut will work well with this bark. Good choices would be cashews, peanuts, pine nuts, or macadamia nuts
- Seeds such as roasted pepitas (pumpkin seeds) or sunflower seeds
Instead of White Chocolate:
- Any type of chocolate will work so consider trying it with milk, semisweet, or dark chocolate varieties like we did in our Chocolate Peppermint Bark
Topping with Candies or Snacks:
- Chopped Candy – such as mini peanut butter cups, M&M’s, peppermints, heath bars, pastel M&M’s for Easter bark, or candy corn for Halloween bark
- Snacks – chopped Oreos, mini chocolate chips, crushed salty pretzels, mini marshmallows
Need to make a bigger batch?
No ingredient substitutions are needed so all you need to do is double the ingredient list and use two lined baking sheets.
Looking for other easy sweet treats?
- We love how easy Peppermint Bark is to make – and so festive!
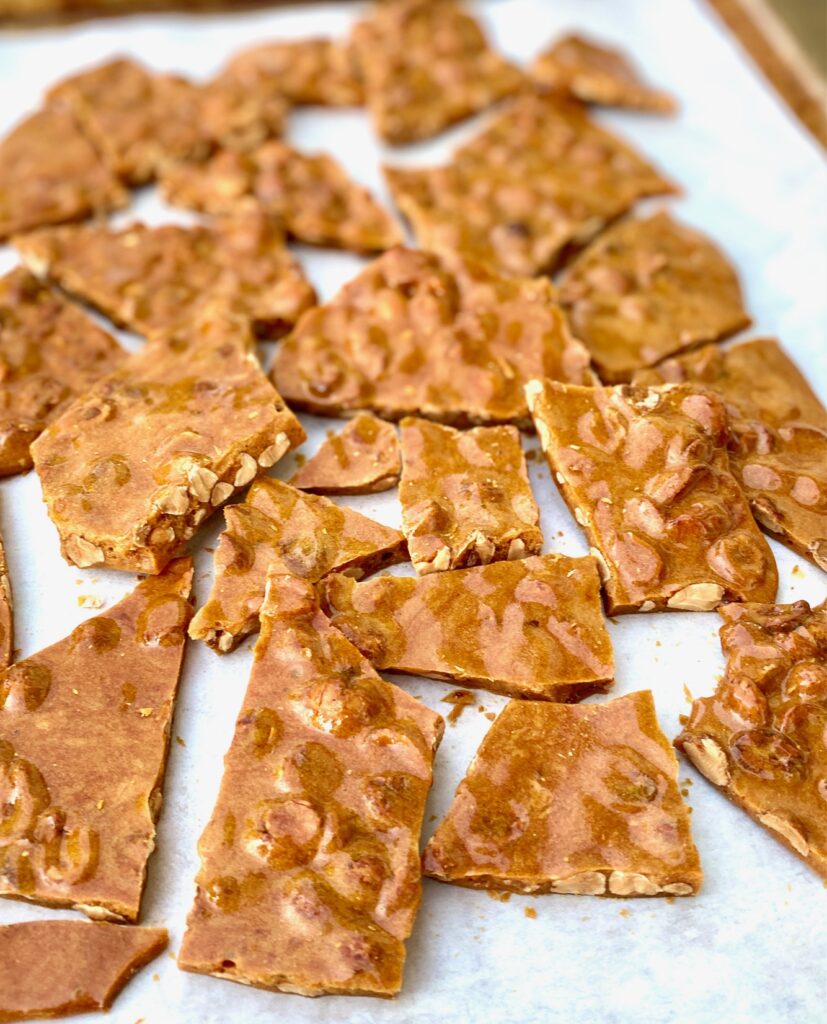
- Microwave Peanut Brittle is fast and scrumptious!
- Top your favorite ice cream with our 10-minute Hot Fudge
White Chocolate Bark
Equipment
- 1 Sheet Pan
- 1 silicone baking mat, piece of parchment, or aluminum foil
Ingredients
- 16 ounces white chocolate chips or wafers
- 2 ounces whole, shelled salted pistachios lightly chopped
- 2 ounces dried cranberries lightly chopped, if needed
Instructions
- Line a baking sheet with foil, parchment, or a silicon baking sheet.Roughly chop the pistachios and dried cranberries.
- Microwave all but 1/2 cup of white chocolate chips in a microwave-safe bowl, stirring every 30 seconds, until melted, about 1.5 – 2 minutes.You can also melt the chocolate using a double boiler on the stove, stirring continuously.
- Stir in the reserved 1/2 cup chocolate and stir until smooth and melted.
- Spread the melted chocolate evenly on the prepared baking sheet, in a rectangle, about 1/4th inch thick.
- Sprinkle all over with dried cranberries and pistachios. Press toppings gently into the chocolate. Let set for one hour at room temperature (or 30 minutes in the refrigerator).Once firm, break the bark into pieces.
- Store in an airtight container, at room temperature, for up to 2 weeks.
Notes
- The easiest way to melt white chocolate is in the microwave, but it can also be melted in a double boiler on the stove.
- The microwave melting time will vary depending on the strength of your microwave, and what type and form of white chocolate is used.
- Our top choice of white chocolate: Ghiradelli, Guittard
Nutrition
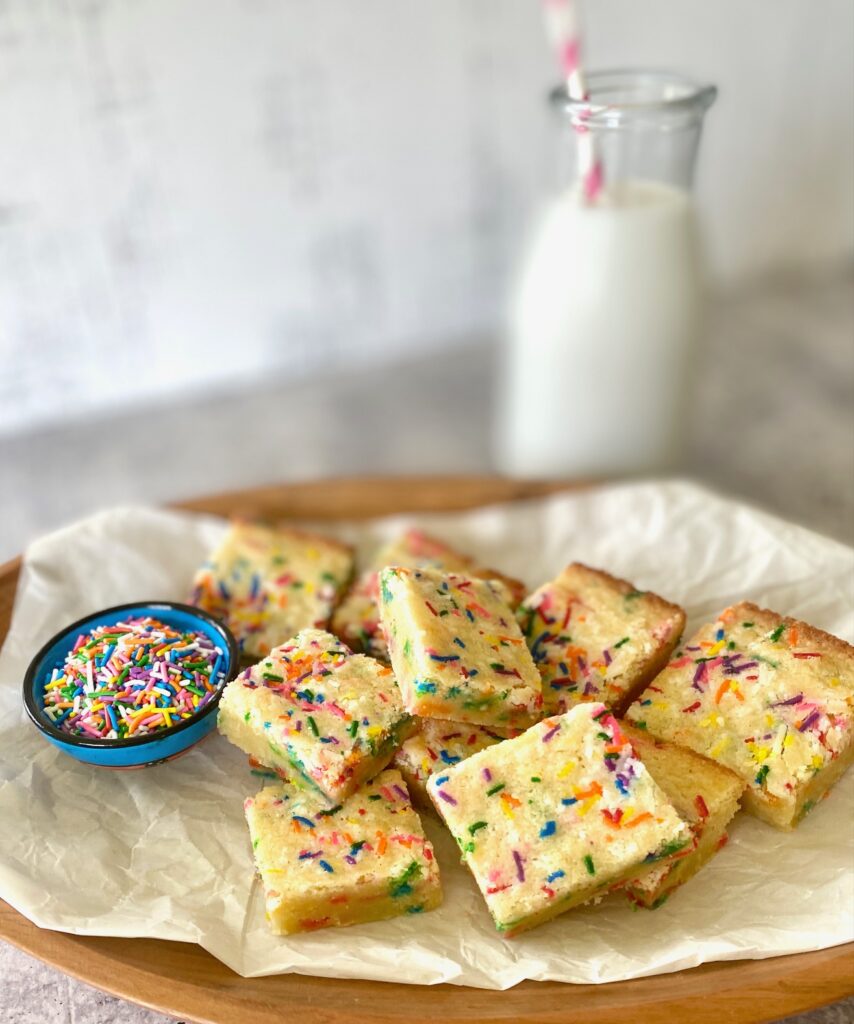
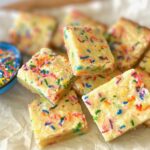
A sweet one-bowl treat with minimal ingredients
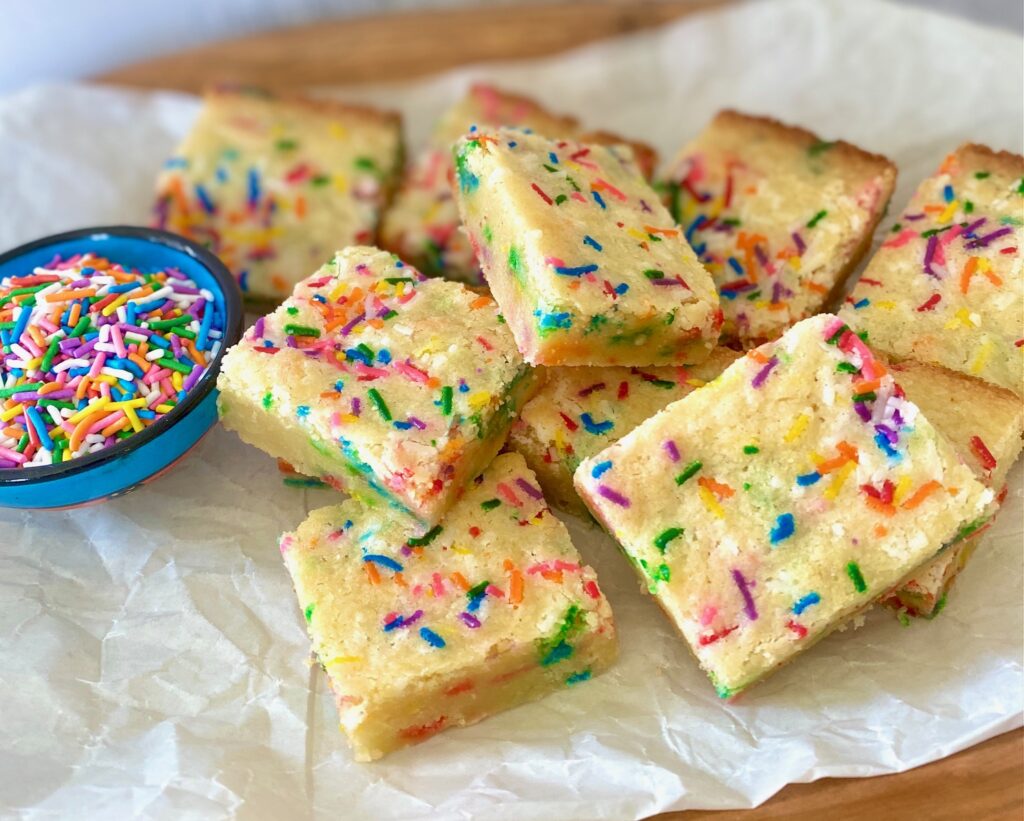
This simple recipe is one of our favorite “go-to’s” because it’s so easy for when you need to bring a treat somewhere, or just need your own sugar fix, but you need it fast!
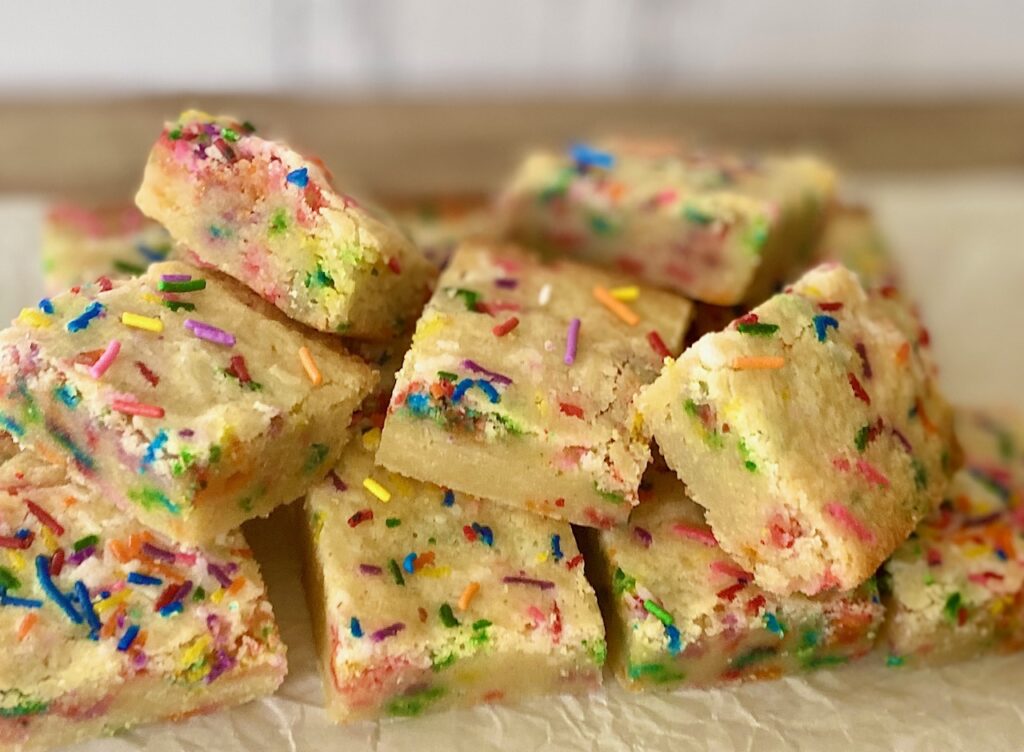
[feast_advanced_jump_to]The addition of sprinkles brings in the fun factor and who can resist sprinkles? Nobody! This easy Sugar Cookie Bar recipe is like a cross between our Easy Drop Sugar Cookies and simple one-bowl Blondies.
These treats are ready in about 30 minutes, with no chilling, and one bowl means less cleanup. Easier than cut-out sugar cookies and always a win-win in our book!
This post contains affiliate links. See our affiliate disclosure policy for details. We only recommend products we love and use.
Ingredients for Sugar Cookie Bars
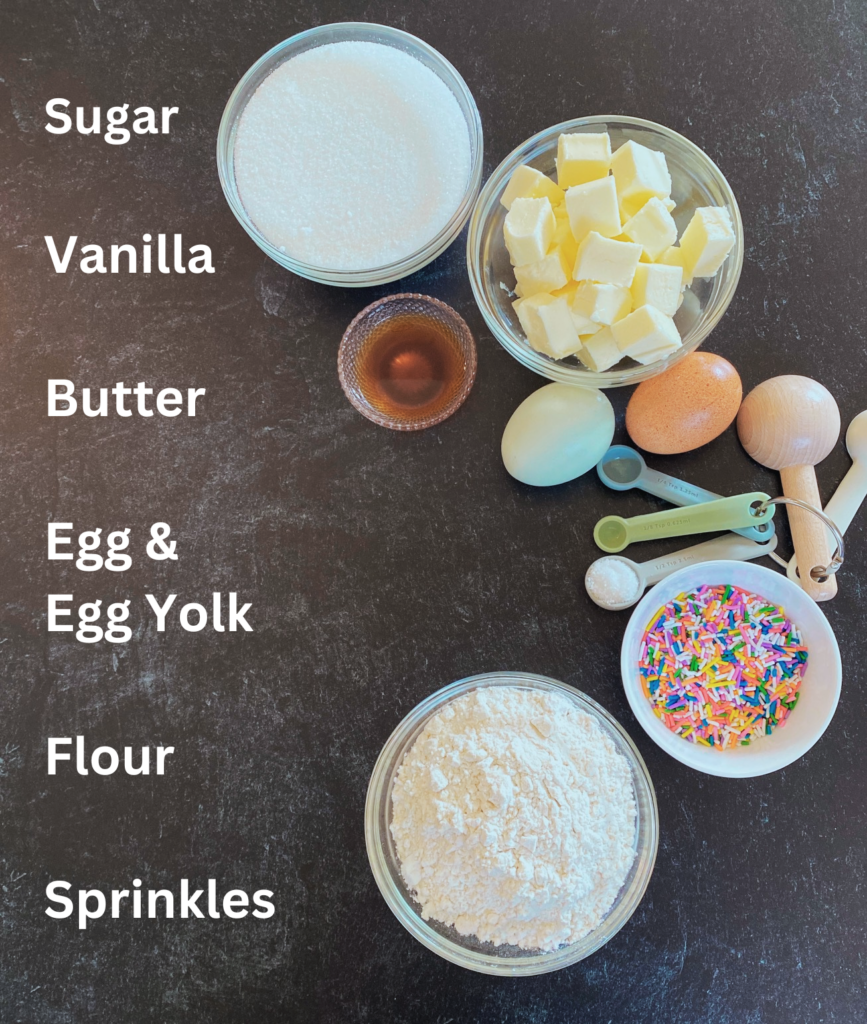
- Sugar – These are sugar cookie bars, after all! 😀
- Flour – all-purpose is best
- Butter – At room temperature. We used unsalted butter, but if you only have salted butter you can use that but cut the salt below to 1/4th teaspoon
- Vanilla Extract – Have you tried making your own vanilla? It’s easy!
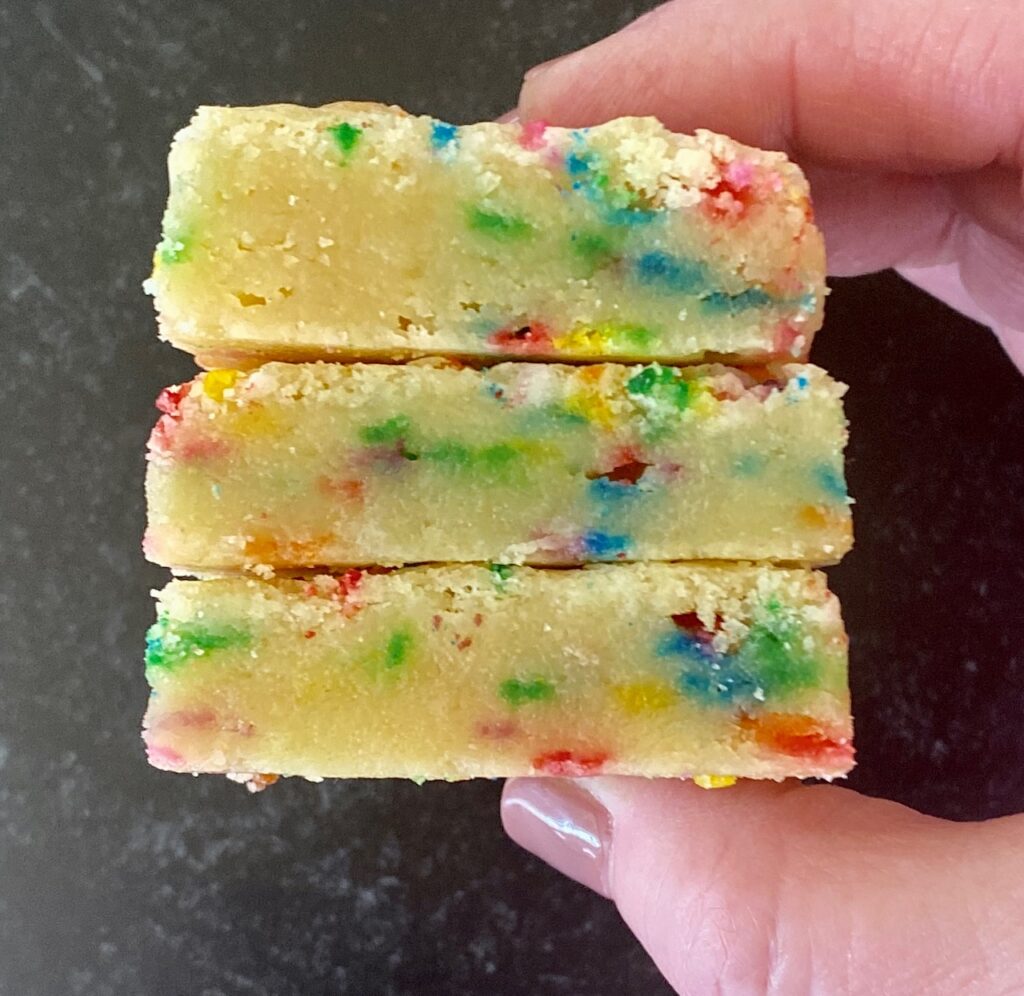
- Whole Egg + an Egg Yolk – The additional yolk acts as a binder, makes the cookie bars extra chewy, and adds moisture to these bars. Save the extra white for another use (maybe tomorrows breakfast!)
- Salt – Salt always helps balance the sweetness in baked goods
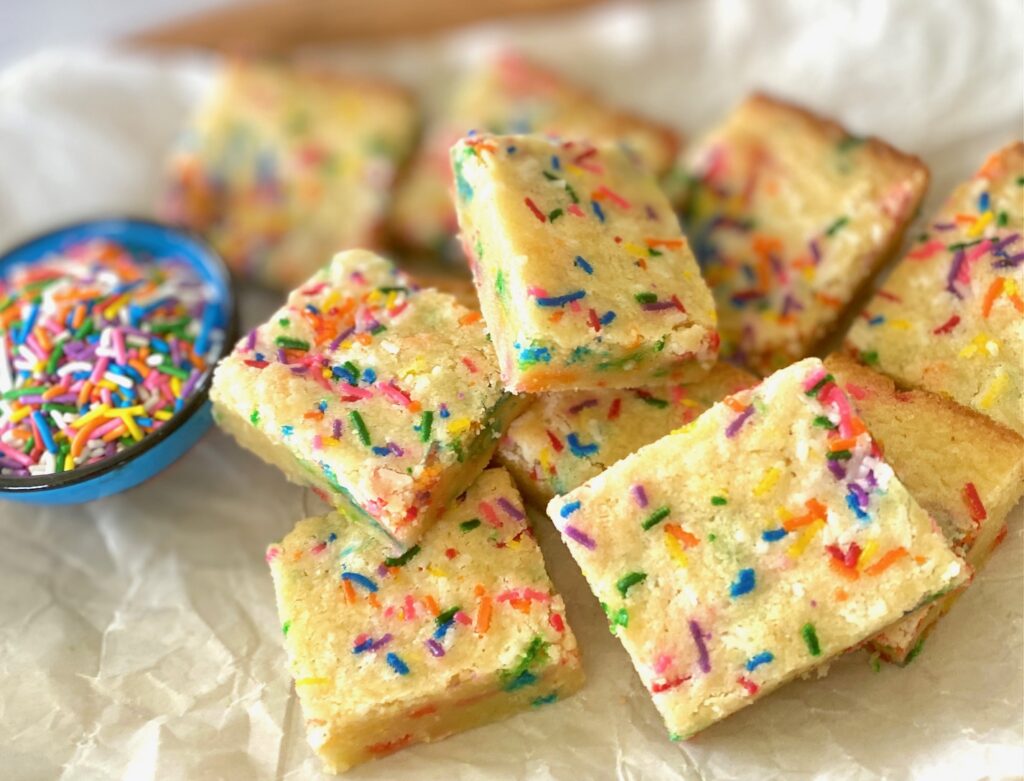
- Sprinkles – Optional, but everyone loves sprinkles!
How to make Sugar Cookie Bars
The method is simple following these easy steps, and the dough is similar to a sugar cookie dough.
- Preheat the oven to 375˚F
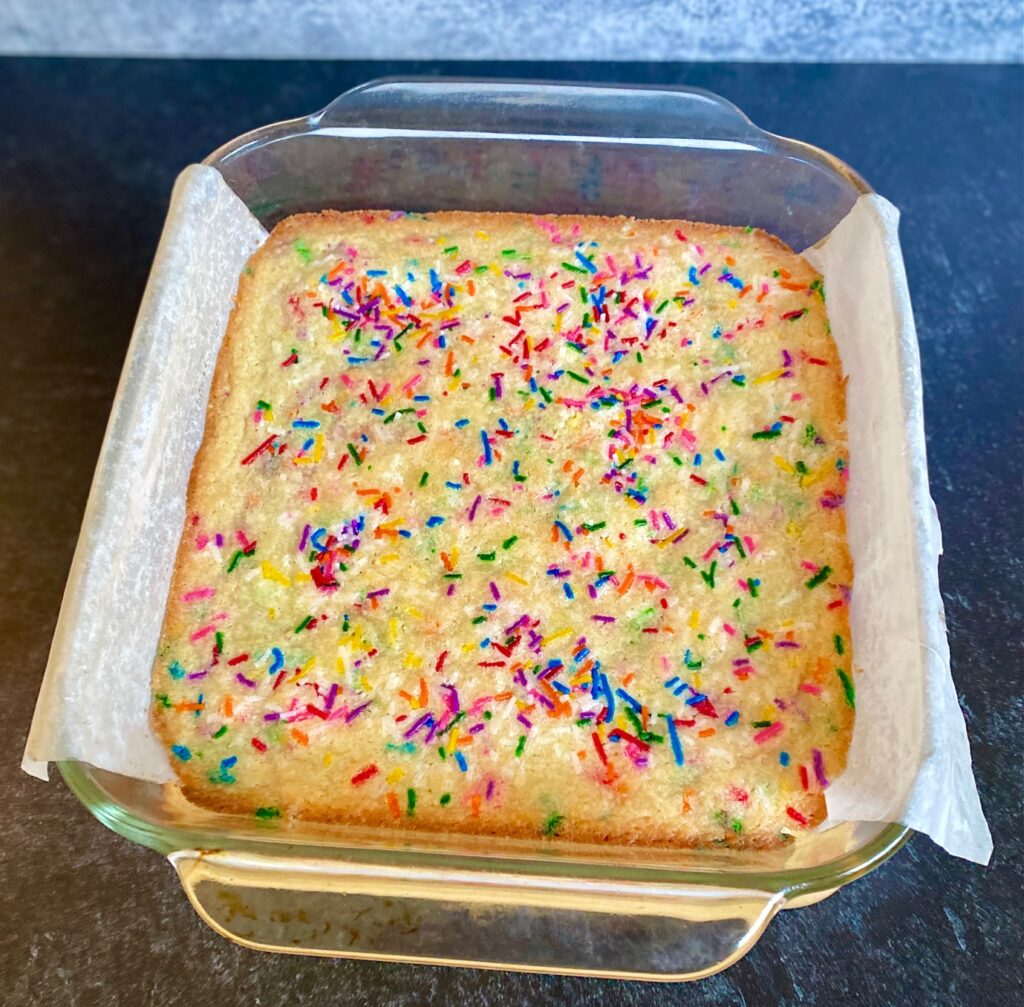
- Prepare an 8″x 8″ square pan by lining it with parchment paper or lightly spray with nonstick cooking spray. (see below for tips on using parchment)
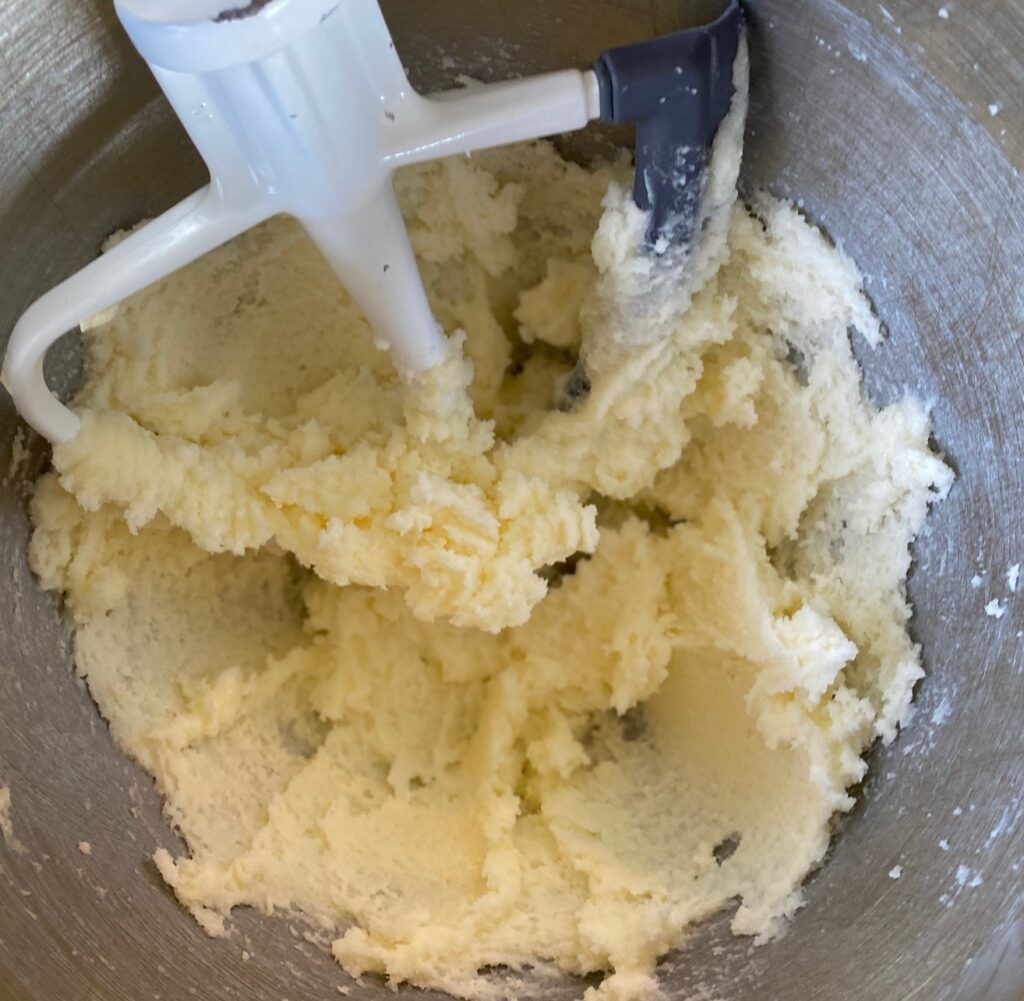
- Cream the butter for about 1 minute until lightly fluffy in a stand mixer fitted with a paddle attachment, or in a large bowl with a hand mixer, on medium speed
- Add the sugar and beat for 2 more minutes. The mixture should be light and fluffy. Be sure to stop and scrape the bowl once or twice to make sure everything is fully combined
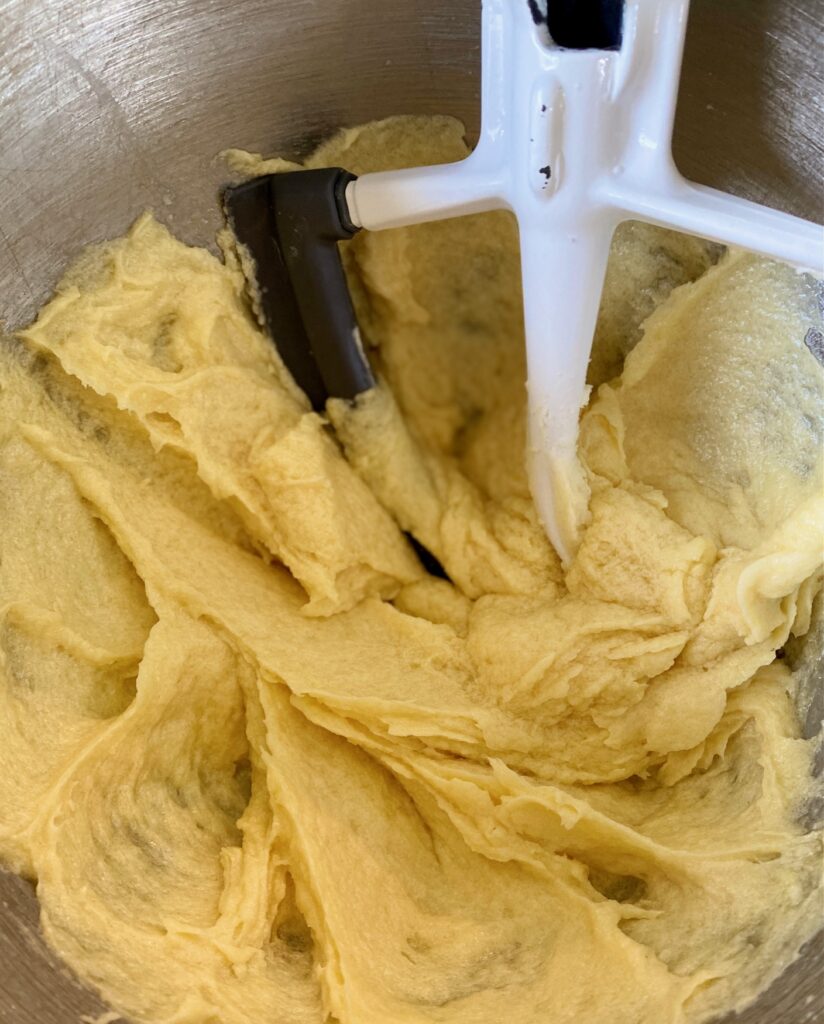
- Gently beat in the whole egg, the egg yolk, and the vanilla and mix until just combined

- Turn off the mixer, add the dry ingredients (flour and salt) to the wet ingredients, and mix until blended and no streaks remain
- Fold in 3 Tablespoons of the colorful sprinkles and gently combine

- Spread mixture evenly into the prepared pan and scatter the remaining sprinkles over the top
- Bake for 21-23 minutes, or until lightly golden brown on the edges
- Be careful not to overbake. The center will not be brown – just the edges. The bars are done when they lose their glossy sheen and will continue to bake, after they’ve been removed from the oven, while cooling
- Remove bars from the oven and let them cool completely in the pan
- Once cooled lift the bars out with the parchment paper “handles”
- Place on a cutting board and cut into 16 squares
- NOTE: If planning to frost the bars it’s easier to frost them before cutting
Storage:
These cookie bars are perfect for make-ahead: Store the cookie bars, covered, at room temperature, for up to 5 days. If frosting your bars store them in the refrigerator instead.
To Freeze: Let the pan cool completely and then cut into bars. Wrap tightly in plastic wrap and put in a freezer bag or airtight container. Freeze for up to 2 months. Thaw completely in the refrigerator or on the countertop.
Sugar Cookie Bar Variations
You can customize these delicious bars for any season or occasion by switching the color of the seasonal sprinkles. It’s easy to make these into Christmas sugar cookie bars with Christmas sprinkles or sweet Valentine’s Day sprinkle bars. They are perfect for the 4th of July with red, white, and blue sprinkles!
Here are some of our favorite variations:
- In place of vanilla: Use almond extract or add 1 Tablespoon of lemon juice and some lemon zest for lemon sugar cookie bars
- Sprinkles: Here’s your chance to customize – any fun sprinkles will work! We used rainbow sprinkles in our bars.
- Instead of Sprinkles: chocolate chips, peanut butter chips, crushed Oreos, dried cherries, or cranberries
- Frosted Sugar Cookie Bars: The only thing that could make these cookie bars better is to slather them with your favorite frosting recipe. We like simple buttercream frosting but cream cheese frosting would be delicious, as well
- Doubling: You can double this recipe and bake in a 9″ x 13″ pan. They may need a few extra minutes of cooking time
- Colored Cookie Bars: Add a few drops of food coloring for instantly fun colored cookie bars
Tips and Tricks
- Room-temperature softened butter works best
- Separating eggs is easier when the eggs are cold
- When lining the pan with parchment it helps to clip the sides with binder clips. They won’t melt in the oven and it keeps the parchment in place. See picture below ⬇️

Looking for other amazing easy treats?
- Scrumptious Chocolate Chip Skillet Cookie (also called a pizookie) is an easy twist on traditional chocolate chippers
- One Bowl Brownies are a cinch with tons of rich chocolate flavor
- Banana Bread with Chocolate Chips is another easy one bowl treat
Sugar Cookie Bars
Equipment
- 1 8-inch square baking pan
- Stand or hand mixer
Ingredients
Cookie Bars:
- ¾ cup unsalted butter, softened to room temperature
- 1 ¼ cup sugar
- 1 egg
- 1 egg yolk
- 1 Tablespoon vanilla extract
- 1 ¾ cups all-purpose flour
- ½ teaspoon salt
- ¼ cup sprinkles, optional
Instructions
- Preheat oven to 375° F. Lightly butter, or line with parchment paper, an 8-inch square baking pan leaving some overhang to let you easily remove the bars later.
- In a large bowl, using a stand mixer fitted with a paddle attachment, or hand-held mixer, cream the butter for about 1 minute. Add the sugar and beat until light and fluffy, about 2 more minutes. Scrape the side of the bowl occasionally.
- Beat in the whole egg, egg yolk, and vanilla until just combined.
- Turn off the mixer and add the flour and salt. Blend gently just until combined and no streaks remain. Scrape bowl if needed.
- Add in most of the sprinkles (about 2/3rds), if using, and mix with a rubber spatula. (The sprinkles could shatter if using the mixing blade to mix them in)
- Press the batter into the prepared pan and evenly smooth the top and then scatter the remaining sprinkles on top.
- Bake for 21-23 minutes or until lightly browned on the edges and top. The top should no longer be shiny.These bars are supposed to be soft so be careful not to overbake them because every oven bakes differently.
- Remove from the oven and allow the pan to cool completely on a cooling rack. The middle may sink a little but that is normal.
- Remove the entire square from the pan by loosening the edges and lifting them out or use the parchment overhang. Place on a cutting board.Cut into about 16 pieces.
- If frosting the bars it's easier to frost them before cutting.
Storage:
- Store in an airtight container and keep at room temperature for up to 5 days.
Notes
- These bars can be tightly wrapped and frozen for up to 2 months
- Store, sealed, at room temperature for up to 5 days
- Substitutions ideas for sprinkles: chocolate chips, peanut butter chips, crushed Oreos, dried cherries, or cranberries
Nutrition
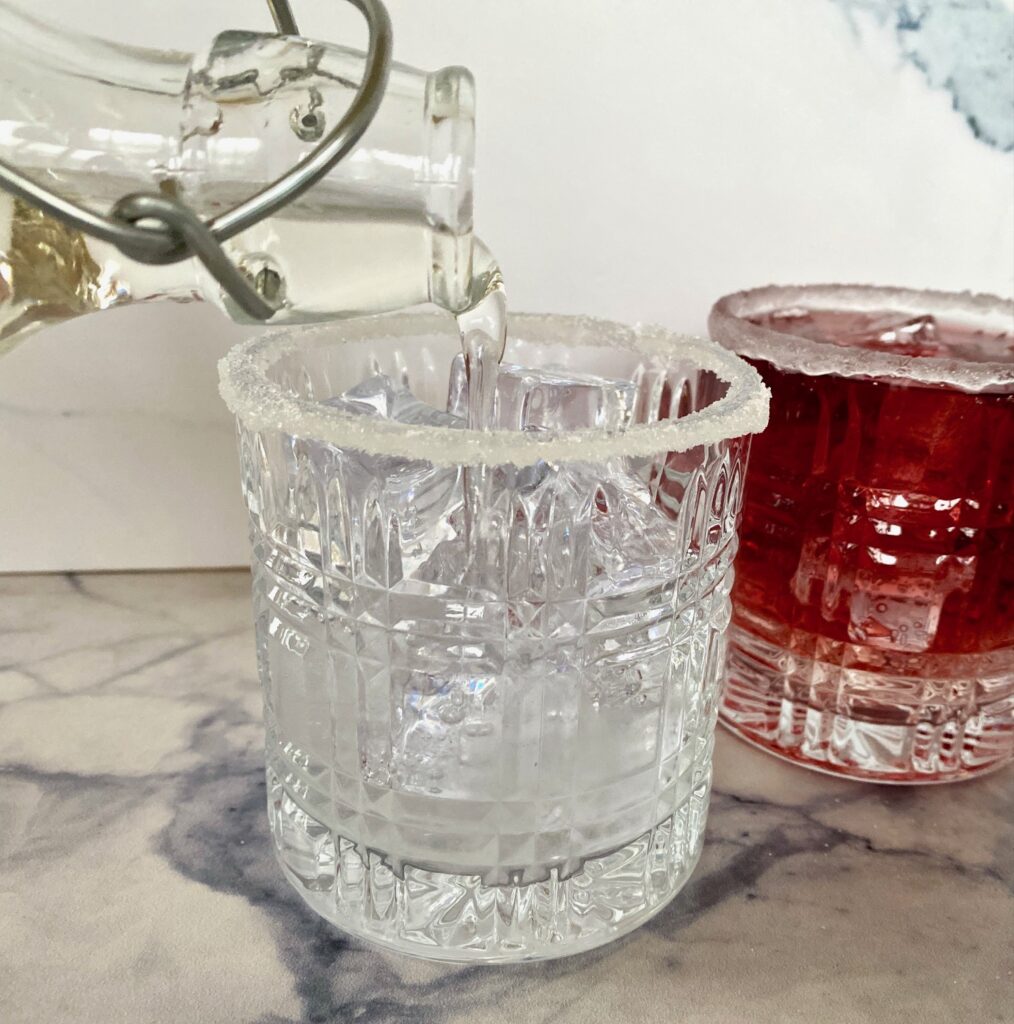
It’s a snap to make with just 2 ingredients – sugar and water!
Making homemade simple syrup could not be easier and it is much faster (and more economical) than running to the market for a pre-made bottle. It takes just 10 quick minutes to make a batch!
This post may contain affiliate links. Please see our affiliate disclosure for more details. We only recommend products we love and use.
What is Simple Syrup?
Simple syrup really is just that – SIMPLE. If you can boil water you can make it!
It’s made by cooking equal parts sugar and water until the sugar is dissolved and the mixture is slightly thickened. It’s used as a sweetener in cooking and baking, but most commonly used as an ingredient in cocktails or iced coffees, lemonades, and tea.
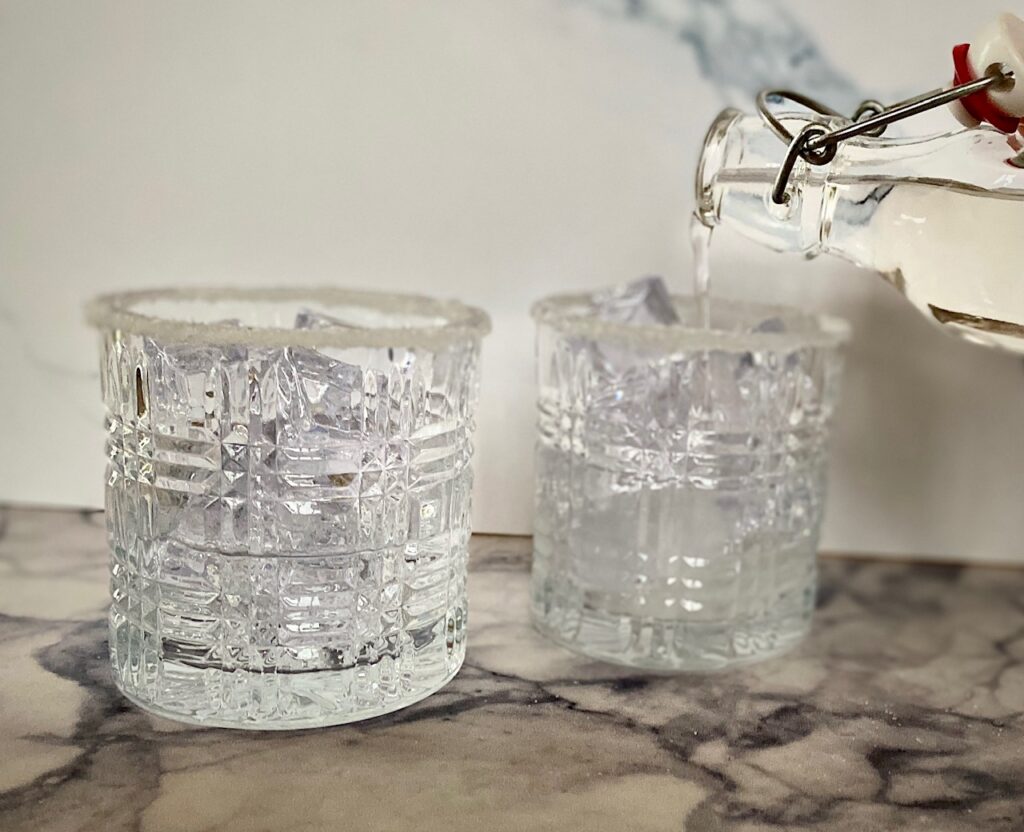
We’ve used it in many of our cocktail recipes, such as the always popular Lemon Drop Martini and the Dirty Shirley. The possibilities for flavoring (infusing) with fruit, herbs, and spices are endless.
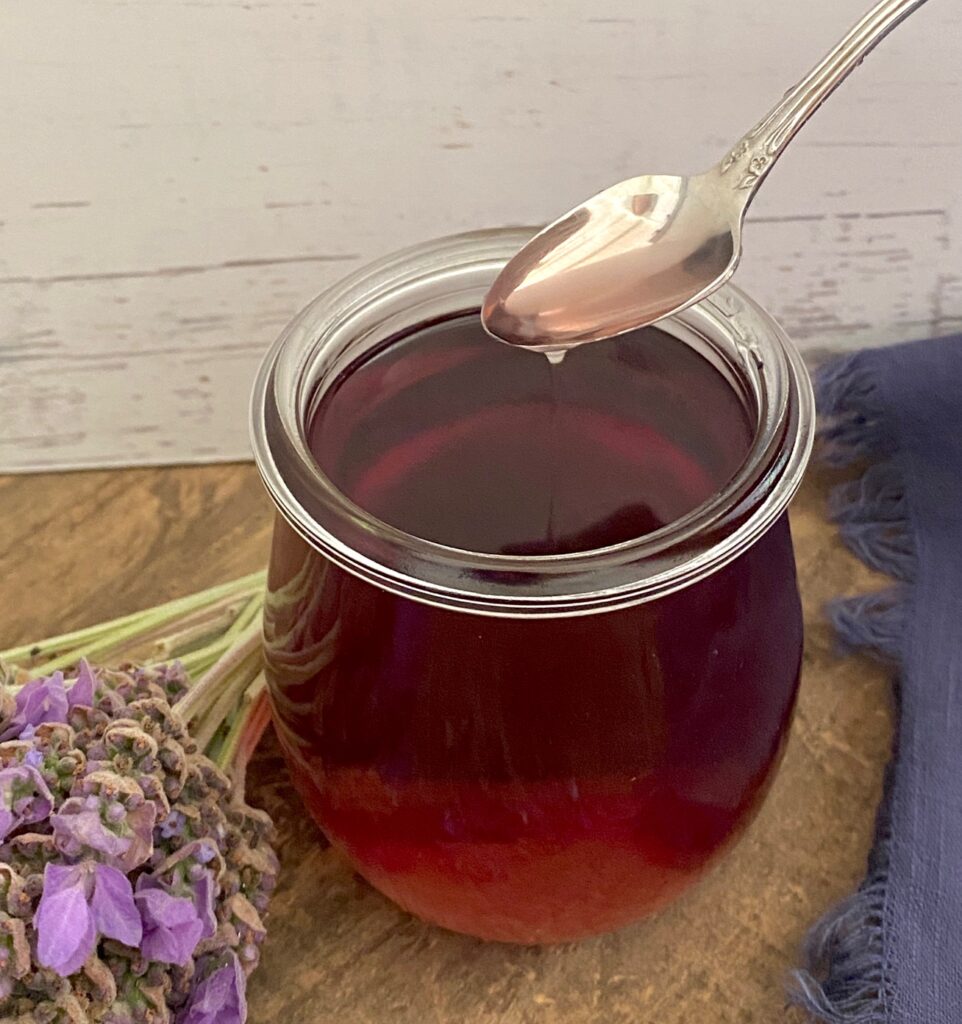
Below we will share some ideas for infusing with flavor, including Lavender Simple Syrup and Pumpkin Spice Syrup.
Ingredients needed:
This recipe is actually more of a method.
So, what is the formula for simple syrup? It’s 1:1 and you only need water and sugar.
Simple Syrup Ratio:
- One part water
- One part granulated sugar
The ratio of sugar to water is always equal, so the recipe can easily be cut in half, doubled, or tripled, depending on what you need.
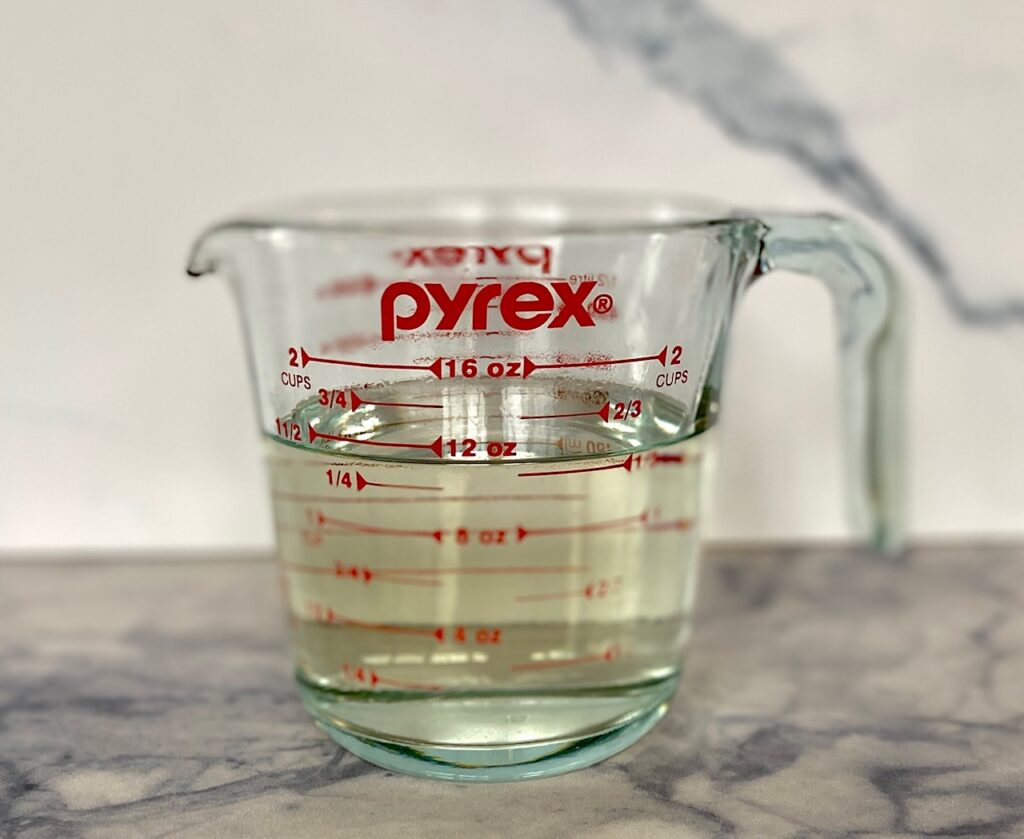
Note: 1 cup sugar + 1 cup water will yield 1½ cups once cooked.
How to make a Simple Syrup
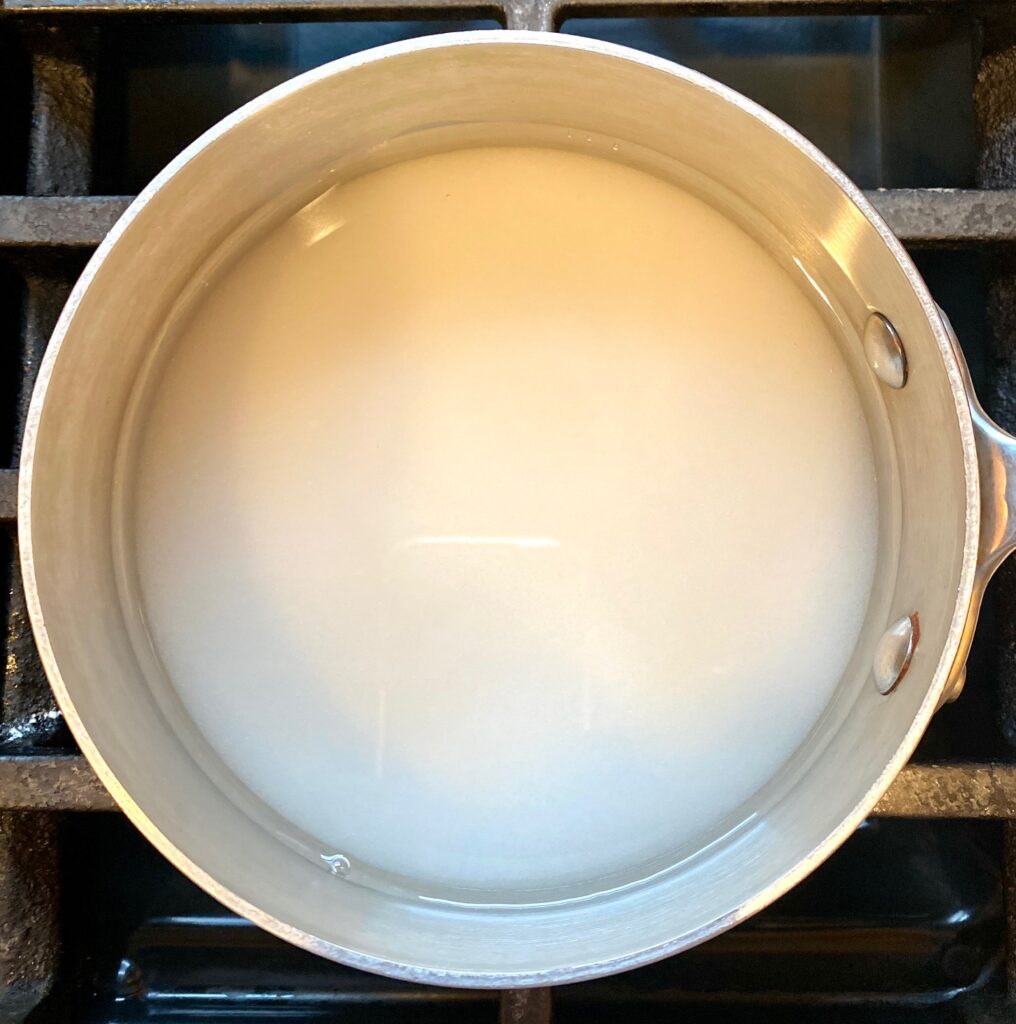
For the best results use a heavy-bottomed pan because it will conduct heat more evenly during cooking.
- In a small saucepan add equal parts water and sugar, and give it a quick stir to combine
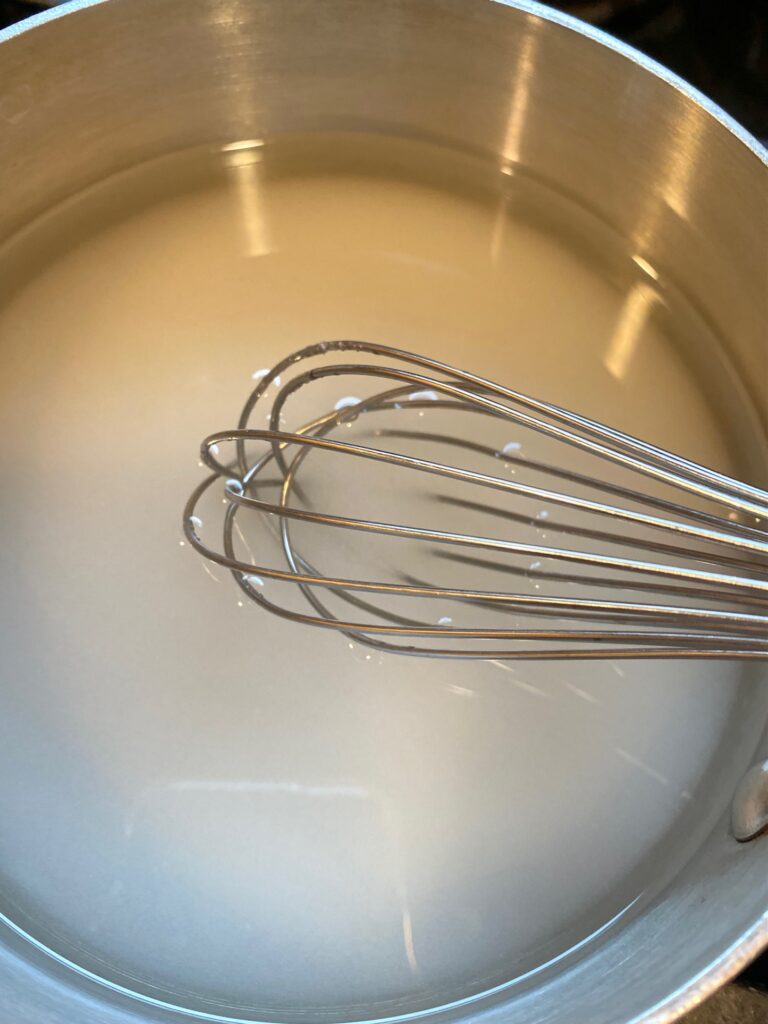
- Cook mixture over medium heat, stirring gently until the sugar dissolves completely. NOTE: It’s not essential that the water boils as long as the sugar dissolves completely
- Remove the pan from the heat and let the mixture cool to room temperature.
- The results should be fairly thin and easy to pour (much thinner than maple syrup).
- If you want a thicker consistency just continue to cook until you achieve your desired thickness. (see below for “rich” simple syrup).
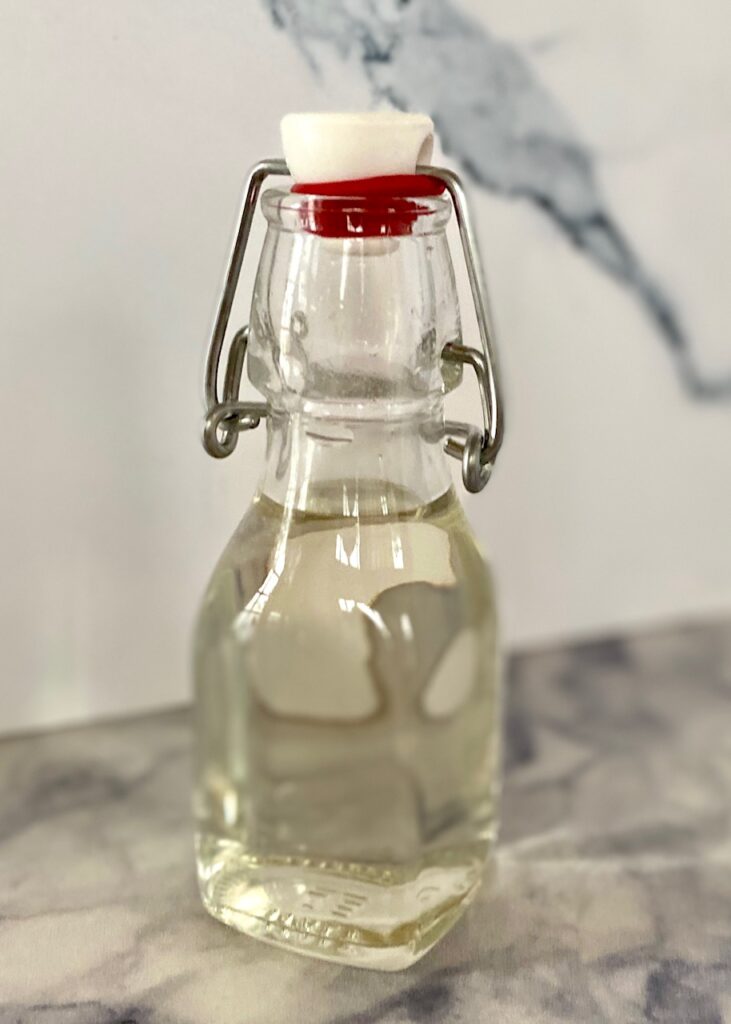
- Pour into a glass jar or container, with a lid, and seal it.
- Refrigerate until ready to use.

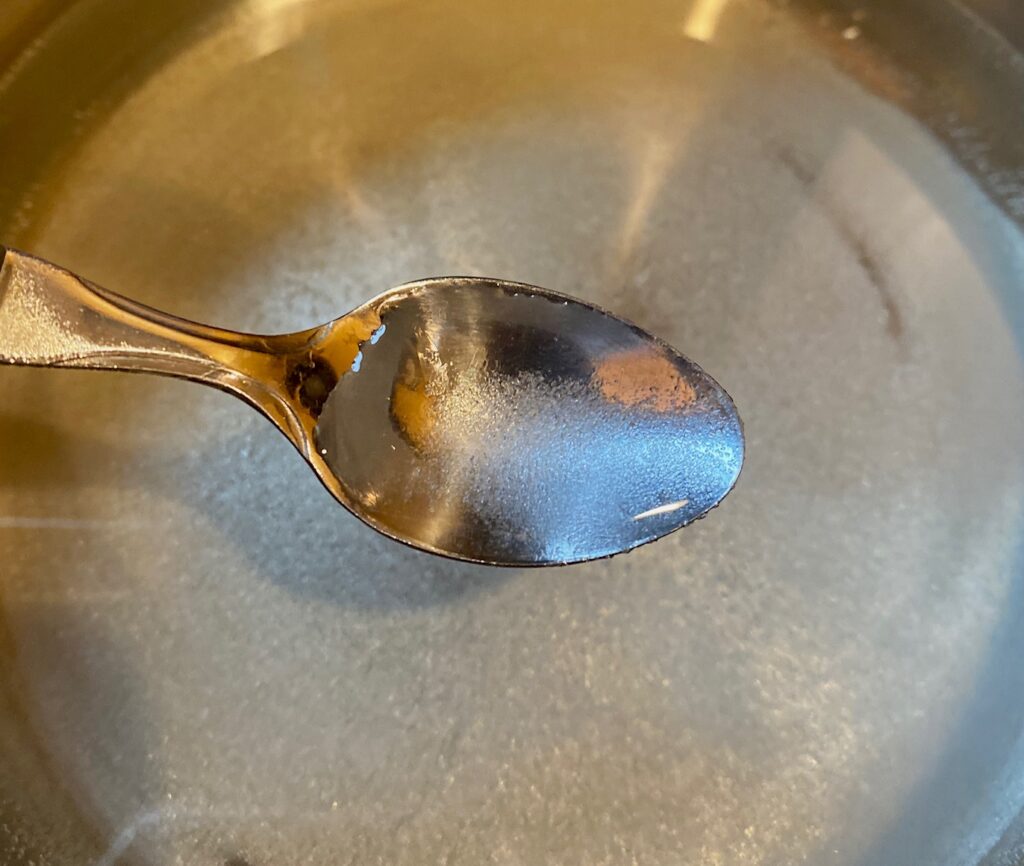
How do you know when it’s done?
In order to test if all of the sugar is completely dissolved carefully scoop up a small amount of the hot mixture with a spoon. There should be no sugar crystals in the liquid. If you see some remaining sugar you’ll need to boil a little longer until all the sugar dissolves.

How long does simple syrup last?
Once cooled and refrigerated the mixture will last in the refrigerator for about 3 weeks. However, just like anything else, use your best judgment, and if it becomes cloudy it’s time to toss it and make a fresh batch.
How to make simple syrup for cocktails
Simple syrup is fantastic when flavored or infused. Any herb, seasoning, spice, or fruit will work. The basic method doesn’t change and you will use the same 1:1 ratio of sugar to water.
Some popular infused simple syrup flavors:
- Rosemary, mint, basil, lavender, rose petal
- Vanilla bean or extract, cinnamon stick, ginger root, pumpkin spice, or espresso powder
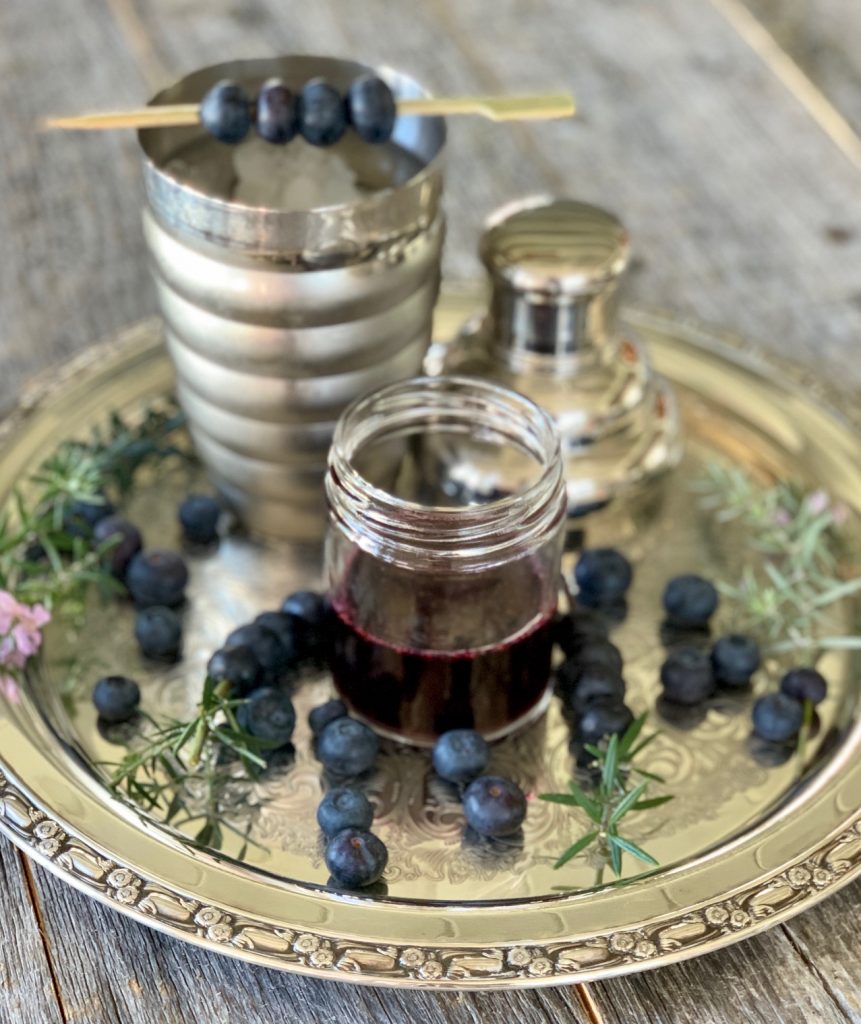
- Blueberry, raspberry, cherry, blackberry, cranberry
- Lemon, orange, grapefruit
Depending on the desired flavor strength there are 2 ways to add the flavor:
- Add the additional flavoring at the end of cooking, and let the ingredients steep off the heat, for a lighter flavor.
- Add it while cooking and cook a bit longer for a stronger flavor (and color).
Once flavored, strain to remove the flavoring ingredients, if needed, before chilling.
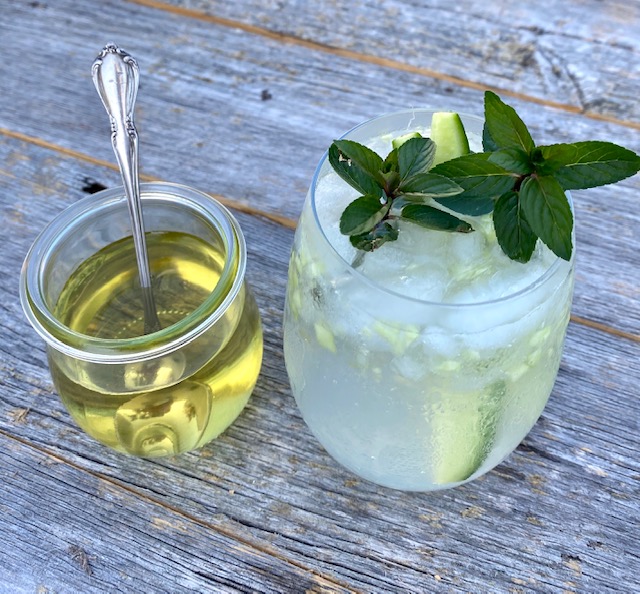
Our easy recipe for how to make lavender simple syrup, or mint simple syrup, are both delicious examples of strained herb simple syrup.
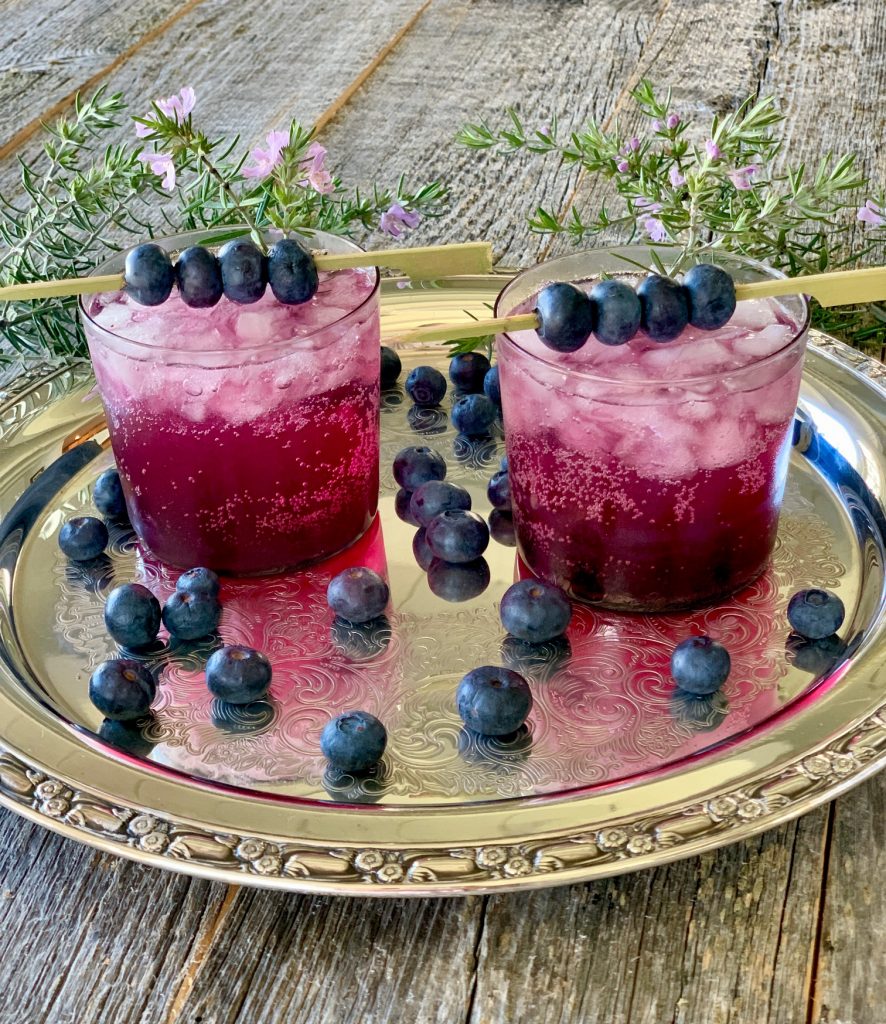
Fruit-infused simple syrup flavors:
Fruit works perfectly for imparting sweet or tart fresh flavor into your syrup. When using fruit you may need to double-strain to remove all the fruit before storing it in a jar. A great example of this can be found in our Blueberry Vodka Cocktail or in the base of our Cranberry Orange Liqueur.
What is “rich” simple syrup?
Rich simple syrup is a 2:1 ratio of sugar to water.
The finished product is much thicker and will usually keep up to 6 months in the refrigerator before becoming cloudy. Many bartenders and home cocktail aficionados prefer the “rich” version because it gives cocktails a bigger mouth feel. You will likely need to simmer a little bit longer with this ratio.
Using simple syrup in baked goods
Brushing cake layers with simple syrup is a great way to ensure they stay moist.
- Simply brush a thin layer to glaze the cake tops, let sit for about 10 minutes, and then continue frosting, as usual.
Can you use other sugars?
Yes! The same ratio applies (1:1)
- Use brown sugar or demerara sugar. Both types work perfectly for whiskey-based cocktails, such as an Old Fashioned or a whiskey sour. These liquid sugars will add a caramel note to coffee drinks. We used brown sugar in our Pumpkin Spice Syrup. Baked goods with cinnamon flavor or cardamom will only taste better with this version.
- Using Honey instead of white sugar tastes great with teas and lemonades.
- Coconut Sugar – coconut sugar is a plant-based low glycemic sugar option.

How to Make Simple Syrup
Ingredients
- 1 cup water
- 1 cup granulated sugar
Instructions
- In a small saucepan add the sugar and water. Stir to combine.
- Cook over medium heat, stirring occasionally, and heat until all of the sugar is dissolved.
- Remove from heat and let cool completely.
- Pour into a glass jar and seal tightly with a lid.
- Syrup will keep, refrigerated, for about 3 weeks.
Notes
- This recipe can be doubled or tripled.
- The ratio is always 1:1 (equal parts sugar to water).
- Store in the refrigerator for up to 3 weeks.
- If the syrup gets cloudy it’s time to discard it.
Nutrition
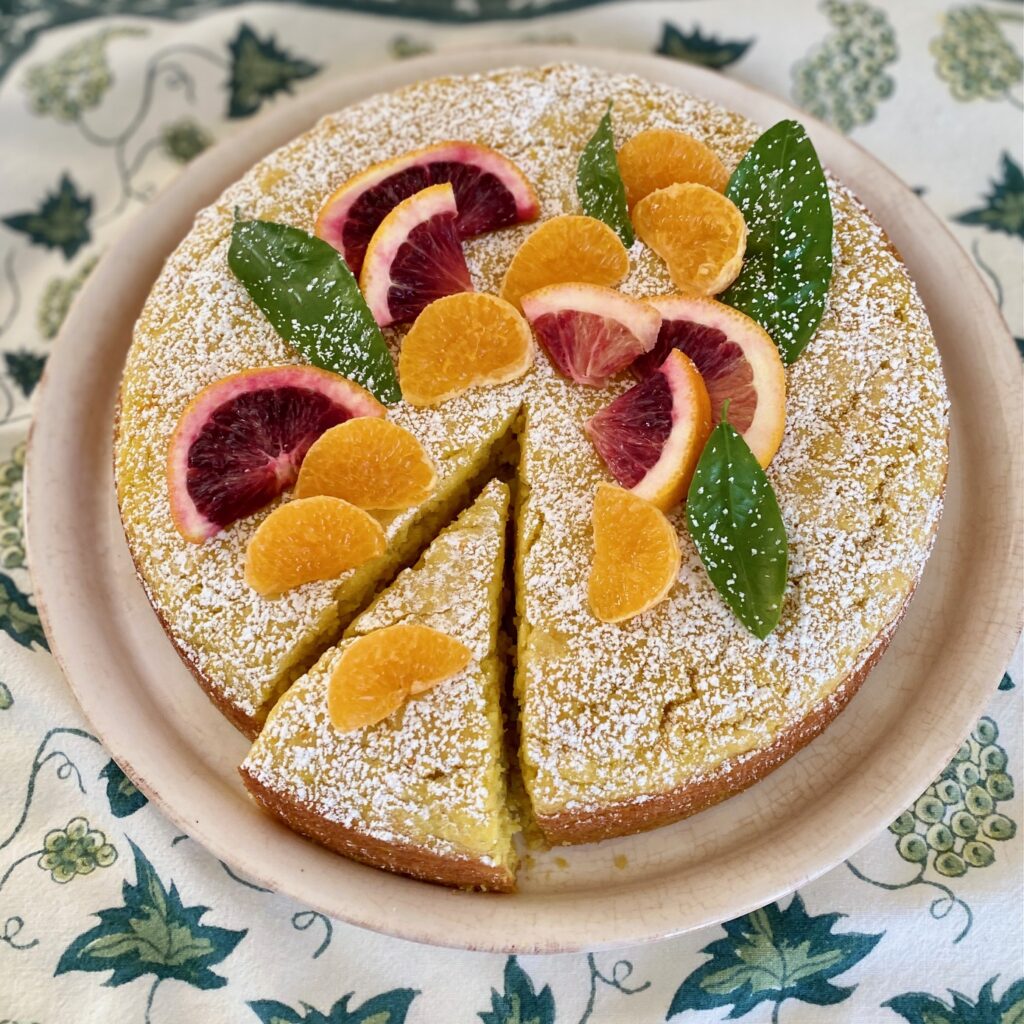
Using the entire orange (orange peel and all) makes this a quick dessert to put together in no time. Adding almond extract gives it a complex flavor.

This moist cake was inspired by a similar cake I had while traveling in Southern Italy. A gifted chef, named Rita, prepared a version of this Mediterranean-style citrus cake for me at Masseria Petrarola in Puglia. Its bright, sunny flavor is a winner! Rita puts sun-kissed citrus segments on top of the cake that have been dried in the courtyard of the ancient estate. Like most olive oil cake recipes the results are magical!
This post contains affiliate links. Please see our affiliate disclosure for more details. We only recommend products we love and use.


You can make this orange olive oil cake recipe in either a bundt cake pan or a 9-inch cake pan which makes it super versatile. We love the look of the bundt cake version sprinkled with powdered sugar.
Ingredients needed:

- Oranges – Use thin-skinned varietals such as Cara Cara oranges, Mandarins, Valencia, or tangerines (more info on varieties below). Using blood oranges will give you a gorgeous pink-hued cake. We used 4 tangerines for this recipe, but any of the oranges mentioned above will work. You’ll need 12 ounces in total
- Olive Oil – We tested our cake with oils from different regions and it does affect the taste slightly, so use your favorite extra-virgin olive oil
- Eggs – room temperature eggs always blend more evenly
- Sugar – this helps balance the tart citrus flavors
- Almond Extract – Almonds and oranges are complimentary flavors, but you can use vanilla extract instead
- All-Purpose Flour – Weighing flour is the most accurate way (290 grams for this recipe) if you have a kitchen scale, but we’ve provided cup measurements in the recipe card below. All-purpose flour keeps this cake light
- Baking Powder – This gives the cake a little lift, so make sure it’s fresh!
- Salt – so important in baking for balancing sweetness
How to make Orange Olive Oil Cake
This cake comes together quickly with the help of a food processor or a heavy-duty blender (such as a Vitamix style blender). If you only have a mini processor just pulverize the oranges in batches and finish mixing in a stand mixer or with a hand-held electric mixer.
- Preheat the Oven to 350˚F and position an oven rack in the center of the oven
- Preparing the Pan:
- For a bundt pan – heavily spray with non-stick cooking spray and make sure all the nooks and crannies are well-coated
- For a 9-inch round pan – heavily spray with non-stick cooking spray, or line with a round parchment paper on the bottom for super easy removal (and clean up), and coat the sides of the pan

- Pulverizing the Oranges:
- Wash the oranges and pat them dry. Cut off both ends and discard. Cut the oranges into quarters, and check to make sure there are no seeds in the orange segments
- Place the cut oranges (peel and all!) into the bowl of a food processor or blender and process until the oranges are in a pulp stage. It’s okay if there are small pieces/flecks of orange peel but overall you want to blend very well. The consistency should be similar to coarse apple sauce
- Drizzle in the extra virgin olive oil and almond extract and blend again until well combined. The mixture will be fairly thick


- Whisking the Sugar and Eggs:
- In a large bowl whisk the eggs and sugar together until light and fluffy (about 2 minutes)
- Add the pulverized orange mixture to the bowl of wet ingredients and gently fold everything together until combined (don’t over-mix)

- Preparing Dry Ingredients:
- In a medium bowl whisk together the flour, baking powder, and salt
- Sift the flour mixture into the orange batter and gently mix until just combined and no streaks of flour remain. Again, don’t over-mix. The final cake batter will be thick thanks to the orange peel


- Baking the Cake:
- Pour mixture into prepared pan and bake in preheated oven until a toothpick inserted in the center of the cake comes out clean. It’s okay if there are a few moist crumbs on the tester.
- NOTE: Every oven cooks differently so start checking for doneness 5 minutes before the suggested baking time
- For Bundt cake – bake for approximately 30-33 minutes
- For a 9-inch round pan – bake 32-36 minutes
- Remove from the oven and let the cake cool, in the pan, for about 30 minutes on a cooling rack
- Run a knife around the edges to loosen it, then invert the cake onto a large serving plate or wire rack to cool it completely
- Just before serving dust the completely cooled cake with powdered sugar, and add fresh oranges or dried orange segments, or candied orange slices, if desired, for garnish

What are the best oranges for Orange Cake?
They are so many varieties of oranges to choose from, especially in the winter months. This Orange Olive Oil Cake works best with thin-skinned oranges. We used a big variety of gorgeous winter oranges in our fresh Citrus Salad.
Thicker skinned oranges have more pith (the white coating between the skin and the orange flesh) and that is where the bitterness lies. So while we want a little bitterness to balance the sweetness in this cake, too much pith can make it too bitter. If you only have thick-skinned oranges on hand, you can still use them but be sure to slice them open and remove most of the white pith before processing.
Examples of thin-skinned oranges are:
- Tangerines (this is what we used) – They are smaller and sweeter with a looser peel, than navel oranges, and in peak season November – May
- Clementines – This is a smaller version of a tangerine. They are sometimes labeled Sweeties or Cuties
- Valencias – also sweet and thin-skinned, most have seeds, and they are very juicy
- Cara Cara – this variety of oranges has a gorgeous orange-pinkish interior, with a sweet juice, so if you choose these the cake will have a more pink hue
- Mandarins – a small, sweet variety of tangerine variety. They have seeds so be sure to remove them if using mandarins for this cake

What is the best kind of Olive Oil to use for cake?
- The olive oil flavor in this cake is soft and subtle and contributes to the end result, which is a super moist flavorful, yet light cake.
- There are a lot of olive oil styles to choose from when making this cake and they all give you a slightly different flavor outcome.
- So, there is no right or wrong choice, but choose a good quality oil that you love. The best way to decide: If you would use it for dipping or on salad you will like it in the cake too.
- TESTING NOTES:
- We tested this cake about 6 times with different oils (It’s a tough job, we know!). The traditional Mediterranean olive oils we used were sourced from Italy, Spain, and Greece. These oils were my favorites because I like a bolder flavor. Others liked the softness of a California olive oil.
How to store and freeze Olive Oil Cake
Can you freeze an olive oil cake? YES – They freeze beautifully!
- ROOM TEMPERATURE: If you have leftover cake (lucky you!), store it in an airtight container or cover it with aluminum foil. It will stay fresh for a few days at room temperature
- FREEZER: Olive oil cake can also be frozen, ungarnished, and wrapped in plastic wrap, for up to two months. Defrost on the countertop before serving and garnishing
Substitutions:
- Try using a springform pan for easier removal of the cake
- Substitute the almond extract with vanilla extract
- Use gorgeous blood oranges for a pink-hued cake with bright orange flavor!
- For added sweetness, drizzle a simple glaze made with confectioners’ sugar and Grand Marnier over the cake
- Need it to be Gluten-Free? Substitute a good gluten-free 1:1 flour
- This cake is already dairy-free!
Other tasty citrus recipes to try
- Want to learn to “supreme” (segment) an orange like a chef? We’ve got a step-by-step guide for you
- Our baby Lemon Olive Oil Cakes are perfect for a sweet petite bite
- Can’t get enough citrus? Our gorgeous Fresh Citrus Salad is perfect for you!
- Citrus works well with spice in this Chili Lime Pork Tenderloin and our fresh baby Arugula Beet Salad

Orange Olive Oil Cake
Equipment
- 1 food processor or blender
- 1 8 cup bundt pan or 9-inch round baking pan
Ingredients
- 12 ounces oranges, thin-skinned varieties, such as cara cara, mandarins, Valencia, tangerines
- ½ cup olive oil + 2 Tablespoons,
- 2 eggs
- 1 cup sugar
- 1 Tablespoon almond extract (or vanilla)
- 2 ¼ cup all-purpose flour (290 grams)
- 4 teaspoon baking powder
- ½ teaspoon salt
Garnish
- ¼ cup powdered sugar, optional
- 6-8 orange segments, optional
Instructions
- Oven: Preheat the oven to 350° F. Position a rack in the center of the oven.Prepare the pan: Heavily spray with non-stick spray, a bundt pan, or a 9-inch round baking pan. Lining the round pan with parchment paper is helpful.
- In a medium bowl, whisk together flour, baking powder, and salt and set aside.
- Cut the ends off the oranges and quarter them. Remove the seeds, if needed.
- In the bowl of a food processor (or a powerful blender) add the oranges (peel and all!) and process until they are pulverized and almost pureed.Drizzle in the olive oil and almond extract, and blend until just combined.
- In a large bowl whisk the eggs and sugar until light and fluffy.Scrape the orange puree mixture into the egg mixture and gently fold everything together until well combined.
- Sift the flour mixture into the orange batter and gently mix until just blended. Don't overmix.
- Pour into the prepared pan.
- Bake: Bundt pan for 30-33 minutes and 9-inch round pan for 32-36 minutes. Begin checking for doneness at the 27-minute mark. Cake is done when the center is set and a skewer inserted into the middle comes out clean. The cake should be very lightly brown on top. The internal temperature on an instant-read thermometer should be 200℉
- Remove from oven and let the cake cool in the pan for about 30-minutes. Run a small knife around the edges to loosen and invert onto a large plate or cooling rack. Let cake cool completely
Optional Garnish
- Just before serving dust the cake with the powdered sugar and add orange segments to the top.
Notes
- Greasing as well as lining a 9″ round pan with parchment paper makes removing the cake easier
- For added flavor drizzle a simple icing over the cake or top with toasted almonds
- No almond extract? Use vanilla extract instead
- This recipe was tested using 3 medium tangerines
- Our bundt cake pan is an 8-cup capacity pan
Nutrition
This simple recipe is a nostalgic beverage and is one of the all-time favorite coffee flavor drinks. The best way to enjoy one is to grab a seat at the Buena Vista Café in San Francisco
Sipping a frothy Irish Coffee, with the Golden Gate Bridge in the background, well, it just doesn’t get better than that!
Our single memory of this became the inspiration for this post, along with the fact that we both love to brew up these amazing cocktails on a chilly night for friends and family. We could not resist sharing this recipe with you.
This post may contain affiliate links. Please see our affiliate disclosure for more details.

Irish Coffee Recipe Ingredients:
This true Irish coffee drink uses only four ingredients.
These drinks are easy to make and a great addition to brunch or happy hour, and they also make a perfect after-dinner drink. We love to make them on a chilly Fall night or during a winter storm because they are such a cozy drink! It’s the pick-me-up cocktail you will want to make over and over!
Here are the ingredients you will need to make a great cup of coffee:
- Fresh Brewed Dark Roast Coffee – make sure it’s piping hot!
- Irish Whiskey – choose your favorite brand – we have a list below of favorites
- Sugar Cubes – we like the taste and look of raw sugar cubes
- Heavy Whipping Cream – whipped until lightly firm (it’s sometimes labeled heavy cream)

How to make a classic Irish Coffee recipe:
The key ingredient in making an original Irish Coffee is fresh whipped cream. The cream needs to be whipped to just the right consistency so that it will float on top of the coffee. The coffee is meant to be sipped through the cream.
- Prepare your coffee
- PRO TIP: For best results when making the perfect hot drink heat up the cup while preparing the coffee. Make sure the cup is a heatproof glass. Fill the cup with hot water and let it sit, allowing the cup to get hot. Pour out the hot water once you are ready to pour in the drink. The San Francisco Chronicle called these the best Irish Coffee mugs, and they have been used since the early 1940s.
- Use a milk frother to whip the cream until lightly frothed and foamy, but not firm. This will take about a minute to a minute and a half.
- Next, place 2 raw sugar cubes into the warm cup. One cube of sugar is equal to one teaspoon. If you don’t have cubes you can use 2 teaspoons of sugar.
- Pour in hot brewed coffee until the cup is ¾ full.
- Stir the cup and allow the sugar to fully dissolve.
- Add one ounce of Irish Whiskey.
- Gently pour the frothed whipped cream over the back of a spoon into the drink. Allow cream to spill over the edges of the spoon. This will allow the cream to float on top of the coffee.


The milk frother we used in this recipe is the affordable Aerolatte Milk Foamer.
Choose a great Irish Whiskey to use in Irish Coffee
As you would assume, Irish Whiskey comes from the country of Ireland. The word Whiskey comes from the Irish word “Gaelic”, which means “water of life”. At one time in history, it was the most popular spirit in the world. In the United States, Jameson has become the Irish Whiskey of choice.
The process to make Irish Whiskey begins with a yeast fermentation mash of corn, wheat, and barley and is distilled three times. This extra step in the distilling process makes for a lighter smoother finish on the palate.
Depending on the process used to make the whiskey the end product can have overtones ranging from spicy to fruity. You will want to choose a whiskey whose flavor profile does not overpower your drink.
You will find many great Irish Whiskey brands on the market. We used Tullamore Dew Whiskey in this recipe, but we also love Jameson Irish Whiskey, which we used in our Irish Cream Liqueur (which you’ll love because it tastes just like Baileys!).
Here are a few we recommend:
- Tullamore Dew Irish Whiskey – a classic that is used at the original Buena Vista
- Jameson Irish Whiskey – it’s a classic at a great price point
- Bushmills Irish Whiskey – has a spicier edge
- Green Spot Irish Whiskey – has a fruity flavor
Enjoy these additional delicious drinks on our site:
- Pumpkin Spiced Latte
- Homemade Irish Cream liqueur
- Homemade Bloody Mary Mix
- Classic Bellini Cocktails


Irish Coffee Recipe
Equipment
- One milk frother
Ingredients
- 2 cubes raw sugar
- 6 ounces brewed coffee
- 1 ounce Irish Whiskey
- 2 tbsp frothed whipping cream
Instructions
- Use a milk frother and whip the cream until lightly frothed and foamy, but not firm. This will take about a minute to a minute and a half.
- The first step in making the perfect Irish Coffee is to heat up the cup. Fill cup with hot water, let sit for a few seconds allowing cup to get hot. Pour out water.
- Next place 2 raw sugar cubes into the warm cup. One cube of sugar is equal to one teaspoon. If you don't have cubes you can use 2 teaspoons of sugar.
- Pour in hot brewed coffee until the cup is ¾ full. Give the cup a stir, allowing sugar to dissolve.
- Add one ounce of Irish Whiskey.
- Gently pour frothed whipped cream over the top of a spoon. Allowing cream to spill over the edges. This will allow the cream float on top of the coffee.
Nutrition
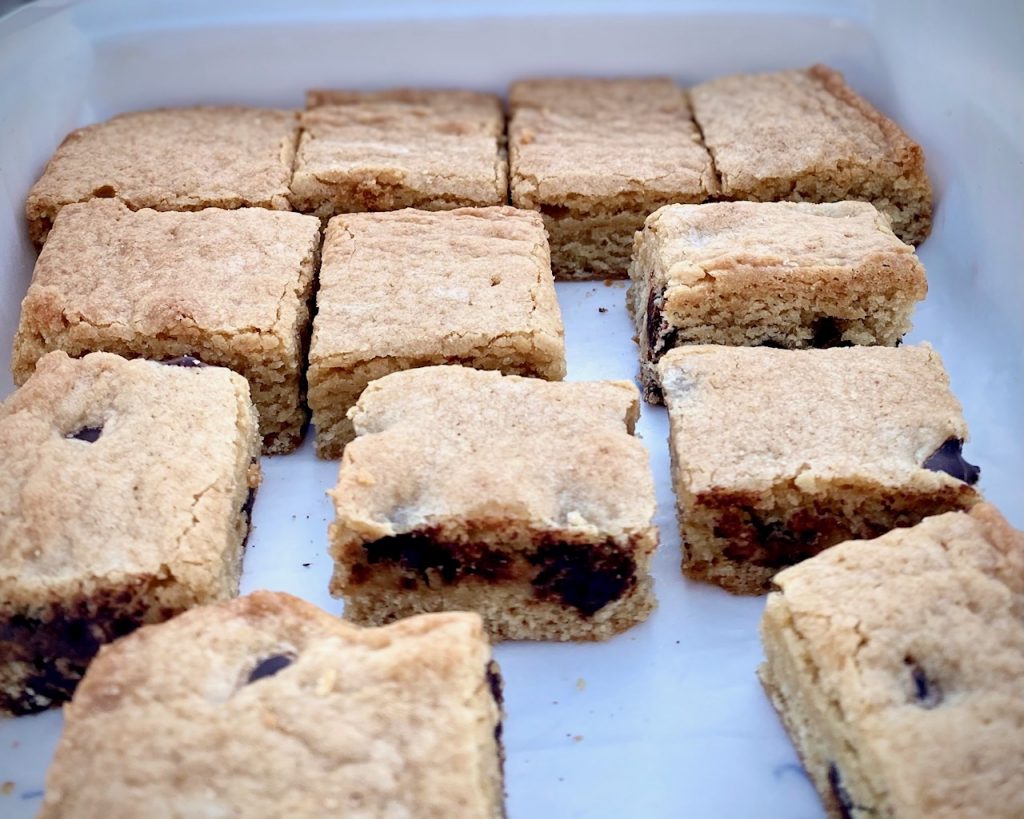
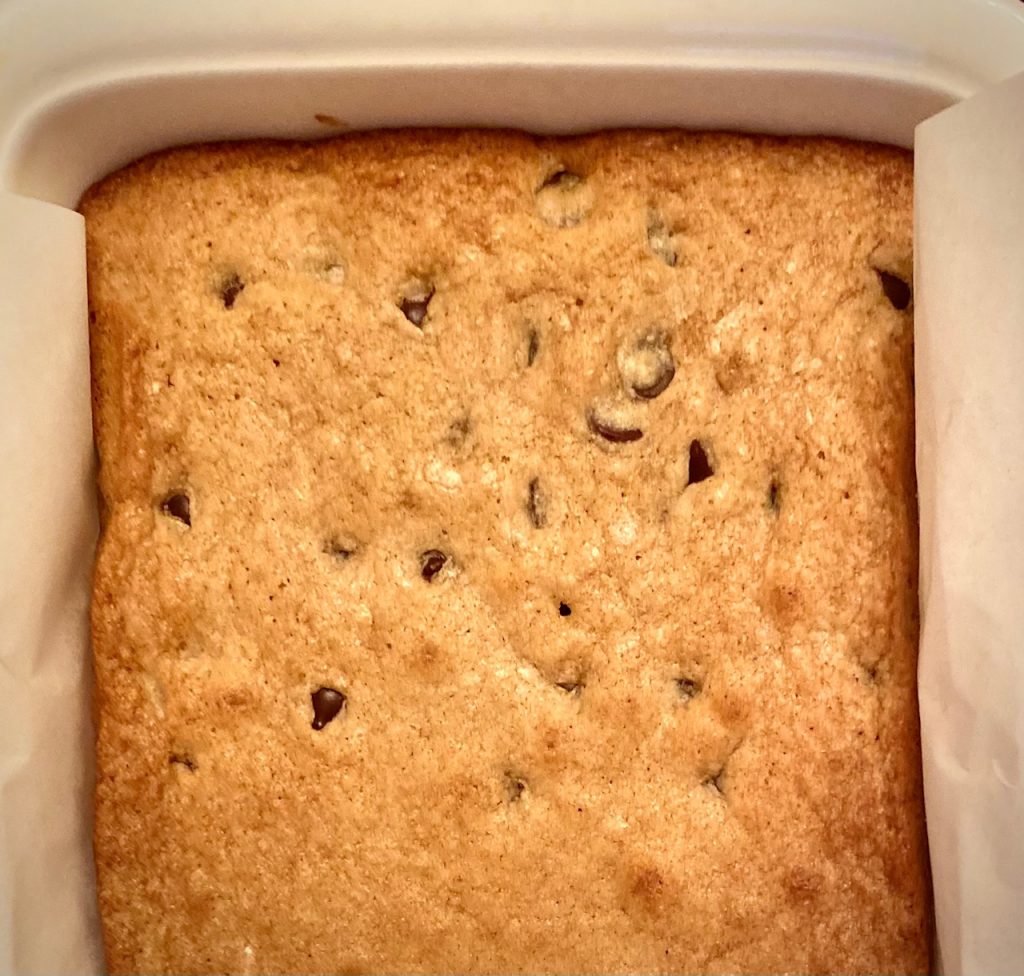
Blondie Bars are one of the easiest one-bowl recipes you will ever make
They take just 15 minutes to prepare and 25 minutes to bake which makes them one of our favorite types of treats!
Our recipe includes the option of mixing in extras like chocolate chips, white chocolate chips, and chopped nuts. You don’t even need a mixer for this recipe!
Ready to get started? Just click on our “jump to recipe” button below to go straight to the recipe card. For tips, processes, and substitutions keep reading.
Jump to RecipeBy the way, these Blondie bars taste terrific without any add-ins too (which actually makes them a true Blondie). Read below for more mix-in ideas.
What is the difference between a Brownie and a Blondie?
Chocolate! Blondies are also called “blond brownies” because of their light color. They have no cocoa in them but they have the same texture as brownies and taste like vanilla and brown sugar rather than chocolate. Speaking of brownies – ours are also a one-bowl treat!
Chocolate Chip Blondies also differ from chocolate chip cookie bars because they have more brown sugar which gives them more of a butterscotch flavor (yum!). We use dark brown sugar to get a deeper flavor but you can easily substitute light brown sugar if you prefer a lighter color and flavor.
Ingredients needed:
- Dark Brown Sugar – sub in light brown if you want
- White Sugar – helps balance the sugar taste
- Butter (unsalted) – if you use salted you may want to omit the extra teaspoon of salt
- Vanilla Extract ~ we like to make our own! Don’t skip the vanilla in the recipe – it’s a must!
- Eggs – our version has 2 eggs for a super moist Blondie
- All-Purpose Flour – give it a stir before you toss it in to aerate it
- Baking Powder – this gives the Blondies a little lift
- Cornstarch – don’t skip this secret ingredient because it helps makes the bars soft and chewy
- Salt – just a teaspoon to balance the sweetness
- Optional Mix-ins ~ chocolate chips or chunks are our top choice but more on that below!

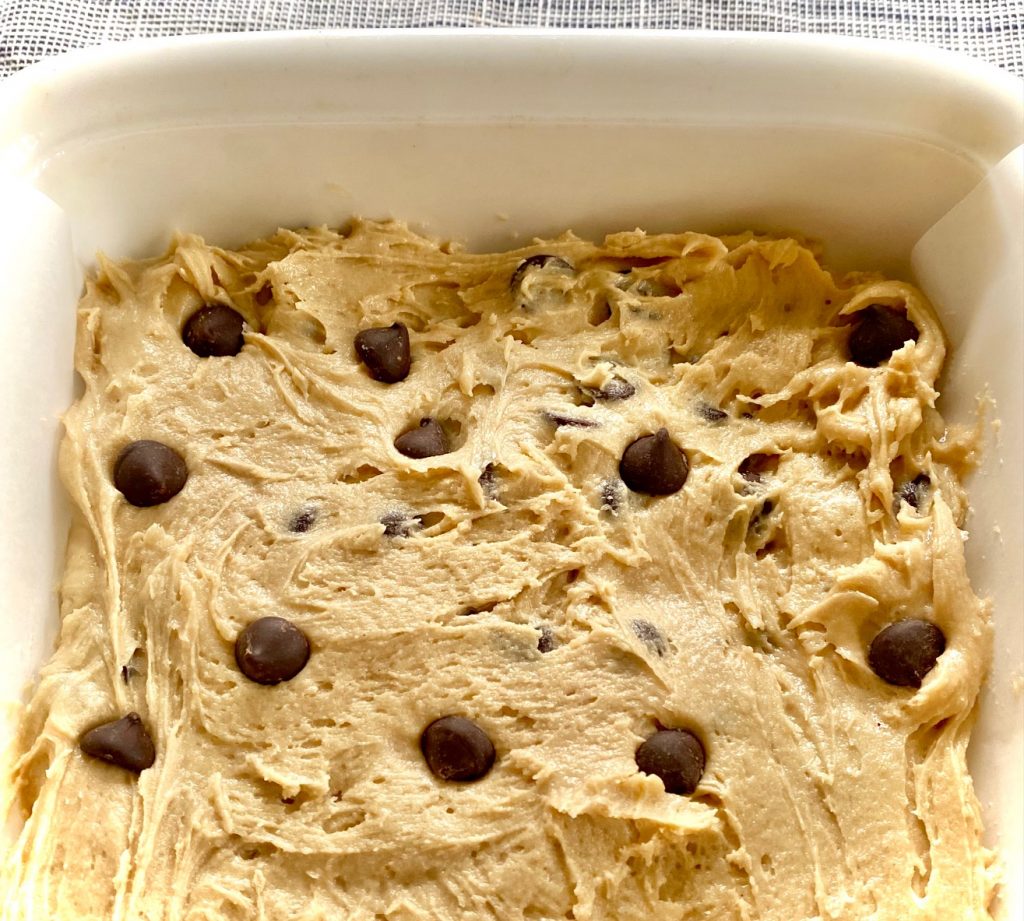
How to make the best Blondies from scratch:
- Place the oven rack in the center of the oven and preheat the oven to 350°F.
- Prepare a pan by greasing and flouring a 9″ x 13″ or a 7″ x 13″ baking pan, or to make removing bars easy after baking, line with parchment paper.
- Combine flour, baking powder, cornstarch, and salt in a small bowl and mix well to combine.
- Fit a stand mixer with the paddle attachment. You can also mix by hand.
- Place softened (or melted and cooled) butter plus both sugars in the mixing bowl and mix until well blended, about 1 minute.
- Add vanilla plus 1 egg and briefly mix to combine. Add additional egg and mix lightly.
- Add the flour mixture and mix only until everything is incorporated. Do not overmix as this will cause a less tender finished product.
- If adding mix-ins now is the time to gently fold them in by hand.
- Spread evenly into pan and bake until the top is golden brown and a toothpick inserted comes out almost dry but not quite. You want the middle to look just slightly underdone.
- Allow to cool for at least 30 minutes before cutting into bars.

What makes a Blondie recipe chewy rather than cakey?
We like our chewy blondies chewy, rather than cakey. There are two factors that help get us there.
- Egg yolks: We use 2 eggs in this recipe and the extra yolk helps make these bars chewier as a result.
- Cornstarch: Too much flour can cause dry baked goods. Cornstarch allows us to cut back just a little on the flour but gives us a tender crumb as a reward

Tips for the best soft blondies:
Although this is a very simple recipe there are a few key tips to follow to ensure the best soft chewy Blondies
- Do not over mix! This recipe really benefits from a gentle hand when mixing. If you over mix these blondies they will not be nearly as moist or tender. Just mix the batter until it is combined. This holds true for brownies and any type of cookie bars, as well.
- Be careful not to overbake. The color should be golden brown and while the edges will be fully cooked the center of the pan should still be a little soft. Blondies will continue to cook as they cool. The cooking time will vary depending on the pan size noted in the recipe card below.
- Choose the best quality ingredients. There are just a few simple ingredients in these brown sugary bars so the flavor of each ingredient really shines through.
- The most important ingredient is good quality vanilla extract. If you want to learn how to make your own, try our easy 2 ingredient pure vanilla extract. It’s amazing and more economical in the long run.
- I like to use dark brown sugar to get a deeper flavor. However, you can use all light, all dark, or half of each with good results. If you use all dark brown sugar the blondies will be richer, sweeter, darker in color, and a bit more moiste.
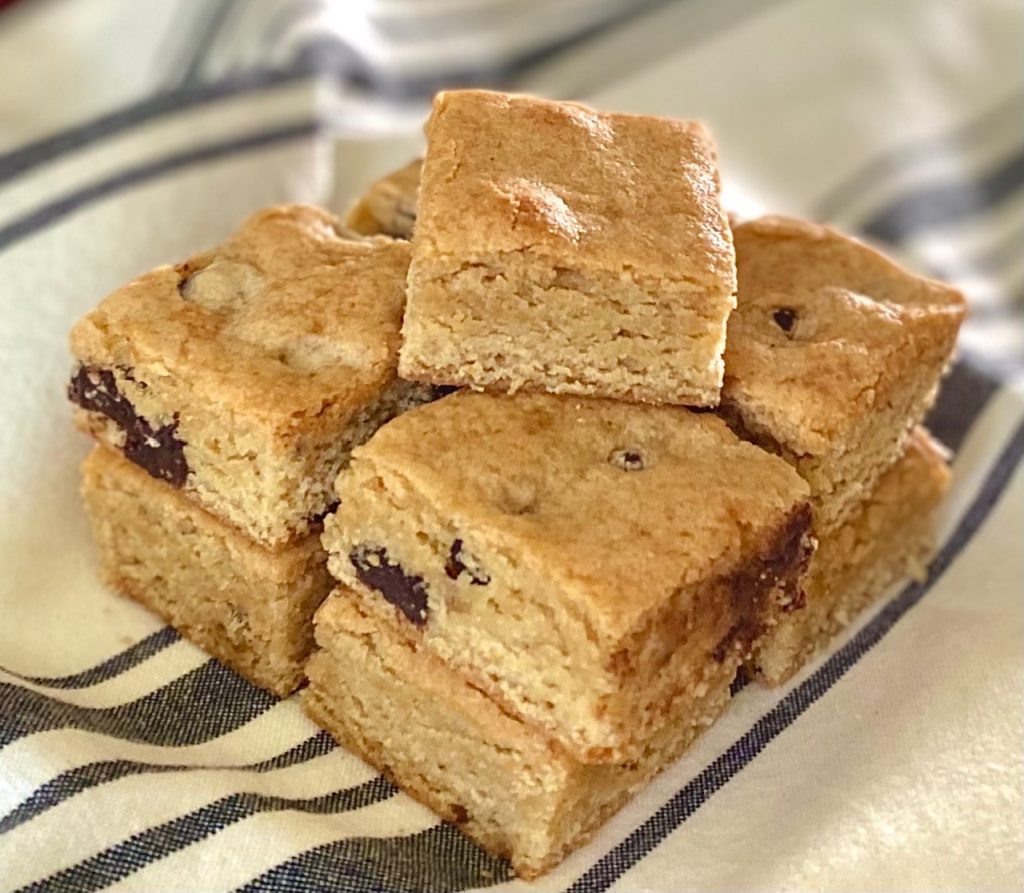
Plain and Chocolate Chip Blondies
What are the best mix-ins for classic Blondies?
Blondies are like a blank canvas because almost everything tastes great mixed into them. You can add up to 1 cup of mix-ins to this recipe.
Here are some of the most popular choices:
- White Chocolate Chip Blondies are a favorite of any white chocolate fan!
- Dark Chocolate Chips or chunks are the choice in my house, but you can use chopped chocolate, as well.
- Butterscotch Chips are a marriage made in heaven with these Blondies because they add to the caramel type flavor.
- Try a mixture or combo of any of the above chips.
- Any type of chopped nuts will work such as walnuts, almonds, macadamia nuts, or peanuts. Be sure to chop roughly before adding.
Other easy sweets and treats:
- Our One Bowl Espresso Brownies and Sugar Cookie Bars are Blondie’s cool cousins
- Pair these Easy Blondies with a Pumpkin Spice Latte
- Imagine these Blondies drizzled with Salted Caramel Sauce or our 10-minute Hot Fudge Sauce
- If you’ve never tried Cowboy Cookies or Double Chocolate Chip Cookies then you are in for a delicious treat!
Easy Blondie Recipe
Ingredients
- ¾ cup dark brown sugar firmly packed
- ¾ cup sugar
- ½ cup butter very soft or melted
- 1 Tablespoon vanilla extract
- 2 large eggs
- 1 ½ cups all-purpose flour
- 1 teaspoon salt
- ¾ teaspoon baking powder
- ¾ teaspoon cornstarch
- ½ cup chocolate chips white or dark, Optional
Instructions
- Preheat oven to 350°F.Grease and flour a 9"x13" or a 7"x11" baking pan, or line with parchment paper.
- Stir together flour, salt, baking powder, and cornstarch in a small bowl. Set aside.
- Melt butter (alternately use very soft butter) and add to a large electric mixing bowl fitted with the paddle attachment. Add both sugars to the bowl and mix until completely combined.
- Add vanilla and eggs one at a time, mixing lightly between each addition.
- Add flour mixture to mixing bowl, and gently combine until just mixed together. If adding chocolate chips, or any other mix-ins, fold in by hand.
- Spread batter into prepared pan and transfer to oven.
- Bake for 20-22 minutes for a 9"x13" pan or 25-27 minutes for a 7"x11" pan, or until a toothpick inserted around edges comes out clean, but the center is still slightly soft.Cool completely on a wire rack to allow the center to finish cooking before cutting into bars, at least 30 minutes.
Notes
Nutrition
This holiday favorite is always a hit and takes no time at all to make!
Ready to get started? Just click on our “JUMP TO RECIPE” button below. For tips, tricks, and substitution ideas keep reading. This post contains affiliate links. Please see our affiliate disclosure for more details.
Jump to Recipe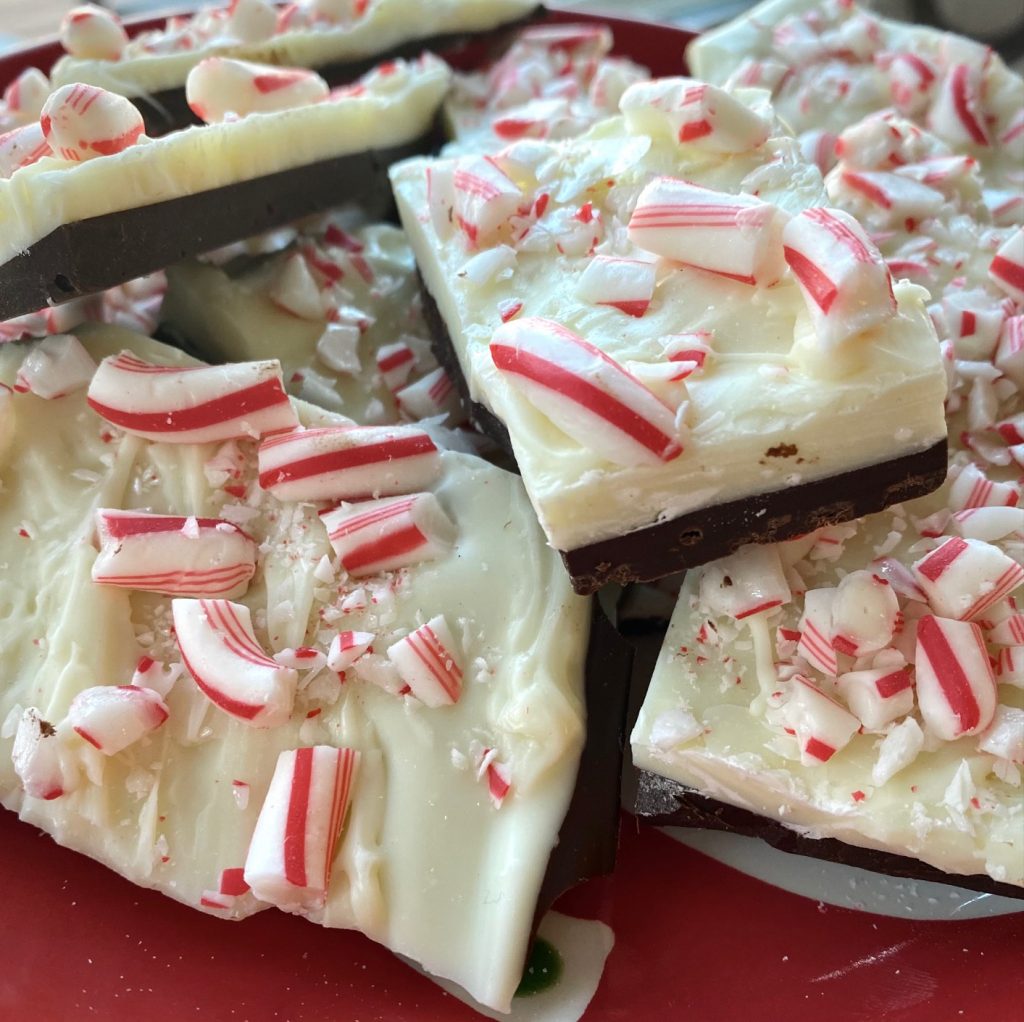
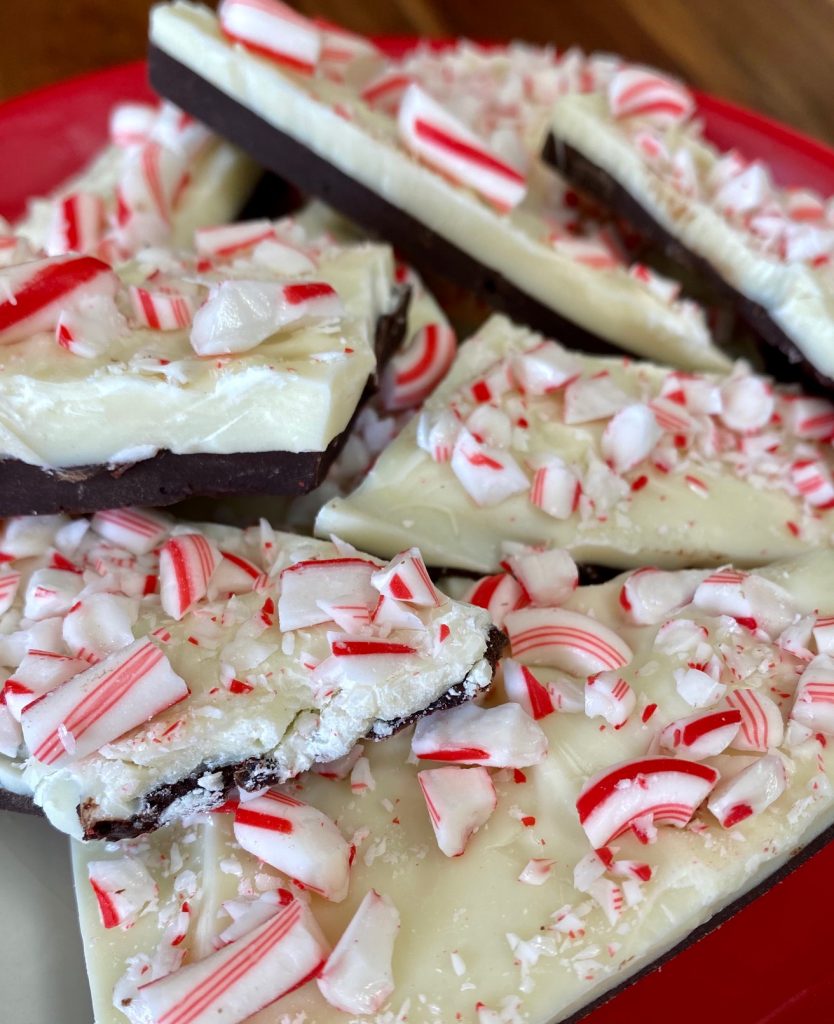
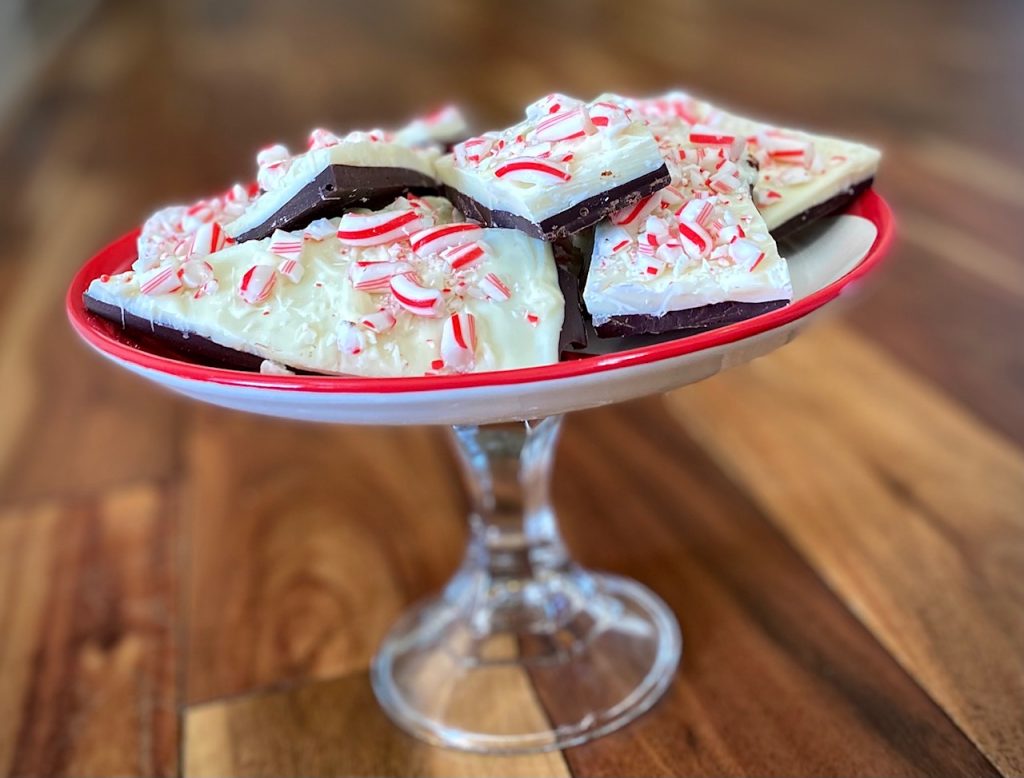
What is Peppermint Bark?
This simple candy is simply white chocolate, layered on top of dark chocolate, then topped with chopped peppermint candies. The white chocolate is flavored with peppermint extract to give it an amazing minty flavor.
Only 4 ingredients are needed and the whole recipe takes just 30 minutes from start to finish. This is the perfect quick holiday treat to share with your family and friends.
Ingredients for Peppermint Bark:
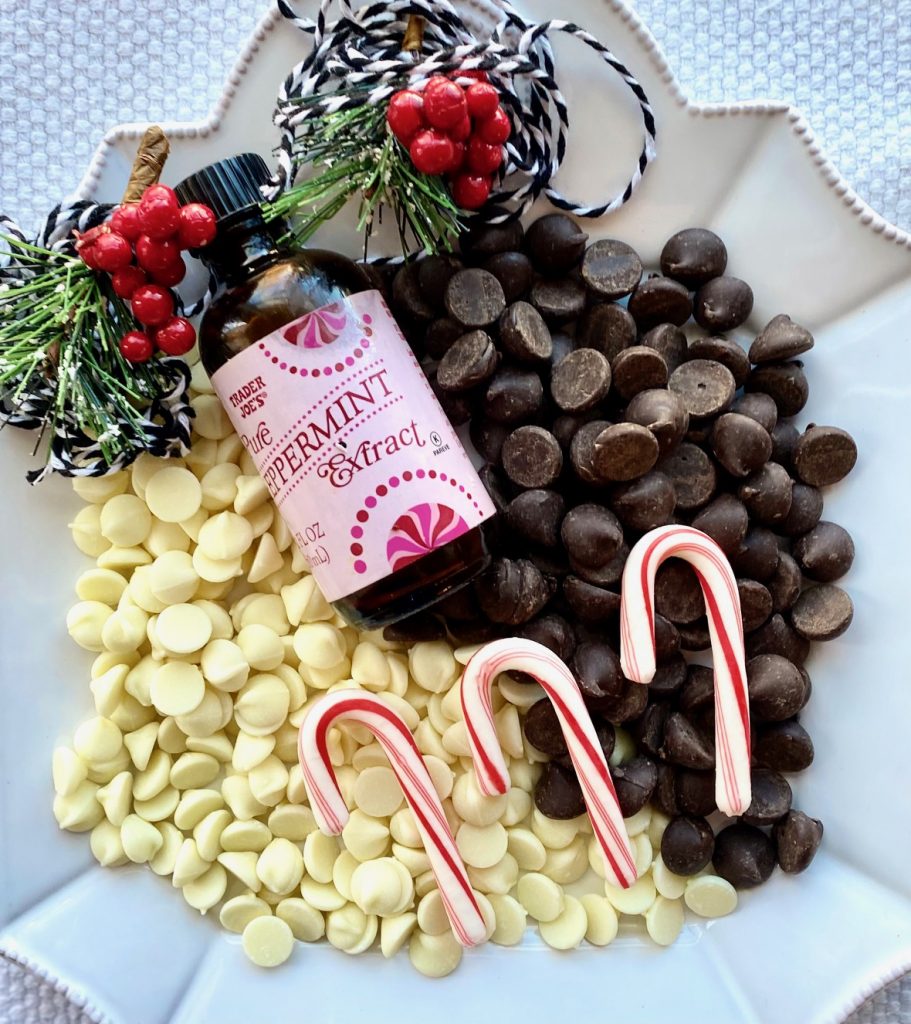
- Dark (or semisweet) Chocolate – We use dark Ghiradelli chips or Guittard extra dark chips
- White Chocolate – Ghiradelli or Guittard brands work best
- Peppermint Extract – Be sure to use pure peppermint extract
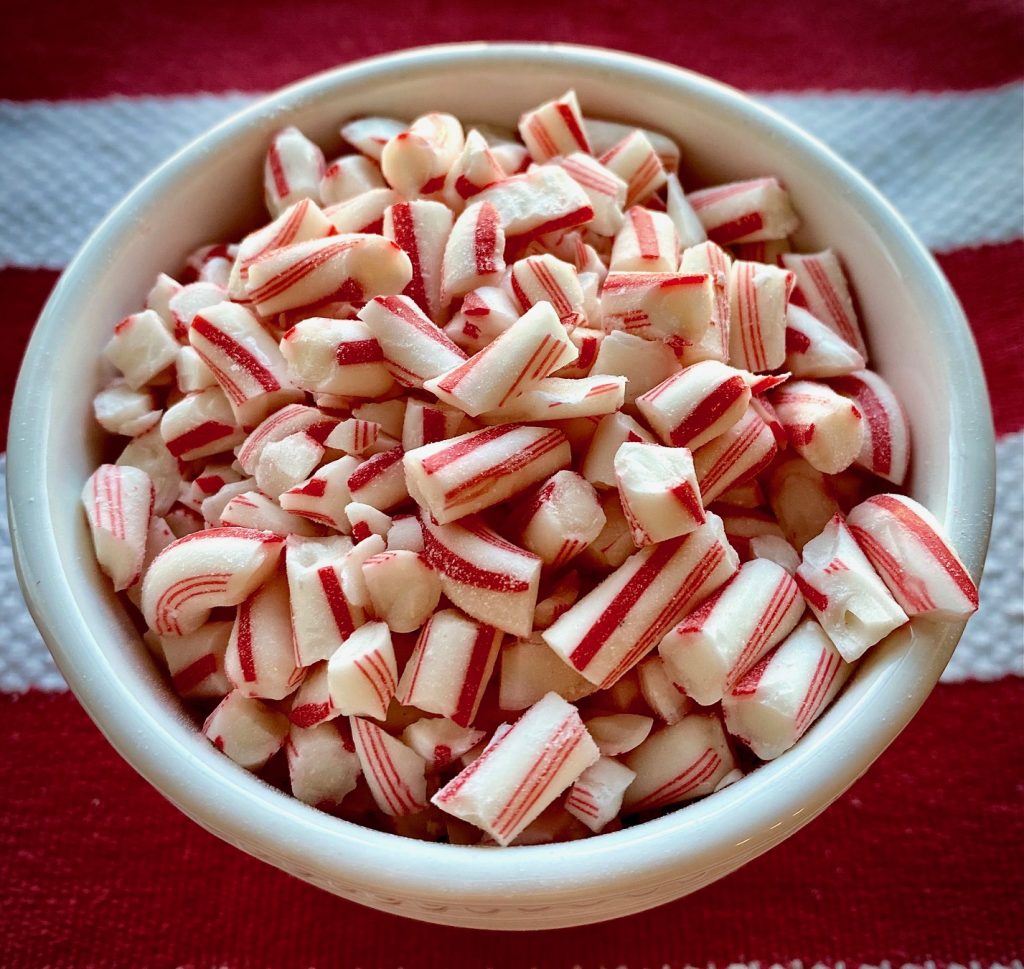
- Candy Canes or Peppermint Candies – either candy canes or hard candies can be used
How to make Homemade Peppermint Bark
- Line a 13″ x 18″ baking sheet pan with parchment paper or a silicone nonstick mat
- Melt dark chocolate by placing it in a heat-proof bowl and microwaving it in 30-second increments until melted. Stir between increments and mix until smooth. It will take only 60-90 seconds total to melt
- Spread an even layer of the melted dark chocolate on the prepared sheet pan. It won’t cover the entire sheet pan
- Chill in the refrigerator for 10 minutes until set
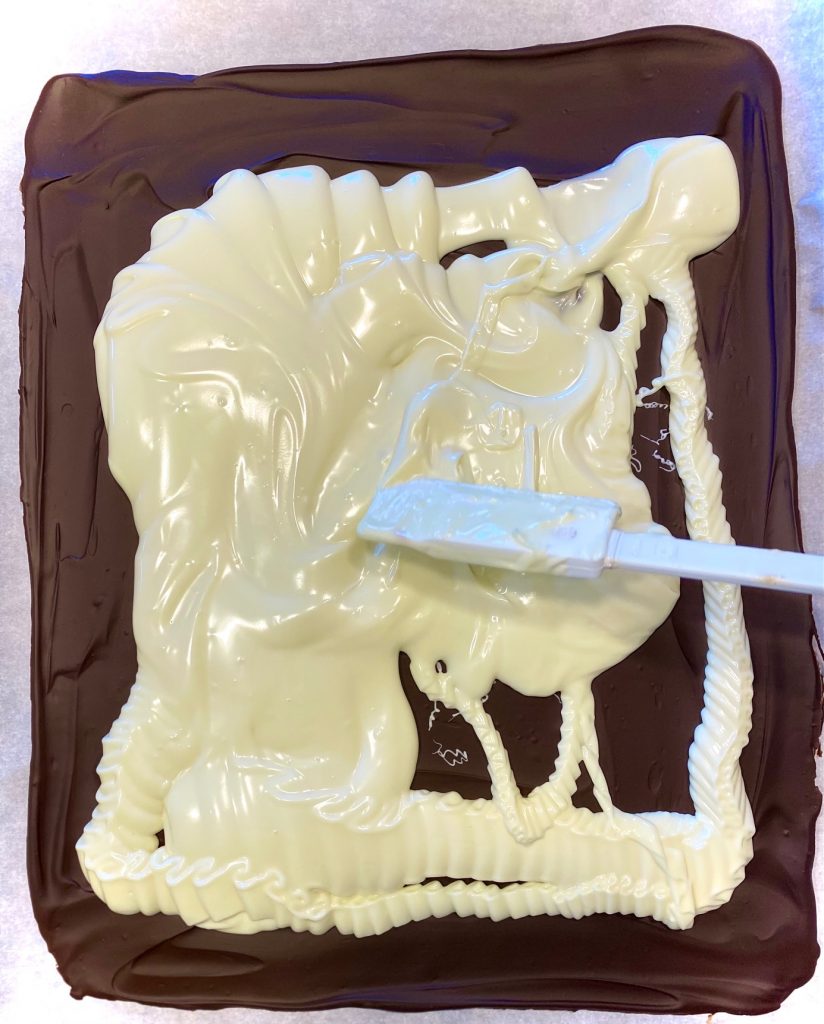
- Repeat the melting process with the white chocolate and stir until smooth
- Add the peppermint extract to the white chocolate and blend thoroughly
- Remove the pan from the refrigerator and pour the white chocolate on top of the dark chocolate. Smooth quickly before the chocolate hardens
- Spread chocolate in even layers. The white chocolate layer will be thicker
- Immediately sprinkle the crushed peppermint candies over the chocolate. Press down lightly so the candies stick
- Refrigerate for an additional 10 minutes
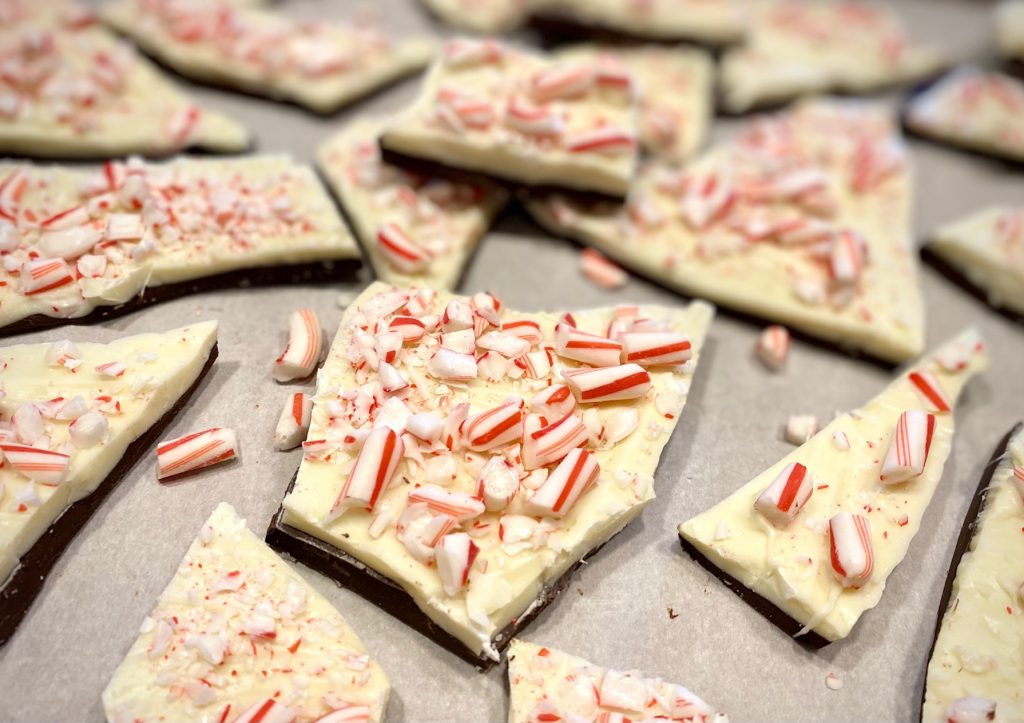
- Once the bark is set, remove it from the refrigerator, bring it to room temperature, and then break apart into bite-size pieces
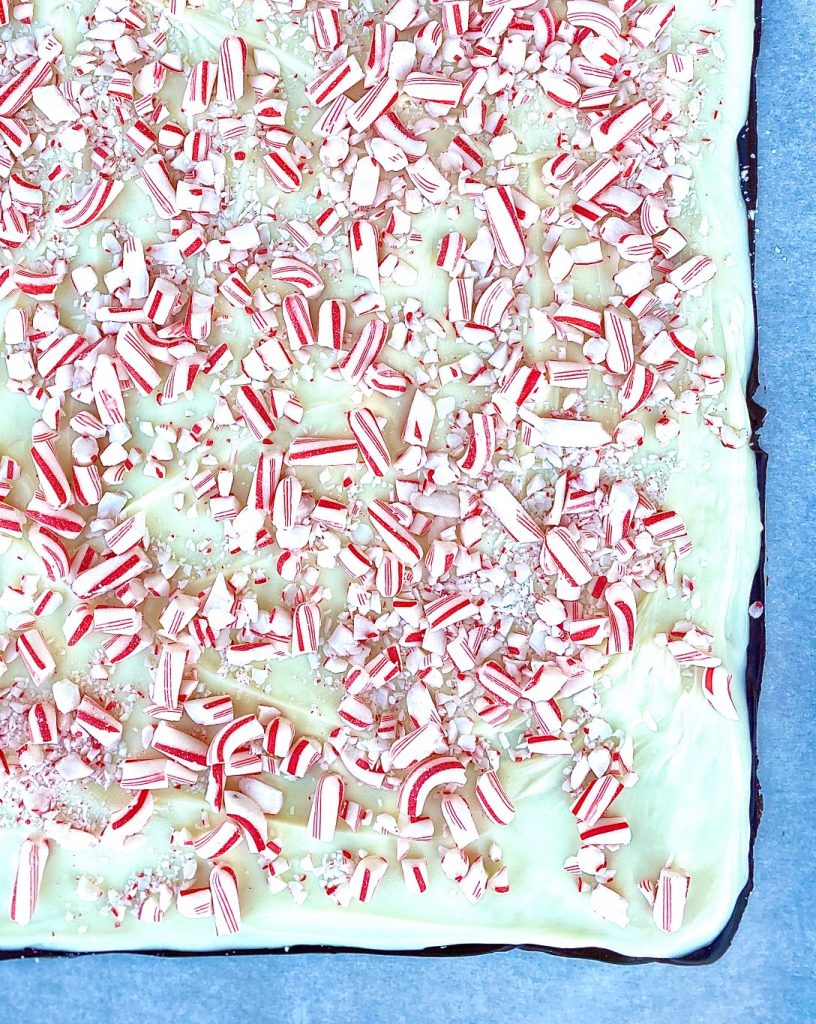
- PRO TIP: Scatter chopped peppermint candy canes over the white chocolate immediately so that the candy sticks to the chocolate
How to melt chocolate on the stove:
If you prefer to melt the chocolate on the stove instead of microwaving it that’s easy too, however, be sure to follow these tips to ensure proper melting:
- You will need a double boiler to melt chocolate on the stovetop
- If you don’t have a double boiler you can make your own. Just place a heat-resistant glass bowl at least one inch above a pot of simmering (not boiling) water. The bowl should not be touching the water. The steam from the pot will melt the chocolate slowly
- Stir constantly until smooth and remove the bowl or upper pan
- Be careful that none of the water or the condensation from the steam reaches the chocolate as this will cause the chocolate to seize (harden in clumps)
What is the best chocolate for bark?
- Chocolate is the star of the show in this recipe so choose the very best chocolate in your budget. We use Ghiradelli or Guittard chips because the flavor is smooth and rich, and it melts beautifully every time.
- When selecting a good white chocolate look for a brand that has cocoa butter instead of palm oil for best results.
- Traditional Peppermint Bark is made with dark chocolate but this bark recipe works with dark, semisweet, or milk chocolate, so pick your favorite!
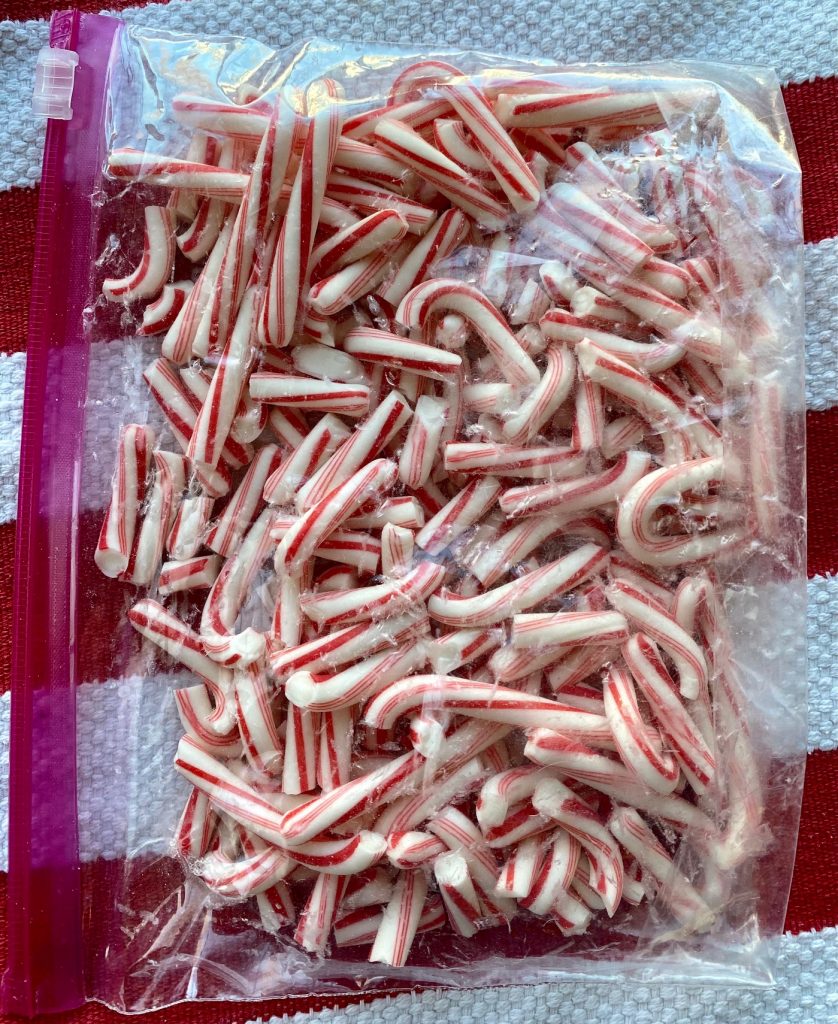
The easiest way to crush candy canes:
Crushing peppermint candy or candy canes can get pretty messy! The easiest way to do it without getting candy everywhere is to place it in a ziploc bag and smash it with a rolling pin or the flat side of a meat mallet.
You could choose to sift the chopped candy canes in a sieve to get rid of the “dust” but that’s optional. You will want some tiny pieces and some chunkier pieces for the best-looking bark.
How to keep Peppermint Bark from separating:
The trick to keeping your layers together is twofold:
- Be sure that each layer has time to set before adding the next layer
- Allow the bark to come to room temperature before you break it into pieces
Can I use peppermint oil?
Yes, you can use pure peppermint oil instead of extract but keep in mind that it is much stronger! For this recipe, you will only need 1/4 teaspoon of oil instead of 1 teaspoon of extract.
Storing Peppermint Bark:
Peppermint bark will last at room temperature, sealed, for about a month. You can refrigerate it but the candy bits will soften. Try wrapping it to avoid any condensation forming on the candy.
You can freeze the bark but it needs to be tightly wrapped in plastic wrap and then sealed in an airtight container. The candy bits will soften once thawed out.

Other Sweets and Treats to try:
- Dark Chocolate Peanut Butter Cups are an easy and gluten-free treat
- Easy Drop Sugar Cookies are festive and great for any holiday
- Chocolate Dipped Pretzels are fun with just 3 ingredients needed!
- Microwave Peanut Brittle is the perfect addition to any treat plate
- Check out our full array of Sweets and Desserts

Peppermint Bark Recipe
Ingredients
- 12 ounces dark or semisweet chocolate
- 16 ounces white chocolate
- 1 teaspoon peppermint extract
- 1 cup candy canes or peppermint candies, chopped
Instructions
- Line a 13" x 18" baking sheet with parchment paper, waxed paper or foil
- Place dark or semisweet chocolate in a medium-sized microwave-safe bowl and microwave in 30-second increments until melted. Stir between increments and mix until smooth.
- Spread an even layer of the melted dark chocolate onto the prepared pan. (It won't quite cover the entire pan). Refrigerate pan for 10 minutes.
- Place white chocolate in a medium-sized microwave-safe bowl and microwave in 30-second increments until melted. Stir between increments and mix until smooth.
- Add the peppermint extract to the melted white chocolate and blend well.
- Remove pan from refrigerator. Spread white chocolate evenly over dark chocolate.
- Immediately add crushed candy canes evenly over the white chocolate. Press lightly to make sure it sticks.
- Refrigerate for additional 10 minutes, or until set.
- Remove from refrigerator, allow to come to room temperature, and break into individual pieces. Serve or store.
Nutrition
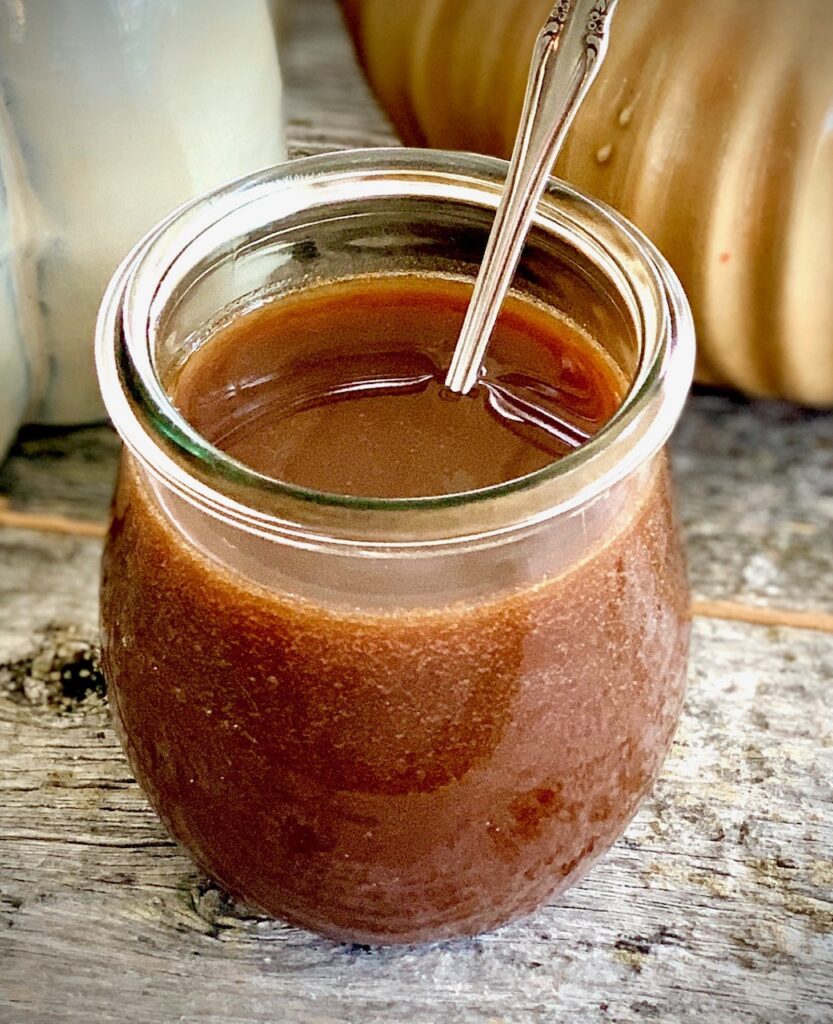
This homemade sauce is super quick because it has no cream but instead uses cornstarch as a thickener
You can make it on the stove in a pan in 10 minutes, or make it in 5 minutes in the microwave! (Directions for the microwave version included in the recipe card as well as below)
This post may contain affiliate links. Please see our affiliate disclosure for more details. We only recommend products we love and use.

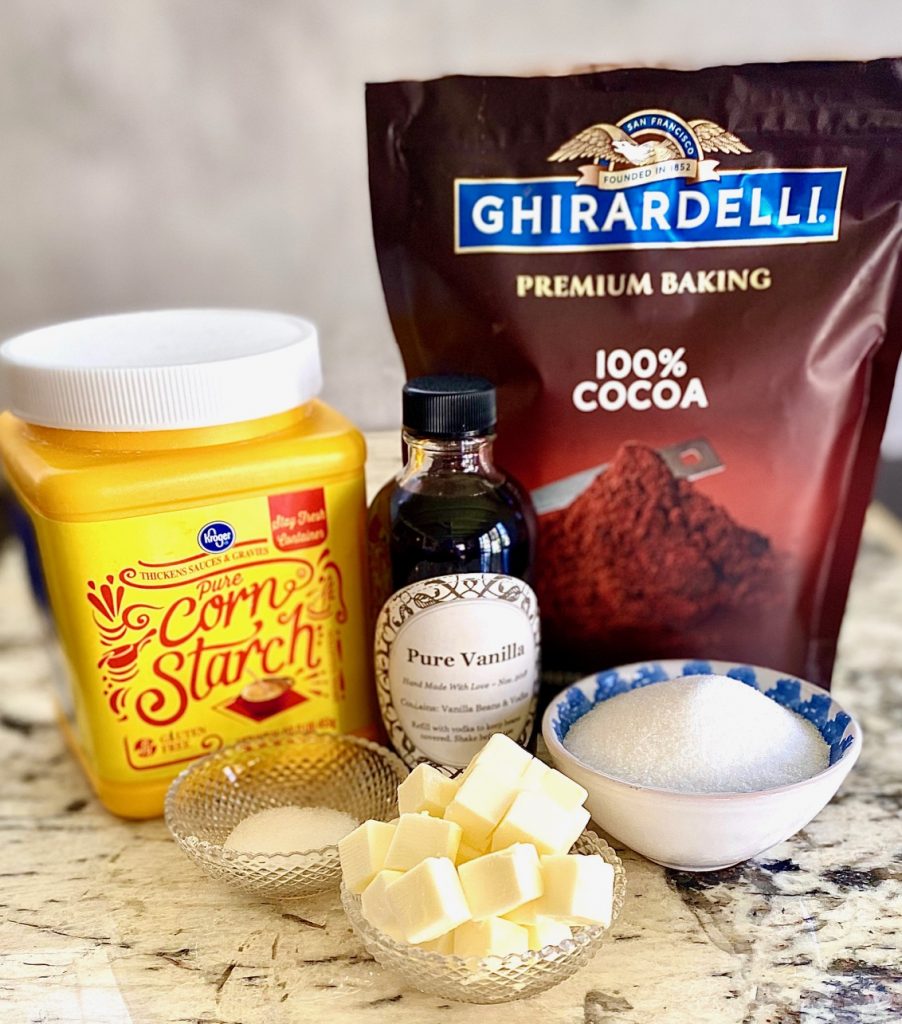
Ingredients for Homemade Hot Fudge
This recipe uses ingredients you probably already have on hand:
- Sugar
- High quality Dark Cocoa Powder – we like Ghiradelli brand 100% cocoa, but choose your favorite. Make sure to use 100% cocoa, not hot cocoa mix
- Cornstarch – this is the thickening agent
- Salt – sea salt is our choice and it helps balance the sweetness
- Butter – choose unsalted for best results, but salted will work too
- Vanilla Extract – you can make your own like we do, or buy a high quality pure vanilla extract at the market or online
How to make homemade Hot Fudge Sauce with Cocoa Powder
This recipe is super quick and easy to make. It’s ready in 10 minutes.
- Combine sugar, cocoa powder, cornstarch and salt. Whisk until no lumps remain
- Add the water and blend well
- Bring the mixture to a low boil over medium heat, stirring constantly, for about 1 minute, until sauce starts to thicken

- Remove from the heat and whisk in the butter, stirring until completely melted
- Whisk in the vanilla extract
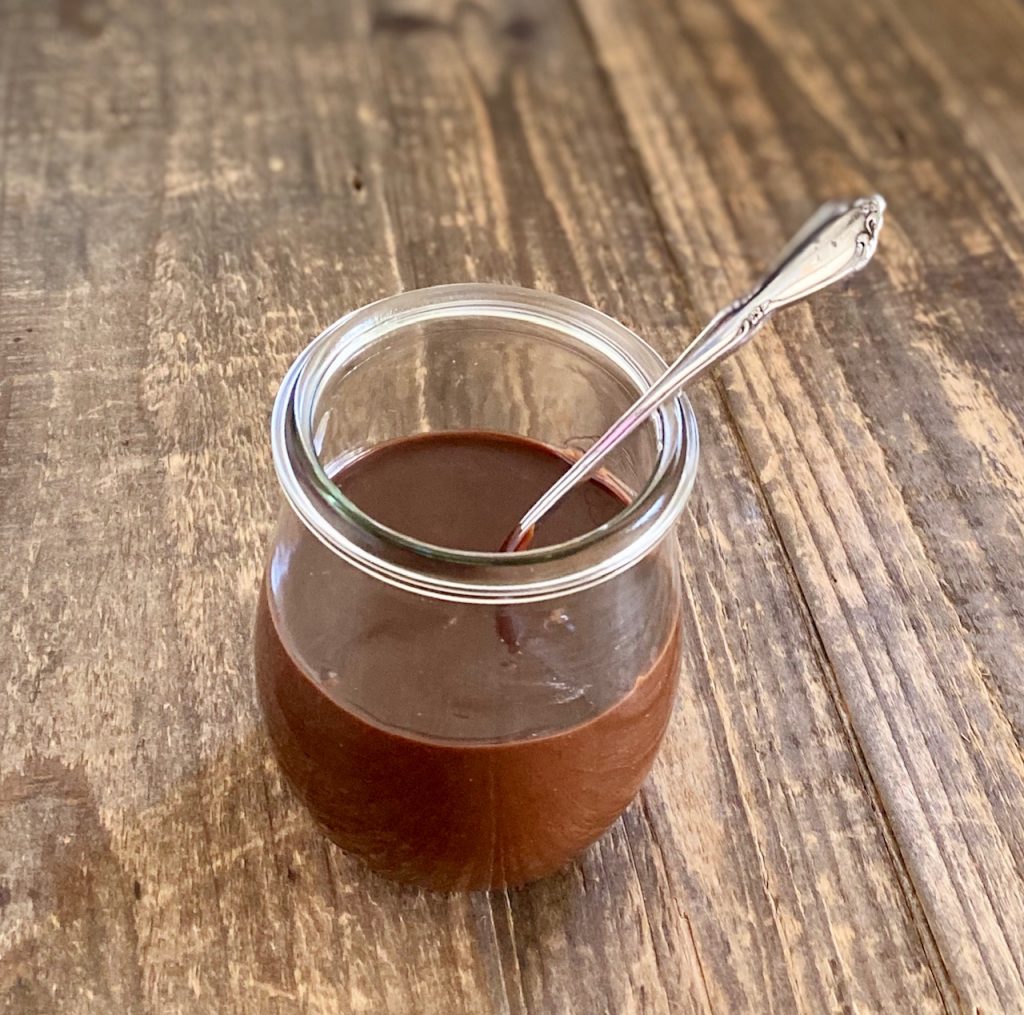
- Pour carefully into a glass jar to store

Microwave instructions
Note: microwaves vary in strength. Ours was made with an 1100 watt microwave
- In a large microwave safe bowl, whisk together sugar, cocoa powder, cornstarch, and salt
- Stir in the water and whisk until very smooth
- Microwave for 1 minute. Whisk and microwave for 1 more minute
- Remove and add the butter. Return to microwave and cook for 45 seconds
- Remove from microwave, and whisk until completely smooth and combined
- Whisk in vanilla extract
- Pour into glass jars to store
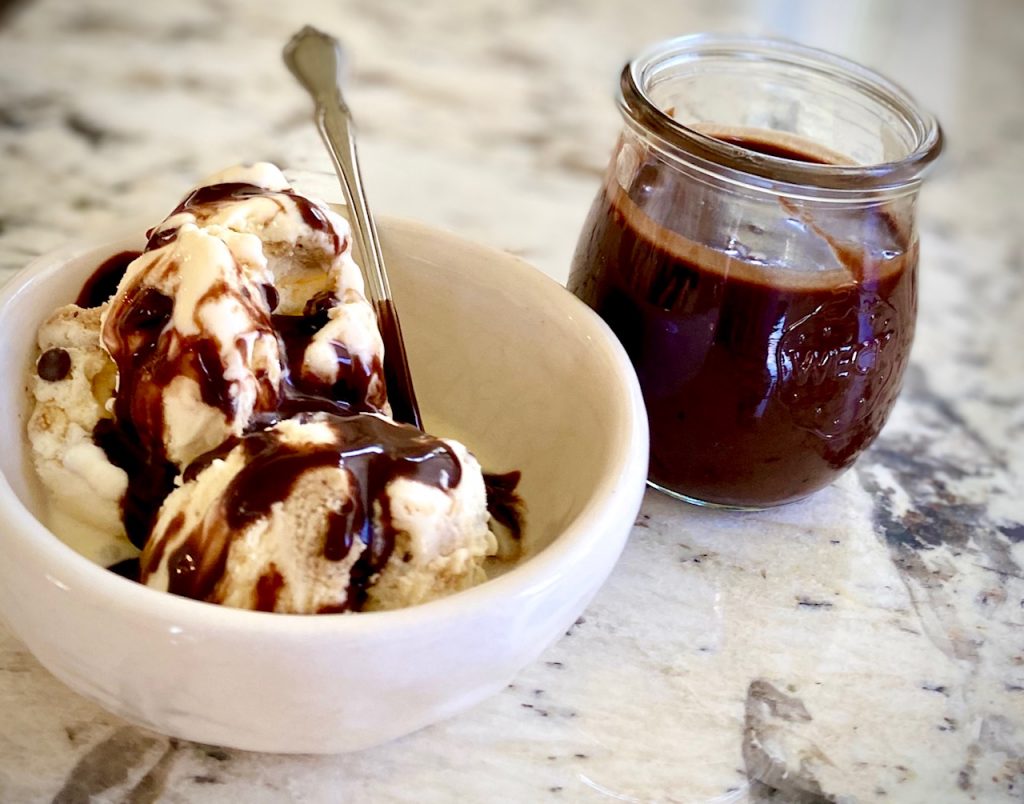
We are big believers that hot fudge sauce and salted caramel sauce are the very best toppings for ice cream. In fact, we could just skip the ice cream altogether and eat homemade hot fudge or caramel sauce straight up!
If you love classic hot fudge but also love the idea of making it quick and easy then this is the sauce recipe for you. It’s great when that chocolate craving hits but you don’t want to stand over the stove forever.
It’s thick but still pourable so great on top of ice cream, drizzled over brownies, or blended into milk.
What’s the difference between Hot Fudge and Chocolate Sauce?
The main difference is the texture and the thickness of the sauce.
- Hot fudge is thick and rich, and usually has dairy, such as butter or cream. Our hot fudge sauce recipe is easy to pour even when chilled, but even better when warmed up.
- Chocolate sauce is thinner, quick to pour, usually has more water and often includes corn syrup.
Storing and reheating
- If not using the hot fudge right away, keep the sauce stored in a sealed container in the refrigerator.
- We suggest using a canning jar with a lid. The sauce will keep for about 1 month (if you can resist eating it for that long!)
- To reheat simply rewarm in the microwave for 20-30 seconds. Give it a stir and let cool slightly before pouring over ice cream.
Gifting this sauce
This sauce is a great gift to give. Just pour into a beautiful glass jar, add a ribbon and a tag and you’re good to go! Be sure to include instructions for refrigerating the sauce.
Other amazing desserts to try
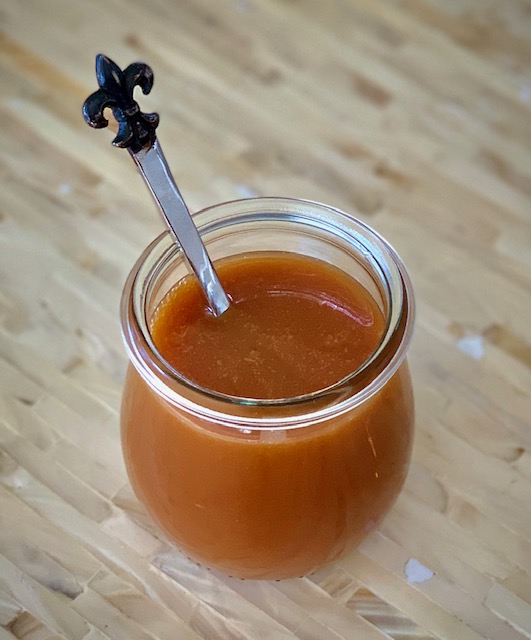
- Easy Salted Caramel Sauce
- Mixed Berry Cobbler
- One Bowl Espresso Brownies
- Baked Churro Donuts
- Giant Skillet Chocolate Chip Cookie

10-Minute Hot Fudge Sauce Recipe
Ingredients
- ½ cup sugar
- 2½ Tbsp unsweetened cocoa powder
- 5 tsp cornstarch
- ¼ tsp sea salt
- ½ cup water
- 2 Tbsp unsalted butter, cut into small cubes
- 1 tsp vanilla extract
Instructions
Stovetop Directions:
- In a medium saucepan whisk together sugar, cocoa powder, cornstarch, and sea salt until no lumps remain.
- Add water and whisk until combined.
- Bring mixture to a low boil over medium heat stirring constantly for about 1 minute, until the sauce starts to thicken.
- Remove from heat and add vanilla extract and butter. Whisk until smooth and butter is completely melted.
- Pour sauce into a heat-proof jar and let cool. If not using right away, let cool completely and store tightly sealed in refrigerator for up to 1 month.
- To reheat, place the amount needed in the microwave for about 20 seconds.
Microwave Directions:
- In a large microwave-safe bowl, whisk together sugar, cocoa powder, cornstarch, and salt. Stir in water and whisk until smooth.
- Microwave for 1 minute, stir, and microwave 1 more minute.
- Add the butter pieces. Cook for an additional 45-seconds.
- Remove from microwave and stir until butter is melted and blended. Stir in vanilla extract.
Nutrition
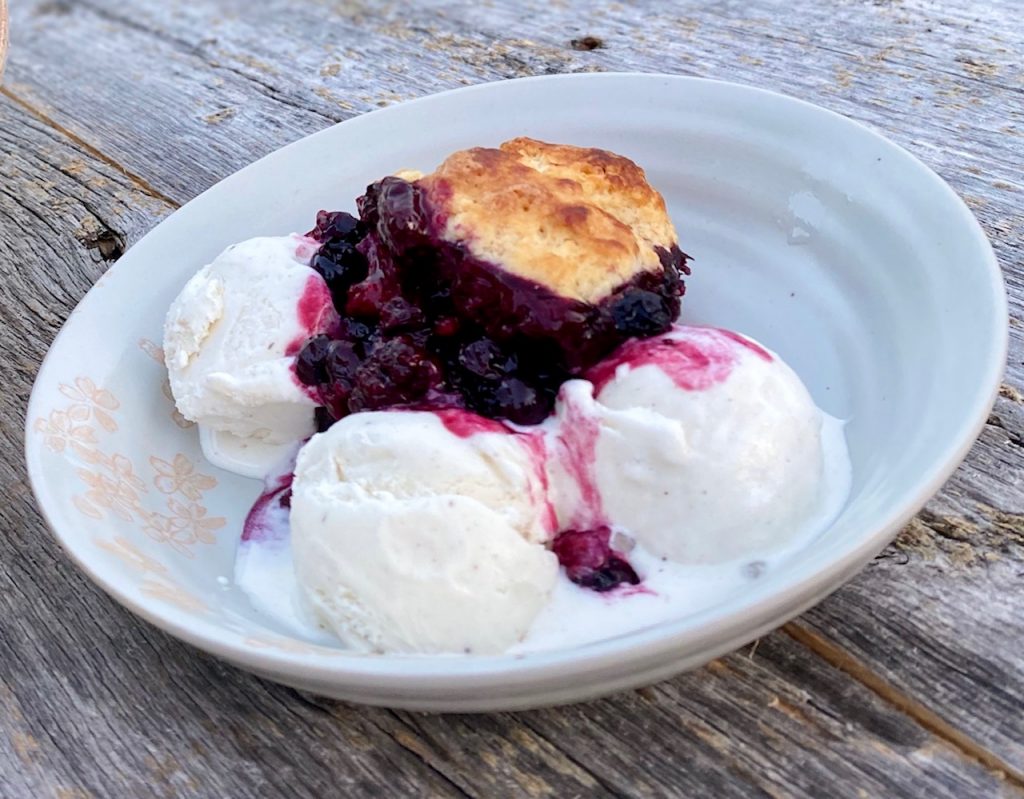
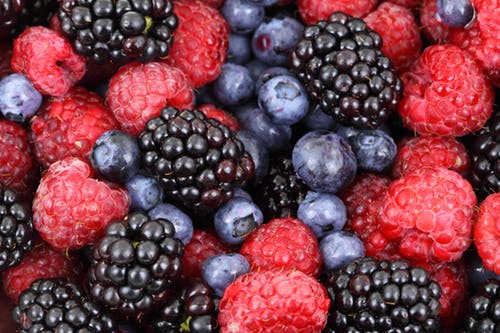
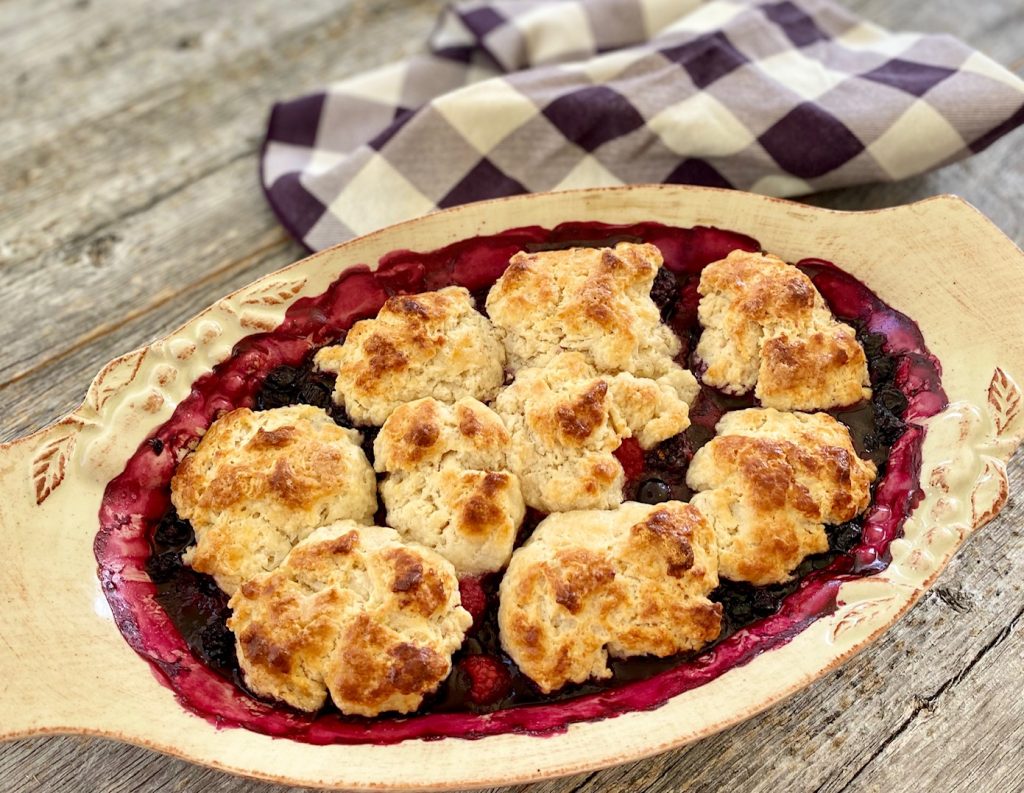
With just a few simple ingredients – including blackberries, raspberries, and blueberries – this berry cobbler recipe is bursting with fresh berry flavor and topped with a buttery biscuit topping
You’ll love the fact that you can prepare this dessert in just 15 minutes and have a sweet treat on the table in less than an hour with no fussy ingredients
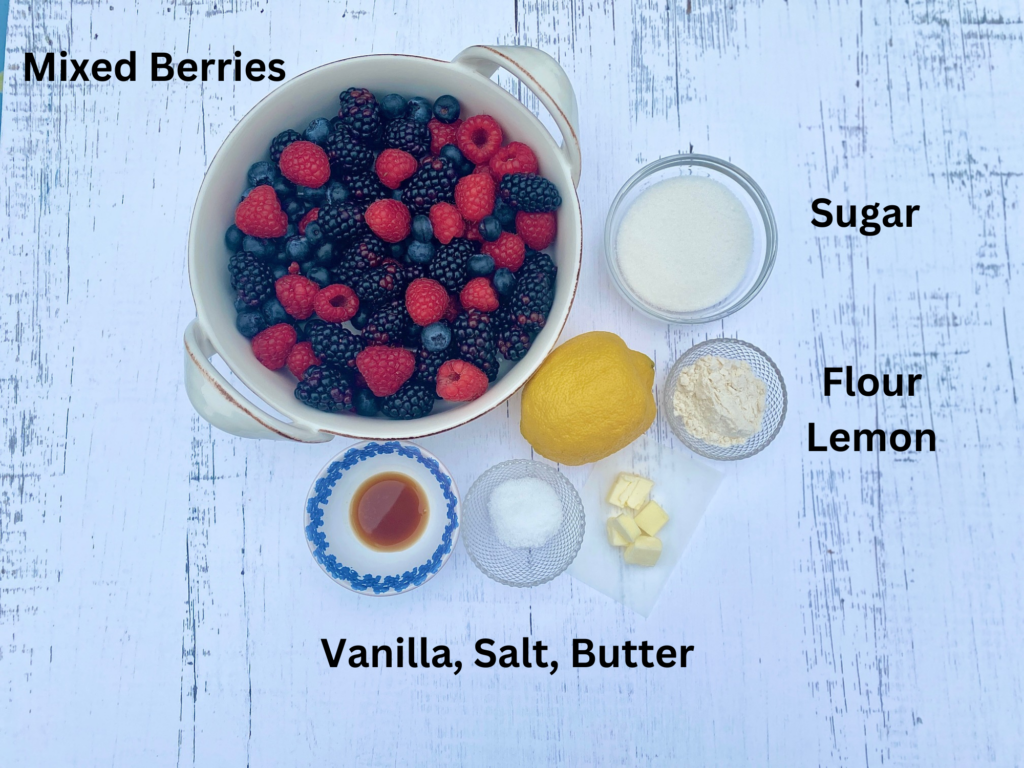
Ingredients for Triple Berry Cobbler
There are 2 parts to any cobbler – the fruit mixture and the cobbler dough
1: The Fruit Mixture
- Berries – we chose a blueberry, raspberry, and blackberry combo but any berries or stone fruits (peaches, apricots, plums) will work
- Sugar – this is dessert, after all!
- Flour – helps to thicken the berries when cooking
- Lemon Juice – the tartness in lemon juice helps balance the sweetness of the berries. Just a little adds a lot of brightness!
- Vanilla Extract – you could also use almond extract
- Salt
- Unsalted Butter – cold butter bits help create a velvety sauce once the cobbler is baked
- Optional: Cornstarch – if your berries are very juicy, or if using frozen berries, add 1 Tablespoon to the mixture
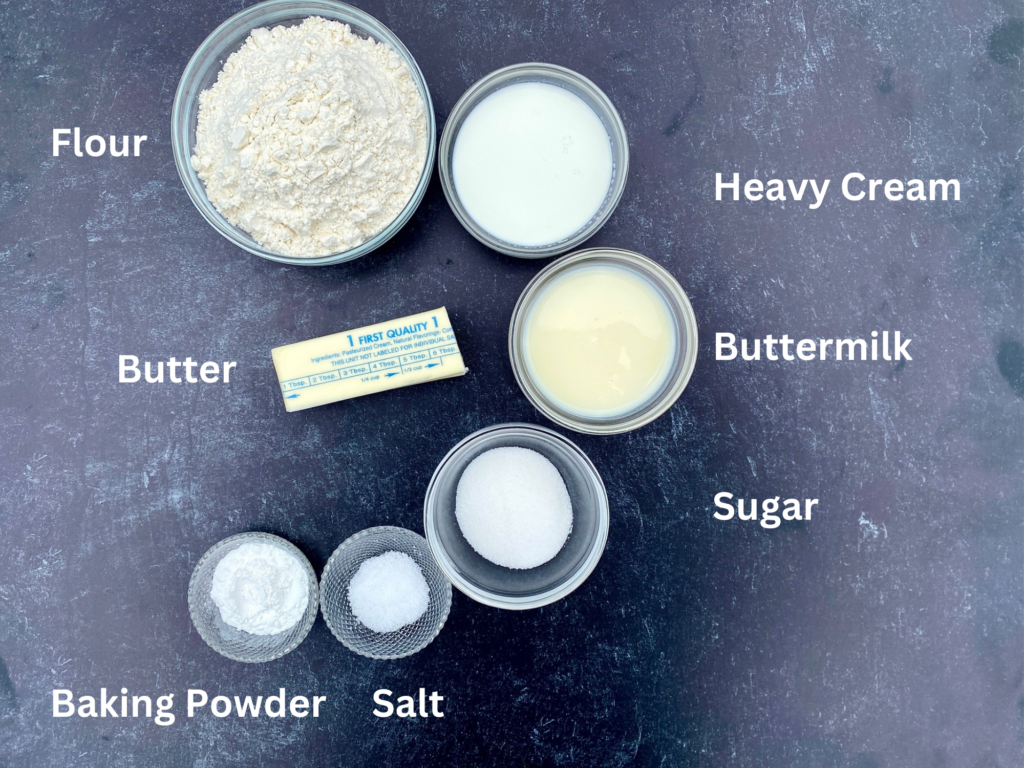
2: The Cobbler Dough
- Flour – all-purpose works best
- Sugar – just a pinch
- Baking Powder – makes the cobbler light and fluffy
- Salt – helps balance the flavor of the dough
- Unsalted Butter – salted will work but omit the other salt in the dough
- Heavy Cream and Buttermilk – we like a combination of both because buttermilk adds a very subtle tang and tenderness to baked goods. If you don’t have any buttermilk just use cream. This dough is forgiving and I’ve substituted half and half for the cream on occasion with great success.
How to Make Berry Cobbler from Scratch
- Preparing the Berry Filling:
- Wash and dry fresh berries. If you use frozen berries, thaw and add a Tablespoon of cornstarch to the berry mixture to help thicken as they cook
- Preheat oven to 375°F while preparing the dough
- Lightly butter a gratin or baking dish, about 9″ x 13″ in size
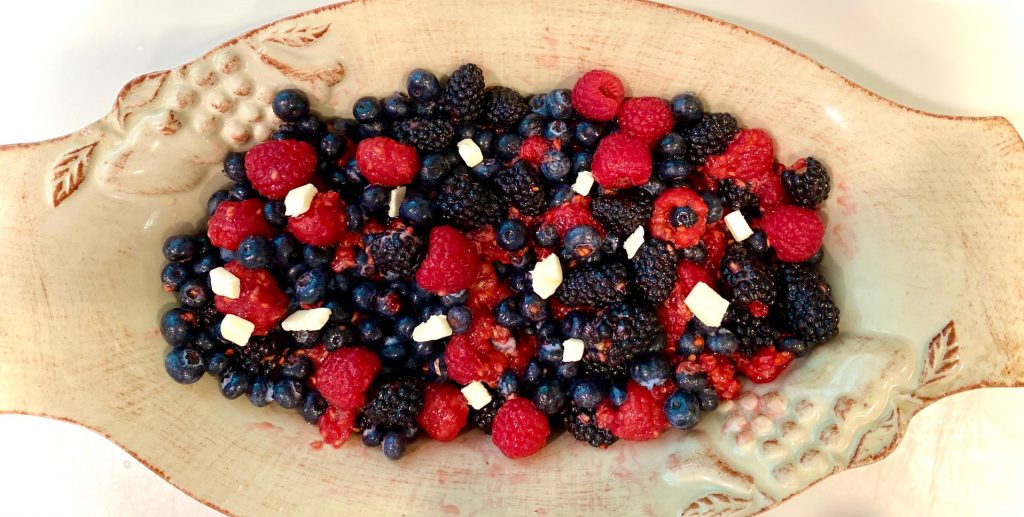
- Toss berries, sugar, 1 Tablespoon flour, lemon juice, vanilla extract (or almond extract), and salt together in the buttered baking dish
- Place small pieces of cold butter (1 tsp total) on top of the berry mixture
- PREPARING THE DOUGH:
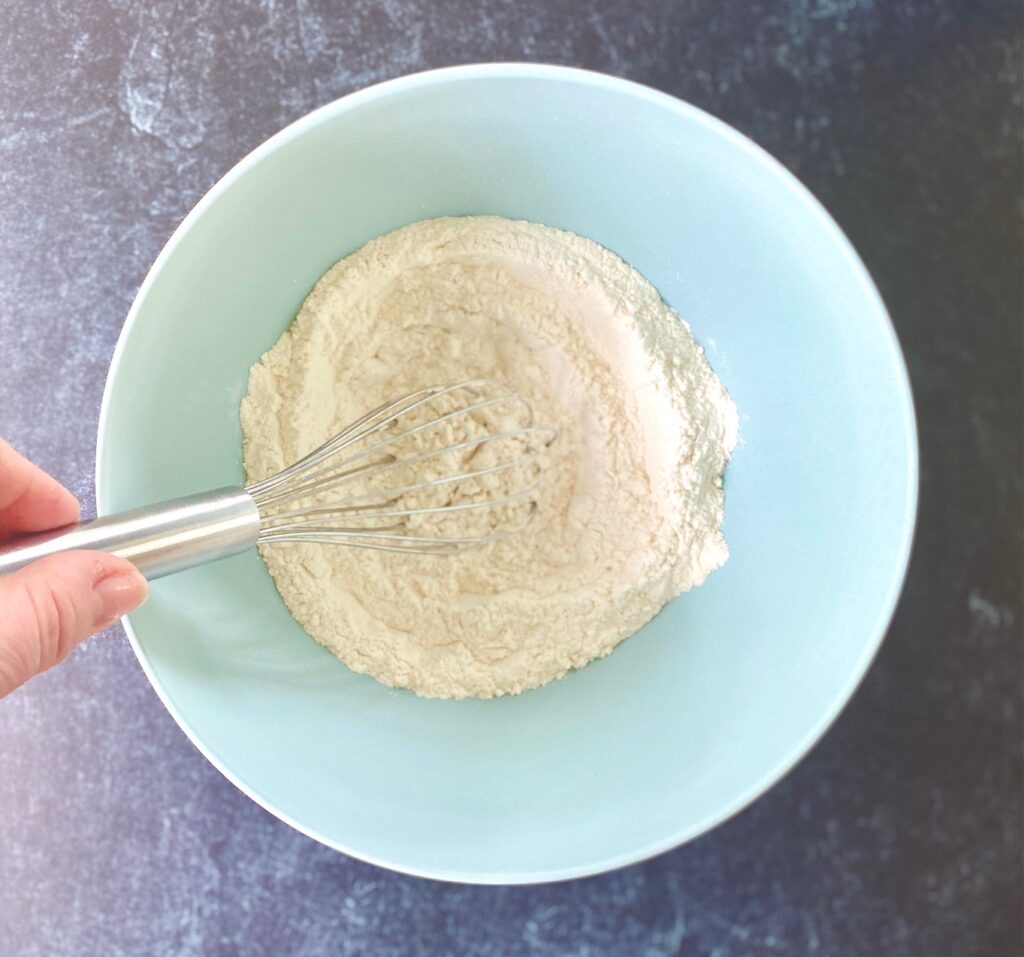
- Make sure the butter, cream, and buttermilk are VERY cold
- In a large bowl combine flour, sugar, baking powder, and salt and whisk together
- Cut in the butter with a pastry blender or two forks. You want the mixture to resemble coarse meal, with pea-sized pieces of butter.

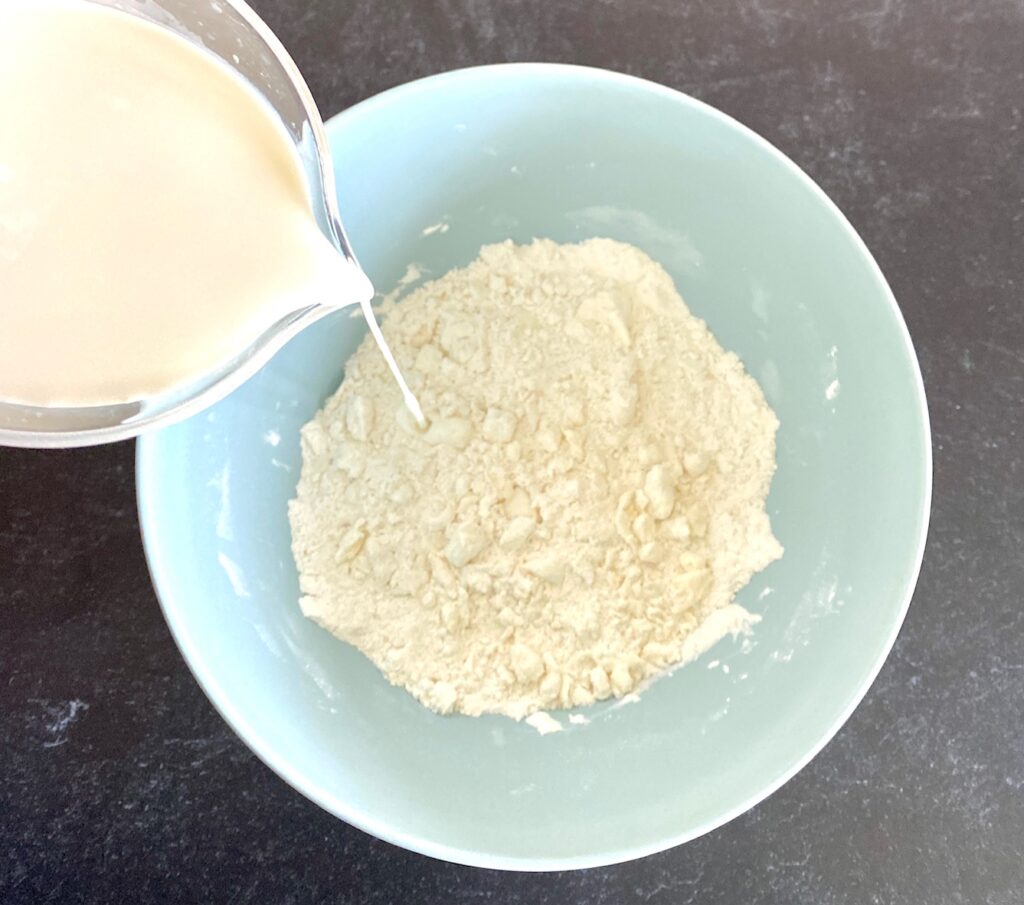
- Add the cream and 1/4 cup of buttermilk.
- Gently mix until just combined. Be careful not to overmix at this point, as this will ensure a fluffy biscuit during cooking.
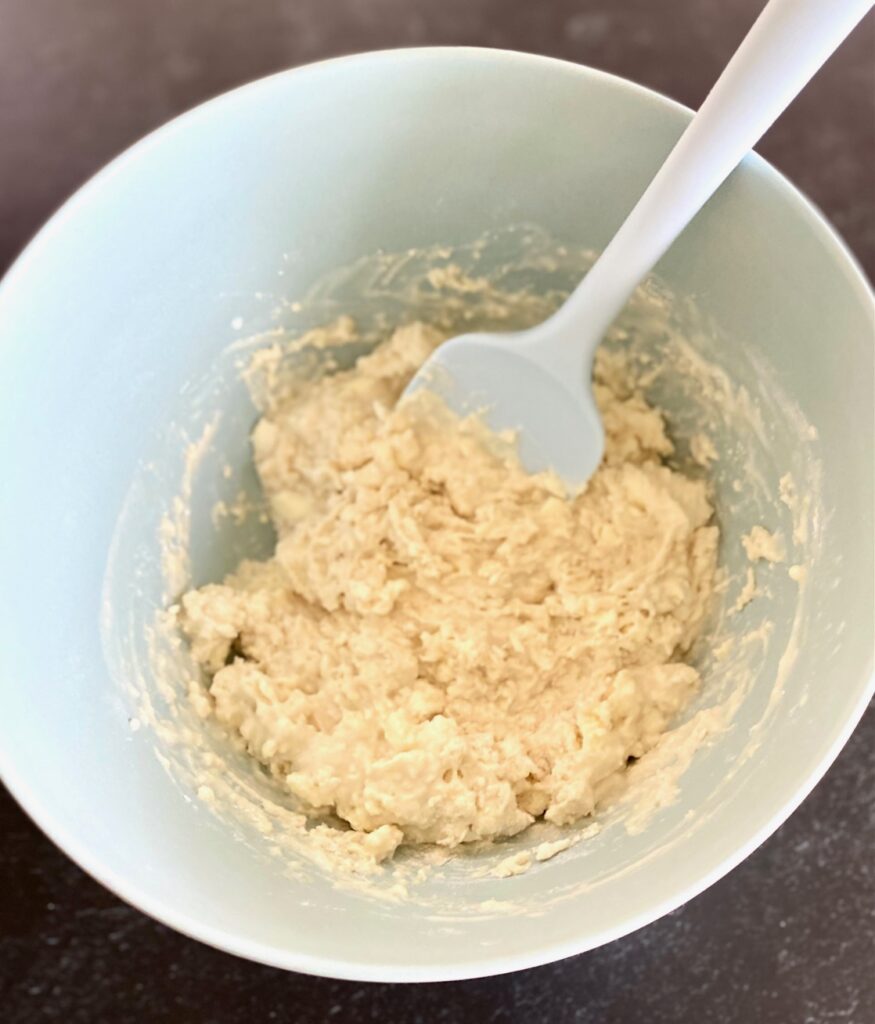
- ASSEMBLING:
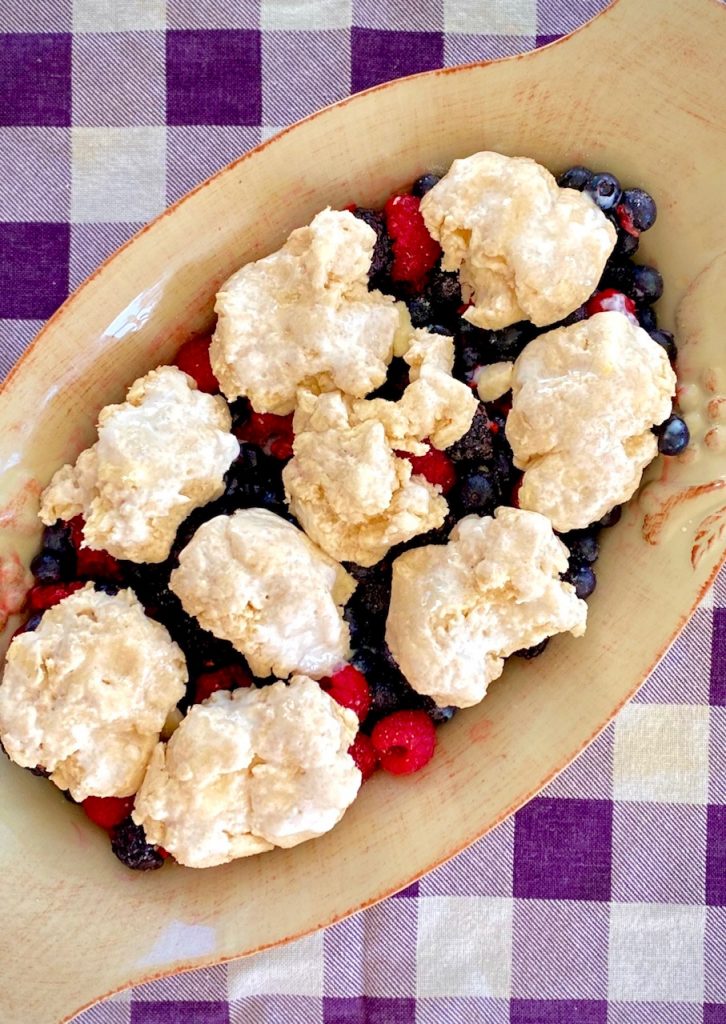
- Form small biscuit-shaped dough pieces with your hands and drop them gently onto the berry mixture. Drop about 8-10 pieces depending on the shape of your baking dish.
- Don’t cover the whole top of the berries. You want some of the beautiful berries to peek out!
- Brush the top of the dough with the remaining buttermilk and sprinkle with white or brown sugar.
- Bake 35-40 minutes. The cobbler is done when the berries are bubbly and the dough is deep golden brown on top.
- Let cool for 10-15 minutes before serving. This gives the syrup from the berries a chance to cool and thicken.
Best Berries for Berry Cobbler:
- Fresh berries are hard to beat, but we’ve used frozen berries, so this fruit cobbler works year-round.
- We use a combination of blueberries, blackberries, and raspberries, but any combo of mixed fresh berries or frozen mixed berries will work. Try it with cherries, strawberries, or whatever you have on hand. Make sure the pieces are all about the same size for even baking.
Why is fruit cobbler called cobbler? And what is a fruit crisp?
There are hundreds of mixed berry cobbler recipes and fruit crisp recipes but what is the difference? The one thing they have in common is that they both feature fruit as the “star of the show“!
- A cobbler has light fluffy biscuit-style dough plopped on top of the fruit with a bit of the fruit peeking out. The cobbler topping doesn’t cover all the fruit.
- A Fruit Crisp has a topping that includes oats, nuts, butter, flour, and usually cinnamon. Our Easy Apple Crisp is a great example.
- Both are easy desserts with no fussy ingredients or steps. And the best part is there is no rolling of dough. Perfect for summer!
Can you make a cobbler ahead of time?
- YES! You can prepare the cobbler, cover it with foil, and store it in the refrigerator overnight.
- When you’re ready to cook remove the baking dish from the refrigerator about 30 minutes ahead of time and bake as directed.
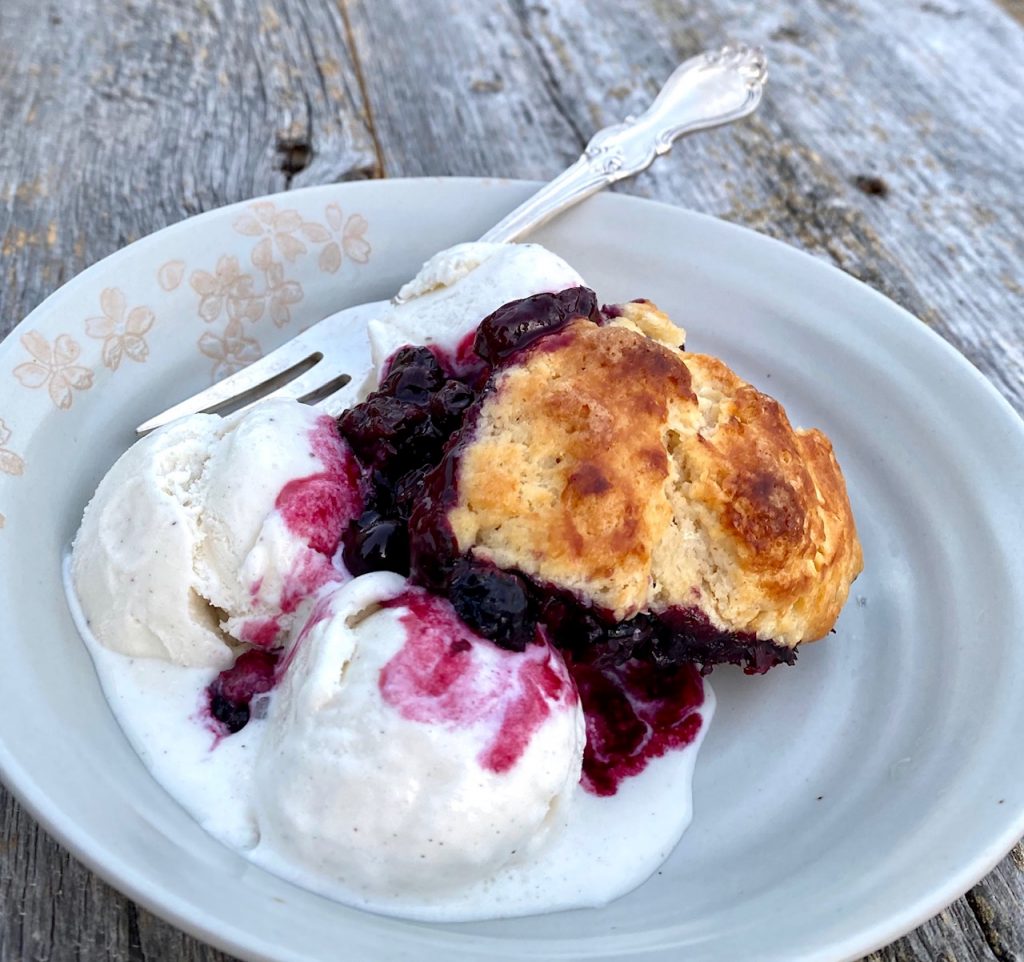
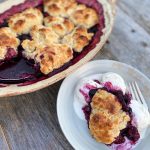
Serving this Cobbler
- Cobbler is perfect on its own, but serving it over a scoop of vanilla ice cream is amazing! The juices from the cobbler make the perfect syrup to top the ice cream.
- Or serve it with a dollop of whipped cream!
How to Store Cobbler
- Fruit Cobbler can be stored, covered with foil, at room temperature for one day, or in the refrigerator for up to 3 days.
- The biscuits will start to soften but you can pop the pan back in the oven at 300°F for about 10 minutes to reheat and firm the biscuits up again.
Love this Mixed Berry Cobbler Recipe? Here are some other fun desserts to try:
- Blueberry Lemon Scones
- Orange Olive Oil Cake
- Cinnamon Baked Pears
- Baked Churro Donuts
- Cinnamon Apple Coffee Cake
Mixed Berry Cobbler
Ingredients
Berry Mixture:
- 6 cups mixed berries – such as blueberries, raspberries, blackberries
- ¼ cup sugar
- 1 Tablespoon all-purpose flour
- 1 teaspoon lemon juice, freshly squeezed
- ½ teaspoon vanilla extract
- ½ teaspoon salt
- 1 teaspoon unsalted butter, very cold, cut into little pieces
Dough Mixture:
- 1½ cup all-purpose flour
- 1½ Tablespoon sugar, plus 1 Tbsp more for sprinkling
- 2 teaspoons baking powder
- ½ teaspoon salt
- 6 Tablespoons unsalted butter, very cold cut into ½" cubes
- ½ cup heavy cream, very cold
- ¼ cup buttermilk, very cold plus 1-2 Tablespoons more for brushing top of biscuits
Instructions
- Preheat oven to 375°F. Butter a 9"x13" baking dish
Berries:
- Toss berries, sugar, flour, lemon juice, vanilla, and salt together in the prepared baking dish. Dot with butter.
Making the Dough:
- In a large bowl whisk together flour, sugar, baking powder, and salt.
- With a pastry cutter or two forks, cut in the butter and mix until the mixture resembles coarse meal (pea-sized pieces)
- Slowly drizzle in cream and buttermilk and gently mix until just combined. Do not overmix.
Assembling the Cobbler:
- Using a large spoon scoop small biscuit sized balls and drop onto the berry mixture. Continue with all of the dough, scattering evenly across the top of the berries, until mostly covered, spacing about 1" apart.
- Brush the top of the biscuit dough with the remaining 1-2 Tbsp buttermilk and sprinkle generously with sugar.
- Bake the cobbler for 35-40 minutes. The filling should be bubbly and the biscuits should be deep golden brown.
- Remove from oven and cool for about 15 minutes before serving.
- Serve with whipped cream or ice cream
Notes
- Store any leftover cobbler for up to 3 days, covered, in the refrigerator. You can reheat in the oven at 300°F for about 10-15 minutes
- If you don’t have buttermilk you can use all cream
- The ratio: 1 Tablespoon of white vinegar or lemon juice to every 1 cup of regular milk. Mix together and let stand for a few minutes