By following this step by step-by-step to make authentic ricotta cheese you will find it hard to purchase store-bought ricotta cheese again. It’s an easy recipe with simple ingredients using a traditional method.
Honestly, we could eat it for breakfast, lunch, and dinner. It’s that good!

Ingredients for making fresh Ricotta cheese
There are just a few basic ingredients for making this homemade ricotta cheese recipe.
- Whole Milk – do not use skim milk or nonfat milk
- Heavy Cream – this makes a rich and creamy ricotta, also called heavy whipping cream
- Distilled White Vinegar – plain vinegar is recommended as opposed to apple cider vinegar
- Fresh Lemon Juice – freshly squeezed is best, rather than bottled juice
- Kosher Salt
See the recipe card below for the exact quantities needed

How to make Ricotta Cheese (Step-by-Step)
Ricotta cheese is easy to make in a stock pot with a lid.
Here is the equipment needed:
- Use an enamel Dutch oven, copper pot, or stainless steel stock pot with a lid to get the best results when making your cheese.
- You will also need a skimmer or slotted spoon and fine cheesecloth.
- Instant read or regular thermometer
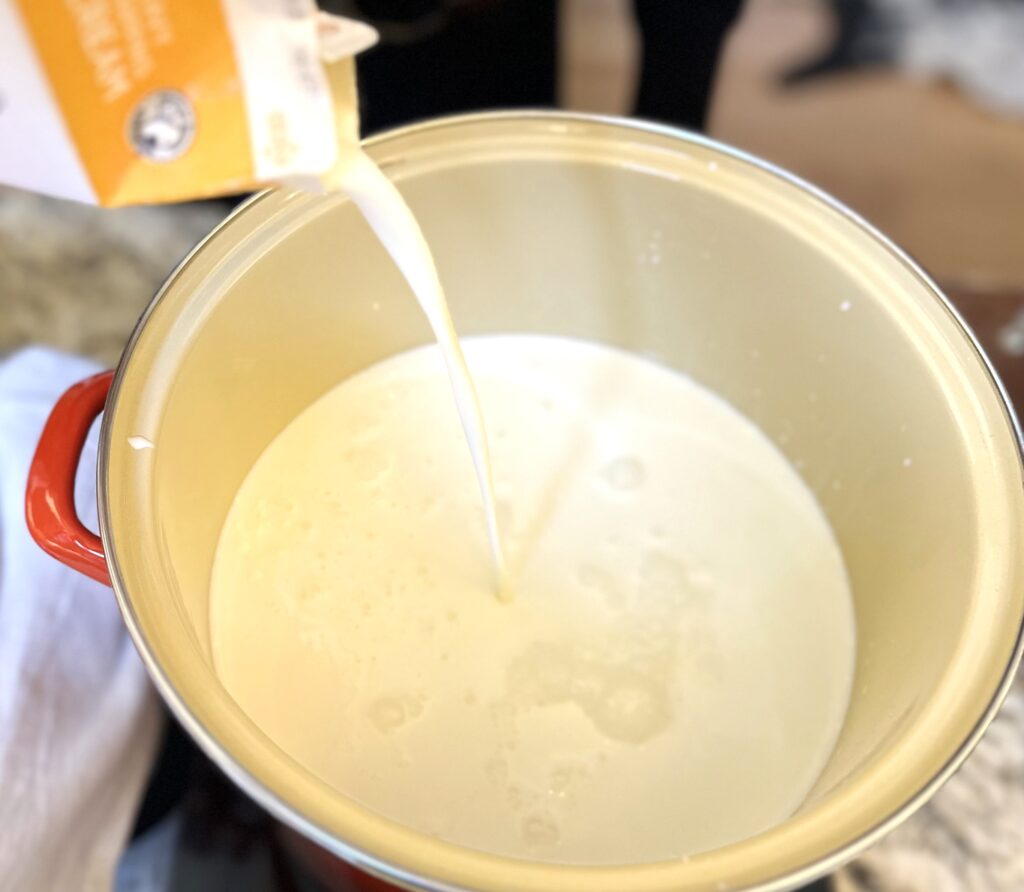
First Step
- Add the milk and cream to the pot and cook over medium heat until the mixture reaches 200˚F. Stir frequently to avoid sticking or burning at the bottom of the large pot.
- Mix the lemon juice and vinegar in a small bowl and set aside.

- Once the mixture reaches 200˚F turn off the heat completely.
- Keep stirring constantly while adding in the salt and lemon juice-vinegar mixture.
- Stir 1-2 times to combine. The cream mixture will immediately begin to coagulate. This is normal.
- Cover with the lid.


- Allow the cheese to rest for 10 minutes without removing the lid or stirring. This is important so DO NOT BE CURIOUS.
- While the mixture rests it will continue to coagulate and white curds will form and float on the surface.
- While waiting for the cheese to finish line a colander with a fine cheese cloth, and place the colander into a large bowl. Set to the side of the pot.
Second Step
- After 10 minutes remove the lid from the pot. Gently rest your skimmer on the curds. If the skimmer does not sink all the way below the curds you are ready to scoop out the cheese.

- Scoop from the middle of the pot to the sides of the pot. Lift out the cheese and place it into the cheesecloth-lined colander.

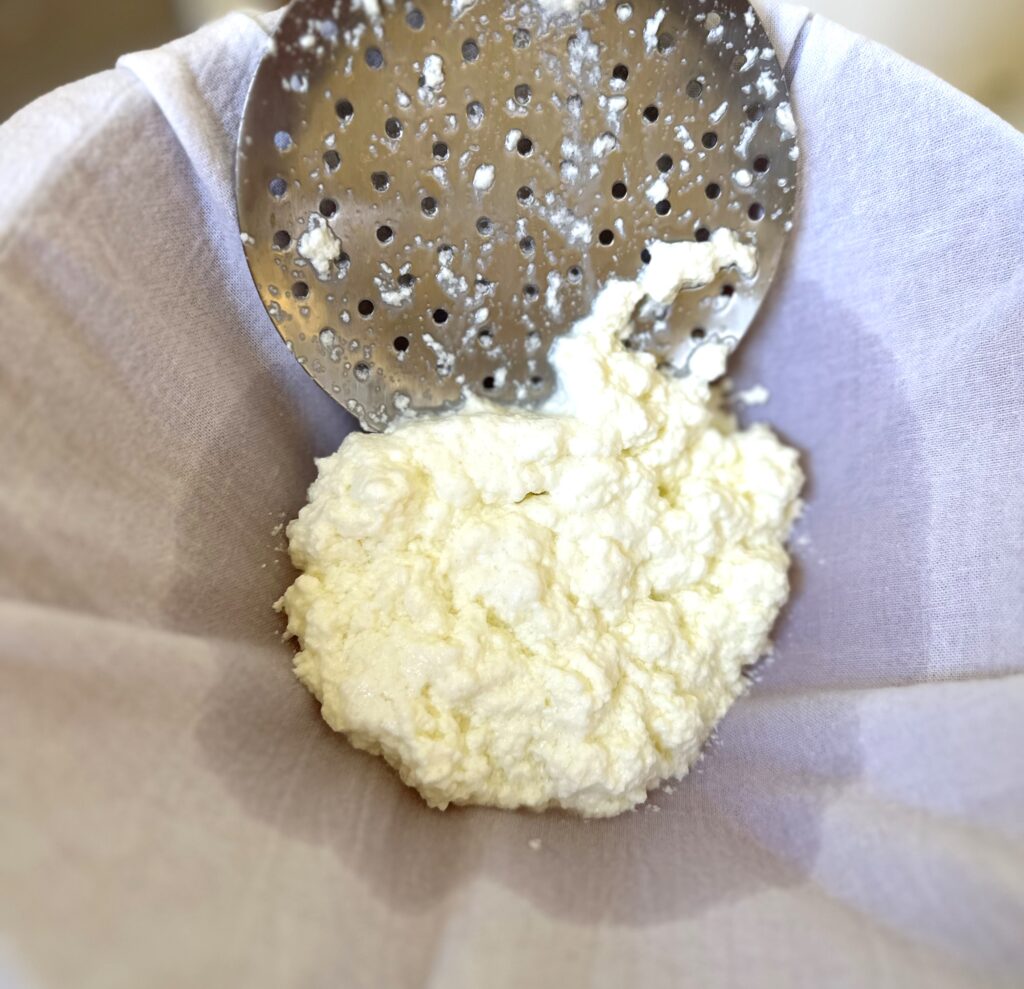
- Scoop out as much of the curds as you can until all that’s remaining is a liquid called “whey”. (See below for ways to use the leftover whey proteins)
- Allow cheese to drain completely. This will take around 30 minutes.
- Retain any liquid whey that drains from the cheese.
- Remove the cheese from the cheesecloth.


- Cheese can be placed in molds to shape to your favorite shape, or placed in glass jars or an airtight container.
- You can serve the finished cheese on its own or add flavors, spices, or herbs. See below for ideas.
- This recipe makes approximately 2 1/2 cups of ricotta cheese
Adding flavors, spices, or herbs to homemade cheese
Here comes the fun part of making your own cheese because you can get bold and creative!
Adding flavors to this cheese is simple. Anything, from a drizzle of honey to olive oils, herbs, vegetables, or fruits works. You can personalize your favorite cheese flavors. Try placing the finished cheese in molds for an added touch.
Here are a few easy examples: These additions make the cheese beyond delicious!
- Lemon Zest – Zest one lemon and then squeeze the fresh juice. Put 1/2 to 3/4 cups ricotta cheese in a small bowl. Drizzle 1 tablespoon of lemon olive oil over the cheese, then add the zest and lemon juice. Add a teaspoon of each at a time until you get the desired flavor. Blend the ingredients thoroughly into the cheese until you have a smooth and creamy cheese.
- Blood Orange Zest – Use the recipe and instructions above but replace the lemon with a blood orange. You can use any variety of orange or citrus.


- Truffle Zest – The principles for making truffle cheese are basically the same as Lemon Zest, however, instead of adding a fruit you will use powdered truffle zest. Start with a bowl of ricotta cheese, then drizzle in truffle olive oil, sprinkle with truffle zest, and then blend until creamy and smooth. You can add the truffle zest a little at a time until you have your desired flavor. We like to sprinkle this version with chopped chives for garnish, color, and flavor.


Simplest ways to use your own Ricotta Cheese
Homemade ricotta cheese is delicious with pasta or in ravioli and lasagna. But, let’s go beyond! Use ricotta cheese as a cream cheese substitute in many recipes.
Here are a few examples:
- Ricotta cheese is delicious on top of toast, crackers, or bagels. Drizzling with honey adds a wonderful sweet kick.
- Sprinkle with chopped fresh herbs like chives, basil, parsley, oregano, thyme, or rosemary, and serve with crackers or crostini. (see note below)
- Top with fresh fruit, sliced strawberries, apples, pineapple wedges, or blueberries on a crostini, toast, or a bagel.
- Serve this cheese with smoked salmon and capers for a delicious breakfast or snack.
Note: When adding fresh herbs to the cheese it is best top the cheese with chopped fresh herbs and serve right away. Herbs will turn brown over time when cheese is stored with the fresh herbs.

How long can you store Homemade Ricotta
- REFRIGERATOR: Finished cheese can be stored in the refrigerator in a sealed container for up to 7 days.
- FREEZER: Cheese can be frozen for up to one year in a resealable container. Please remember to label and date your container before freezing. Thaw in the refrigerator for 5-6 hours, and then gently stir before using for best results.
What is Whey?
So, what are whey proteins?
It’s the liquid remaining after the milk curds have been strained and curdled. This is the leftover liquid from the ricotta-making process and it’s got a lot of uses in recipes.
Whey can be frozen for up to one year and used for future recipes. When freezing whey pour it into a freezer-safe airtight container. It’s best to use a container that will represent one serving size because you can not refreeze whey once it’s been thawed.
Let the liquid whey thaw for 24 hours in the refrigerator before using and gently stir it.
What are some uses for leftover Whey?
There are many uses for leftover whey including yogurt, bread, soups, and a variety of other amazing recipes.
Whey can also be used as a substitute for buttermilk in pancakes or quick breads like our buttermilk banana bread. It can also be used as a milk substitute in homemade mac and cheese, waffles, or our berry banana smoothie bowl.
What is the difference between Ricotta cheese and Cottage cheese?
Ricotta cheese is made from leftover whey while cottage cheese is made from curds. This makes cottage cheese a more dense slightly lumpy cheese while ricotta is smooth. Both cheeses are soft, but one is lumpy and one is more smooth.
Wondering which cheese is healthier? Cottage cheese has a lower fat content. However, Ricotta cheese is higher in calcium and is high in vitamins A, E, D, and B2. It is a great addition to a low-carb diet and has less carbohydrates than cottage cheese.

Here are some additional light snacks to try!

How to make Ricotta cheese
Equipment
- Stock pot
- cheesecloth
- cheese ladle
Ingredients
- 1 gallon Whole milk
- 4 cups Heavy cream
- 1½ cups Distilled white vinegar
- ½ cup Fresh squeezed lemon juice
- 2 tsp Kosher salt
Instructions
- Heat the milk and cream over medium heat until it reaches 200˚F. Stir frequently to avoid sticking or burning at the bottom of the large pot.
- Mix the lemon juice and vinegar together in a small bowl and set aside.
- Once the mixture reaches 200˚F turn off the heat completely.
- Keep stirring consistently while you add in the salt and lemon juice vinegar mixture.
- Mix 1-2 times to completely combine. The cream mixture will begin to coagulate immediately. This is normal. Cover with the lid.
- Allow the cheese to rest for 10 minutes without removing the lid or stirring. This is important so DO NOT BE CURIOUS.
- While the mixture is resting it will coagulate and white curds will form and float on the surface.
- While you are waiting for the cheese to finish line a colander with a fine cheese cloth, and place the colander into a large bowl. Set to the side of the pot.
- After 10 minutes remove the lid from the pot. Gently rest your skimmer on the curds. If the skimmer does not sink all the way below the curds you are ready to scoop out the cheese.
- Scoop from the middle of the pot to the sides of the pot. Lift out the cheese and place it into the cheesecloth-lined colander.
- Scoop out as much of the curds as you can until all that is remaining is a liquid called "whey". See below for all the ways you can use the leftover whey proteins.
- Allow cheese to drain completely. This will take around 30 minutes.
- Retain any liquid whey draining from the cheese for future uses.
- Remove the cheese from the cheesecloth. Cheese can be placed in molds or shaped to your favorite shape.
- You can serve the cheese or add flavors. Cheese is now ready to add to your favorite recipes.
Nutrition
Building the perfect cheese board is a lot of fun because no two really ever really need to be the same. This is a great time to get creative!
We will walk you through the building blocks and help you create a party showpiece that is simple yet elegant.
This is an easy and stress-free appetizer to assemble and you just need a small amount of each for a beautiful platter. Having a variety of colors and textures is the key.
There is no ‘best’ way to create the perfect cheese board but here are a few different ideas and the building blocks you need:
Jump to Recipe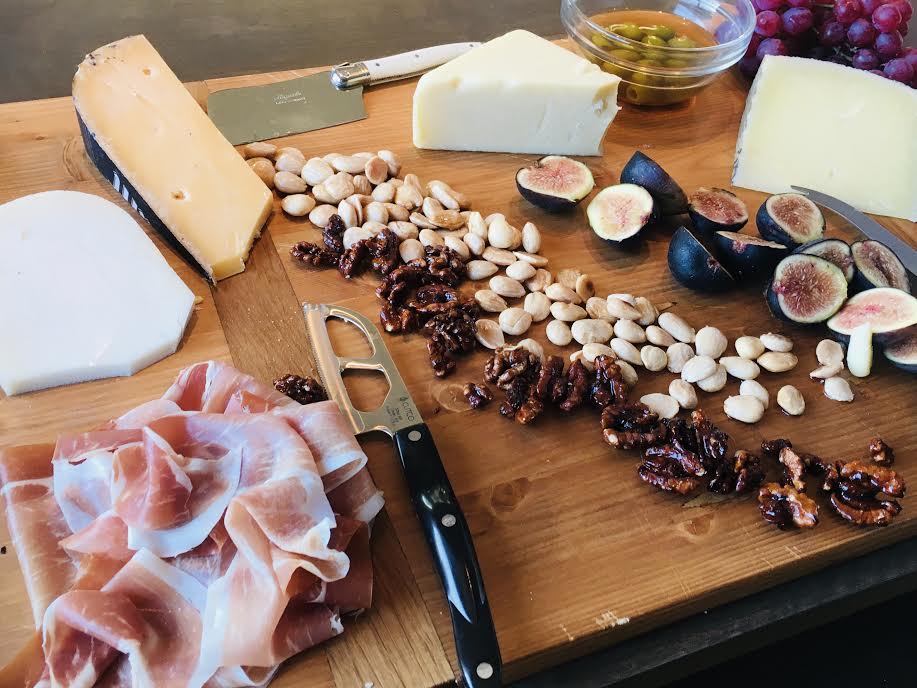
Building blocks of a great cheese tray:
These are the basics and we’ll get more specific below.
- The Platter – Get creative based on the size of your party. We love a wooden board because guests are comfortable cutting on it, but any beautiful flat surface will do!
- Small knives – Use a sharp knife for hard cheeses and another knife for soft cheeses
- Cheeses – The star of the show! Variety is the key but you only need small pieces
- Meats – Optional if you want a heartier board. 2 or 3 varieties are the perfect amount
- Spreads – Put these in small bowls to give the platter some height – be sure to add a small spreading knife or spoon
- Crackers and Bread – There are so many choices so, again, look for texture and variety
- Fruits and Nuts – Adds color and ties it all together
Ready to get started creating the perfect Cheese Board for your next party?

What is needed for a cheese board:
Grab this list and head to any grocery to find your favorites.
Here is what we suggest you include. Be sure to adjust based on party size:
- 1-2 hard varieties of cheese – choices include: cheddar, gouda, small bits of Parmesan, Manchego, and Swiss. Buy a block and cut some in slices and some in chunks for great visual variety
- 1-2 soft cheeses – goat cheese, Boursin, brie, Camembert, fontina
- 1 pungent cheese – such as Blue or gorgonzola
- 2-3 meats – cured thinly sliced favorites include: genoa salami, prosciutto, and speck
- Fresh or dried fruits – green or red grapes, any type of berries, apples, pears, cherries, nectarines, figs
- A few handfuls of nuts – we like pistachios, Marcona almonds, candied pecans, and cashews
- Olives – it’s fun to get some green and some dark olives for color contrast
- Crackers and Bread – it’s great to have 2-4 types on the board. We like rosemary crackers, parmesan crackers, and crunchy pita crackers. Sliced sourdough or French baguette work perfectly
- Savory and/or sweet spreads – Black Olive paste, Cherry tomato paste, fig jam, black cherry jam, honey, or oven dried tomatoes packed in olive oil are great options
- Artichoke Hearts – Optional. Choose small quartered hearts packed in olive oil
Want to learn more about cheeses? We love this guide.

One of the great things about building a perfect cheese board is that it’s easy if you have most of the staples on hand and just need to fill in a few pieces.
Many upscale groceries sell small wedges of cheese which allows for a good variety on your cheese platter. Keep a few varieties of crackers, nuts, and olives on hand in the pantry and refrigerator for a fast last minute party appetizer.

Helpful Hints
- To make it easier for your guests, precut some hard cheeses and cut the brie into wedges. This makes it simple for guests to grab a slice off of the board.
- The cheese platter can be made in advance, with the exception of the crackers, bread, and nuts, wrapped in foil or saran wrap and refrigerated.
- Before serving add the crackers, breads, and nuts. (If added and refrigerated ahead of time they will get soft, stale and soggy)
- Cheese tastes better at room temperature, so remember to bring your cheese out of the refrigerator about 30-minutes ahead of serving.
- Aim for 3-5 cheese for a party platter

How to Make a Cheese Board
Equipment
- 1 large platter
Ingredients
- 8 ounces Hard cheeses, sliced gouda, cheddar, manchego, parmesan
- 8 ounces soft cheeses, brie, fontina, Boursin, goat
- 4 ounces pungent cheeses, blue or gorgonzola
- 2-3 ounces nuts cashews, pistachios, pecans, Marcona almonds
- 2 ounces olives
- 3-4 ounces meats, thinly sliced prosciutto, salami, speck
- 1 ounces dried fruit cherries, cranberries
- 1 handful berries or cherries
- 3 ounces spreads fig jam, olive paste, oven dried tomatoes in oil
- 2 packages Crackers any variety
- 2 ounces sliced sourdough or French baguette
- Fresh fruit figs, nectarines grapes
Instructions
- Start with a clean dry platter or board
- Add any small bowls to the board and fill with spreads and olives
- Place hard cheese slices or chunks in rows or bunches on the board
- Add soft and pungent cheeses to fill in
- Add fruits, both fresh and dried, to fill in spaces
- Sprinkle the nuts around to fill in the remaining spaces
- Add crackers and bread around the outside edges of the platter
- Include and spoon or knives for spreading
Notes
- To make it easier for your guests, precut some hard cheeses and cut the brie into wedges.
- Add any additional crackers or bread in a small bowl on the side.
- Calorie count is approximate and based on 12 – 16 servings
Nutrition
When you make shrimp cocktail it’s the little things that count. This is an easy recipe to master, with just a few ingredients, so every step makes a difference.
This classic appetizer is a favorite for a reason. It’s easy, it’s delicious, and it’s also low in calories (yea!). Add a zesty cocktail sauce to serve alongside these plump shrimp and watch them disappear!
Below you will find tips on:
- The right size and type of shrimp for a shrimp cocktail
- How to perfectly cook shrimp
- How to make a classic, balanced, and zesty seafood cocktail sauce

Ingredients needed
There are 2 parts to this homemade shrimp cocktail recipe – the shrimp (and its poaching liquid) and the zesty shrimp cocktail sauce
Shrimp:
- Shrimp – large raw shrimp with the tails on. Use 16/20’s, 21/25’s, or 26/30’s for best results. See below for more info on sizing. We prefer 21/25’s which are also called Jumbo Shrimp. Smaller shrimp are not recommended.
- Lemons – both for cooking the shrimp, making the cocktail sauce and for garnish
- Bay Leaf – when used in poaching Bay leaves add a subtle herb-like flavor
- Salt and Black Peppercorns – peppercorns are full of flavor but easy to strain out later
- Old Bay Seasoning – or something similar to give the shrimp added flavor
- Parsley – optional garnish. We prefer flat-leaf parsley

Seafood Cocktail Sauce:
See our full post and instructions on making this shrimp cocktail sauce, which couldn’t be easier. Here are the ingredients:
- Ketchup – the base of the sauce
- Worcestershire Sauce – gives great added flavor
- Lemon Juice – adds a bright flavor
- Horseradish and Hot Sauce – Adds the heat and allows you to make this sauce as mild or spicy as you would like

How to Make restaurant-quality Shrimp Cocktail
Make the Homemade Shrimp Cocktail Sauce:
- Prepare the cocktail sauce by whisking all of the ingredients together. Set aside if using right away or refrigerate for up to 7 days.
- If you don’t have time to make your own cocktail sauce be sure to buy a high quality version at the grocery store.
Preparing the Shrimp:
- Remove the shrimp shells but leave the tails on (makes a great handle for dipping!)
- Devein shrimp, if needed, and rinse. (see below for tips on deveining shrimp)
Cooking the Shrimp:
- Fill a large pot 3/4 full with water.
- Cut a lemon in half and squeeze the juice into the water. (Save the other half for garnish) Add the squeezed lemon half to the water.
- Add Bay leaf, salt, black peppercorns, and Old Bay seasoning. This is called a “court bouillon”.
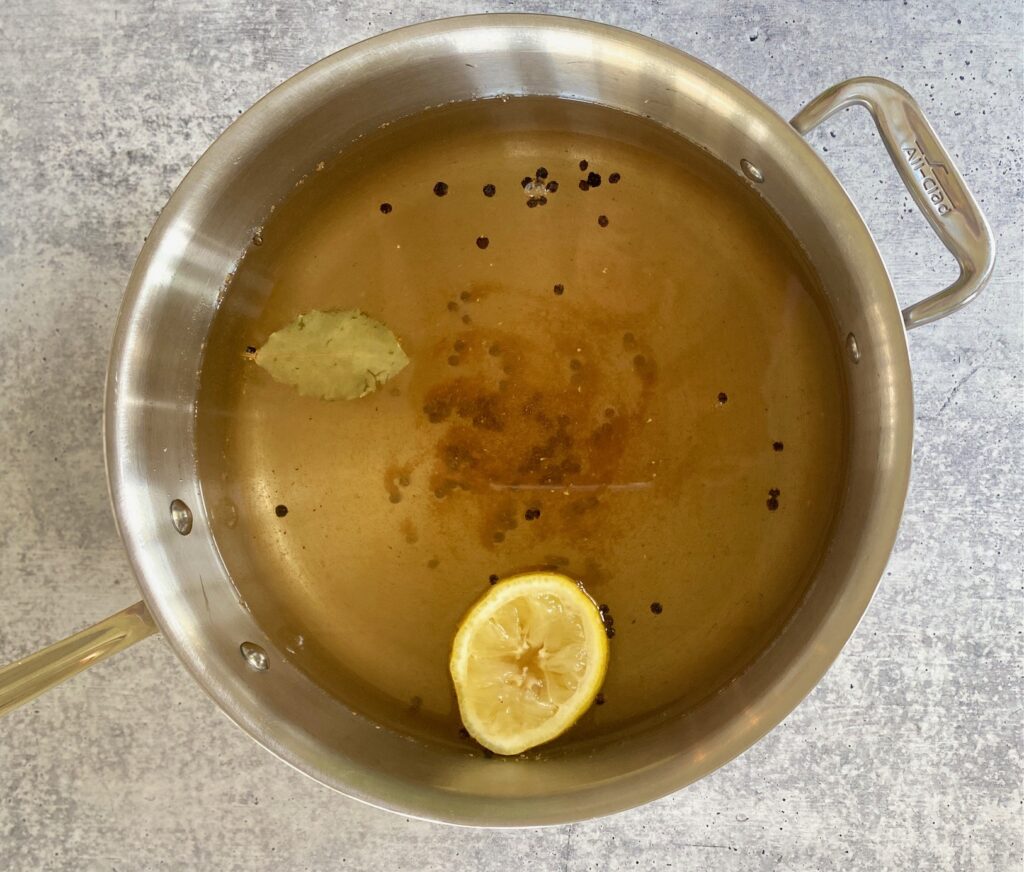
- Bring mixture to a boil and then reduce to a simmer and cook for 15 minutes to infuse the water.
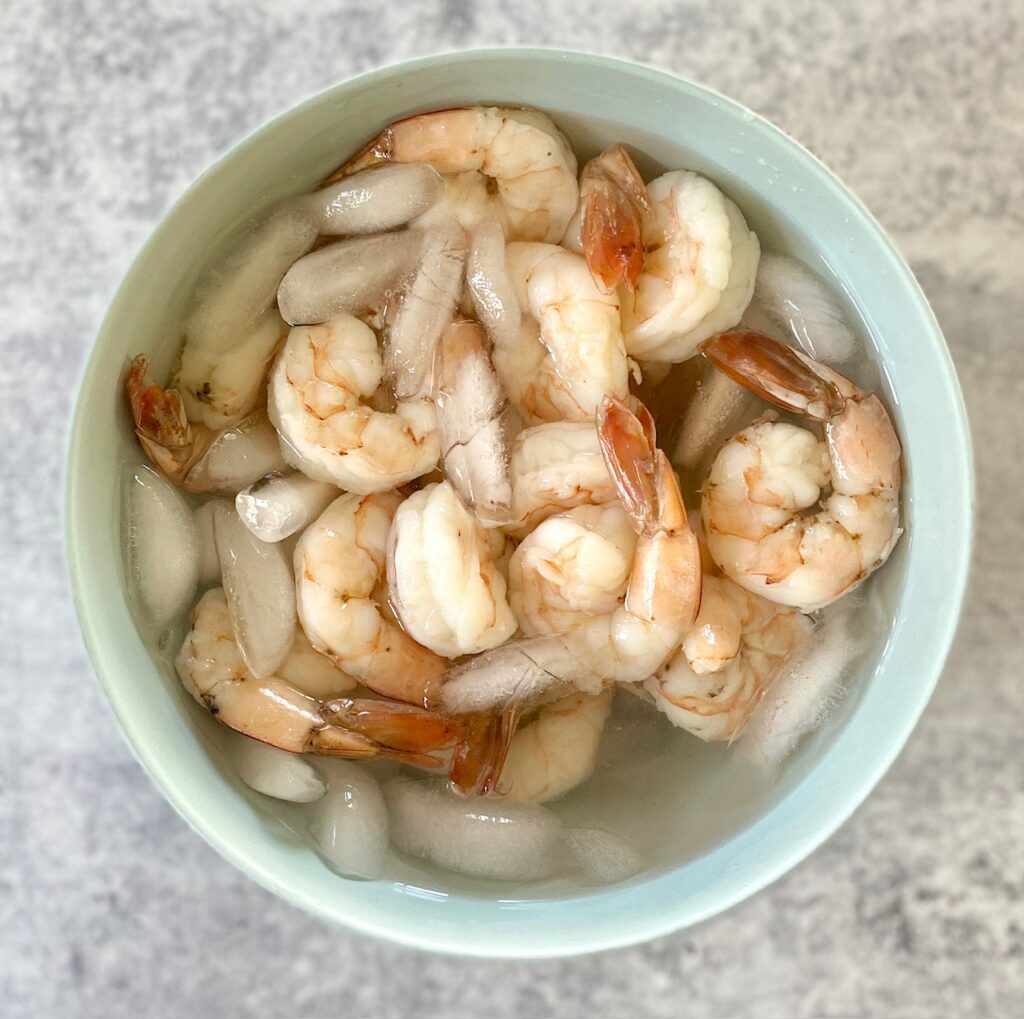
- Prepare a bowl of ice water by filling a medium bowl with 2 cups of ice and filling halfway up with cold water. Be sure to do this before cooking the shrimp.
- Remove the pan from the heat and drop in the cleaned shrimp.
- Cook, stirring occasionally, until the shrimp begin to curl (see time chart below) and they have turned pink. Jumbo shrimp is perfectly cooked in 2 minutes.
- Once cooked, strain the shrimp, or remove them with a slotted spoon, and then quickly add them to the ice bath to cool them and stop the cooking.
- Once cooled strain again and pat the shrimp dry.
- If not serving right away store the cooked shrimp in the refrigerator for up to 24 hours

2 Ways to Serve Classic Shrimp Cocktail
- 1. INDIVIDUAL SERVINGS:
Fill a small dish or martini glass with a few Tablespoons of cocktail sauce. Hang 3-5 pieces of prepared shrimp over the edge, then add a sprig of parsley or a wedge of lemon (or both) for garnish. A sprinkling of lemon zest is also pretty.

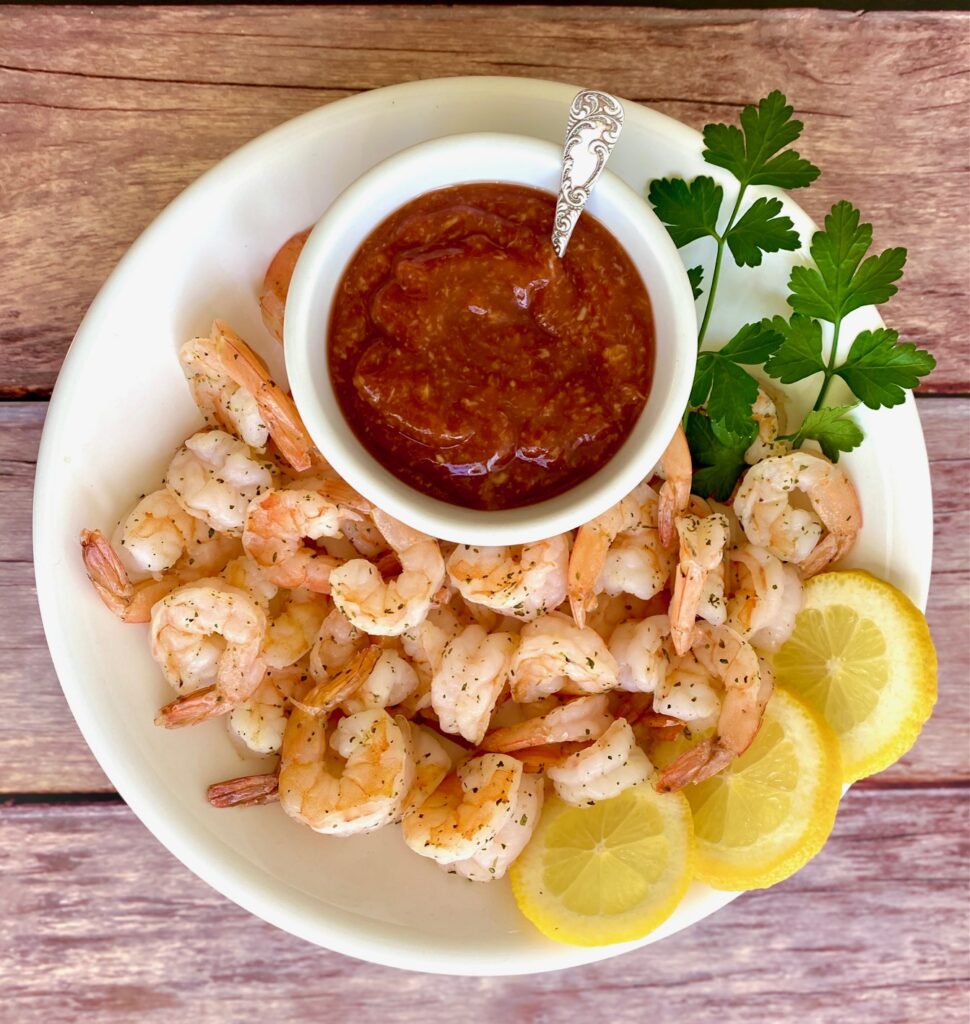
- 2. PLATTER
Add prepared cocktail sauce to a small bowl and place on a platter. Scatter the prepared shrimp around the bowl of sauce and garnish with fresh lemon wedges and parsley.
What do the numbers on shrimp mean?
- Shrimp sold in the U.S. are labeled with numbers that tell you approximately how many shrimp are in a pound.
- For example, 21/25 means there will be 21-25 pieces per pound.
- Shrimp often has names, but that is not as accurate, so using the number system is best.
How long to poach shrimp
Here’s a timing guide for raw shrimp, but as always, use your eyes to tell you when they are done. Shrimp cook quickly so be sure to have the ice bath ready. These are the 3 best sizes for a classic shrimp cocktail.
- Size 16/20 – poach for 3.5-4 minutes
- Size 21/25 – poach for 2 minutes
- Size 26/30 – poach for 1.5 minutes
NOTE: If using frozen shrimp add approximately 1 minute to the cooking time.
Make-Ahead and Storage Tips
- The shrimp can be poached and chilled 24 hours ahead of serving
- Seafood cocktail sauce can be prepared up to 7 days ahead of time and stored in an airtight container in the refrigerator

Can I Use Frozen Shrimp?
YES! Either thaw overnight in the refrigerator and cook as directed above, or cook frozen but add about 1 minute to the cooking time.
How to Devein Shrimp
- Hold the shrimp between your thumb and forefinger with the rounded side (back of the shrimp) upward.
- Place the pointed end of a wooden skewer, or tip of a knife, between the second and third segments of the shrimp, about 1/8-inch down from the top.
- Gently push the skewer, or knife tip, through the skin and then lift up to remove the vein.
- Discard and repeat with each shrimp. Rinse the deveined shrimp before using them.
What pairs with Shrimp Cocktail?
- Shrimp cocktail pairs well with nearly any type of salad such as our Arugula Beet Salad with Goat Cheese, Strawberry Spinach Salad, or Fresh Citrus Salad
- Serve with a bowl of Honey Roasted Cashews, or Candied Pecans
- Don’t forget a cool classic cocktail: Lemon Drop Martini, Moscow Mule, or French Martini
- Serve alongside Mini Caprese Skewers

How to Make Shrimp Cocktail
Ingredients
Shrimp:
- 1 pound raw shrimp, extra large (21-25 or 16-20 count) peeled, deveinded, tails on
- ½ lemon
- 1 Bay leaf
- 1 Tablespoon black peppercorns
- 1 teaspoon Old Bay seasoning, optional
- 1 pinch salt
- 4 sprigs flat leaf parsley
Shrimp Cocktail Sauce
- 1 cup ketchup
- 1 Tablespoon Worcestershire sauce
- 3 Tablespoons fresh lemon juice
- 3 Tablespoons prepared horseradish (more or less depending on personal taste)
- 1 Dash hot sauce
Instructions
Cocktail Sauce:
- Prepare the cocktail sauce by combining all ingredients and set aside. This sauce can be made ahead of time and refrigerated for up to 7 days
Prep the Shrimp:
- Remove shells from the shrimp, but leave tails on. Rinse and then devein the shrimp, if needed.
How to devein shrimp:
- To devein the shrimp before cooking, hold the shrimp between your thumb and forefinger with the rounded side of the shrimp upward. Place the pointed end of a wooden skewer, or tip of a knife, between the second and third segments of the shrimp, about 1/8-inch down from the top. Gently push the skewer or knife tip through the shell and then lift up to remove the vein. Discard and repeat with each shrimp.
Cook the shrimp:
- Fill a large pot 3/4 full with water. Cut the lemon in half and squeeze in the juice and then add the lemon half to the water. Cut remaining half into wedges for serving.Add the Bay leaf, peppercorns, Old Bay, and salt.Bring to a boil, reduce to a simmer, and let cook for 15 minutes to infuse the water with flavor.
- Prepare an ice bath for the shrimp: In a large bowl add 2 cups of ice cubes and then fill halfway up with water.
- Remove pan from the heat and drop in the cleaned shrimp. Cook, stirring occasionally, until they curl and turn pink. (See the cooking chart below)Note: different size shrimp will cook at various times. Here is a guide, but watch them and use your best judgment. Size 26/30's – poach for 1½ minutesSize 21/25's – poach for 2 minutesSize 16 /20's – poach for 3 ½- 4 minutes
- Once cooked, strain the shrimp, and then add them to the prepared ice bath. Leave shrimp in the ice bath for a few minutes to stop the cooking and let them cool completely. Strain again and pat dry.
2 ways to serve Shrimp Cocktail
- 1. INDIVIDUAL– Fill a small serving dish or martini glass with cocktail sauce. Hang 3-5 shrimp over the edge, add a wedge of lemon or parsley, and serve.2. PLATTER – Add prepared cocktail sauce to a small dish or ramekin and place on a platter. Scatter cooked shrimp around the dish of sauce. Garnish with lemon wedges and parsley.
Notes
- Making your own cocktail sauce is the way to go! For full instructions visit our post on Seafood Cocktail Sauce.
- If using frozen shrimp be sure to thaw it overnight in the refrigerator, or in a cool water bath for at least 30 minutes before poaching. If cooking from frozen add one minute to the cooking time.
- Looking for similar serving glasses? Try these from Amazon: https://amzn.to/4oNR7ci
Nutrition
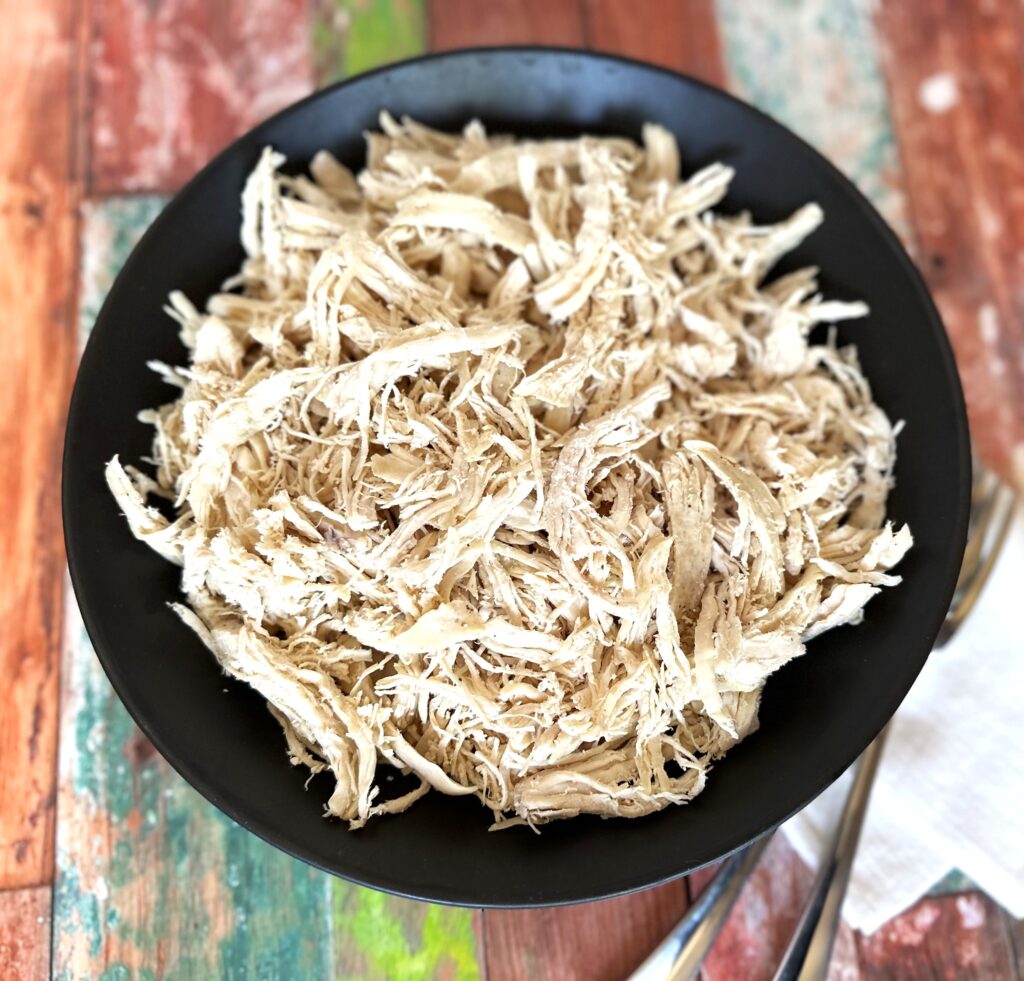
Learning how to make tender shredded chicken could not be easier! Below you’ll find our simple step-by-step instructions for making the best shredded chicken.
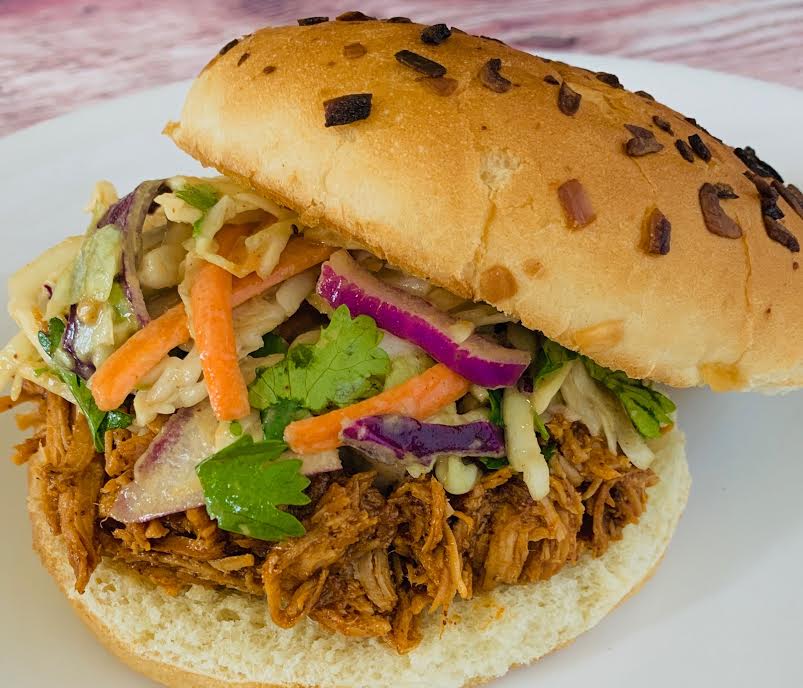
Shredded or pulled chicken can be used in a variety of delicious ways from salads to tacos to enchiladas, pasta dishes and much more.
Ready to get started? Just click on our ” Jump to Recipe” button below to go straight to the recipe card. For tips, processes, and substitutions keep reading. This post may contain affiliate links. Please see our affiliate disclosure for details. We only recommend products to you that we love ♥️ and use.
Jump to RecipeIngredients needed for this easy recipe:
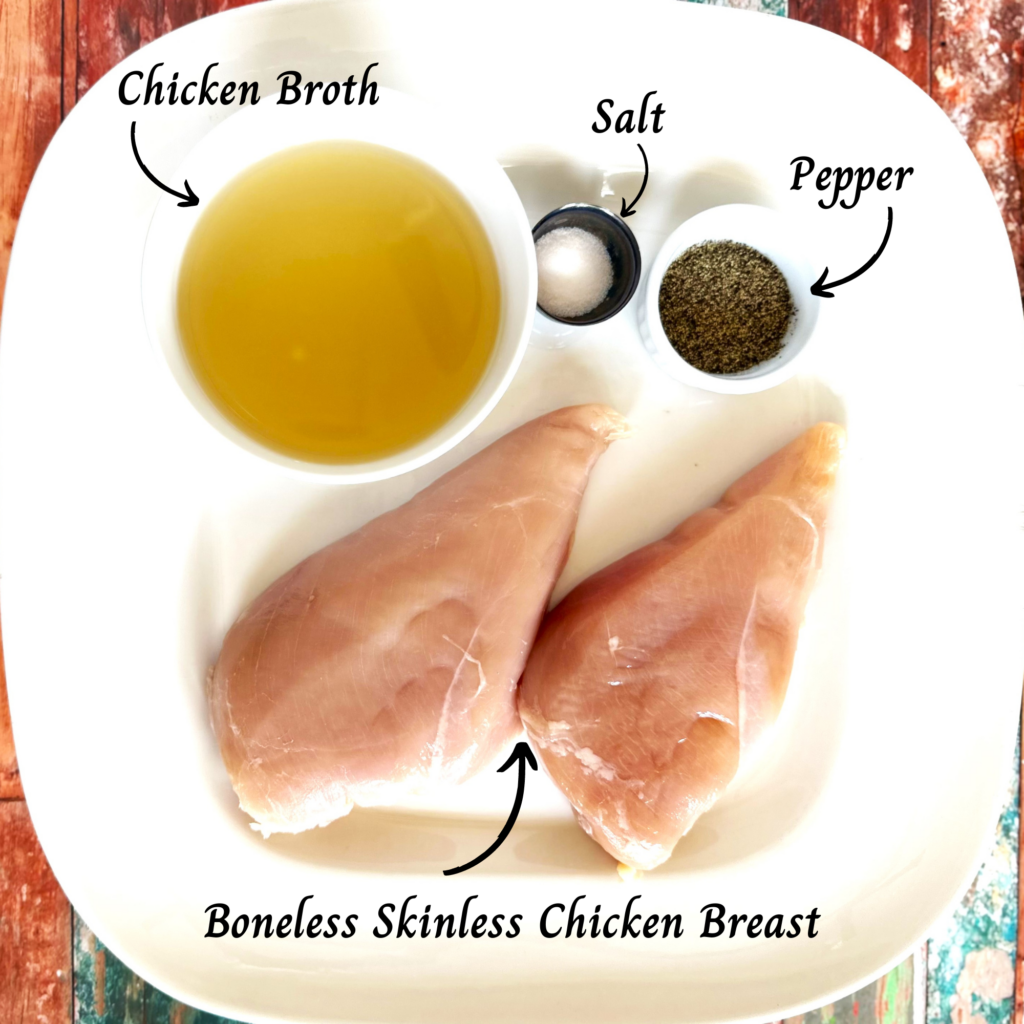
- Fresh Chicken Breast – Boneless skinless chicken breasts are the best choice for best results. You can also use skinless chicken thighs, we prefer skinless and boneless chicken thighs.
- Chicken Broth or Chicken stock – This keeps the tender chicken super moist and infuses extra flavor
- Salt or Sea salt – Just a pinch makes a big flavor difference in the end results
- Pepper – We used black pepper but you could use white pepper if the recipe you’re making the cheese for is a purely white dish
- Olive Oil – For sautéing the chicken
What is the easiest way to make shredded chicken?
The process of making shredded or pulled chicken is quite simple and straightforward. Once you find out how easy it is you’ll never need to buy store-bought rotisserie chicken again.
Our tried and true method is to give the chicken breasts a light sauté and then gently poach them
Follow the step-by-step guide below and you will have delicious chicken that you can use in a variety of recipes in no time. Note: This method does not include any added herbs or flavoring so it can be used for any dish.
Step-by-step: How to make shredded chicken
Our lightly sautéed and poaching method makes for a flavorful moist finished chicken breast that is easy to shred.
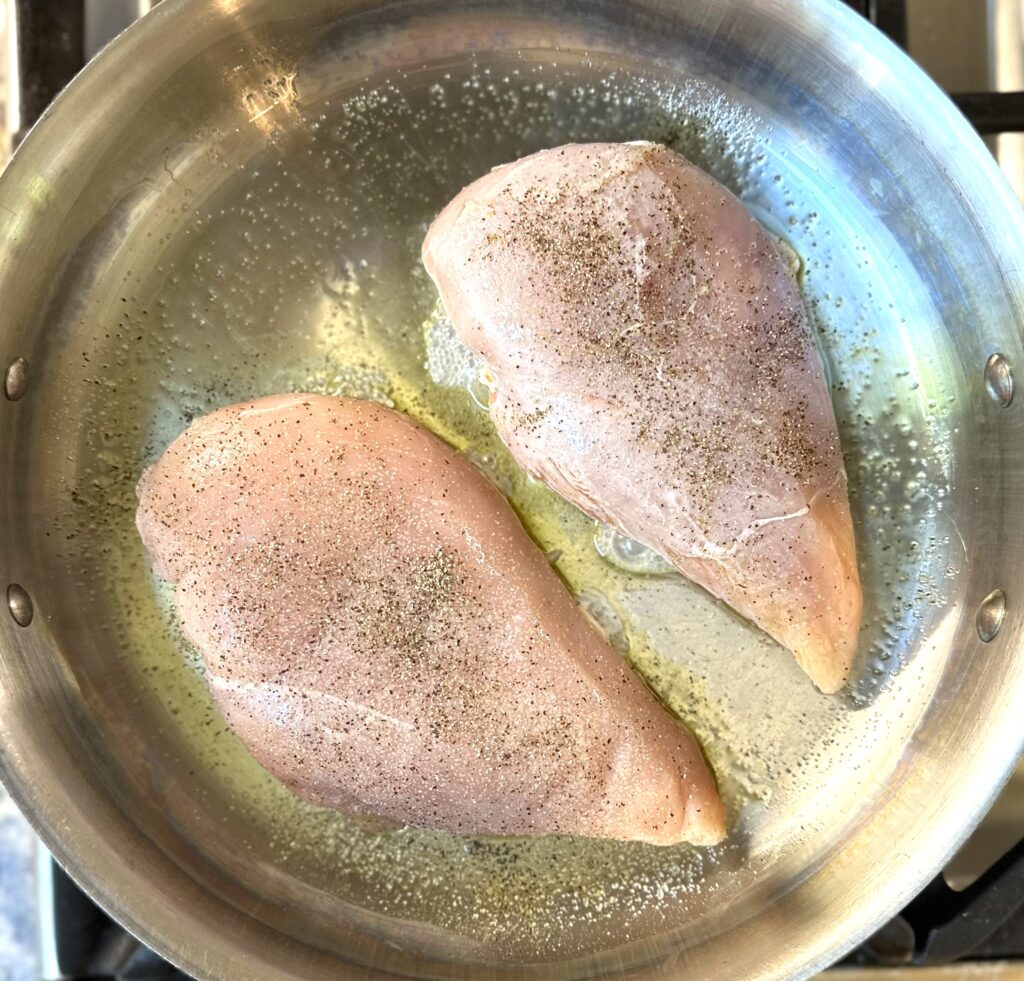
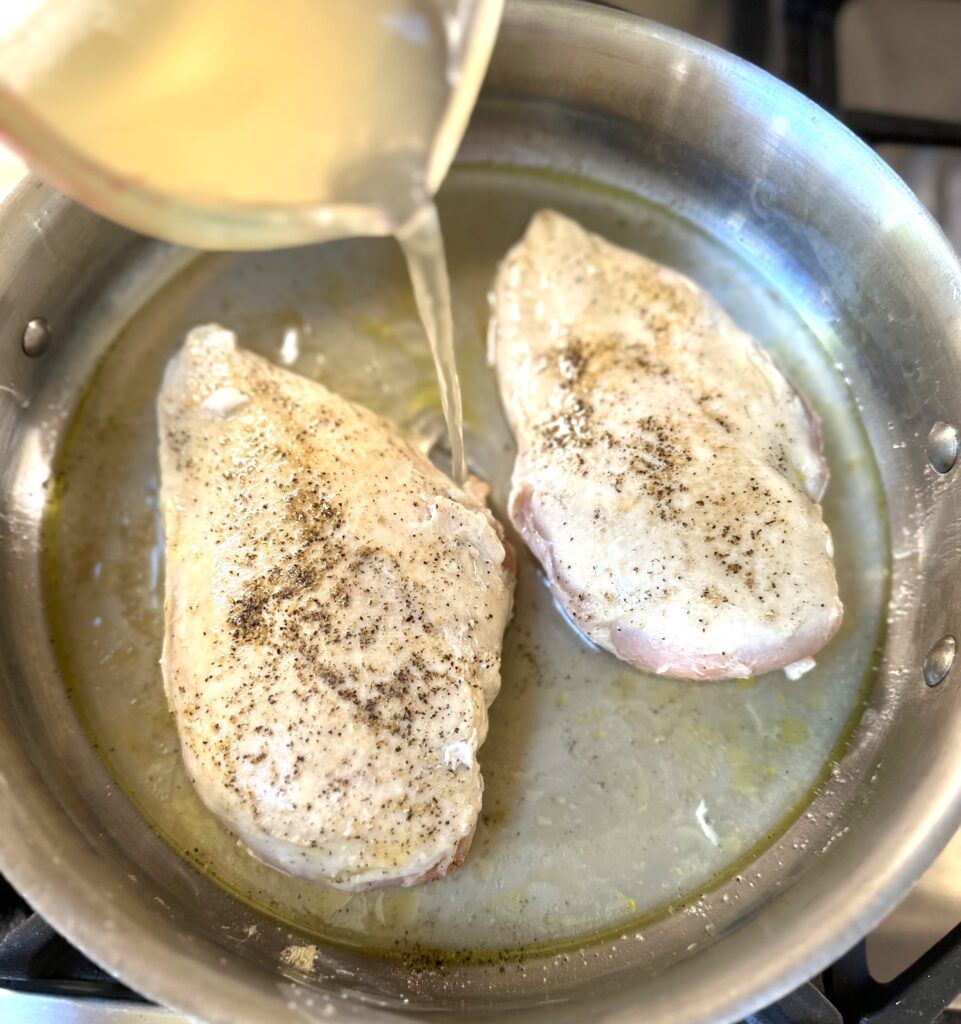
- Heat one Tablespoon of olive oil into a high-rimmed sauté pan over medium heat.
- Add chicken breasts. Sprinkle the top with salt and pepper.
- Sauté for about 2 minutes on each side until they are very lightly browned. Sautéing the breasts adds flavor, but be careful not to overcook the beast meat the goal is to keep the outer skin moist.
- Slowly pour in room-temperature chicken broth. Cover the chicken with a lid and poach.
- Bring liquid to a simmer (but do not boil).
- Reduce heat to medium-low, cover the pan with a lid, and poach chicken until the internal temperature of the chicken reaches 165˚F.
- Timing will vary depending on the size and thickness of your chicken breast meat. Poaching can take anywhere from 5 to 10 minutes for each side.
- We flip the breasts mid-way through the cooking to make sure they are evenly poached. If possible use a meat thermometer to ensure the meat is thoroughly cooked.
- Remove breasts from the pan and shred them using one of the methods below.
Can you save the cooking liquid?
- YES! Strain the cooking liquid and reserve it in case you want to add some moisture back into the chicken later. If not using right away, cool and refrigerate or freeze.
What is the easiest way to shred chicken?
There are 3 basic ways to easily shred chicken. All of these methods work well but if you are using bone-in chicken then use method #1
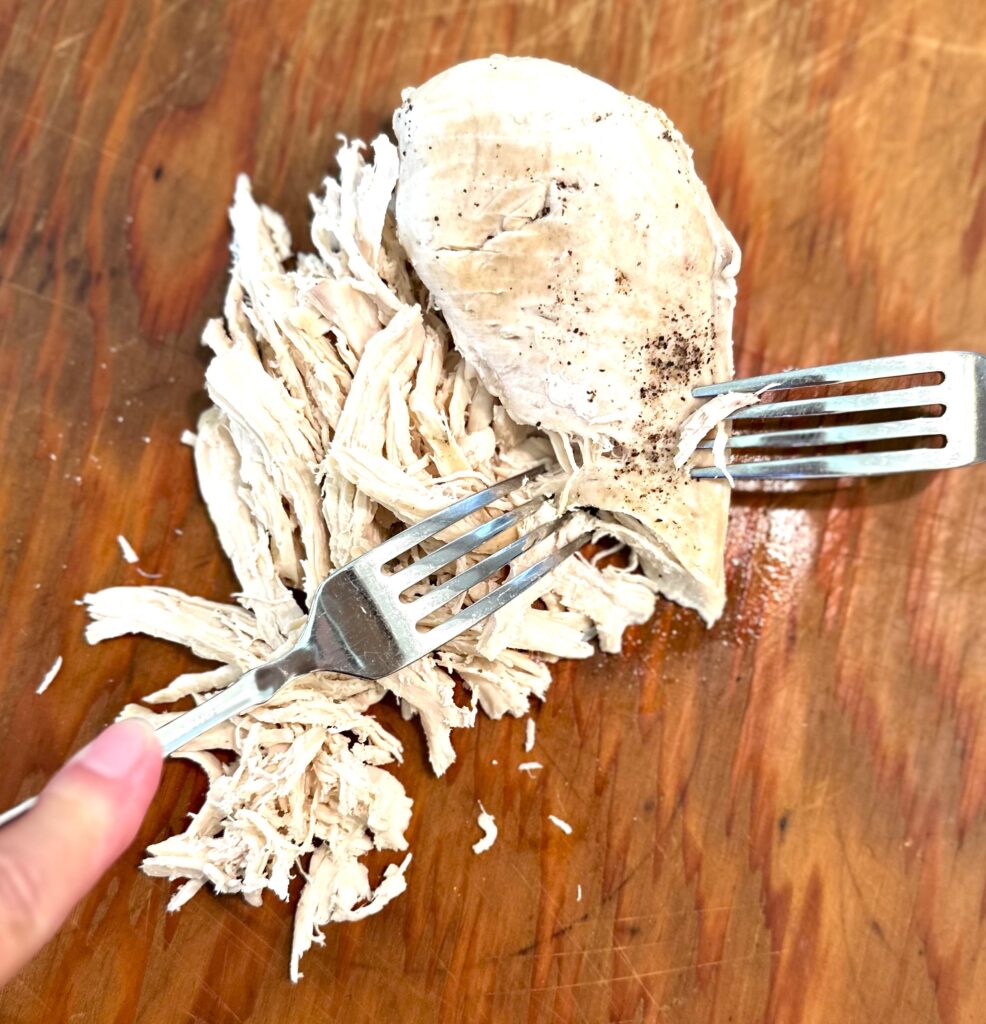
- Use Two Forks – Place chicken on a cutting board, while the meat is still warm, use 2 forks to separate the chicken along the grain and continue pulling at the chicken until shredded. It’s easiest if you use one fork to anchor the chicken and the other one to pull. The fork method is our favorite method because you have a lot of control over the size of your pieces. Want to get really fancy? Try a pair of meat shredder claws which makes this fast work!
- Hand Mixer or Stand Mixer – Place chicken pieces into the bowl. On the a low speed place the blades directly onto the chicken and mix for about 15 seconds, or until the chicken is shredded. (If using a stand mixer – we like Kitchen Aid – use the paddle attachment blade and be sure the tilt-head is locked down to avoid the blade bouncing up). This is a great method if you have a large amount of chicken to shred because it’s a fast and easy way and results in nice bite-size pieces.
- Food Processor or Blender – This method is similar to the mixer method but works even faster so be sure to simply use the pulse option until you get desired shredded size.
OPTION 1: 2 Forks
OPTION 2: Mixer method

What’s the difference between pulled chicken and shredded chicken?
Both of these terms – shredded and pulled – are correct and they can be used interchangeably. The chicken meat is cooked until tender then “shredded” or “pulled” along the grain of the meat until you get the size of shreds desired. The size of the final shred can vary based on how you will be using it in your chicken recipe.
This versatile method to cook chicken is the basis for many popular chicken dishes. Try it for tacos, nachos, salads, enchiladas, burritos, casseroles, sandwiches, soups, and even pizza.
Recipes with Shredded Chicken:
The uses for this style of chicken are endless but here are a few of our favorite recipes that incorporate shredded chicken:
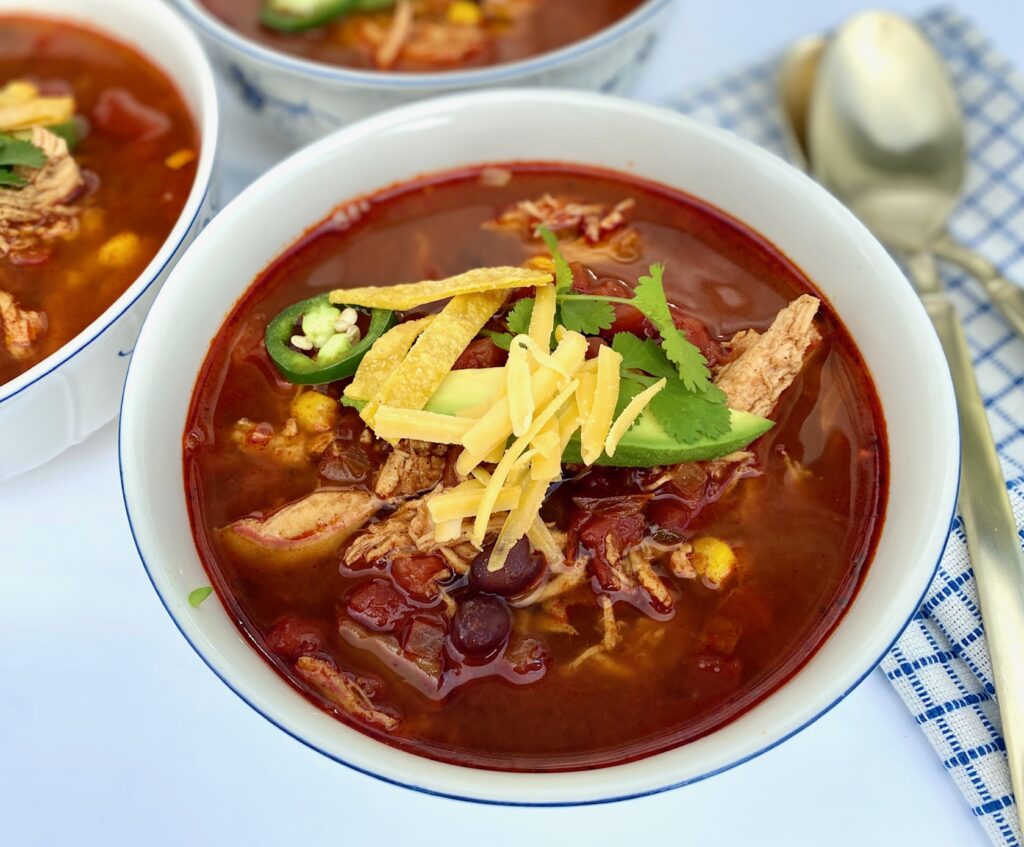
- Chicken Tortilla Soup – cooking the chicken ahead of time is a great way to save time on this recipe
- Greek Lemon Chicken Soup – want to do it all in the instant pot? Try this instead.
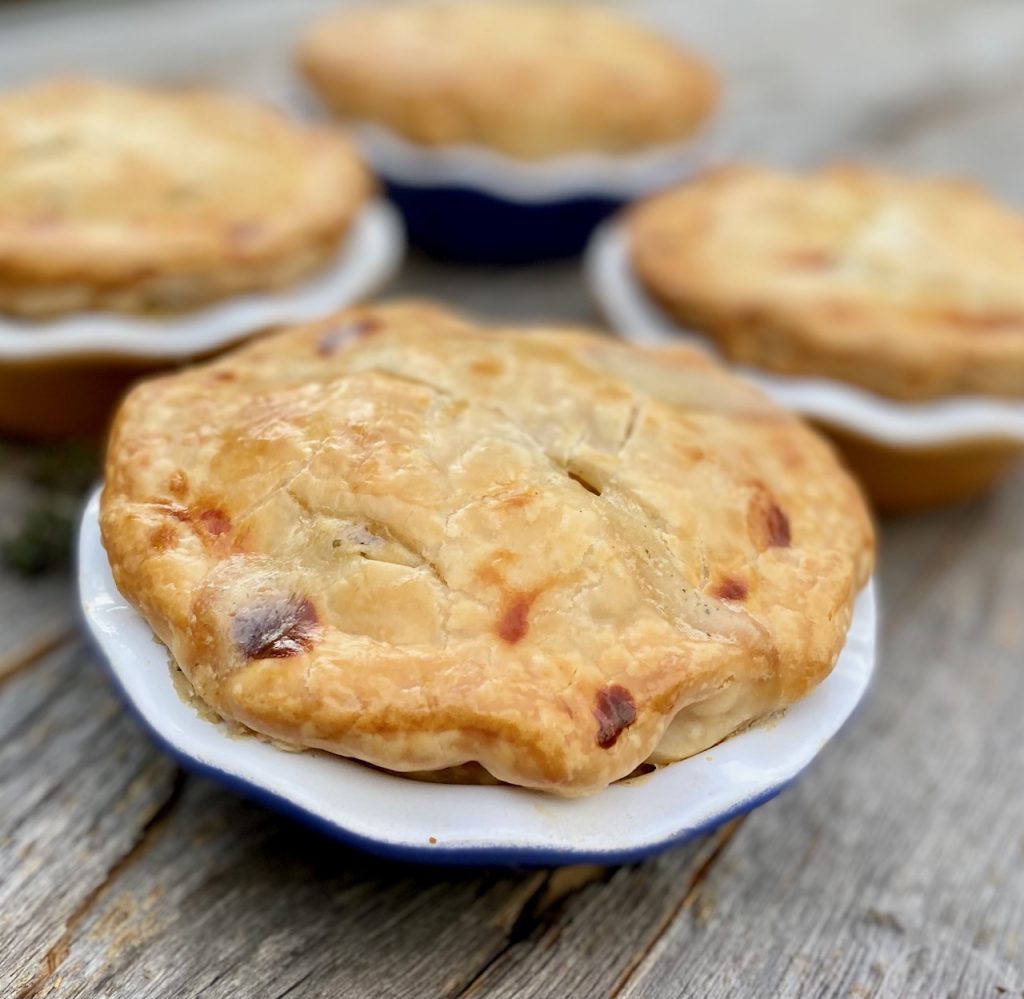
- Chicken Pot Pie – the perfect way to use this method!
- Slower Cooker Pulled Chicken Sandwiches – this is an all-in-one method so great if you need to “set it and forget it”

Other ideas for using pulled chicken:
This recipe is the basic method but you can easily add seasonings to ramp up the flavor once you have it shredded.
- We LOVE adding our Homemade Taco Seasonings Blend to this chicken for any type of taco or nacho recipe
- Drizzle in some Sweet Chili Sauce and add it to your favorite Asian-style salad or on top of Asian Coleslaw
- Flavor it up with our Easy Pesto Sauce and add on top of your favorite pasta!
FAQ’s:
How much will this recipe make?
- 1 pound of cooked, boneless chicken breasts will make about 2 ½ cups of shredded chicken.
Can I make shredded chicken in a slow cooker?
Yes! This is a great way to make it and a real timesaver for meal prep. Keep in mind you won’t have the browned bits on the surface like you do with the traditional sauté/poach method.
- Simply add the chicken, chicken broth, salt, and pepper to the slow cooker, cover, and cook
- It takes about 3 hours on high or 5 hours on low to fully cook the chicken.
- Each crockpot or slow cooker will vary so use your best judgment.
- After cooking just shred as instructed above.
How to store:
This chicken is perfect for make-ahead meal planning, so consider making a big batch. When reheating you may want to add a touch of water or broth.
- Refrigerator – Cool and store tightly sealed in an airtight container or ziplock bag for up to 3-4 days.
- Freezer – Let cool completely, shred, seal, and freeze for up to 3 months (seasoned or unseasoned).

How to Make Shredded Chicken
Ingredients
- 1 pound Chicken breasts, boneless, skinless
- 4 cups Chicken broth, room temperature
- 1 dash Salt
- 1 dash Pepper
- 1 Tablespoon Olive oil
Instructions
- Heat one Tablespoon of olive oil into a high-rimmed sauté pan over medium heat.
- Add chicken breasts. Sprinkle the top with salt and pepper.
- Sauté for about 2 minutes on each side until they are very lightly browned. Sautéing the breasts adds flavor, but be careful not to overcook them because the goal is to keep the outer skin moist.
- Slowly pour in room-temperature chicken broth. The chicken should be covered with liquid.
- Bring liquid to a simmer (but do not boil).
- Reduce heat to medium-low, cover the pan with a lid, and poach chicken until the interior temperature reaches 165˚F.
- Timing will vary depending on the size and thickness of your chicken breasts. Poaching can take anywhere from 5 to 10 minutes for each side.
- We flip the breasts mid-way through the cooking to make sure they are evenly poached. If possible use a meat thermometer to ensure the meat is thoroughly cooked.
- Remove breasts from the pan and shred while warm, using one of the following methods:1. Use Two Forks – While the meat is still warm, use 2 forks to separate the chicken along the grain and continue pulling at the chicken until shredded. It’s easiest if you use one fork to anchor the chicken and the other one to pull. This is our favorite method because you have a lot of control over the size of your pieces.2. Hand Mixer or Stand Mixer – Place chicken pieces into the bowl. On the lowest speed place the blades directly onto the chicken and mix for about 15 seconds, or until the chicken is shredded. (If using a stand mixer – we like Kitchen Aid – use the paddle blade and be sure the tilt-head is locked down to avoid the blade bouncing up). This is a great method if you have a large amount of chicken to shred because it’s fast and easy!3. Food Processor or Blender – This method is similar to the mixer method but works even faster so be sure to simply use the pulse option until you get desired shredded size.
Notes
-
- Refrigerator – Cool and store tightly sealed for up to 3 days
-
- Freezer – Let cool completely, seal, and freeze for up to 3 months (seasoned or unseasoned)
- SLOW COOKER/ CROCKPOT Instructions:
- To make chicken in a slow cooker or crockpot simply omit the sauté step and add everything to the slow cooker. Cover and cook for about 5 hours on low or 3 hours on high setting.
Nutrition
It’s a snap to make with just 2 ingredients – sugar and water!
Making homemade simple syrup could not be easier and it is much faster (and more economical) than running to the market for a pre-made bottle. It takes just 10 quick minutes to make a batch!
This post may contain affiliate links. Please see our affiliate disclosure for more details. We only recommend products we love and use.
What is Simple Syrup?
Simple syrup really is just that – SIMPLE. If you can boil water you can make it!
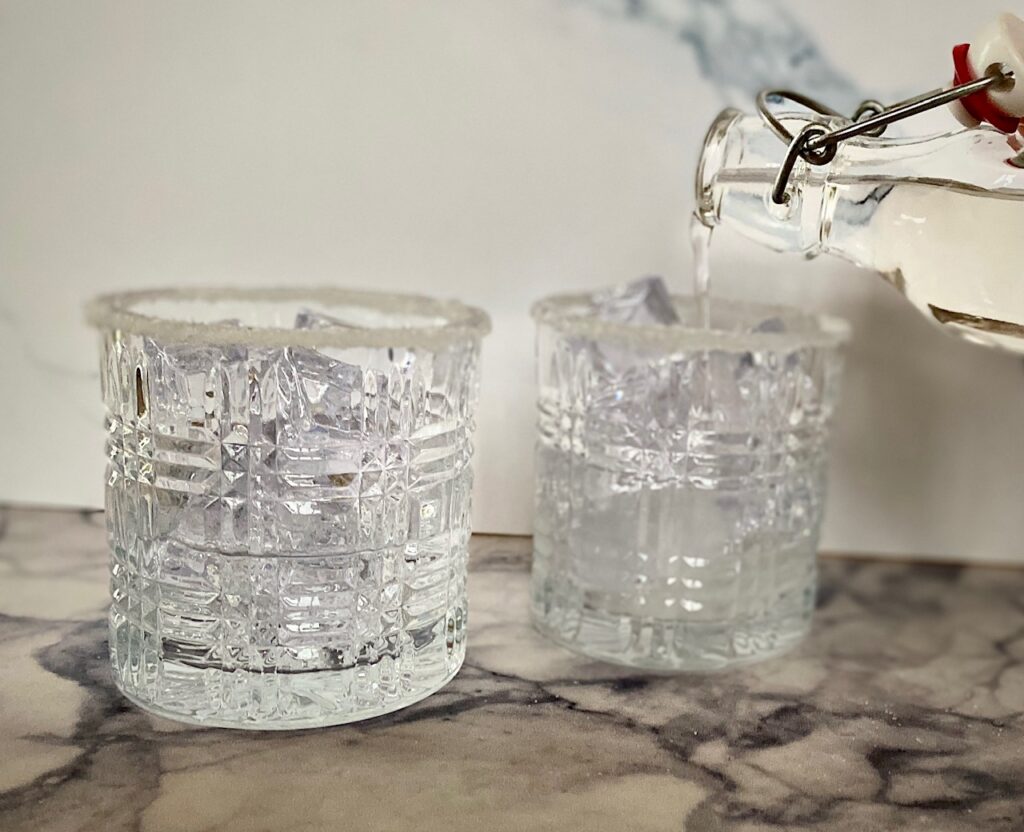
It’s made by cooking equal parts sugar and water until the sugar is dissolved and the mixture is slightly thickened. It’s used as a sweetener in cooking and baking, but most commonly used as an ingredient in cocktails or iced coffees, lemonades, and tea.
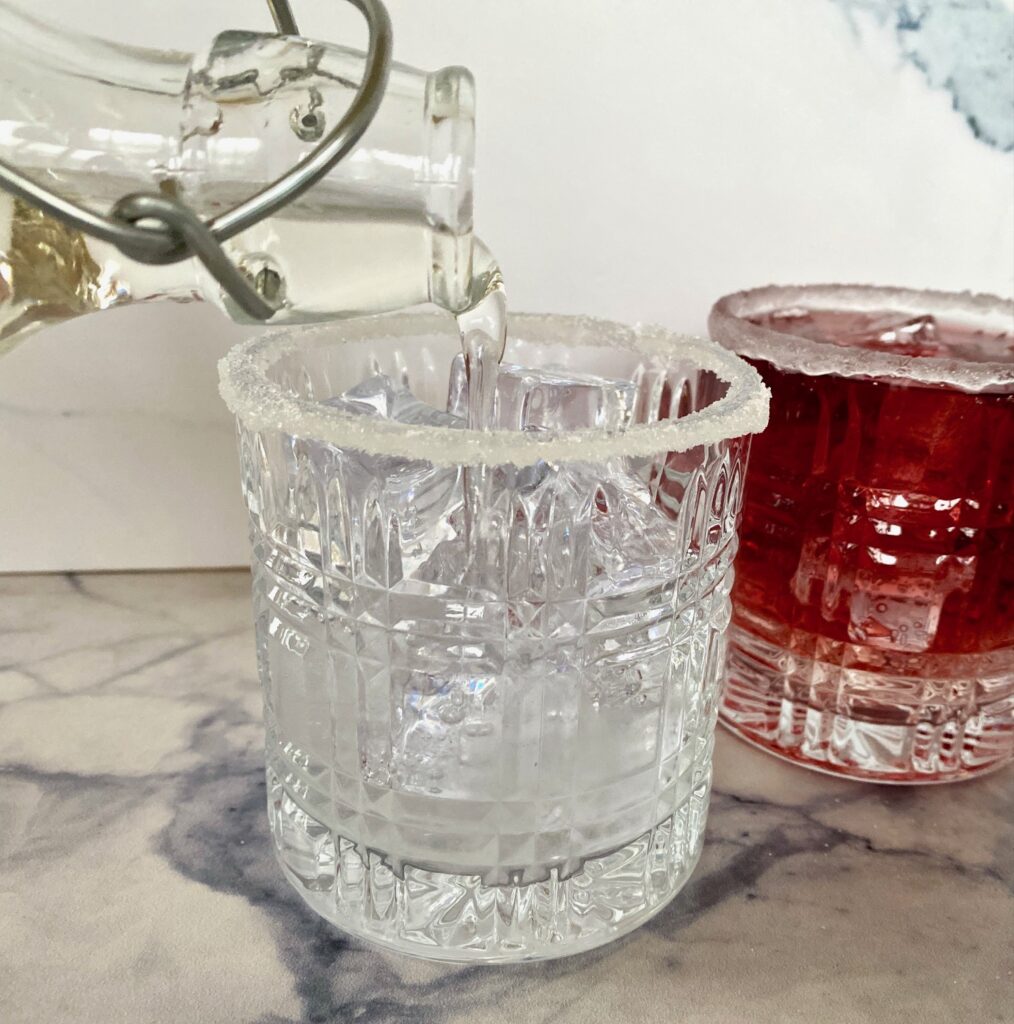
We’ve used it in many of our cocktail recipes, such as the always popular Lemon Drop Martini and the Dirty Shirley. The possibilities for flavoring (infusing) with fruit, herbs, and spices are endless.
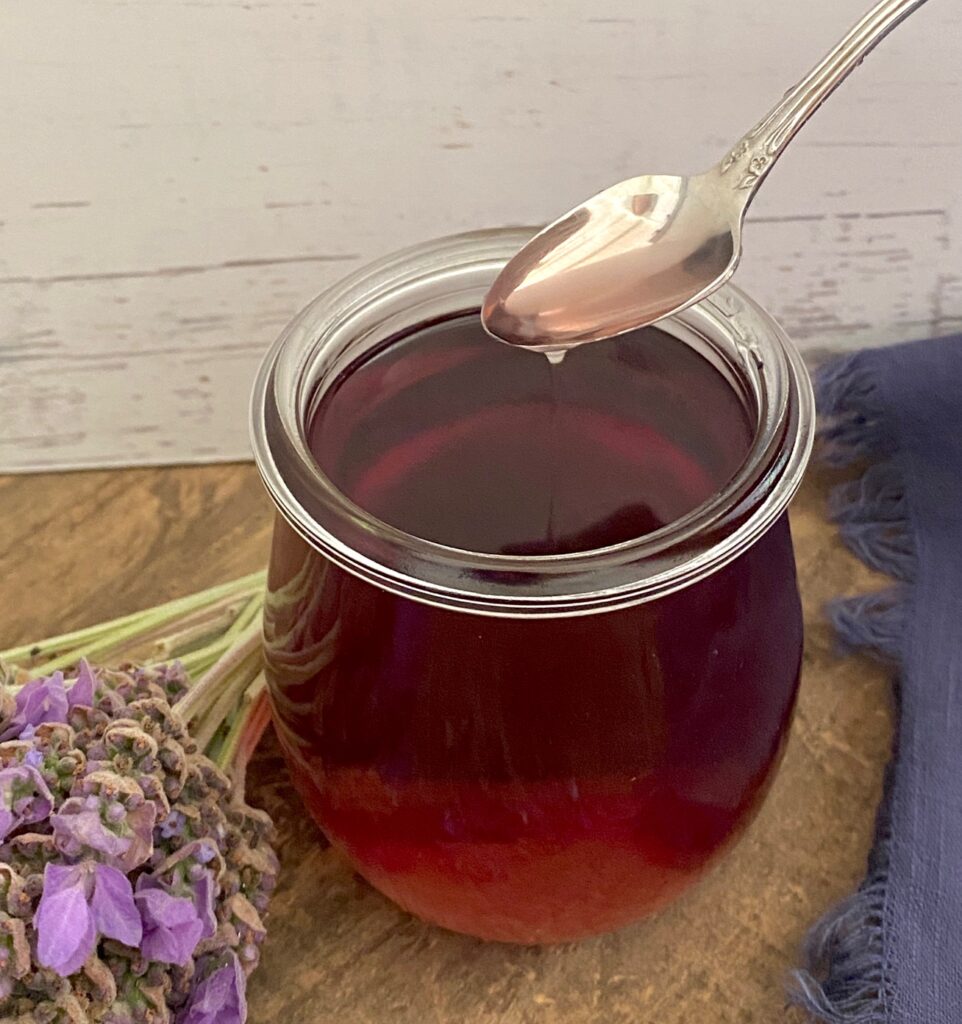
Below we will share some ideas for infusing with flavor, including Lavender Simple Syrup and Pumpkin Spice Syrup.
Ingredients needed:
This recipe is actually more of a method.
So, what is the formula for simple syrup? It’s 1:1 and you only need water and sugar.
Simple Syrup Ratio:
- One part water
- One part granulated sugar
The ratio of sugar to water is always equal, so the recipe can easily be cut in half, doubled, or tripled, depending on what you need.
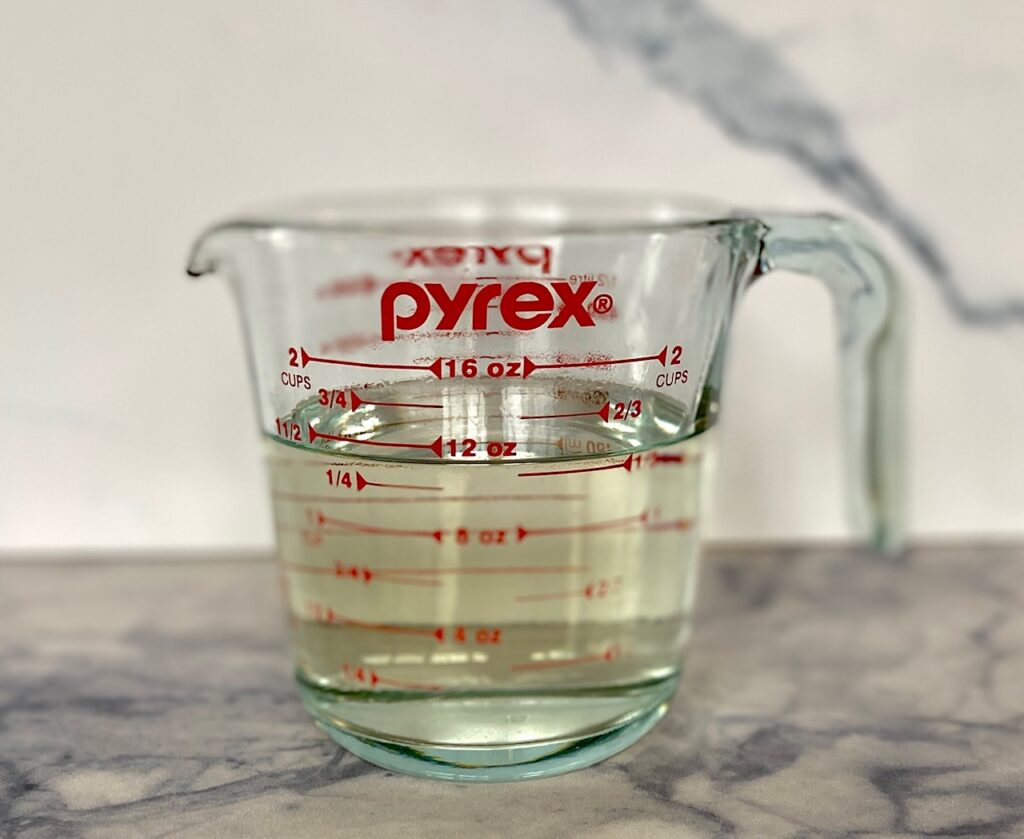
Note: 1 cup sugar + 1 cup water will yield 1½ cups once cooked.
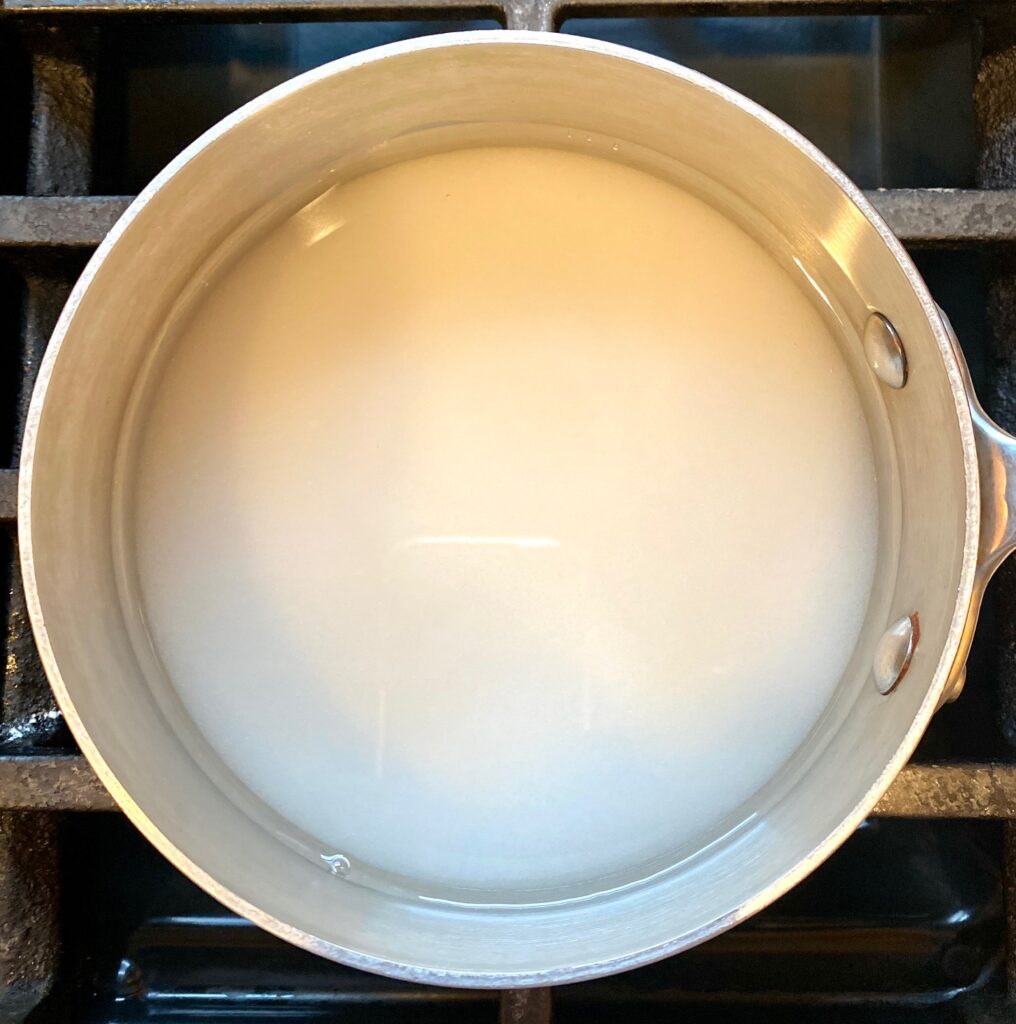
How to make a Simple Syrup
For the best results use a heavy-bottomed pan because it will conduct heat more evenly during cooking.
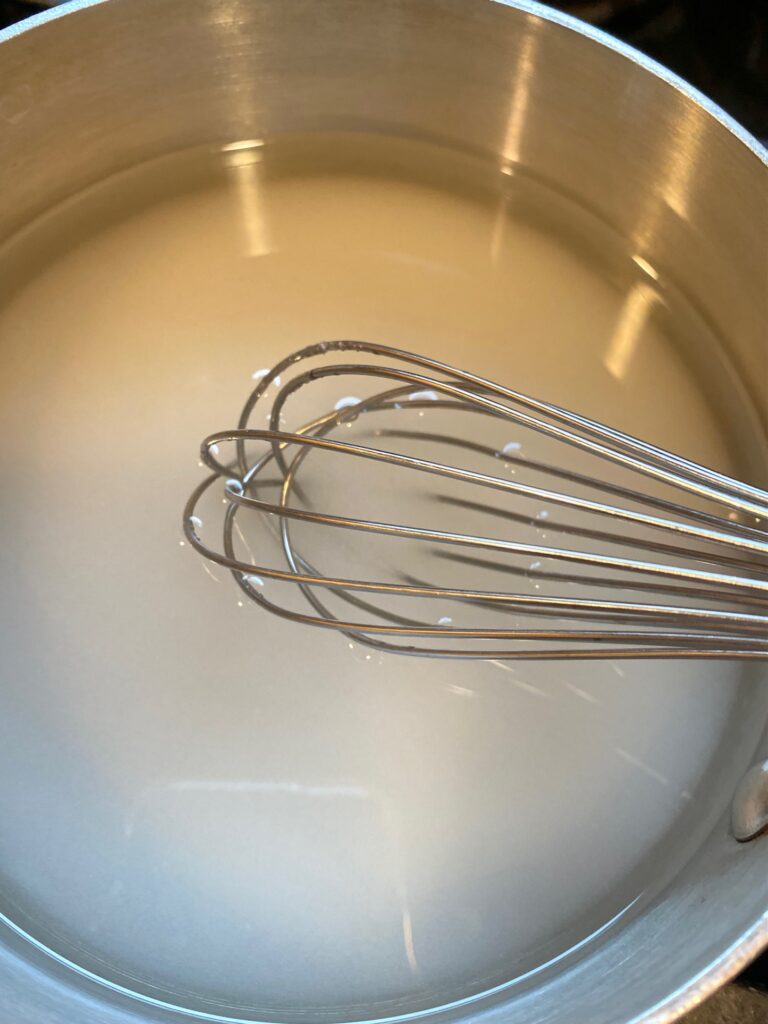
- In a small saucepan add equal parts water and sugar, and give it a quick stir to combine
- Cook mixture over medium heat, stirring gently until the sugar dissolves completely. NOTE: It’s not essential that the water boils as long as the sugar dissolves completely
- Remove the pan from the heat and let the mixture cool to room temperature.
- The results should be fairly thin and easy to pour (much thinner than maple syrup).
- If you want a thicker consistency just continue to cook until you achieve your desired thickness. (see below for “rich” simple syrup).
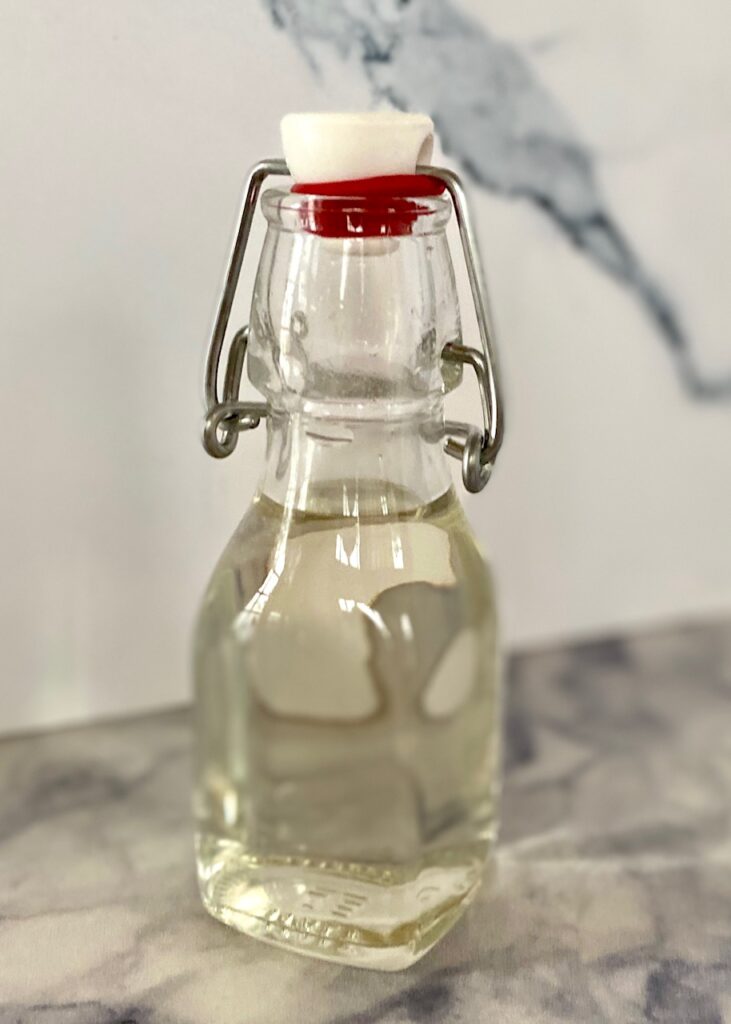
- Pour into a glass jar or container, with a lid, and seal it.
- Refrigerate until ready to use.

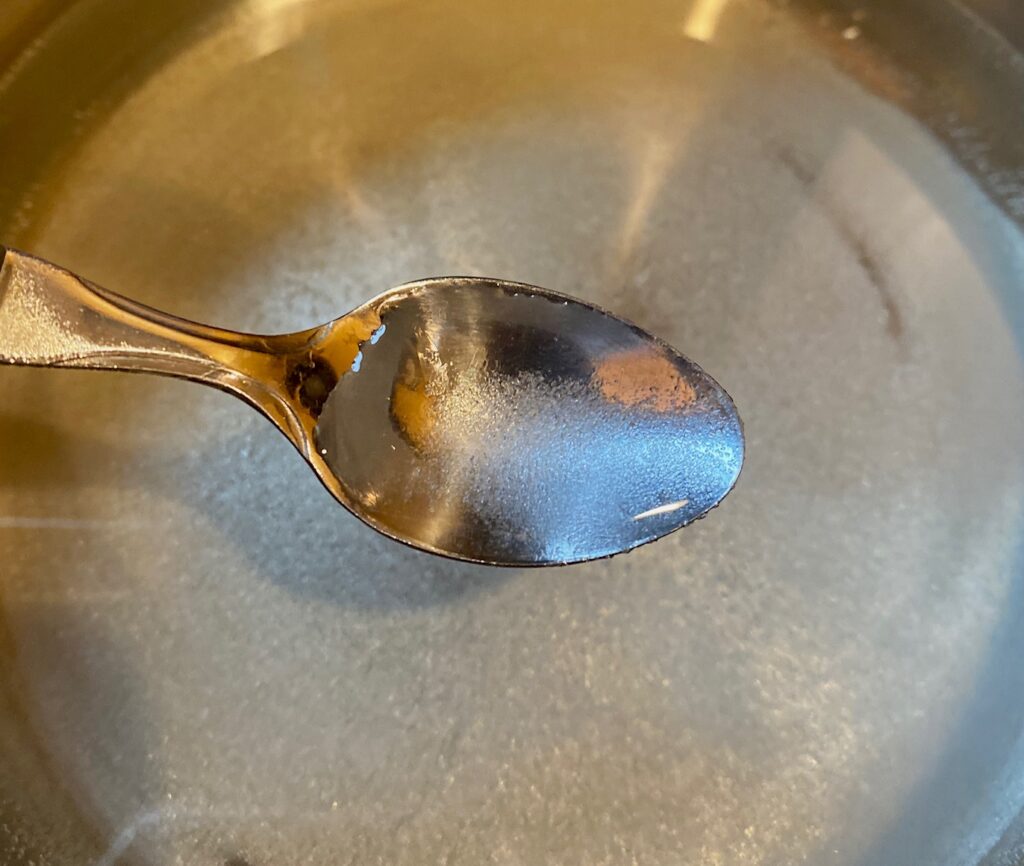
How do you know when it’s done?
In order to test if all of the sugar is completely dissolved carefully scoop up a small amount of the hot mixture with a spoon. There should be no sugar crystals in the liquid. If you see some remaining sugar you’ll need to boil a little longer until all the sugar dissolves.

How long does simple syrup last?
Once cooled and refrigerated the mixture will last in the refrigerator for about 3 weeks. However, just like anything else, use your best judgment, and if it becomes cloudy it’s time to toss it and make a fresh batch.
How to make simple syrup for cocktails
Simple syrup is fantastic when flavored or infused. Any herb, seasoning, spice, or fruit will work. The basic method doesn’t change and you will use the same 1:1 ratio of sugar to water.
Some popular infused simple syrup flavors:
- Rosemary, mint, basil, lavender, rose petal
- Vanilla bean or extract, cinnamon stick, ginger root, pumpkin spice, or espresso powder
- Blueberry, raspberry, cherry, blackberry, cranberry
- Lemon, orange, grapefruit
Depending on the desired flavor strength there are 2 ways to add the flavor:
- Add the additional flavoring at the end of cooking, and let the ingredients steep off the heat, for a lighter flavor.
- Add it while cooking and cook a bit longer for a stronger flavor (and color).
Once flavored, strain to remove the flavoring ingredients, if needed, before chilling.
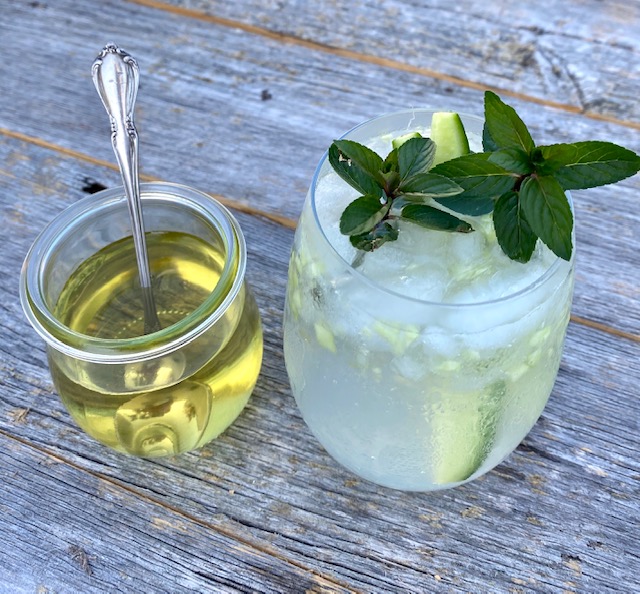
Our easy recipe for how to make lavender simple syrup, or mint simple syrup, are both delicious examples of strained herb simple syrup.
Fruit-infused simple syrup flavors:
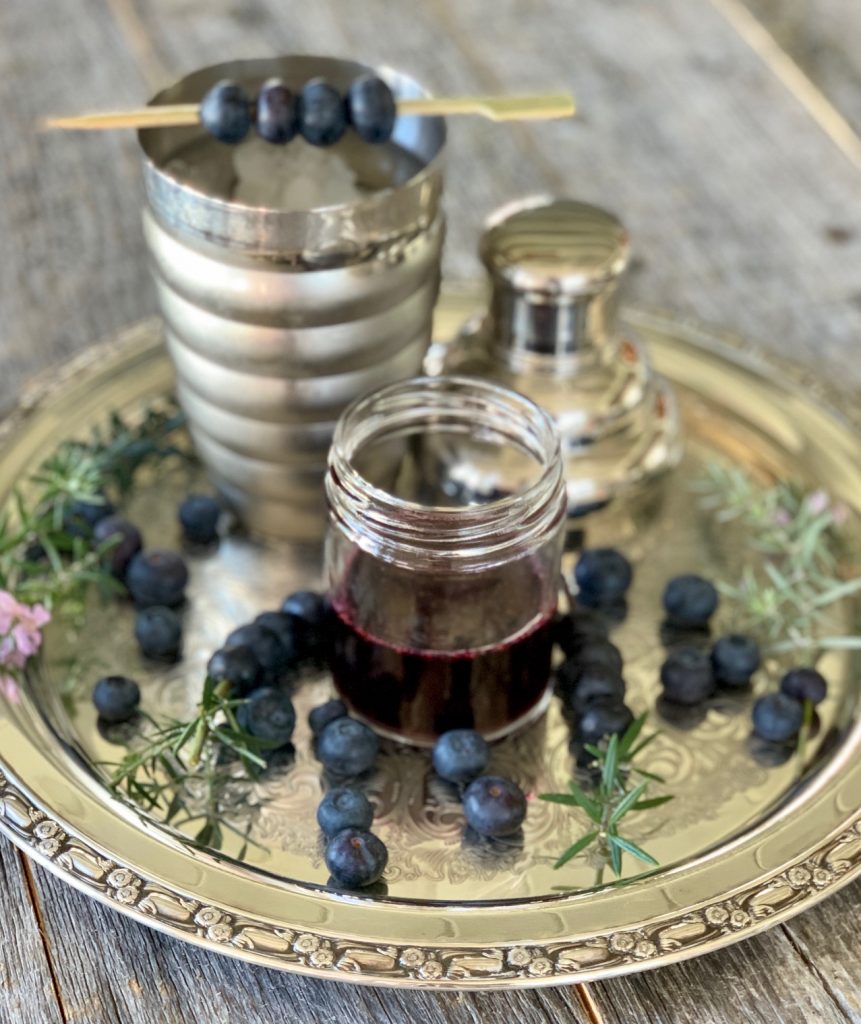
Fruit works perfectly for imparting sweet or tart fresh flavor into your syrup. When using fruit you may need to double-strain to remove all the fruit before storing it in a jar. A great example of this can be found in our Blueberry Vodka Cocktail or in the base of our Cranberry Orange Liqueur.
What is “rich” simple syrup?
Rich simple syrup is a 2:1 ratio of sugar to water.
The finished product is much thicker and will usually keep up to 6 months in the refrigerator before becoming cloudy. Many bartenders and home cocktail aficionados prefer the “rich” version because it gives cocktails a bigger mouth feel. You will likely need to simmer a little bit longer with this ratio.
Using simple syrup in baked goods
Brushing cake layers with simple syrup is a great way to ensure they stay moist.
- Simply brush a thin layer to glaze the cake tops, let sit for about 10 minutes, and then continue frosting, as usual.
Can you use other sugars?
Yes! The same ratio applies (1:1)
- Use brown sugar or demerara sugar. Both types work perfectly for whiskey-based cocktails, such as an Old Fashioned or a whiskey sour. These liquid sugars will add a caramel note to coffee drinks. We used brown sugar in our Pumpkin Spice Syrup. Baked goods with cinnamon flavor or cardamom will only taste better with this version.
- Using Honey instead of white sugar tastes great with teas and lemonades.
- Coconut Sugar – coconut sugar is a plant-based low glycemic sugar option.

How to Make Simple Syrup
Ingredients
- 1 cup water
- 1 cup granulated sugar
Instructions
- In a small saucepan add the sugar and water. Stir to combine.
- Cook over medium heat, stirring occasionally, and heat until all of the sugar is dissolved.
- Remove from heat and let cool completely.
- Pour into a glass jar and seal tightly with a lid.
- Syrup will keep, refrigerated, for about 3 weeks.
Notes
- This recipe can be doubled or tripled.
- The ratio is always 1:1 (equal parts sugar to water).
- Store in the refrigerator for up to 3 weeks.
- If the syrup gets cloudy it’s time to discard it.
Nutrition
Canning is so easy. You too “can” do this!
Fruits, jams, salsas, most tomatoes, pickles, and chutneys are among the foods that can be safely preserved using this simple method.
When canning any food please make sure your work surfaces is clean and sterile. All equipment used for the canning process must be washed in very hot, soapy water.
As you get started, prepare the equipment you will be using, wash your canning area, and prepare your canning kettle. Do this first.
Now you are ready to prepare the food you will be canning. Have recipe prepared and ready prior to starting this easy step by step water bath canning method.
Jump to RecipeThis post may contain affiliate links. Please see our affiliate disclosure for more details.
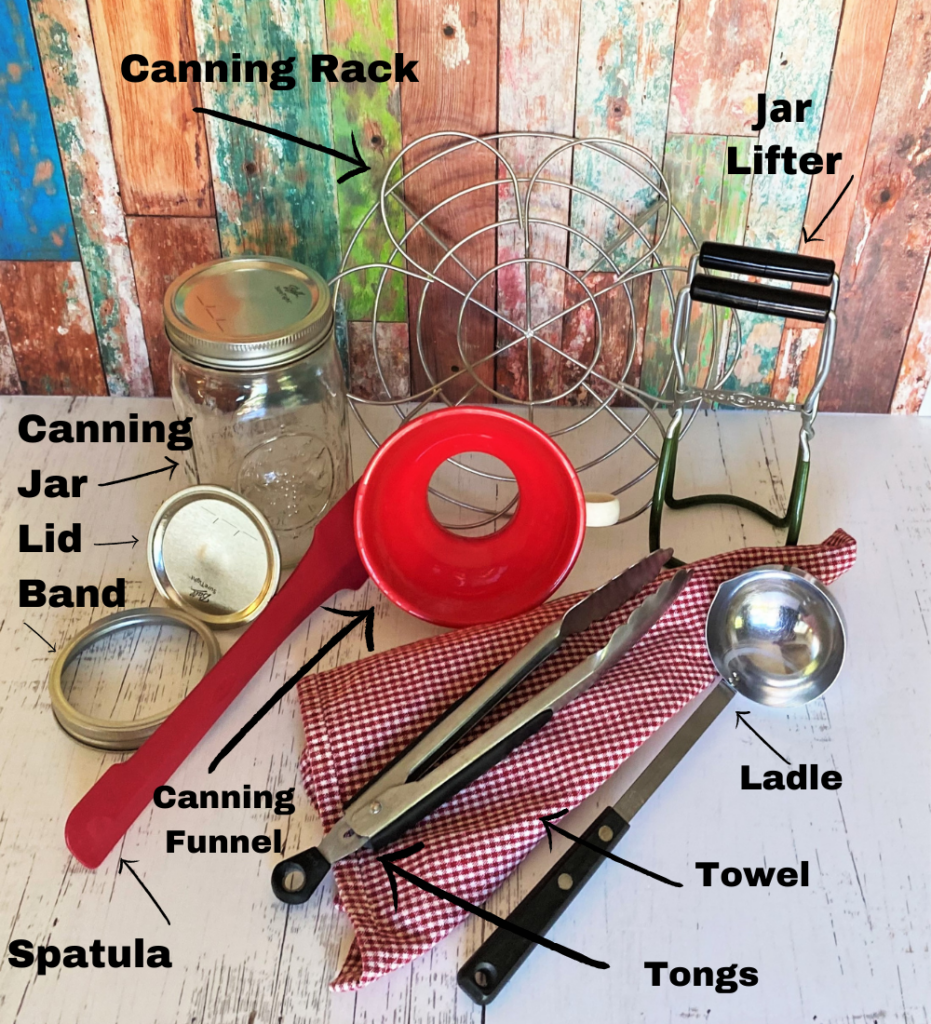
Equipment you will need for Water Bath Canning
- Canning kettle or large deep stockpot with a lid, and a rack that fits inside. The rack is necessary to keep the jars stable and upright while in the “bath”. The jars should not be directly touching the bottom of the pot.
- Glass canning jars, lids and bands. Previously used glass jars are ok to use but always use new jar lids. Check glass jars to make sure they are not chipped, or uneven, because this will prevent a proper vacuum seal during canning.
- Kitchen utensils needed – spatula, ladle, tongs, and a dry towel.
- Jar lifter – see recommendation and photo below
- Canning Funnel – this is a large funnel with an expanded opening to fill jars easily and keep the jar rims clean.
- Of course! Have your recipe finished and ready before canning!!
If you are just getting started or are new to the process of water bath canning here is a link for a terrific starter kit you can order. This is the equipment needed for your success and it’s reasonably priced!
Our recommended canning kettle and rack combo is the McSunley Stainless Steel Water Bath Canner with Rack
The Norpro Canning Essential 6-piece set includes all the canning utensils you will need in one easy set
Don’t forget complete canning jars, lids and bands. We like these six 16-ounce mason jars with silver bands and lids which is enough for one batch of this recipe.
How do you do a water bath for canning? Here are step by step instructions:
Follow this easy step by step guide for Water Bath Canning.
Step One:
- Wash all equipment you will be using for canning in hot, soapy water. Dry and set aside.
- Fill kettle or stockpot half full of water, add the rack and the empty canning jars. Heat water to 180˚ F to warm the jars. This will prevent the jars from cracking or breaking when you add finished warm fruit or other food.
- In a shallow saucepan place the lids and bands. Cover with water and warm on low heat. Do not heat water to the point that you cannot handle the lids and bands safely and easily.
- With the jar lifter or tongs remove the warm jars from heated water in the kettle. Drain any remaining water from jar. Place on a clean towel.
- Place the canning funnel on the jar opening. Add in prepared food one ladle full at a time. Leave about one inch of space from the top of the jar to the food. It’s important not to overfill because you need leave room for expansion.
- Remove any air bubbles by running a spatula around the inside of the jar.
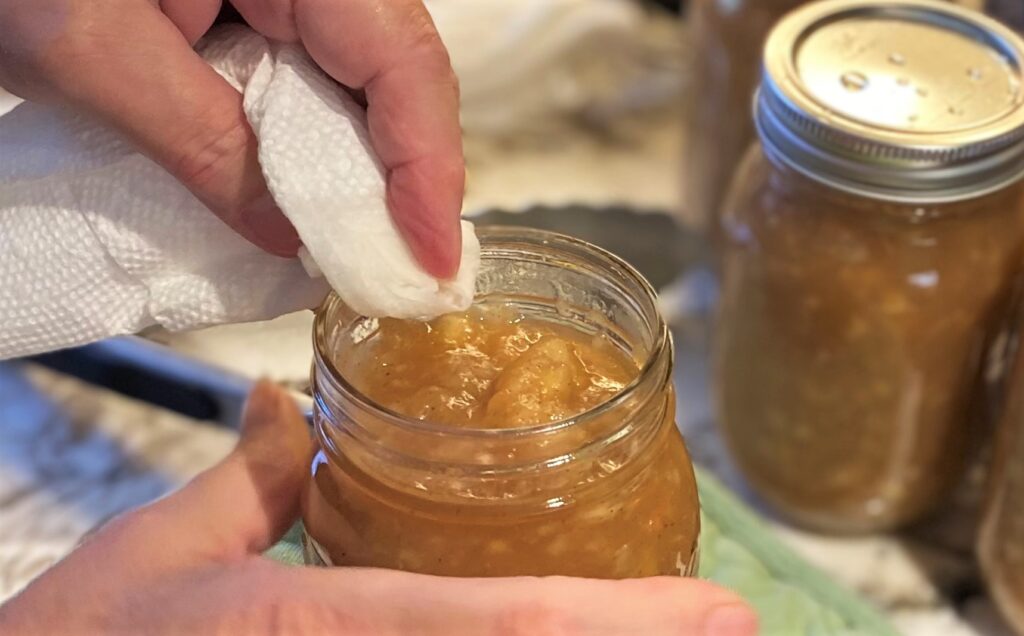
- Remove canning funnel. With a warm wet paper towel, clean any food residue from the mouth edges of the jar. This will allow for a tight vacuum seal.
Part Two:
- Place warm lid onto the jar. Add band and twist on to seal tightly. Set aside.
- Complete the same process for all remaining jars.
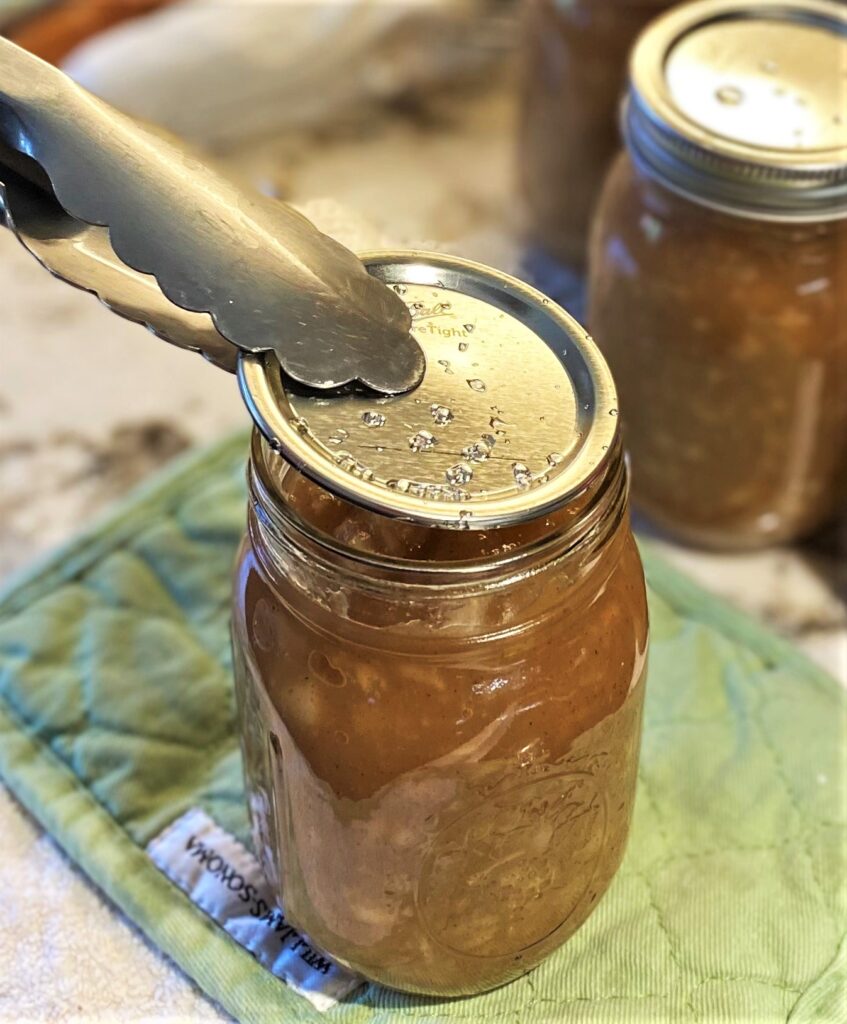


- Use the jar lifter to place each jar into water kettle and onto the rack. If needed add more hot water to fully cover at least 2″ above the top of the jars. Bring water to a boil.
- Boil jars at a steady, gentle boil. Boil 25 minutes for pints and 30 minutes for quart sized jars. This is a general rule. Cooking times will vary for different foods. Always refer to the individual recipe for canning cook times.
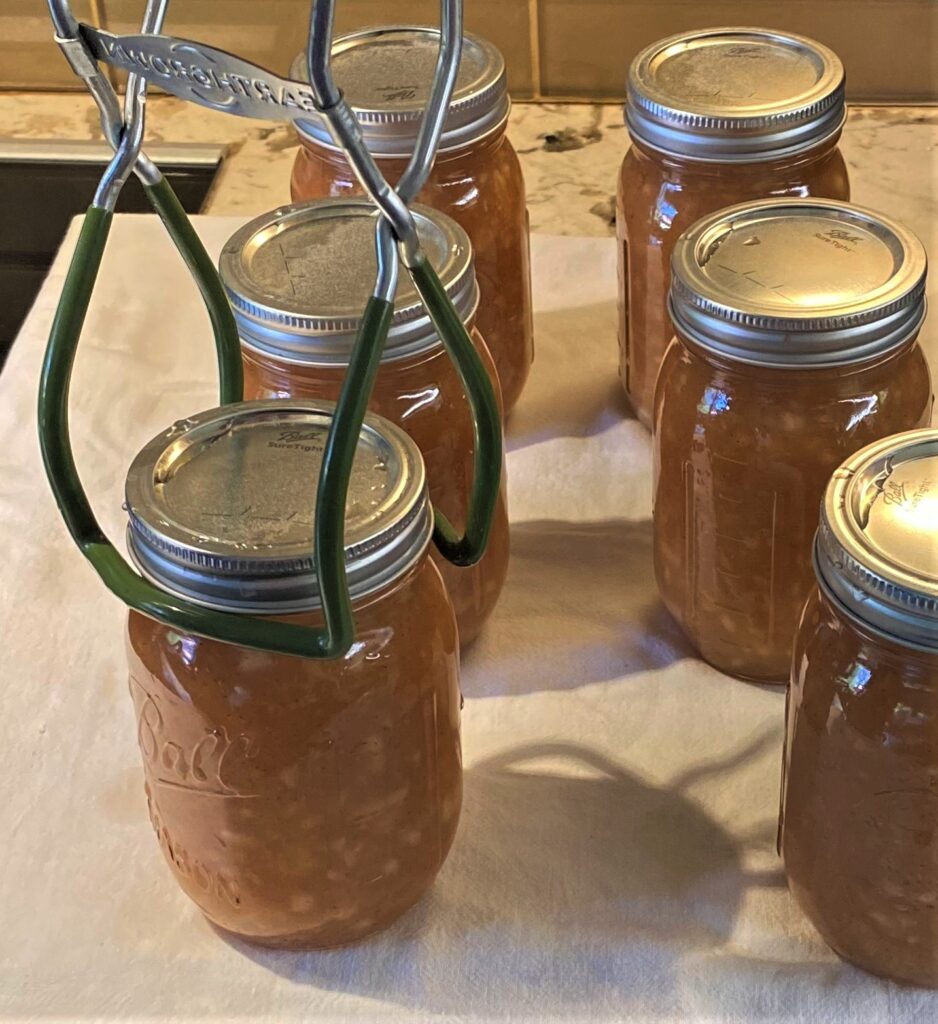
- Remove jars from water with the jar lifter and place on a towel right side up.
- Let jars rest for 12 to 24 hours. When a jar is properly sealed you will hear a small popping sound. The lid will move inward and seal is complete.
Checking the finished process
There are three ways to check for a proper seal. “Hear the Seal, See the Seal, and Feel the Seal”. Again, this process can take 12 to 24 hours so be patient with your jars.
- While jars are resting, after removing them from the water bath, you will hear a pop, one by one, as the jars start to seal.
- Press your fingers over the middle of the jar lid. You should feel a solid surface on the lid. There should be no movement in or out, or up and down.
- Look at the jars to visually see the indent to the jar lid.
- If any jars do not seal properly then place them in the refrigerator immediately and enjoy the food within the next week to 10 days.
How water bath canning works to prevent food spoilage
It is a common fact that food will spoil, and all food spoils at some point. Microorganisms such as mold, yeast and bacteria are always in the air, water, soil, and on most foods. The goal of water bath canning is to stop the action of these microorganisms.
With the proper application of water bath canning, the heat to the jar of food will cause an airtight seal. This prevents any organisms from entering the jar. This will allow you to safely store your food for up to 18-months.
Making sure all of your canning jars have properly sealed is the most important step in home canning food!
How to best store your canned foods
- Store jars right side up
- Find a cool, dark space on a sturdy shelf
- Avoid areas with sunlight, dampness or drafts.
- The best temperature for storing home canned foods is between 50˚ to 70˚ F.
Other foods that are good for “hot bath” canning
High-acid foods and acidified foods can be safely “hot bath” canned. If canning high acid fruit we like to use a bit of Ball brand Fresh Produce Protector to prevent discoloration of cut fruit while prepping.
- Most any fruits – peaches, pears, cranberries, berries, plums, apricots
- Jams, jellies, preserves, marmalades, chutneys
- Tomatoes, tomato sauces, salsas
- Pickles and pickled fruits and vegetables
- Relishes
- Homemade Ketchups and Sauces
- Our favorite is our Homemade Apple Sauce recipe which is easy and loaded with flavor
Water Bath Canning
Equipment
- Canning kettle or large stockpot with lid
- Canning rack
- Canning utensils
- Canning jars, lids and bands
- Kitchen towel
Ingredients
- 1 teaspoon Fresh Produce Protector, such as Ball brand, if canning acidic fruit
Instructions
- Wash all equipment you will be using for canning in hot, soapy water. Dry and set aside.
- Fill kettle or stockpot half full of water, add the canning rack and the empty canning jars. Heat water to 180˚F to warm the jars. This will prevent the jars from cracking or breaking when you add finished warm fruit or other food.
- In a shallow saucepan place the lids and bands. Cover with water and warm on low heat. Do not heat water to the point that you cannot handle the lids and bands safely and easily.
- With the jar lifter or tongs remove the warm jars from heated water in the kettle. Drain any remaining water from jar. Place on a clean towel.
- Place the canning funnel on the jar opening. Add in prepared food one ladle full at a time. Leave about one inch of space from the top of the jar to the food. It's important not to overfill because you need leave room for expansion.
- Remove any air bubbles by running a spatula around the inside of the jar.
- Remove canning funnel. With a warm wet paper towel, clean any food residue from the mouth edges of the jar. This will allow for a tight vacuum seal.
- Place warm lid onto jar. Add band and tighten well. Set aside.
- Complete this process for all remaining jars.
- Use the jar lifter to place each jar into water and onto the rack. Fill the water level to fully cover all jars with water. Bring water to a boil.
- Boil jars at a steady, gentle boil for 25 minutes for pints, and 30 minutes for quarts. This is a general rule. Cooking times will vary for different foods. Always refer to the individual foods recipe for canning cook times.
- Remove jars from water with the jar lifter and place on towel right side up.
- You have three ways to check for a proper seal:"Hear the Seal, See the Seal, Feel the Seal" This process will take 12 – 24 hours.
- Let jars rest for 12 – 24 hours. When jars are properly sealed you will hear a small popping sound. The lid will very slightly move inward.
- After 24 hours press your fingers over the middle of the jar lid. You should feel a solid surface on the lid. There should be no movement in or out, or up and down.
- Look at the jars to visually see the indent to the jar lid.
- For jars that do not seal properly place them in the refrigerator right away and enjoy the food within the next week to 10 days.
- Store jars right side up in a cool, dark space with a sturdy shelf. Avoid areas with sunlight, dampness or drafts.
- The best temperature for storing home canned foods is between 50˚ to 70˚F
Nutrition
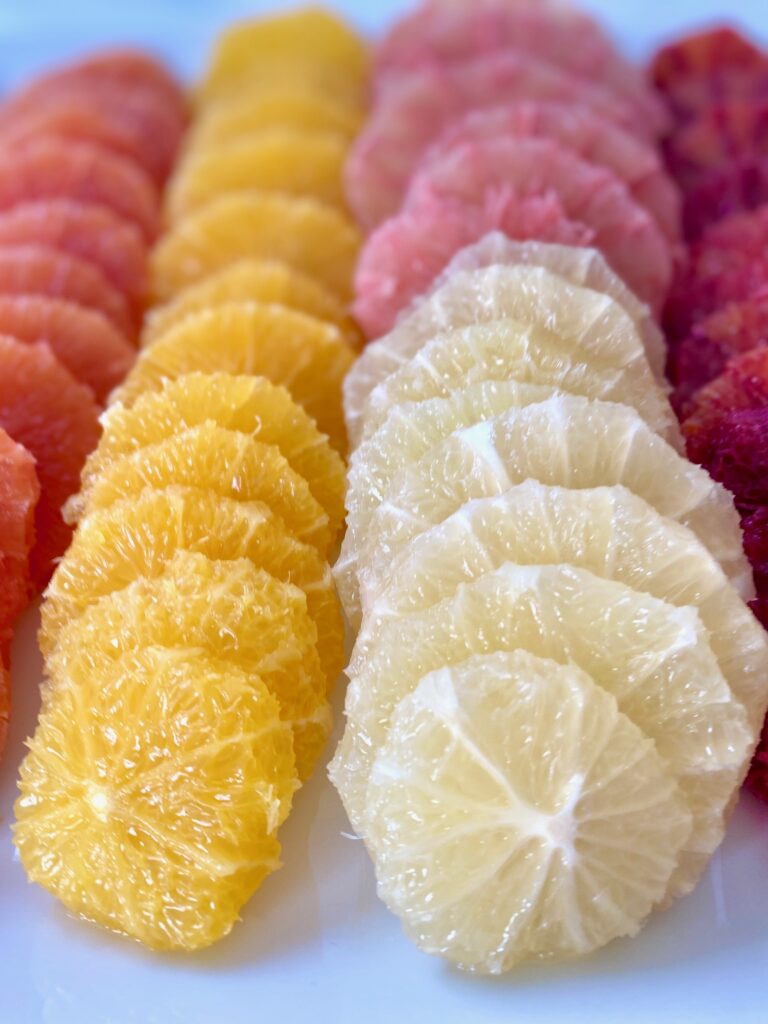
Want to learn how to Supreme or segment an orange?
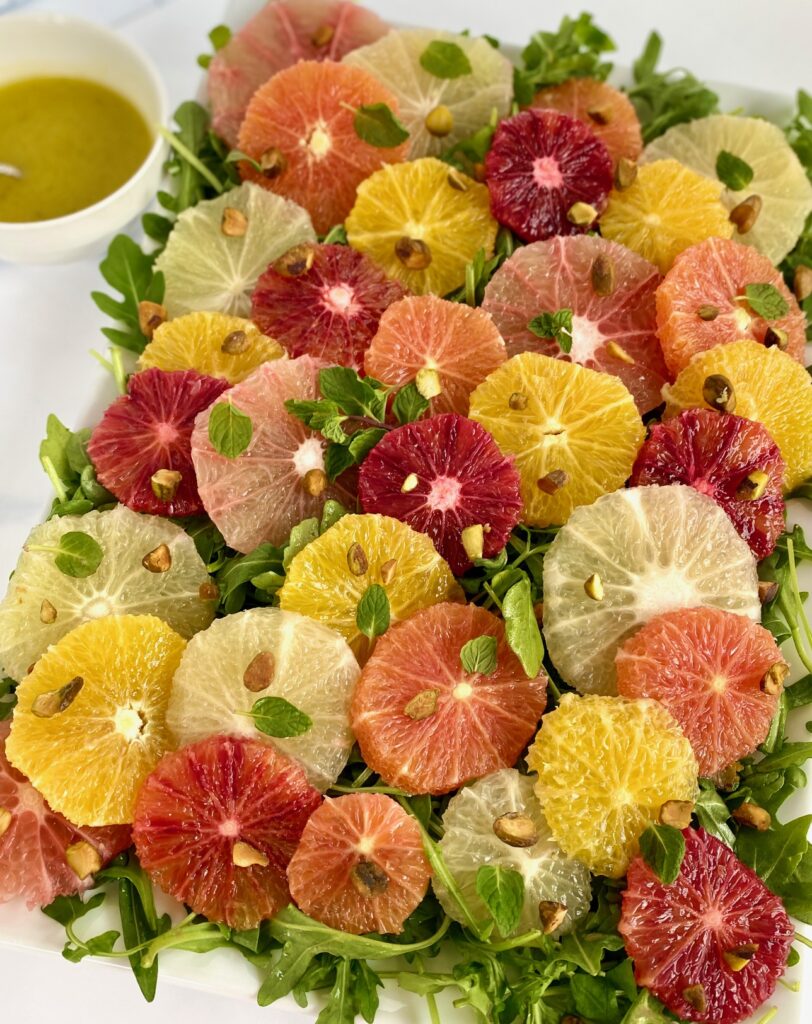
Learn how to supreme an orange or any other citrus fruit (also called segmenting or sectioning) and you can make your salads look like they do at restaurants
You may have noticed when you eat in a restaurant that the citrus segments have no membrane or white pith on them. This makes them easier to eat and they look nicer too. The membrane can be papery and has no taste.
Jump to RecipeOnce you’ve practiced the “supreme” method a few times you will see how easy it is to do. Our step-by-step below with photos will help guide you.
What does supreme the orange mean?
Supreming means you are removing the pith and membrane from citrus fruit so it can be served in slices. Any recipe that calls for citrus slices can benefit from this technique.
What is the membrane of citrus fruit?
The membrane is like a coat for the actual fruit segments or sections, inside the peel, helping hold the pieces together. The texture is thin and papery, and relatively easy to remove. You can remove the membrane from any orange, lime, grapefruit, or lemon.
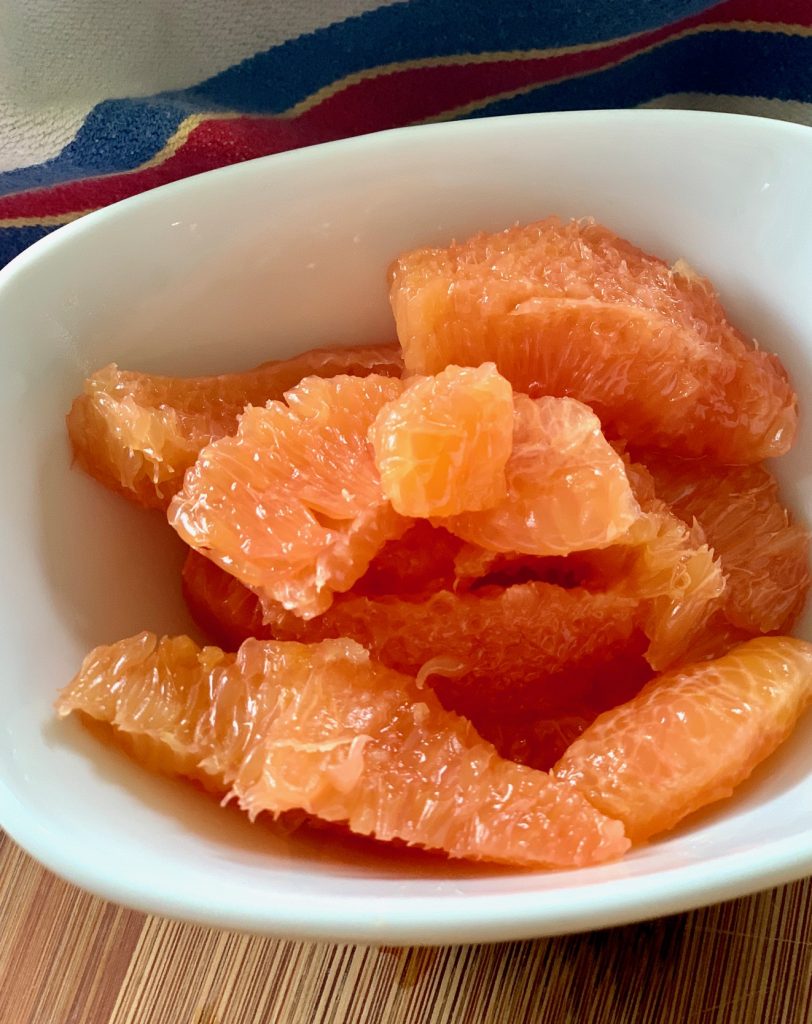
Once removed the citrus segments are considered “Citrus Supreme”
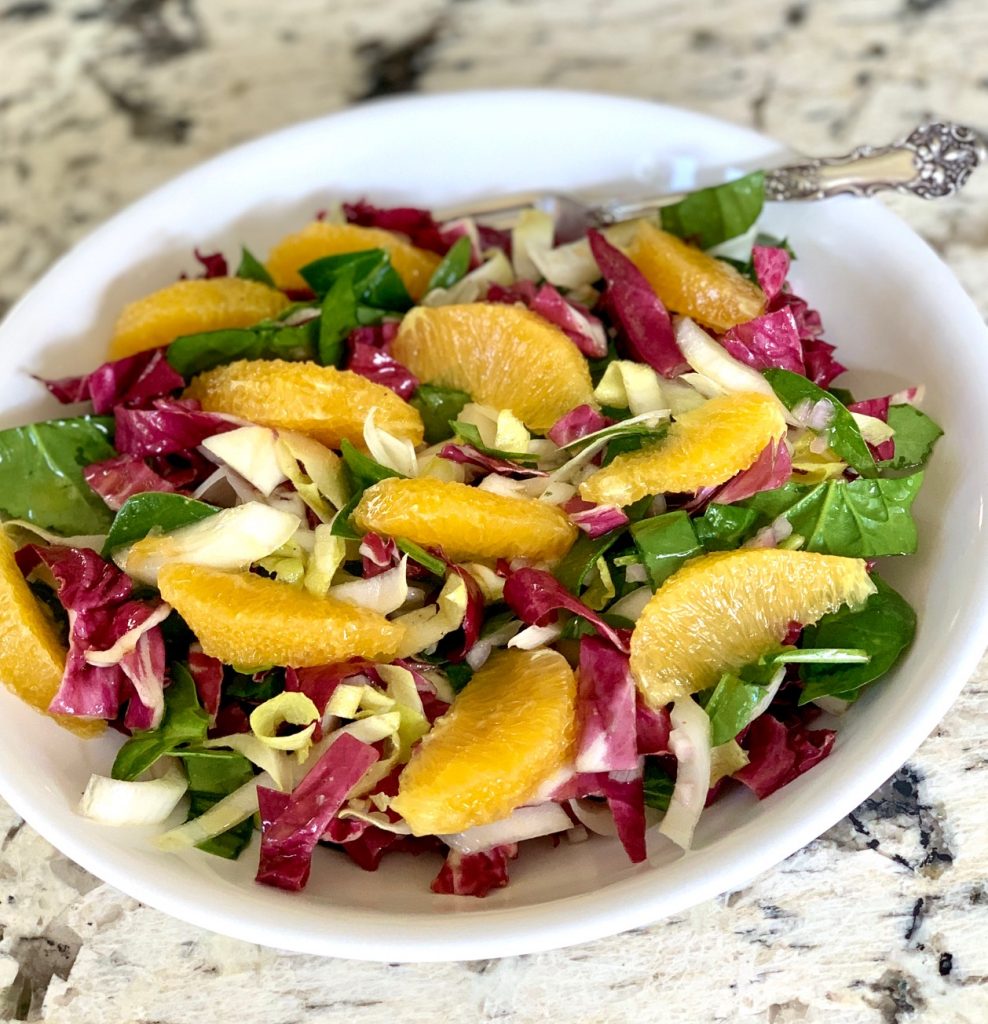
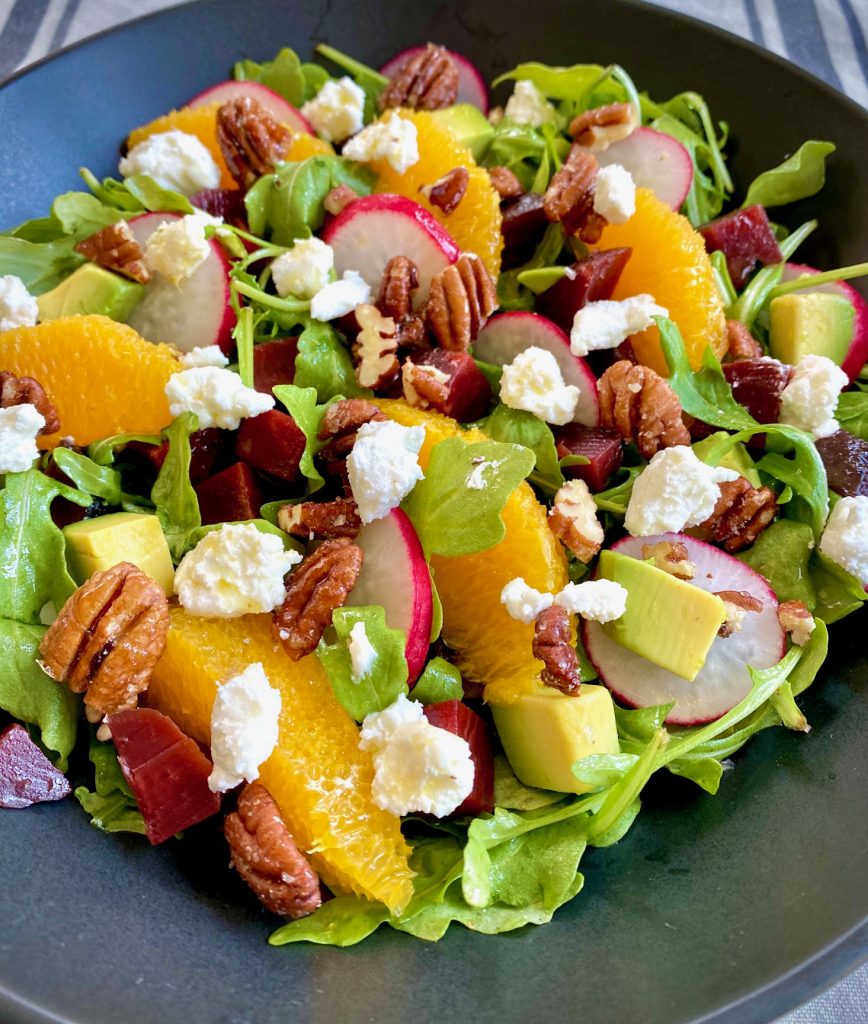
Our Tricolore Salad is topped with perfect orange “supreme”
Step by Step on how to supreme or segment oranges or any citrus fruit:
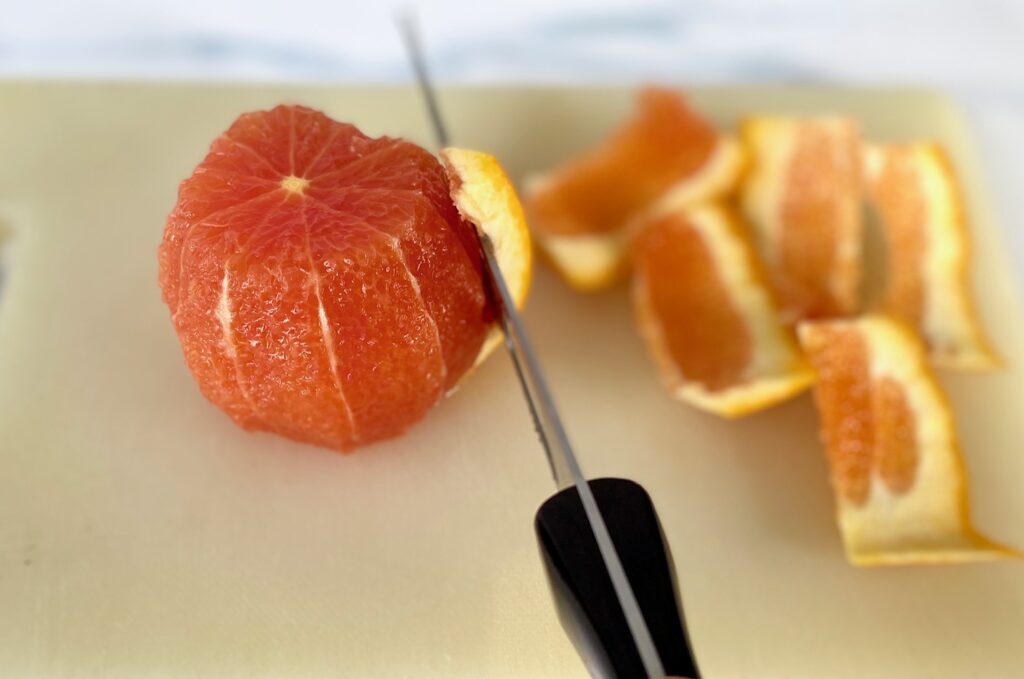
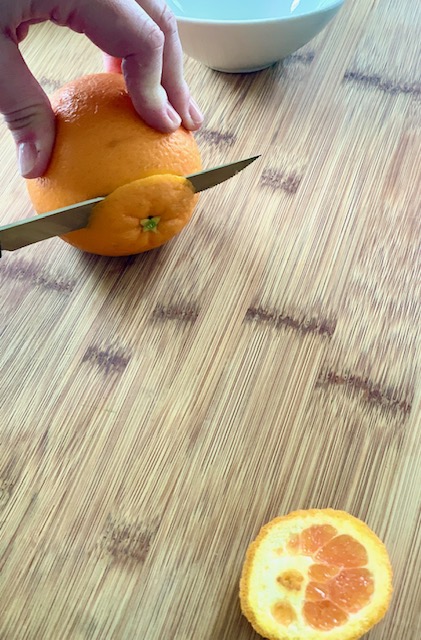
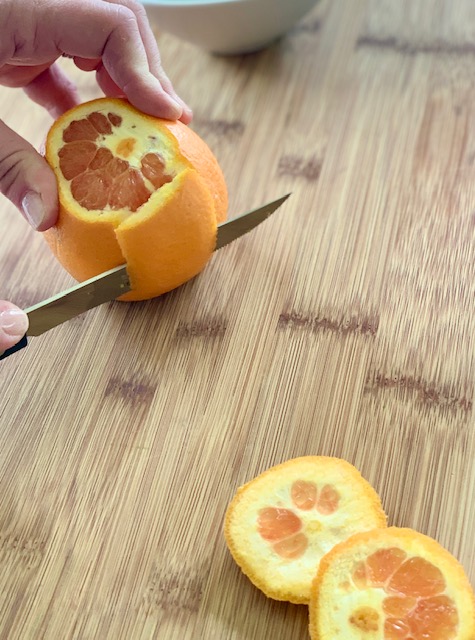
Step 1: Cut off both ends of the orange
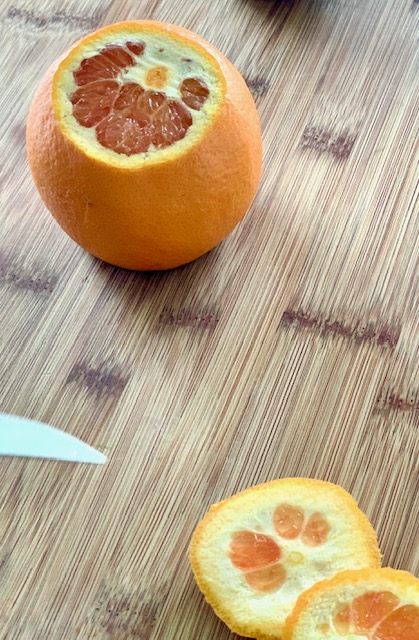
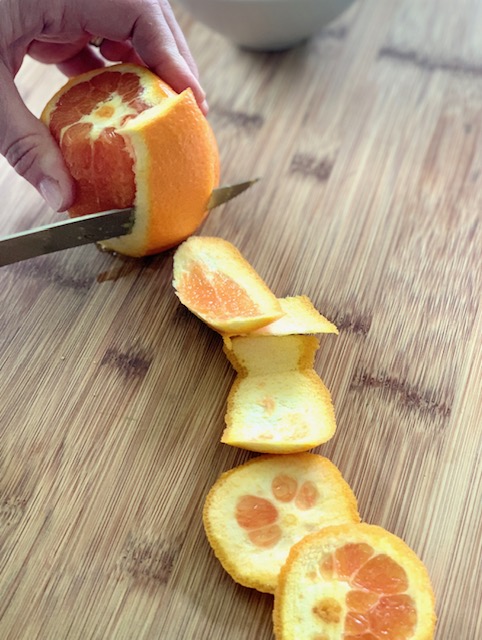
Step 2: Stand the orange upright, and with your knife, and cut downward to remove the peel and pith.
Follow the natural curve of the orange from top to bottom. Continue around the orange until all peel and pith are removed.
Step 3: Once you have removed the peel you can easily see the membranes between each segment. Slice on each side of the membrane to remove the segment.
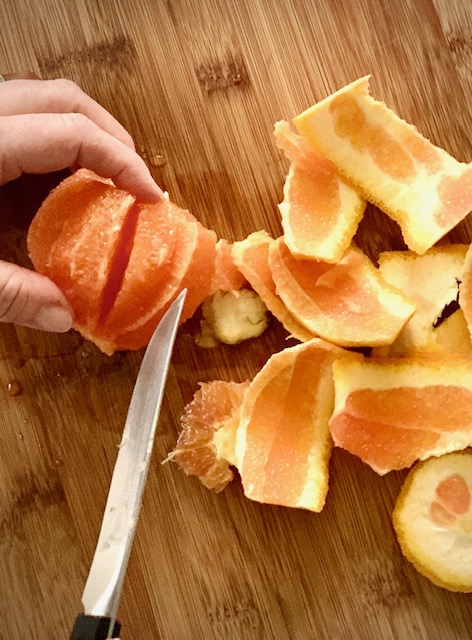
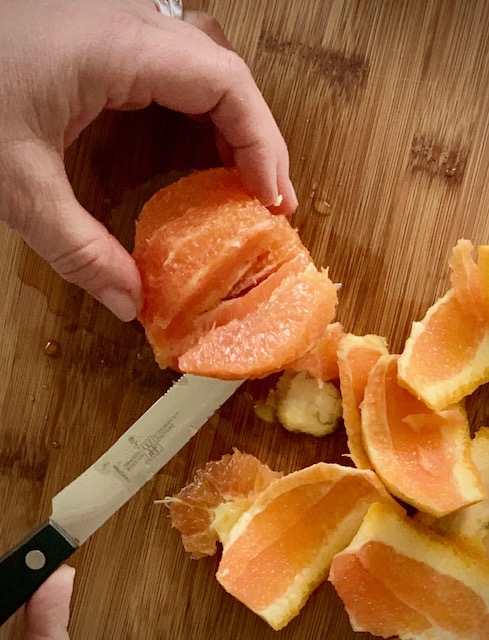
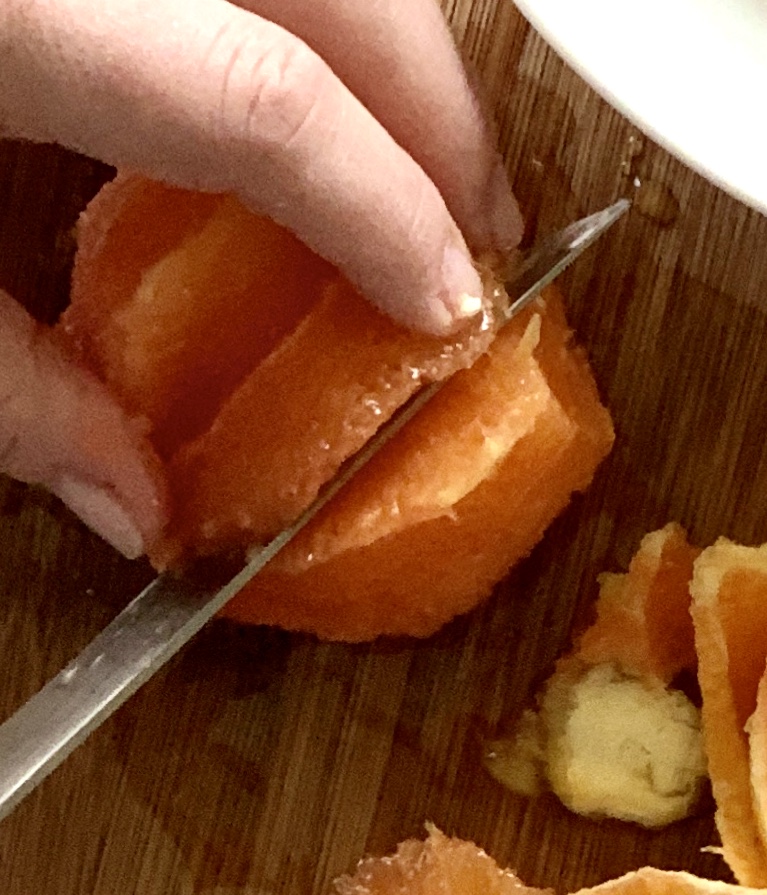
Step 4: Continue until each segment is removed
Pro Tips for Segmenting Citrus:
- Use a very sharp knife. We recommend a serrated knife with a sharp tip
- Cold citrus is easier to cut and segment
- Navel, Valencia, and Blood Oranges are easiest to segment because they are firmer. Softer oranges, such as Cara Cara, Mandarins, and Satsumas can be segmented but it can be harder to get a clean cut.
Other Salads and Vinaigrette Dressing recipes to try:
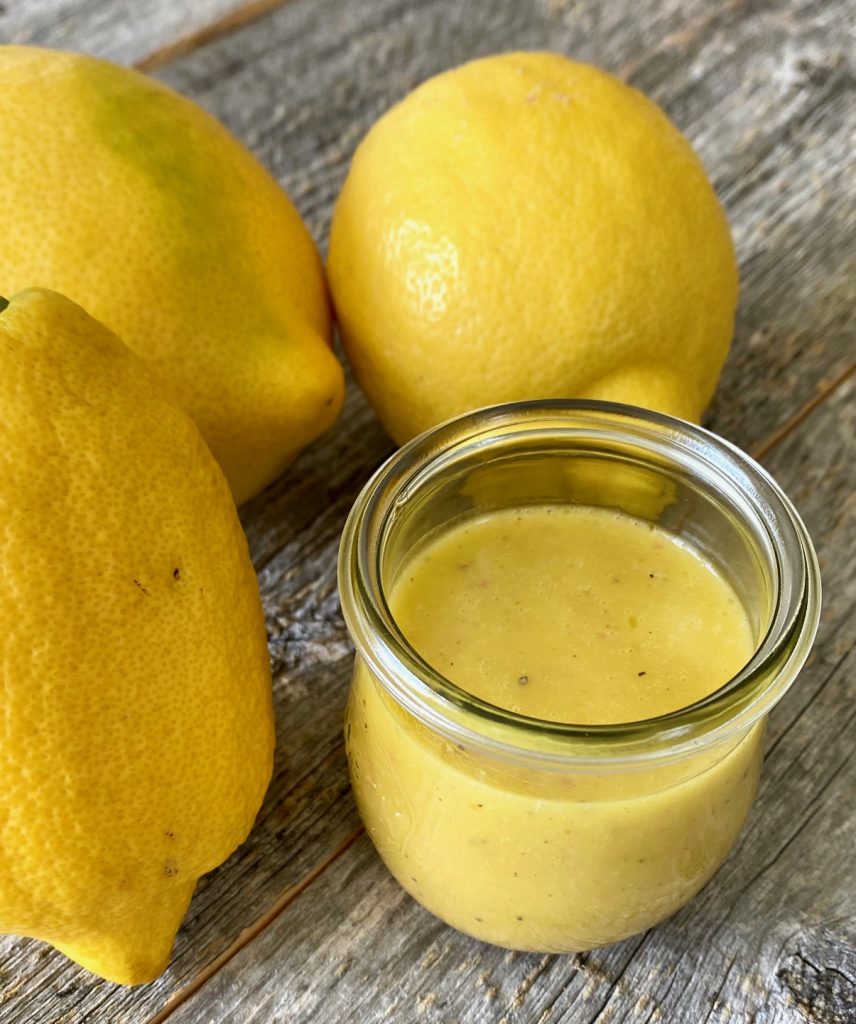
- Tricolore Salad with Oranges topped with Lemon Champagne Vinaigrette
- Our Arugula Beet Avocado Salad uses orange segments too
- Try our Classic Champagne or Balsamic Vinaigrettes or our Lemon Vinaigrette Dressing.

How to Supreme an Orange (or any citrus fruit)
Equipment
- Serrated knife
Ingredients
- 1 cold orange, Navel, Valencia, Blood Oranges or any cold citrus
Instructions
- Step 1: Cut off both ends of the orange so it sits flat on the cutting board
- Step 2: Stand the orange upright and with the knife cut downward to remove the peel and the pithFollow the natural curve of the orange from top to bottom. Continue around the orange until all peel and pith are removed.
- Step 3: Once all peel is removed you can easily see the membrane between each segment. Slice on each side of the membrane to remove each segment individually.
- Step 4: Continue until each segment is removed
Notes
- Any citrus will work for this method
- Cold citrus is easier to cut and segment
- Navel, Valencia, and Blood Oranges are easiest to segment because they are firmer. Softer oranges, such as Cara Cara, Mandarins, and Satsumas can be segmented but it can be harder to get a clean cut.
Nutrition
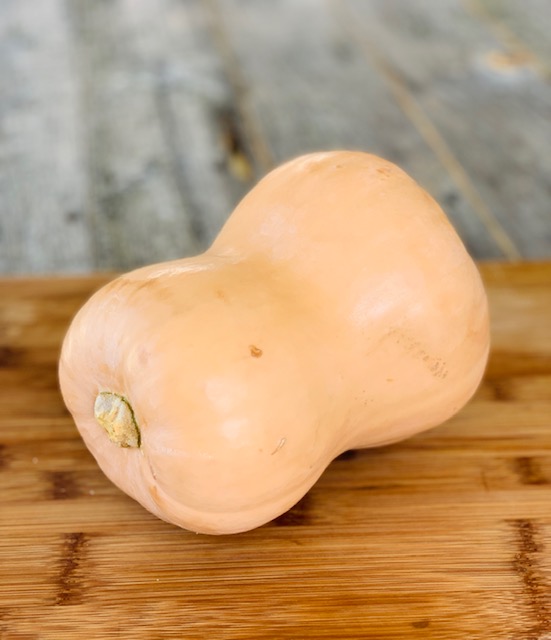
Butternut squash is super versatile and can be used in many different ways. You can buy it pre-cut in the store but it will be fresher if you cut it yourself.
It’s more economical to prepare it yourself. Plus, it’s easy!
Ready to get started? Just click the “jump to recipe” button or keep reading for more tips and ideas. This post may contain affiliate links. Please see our affiliate disclosure for more details. We only recommend products we love and use.
Butternut squash is almost as popular as pumpkin during the Fall and Winter. It takes about 3 minutes to prep it and you are ready to go!
Equipment needed
- Large cutting board
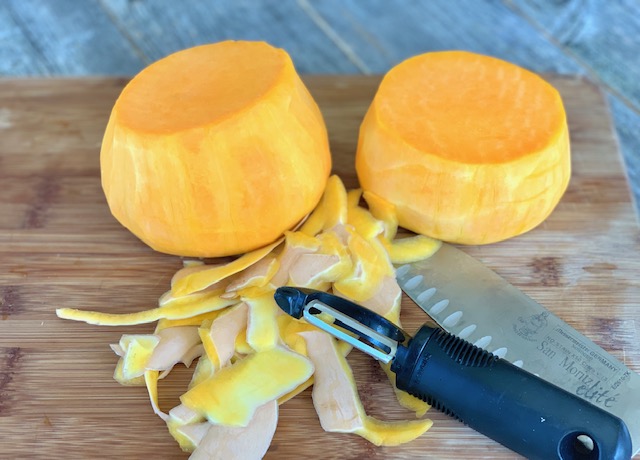
- Large, heavy sharp knife
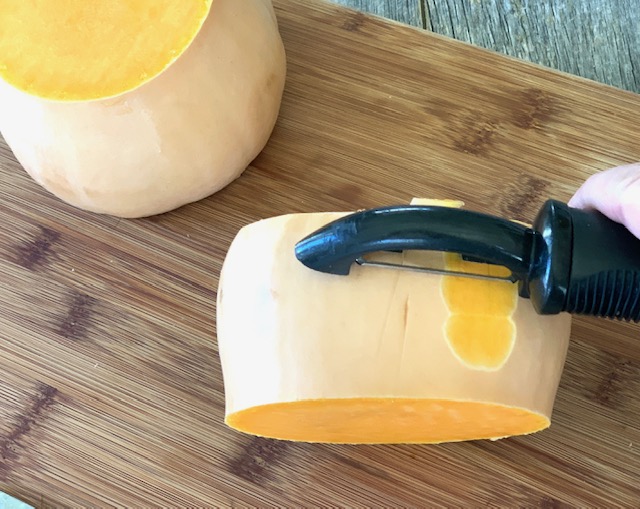
- A good peeler. I prefer a swivel peeler, but a good Y peeler works equally well.
How to cut a butternut squash
This guide will make sure you safely cut the squash. Here are steps:
- 1 and 2: Because the shape is odd, cut the stems off on both ends to begin
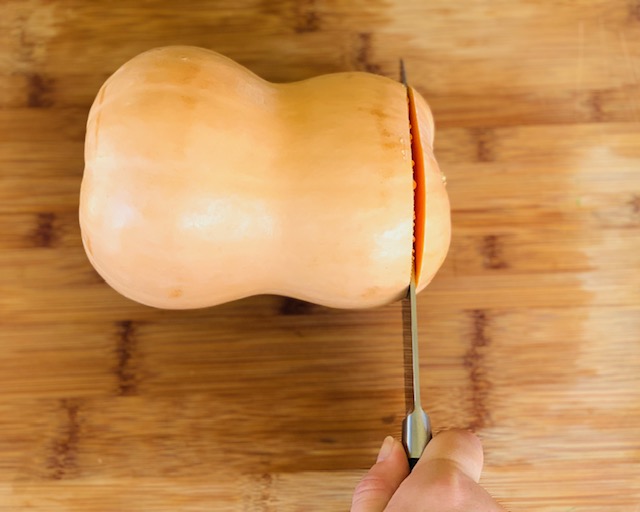
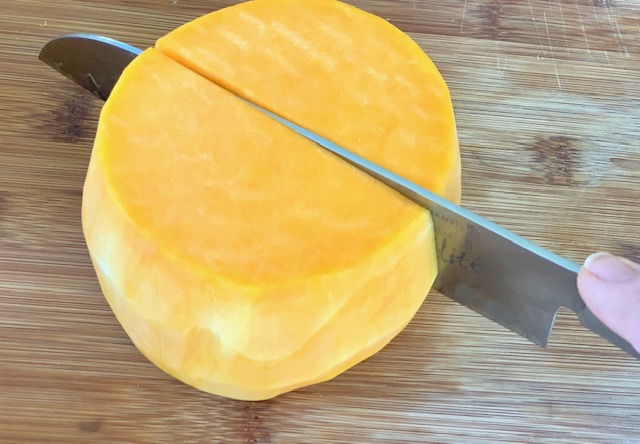
- 3 – Cut in two equal pieces and lay the squash flat on each end to safely cut and peel
- 4 and 5- Once the squash is peeled (step 4) you will slice it in half again (see step 5)
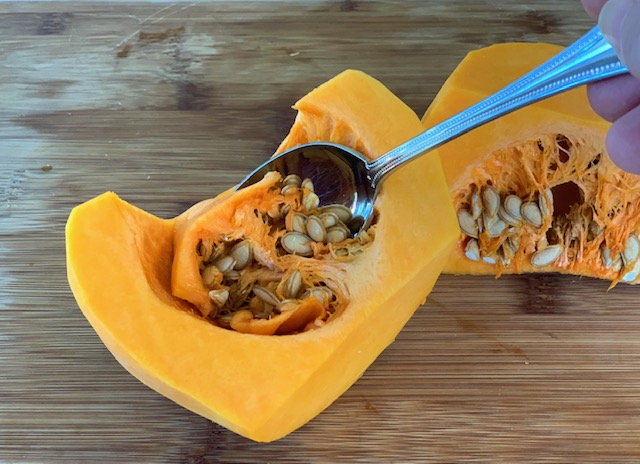
- 6 – Scoop out the seeds and discard them
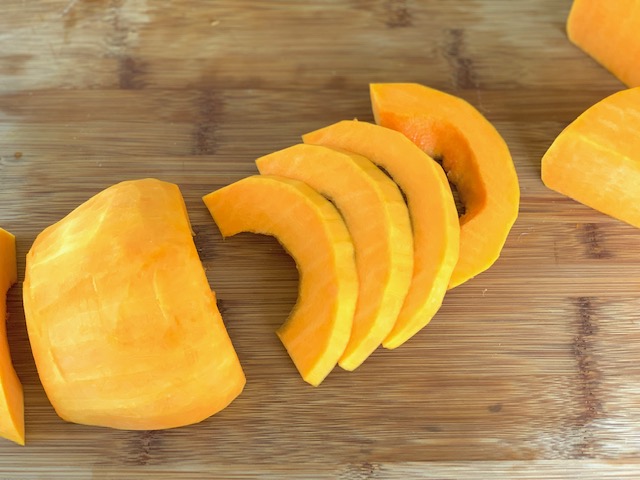
- 7 – Lay the squash quarter flat side down and cut into slices
- 8 – Cut the slices into cubes, if desired


Does butternut squash have to be peeled before roasting?
The skin on butternut squash is very tough so it should be peeled before you can eat the squash. There are some who like to eat the skin once it is roasted but most prefer the squash peeled.
Can you prep and peel the squash ahead of time?
Yes! You can peel, prep, and cut the squash up to 3 days in advance. Once prepped just store in an airtight bag or container in the refrigerator.
Ideas for using butternut squash
There are so many fun recipes you can make once you have it peeled and cut. Use this method to prepare the squash for everything from soups to simple roasting. Adding to salads is an easy way to turn a simple side salad into a meal.
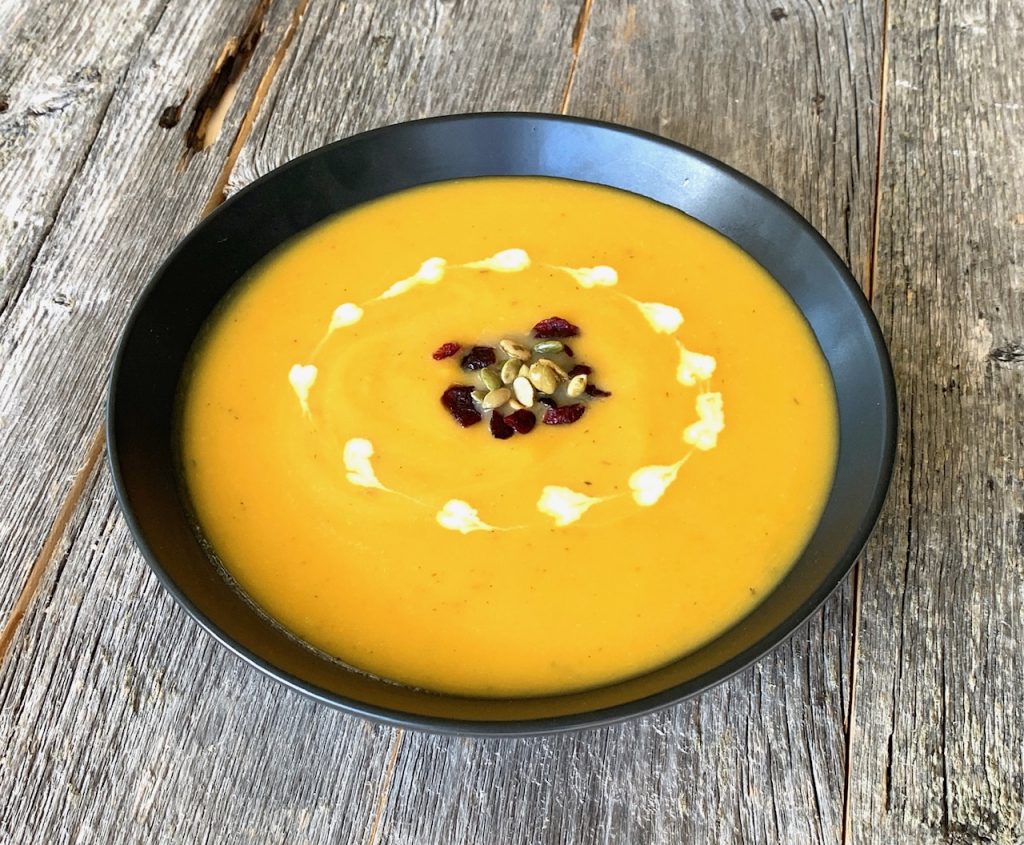
One of the most popular ways to use cubed squash is in Butternut Squash Soup. Ours is garnished with pumpkin seeds and dried cranberries and makes the perfect starter, light lunch, or dinner.
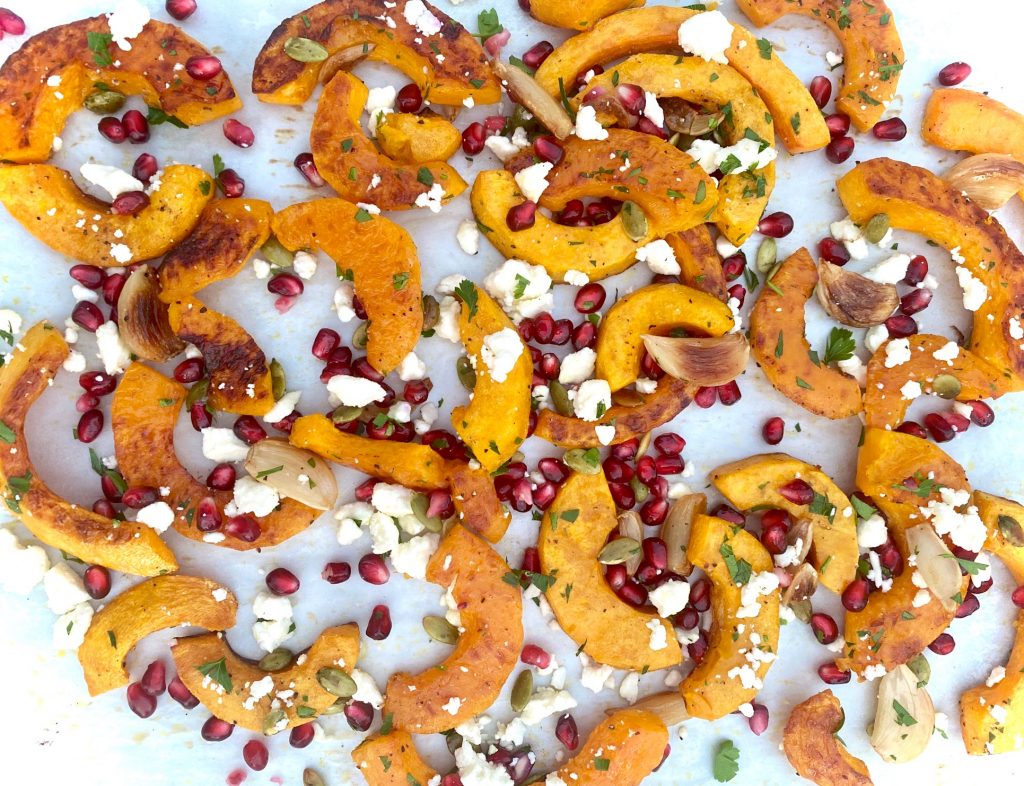
One of our favorite recipes for sliced squash is Roasted Butternut Squash with Pomegranate

How to Cut a Butternut Squash
Ingredients
- 1 butternut squash
Instructions
- Cut stem off butternut squash on both ends
- Cut in half & peel entire butternut squash
- Cut butternut squash in half again
- Remove seeds by scooping them out with a spoon. Discard seeds
- Lay the squash quarters flat side down and cut into slices
- If desired, then cut into cubes
Nutrition
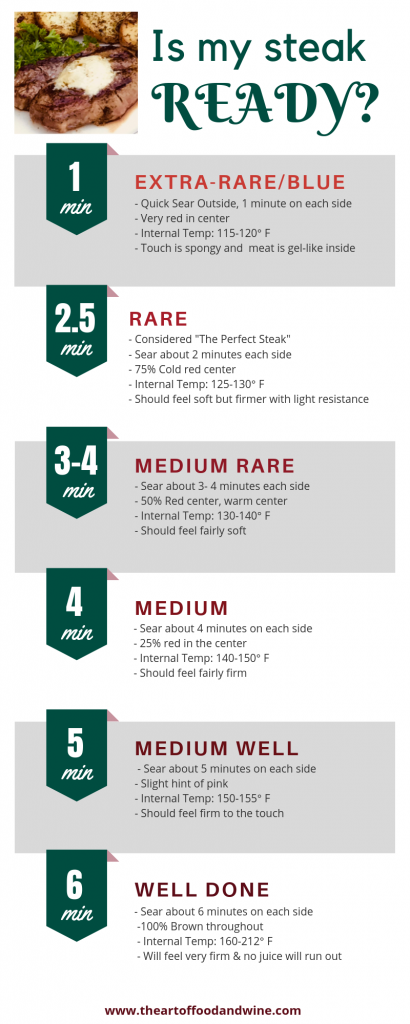
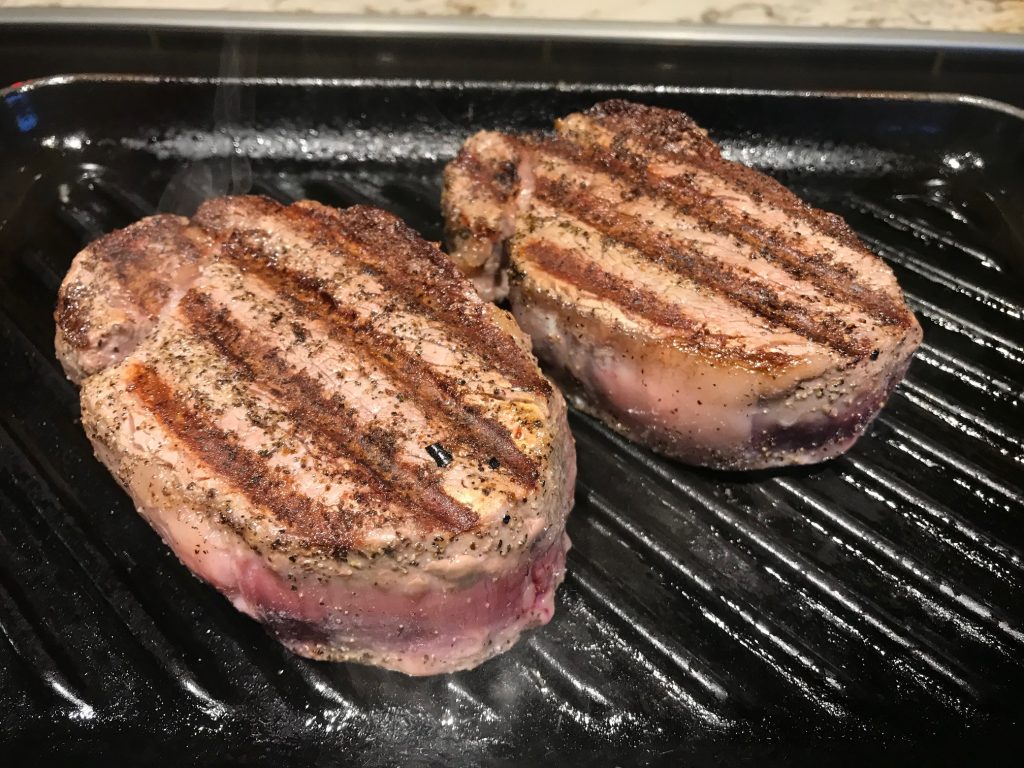
Cooking the perfect steak can be challenging so we put together an easy-to-use chart to help you make the perfect steak.
Most meat experts think that “Rare” is the perfect steak temperature. While this might be your preference too, there are different tastes for all.
Since everyone has their own preference this chart will help you decide how long to grill steaks.
Steak Cooking Guide:
Garlic Herb Mushrooms on top of grilled steak:
One of the tastiest ways to top any grilled steak is with our savory garlic herb mushrooms. We love these on top of pasta or chicken, as well!

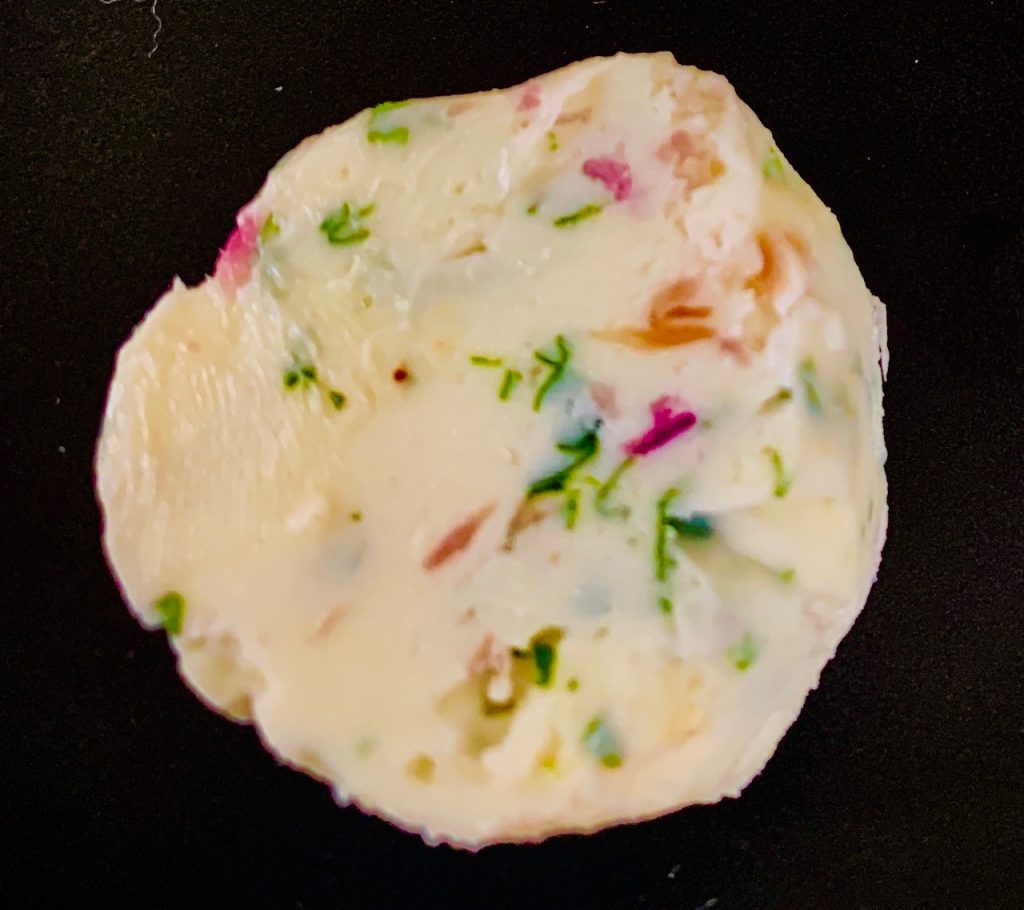
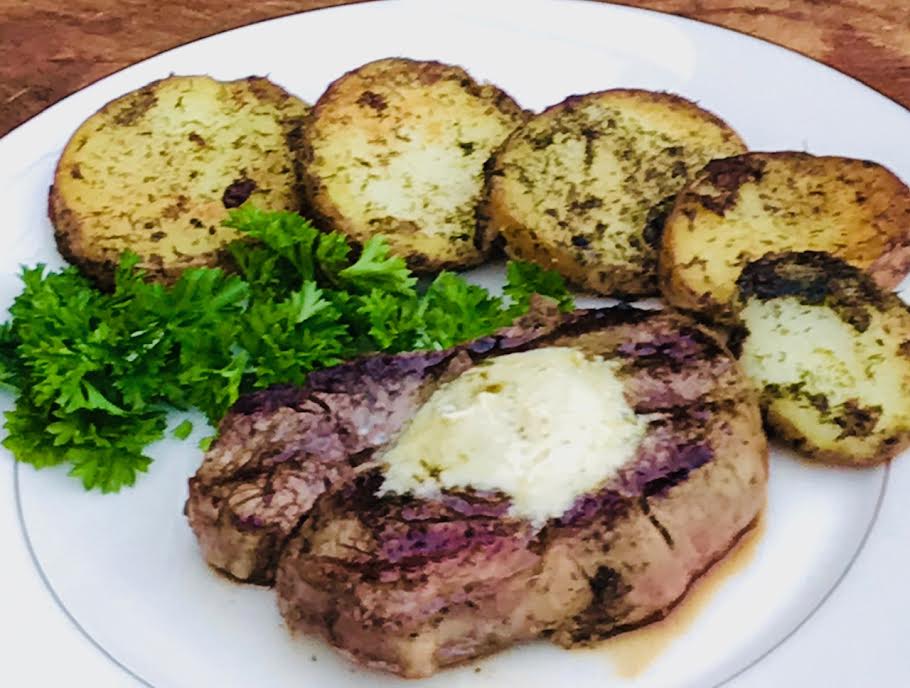
Top your grilled steak with our recipe for Shallot Parsley Butter:
Making flavored butter is a great way to ramp up the flavor of any steak. It is a simple process of adding herbs and flavors to softened butter. Shallots and steak go perfectly together.
Choosing the right cut of steak:
There is a lot of information out there about steak. We found a great comprehensive guide on the website Art of Manliness to help understand how to choose the best cut of meat. It contains easy to understand info including the differences in cuts, grass vs. grain-fed, and dry aging. A Guide to Steaks.
Suggestions for wine pairings:
Steak pairs perfectly with big bold red wines from California.
Your weekday wines:
- Josh Cabernet Sauvignon Northern Coast California
- Freemark Abbey Merlot Napa Valley
Your weekend wines:
- Cakebread Cellars Merlot Napa Valley
- Duckhorn Cabernet Sauvignon Northern California Coast
Special Occasion Wines:
- Caymus Cabernet Sauvignon Napa Valley
- Duckhorn Three Palms Vineyard Merlot Napa Valley
Perfect side dishes for steak:
]]>It’s easy to make flavored butter with a variety of sweet and savory ingredients.
Flavored butter is ready in just 5 minutes!
What is compound butter?
Compound butter is simply softened butter, whipped, with sweet or savory ingredients added in. Compound butter, also called flavored butter, is so easy and there are endless combinations! Below we share some of our favorite combos.
Once you start making compound butter you will be hooked. They bring so much added flavor. Below are some combination ideas but keep in mind, these are just the beginning. We would love to hear what combinations you come up with for yours!
The Orange Honey Butter on top of our warm Classic Zucchini Bread is amazing. A slice of our warm Beer Bread or Irish Soda Bread would be perfect with the Garlic Chive Butter!
Shallot Parsley Butter 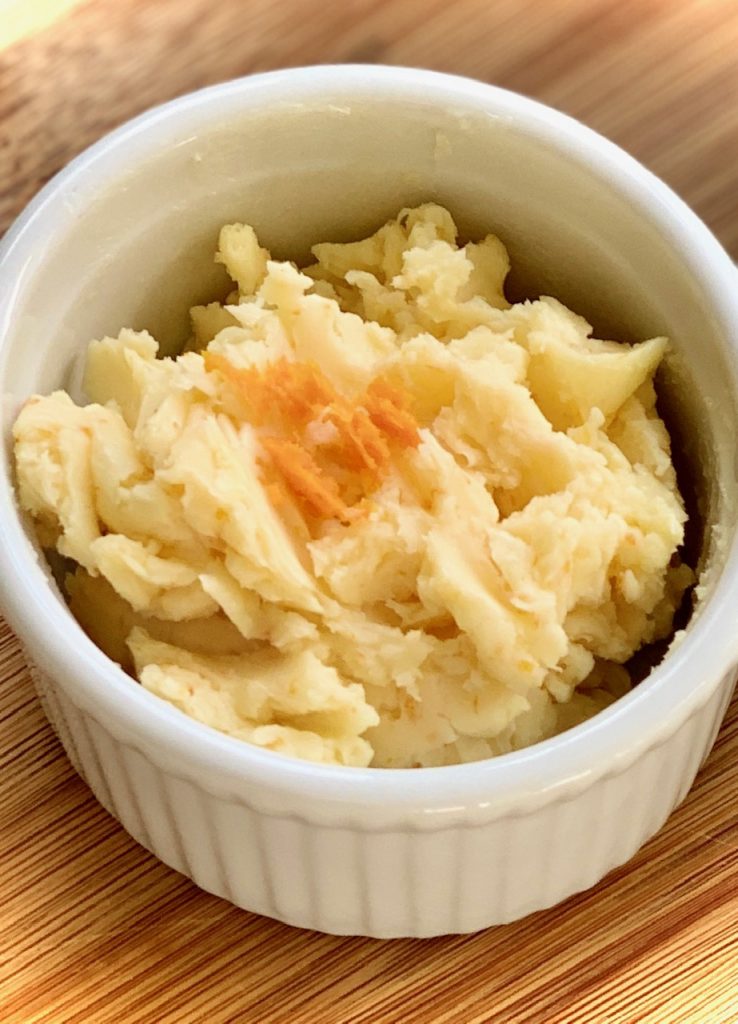
Orange Honey Butter
How to make Compound Butter:
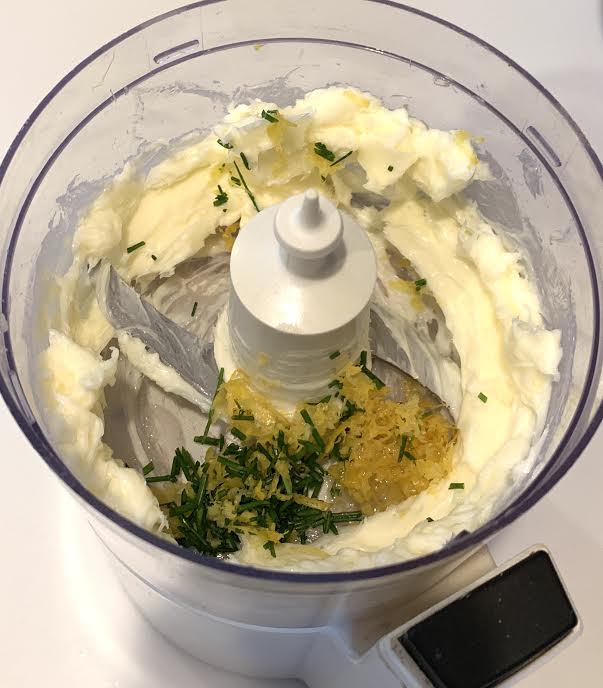
Be sure to start with softened butter and a pinch of salt in a bowl or a small food processor.
Add any of the combinations of flavors below or create your own!
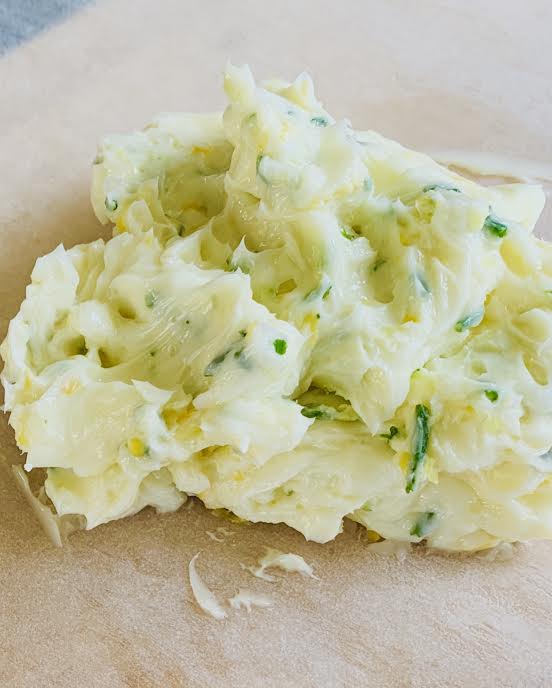
Once mixed transfer the butter to a piece of parchment paper, waxed paper, or plastic wrap
Roll gently into a 5-6″ log
To store the butter:
- Twist the paper or plastic wrap at the ends to seal the butter
- Refrigerate or freeze for about 2 hours before using if you plan to cut into coin-sized slices.
How long does flavored butter last?
Compound butter keeps in the refrigerator for 7 days. If you freeze it, sealed, it will keep for up to 6 months. You can also put the butter in a ramekin before chilling if you are planning to serve it with bread or rolls at dinner.
I always make a few flavors at a time, wrap separately, and label each flavor before I store it in the freezer. This makes it easy to just slice off a coin sized piece when needed.
Best compound butter for steak:
There are a few different flavor combinations that work well with a grilled steak but our favorite is the Shallot Parsley Butter, Shallot Chive Butter, or the Garlic Chive Butter. Your steak will taste like a steak served at the best steakhouses.
Serving compound butter on vegetables:
Roasted vegetables are the perfect palette for flavored butters. Roasting brings out the very best flavor of any vegetable, and if you top them with your favorite compound butter it makes it even better.

Favorite Flavor Combinations:
Here are a few of our favorite ways to use these butter combinations:
- Shallot Parsley Butter – Great on grilled steaks and warm bread
- Lemon Chive Butter – Perfect for vegetables and chicken
- Cilantro Lime Ginger Butter – Ideal for fish or Asian style vegetables
- Cajun Butter – Use on grilled shrimp, white fish, and salmon
- Orange Honey Butter – Amazing on biscuits, cornbread, zucchini bread, quick bread, and muffins
- Shallot Chive Butter is wonderful on potatoes or any kind of chicken
- Add Garlic Chive Butter to your favorite fish, saute it with shrimp, or slather it on sourdough or French bread before roasting in the oven


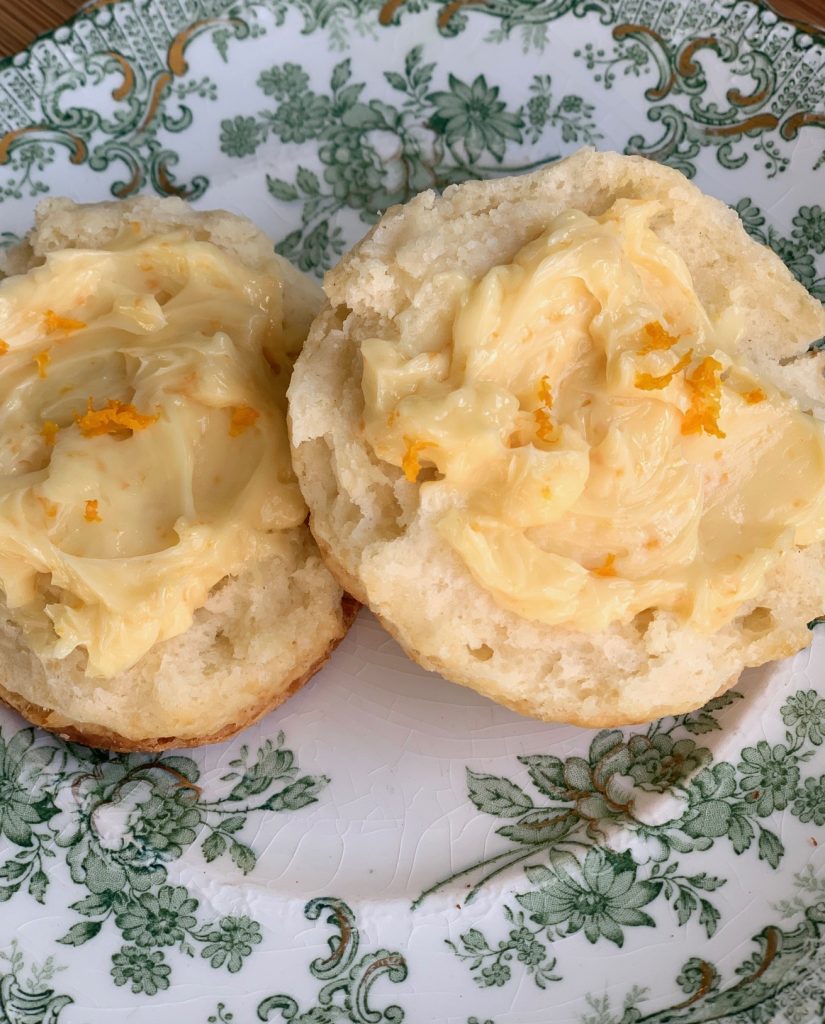
Our Baking Powder Biscuits taste even better with Orange Honey Butter!
We would love to hear what flavors you come up with for your butter!

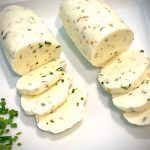
Two of our favorite combos:
Shallot Chive Butter and Garlic Chive Butter
Compound Flavored Butter Recipes
Ingredients
Base Ingredients:
- 4 ounces unsalted butter, room temperature (1 stick)
- 1 pinch sea salt, optional
+ Add-Ins
Shallot Parsley Butter
- 1 Tbsp shallots, dice
- 1 Tbsp Flat-leaf parsley, finely chopped
Lemon Chive Butter
- 2 tsp chives, minced
- 1 Tbsp lemon juice, freshly squeezed
- ½ tsp lemon zest
Cilantro Lime Ginger Butter
- 1 Tbsp cilantro, finely chopped
- 1 tsp lime juice, freshly squeezed
- ½ tsp lime zest
- ½ tsp ground ginger, or 2 tsp fresh grated ginger
Cajun Butter
- 2 tsp cajun seasoning
- ¼ tsp cayenne pepper
Orange Honey Butter
- 1 Tbsp orange juice, freshly squeezed
- 1 tsp orange zest
- 1 Tbsp honey
Shallot Chive Butter
- 2 Tbsp chives, finely chopped
- 2 Tbsp shallots, finely chopped
Garlic Chive Butter
- 2 Tbsp chives, finely chopped
- 1 Tbsp garlic, finely chopped
Instructions
- Add softened butter to a medium bowl or a small food processor and add a pinch of salt. Add in any of the above combinations and combine completely.
- Once mixed, transfer onto on a piece of parchment paper, waxed paper or plastic wrap.
- Shape gently into a log about 5-6" in length. Twist the paper or plastic wrap at the ends to seal the butter. Refrigerate for at least 2 hours and up to a week, or place in a freezer-safe bag and freeze for up to 6-months. Note: You can also put the butter in a small ramekin, cover with plastic wrap, and refrigerate for 2 hours, before serving at the table with warm bread or rolls.