Summer weather calls for refreshing, light salads that highlight the season’s bountiful produce, and this one has it in abundance!
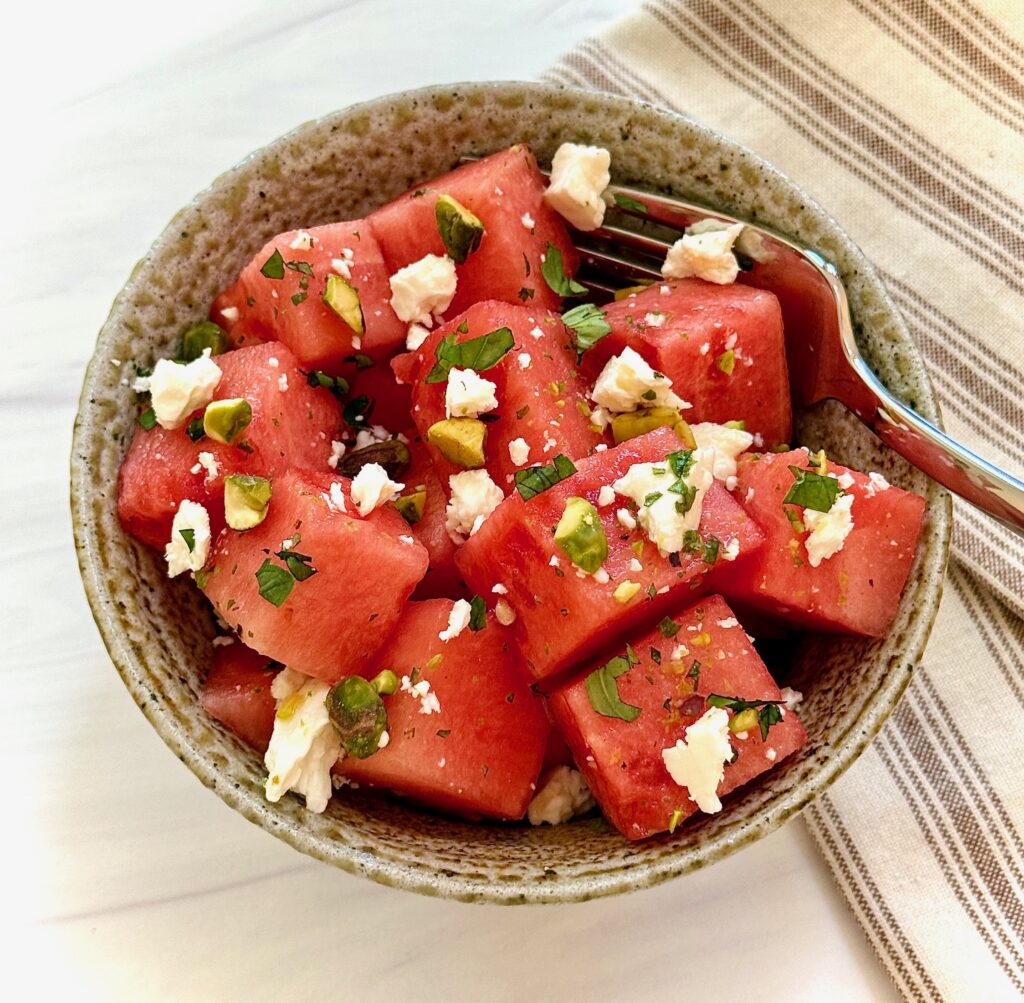
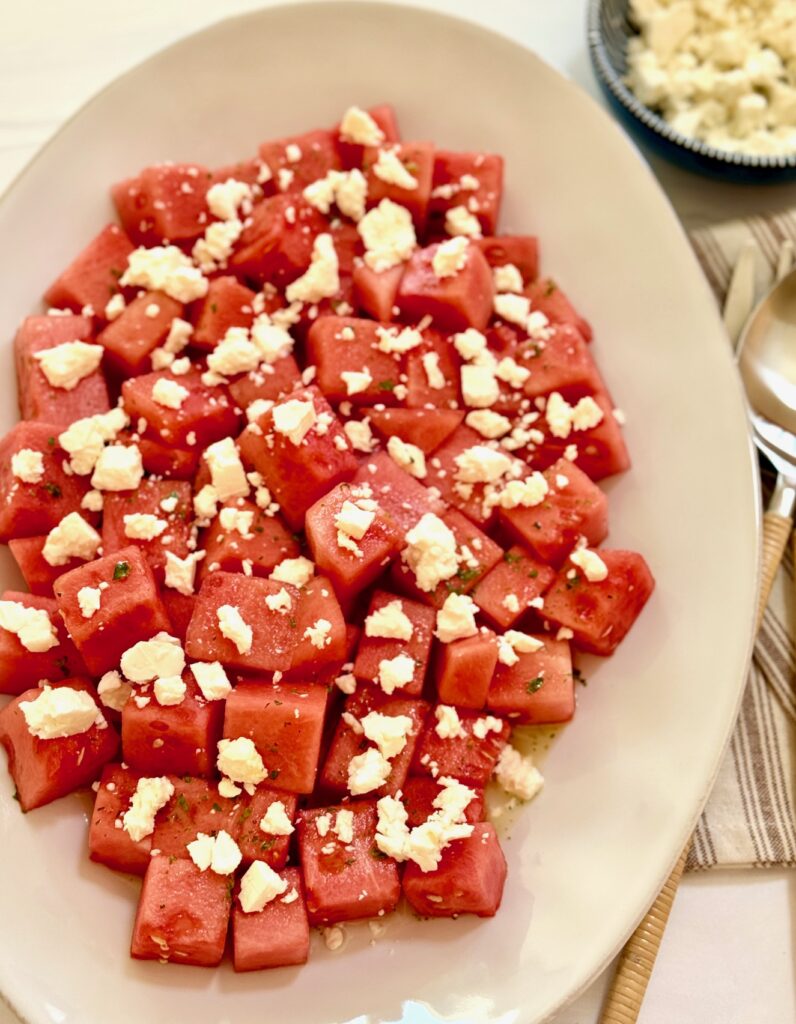
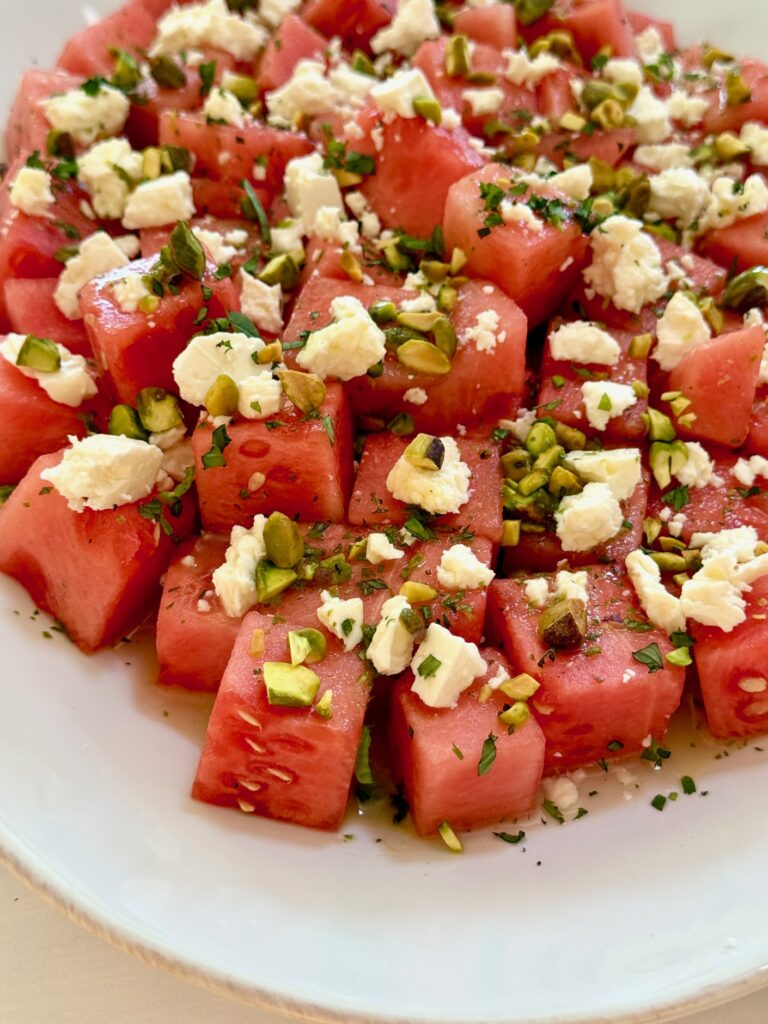
This colorful 15-minute salad combines the sweetness of juicy, ripe watermelon with the tanginess of feta cheese and the freshness of mint leaves, creating a perfect balance of flavors and textures. It’s lightly dressed in a refreshing lime mint vinaigrette.
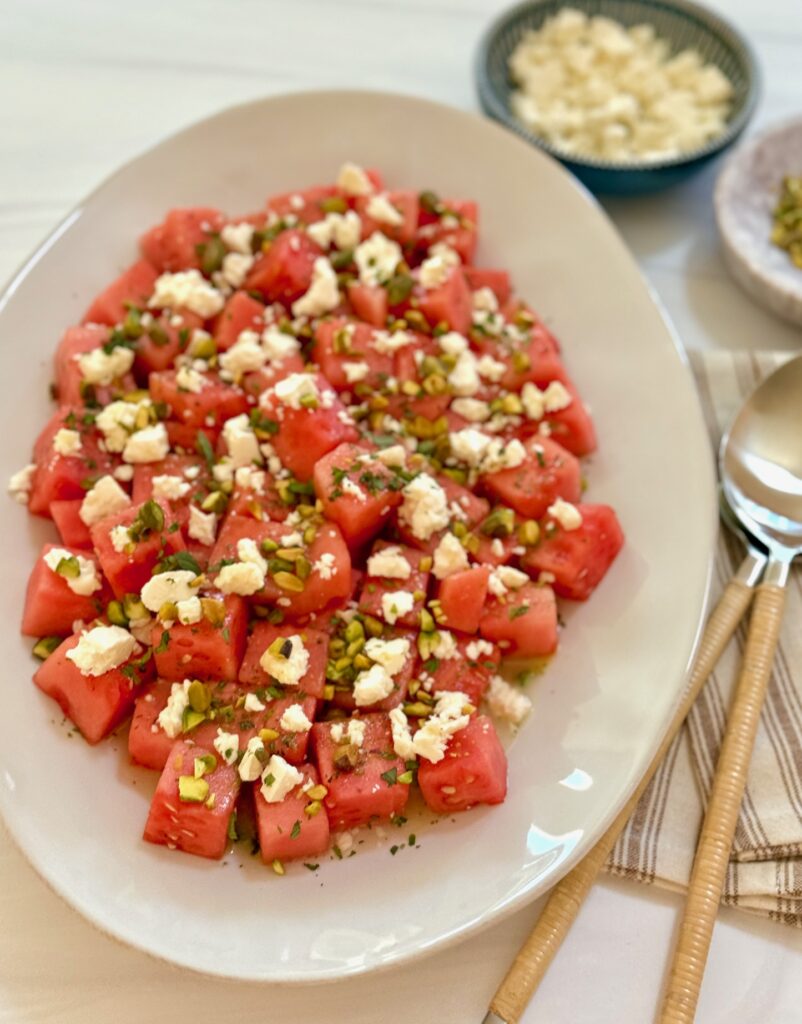
Whether you’re looking for a simple side dish to accompany some of your grilled favorites or a standalone salad that steals the show, this watermelon salad with feta, mint, and tangy lime dressing is sure to be a hit at any summer gathering.
Ingredients Needed:
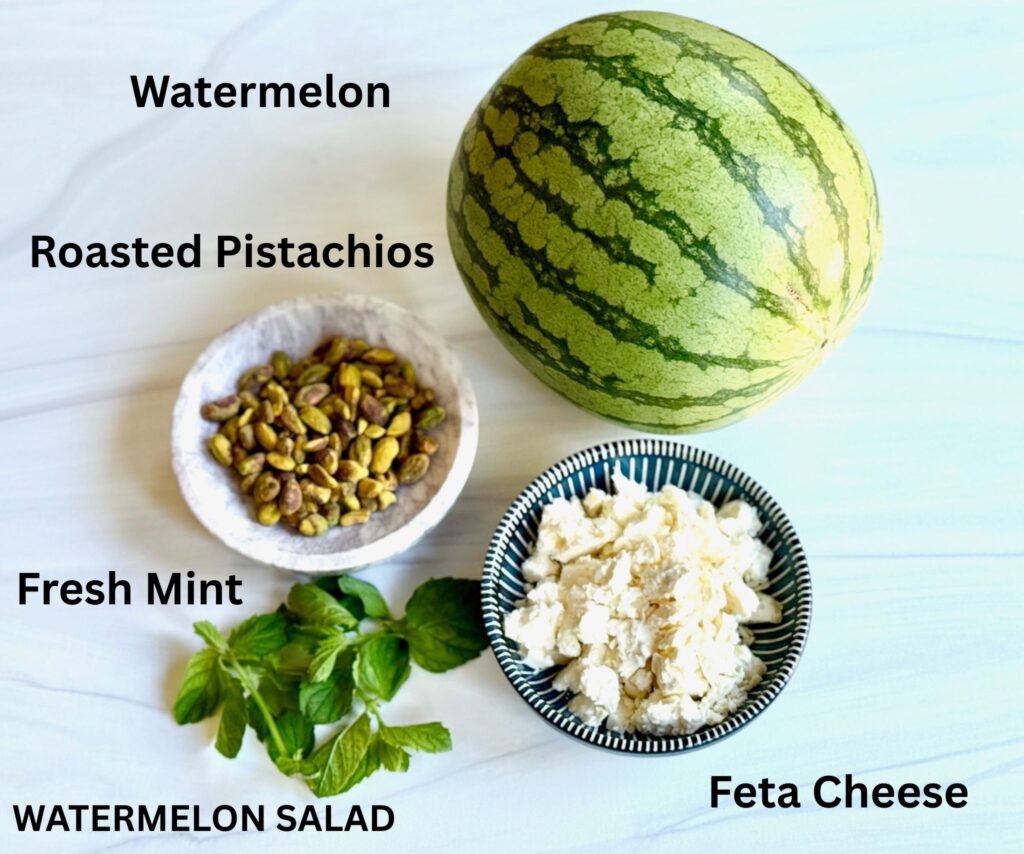
The beauty of this salad lies in its simplicity.
- Watermelon – choose a ripe one for the best flavor. You’ll need about 6 cups of cubed melon for this salad. Buy seedless if you can, because it makes life easier!
- Feta Cheese – we love feta for its tangy flavor, and we think the best is Greek sheep’s milk feta. Buy a block and gently crumble it for the best texture.
- Fresh Mint – chop it up and sprinkle it over the salad, and we’ll also use it in the lime vinaigrette dressing for an added boost of flavor.
- Roasted Salted Pistachios – great for a nice salty crunch in every bite! We like the salted and roasted variety.
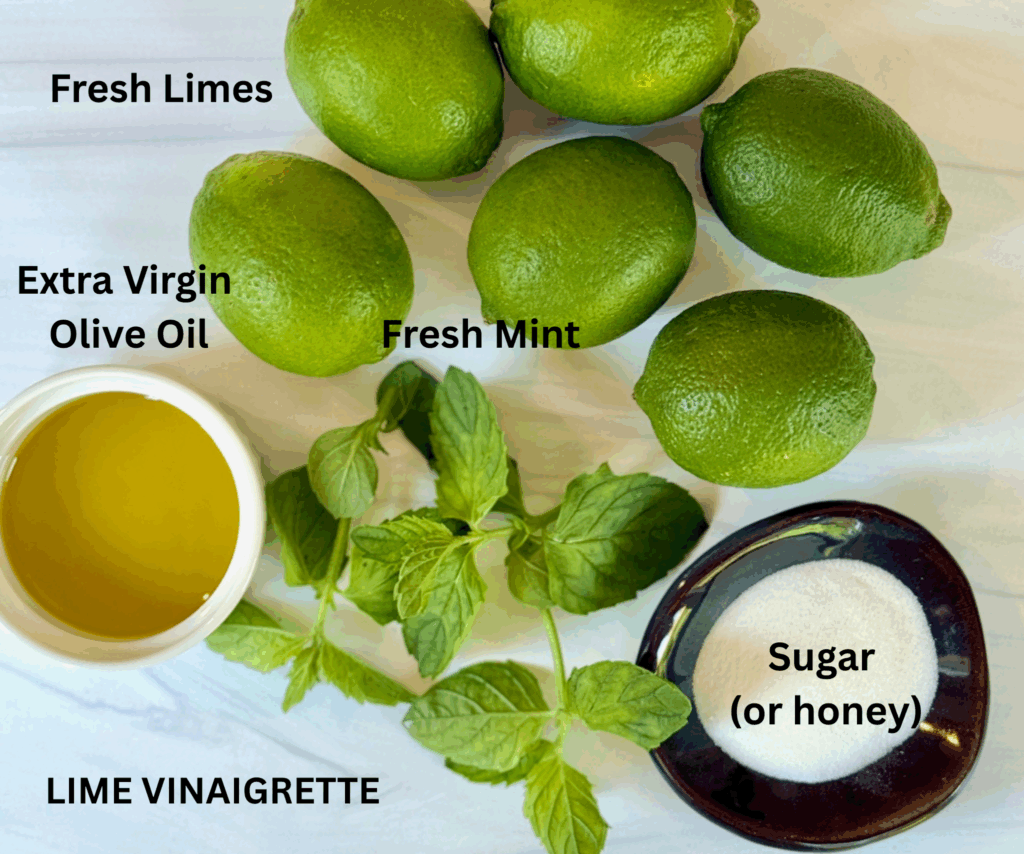
- Lime Vinaigrette – see below ⬇️
- Lime Vinaigrette – a simple dressing with olive oil, fresh lime juice, honey or sugar, and chopped mint
Easy steps for Watermelon Salad:
This recipe is so easy that it’s almost not a recipe at all – it’s more of a guideline!
Make the Lime Vinaigrette
- Juice 3 fresh limes into a bowl to equal 5 Tablespoons. Reserve 1 Tablespoon and set aside for later for the salad
- Chop 3 Tablespoons of mint, reserving 2 teaspoons for the dressing
- Whisk in 1 Tablespoon of sugar, honey, or agave and whisk until sugar is dissolved
- Slowly whisk in 3 Tablespoons of extra virgin olive oil and mix until emulsified
- Stir in 2 teaspoons of chopped mint
- Set the vinaigrette aside while you make the salad
Prepare the Salad
- Remove the rind of the watermelon and cut it into bite-sized cubes until you have about 6 cups.
- Chef’s Note: Don’t worry if the pieces are even or square. The shape of watermelon can make this hard, and why waste watermelon?! Besides, this is an easy summer salad!
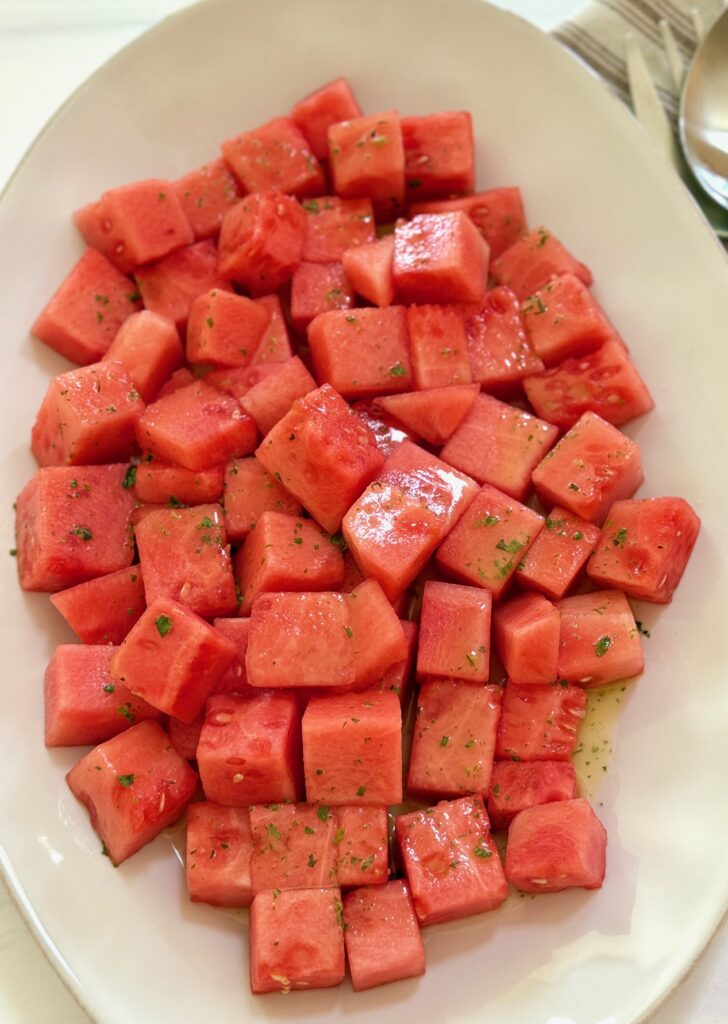
- Place the cubes on a large platter or in a large shallow bowl.
- Crumble the feta. We prefer to buy feta in a block and crumble it ourselves because it adds texture to the salad if all of the pieces are different. And, feta is simple to crumble.
- Roughly chop the roasted pistachios. Again, different-sized pieces are great!
- Drizzle 1/4 cup of the lime vinaigrette on the watermelon and gently toss to coat.
- Scatter the feta and pistachios over the top of the watermelon, and then drizzle the remaining lime dressing and the remaining 1 Tablespoon of fresh lime juice.
- Sprinkle the remaining chopped mint (2 Tablespoons) all over the salad and serve.
Tips for success for Watermelon Mint Salad
This salad is popular and simple to make, but here are some tips and tricks for success:
- Choose The Best Watermelon – it’s the star of the show! Look for melons that feel relatively heavy for their size. Also, smaller watermelons tend to have a more concentrated flavor. Chill the melon for a few hours before cutting for a nice crisp flavor.
- Quality Feta – this makes all the difference! Try to find a good sheep’s Greek feta that is sold in a block and stored in a salty brine. It will have a lovely creamy texture and a light saltiness that balances perfectly with sweet watermelon.
- Fresh Mint – don’t chop it too far in advance because it will begin to brown.
- Mix Gently – combine the watermelon with the vinaigrette first, and then scatter the rest of the ingredients on top. The feta will break down with tossing, so best to sprinkle it on.
Make Ahead and Leftover Tips
- This is a salad that needs to be tossed right before serving because watermelon is naturally watery. If you need to prep ahead, just keep all of the components stored separately and combine right before serving.
- Store any leftover salad in a sealed container in the refrigerator for up to 2 days. You may need to drain the watermelon juice before serving.
Favorite Main Dishes to serve with Watermelon Salad
- Jerk Chicken – its spiciness is the perfect contrast
- Ribs – a summer pairing that can’t be beat! Try our Smoked Ribs, Slow Cooker Ribs, or fall-off-the-bone Oven Baked Ribs
- Cedar Plank Salmon – the light smoky flavor pairs well with watermelon
- Garlic Butter Steak Bites – an easy main dish for warm summer nights with no oven required!

Watermelon Salad with Feta
Ingredients
Salad Ingredients
- 6 cups watermelon, cut into cubes
- ½ cup feta, crumbled
- ⅓ cup roasted pistachios, shelled and lightly chopped
- 2 Tablespoons fresh mint, chopped
- 1 Tablespoon fresh lime juice
- ⅓ cup Lime Vinaigrette (see ingredients below)
Lime Vinaigrette Dressing:
- 4 Tablespoons lime juice, freshly squeezed (approx. 3 limes)
- 1 Tablespoon sugar or honey
- 3 Tablespoons extra virgin olive oil
- 2 teaspoons fresh mint, minced
Instructions
Lime Vinaigrette
- In a small bowl, add 4 Tablespoons of lime juice and sugar. Whisk until the sugar is dissolved. (Or use a mini food processor)
- Slowly whisk in 3 Tablespoons of extra virgin olive oil and mix until emulsified. Stir in 2 teaspoons of freshly chopped mint. Set the vinaigrette aside while making the salad. This will equal about 1/3 cup.
Watermelon Salad
- Remove the rind and cut watermelon into cubes, equaling 6 cups. Place cubes on a large platter or in a large shallow bowl.Crumble the feta and chop the roasted pistachios.
- Drizzle 1/4 cup of the lime vinaigrette over the watermelon and gently mix.Scatter the feta and chopped pistachios all over the salad. Drizzle the remaining vinaigrette and the reserved 1 Tablespoon of lime juice.
- Sprinkle the remaining 2 Tablespoons of chopped mint all over the salad and serve.
Notes
- We recommend roasted salted pistachios. If yours aren’t salted, you may want to add some salt to the salad.
- If making ahead of time, keep all the components separate and then add them together at the last minute to avoid a watery salad.
Nutrition
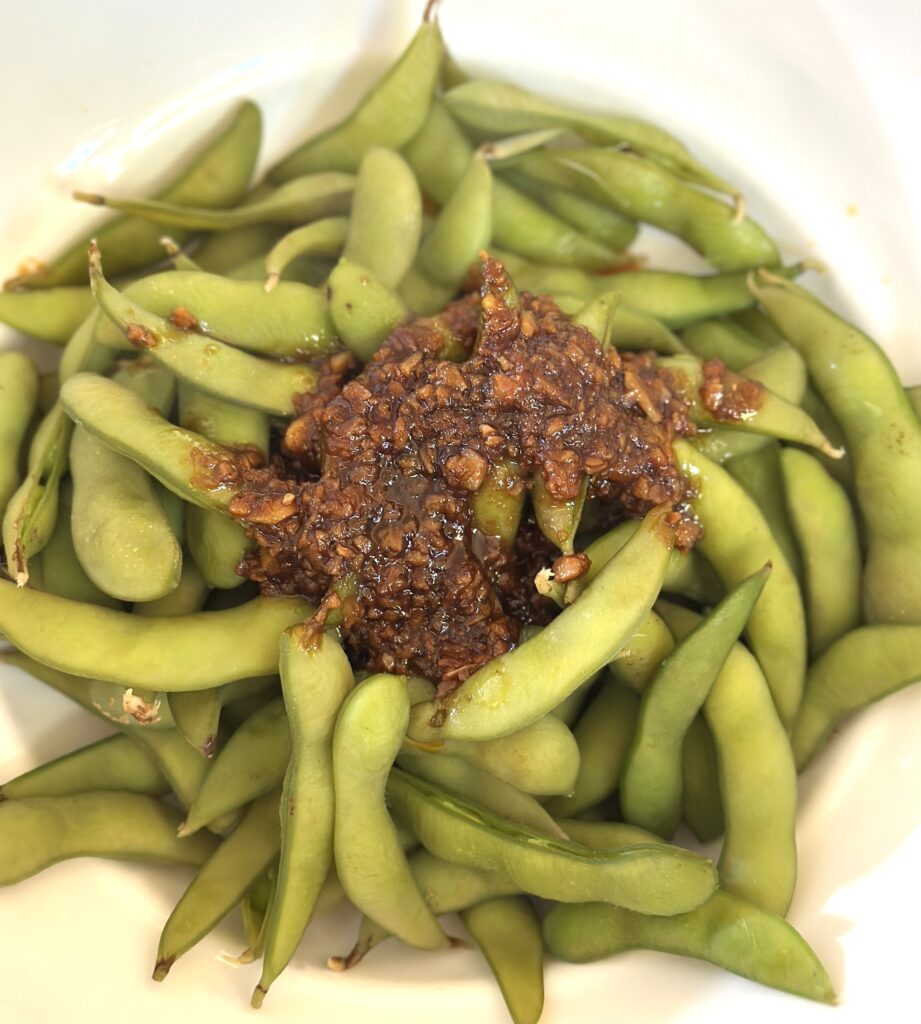
These spicy treats make a great appetizer, side dish, or snack that you can have on the table in just 10 minutes. With all its savory garlicy goodness, it will keep your guests asking for more!
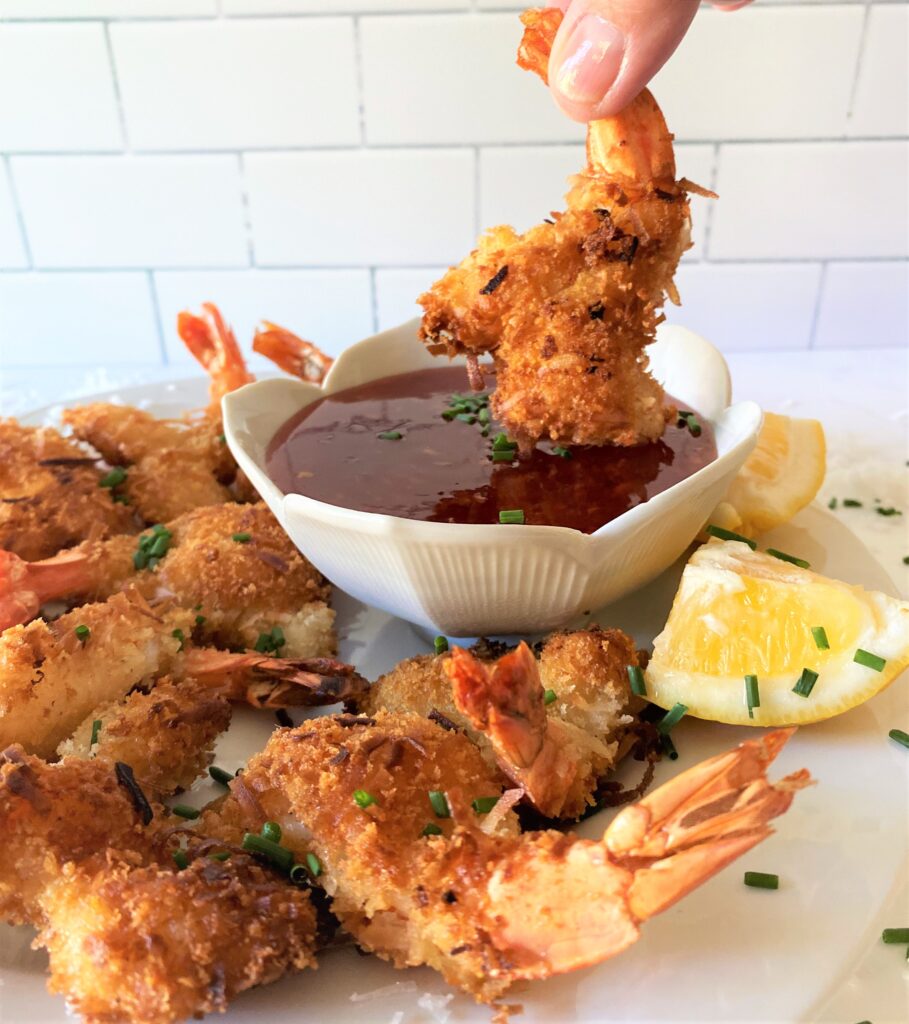
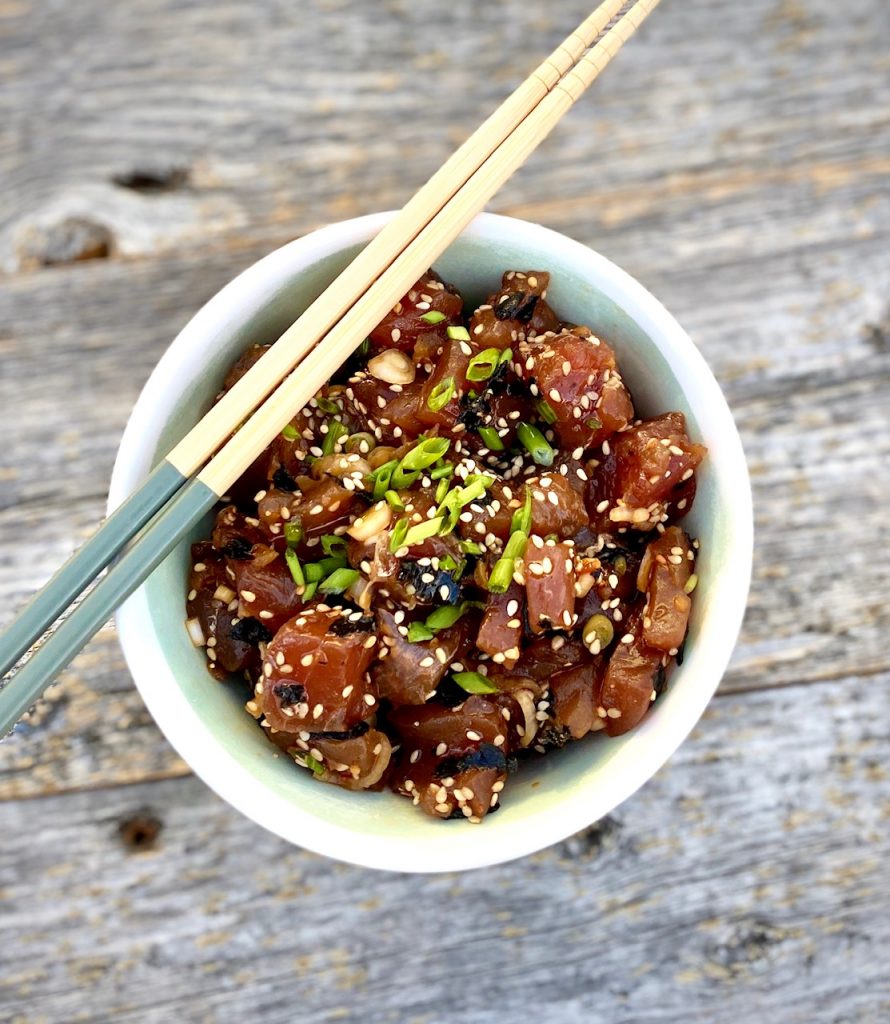
We love to serve them with our Coconut Shrimp, Ahi Poke, or Chicken Skewers with Peanut Sauce.
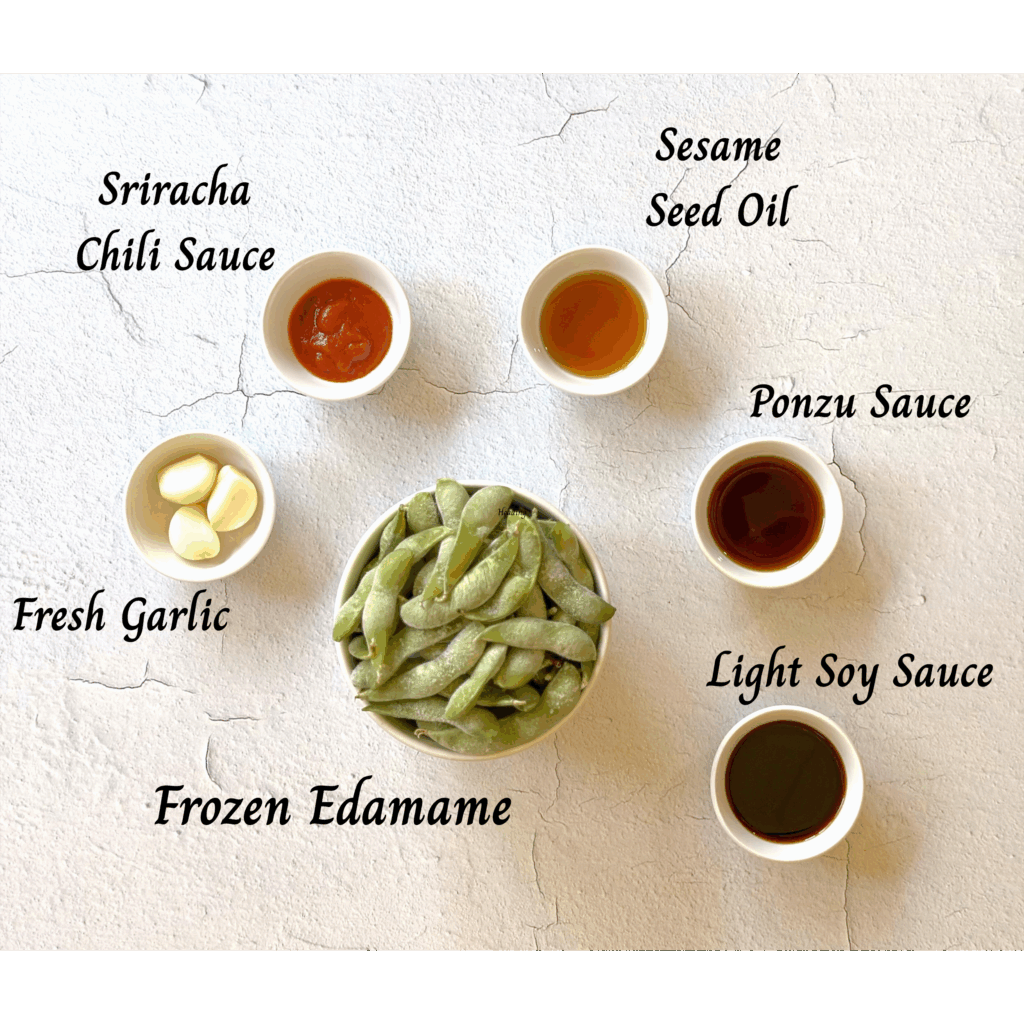
Ingredients needed for Spicy Garlic Edamame
- Frozen edamame – one package
- Fresh minced garlic
- Soy sauce – we use light soy sauce
- Ponzu sauce – an Asian condiment with a light citrus flavor
- Sesame seed oil – found in the Asian section of the supermarket
- Siracha sauce or chili oil
- Cooking oil – use for browning garlic
How to make Spicy Garlic Edamame
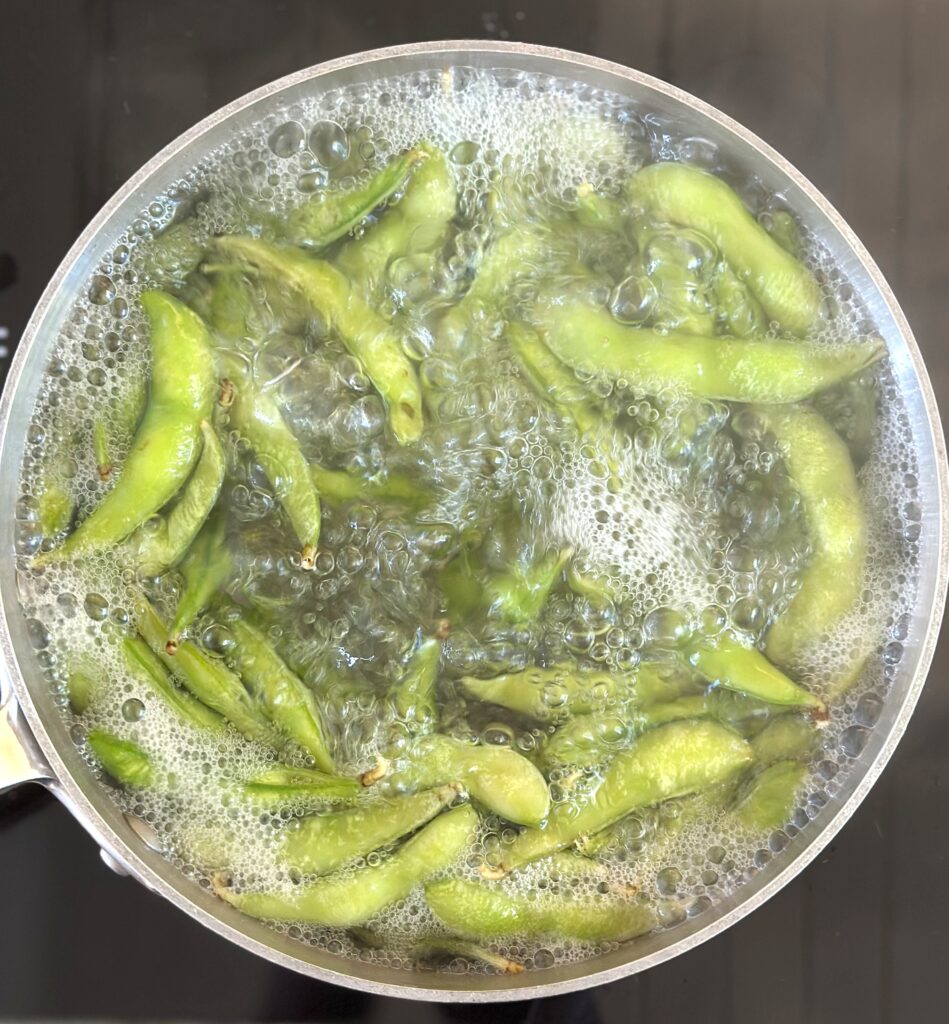
- Fill a medium saucepan 3/4 full of water and add 1 teaspoon salt. Bring to a boil. Add frozen edamame and follow the cooking instructions on the package.
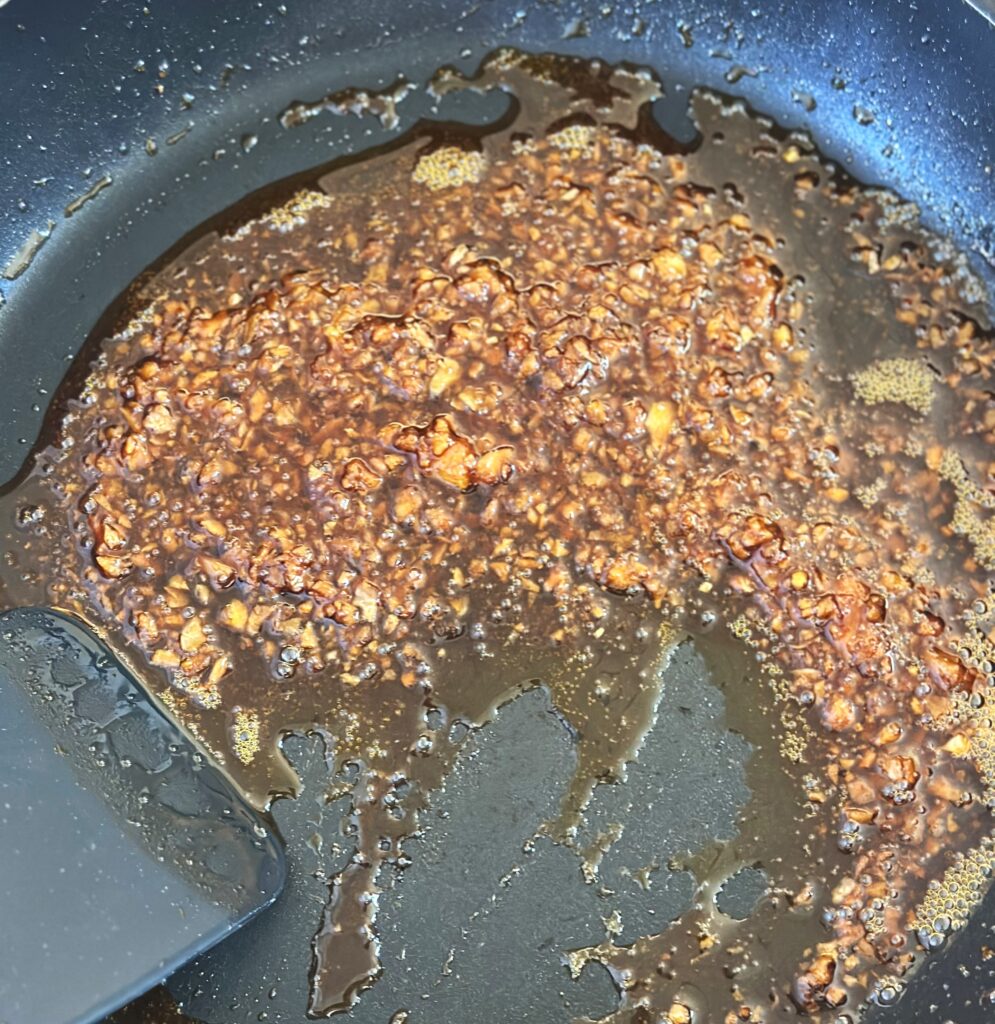
- While the edamame are cooking, add 1 Tablespoon of cooking oil to a small skillet. Heat the oil over medium heat, and then add minced garlic.
- Sauté until garlic is light brown and fragrant.
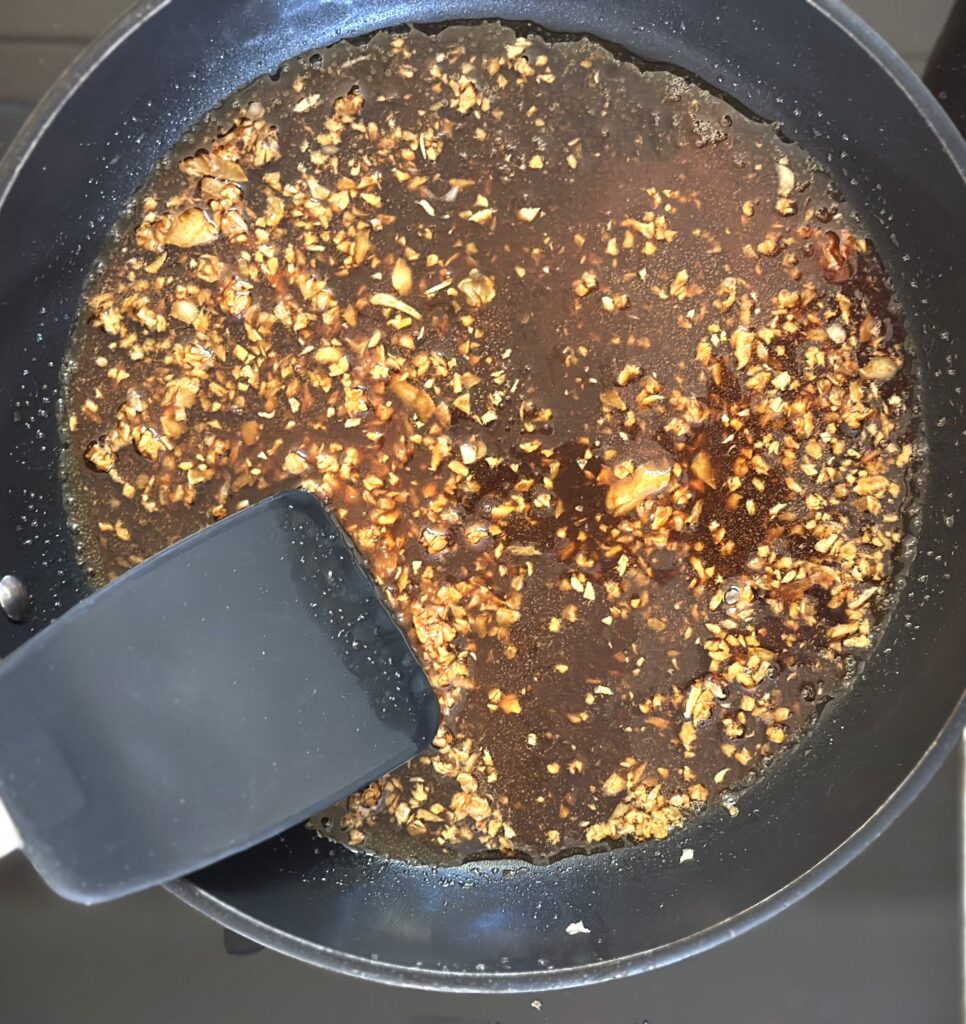
- Add all of the additional ingredients: soy sauce, ponzu sauce, sesame seed oil, and sriracha or chili oil.
- Bring the mixture to a low boil, and continue cooking to reduce the mixture down until it thickens. This takes about 2 to 3 minutes. Remove from heat.
- Once edamame have finished cooking, drain them in a colander while you finish preparing the spicy garlic sauce.
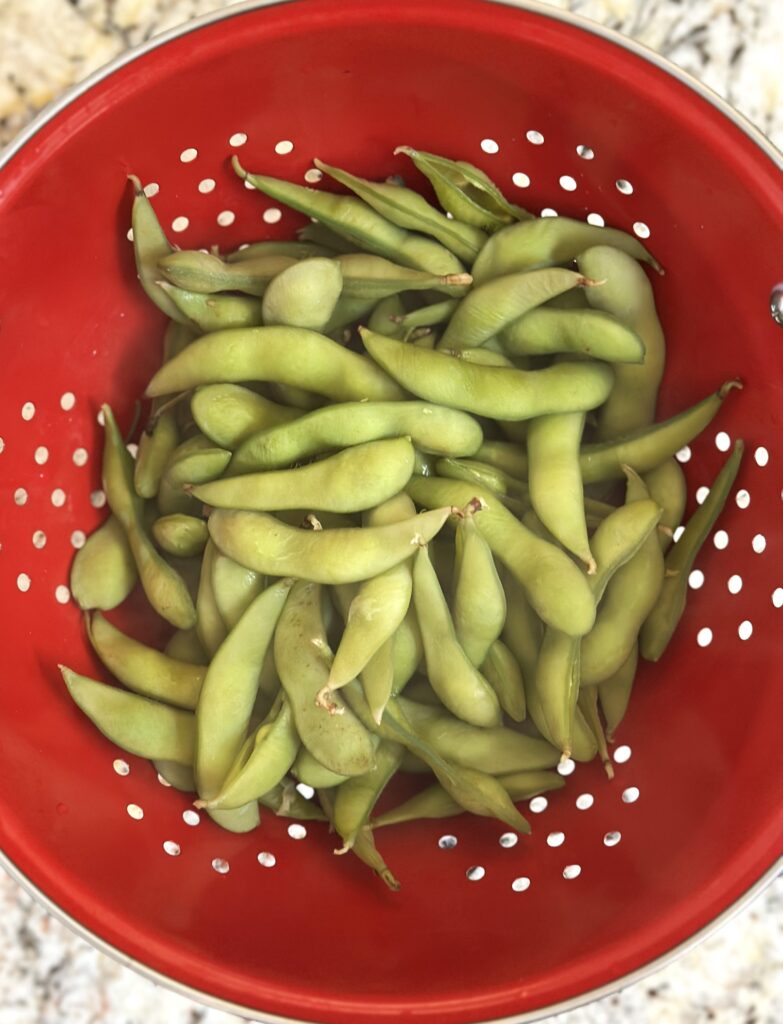
- Add edamame to a serving bowl and top with the spicy garlic sauce.
- Toss edamame to coat them with sauce and serve warm.
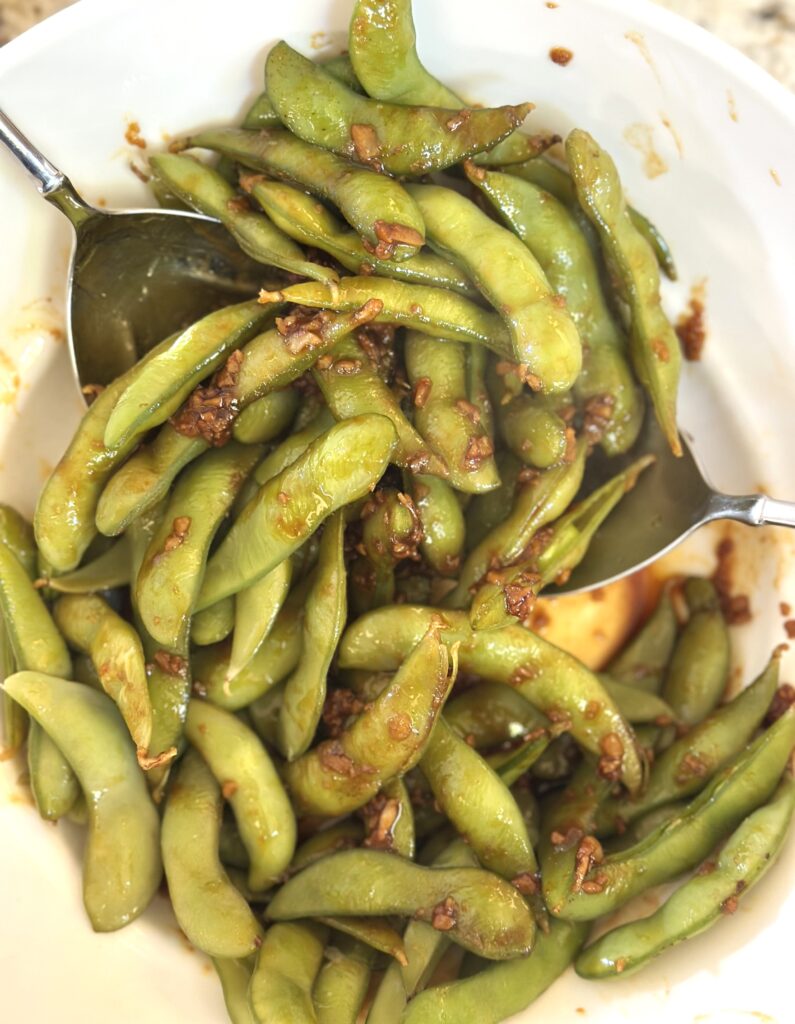
- Want more heat add additional sriracha. Want less heat, cut back on the sriracha or chili oil.
What is Edamame?
Edamame is simply the Japanese name for young soybeans which are harvested before they reach full maturity. They are still green and have not hardened yet. They have a nutty flavor and are a little on the sweet side. Soybeans grow naturally in a pod, but are often served shelled.
You can find edamame in the frozen food section of your grocery store next to other bean varieties, along with other vegetables.
You can boil, steam, or even cook them in a microwave. Often they are seasoned with salt, but our recipe takes these snacks to an entirely new level!

What are the health benefits of Edamame?
Edamame is part of the legume family and is low in carbohydrates. They are a wonderful source of protein and a good source of fiber.
This little bean contains a wealth of antioxidants and is rich in vitamins and minerals, including vitamin K, vitamin E, folate, zinc, potassium, and magnesium to name a few.
Potential health benefits include improving blood sugar levels, helping to lower cholesterol, and promoting heart health.
Here are some variations of Spicy Edamame:
Get creative here! This recipe can include a wide range of variations, so let yourself explore new tastes and combinations. There are endless sweet and savory ingredient substitutions to add to create this tasty dish.
Here are a few ideas. Any combination of these ingredients will work.
- Maple syrup, brown sugar, miso paste, or oyster sauce.
- Want some heat? Add red pepper flakes, sambal oelek, or fresh ginger.
- For garnish, you can add black or white sesame seeds.

Leftovers and reheating instructions:
This dish is best served warm. You can reheat any leftovers over medium heat in a small skillet. You can add a little water to the skillet to keep the beans moist.
Refrigerate any leftovers in a sealed container for up to 3 days.
Serve these tasty dishes alongside Spicy Edamame:
- Korean Beef Bulgogi
- Beef and Broccoli Stir Fry
- Tofu Rice Bowl with Vegetables
- Asian Cucumber Salad
- Coconut Shrimp
- Ahi Poke Recipe

Spicy Garlic Edamame
Equipment
- 1 Medium sauce pan
- 1 Small skillet
- 1 Colander to drain cooked edamame
Ingredients
- 1 Package Frozen Whole Edamame
- 1 Tablespoon Cooking Oil, such as canola oil
- 1½ Tablespoons Fresh Garlic, Minced
- 2 Tablespoons Soy Sauce (light soy sauce preferred)
- 2 Tablespoons Ponzu Sauce
- 2 teaspoons Sesame Seed Oil
- 1 Tablespoon Sriracha Sauce or Chili Sauce (more or less to taste)
Instructions
- Fill a medium saucepan 3/4 full of water and add 1 teaspoon salt. Bring to a boil. Add frozen edamame and follow the cooking instructions on the package.
- While the edamame are cooking, add 1 Tablespoon of cooking oil to a small skillet. Heat the oil over medium heat, and then add minced garlic. Sauté until garlic is light brown and fragrant.
- Once edamame have finished cooking drain them in a colander while you finish preparing the spicy garlic sauce topping..
- Add in all remaining ingredients: soy sauce, ponzu sauce, sesame seed oil and sriracha. or chili oil Bring the mixture to a low boil, and continue cooking to reduce the mixture until it thickens. This takes about 2 to 3 minutes. Remove from heat.
- Add edamame to a serving bowl and top with spicy garlic sauce. Toss edamame to coat completely with sauce and serve.
Notes
- To tame the heat, use less sriracha or chili oil.
- This dish is best served warm. You can reheat leftovers over medium heat in a small skillet.
- Refrigerate any leftovers in a sealed container for up to 3 days.
Nutrition
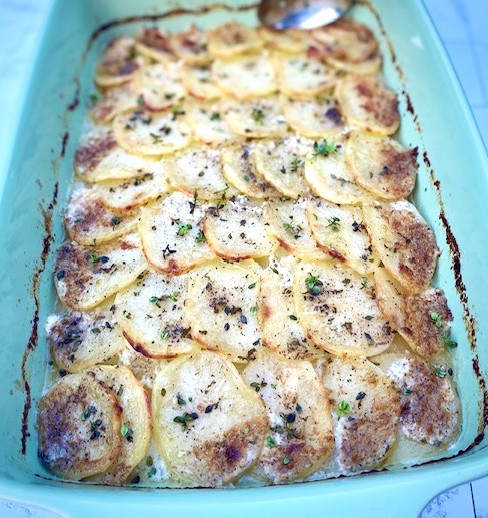
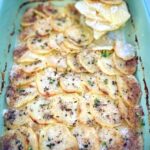
Scalloped potatoes are a classic comfort food dish that never fails to satisfy. Layers of thinly sliced potatoes are baked in a creamy sauce until golden and bubbly, creating a side dish that is both decadent and delicious.
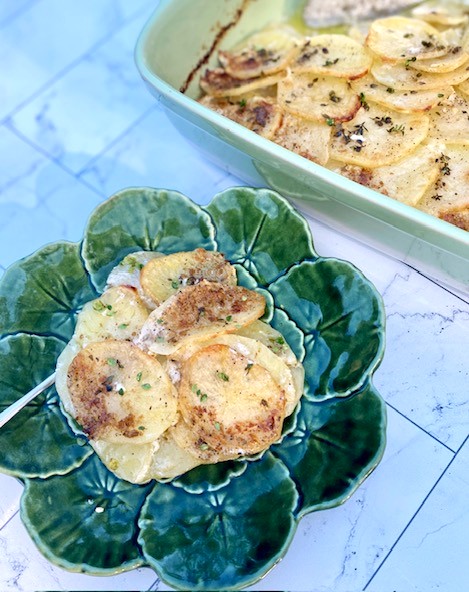
Whether serving at a holiday gathering or as a comforting weeknight dinner side dish, scalloped potatoes are always a crowd-pleaser. This recipe makes a big batch, so there’s enough for seconds and leftovers!
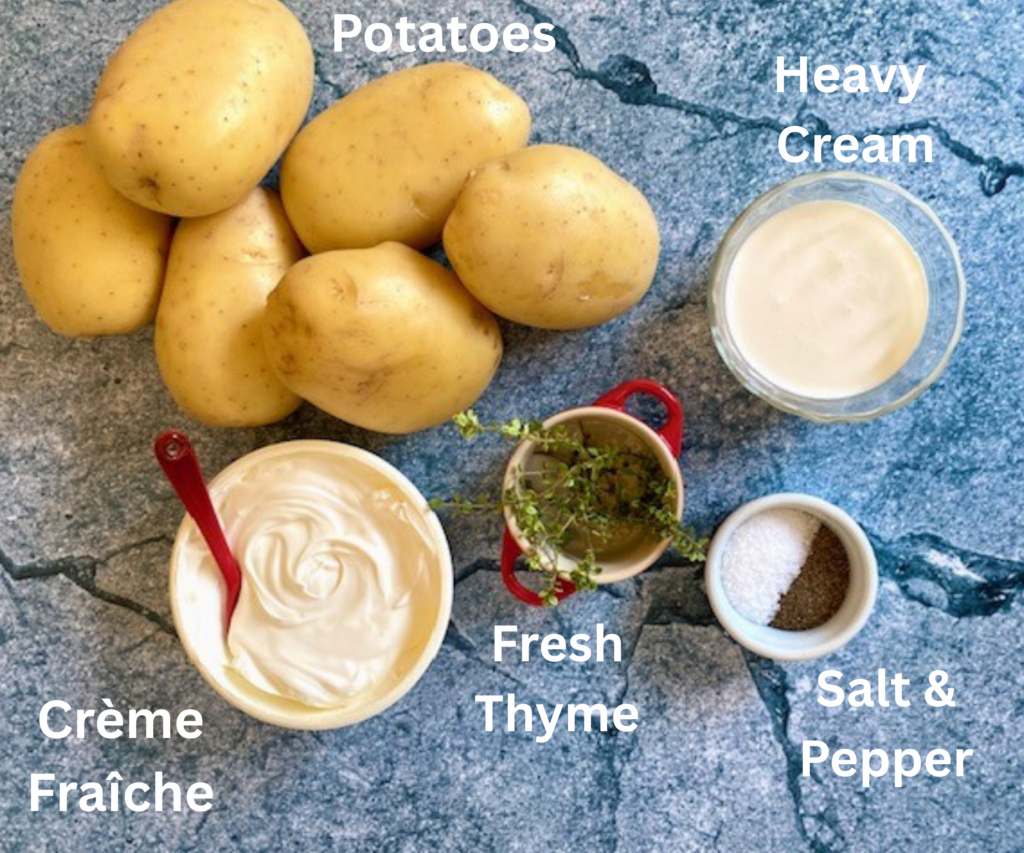
Ingredients Needed:
- Yukon Gold Potatoes – you can also use another type of yellow potato or red bliss potatoes
- Crème Fraîche – Crème fraîche is the magic in this dish! It has a richer, creamier texture and a less tart flavor than sour cream, with a subtle tanginess you’ll love
- Heavy Cream – or use double cream
- Kosher Salt – if using regular salt, cut back a little bit on the amount
- Black Pepper – freshly ground black pepper is best
- Fresh Thyme Leaves – or use dried, but if using dried thyme, cut the amount by half
- Butter – just a small amount of butter is needed for coating the casserole dish
(See the recipe card at the bottom for exact quantities of each ingredient)
How to make Scalloped Potatoes from scratch
Master the art of making perfectly seasoned and baked scalloped potatoes that will leave everyone asking for seconds!
- Preheat oven to 400°F with the rack in the center position.
- Generously butter a 9″ x 13″ casserole dish and set aside.
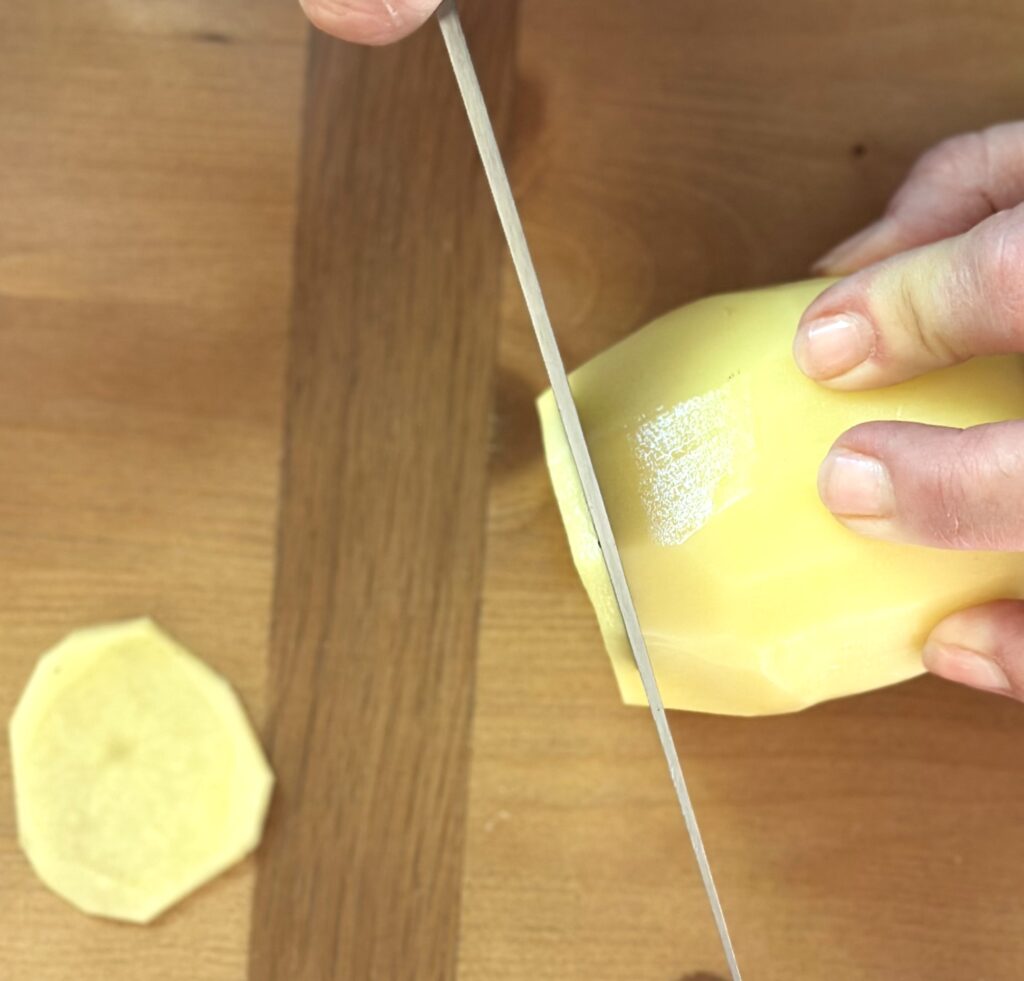
- Clean and peel potatoes and slice into 1/8-inch round pieces.
- PRO TIP: To make this process quick and the pieces uniform, use a mandoline slicer.
- Set sliced potatoes aside.

- In a medium bowl, whisk together the crème fraîche and heavy cream.
- Gently de-stem and lightly chop the thyme leaves.
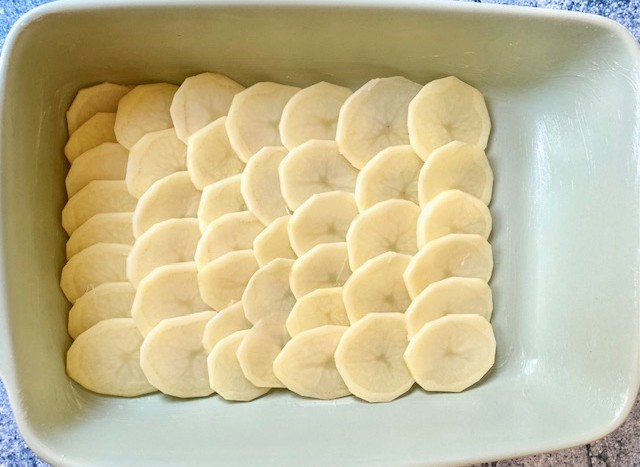
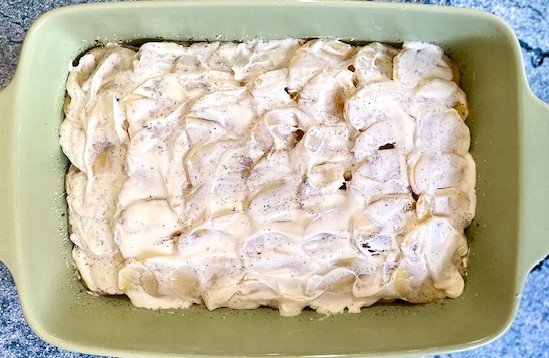
- Arrange one-third of the sliced potatoes on the bottom of the buttered casserole dish, overlapping them into a pattern as you go. (See photo below)
- Season the layer generously with salt and pepper and sprinkle ½ teaspoon of chopped fresh thyme.
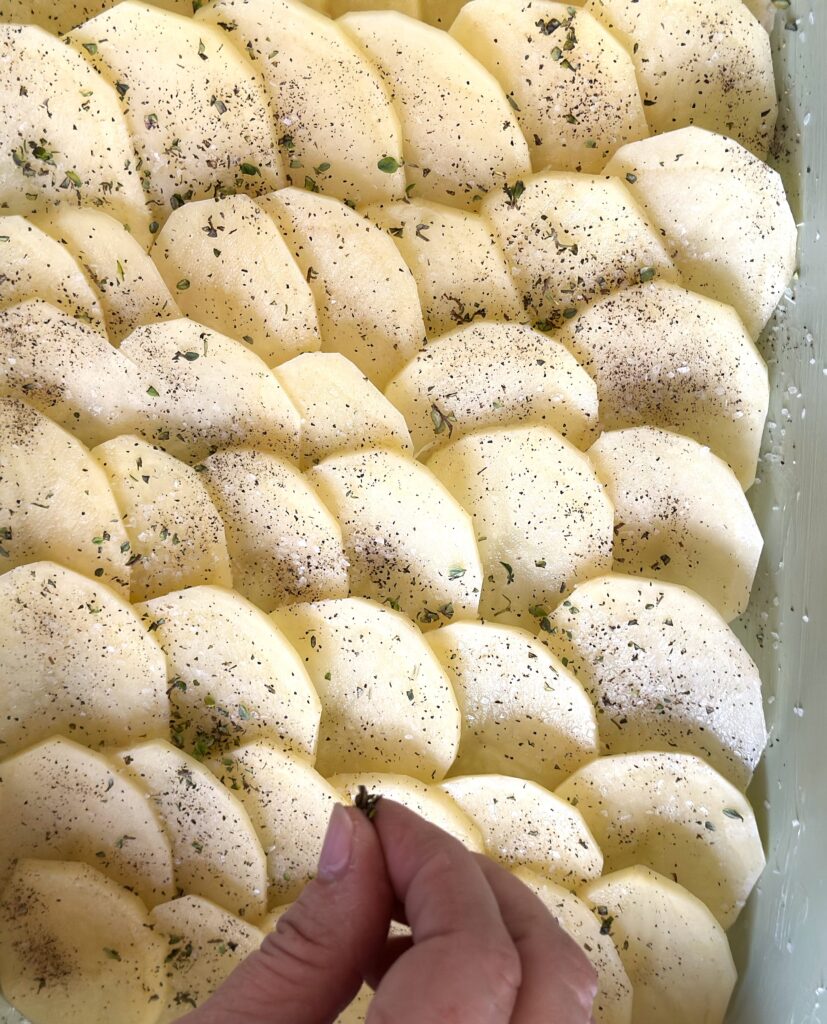
- Spread one-third of the crème fraîche mixture on the potatoes and herbs.
- Repeat the same method of layering to make two more layers.
- Bake for 30 minutes at 400˚F.
- Reduce heat to 350°F and cook until potatoes are tender when pierced with a sharp knife, and the top is golden brown, about 35-40 more minutes.
- If you want a more golden brown top, broil the potatoes on high for 3-5 minutes. Watch closely to make sure they don’t burn.
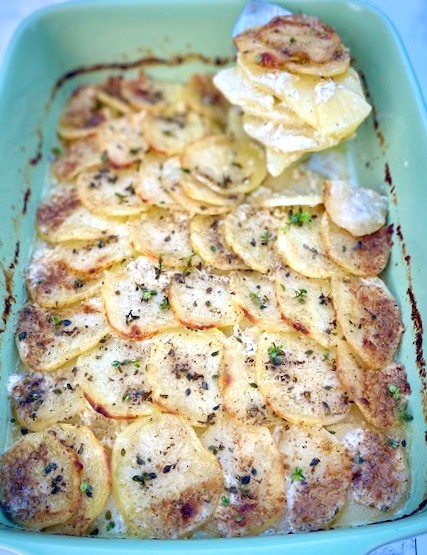
- Remove from the oven and let the potatoes rest for 15-20 minutes before serving. This gives the creamy mixture a chance to lightly solidify and makes it easier to serve.
What is the difference between Scalloped Potatoes and Potatoes au Gratin?
These two potato recipe names get mixed up all the time. Although similar, they have a distinct characteristic that makes them different. That difference is “cheese“! Both are delicious, but here’s the difference:
Potatoes au Gratin – Translated: the French phrase “au gratin” means “by grating” or “with a crust”. So the term au gratin generally means “cooked covered with breadcrumbs and cheese”.
Scalloped Potatoes – The word “scalloped” refers to how the potatoes are sliced. After thinly slicing the potatoes, they are cooked until tender in a simple cream sauce.
Can you make Scalloped Potatoes ahead of time?
Everyone loves a make-ahead dish, especially around the holidays when oven space is at a premium. The good news is YES, this recipe is one of them!
- Prepare scalloped potatoes as directed above, bake, and let them cool completely to room temperature. Cover tightly with aluminum foil. Potatoes can be refrigerated for 2 days.
- When you are ready to reheat, take the potatoes out of the refrigerator and allow them to come to room temperature. Preheat oven to 350°F and reheat, uncovered, for 15 to 20 minutes or until bubbly.
How to store leftovers
- Let potatoes cool. Transfer to a sealed container and store in the refrigerator for up to 3 days.
How to reheat leftovers
- Preheat the oven to 350˚F
- Remove potatoes from the refrigerator and let them come to room temperature
- Place in an oven-proof baking dish and reheat for about 15-20 minutes or until heated through and slightly bubbly
What to serve with creamy Scalloped Potatoes
- Honey Glazed Ham
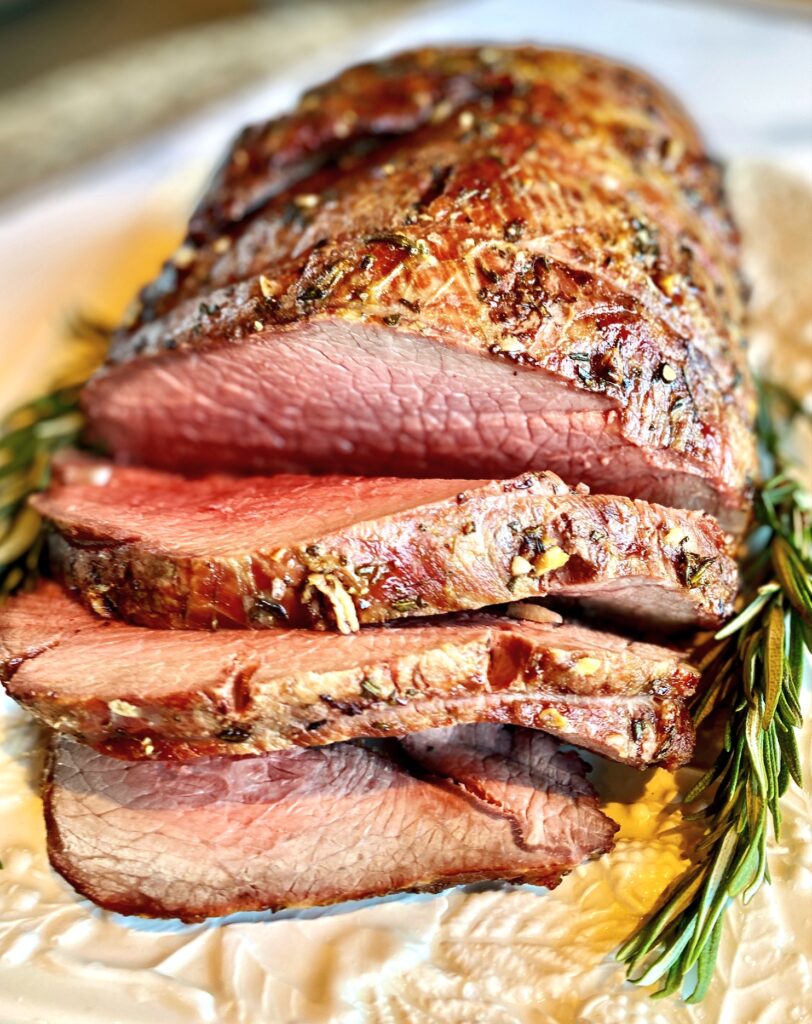
- Garlic Studded Roast Beef
- Air Fryer Pork Chops
- Buttermilk Fried Chicken
- Pork Loin Roast with Herbs

Looking for more easy potato side dishes?
- Roasted Garlic Mashed Potatoes
- Oven-roasted Potatoes
- Hasselback Potatoes with Herbs
- Sweet Potato Casserole
Scalloped Potatoes Recipe
Equipment
- 9 x 13 Baking Dish
- mandoline optional for slicing
Ingredients
- 3 pounds Yukon gold potatoes, peeled and cut into ⅛ inch thin round slices
- 15 ounces Crème fraîche
- ⅔ cup Heavy cream
- 1 Tablespoon Kosher salt (or 1 ½ teaspoons regular salt)
- 1½ teaspoons Black pepper freshly ground
- 2 teaspoons Fresh Thyme leaves destemmed and lightly chopped, or 1 Tbsp dried thyme
- 1 teaspoon Butter for coating the baking dish
Instructions
- Preheat oven to 400°F with the rack in the center position
- Generously butter a 9" x 13" baking dish. Set aside
- In a medium bowl whisk together the crème fraîche and heavy cream.
- Peel potatoes and slice into 1/8th inch slices.
- Arrange one third of the sliced potatoes on the bottom of the buttered baking dish in an overlapping pattern as you go.
- Season generously with salt and pepper. Sprinkle ½ teaspoon of chopped thyme leaves over the potatoes.
- Evenly spread one-third of the crème fraîche mixture on top of potatoes and herbs.
- Repeat same method of layering with two more layers.
- Bake for 30 minutes. Reduce heat to 350°F and cook until potatoes are tender when pierced with a sharp knife, and the top is golden brown, about 35-40 minutes.If browned top is desired broil on high for 3-5 minutes.
- Remove from the oven and let the potatoes rest for 20 minutes prior to serving.
Notes
Nutrition
It’s popping up on menus everywhere; once you’ve tried it, you’ll see why!
Unlike its colorful cousin, the Aperol Spritz, the Hugo is delicate, floral, and light thanks to a combination of fresh mint, Prosecco, and St-Germain elderflower liqueur. It’s the perfect drink or aperitif on a warm summer night with its lower-by-volume alcohol content and calories.
We’ve got directions for a single drink, and a pitcher of drinks for a crowd. It’s an aperitif, so be sure to add some fun bites, like our Honey Roasted Cashews, and pita chips with Tzatziki Dip and you’ve got a party!

Ingredients Needed
- St-Germain Elderflower Liqueur – or any brand you prefer
- Fresh Mint Sprigs – see tips below for keeping them fresh
- Prosecco – use a dry (brut) Prosecco
- Sparkling Water or Soda Water – choose unflavored and chill it before using
- Ice – this is a drink best served very cold!
- Lime – lime wheels for garnish

How to make a classic Hugo Spritz cocktail
There are just four easy steps for this refresher:
- Add the St-Germain elderflower liqueur and 2 torn mint leaves to a large wine glass or cocktail glass. Gently muddle the mint leaves with the back of a spoon and let sit for about 2 minutes to allow the mint to release its natural oils
- Add a generous scoop of ice, and the chilled Prosecco, and stir
- Top with the chilled sparkling water, and briefly stir to combine
- Drop in the lime wheel and garnish with a sprig of mint


How to make a pitcher of Hugo Spritz cocktails
- Add the St-Germain liqueur and 5-6 leaves of torn mint in a large pitcher. Muddle the mint gently and let rest for about 2 minutes to infuse with flavor.
- Add plenty of ice and pour in the Prosecco. Stir to combine and top with the sparkling water. Gently stir to mix everything.
- Add a few lime wheels to the pitcher and a lime wheel slice to each glass and fill each glass with the Hugo mixture.
- Garnish with prepared mint sprig and enjoy!

How to keep mint fresh for a garnish
- Rinse in cool water and store in a small ice bath or store stem down in a small container of water
- Strip the lower leaves from the stalk so that you have a nice bouquet remaining at the top
- Gently slap the mint on your palm to release the natural oil right before garnishing. This will result in a beautiful perfume of mint with each sip!
Who invented the Hugo Spritz?
- Roland Gruber, a bartender in the northern Italian town of Naturno, which is on the Italian-Austrian border, invented the Hugo Spritz cocktail around 2005
- It quickly gained popularity in Austria, Germany, and Italy. More recently it has become popular in the U.S., as well. It was originally named “Otto” and is sometimes referred to as just a “Hugo”
What is Elderflower Liqueur
- This liqueur is made from elderflower blossoms and sugar that is fermented
- It has a lightly sweet and floral flavor
- We recommend the St-Germain brand, but any elderflower liqueur will work, and you should consume it within 6 months of opening it. Store in a cool dry place.

Substitutions and Variations
- For a pink Hugo Spritz use a Rosé Prosecco
- Use white wine instead of Prosecco for a less bubbly version, sometimes called the St-Germain Cocktail
- A St-Germain Spritz is similar and delicious. It’s a simple mixture of Prosecco, St-Germain, Soda Water, and a lemon wheel.
Best glasses to use for a Spritz
- Any type of spritz will benefit from a large wine glass which allows you to use plenty of ice. This is a drink that needs to be cold!
- A highball glass, or a standard rocks-style will work, as well.
What to serve with a Hugo Spritz
The Hugo is an aperitif, meant to be served before a meal or with a late afternoon snack. Thanks to all the bubbles in this drink, it pairs well with salty and creamy foods. Here are some fun options:
- Roasted Chickpeas – a perfect crunchy salty treat
- Baked Brie with Garlic – creamy, and a perfect pairing
- How to Make a Cheese Board – an easy make-ahead appetizer
- Sun Kissed Tomatoes – Italian-style and a traditional aperitif snack


Hugo Spritz
Ingredients
For one Hugo Spritz
- 2 sprigs fresh mint, divided for drink and garnish
- 1 ounce St-Germain Elderflower Liqueur, chilled
- 1 scoop ice
- 4 ounces Prosecco chilled
- 1 ounce Sparkling Water or Soda Water chilled
- 1 slice Lime cut into a wheel for garnish
For a Pitcher (6 servings)
- 1 bunch fresh mint, divided
- 6 ounces St-Germain Elderflower Liqueur chilled
- ice
- 750 ml Prosecco, (1 bottle) chilled
- 6 ounces Sparkling Water or Soda Water, chilled
- 6 slices Lime, cut into wheels for garnish
Instructions
For one Hugo Spritz
- Add the St-Germain and 2 torn mint leaves into a wine glass. Gently muddle and let sit for 2 minutes.1 ounce St-Germain Elderflower Liqueur,
- Add ice and Prosecco. Stir gently. Top with sparkling water and stir again.Add the lime wheel to the glass and garnish with a sprig of mint.1 scoop ice, 4 ounces Prosecco, 1 ounce Sparkling Water or Soda Water, 1 slice Lime
For a pitcher of Hugo Spritz
- Add the St-Germain liqueur and 5-6 mint leaves to a large pitcher. Gently muddle and let sit for 2 minutes.6 ounces St-Germain Elderflower Liqueur
- Add ice and Prosecco and stir gently to combine. Add sparkling water and gently stir again.ice, 750 ml Prosecco, (1 bottle), 6 ounces Sparkling Water or Soda Water,
- Add a lime wheel to each of 6 wine or cocktail glasses for serving, pour in mixed Hugo Spritz, and garnish each glass with a sprig of mint.6 slices Lime,
Notes
- Be sure to chill ingredients in advance for best results.
- If making a pitcher of drinks ahead of time add only the torn mint and liqueur, then add the Prosecco, ice, and sparkling water when ready to serve. Finish with garnishing.
- To bring out full mint sprig flavor gently slap the sprig on the palm of your hand before garnishing.
Nutrition
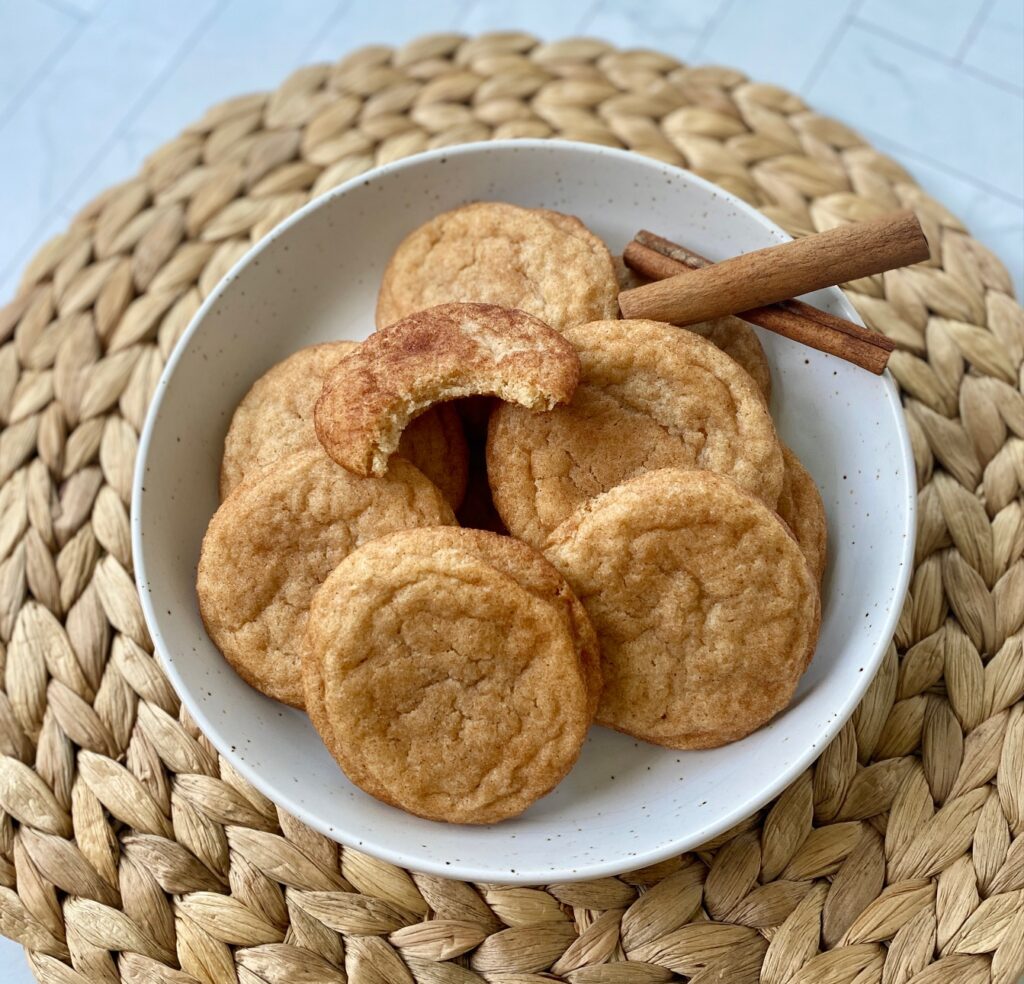
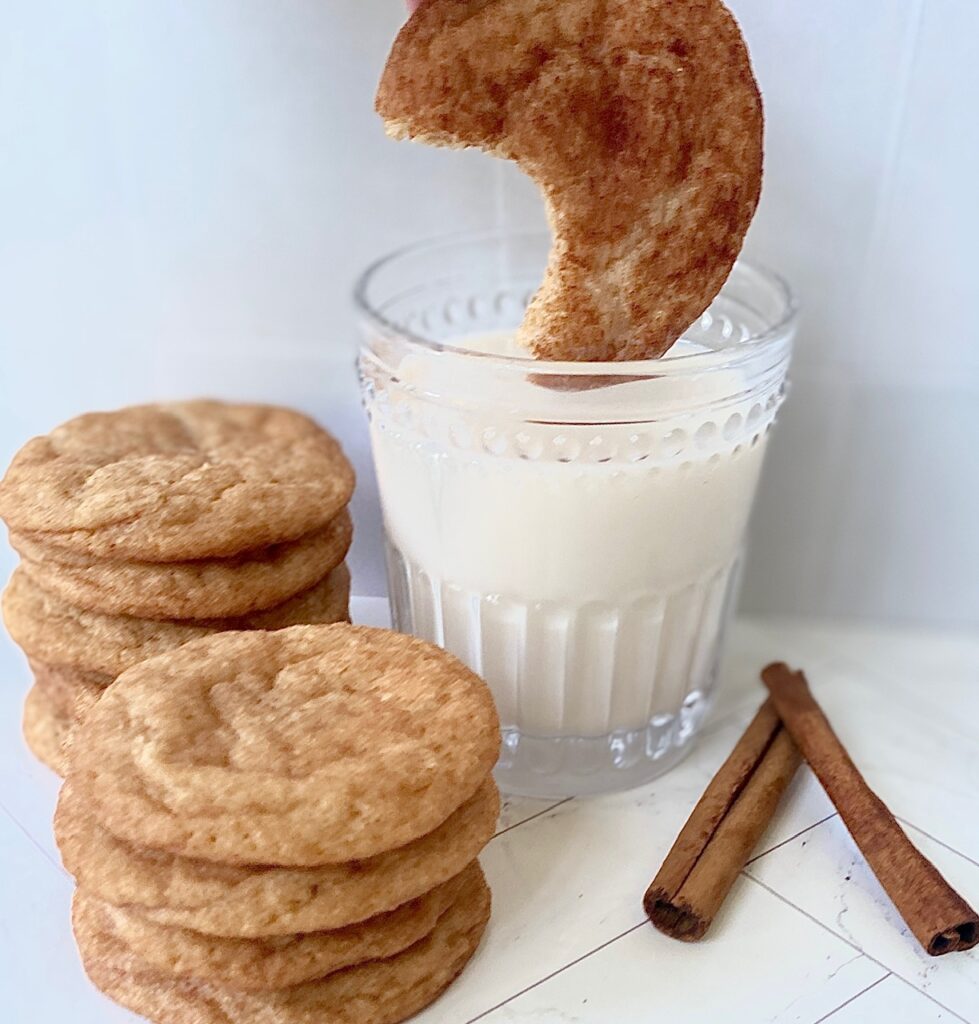
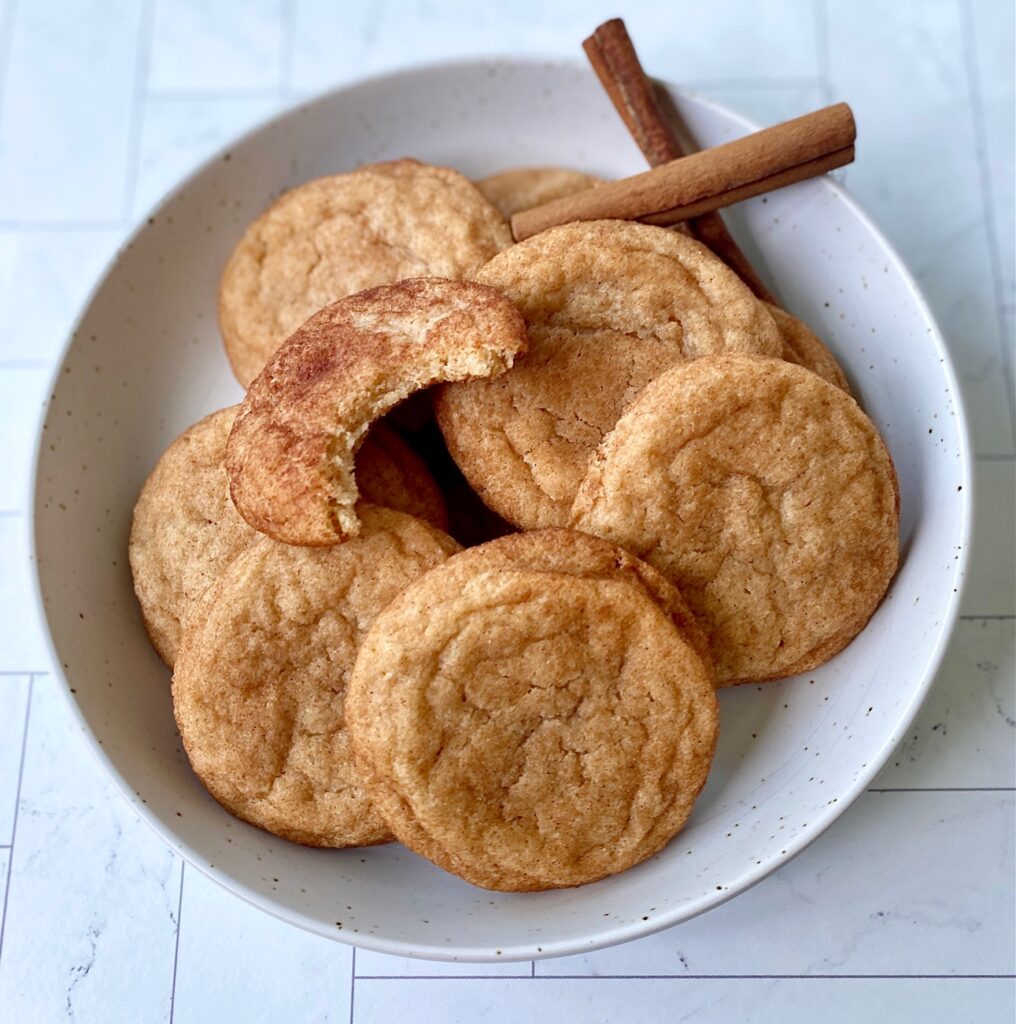
A classic cookie, with a chewy texture and a light tang, we think these are the perfect Snickerdoodle Cookie! What’s not to love? They are easy, full of flavor, use simple ingredients, are soft, and ready in less than 30 minutes.
Every bite is so satisfying! Cookie perfection!
This post may contain affiliate links. Read our affiliate disclosure policy for more details.
Ingredients Needed
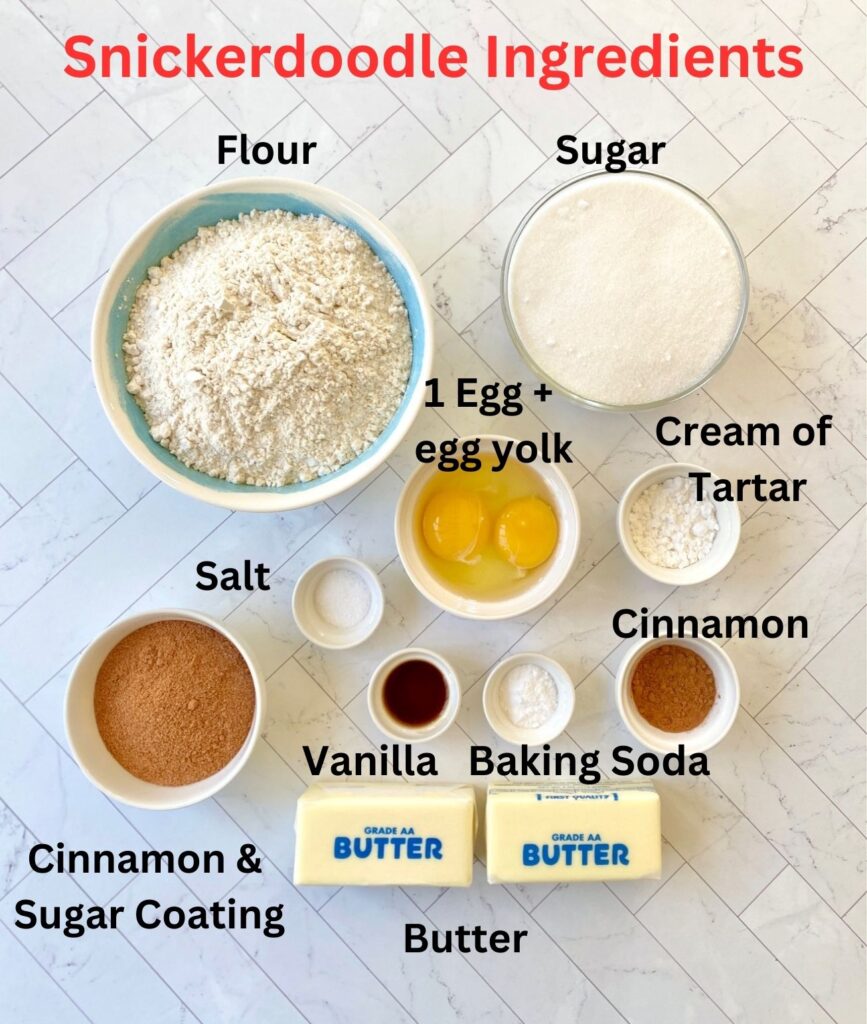
Homemade Snickerdoodle Cookies are comforting favorite cookies for a reason. They are easy to prepare and you probably already have all 9 ingredients needed to make them in your pantry and refrigerator right now!
- FLOUR – use all-purpose flour for the best structure
- CREAM OF TARTAR – the key to giving Snickerdoodles that classic tangy flavor. An essential ingredient that works in combination with baking soda to create an acidic chemical reaction
- BAKING SODA – this leavening agent works in conjunction with the cream of tartar. Without it, the cookies would be flat and lack the beautiful crackle on top
- CINNAMON – this separates Snickerdoodles from sugar cookies! Make sure to use your best cinnamon for this recipe because it’s the star of the show and it’s used in both the dough and the cinnamon sugar coating
- SALT – helps balance sweetness and enhance any baked good
- BUTTER – we use unsalted butter, and it should be room temperature but not warm
- SUGAR – regular granulated sugar which is used in both the dough and the cinnamon sugar mixture for the coating
- EGG + EGG YOLK – the added egg yolk makes these cookies beautifully soft. Room-temperature large eggs work best
- VANILLA EXTRACT – use pure extract. Have you tried making Homemade Vanilla yet? It’s easy and there are only two ingredients.
How to make the perfect Snickerdoodle Cookie
You can make these cookies fast without chilling the dough, so if you’re planning to bake them right away, preheat the oven to 375˚F before you get started mixing.
TIP: Use a handheld mixer or a stand mixer with the paddle attachment. You could also mix the dough by hand with a wooden spoon as my mother-in-law does, however, it’s a bit of a workout creaming the sugar and butter!
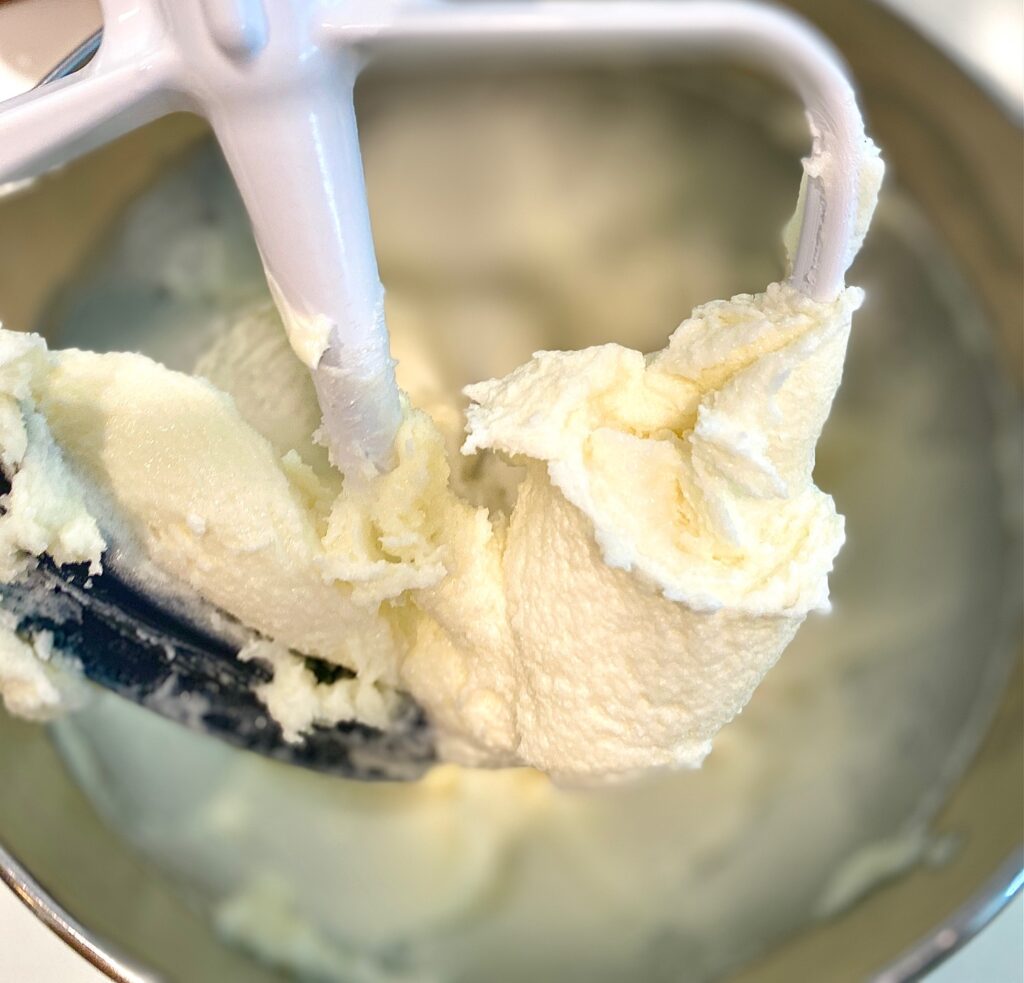
- CREAMING: In the large bowl of a stand mixer fitted with a paddle attachment, or a hand mixer, begin creaming the butter and the sugar together on medium speed.
- This will take about 3 minutes and is important for whipping air into the cookie dough and helping the butter coat the sugar. Scrape the sides of the bowl once or twice while mixing.
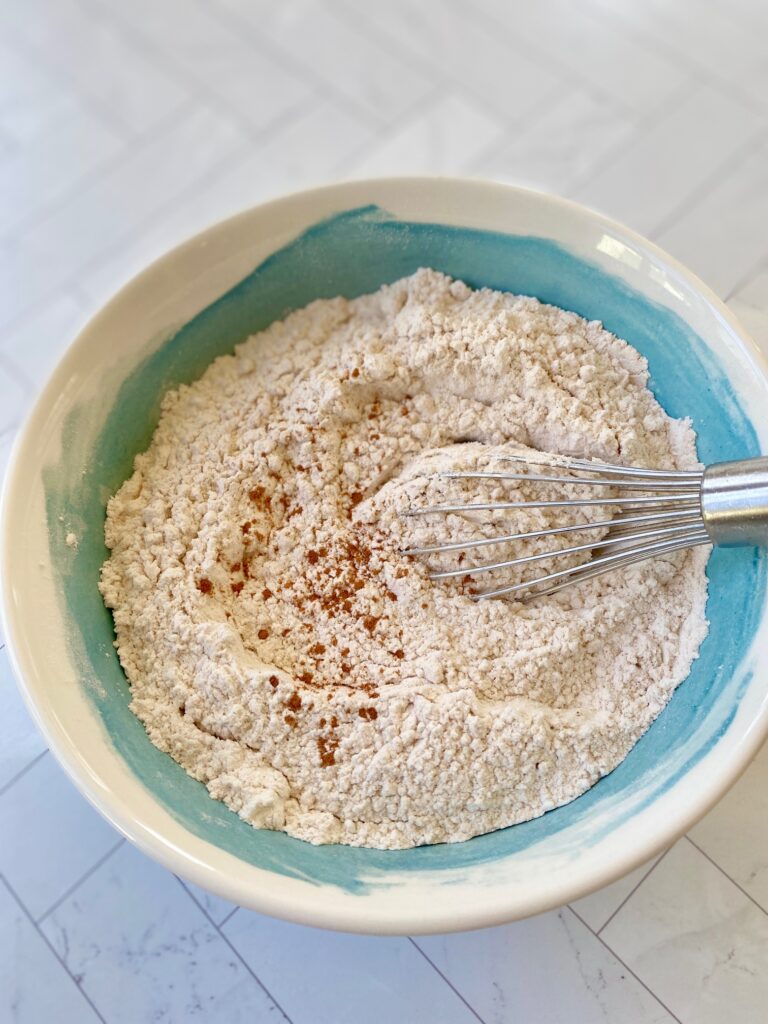
- DRY INGREDIENTS: While the butter/sugar mixture is creaming blend in a separate medium bowl: flour, cream of tartar, cinnamon, baking soda, and salt. Set aside.
- COMBINE: Add the egg, egg yolk, and vanilla extract to the butter/sugar mixture and blend on medium speed until combined.
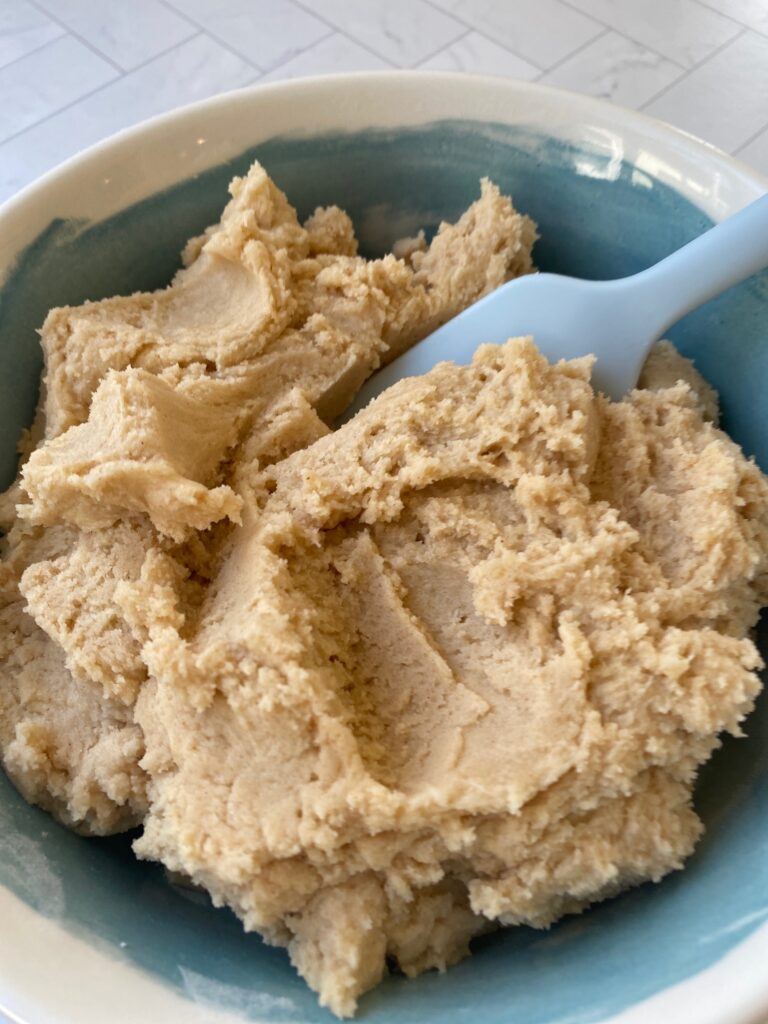
- MIX: Add half of the reserved flour mixture to the wet ingredients and mix on low speed until combined. Add the remaining flour mixture and blend until no streaks remain.
- OPTIONAL CHILLING: Cover and chill the dough for 30 minutes (or up to 24 hours). Chilling will result in a puffier cookie.
- PREP PAN: Line a baking sheet with parchment paper, if desired
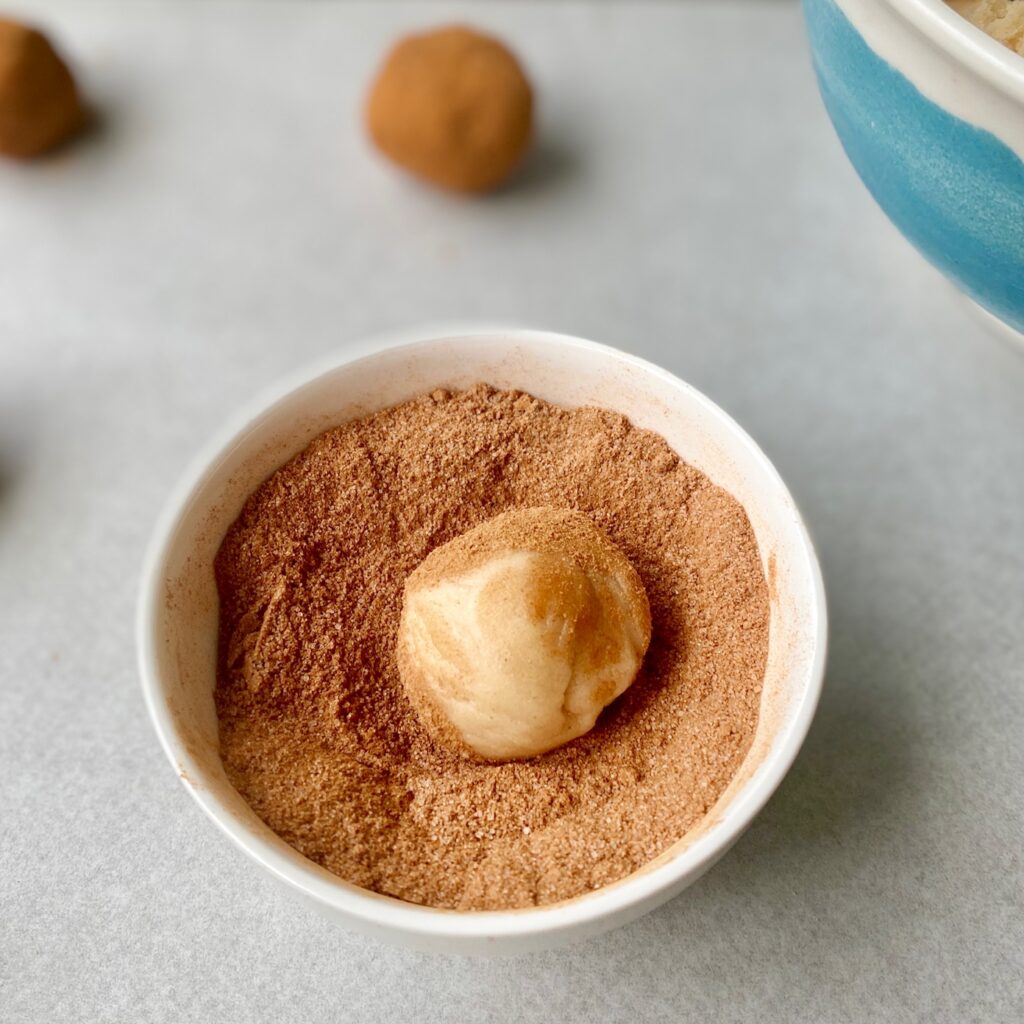
- CINNAMON SUGAR COATING: Mix 1/4 cup sugar and 2 teaspoons cinnamon in a small bowl to make the coating
- SCOOP THE DOUGH: Scoop cookies and roll them into smooth, round balls (we make ours about 2 inches around using a cookie scoop)
- COATING: Drop the rounded balls into the cinnamon-sugar mixture and coat the entire cookie twice to ensure they are heavily coated
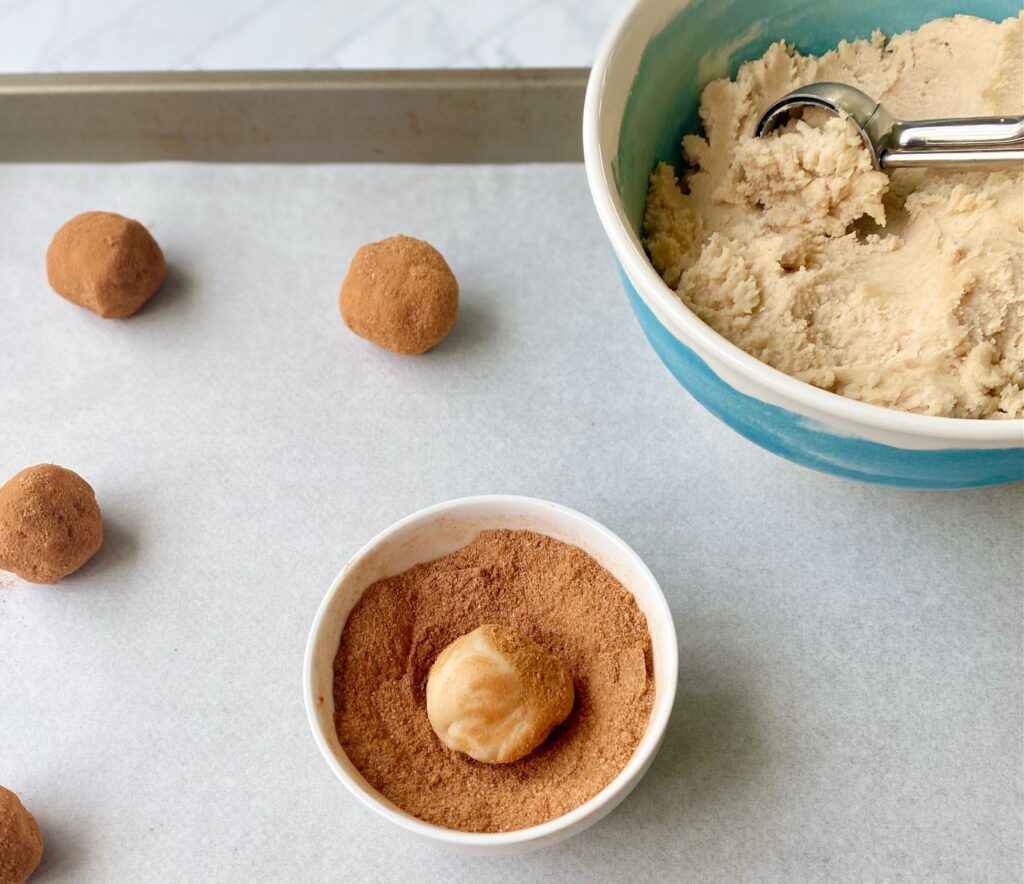
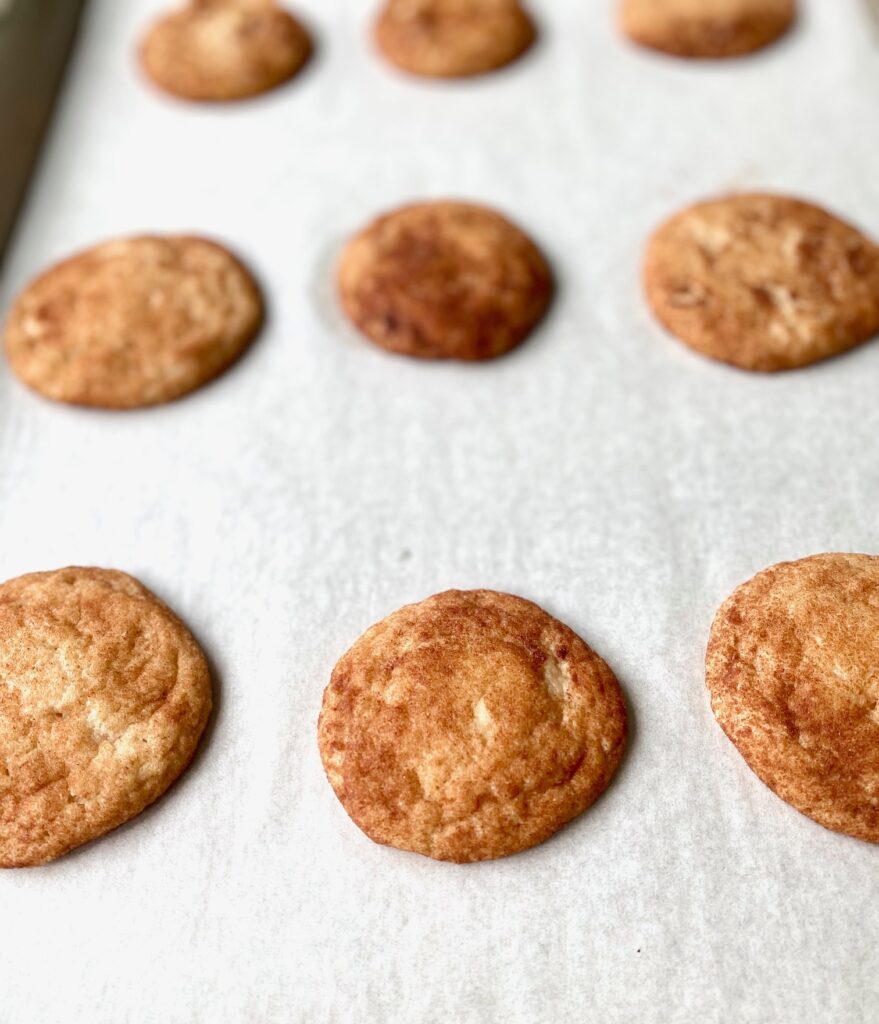
- BAKE: Place the coated cookie dough balls on the prepared pan, spaced evenly apart (about 3 inches), and bake for 8-11 minutes.
- CHECKING FOR DONENESS: The edges will be set and the middle of the cookie will still be a bit soft and crackly. The color should be light golden, but not pale. The cookies will puff up in the oven and settle back down while cooling.
- COOL: Let the cookies rest on the pan for 1-2 minutes and then remove to a wire rack for at least 5 minutes to allow them to firm up.
How to Store Baked Snickerdoodles
- ROOM TEMPERATURE: Store the cooled cookies in an airtight container for 4-5 days (we’ll be surprised if there are any leftovers after the first day – we had to hide a few to test this part!)
- FREEZER: These cookies freeze beautifully! Store cooled baked cookies in a freezer-safe bag or container for up to 3 months. Allow to thaw at room temperature for 30 minutes before serving.
- FREEZING DOUGH: Roll cookies into balls and freeze for up to 3 months, remove from freezer when ready to bake and let thaw for 30 minutes, then roll in cinnamon sugar coating and bake.
Do I need to chill Snickerdoodle cookie dough?
- Nope! This easy recipe doesn’t require chilling because of the high flour content.
- You can chill the dough, covered, for up to 24 hours before baking. The result will be a puffier cookie with less crinkly tops.
- If it’s a very hot day (or just hot in your kitchen) you can chill the dough for 10 -15 minutes and this will help the cookies retain their shape.
Tips & Hints
- Why are my Snickerdoodles dry? Dry cookies usually indicate too much flour in the dough. Be sure to lightly add flour to a measuring cup with a spoon. Never scoop flour directly from the container because that will compress it and you will end up with extra flour.
- Why are my Snickerdoodles hard? They’ve been overbaked. Start checking them at the 8-minute mark and remove them when they are still a little soft because they will continue cooking slightly on the pan while they cool. Slightly underbaked is the way to go!
- We always use parchment paper when we bake cookies to line our baking sheets. It makes clean up a breeze!
- Use room-temperature butter and eggs for the best results
- Check your cream of tartar and baking soda for freshness before using
- Want a flatter cookie? Rap the cookie sheet gently at the end of the bake to help deflate the cookies.
More fun cookie recipes and dessert ideas
- Good old-fashioned Drop Sugar Cookies with no rolling or cutting are a cinch. Frosting optional!
- A gooey Chocolate Chip Skillet Cookie is fun for a crowd
- Double Chocolate Chip Cookies are ideal for the dark chocolate lover
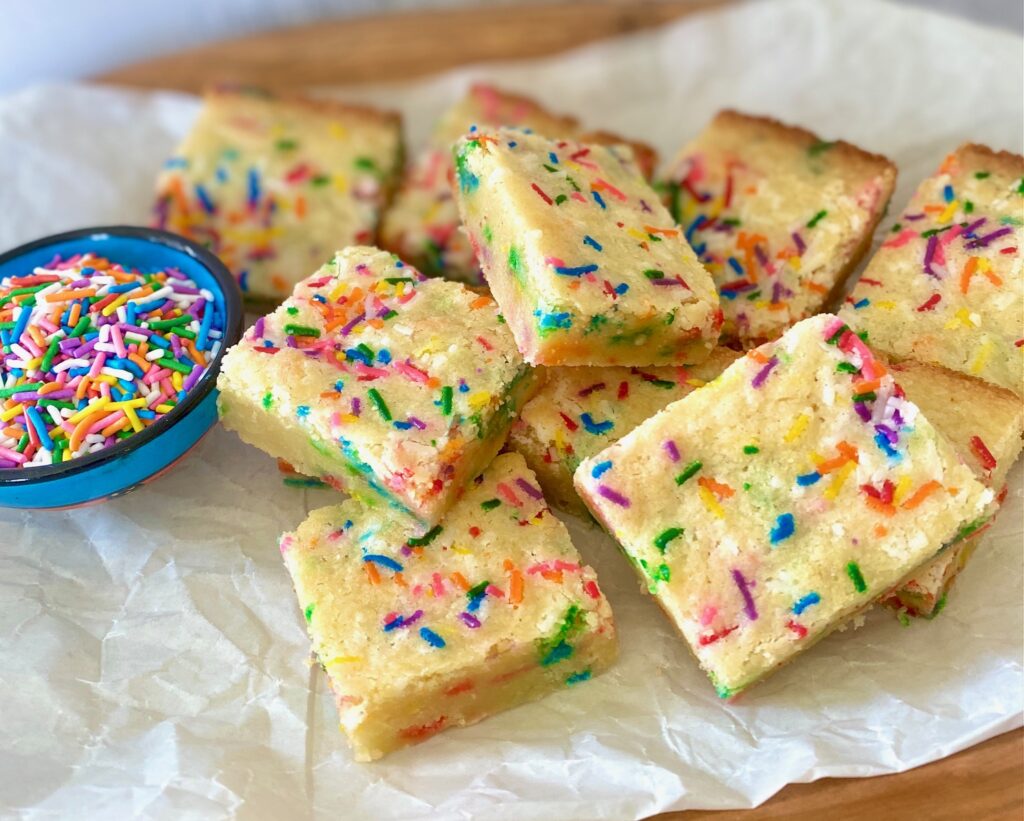
- Sugar Cookie Bars are simple and delicious. Add sprinkles for the kids!


Snickerdoodle Cookie Recipe
Ingredients
Cookie Dough:
- 2 ¾ cup all-purpose flour (spooned and leveled)
- 2 teaspoons cream of tartar
- 1½ teaspoons cinnamon
- 1 teaspoon baking soda
- ¼ teaspoon salt
- 1 cup unsalted butter, (soft but not warm)
- 1 ½ cups sugar
- 1 whole egg + 1 egg yolk (room temperature)
- 1 teaspoon vanilla extract
Cinnamon Sugar Coating:
- ¼ cup sugar
- 2 teaspoons cinnamon
Instructions
- Preheat oven to 375°F. Line baking sheets with parchment paper, if desired.
- In a stand mixer (or using a handheld mixer) cream together butter and sugar for about 3 minutes on medium speed. Add egg, egg yolk, and vanilla and blend until combined. Scrape bowl if needed.1 cup unsalted butter,, 1 ½ cups sugar, 1 whole egg + 1 egg yolk, 1 teaspoon vanilla extract
- In a medium bowl, mix the flour, cream of tartar, cinnamon, baking soda, and salt, until blended. Set aside.2 ¾ cup all-purpose flour, 2 teaspoons cream of tartar, 1 teaspoon baking soda, 1½ teaspoons cinnamon, ¼ teaspoon salt
- Add half of the dry ingredients to the creamed ingredients and gently mix on low until blended. Add remaining dry ingredients and mix until combined.
- OPTIONAL: Cover and chill dough for 30 minutes (for a thicker, puffier cookie).
- In a small bowl, mix together the Cinnamon Sugar coating.¼ cup sugar, 2 teaspoons cinnamon
- Roll dough into 2-inch balls and roll in the cinnamon sugar mixture twice to ensure they are evenly coated. A medium-size (also called #50) cookie scoop works well for 2-inch cookies.
- Place cookie balls 2 inches apart on a prepared (or ungreased) cookie sheet.
- Bake for 8-10 minutes. Let cool on a baking sheet for 2 minutes. Remove and let cool completely on a wire rack.
- Store in an airtight container for 4-5 days.
Notes
- The dough can be prepared and chilled in an airtight container for up to 24 hours before baking.
- Store baked cookies in an airtight container at room temperature for 4-5 days.
- Freeze the cooked and cooled cookies for up to 3 months.
- Freeze cookie dough, preportioned in balls for up to 3 months, thaw for 30 minutes, roll in cinnamon sugar, and bake as directed.
Nutrition
Nothing says summer like fresh berries. This perfect summer salad is an ideal light lunch, a colorful side dish for dinner, or served in a large bowl at summer BBQs.
Like our Strawberry Spinach Salad, it’s a great way to use up leftover berries!
This post may contain affiliate links. Please see our Affiliate Disclosure Policy for more details.

Ingredients Needed
One of our favorite things about this fresh summer salad is its simple ingredients and its flexibility. So feel free to mix and match your favorite add-ins!
- Mixed Greens – We think spring mix plus arugula is the perfect combination. You could also use fresh baby spinach leaves, romaine lettuce, arugula, or a combination of any/all of these
- Fresh Berries – Choose your favorite summer berries. Any combo of raspberries, blackberries, strawberries, and blueberries works! Look for plump juicy berries
- Poppy Seed Dressing – Or use a classic Lemon Vinaigrette. We have easy recipes for both but store-bought versions work too! Or use a simple olive oil and balsamic dressing
- Candied Pecans – Or candied walnuts. Make your own or use store-bought. Any type of nuts work well with berries
- OPTIONAL: crumbled blue cheese, goat cheese, or feta cheese

How to make Berry Salad with Poppy Seed Dressing
- If you’re making homemade candied pecans make them first and set them aside to cool before using
- If mixing up our Homemade Poppy Seed Dressing or Lemon Vinaigrette gather the dressing ingredients, mix, and set aside (or make ahead and store in the refrigerator in a mason jar)
- Wash berries and gently pat dry. Stem and cut fresh strawberries in half if they are large
- Add lettuce to 4 medium sized shallow bowls
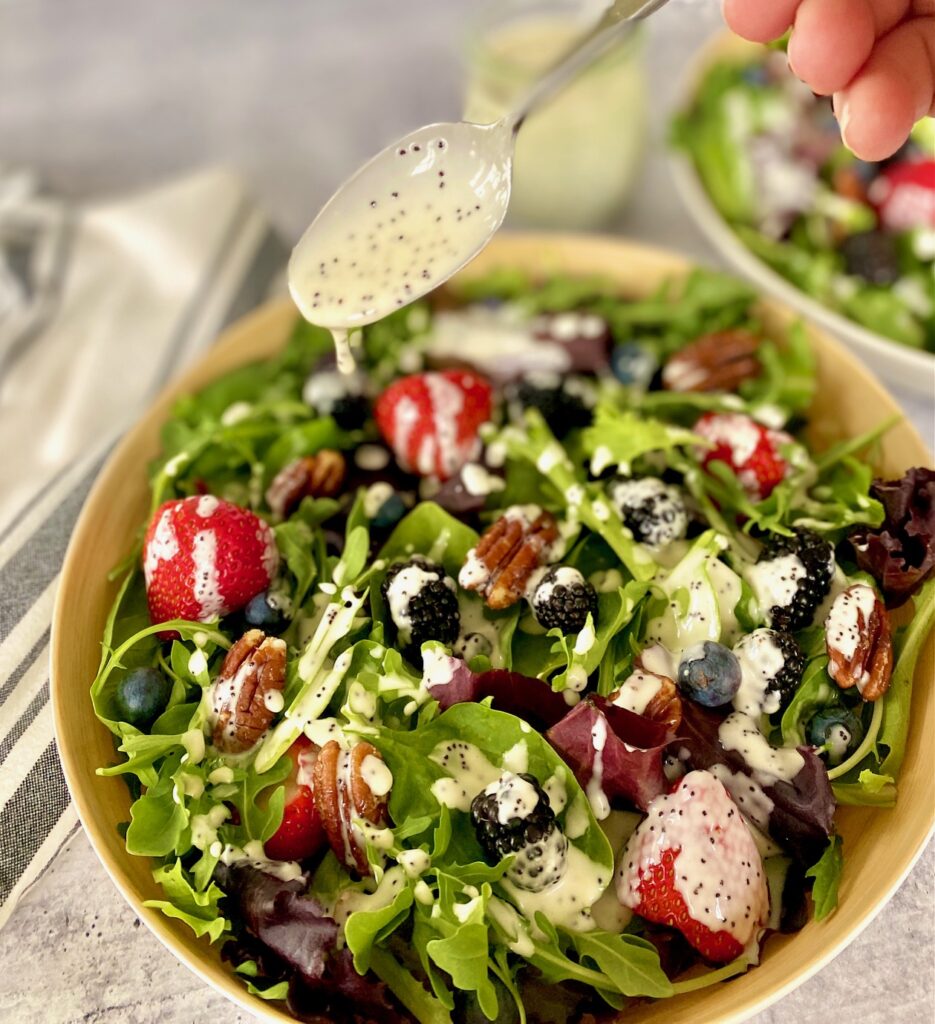
- Top with fresh delicious berries and then scatter the pecans on top
- If using, add a sprinkle of feta cheese, blue cheese, or goat cheese on top of each salad
- Drizzle liberally with dressing. Toss if desired. You can also serve the dressing on the side and let everyone add the amount they want
- If desired, for a crowd, mix everything in one big bowl instead of individual bowls and let everyone serve themselves
- Serve and savor!
Make Ahead Tips
- Make dressing up to 3 days ahead of time and store in an airtight container in the refrigerator. Shake well or whisk before serving.
- Candied or roasted nuts can be made up to 3 days in advance and stored at room temperature.
- Clean and pat dry the berries up to 1 day ahead and store in the refrigerator
- This salad should be assembled right before serving, so if you need to transport it the best way to do this is to bring the ingredients separately and toss everything with the green salad mix just before serving.

Helpful tips for making the best berry fruit salad
- Start with cold ingredients. This will help reduce the chance of your salad wilting.
- Don’t add the dressing to salads until you’re ready to serve.
- If making candied or toasted nuts be sure to allow time for them to cool before adding to the salad.
- If you want to toss the salad before serving we recommend tossing just the lettuce with the dressing and then adding the toppings. Berries are tender and fragile and can get crushed with extra tossing.
Storing Leftovers
- REFRIGERATE: Store in an airtight container for one day.
Variations
Berry Salad is super adaptable so use anything that appeals to you. Here are some ideas:
- Add a Protein – for a heartier main dish salad try adding shredded chicken, shrimp, sliced steak, or salmon
- Add more Veggies – sliced red onions, zucchini, or cucumbers
- Add a Grain – Add cooked brown rice, quinoa, or cous cous for a full meal
- Healthy Add-Ins – avocado, olives, and roasted garbanzo beans
- Salad Dressings – use any type that you love!

What to serve with this Fresh Berry Salad Recipe
Serve as the perfect side dish with any protein! Great for outdoor summer dining. Try it with any of these great recipes.
- Cedar Plank Salmon has a smoky flavor that pairs well with bright berries
- This light salad is a good match for Garlic Steak Bites
- Pairing with Air Fryer Pork Chops or Pan Seared Scallops makes this a true 15-minute meal

Fresh Berry Salad
Ingredients
- 6 ounces mixed greens (or romaine)
- 2 cups fresh berries (blueberries, blackberries, strawberries, raspberries)
- ½ cup candied pecans or walnuts recipe link below, or use a store-bought version
- ½ cup poppy seed dressing or lemon vinaigrette recipe links below, or use a store-bought version
OPTIONAL:
- ¼ cup blue cheese, goat cheese, or feta cheese crumbled
Instructions
- Make the dressing and candied pecans, if making homemade, and set aside½ cup candied pecans or walnuts
- In 4 individual bowls add the mixed greens, top with the mixed berries, scatter the pecans (and optional cheese).6 ounces mixed greens, 2 cups fresh berries, ½ cup poppy seed dressing or lemon vinaigrette, ¼ cup blue cheese, goat cheese, or feta cheese
- Drizzle the dressing over the top of the salad. Or leave the dressing on the side and allow each person to add their own.
Notes
- Candied Pecans are easy to make at home and can be made up to 3 days ahead of time and stored in an airtight container.
- Lemon Vinaigrette or Poppy Seed Dressing pair well and these are the links to our homemade versions.
- Dressing can be made ahead and refrigerated in an airtight container for up to one week. Shake or stir before serving.
- Calorie and nutrient count does not include optional cheese.
Nutrition
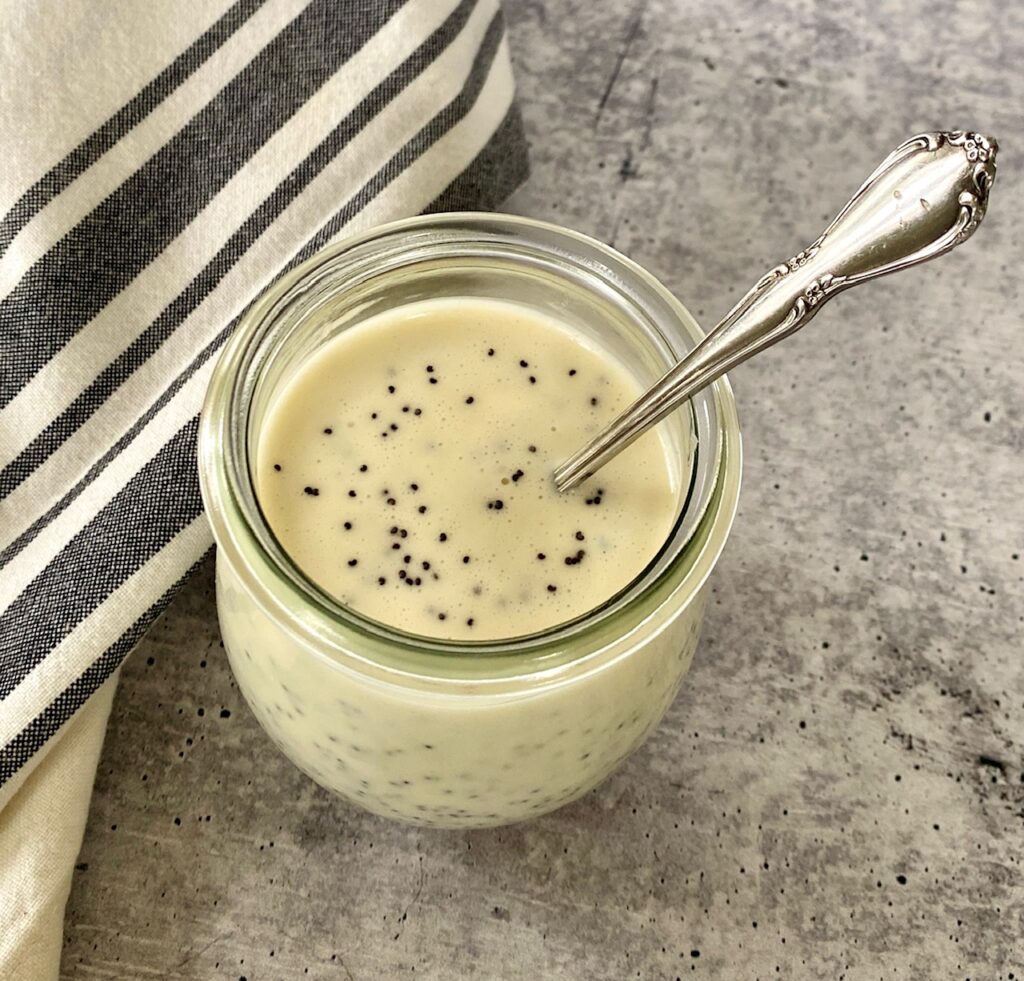
With its sweet and tangy taste, this dressing has become a staple as a drizzle over mixed greens or as a marinade on grilled chicken or vegetables.
Say goodbye to store-bought dressings and whip up a batch of this delicious homemade poppy seed dressing recipe with fresh ingredients instead. No mystery ingredients in homemade dressings!

- Tiny poppy seeds add a slight crunch and nutty flavor to this creamy dressing, making it stand out from other dressings.
- The sweet and tangy taste of the vinegar and sugar creates the perfect balance of flavors.
Ingredients Needed
This recipe makes about one cup of dressing but can easily be doubled. See the printable recipe card below for the exact quantities, nutrient information, and serving size.
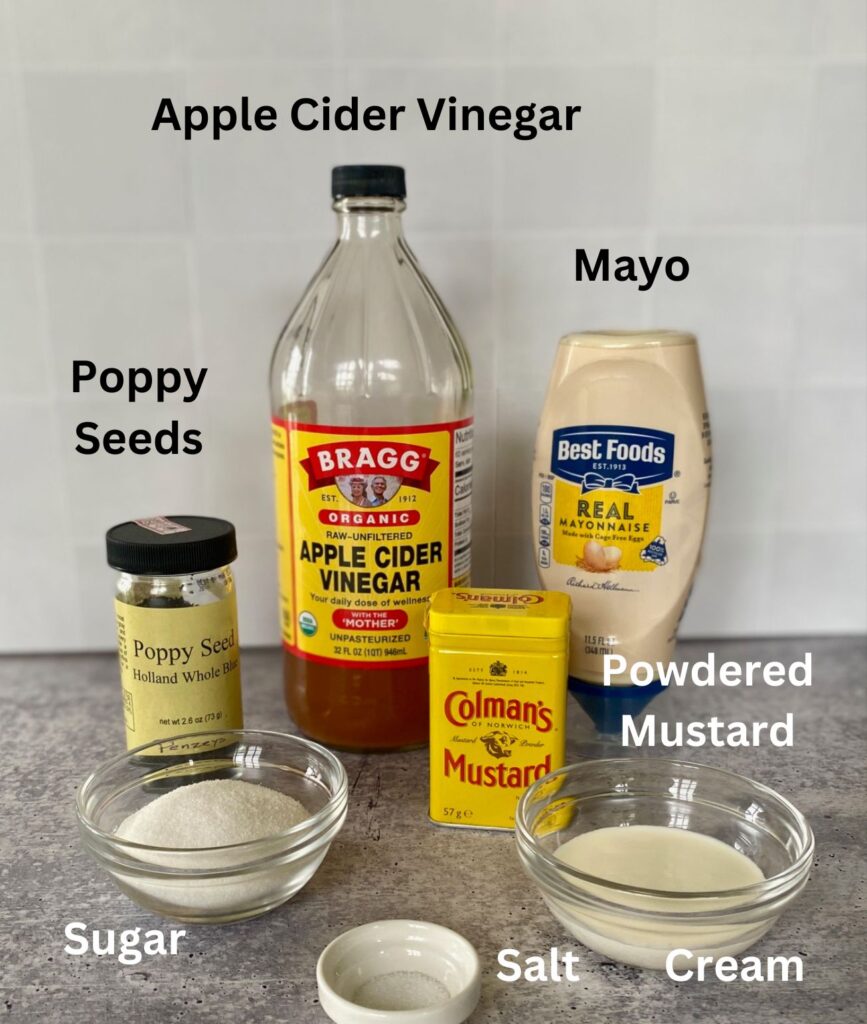
- Apple Cider Vinegar – alternately you can use white wine vinegar or white vinegar
- Sugar – or use honey or agave
- Cream – or half & half
- Dried Mustard – if you don’t have any dried mustard use Dijon mustard instead
- Salt – just a pinch to balance the sweetness
- Mayonnaise – we like Best Foods or Dukes
- Poppy Seeds – the star of the show!
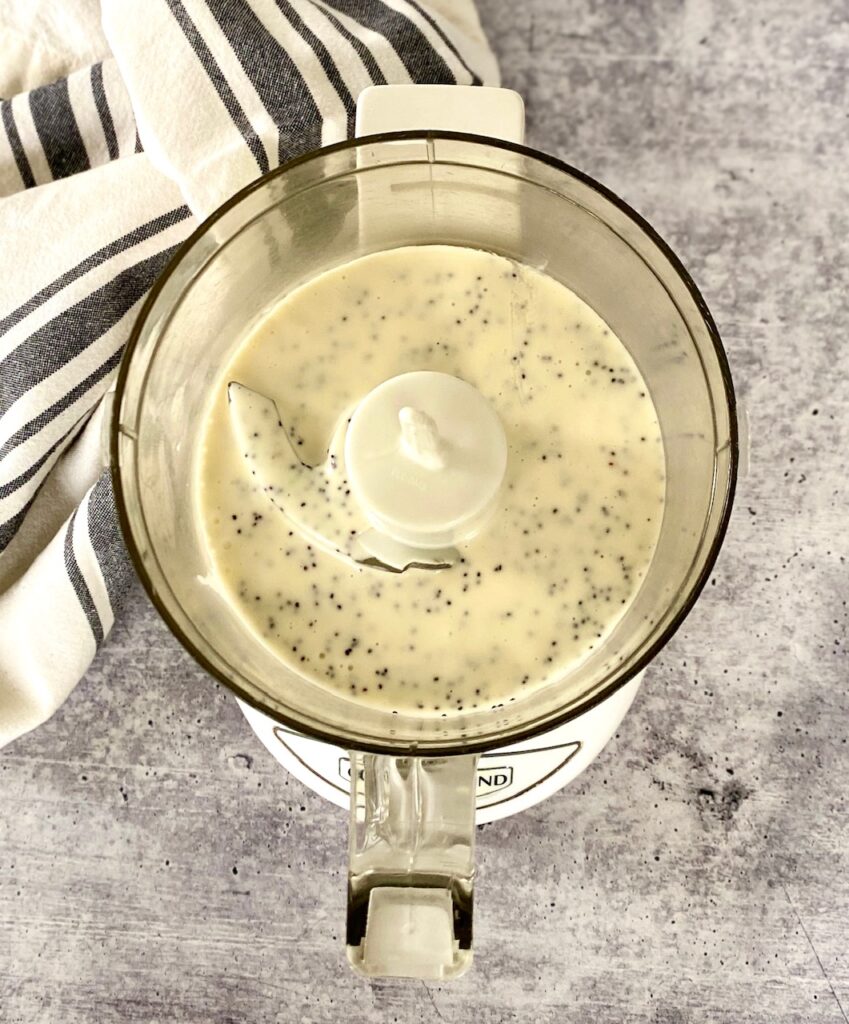
Step-by-step instructions to make Poppyseed Salad Dressing
- In the bowl of a mini food processor or blender add the vinegar, salt, and sugar. Allow it to sit for a few minutes so that the salt and sugar begin to dissolve. You can also make this dressing in a medium bowl and stir with a whisk.
- Add the mayonnaise, cream, and dry mustard.
- Blend until smooth, creamy, and completely combined. Taste and add more salt to match your personal preference.
- Add the poppy seeds and blend for a few seconds to combine, or stir them in by hand. Try to avoid overprocessing the seeds.
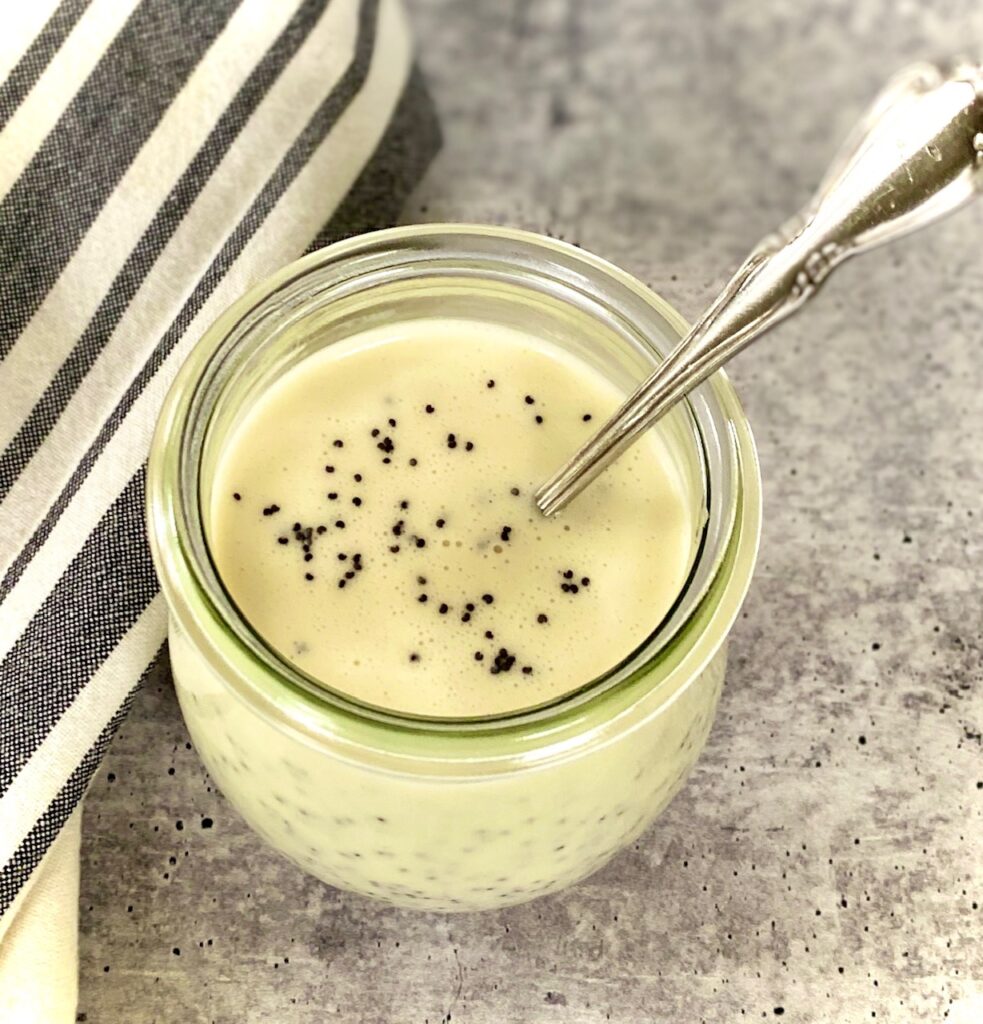
- Transfer to a mason jar or other airtight container.
- If not using the dressing right away store in the refrigerator for up to 7 days and shake well, or stir, before serving.
Variation Ideas
- VINEGAR – use white wine vinegar in place of apple cider vinegar
- WHITE SUGAR – swap with honey or agave, although both of these choices will be sweeter
- DRY MUSTARD – use Dijon-style mustard instead
- CREAM – use half & half or whole milk. Buttermilk would also make a nice tangy alternative
- HONEY MUSTARD POPPY SEED DRESSING – add 2 Tablespoons of honey and 1 Tablespoon of Dijon mustard to the recipe
How to make a thicker dressing:
- This homemade creamy poppyseed dressing recipe won’t be as thick as a store-bought version because those contain thickeners such as xanthan gum, titanium dioxide, and soybean oil.
- We like to make it in a mini food processor (or blender) to help create a slightly thicker dressing. You can also add more mayo, or cut back on the cream, for a thicker result, but keep in mind that will change the flavor balance.
Storing the Dressing
- REFRIGERATE: Store for up to 7 days in a sealed airtight container. We suggest a glass jar or container. Shake well before using.
Best ways to use Creamy Poppy Seed Dressing
- We LOVE this dressing on a crunchy kale salad
- Perfect on our Strawberry Spinach Salad
- Drizzle on this Arugula Beet Salad for a tangy twist
- Add to BLT sandwich or chicken salad sandwich
- Make a fresh summer Berry Salad like the one pictured here (or any fruit salad) with a sprinkling of our Candied Pecans on top!
Poppy Seed Dressing
Equipment
- Small Food Processor optional
Ingredients
- ¾ cup mayonnaise
- 2 Tablespoons cream (or 1/2 & 1/2)
- 3 Tablespoons sugar (or 2 TBS honey/agave)
- 4 Tablespoons apple cider vinegar or white vinegar
- ½ teaspoon dry mustard or dijon mustard
- ½ teaspoon salt
- 1 Tablespoon poppy seeds (more to taste)
Instructions
- In a medium bowl or bowl of a small food processor (or blender) add the vinegar, sugar, and salt. Allow mixture to sit for about 2 minutes to dissolve salt and sugar.3 Tablespoons sugar, 4 Tablespoons apple cider vinegar, ½ teaspoon salt
- Add mayonnaise, cream, and dry mustard. Blend until creamy.¾ cup mayonnaise, 2 Tablespoons cream, ½ teaspoon dry mustard
- Stir in poppy seeds and blend again for 5 seconds or blend by hand.1 Tablespoon poppy seeds
- Transfer to an airtight container. Refrigerate if not using immediately. Shake well before serving.
- Dressing can be stored for about 7 days in the refrigerator
Notes
- This recipe makes about 1 cup of dressing and can be doubled.
- Want a thicker dressing? Add up to 1/4 cup more mayonnaise or less cream
- Keep tightly sealed in the refrigerator for up to 7 days. We recommend a glass mason jar.
- Shake well before using.
Nutrition
This classic cocktail, made with 4 ingredients, including gin, champagne, lemon juice, and simple syrup, is the perfect blend of citrusy sweetness and bubbly effervescence
Whether you’re looking to impress guests at your next dinner party or simply craving a delicious cocktail on a warm evening, mastering the art of making French 75’s will elevate your mixology skills.
Grab your shaker and get ready to learn how to craft this timeless libation with our foolproof recipe

This post may contain affiliate links. Please see our affiliate disclosure for more details. We only recommend products we love and use.
Ingredients Needed:
This recipe makes 2 cocktails in a champagne flute or coupe glass. See the printable recipe card below for exact quantities and instructions. Just 4 simple ingredients needed.

- Gin – choose a dry gin
- Fresh Lemon Juice – This is the time for freshly squeezed lemon juice
- Simple Syrup – For sweetness. It’s easy to make your own simple syrup. It’s simply sugar and water, heated together until the sugar dissolves, then cooled
- Champagne – Enough to top the glass. We prefer Brut champagne because it has plenty of bubbles, is not too sweet, and is a little dry (see below for sparkling wine substitution ideas). The amount will depend on the size of your glass
- Lemon Twist – For garnish, see below for instructions
How To Make a Classic French 75
- Prepare the Simple Syrup and cool to room temperature
- Prepare the lemon twists with the lemon peel (before you squeeze the juice from the lemon) and then squeeze the lemon juice
- Fill a cocktail shaker halfway with ice
- Add the gin, lemon juice, and simple syrup to the shaker
- Shake well until chilled (20-30 seconds)
- Strain into a champagne flute or other glass
- Top off the glass with Champagne
- Garnish with a lemon twist and enjoy!


Common Substitutions
- French 76 Cocktail – substitute vodka in place of the gin
- Mexican 75 Cocktail – this variation uses lime juice instead of lemon juice and tequila instead of gin
- Use Cognac in place of gin – this is thought to be how the original recipe was made
- Elderflower syrup or liqueur in place of simple syrup, such as St. Germain
- In place of Champagne try Cava, Prosecco, or any dry sparkling wine
- In place of the lemon twist use rosemary sprigs for color
Tips to follow for the perfect cocktail at home
- Use high-quality ingredients: Good gin, fresh lemons, dry Champagne
- Chill the gin and Champagne for best results
- Shake well: Shake the drink vigorously with ice to properly chill and dilute the ingredients. This will also create a nice frothy texture
- Room-temperature simple syrup works best for blending
- Chill the glassware if serving on a warm day
- Making for a crowd? Prep everything ahead of time and make the cocktails in batches for the best results. Simple syrup and lemon juice can be stored in the refrigerator for up to 3 days in advance.

How to make a lemon twist garnish
- Peel a straight strip of lemon peel from the lemon with a paring knife, or use a channel knife to peel around the lemon as we did in the photo below. Remove the white pith and clean up the edges
- Curl the peel around the handle of a spoon or a straw while you prepare the cocktail
- Here is a quick video with easy instructions for making them

Why is it called a French 75?
- This elegant cocktail recipe dates back to 1915 and World War 1 and was supposedly created at Harry’s New York Bar in Paris, by Harry Craddock. This drink has stood the test of time because of its refreshing sophisticated flavor profile.
- It’s named after the French 75-millimeter light field weapon used by the French army. The weapon was light, quick, and “packed a punch” just like this cocktail!
What is the difference between a French 75 and a French Martini?
- The gorgeous French Martini is sweeter and fruit-forward with Chambord (a black raspberry liqueur), pineapple juice, and vodka. It’s an easy drink to make as well, so click over to see the full step-by-step.
- The French 75 is less sweet with tart lemon juice, gin, and Champagne
The best glassware to use:
- Traditional Champagne Flute: The tall, slender shape allows the effervescence of the champagne to be showcased beautifully. This not only enhances the visual appeal of the cocktail but also helps preserve its bubbly nature longer.
- Coupe Glass: The wide bowl-like shape of the coupe glass provides ample space for the bubbly and looks very old-school elegant!
- In a pinch use a tall glass

Other Champagne Cocktails to try
We love the festive nature of cocktails that use Champagne! They are light, fun, and not just for special occasions. They’re perfect for warm nights, girls nights, happy hours, and brunch. Here are a few of our favorites:


French 75 Cocktail
Equipment
- 1 Cocktail Shaker
Ingredients
- 2 ounces Gin, chilled
- 1 ounce Lemon Juice, freshly squeezed
- 1 ounce Simple Syrup
- 4-6 ounces Brut Champagne, depending on size of glass, chilled (or Cava, Prosecco, or Sparkling Wine)
- 2 Lemon Twists for garnish
Instructions
- Prepare simple syrup and cool to room temperature while preparing cocktail
- Make lemon twist garnishes (be sure to do this before you squeeze the lemons), and squeeze the lemons for lemon juice
- Fill a shaker halfway with ice and add gin, lemon juice, and simple syrup.
- Place lid on shaker and shake vigorously until well chilled, about 30 seconds
- Strain into champagne glasses and top with Champagne
- Garnish each glass with a lemon twist and serve
Notes
- How to make Simple Syrup
- Well chilled Champagne and Gin make the best cocktails
- Simple Syrup works best at room temperature for cocktails
- Champagne amount will vary based on champagne glass size.
Nutrition
It’s prepped and on the table in 20 minutes!
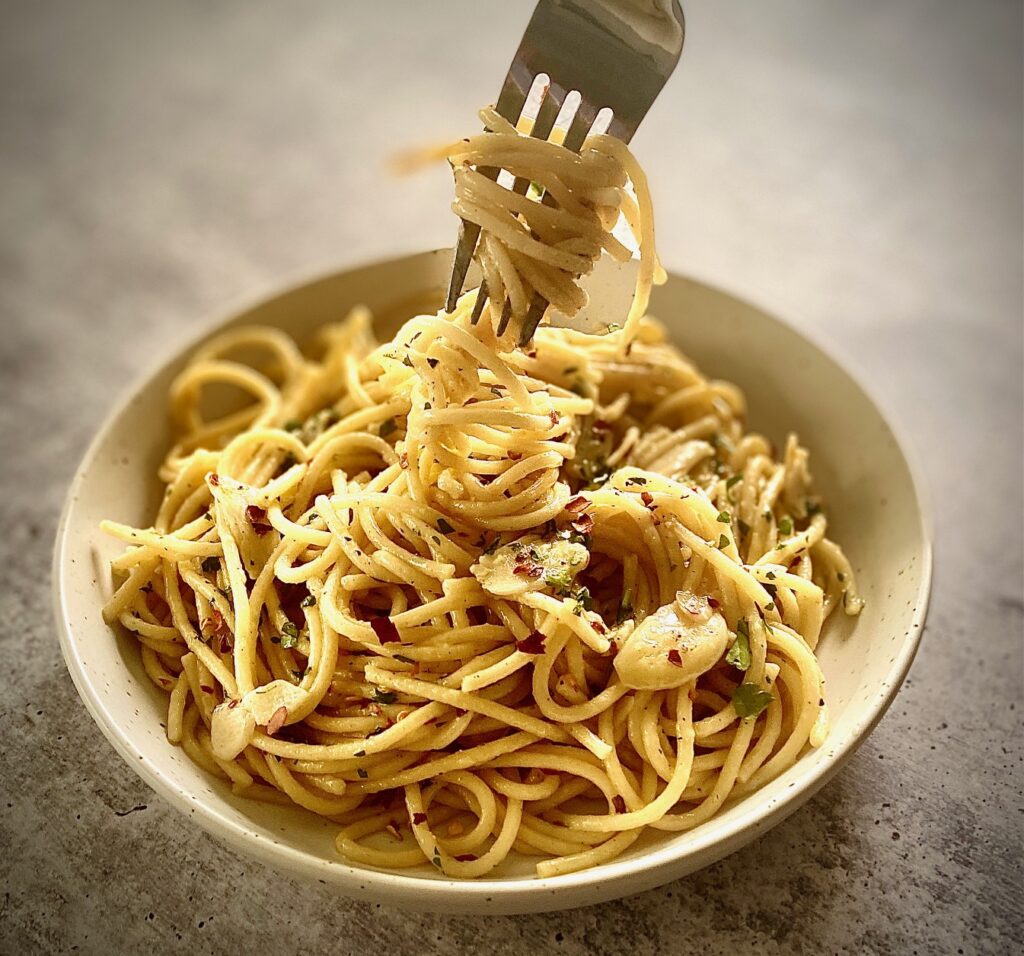
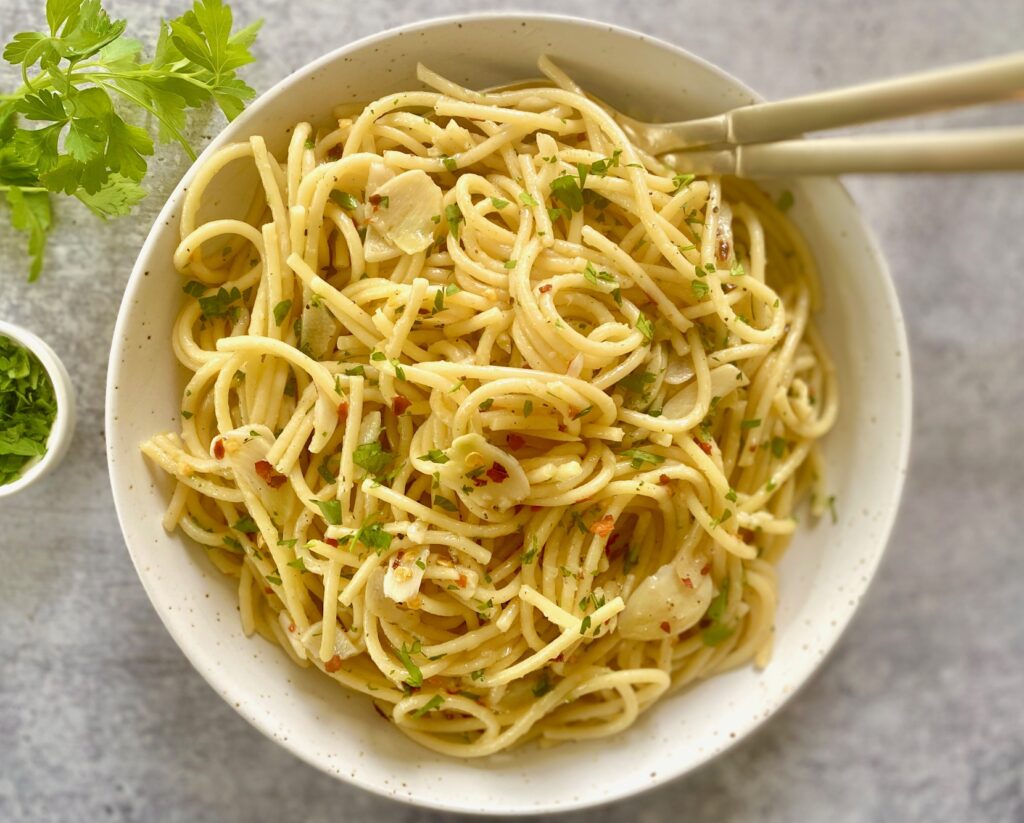
This simple and delicious Neapolitan Italian dish is popular all over Naples (and Rome) but it’s a cinch to make at home with basic pantry staples. Trust us, you’re going to be hooked!
What is Aglio Olio Sauce made of? Its main ingredients are simple ingredients: Aglio (garlic) and Olio (oil) are the foundations of this recipe.
The traditional pasta is a basic spaghetti noodle. The secret to its deliciousness is using the hot pasta water in the sauce, which is combined with the hot olive oil. The added starch in the water creates an emulsion for a silky sauce.
Get ready to peel some garlic!
Ingredients
For the exact quantities and full recipe see the recipe card below.
- Spaghetti – Dried pasta works best for this recipe and while spaghetti is traditional you can use fettuccine or linguine
- Extra Virgin Olive Oil – we recommend using your best extra-virgin olive oil for this recipe because olive oil is the star of the show here!
- Garlic – we LOVE a lot of garlic so we use 10-12 cloves of garlic. If that seems like a lot for your taste it’s okay to cut back to 6-8 cloves
- Crushed Red Pepper Flakes – traditionally, in Italy, they use fresh peperoncini (red chile peppers) for spaghetti aglio e olio, but they can be hard to find in the U.S., so we’ve substituted red pepper flakes. Add more or less depending on your desired spice level
- Sea Salt and Black Pepper – the pasta water needs a generous seasoning of salt (a must for a tasty finished sauce), and we’ll use it in the sauce too. You can substitute kosher salt, as well
- OPTIONAL, Fresh Lemon Juice – just a small amount but it really brightens up this dish so we highly recommend it
- OPTIONAL, but recommended – Grated Parmesan Cheese and Fresh Parsley – neither are traditional, or required, but…cheese…need we say more?

How to make easy Pasta Aglio e Olio
This dish comes together quickly so have all the ingredients prepped and ready before the cooking starts. We’ll make the sauce while the pasta is boiling.
- COOK THE PASTA: Bring a large pot of salted water to a boil. Be sure to salt the water generously (trust us, don’t skip this step!). Add the pasta to the boiling water and cook for about 8-10 minutes or until al dente (do not drain).
- PREP: Peel and thinly slice the garlic cloves (use 8-12 depending on your personal taste, we use 10). Roughly chop the parsley leaves and grate the Parmesan. Set aside.
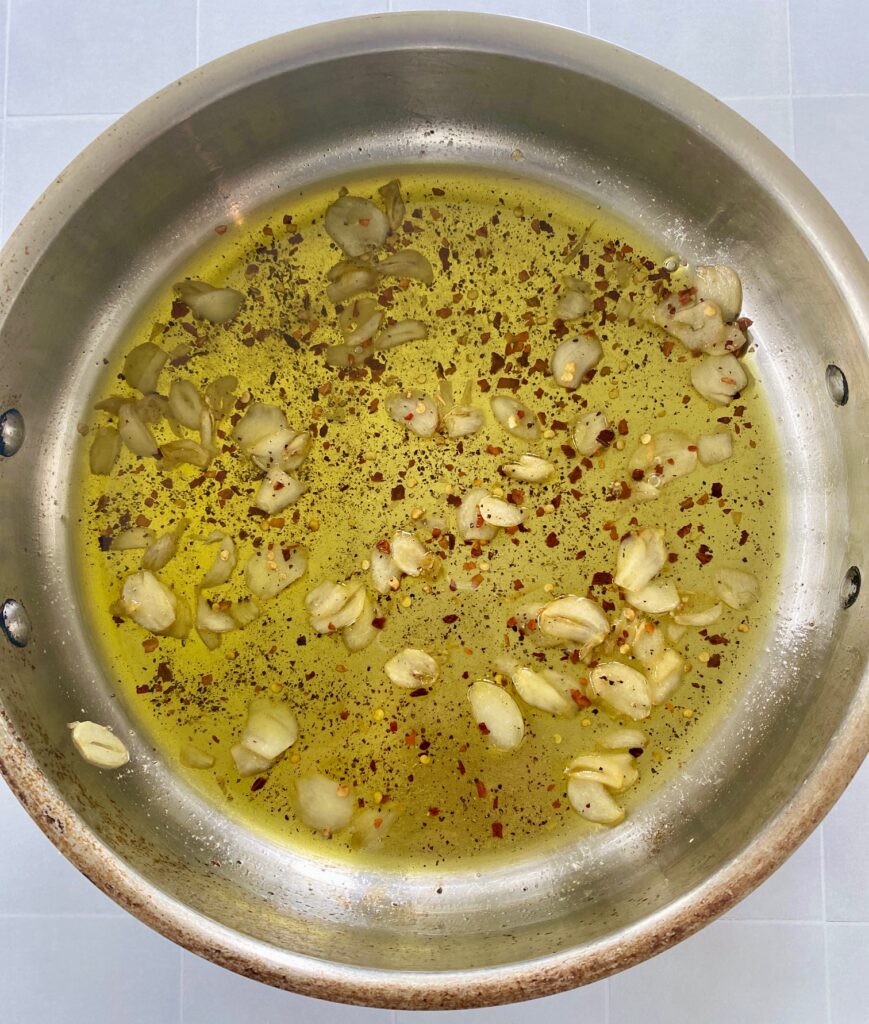
- MAKE THE SAUCE: While the pasta cooks you will make the garlic oil by heating the olive oil over medium-low in a large sauté pan or heavy-bottomed large skillet.
- Once oil is heated add the sliced garlic cloves and cook them for 3-4 minutes, or until they are lightly golden. It’s IMPORTANT to stir constantly during this time to ensure they don’t burn or overcook, so don’t walk away. You’re going to babysit them, but trust us, it’s the best smell and it’s worth it!
- Add red pepper flakes, 1 teaspoon salt, and 1 teaspoon pepper to the garlic and cook another 30-45 seconds, stirring constantly.
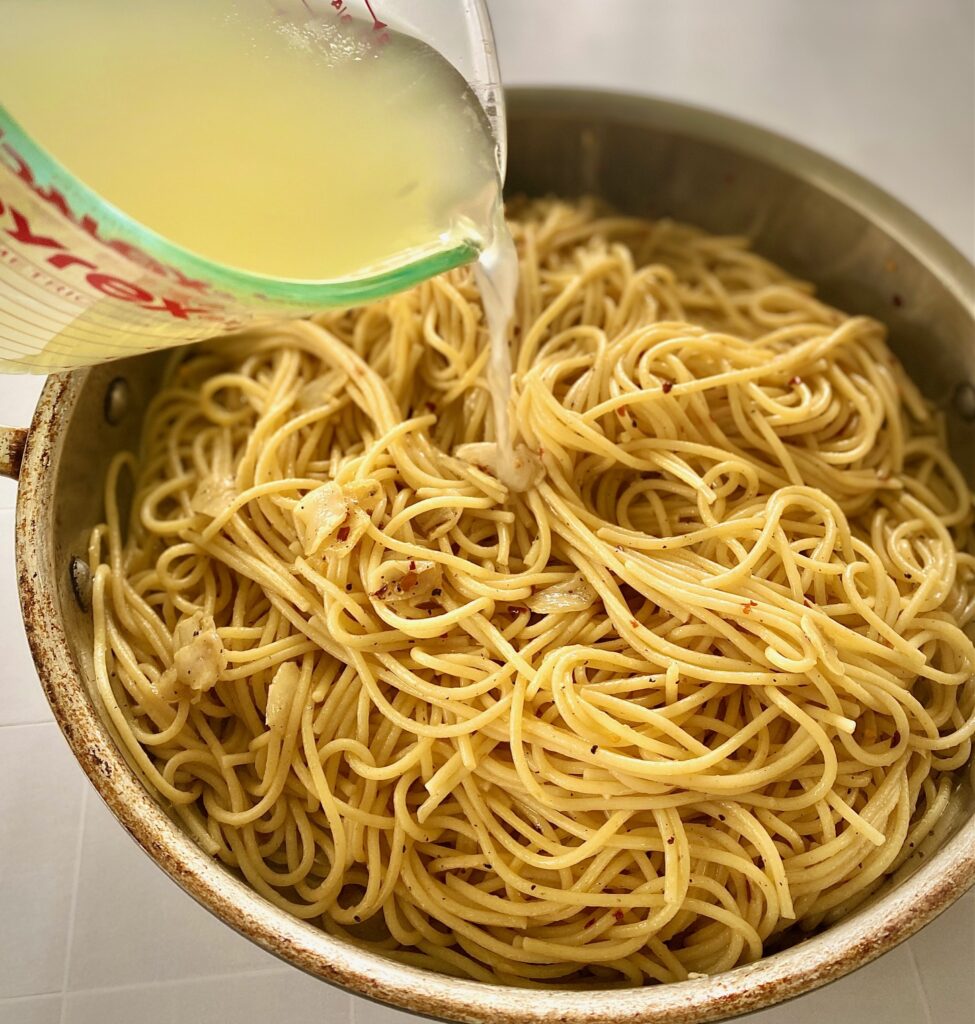
- ADD THE PASTA: Using tongs remove the al dente cooked pasta from the pot and add directly to the sauté pan. Turn up to medium heat.
- Stir to completely coat the pasta with the oil and garlic and then add 1/2 cup of the hot starchy pasta water to the pan. Toss everything together and cook slightly to create a silky sauce.
- If needed, add up to 1/4 cup more of hot reserved pasta water to get the consistency you need.
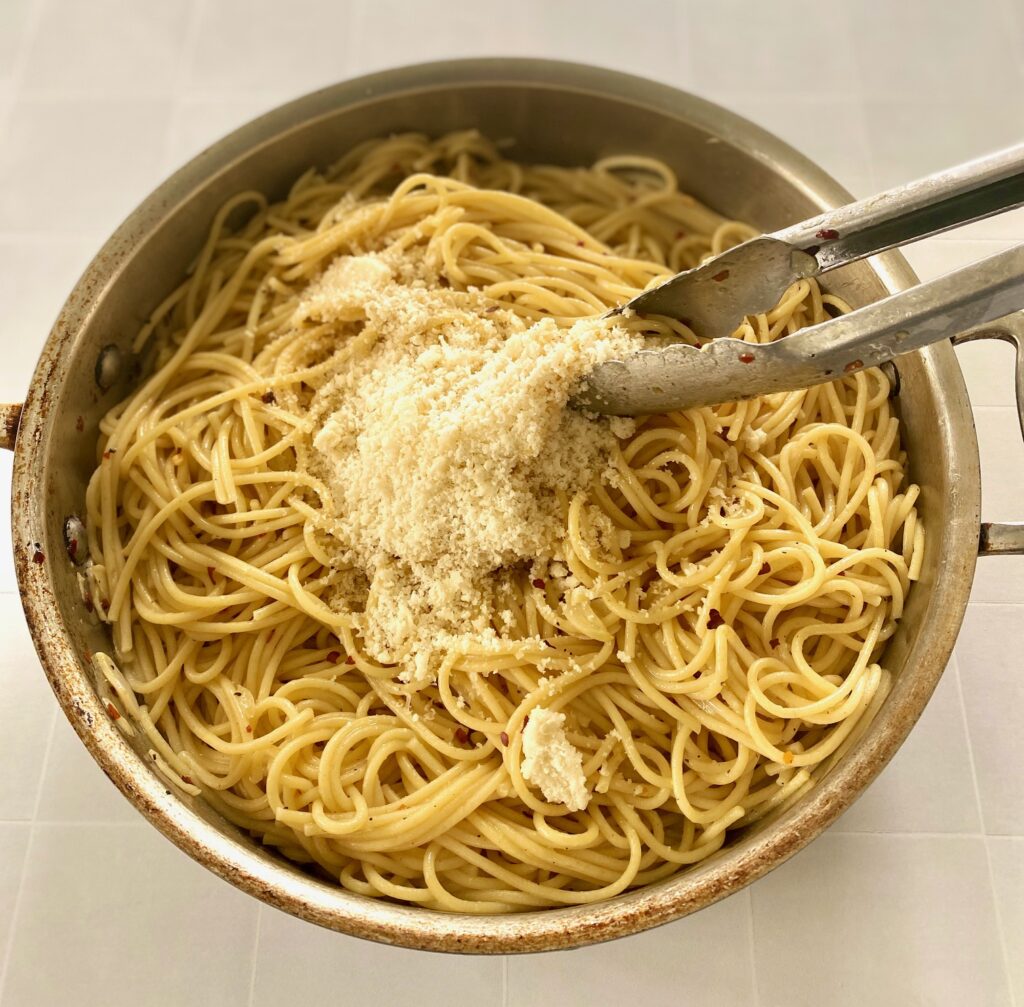
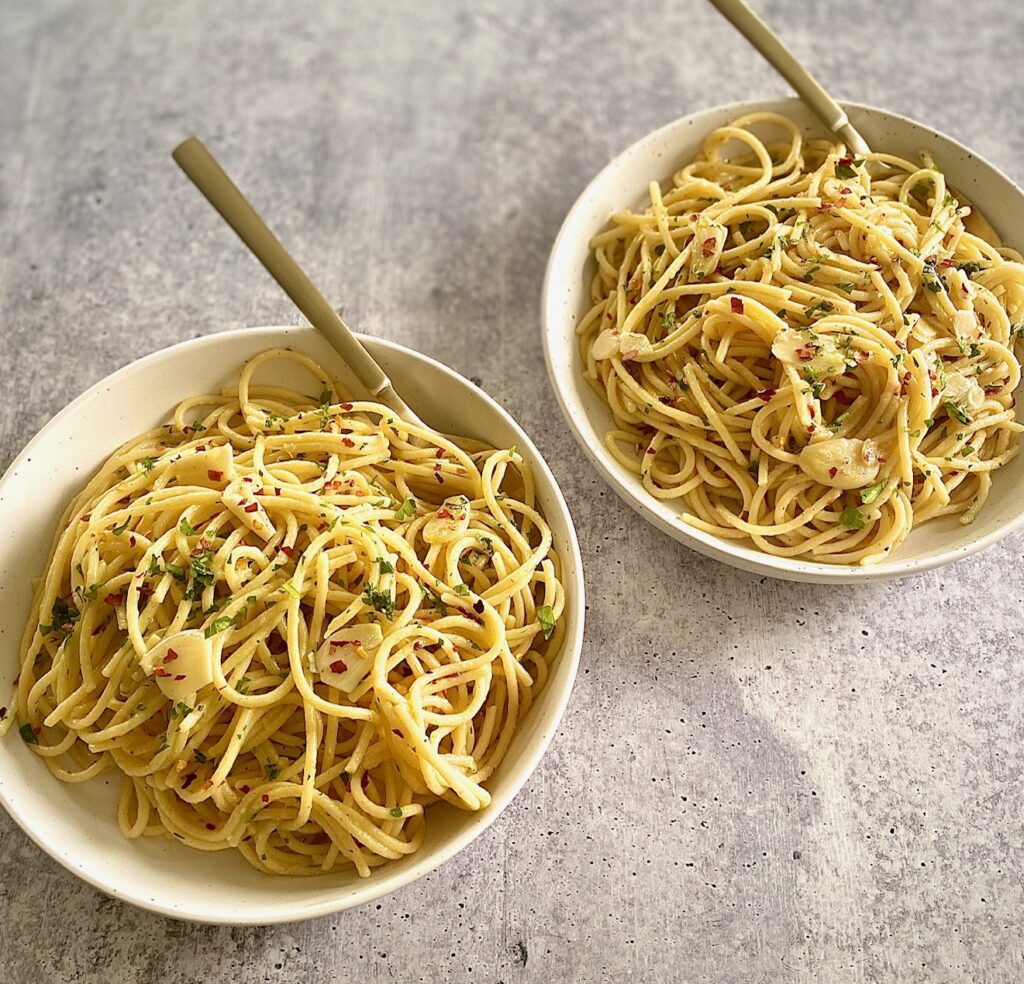
- FINISHING THE DISH AND GARNISH: Turn off the heat, and if desired, add the lemon juice, grated Parmesan, and chopped parsley. Taste the pasta to see if any additional salt, pepper, or red pepper flakes are needed.
- Serve piping hot in shallow bowls.


Storage and Leftovers
Have leftovers? Lucky you! This traditional Italian pasta dish easily reheats.
- Store in an airtight container in the refrigerator for up to 3 days.
- Gently reheat again before serving.
Chefs Tips
- Use grated cheese rather than shredded because it will blend better
- Generously salt the pasta water. It is essential to the flavor of the finished dish!
- Be sure the garlic is cooked just until golden but not browned. Depending on your individual stove top and sauté pan this can take anywhere between 3-6 minutes.
Additions and Substitution Ideas
- Add 2 finely chopped anchovies to the cooked garlic for an umami flavor bomb!
- Any cooked protein can be added for a complete meal. We love garlic shrimp or shredded chicken
- Boost your nutrients with added veggies, such as cherry tomatoes, oven-dried tomatoes, sliced zucchini, sliced mushrooms, cooked broccoli, kale, or arugula. (Just toss them into the hot oil before the pasta so they cook lightly)
- If you prefer the texture of chopped garlic, instead of sliced, that works too. We’ve had success using smashed garlic cloves, as well
- Use lemon zest along with the lemon juice for added flavor and brightness
Your Sommelier suggestions for wine pairings
When pairing this Spaghetti Aglio e Olio recipe it’s best to keep in mind the spicy nature of this dish and match it with a dry wine. You could also consider your side dishes when pairing. Here are our favorite varietals.
- WHITE VARIETALS: Pinot Grigio or Sauvignon Blanc
- RED VARIETALS: Zinfandel or an Italian Primitivo
What to serve with Pasta Aglio e Olio
This classic pasta dish is like a blank slate but it’s slightly rich, so we like to keep our sides simple. Our favorite pairings:
- Grilled Vegetables, Oven Roasted Brussel Sprouts or Asparagus
- Our sunny Tricolore Salad with Oranges, a fresh arugula salad with the world’s best Lemon Vinaigrette, or fresh Citrus Salad
Other great easy Main Dishes and easy Pasta Recipes to try
- Homemade Marinara Sauce – perfect over any pasta
- Pesto Gnocchi – full of fresh herb flavor
- Garlic Mushroom Pasta – great as a meatless option for dinner
- Classic Bolognese Sauce – easy to make in the Instant Pot or on the stovetop

Pasta Aglio e Olio
Ingredients
- 16 ounces dried spaghetti
- 4 ounces extra virgin olive oil
- 8 -10 cloves garlic peeled and cut into thin slivers
- 1 teaspoon crushed red pepper flakes (add more or less to taste)
- 1 teaspoon sea salt
- 1 teaspoon black pepper
Optional, but recommended:
- ½ cup Parmesan, grated
- ⅓ cup Flat leaf Italian parsley, roughly chopped
- 1 Tablespoon lemon juice, freshly squeezed
Instructions
- Bring a large pot of very generously salted water to a boil.
- Peel and thinly slice garlic cloves. Roughly chop parsley. Squeeze lemon juice. Set aside.
- Once water is boiling add the spaghetti and cook until al dente, 8-10 minutes.
- While pasta is boiling heat olive oil in a large saute pan or heavy-bottomed skillet over medium-low heat. Add garlic slices, stir frequently to prevent any burning, and cook for about 3-4 minutes, until the garlic turns golden in color.
- Stir in red pepper flakes, sea salt, and black pepper and cook for 30-45 seconds, stirring continuously.
- Using tongs, add cooked pasta to the garlic oil mixture, stir to coat completely.Turn the heat up to medium and add 1/2 cup of the hot pasta water to the pan. Toss to coat and stir until the sauce becomes silky. Add a little more pasta water if needed.
- Turn off the heat and stir in the optional lemon juice, parsley, and Parmesan, if desired. Toss again to coat. Check seasonings and add more red pepper flakes, salt, or pepper if needed.
- Serve hot in shallow bowls with extra grated Parmesan, if desired.
Notes
- Nutritional information does not include optional Parmesan, parsley, and lemon juice.
- Store leftovers in the refrigerator in an airtight container for up to 3 days and gently reheat to serve.
- We use 10-12 cloves of garlic, but you can use as few as 8, to suit your taste.
- The traditional Italian version is made without cheese and with fresh red peperoncini instead of red pepper flakes, so feel free to substitute these sliced peppers if they are available in your area.
- If preferred, use smashed or chopped garlic cloves.
Nutrition
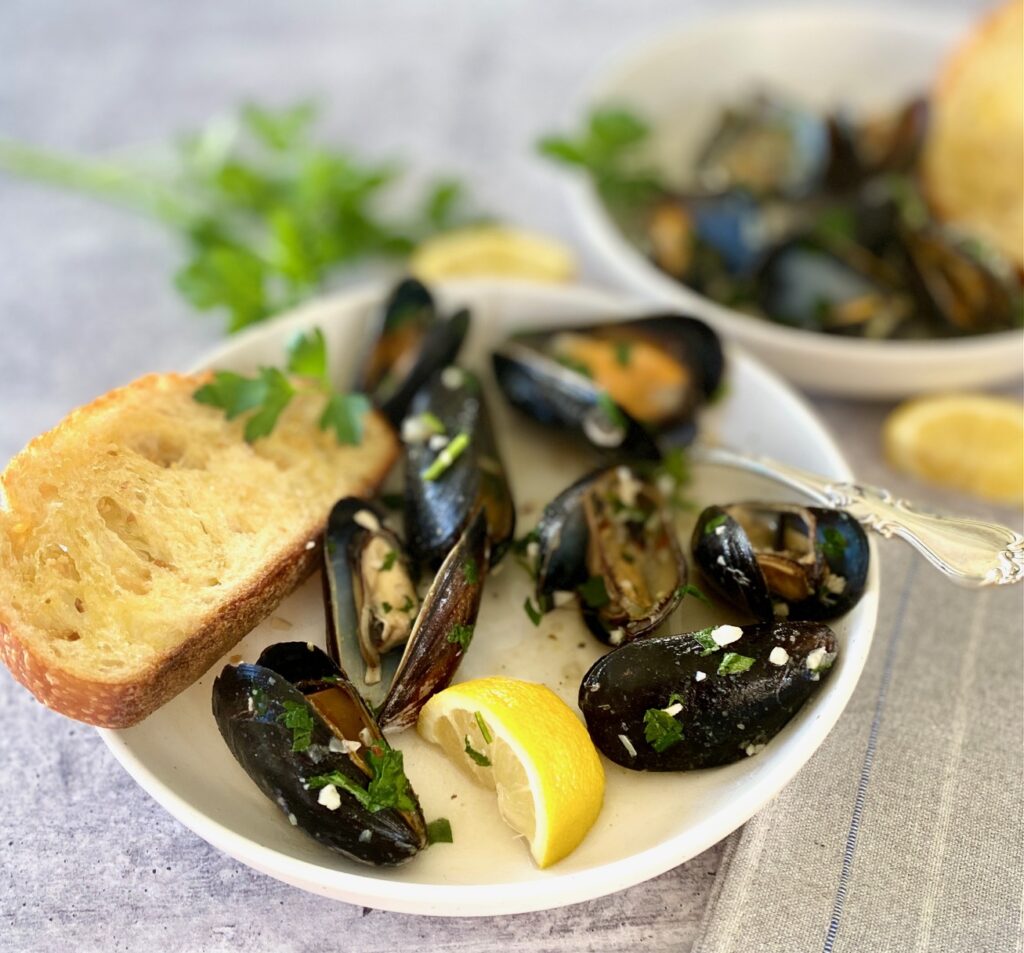
This dish looks fancy but it’s a simple recipe to prepare!
Pair these delicious mussels with plenty of rustic toasted garlic bread for dipping in the delicious white wine garlic sauce. It’s the ideal dinner but also makes a great appetizer.
Ingredients Needed
Plan on 1 pound of mussels per person, for a main course, or 1/2 pound per person for an appetizer portion. See the exact quantities in the recipe card below.

- Mussels – we used 4 pounds for this mussels recipe. See below for choosing the best mussels and how to clean them
- Olive Oil – we chose extra virgin olive oil
- Shallots and Garlic Cloves – Both of these aromatic add traditional flavors
- Salt, Black Pepper, Italian Seasoning, Red Pepper Flakes – we use sea salt
- Dry White Wine – such as Sauvignon Blanc, Pinot Grigio, or a crisp Chardonnay. This is the primary steaming liquid for white wine mussels so pick one you would actually drink, as well.
- Vegetable Stock or Chicken Stock – both work well for additional cooking liquid
- Butter – unsalted is best, but it’s okay to use salted if that’s all you have on hand
- Fresh Parsley – be sure to use flat-leaf fresh parsley for a great pop of color and freshness
- Rustic Bread – crusty bread with garlic, for dunking, is a must for getting every last drop of all the garlicky white wine broth!
Make the Garlic Bread First
- Preheat the oven to 375˚F.
- Prep the garlic bread by brushing with olive oil and topping with chopped garlic.
- Cook bread while steaming the mussels so that everything is ready to serve at the same time.


How to make Steamed Mussels in White Wine Sauce
Prep the mussels and other ingredients
- Clean and scrub the mussels under very cold water in a colander and drain.
- If any mussels are open tap the open shells lightly and if they do not close discard them. See below for more details about choosing and cleaning mussels.
- Chop the shallots, garlic, and parsley leaves. Cube the 3 tbsp of butter.
Cook the Mussels
- In a deep large pot or Dutch oven (with a lid), heat 2 Tablespoons of olive oil over medium heat until it is shimmering.
- Add the chopped shallots, and sauté for 1 minute, stirring to coat.
- Sprinkle in salt, pepper, Italian seasoning, red pepper flakes, and garlic. Cook for 2 more minutes, until garlic is golden, stirring to prevent burning.
- Add the cleaned mussels and stir gently to coat in the garlic mixture.
- Pour in the broth and white wine, stir again to coat, and then cover with a lid.

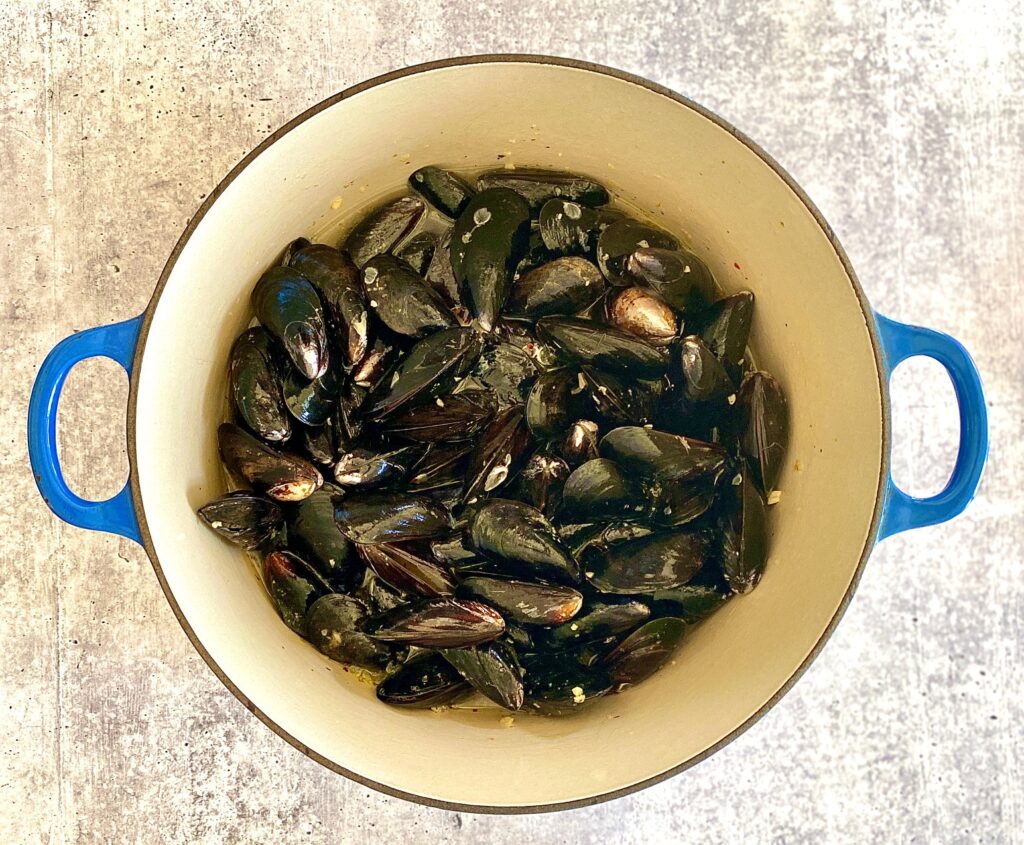
- Steam for 5-7 minutes on medium-high heat. Check to make sure the mussels have popped open, and if needed cover and cook another 1-2 minutes.
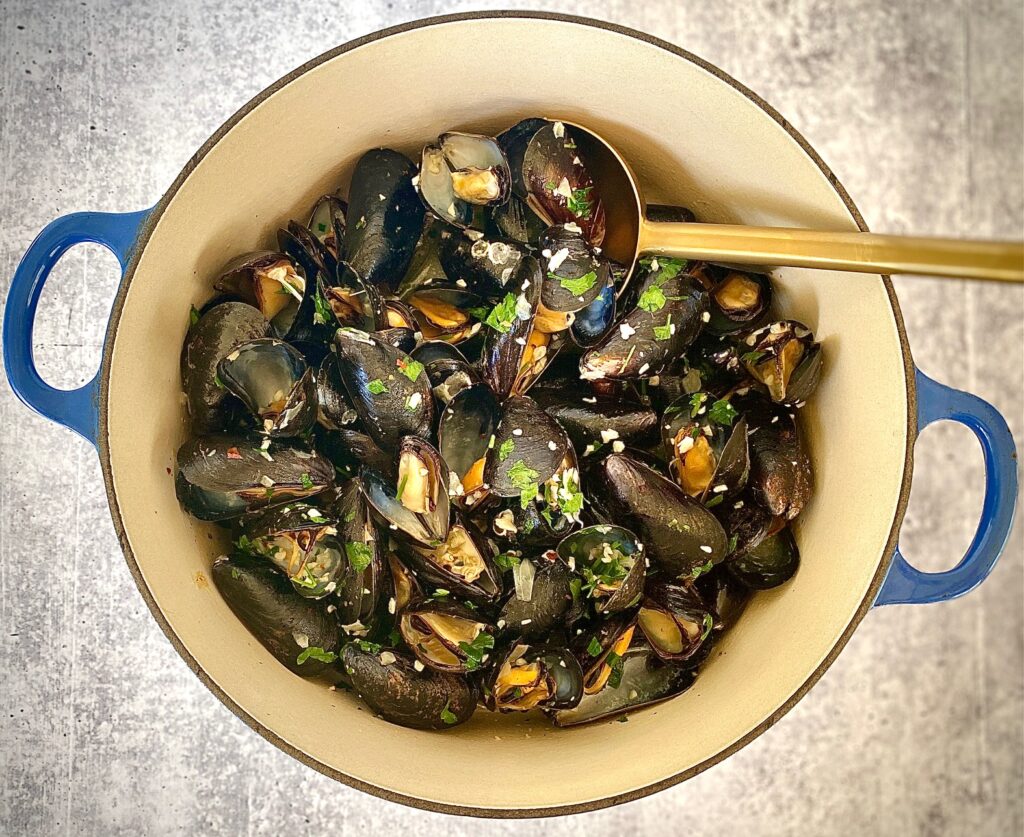
- Turn heat to medium and scoop mussels out with a slotted spoon, evenly dividing them into 4 wide bowls for serving.
- Stir parsley and butter into the broth. Cook for about 2 minutes to melt butter
- Pour or ladle sauce evenly over the bowls.
- Remove bread from the oven and serve a slice alongside each bowl.
- The other serving option is leaving them in the large pan and serving at the table, or putting all of the mussels in a large bowl for the whole table.

Choosing and Cleaning Mussels
There is so much to love about mussels. They are quick-cooking, versatile, readily available, and one of the least expensive seafood. Also, they are simply delicious!
Grocery Store Bought:
- When buying mussels look for shells that are wet, shiny, and clean, and smell like the sea. The shells should be closed, and not chipped. A good fishmonger should pick over the shells to be sure they are closed.
- Mussels are best stored in mesh bags. If they are in a plastic bag be sure to open it once home so the mussels can “breathe” and store them in the refrigerator for up to 24-hours. Cover with a damp paper towel.
- Most mussels sold at the market are farm-raised mussels and have been cleaned and debearded, but you should always rinse them in cold water to remove any remaining sand or debris.
- If the shell is open tap it lightly with your fingernail, if the hinge of the shell closes it is still alive and okay to use. Otherwise, discard it. If in doubt, always toss it out.
- If they need to be debearded (the fibers from around the shell) simply tug the fibers with your thumb and forefinger and discard them.
Fresh Mussels (Wild Mussels):
- If you are lucky enough to get fresh live mussels you’ll need to soak them in very cold water before using them. Peak season is October through March. Wild mussels are sandy and still bearded!
- If any of the mussel shells are open tap lightly, if the hinge of the shells closes it is still alive. Otherwise, discard open mussels because they are dead and should never be eaten.
- Place mussels gently in a bowl of cold water for 20 minutes. This will help the bivalves filter out some of their sand. Scrape off any barnacles with a firm brush and remove the beard.
- Place cleaned mussels in a bowl of fresh cool water for an additional 10 minutes and then give them a final rinse before cooking.
- For further info check out this detailed step-by-step from Global Seafoods

Leftovers and Storage
- REFRIGERATOR: Store leftovers in an airtight container for one day. Gently reheat.
What is Moules Marinières?
- This is it! The French name translates to “mussels fishermen style” and is popular in the Northern regions of France (and in Belgium).
- This preparation is traditionally mussels steamed with a dry white wine and aromatics, such as onion, shallots, and garlic. Parsley is usually part of the dish as well.
Variations
- Keep it Pescatarian – use vegetable broth (instead of chicken broth) to keep this easy recipe meat-free
- Add french fries for dunking for a moules frites version
- Creamy Mussels – to make a white wine cream sauce whisk in 1 cup of heavy cream with the butter before serving, or try coconut cream
- Mussels over Pasta – Serving these delicious mussels over pasta makes this a full dinner. Boil 3/4 pound of your favorite spaghetti or linguine. Add the mussels sauce into the pan and stir until the pasta is well coated. Transfer to serving bowls and top with the steamed mussels
- Lemon Juice – a squeeze of lemon juice or sprinkling of lemon zest at the end of cooking is always a good idea with seafood recipes
Your Sommelier Recommends
A simple and smart pairing is to use the wine varietal used in making the dish.
- For these savory mussels, a beautiful pairing could include a Sauvignon Blanc, an unoaked Chardonnay, a crisp Chablis, or a Chenin Blanc.
- Looking for an old-world French wine? You can’t miss with a Pouilly-Fuissé or a Sancerre.

Looking for other simple savory seafood ideas?
- Steamed Clams with Garlic Butter and Wine are similar and a simple weeknight dinner
- Miso Glazed Seabass (or use cod) has a delicate flavor but is easy to make
- Step-by-step for Perfect Pan Seared Scallops
- Sheet Pan Asian Salmon with Asparagus ready in just 30-minutes on one pan

Mussels in White Wine Sauce
Equipment
- 1 Large Pot or Dutch Oven with lid
Ingredients
For Mussels
- 2 Tablespoons olive oil
- 4 Tablespoons shallots, roughly chopped
- 4 Tablespoons garlic cloves, chopped
- 1 generous pinch sea salt
- 1 generous pinch black pepper, freshly ground
- 1 teaspoon dried Italian seasonings
- ½ teaspoon red pepper flakes
- 4 pounds mussels, scrubbed
- 8 ounces dry white wine, such as Sauvignon Blanc, Chardonnay, or Chablis
- 4 ounces vegetable broth or chicken broth
- 3 Tablespoons butter, cut into pieces
- ¼ cup flat leaf parsley leaves, coarsely chopped
Garlic Bread
- 4 slices thick rustic bread
- 2 Tablespoons extra virgin olive oil
- 1 Tablespoon garlic, chopped (or 1 tsp garlic powder)
Instructions
Garlic Bread:
- Preheat oven to 375℉.
- Brush the olive oil on the bread slices and spread with garlic. Transfer to a baking sheet and bake for 10 minutes while preparing the mussels. Bread should be toasted and crusty.
Mussels:
- Clean and scrub mussels under very cold running water. If any mussels are open tap them lightly and if they do not close discard them.
- In a large, deep pot, heat 2 Tablespoons of olive oil over medium heat until hot and shimmering.
- Add shallots and sauté for one minute, stirring constantly. Sprinkle in salt, pepper, garlic, Italian seasoning, and red pepper flakes. Cook for about 2 more minutes, until garlic is golden, stirring to prevent burning.
- Add the cleaned mussels, stir gently to coat in the garlic mixture and pour in the broth and white wine, stir again to coat, and then cover the pan.Steam the mussels for about 5-7 minutes over medium-high heat, or until they open up. Check to make sure the mussels have popped open, and if needed cover and cook another 1-2 minutes.Turn the heat down to medium.
- Using a slotted spoon transfer the mussels into 4 serving bowls. Always discard any mussels that don't open.
- Add the butter and chopped parsley to the broth and cook for 2 minutes, stirring to combine, until the butter is completely melted.
- Spoon the broth over the mussels into each of the four bowls.
- Remove the garlic bread from the oven and serve alongside the mussels.
Notes
- VARIATION: If you want creamy mussels whisk in 1 cup of cream along with the butter.
- Always discard mussels that don’t open after cooking.
- Store leftovers for 1 day in the refrigerator.