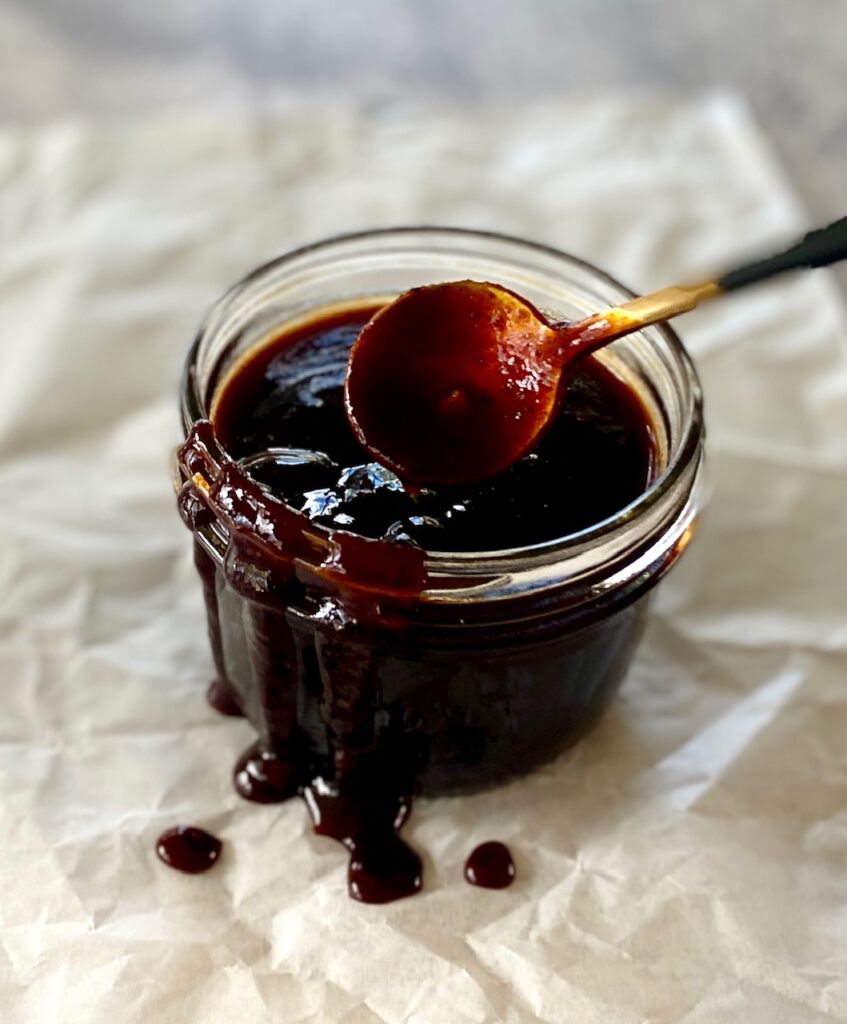
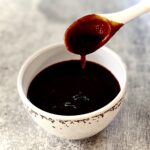
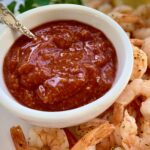
Quickly make your own BBQ sauce with (mostly) basic pantry staples. It only takes 15 minutes from start to finish to create a big, sweet, sassy sauce!
We love to slather this sauce on EVERYTHING including our fall-off-the-bone Oven Baked Ribs, Slow Cooker Ribs, Oven Baked Chicken Wings, and Slow Cooker Pulled Chicken
This post may contain affiliate links. Please see our affiliate disclosure for more details.
Ingredients Needed
The beauty of homemade sauce is that you know what’s in it and it’s a great way to steer clear of added preservatives. Even the best grocery store sauces have high fructose corn syrup. This zesty sauce is prepped in 5 minutes!
You don’t need a lot of ingredients or a secret ingredient for the best BBQ sauce.
For the full recipe, ingredient quantities, and nutritional information refer to the printable recipe card below.
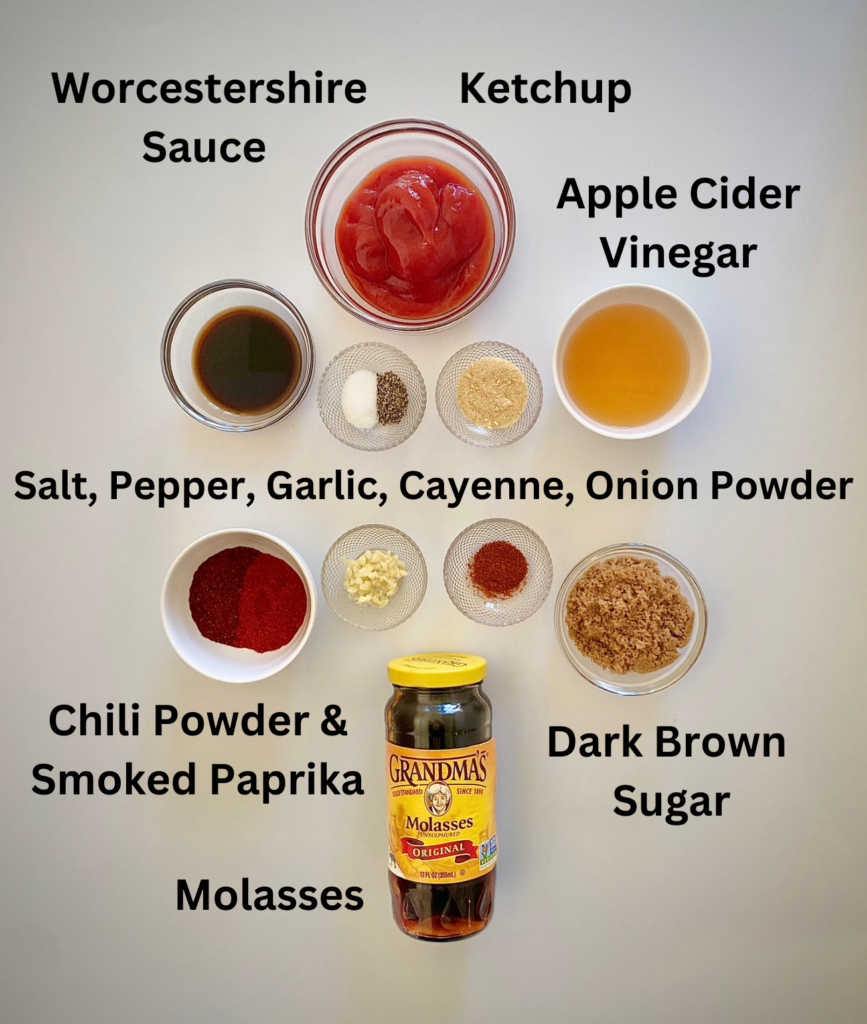
- Ketchup – this is the tomato base for the sauce
- Molasses – we like unsulphered molasses, and use it in our Easy Baked Beans too. It adds sweetness but also a warm, earthy, and slightly smokey flavor. If needed, substitute maple syrup which will lend a lighter flavor, no smokiness, and produce a sweeter sauce.
- Dark Brown Sugar – adds a caramel note to the sauce.
- Apple Cider Vinegar – gives the sauce a slightly fruity and tangy flavor that pairs well with the smoky savory elements of barbecue sauce
- Worcestershire Sauce – you could substitute soy sauce if needed
- Spices: chili powder, smoked paprika, onion powder, salt, and black pepper
- Garlic – freshly minced (garlic powder works in a pinch)
- Cayenne Pepper or Hot Sauce – optional, if you want medium heat in your sauce
- Liquid Smoke – an optional ingredient if you want a bigger smoky barbecue sauce. (We don’t use it but that’s just our personal taste)
How to make Homemade BBQ Sauce
This is an easy one-pan sauce that takes so little time and comes together quickly.
- In a medium saucepan whisk together all of the ingredients: ketchup, molasses, dark brown sugar, apple cider vinegar, Worcestershire sauce, chili powder, minced garlic, paprika, onion powder, salt, pepper, and if using, add liquid smoke and/or hot sauce.


- Once blended cook over medium heat until the sauce comes to a simmer. (Taste to see if you want to add more hot sauce or cayenne for a spicy BBQ sauce).
- Cover and cook for 5 minutes.
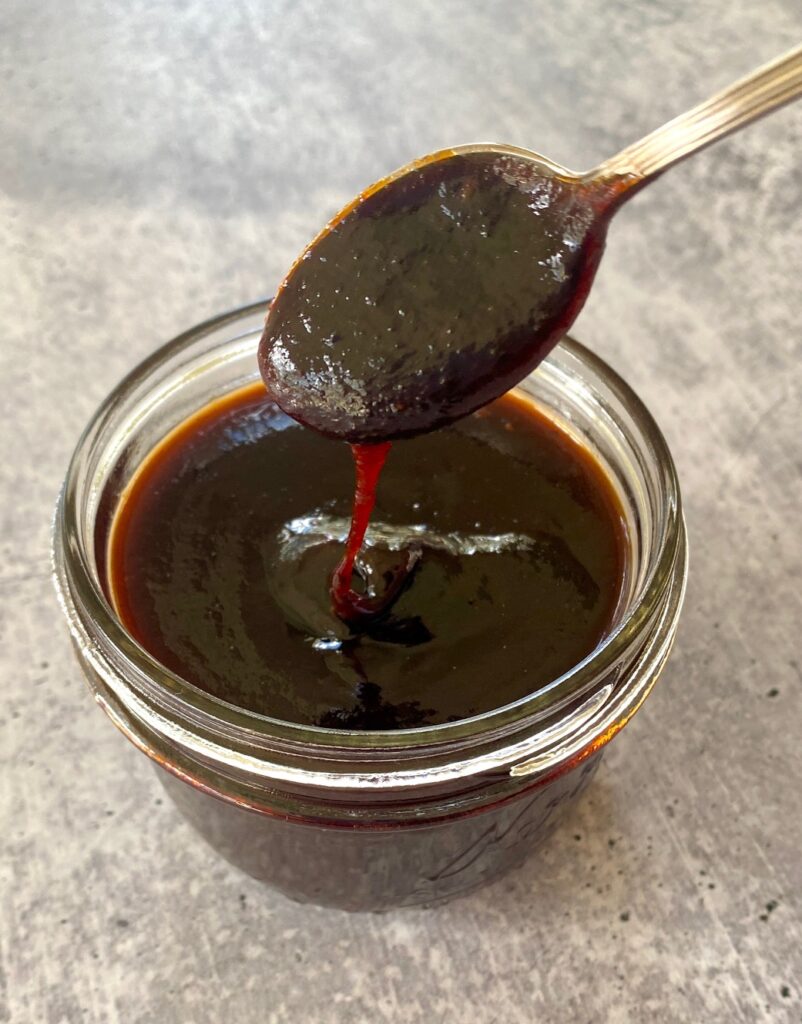
- Uncover, whisk, cover, and cook for an additional 7-8 minutes or until the sauce reaches a thick but pourable consistency.
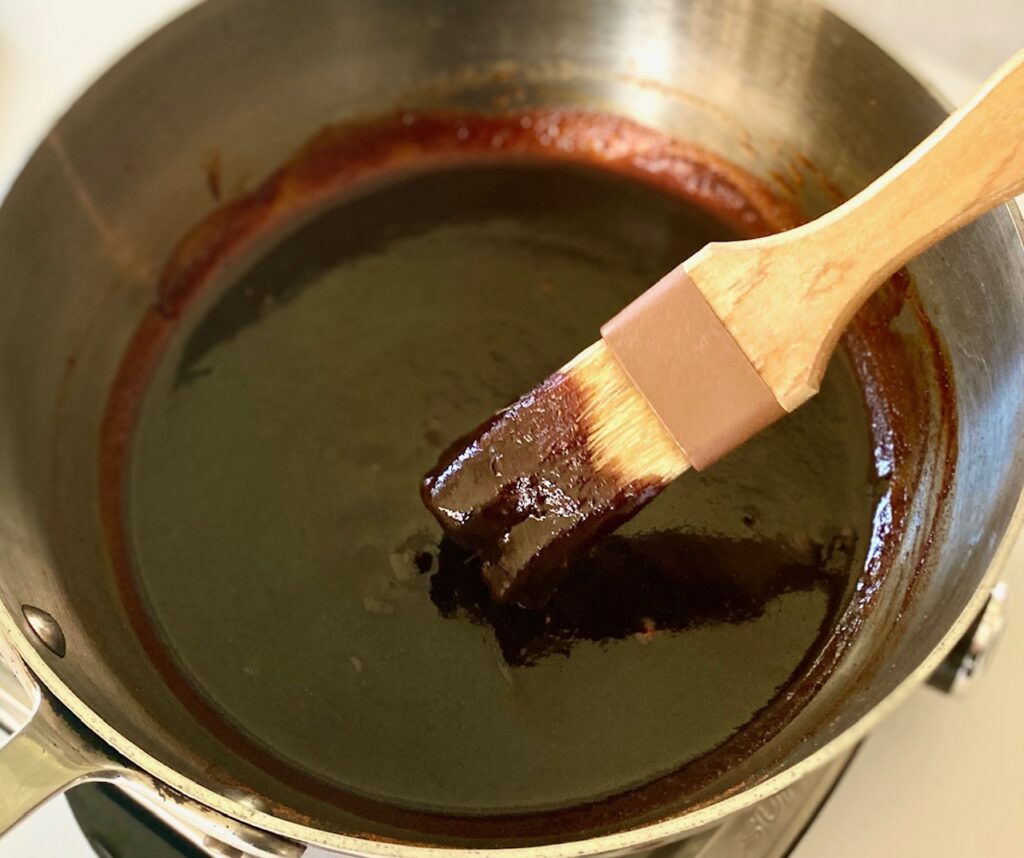
- Remove from the heat, whisk again, and use right away, or let the sauce cool if using later.
- Brush it on everything!
- Makes about 2 cups of sauce.
Make Ahead and Storage
- This sauce can be made ahead and stored in the refrigerator for about 2 weeks or in the freezer for 3 months. Thaw frozen sauce in refrigerator before using. (The next time you make a batch of pulled pork or pulled chicken it’s ready to go!)
- Once the sauce is cooled to room temperature put it in an airtight container or a tightly sealed glass mason jar
- This homemade barbeque sauce recipe can be rewarmed over low heat before using it.

You can “water bath can” your own homemade BBQ sauce
- Water bath canning is a simple process that can extend the life of your BBQ sauce for future use. It also makes a wonderful homemade gift idea.
- Notes for canning BBQ sauce: Place jars in hot water. Heat to medium-high, place the lid over the canning pot and bring water to a rolling boil. Process pint jars for 20 minutes, adjusting for altitude. Refer to the full instructions on our step-by-step process for Water Bath Canning.
- Sauce can be stored in a cool, dark space for up to 6 months.
Variations and substitution ideas
- Use maple syrup instead of molasses
- Love a sweet sauce? Skip the hot sauce or cayenne
- Instead of Worcestershire sauce use soy sauce or coconut aminos
- If you use light brown sugar the sauce will still be delicious but a bit lighter in flavor
- For a smoky BBQ sauce add liquid smoke or blackstrap molasses
Best ways to use this easy BBQ sauce
Like all great recipes, this Kansas City-style sauce has many great uses!
- Perfect on any kind of beef or pork ribs
- Great on BBQ Chicken Pizza
- Makes a delicious dipping sauce for french fries or chicken wings
- Slather it on a pork tenderloin, pork chops, or chicken
Chef’s Tip on BBQ Brushes: Use separate brushes for your barbecue needs because they tend to retain some of the smokey flavor. (You don’t want your pastries or garlic bread to taste like BBQ!). We like a wooden handled brush with natural bristles or a silicone brush.
Other great sauces and rubs for meats
- This zesty Dry Rub for Ribs is a great first layer of flavor that pairs well with this sauce
- Teriyaki Sauce is a reader favorite and is also ready in just 15 minutes
- Pork and chicken always taste better with Sweet Chili Sauce
- Chimichurri Sauce is an easy, fresh, herb-flavored sauce that works with chicken and steak
- Classic Italian Gremolata Sauce is made with fresh lemon zest, parsley, and minced garlic. It’s a great topping for vegetables, steak, and seafood.
Homemade BBQ Sauce
Ingredients
- 1 cup ketchup
- ⅓ cup molasses
- ¼ cup dark brown sugar
- 4 Tablespoons apple cider vinegar
- 2 Tablespoons Worcestershire sauce
- 1 Tablespoon chili powder
- 2 teaspoons smoked paprika
- 1 teaspoon garlic, minced
- 1 teaspoon onion powder
- ½ teaspoon salt
- ½ teaspoon black pepper, freshly ground
- 1 pinch cayenne pepper, optional
- 1 teaspoon liquid smoke, optional
Instructions
- In a medium saucepan stir together all of the ingredients: ketchup, molasses, dark brown sugar, cider vinegar, Worcestershire sauce, chili powder, minced garlic, paprika, onion powder, salt, pepper, and if using, liquid smoke and cayenne/hot sauce.
- Heat over medium heat and bring to a simmer. Cover and let cook for 5 minutes on a low simmer, stir, cover again and, cook another 7-8 minutes, or until thickened.
- Remove from heat, stir, and use immediately.If not using right away, cool the BBQ Sauce to room temperature, pour it into a sealed glass container, and store it for up to 2 weeks in the refrigerator.
Notes
- This recipe makes about 2 cups of BBQ Sauce
- Want it spicier? Add a little more cayenne
Nutrition
It’s delicious on grilled meats or vegetables, in wraps, and perfect as a dip for crudités or pita chips
Ready to get started? Just click on our “jump to recipe” button directly below to go straight to the recipe card. For tips and process ideas read the full post below. This post may contain affiliate links. Please see our affiliate disclosure for details. We only recommend products to you that we love and use.
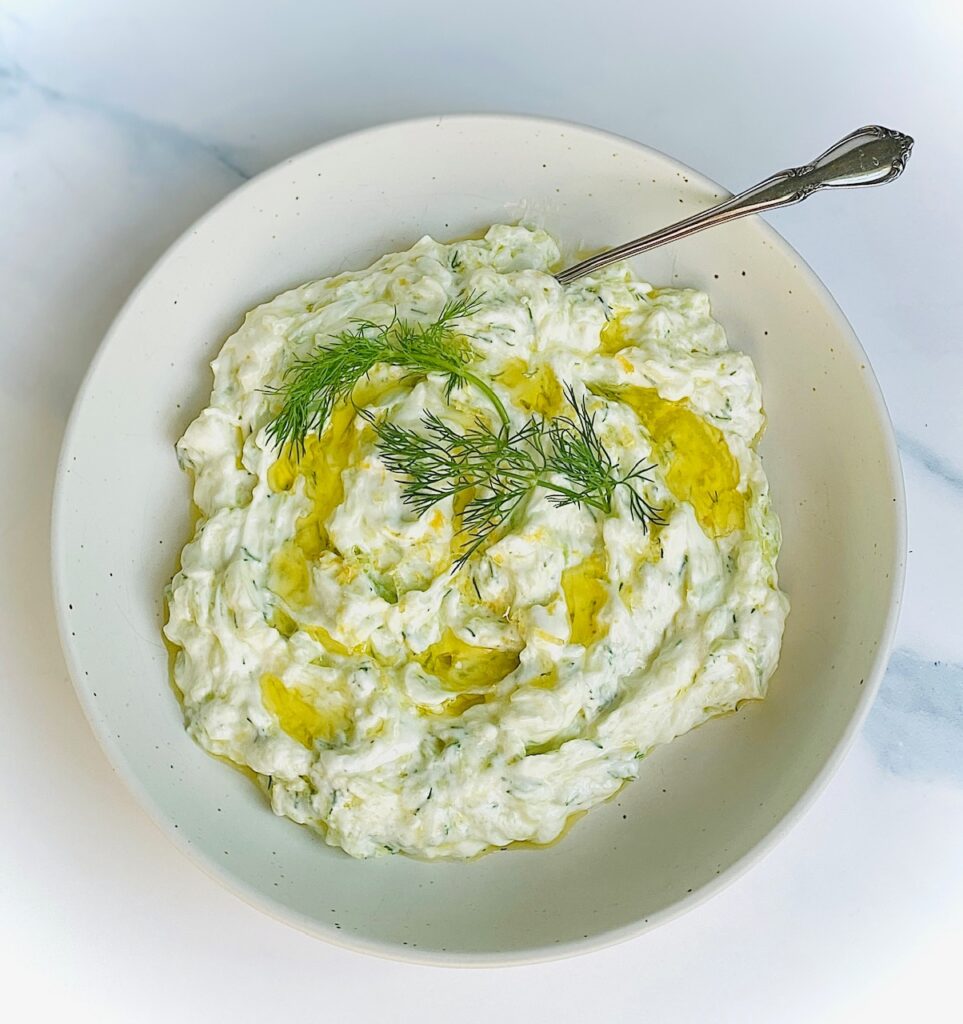
Jump to RecipeWhat is Tzatziki?
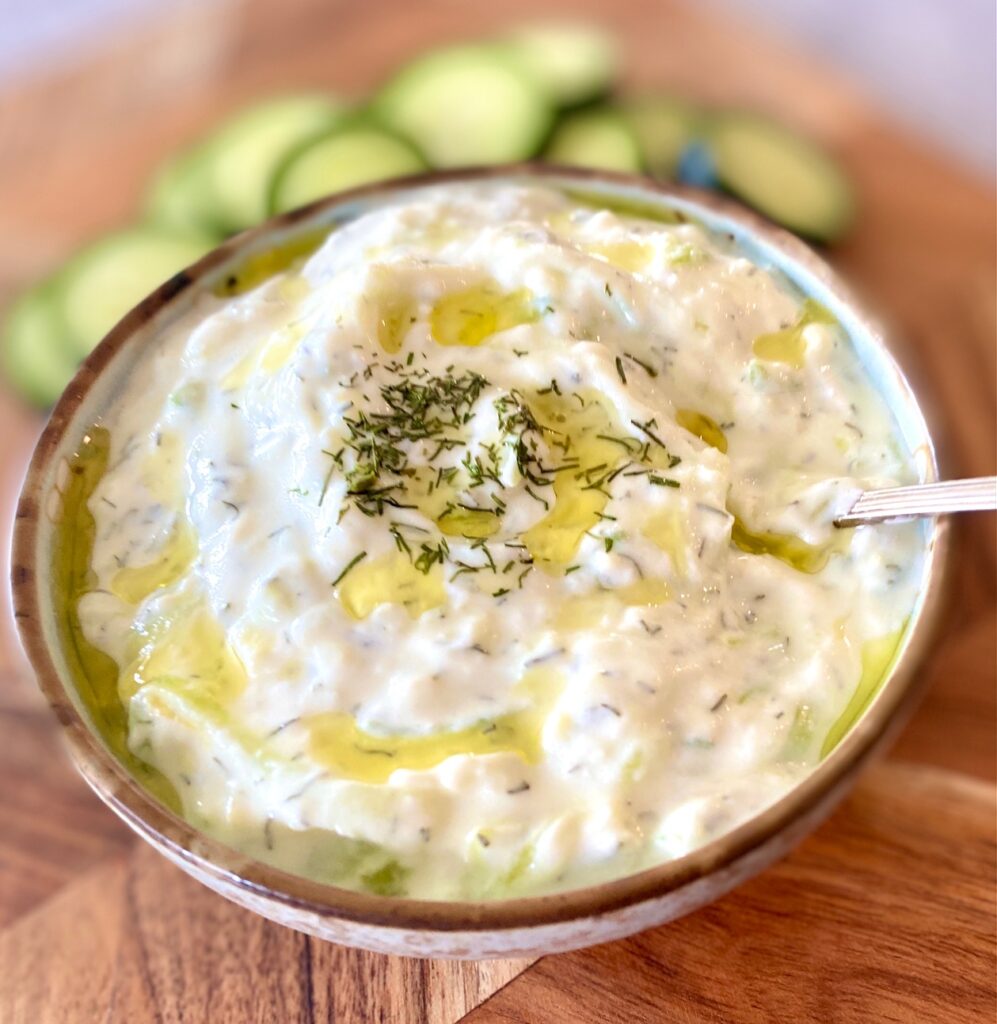
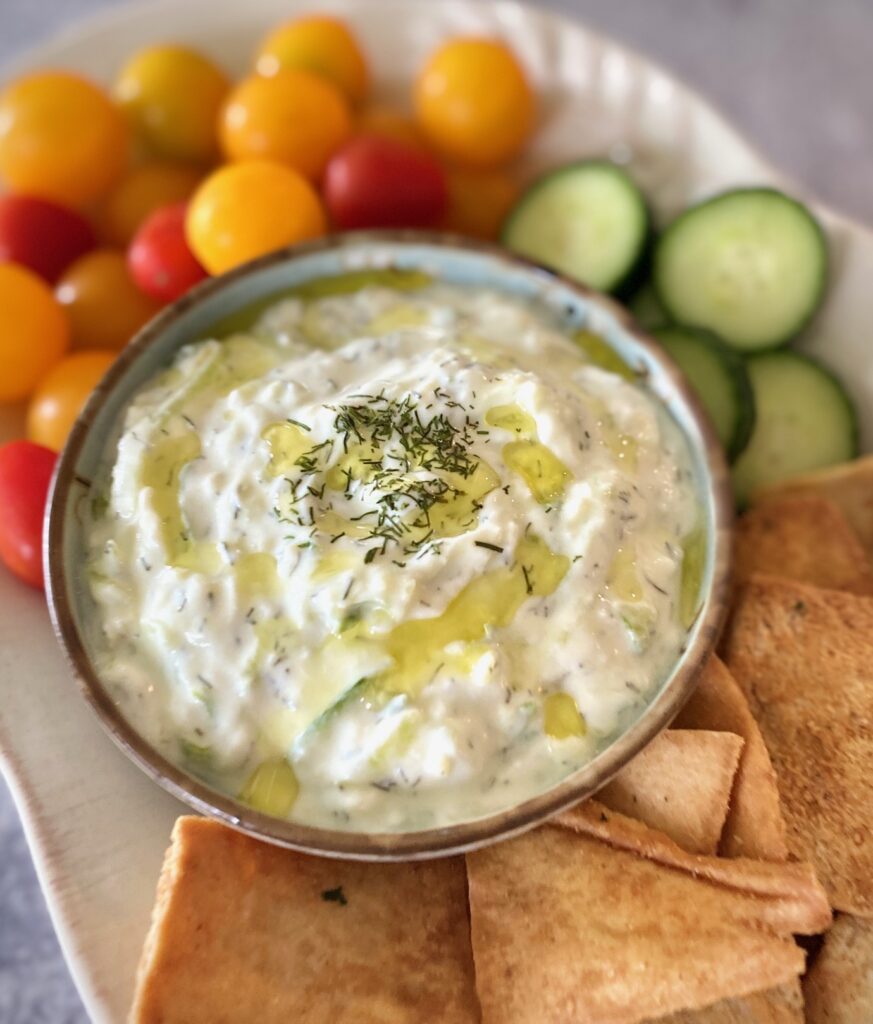
Tzatziki sauce or dip is a cool, creamy sauce made of cucumbers, yogurt, lemon juice, olive oil, garlic, and fresh herbs, such as dill. It originates from the Greek island of Paros and is popular all over the Mediterranean.
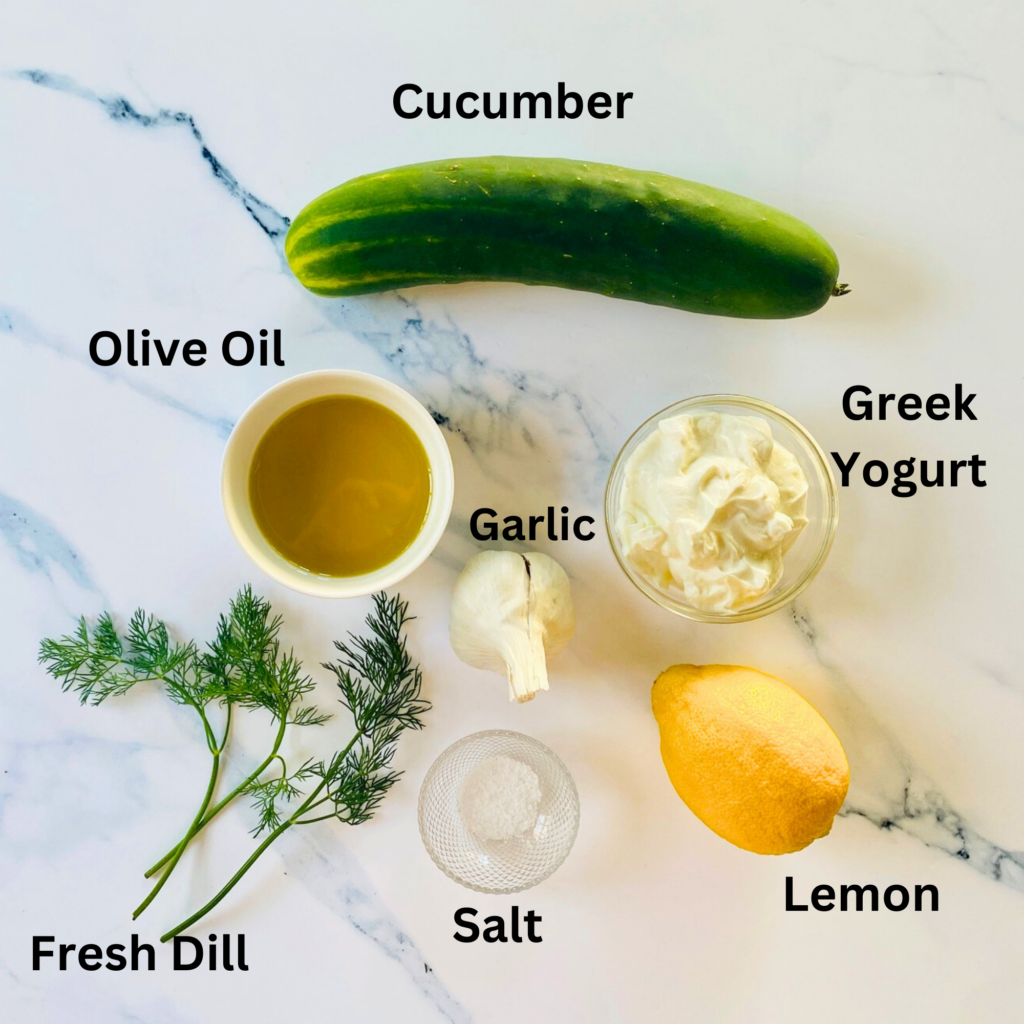
Ingredients needed:
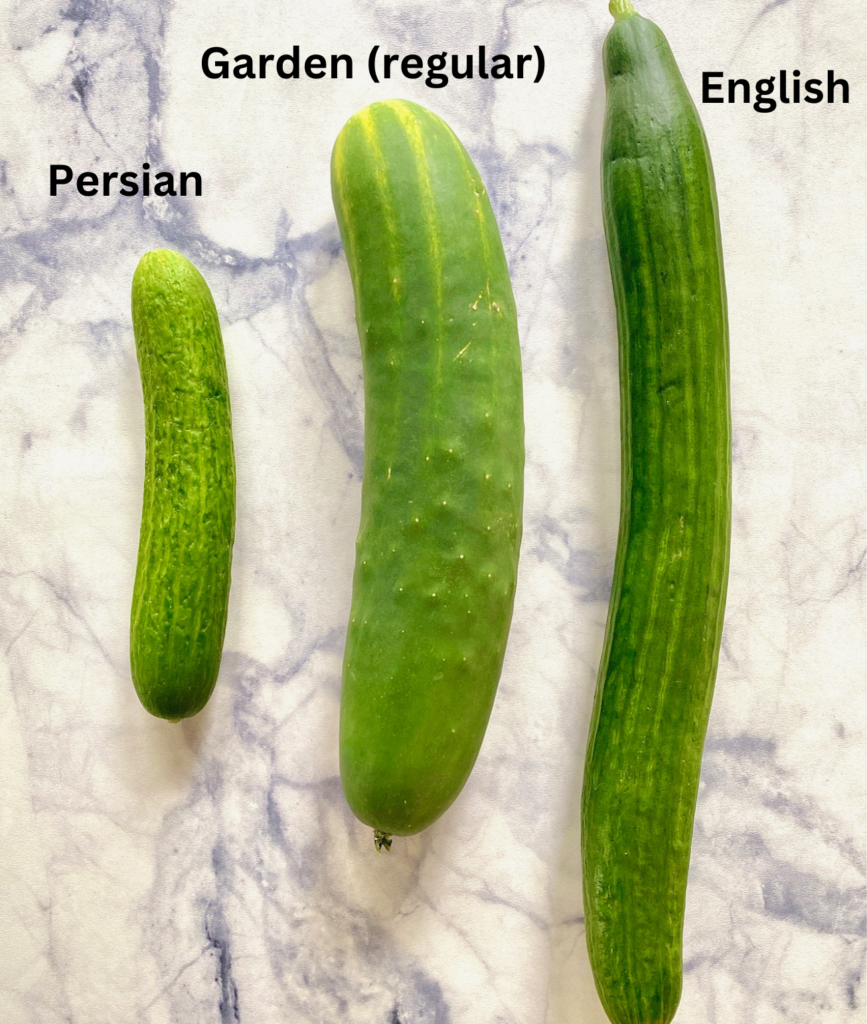
- Cucumber – Use regular garden cucumbers, English, or small Persian cucumbers
- Whole Greek Yogurt – Plain full-fat or reduced-fat Greek yogurt. Don’t substitute regular plain yogurt, because it isn’t pre-strained, and then the dip will be too watery
- Fresh Lemon Juice and Zest – Just a touch brings a bright flavor to the sauce
- Extra Virgin Olive Oil – adds creaminess to the sauce
- Grated or Minced Garlic Clove – we love ours garlicky but use as much or little as you would like
- Sea Salt – Adds a tangy touch
- Chopped Fresh Dill – the amazing finishing touch that also adds gorgeous color. Mint is another choice of herbs for this dip (or add both)
How to make traditional Tzatziki
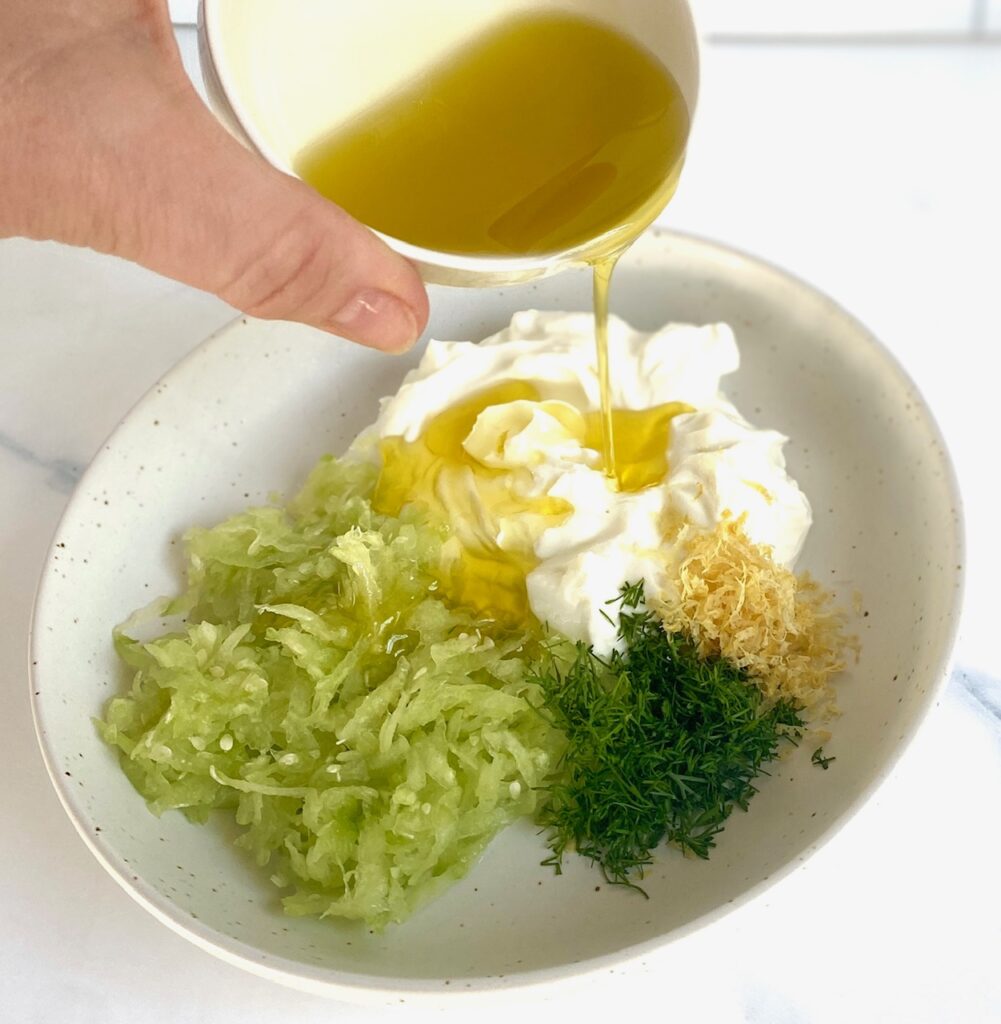
- Peel and then mince or grate the garlic clove. Finely chop the dill. Zest the lemon and then squeeze out the lemon juice.
- Peel the cucumber, cut it in half lengthwise, and scrape the seeds (if using a regular cucumber). If using English or Persian cucumbers there’s no need to peel.
- Grate the cucumber using the largest holes of a box grater until you have 1 cup.
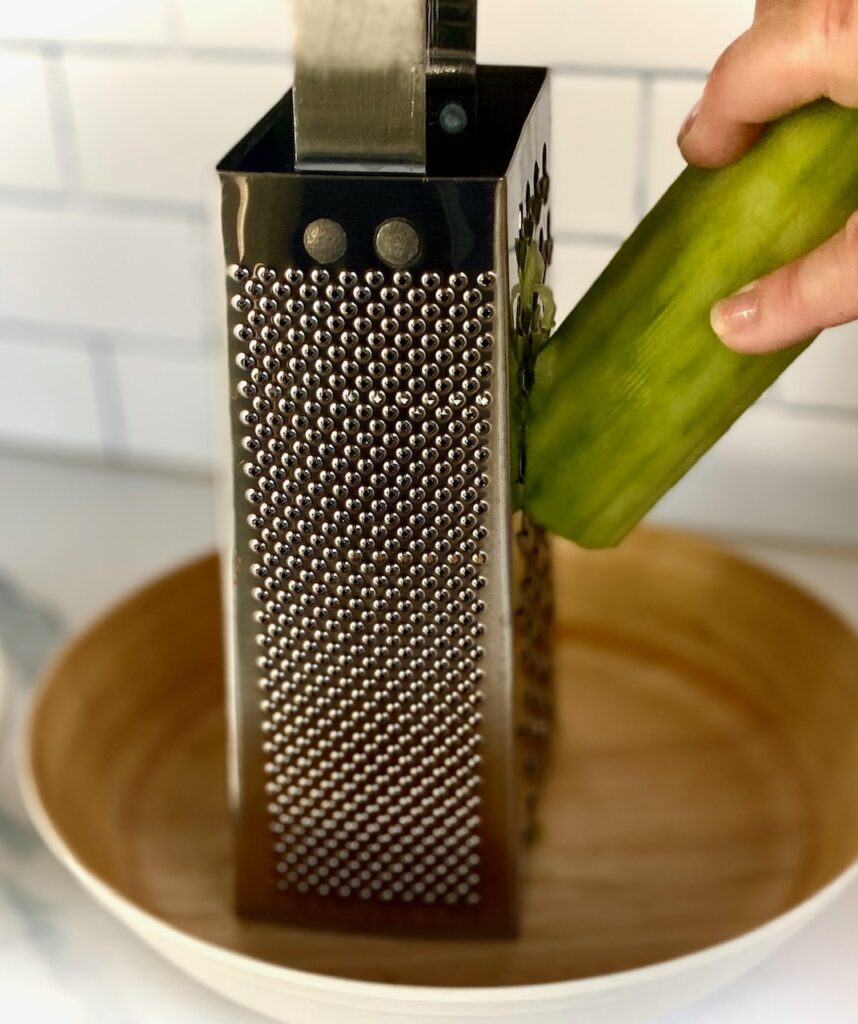

- Squeeze the grated cucumber between a few paper towels over the sink to remove the excess water. **Don’t skip this step – it’s crucial. If you don’t squeeze the excess water out you’ll end up with watery sauce instead of delicious creamy sauce!
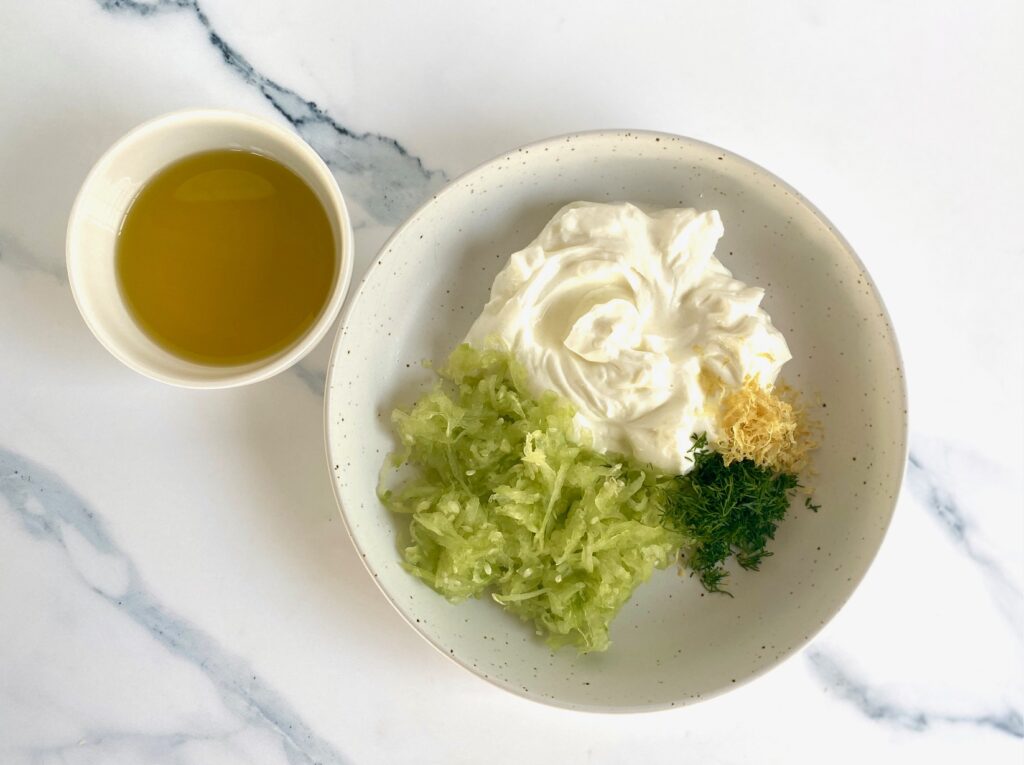
- Add the cucumber to a bowl, along with all of the remaining ingredients, but reserve 1 Tablespoon of the olive oil
- Stir well to combine and then drizzle with the remaining olive oil and sprinkle with additional chopped dill if desired, lightly stir, and serve.
- If not serving right away, cover, and refrigerate until ready to use.
What is the difference between Greek and Turkish Tzatziki?
- Traditional Greek Tzatziki is made with finely grated cucumbers which are squeezed to remove the water content. Removing the water makes for a thicker more spreadable sauce. It has a lemon, garlicky flavor and is added to thick Greek yogurt.
- Turkish cacik uses most of the same ingredients but does include additional herbs resulting in more of a spicy herby sauce.
What pairs well with Tzatziki?
In short, everything! The choices are endless but here are a few of the most popular ways to use Tzatziki:
- Ideal as an accompaniment for grilled beef, lamb, and chicken
- As a Dip – great for dipping pita chips or fresh naan or pita bread and any type of raw veggies
- With Roasted Potatoes or Asparagus
- The perfect sauce for wraps or in gyros
- A must with any type of Kebabs
- Delicious for dipping and dunking French fries
- Try it on your hamburger, turkey burger, or lamb burger
- Drizzle on our Oven Baked Salmon or Air Fryer Salmon
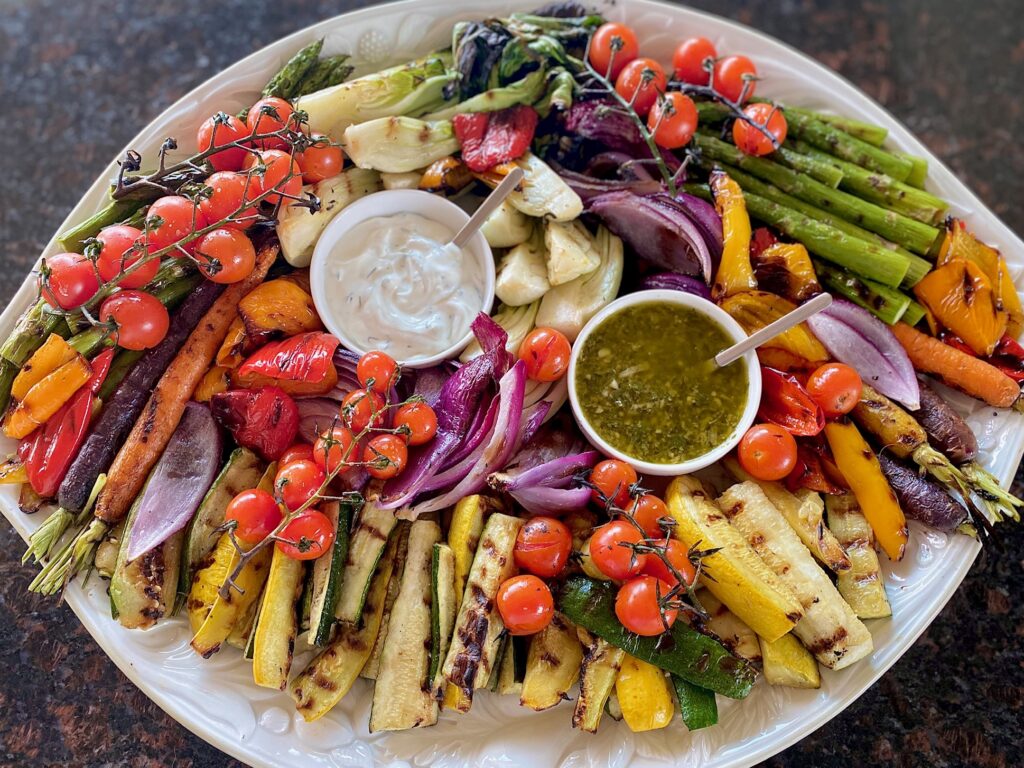
One of our favorite ways to dress up a Grilled Vegetable Platter is with Tzatziki Sauce and Pesto Sauce
Types of Cucumbers for Tzatziki
Any variety of cucumbers will work but here are a few tips to keep in mind
- Regular Cucumbers: This varietal has a thicker, waxier skin so you’ll need to peel them completely and also scrape out the large seeds. The seeds can make the dip watery if they aren’t scraped out prior to grating.
- Persian Cucumbers and English Cucumbers: Both of these varietals are seedless and have thin skin, therefore they don’t need to be peeled before grating. Persians are small in size and English are larger.
Is Tzatziki good for you?
The simple answer is YES! Tzatziki is made with healthy fresh Meditteranean ingredients that are high in proteins, calcium, and vitamins. Tzatziki is naturally low in calories and fat making it a wonderfully healthy dip or sauce.
Leftovers and Storage
Have leftovers? Lucky you! Store in a tightly covered container in the refrigerator for up to 3 days.
More easy-to-make Dips and Sauces

Tzatziki Sauce
Equipment
- box grater
Ingredients
- 1 cup cucumber, grated (peeled and seeded, if needed)
- 1 cup Greek Yogurt plain
- 1 clove garlic minced, pressed, or finely grated
- 2 Tablespoons lemon juice + 1 Tablespoon lemon zest (more to taste)
- 3 Tablespoons olive oil, divided
- 2 Tablespoons fresh dill, finely chopped (or 2 teaspoons dried)
- ¼ teaspoon sea salt
Instructions
- Peel the cucumber, and de-seed (necessary, if using a regular garden cucumber).
- Grate the cucumber using the largest holes of a box grater until you have 1 cup. Squeeze the grated cucumber with a paper towel to remove as much excess water as possible.
- Peel and then mince, or grate, the garlic clove. Finely chop the dill. Zest the lemon and squeeze the lemon juice.
- Transfer cucumber, dill, lemon juice, and zest to a medium bowl. Add the Greek yogurt, 2 Tablespoons olive oil, salt, and dill.Stir everything together, check the seasonings, and add additional lemon juice or salt.
- When ready to serve drizzle remaining olive oil over the top.
- If not serving immediately chill the Tzatziki for up to 24 hours.
Notes
- Tzatziki can be stored for up to 3 days in the refrigerator
- This recipe can be doubled
- Use regular garden, Persian, or English cucumbers for best results. If using regular cucumber peel and de-seed first.
- Be sure to use Greek Yogurt. Other types are not thick enough and will result in a watery sauce
Nutrition
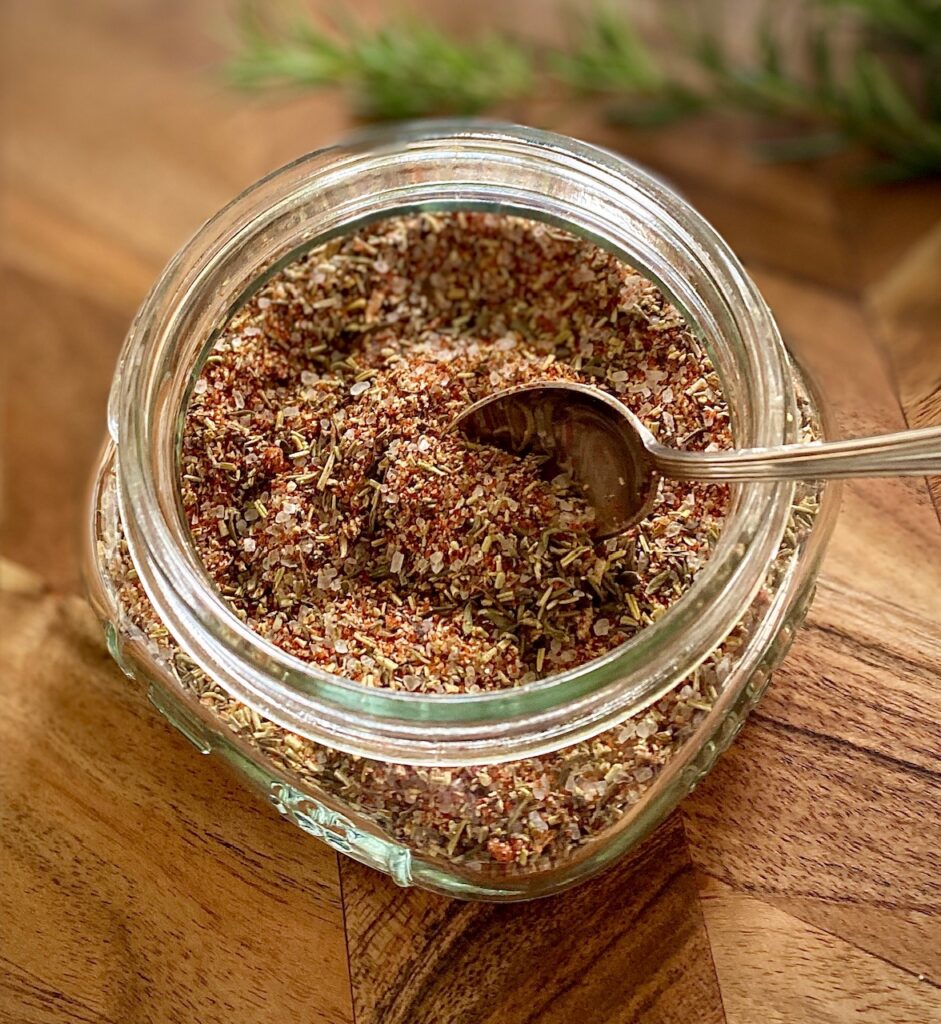
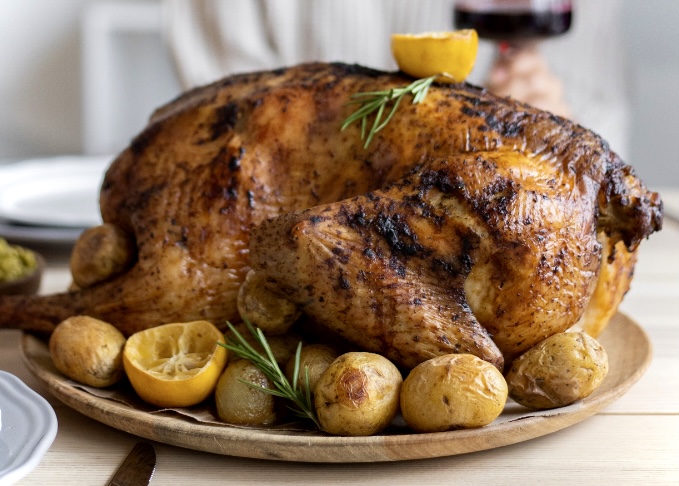
This turkey seasoning rub features an aromatic blend of classic seasonings that you probably already have in your spice cabinet to make the perfect dry rub. This can also be made into an herb paste, as well.
Prep is so easy! It takes just 5 minutes to combine everything and then rub the blend onto your turkey (or chicken) to roast or grill!
Ready to get started? Just click the “jump to recipe” button below or keep reading for more tips and ideas. This post may contain affiliate links. Please see our affiliate disclosure for more details. We only recommend products we love and use.
Jump to Recipe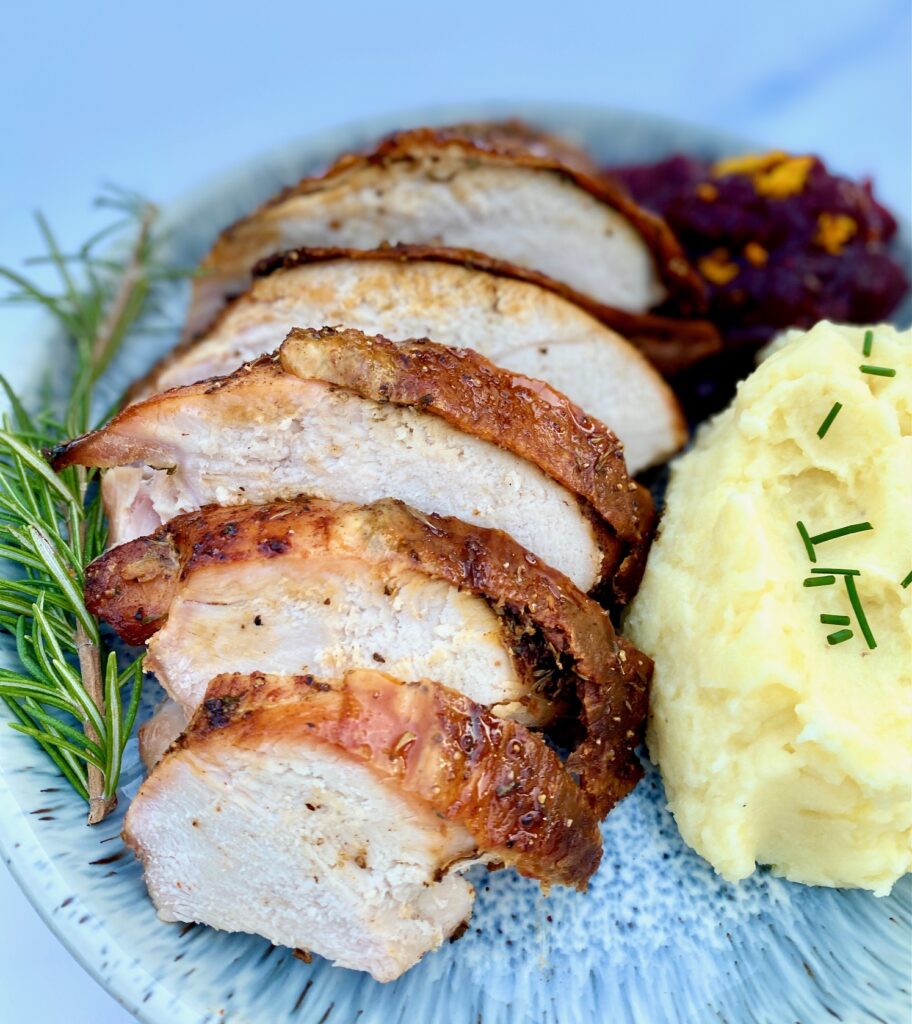
Create the perfect turkey dinner with the addition of creamy Garlic Mashed Potatoes, Cranberry Orange Sauce, and Green Beans Almondine. If you are hosting a smaller holiday or family dinner, try our savory Easy Oven Roasted Turkey Breast which is perfect for a smaller crowd.
Homemade seasoning mixes are a smart way to go for 3 reasons:
- HEALTHIER: You know exactly what’s in your mix – no artificial flavors or additives
- PERFECT QUANTITY: This poultry seasoning recipe makes just the right amount for 2 turkeys or 3 large chickens. So, no leftover stale seasoning mix hiding in the back of the spice cabinet (hey, we’ve all done it!)
- ECONOMICAL: Why spend $7-$20 on a small can of seasonings that you can likely make for $2.00 in 5 minutes?
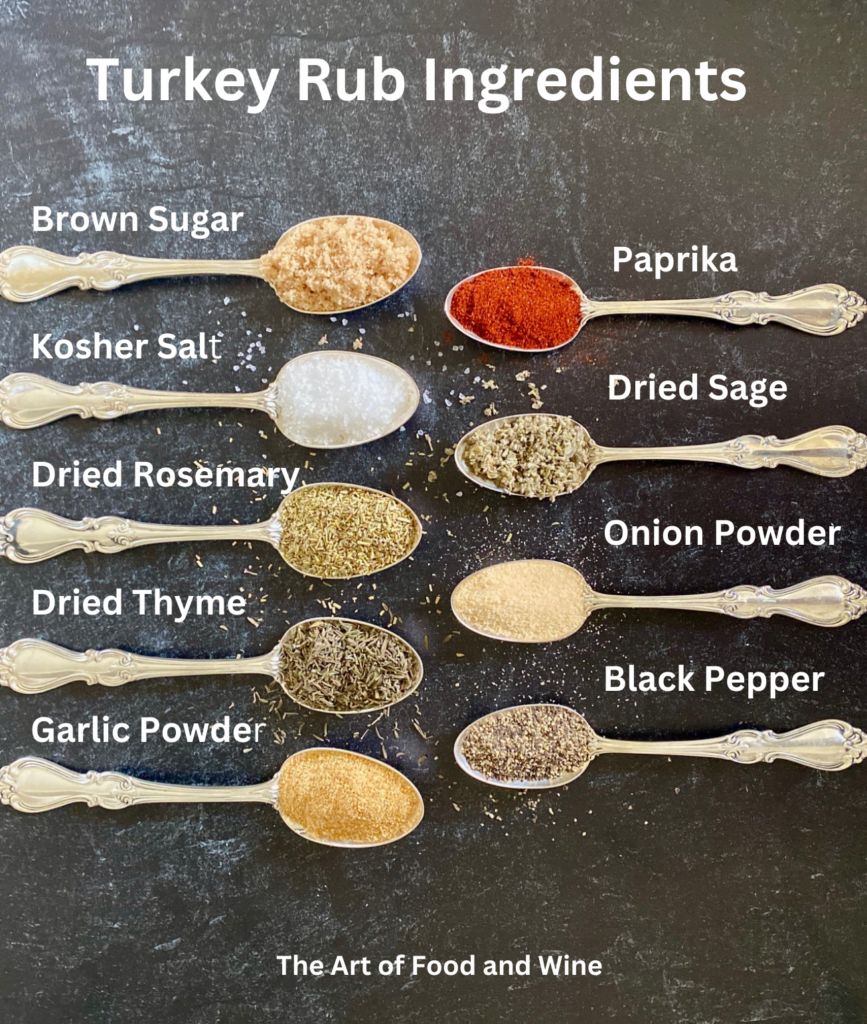
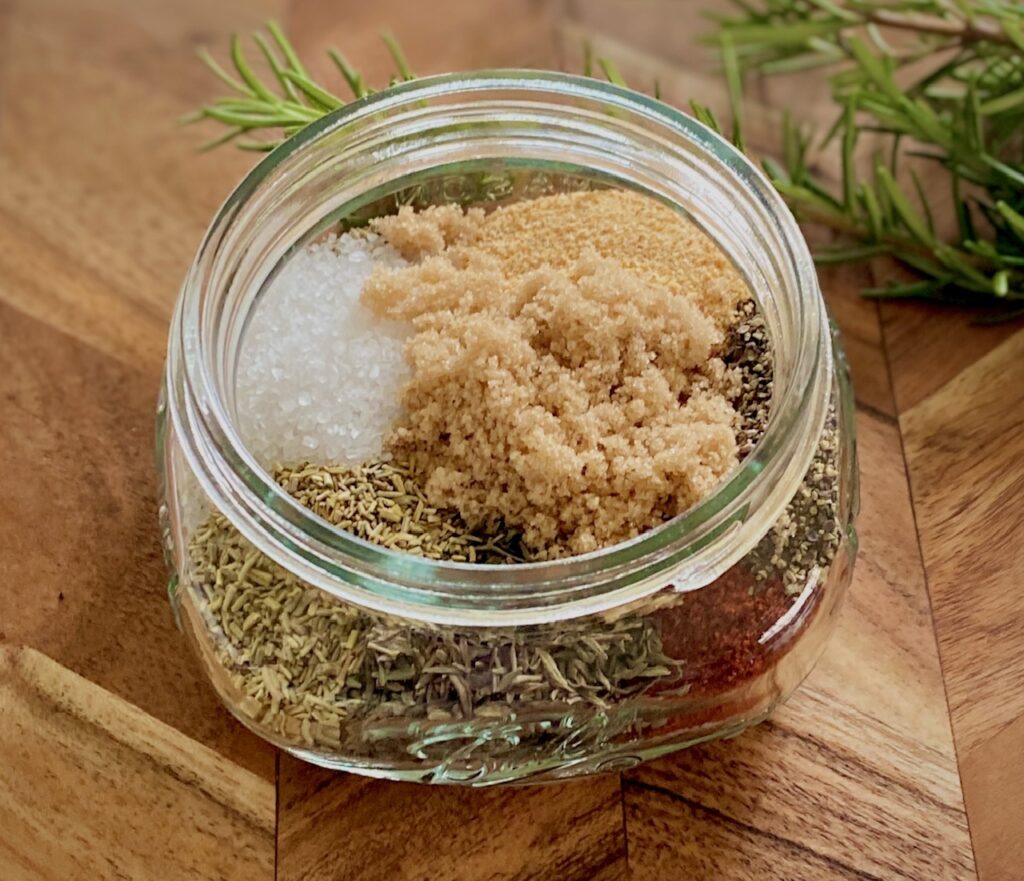
Ingredients in Turkey Seasoning Rub
- Light Brown Sugar – This is optional but it gives the skin a gorgeous crackly brown color as well as helping to balance the spices. If you’re going sugar-free you can omit the sugar
- Kosher Salt – it’s important to use Kosher salt, rather than table salt. Kosher salt is larger and more coarse which makes it easier to evenly spread on the turkey and helps prevent over-salting. If you need to use table salt just use 1 teaspoon, instead of 2 Tablespoons.
- Dried Rosemary, Thyme, and Sage – the “trifecta” of herbs for poultry! (See below if you want to use fresh herbs instead)
- Garlic Powder and Onion Powder– If you substitute garlic salt or onion salt then cut back a little on the kosher salt.
- Paprika – We use regular sweet paprika, but if you want a smoky flavor use smoked paprika, or if you’d like a bit of spice, try hot paprika
- Black Pepper – freshly ground
How to substitute fresh herbs for dried herbs: We use dried herbs for this recipe but if you decide to use fresh herbs make sure to finely chop them, double the amount (just the herbs, not the spices), and use the mixture within 3 days.
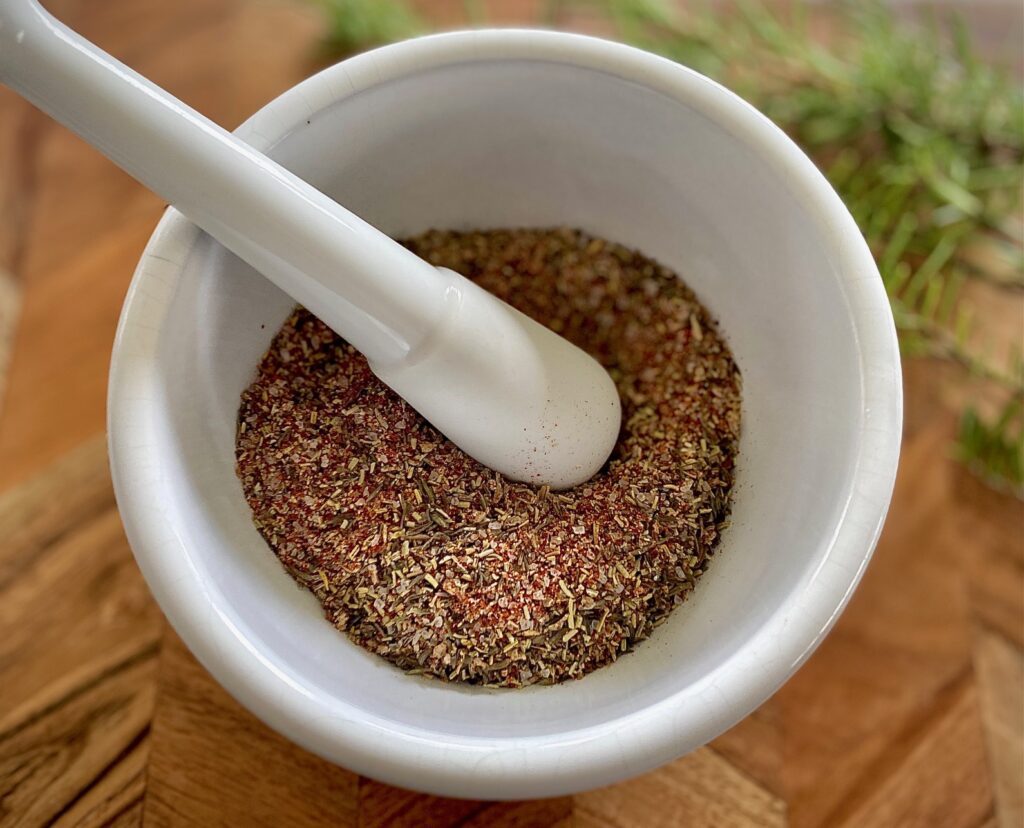
How to make Turkey Dry Rub
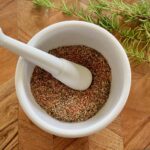
- Combine all of the ingredients together in a bowl or jar and whisk or stir to combine. Or simply place the lid on and shake to combine.
- If you want the dried herbs to be slightly more fine place them in a mortar and pestle and crush lightly.
- If not using the turkey seasonings immediately we recommend storing the blended mix in a sealed glass jar in a cool dry place.
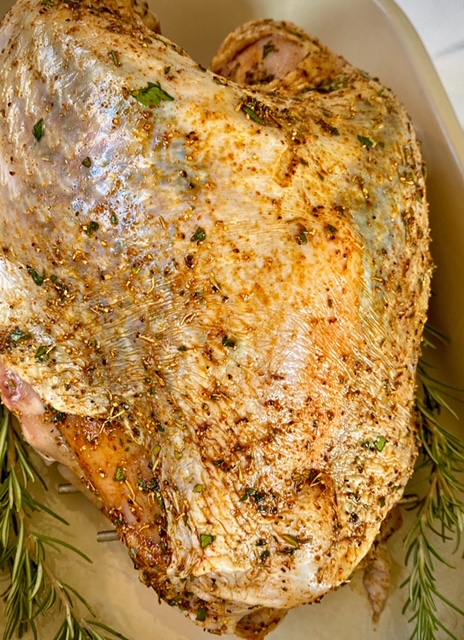
Using this rub to season your Thanksgiving Turkey:
- Coat the thawed bird with a thin layer of olive oil and rub the mixture all over the turkey. Make sure to fully coat the bird.
- We recommend gently loosening the skin around the breast and thighs and putting some of the mixture directly on the meat. Great for an added pop of flavor.
- The turkey can be rubbed 30 minutes before cooking and up to 24 hours ahead of time. (if not cooking within one hour place the turkey back in the refrigerator)

Making a seasoned spice paste or wet rub:
- For a very thick paste – mix the blended mixture with about 2 Tablespoons of olive oil, melted coconut oil, or melted and slightly cooled butter
- For a looser “wet” rub – add 4 Tablespoons of olive oil, coconut oil, or melted butter to the poultry seasoning and blend together
- Smear the paste with a spatula all over the bird. Finish by using your hands to smooth out the paste. Make sure the entire surface area of the bird is covered with the rub. For more flavor, allow the meat to marinate in the refrigerator for 30 minutes, or up to 24 hours.
Ingredient Variation Ideas:
It’s easy to customize this blend and very forgiving of substitutions!
- Herbs: Herbs you could add include basil, oregano, marjoram, parsley
- Sugar: substitute raw sugar or coconut sugar, or use honey if making a paste
- Spices: Like it a little hot? Add hot paprika, a pinch of cayenne, or add chili powder. Smoked paprika will give it a lovely smoky flavor even without grilling
- Use fresh minced garlic if you are making a fresh herb rub and paste
- Try adding some lemon zest for added zing!
Storage
- This Turkey Rub recipe can be doubled, tripled or even cut in half
- Store tightly sealed in a jar, container, or zip-up plastic bag for up to 3 months. Keep in a cool dry place
We ♥️ fresh spice mixtures and rubs!
Here are a few of our other favorites:
- Potlatch Seasoning – great for fish, especially salmon
- Dry Rub for Ribs – a reader favorite!
- Homemade Taco Seasoning Mix – packed with flavor and a must for Taco Tuesday!
- Pumpkin Pie Spice Mix – perfect for pie but also the base for our popular Pumpkin Spice Syrup for your favorite Fall coffee: the Pumpkin Spice Latte
Turkey Seasoning
Ingredients
- 2 Tablespoon Light brown sugar
- 2 Tablespoon Kosher salt (or 1 teaspoon table salt)
- 1 Tablespoon Dried rosemary
- 1 Tablespoon Dried thyme
- 1 Tablespoon Garlic powder
- 1 Tablespoon Paprika
- 2 teaspoons Dried sage
- 2 teaspoons Onion powder
- 2 teaspoons Black pepper
Instructions
Dry Rub Seasoning for two 10-12 pound turkeys
- Combine all of the ingredients in a small dish and whisk to combine
- Store in a sealed container and use within 3 months for the best flavor
- Spread the rub all over the turkey, up to 24 hours before cooking
For a wet rub:
- Combine the seasoning blend with 4 Tablespoons of olive oil, coconut oil, or melted butter. Spread evenly all over the turkey.
Notes
- Need more? This recipe can be doubled or tripled
- Store: tightly sealed in a container for up to 3 months
- Prefer no sugar? Just omit the brown sugar
- Using fresh herbs? Double the amount of herbs
Nutrition
It’s an easy one-pan staple with just a few basic ingredients
Our version is quick because there’s no need to peel the tomatoes. Just do some quick chopping and you’re ready to get cooking!
This sauce is a basic version and there are plenty of ways to personalize it to suit your tastes. Marinara sauce works perfectly as a base for most Italian recipes such as pasta or pizza sauce, in lasagna, cannelloni, or manicotti, or with eggplant and chicken parmesan.
Ready to get started? Just click on our “JUMP TO RECIPE” button just below. For tips, processes, and substitutions keep reading. This post may contain affiliate links. Please see our affiliate disclosure for details. We only recommend products to you that we love ♥️ and use.
Jump to Recipe
MARINARA SAUCE ON SPAGHETTI
Ingredients for Marinara Sauce with Fresh Tomatoes:
What is classic Marinara made of?
This simple and rustic one-pan Marinara Sauce recipe uses 5 basic healthy ingredients (plus salt and pepper). See our printable recipe card at the bottom for the exact quantities.

- Tomatoes – Use fresh vine ripe tomatoes if possible. Choose a variety, if desired, which can include plum, Roma, vine-ripened, and cherry tomatoes. (If you prefer to use canned tomatoes use three 28-ounce cans of whole or crushed San Marzano tomatoes for best results). Read here for more about tomato varieties.
- Olive Oil – Use your best olive oil
- Basil – Fresh basil is so flavorful in this sauce and our first choice
- Oregano – Fresh is best, but dried works fine too
- Garlic – Use fresh cloves (garlic powder can be used in a pinch)
- Salt and Pepper – Taste the sauce at the end and add more if needed

How to make 30-Minute Marinara:
- Remove stems and hard cores and chop tomatoes into chunks. If using cherry tomatoes in addition to large tomatoes just leave them whole because they will soften and burst while cooking
- Pluck oregano and basil leaves from their stems
- Peel the garlic cloves. We cook ours whole but you can also roughly chop them before adding them to the pan to get a little bigger garlic flavor
- Add the olive oil to a large Dutch oven or sauté pan
- Heat oil over medium heat until shimmery, add salt and garlic cloves, and cook for 1 minute
- Add tomatoes, basil, oregano, and pepper to the pan and stir to combine everything

- Continue cooking over medium heat, stirring frequently and pressing gently on tomatoes with a large heat-proof spoon to help them release their juices.
- The sauce should be lightly bubbly while the tomatoes and garlic begin to soften.
- After cooking for about 30 minutes, remove the pan from the heat.

Blending the sauce:
- The sauce is now ready to be blended. We prefer using an immersion blender but you can also blend the sauce in a regular blender.
- IMMERSION BLENDER: If using a Dutch oven you can blend directly in the pan. If using a skillet move the sauce into a deep bowl before using an immersion blender.
- COUNTER TOP BLENDER: If using a regular blender be very careful because hot liquids expand. We recommend blending in two batches and always placing a kitchen towel over the lid for extra safety.
- The time spent blending depends on how smooth or textured you’d like the sauce. (We like ours more textured)
- Optional Step: Strain the sauce if you want it smooth or if you’ve chosen not to blend it. If you don’t blend it there will be a substantial amount of tomato skins to strain and discard. (see more below about straining the sauce).
- Test for seasonings and add more if desired.
- Cool the sauce completely if not using it right away and before storing.
- We like to store ours in glass jars which makes thawing and reheating easy.

Straining the sauce:
If you want a super smooth marinara sauce then strain the sauce through a mesh strainer into a large bowl. From there you can decide if you want to add more seasonings and then let the sauce cool.

What is the difference between Marinara Sauce and Spaghetti Sauce (or pasta sauce)?
They are very similar but here are a few key differences:
- Marinara sauce is thinner and simpler with just a few key ingredients (like ours) and a relatively short cooking time (30 minutes).
- Homemade tomato pasta sauce (spaghetti sauce) is thicker with a longer cooking time, to give it a heartier end result, and often includes tomato paste.
- Pasta sauce often includes the addition of lots of Italian spices, giving it a more complex flavor, and cooked ground meats like turkey, beef, or Italian sausage. Marinara sauce does not typically include meat.

Substitutions and additional ingredient ideas:
- If fresh tomatoes are out of season substitute canned whole peeled tomatoes or crushed tomatoes. One 28-ounce can equals about 6-7 tomatoes. Use the same process as above (cut whole tomatoes in chunks before adding them to the pan)
- Add thyme instead of oregano – or use all dried herbs. Remember that dried herbs are stronger than fresh. A good ratio is: 1 Tablespoon fresh = 1 teaspoon dried herbs
- Add onions or shallots (finely diced) along with the garlic
- If the tomatoes are too tart add 1 Tablespoon of sugar or honey during cooking
- Add a splash of balsamic vinegar for a richer flavor
- Want it a little spicy? Add a pinch of red pepper flakes with the garlic

How to store and reheat Marinara Sauce:
- REFRIGERATOR – Allow sauce to cool completely and store in an airtight container in the fridge for up to 5 days.
- FREEZER – Store the sauce in the freezer for up to 3 months in an airtight container or in glass jars (our first choice). When you are ready to use it, remove it from the freezer and allow it to thaw completely. Once thawed out, stir well.
- REHEATING – Place sauce in a pan and simmer over medium heat for about 5 minutes before serving.

Ideas for serving with Marinara Sauce
We love to use this marinara sauce recipe as a pasta sauce, on top of spaghetti, along with an easy light salad and warm bread. Here are some of our favorite pairings:
- Fresh Citrus Salad
- Brussels Sprout Salad with Apples and Pomegranate Seeds
- 4 Ingredient Beer Bread (or rolls)
- No yeast Irish Soda Bread with Flavored Butters
- Light and Fluffy Baking Powder Biscuits

Homemade Marinara Sauce
Equipment
- Large Dutch oven or sauté pan
- Immersion blender or countertop blender
Ingredients
- 2 Tablespoons olive oil
- 5 pounds tomatoes, (Roma's, plum, vine-ripe, cherry tomatoes, San Marzano) stem removed and cut into rough chunks
- 4 cloves garlic peeled
- 1 Tablespoon coarse or kosher salt
- 10 fresh basil leaves (or 1 Tbsp dried basil)
- 2 sprigs fresh oregano (or 1/2 tsp dried oregano)
- 1 teaspoon black pepper
Optional ingredients
- 1 Tablespoon balsamic vinegar (optional, to add richer flavor)
- 1 Tablespoon sugar or honey (optional, to sweeten)
Instructions
- Remove stems and hard cores and chop tomatoes into chunks. If using cherry tomatoes, remove stem and leave them whole.Peel garlic. Pluck basil and oregano from their stems.
- Add the olive oil to a large Dutch oven pan or sauté pan
- Heat oil over medium heat until it shimmers. Add garlic and salt and cook for one minute
- Add tomatoes, basil, oregano, and pepper to the pan and stir to combine everything.Continue cooking, stirring occasionally and pressing gently on tomatoes to encourage them to release their juices. The sauce should be bubbly and the tomatoes and garlic will soften. Cook for about 30 minutes and remove from the heat.
Blending the sauce
- IMMERSION BLENDER METHOD: If using a Dutch oven you can blend with an immersion blender directly in the pan. If using a saute pan you will need to move into a deep bowl.COUNTER TOP BLENDER: If using a regular blender be very careful because hot liquids expand. We recommend blending in two batches and always placing a kitchen towel over the lid for extra safety.
- Blend until you have the texture you like. If you want a super smooth sauce you can strain the sauce through a mesh strainer, pushing on the solids, and then discard the solids.
- Taste the sauce and see if it needs additional salt and pepper, or any additional seasoning (such as basil or oregano).If the sauce needs sweetening add 1 Tablespoon sugar or honey. If desired, add 1 Tablespoon balsamic vinegar to give sauce a richer flavor.
- Cool the sauce completely if not using it immediately.
Notes
- Use a variety of tomatoes if possible, including Roma’s, cherry tomatoes, heirloom tomatoes, San Marzano, and vine-ripened
- If you prefer to use canned tomatoes use three 28-ounce cans of whole or crushed San Marzano tomatoes for best results.
-
- REFRIGERATOR – Allow sauce to cool completely and store in an airtight container in the fridge for up to 5 days.
-
- FREEZER – Store the sauce in the freezer for up to 3 months in an airtight container or glass jars (our first choice). When you are ready to use it, remove it from the freezer and allow it to thaw completely. Once thawed give the sauce a stir.
-
- REHEATING – Place sauce in a pan and simmer over medium heat for about 5 minutes before serving.
Nutrition
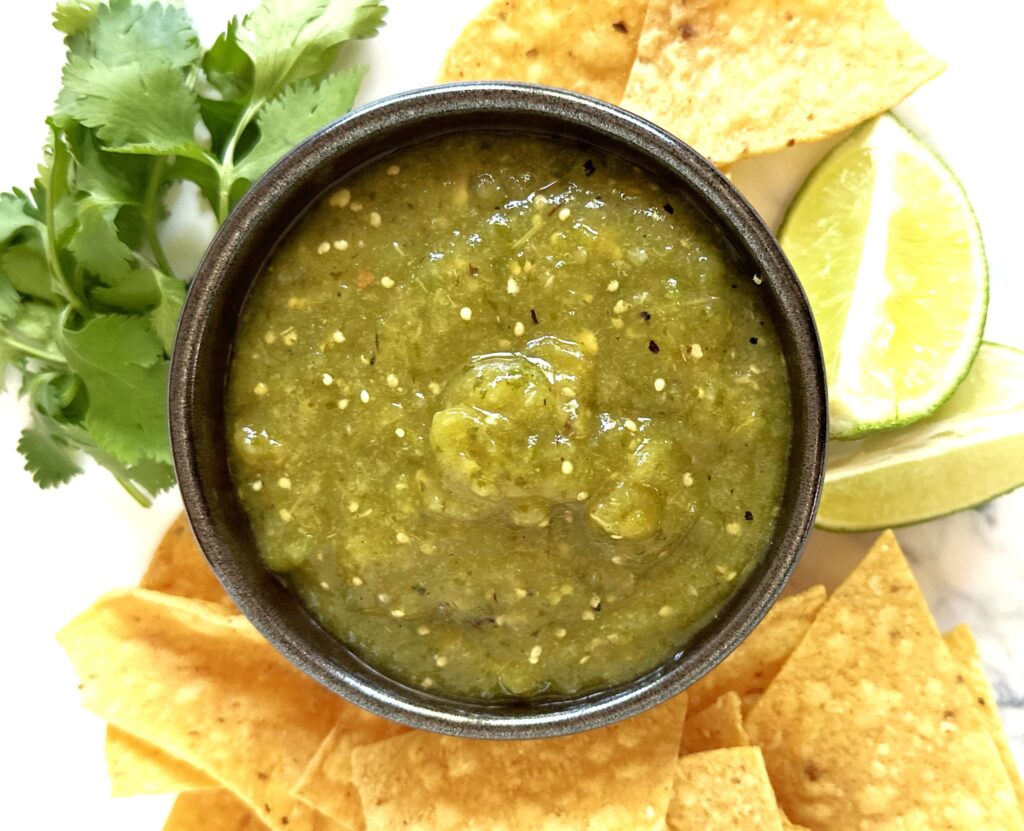
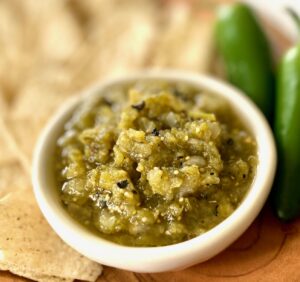
Our Salsa Verde Recipe is slow roasted for a zesty salsa packed full of amazing flavors!
Ready to get started? Just click on our “jump to recipe” button below to go straight to the recipe card. For tips, processes, and substitutions keep reading. This post may contain affiliate links. Please see our affiliate disclosure for details. We only recommend products we love and use.
Jump to RecipeYou’ll be dipping chips all day with this sunny salsa or use it to top our Turkey Tacos or Carne Asada. Whip up a refreshing Paloma cocktail and you’ve got the perfect meal!
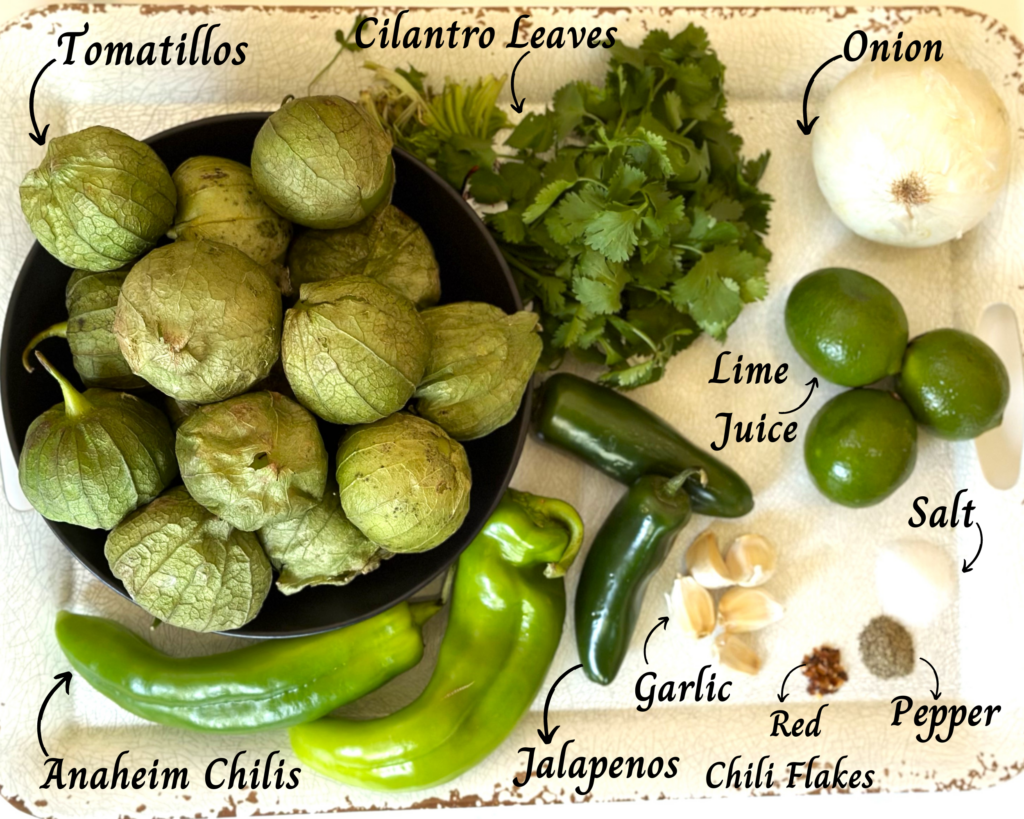
Ingredients for our Salsa Verde Recipe
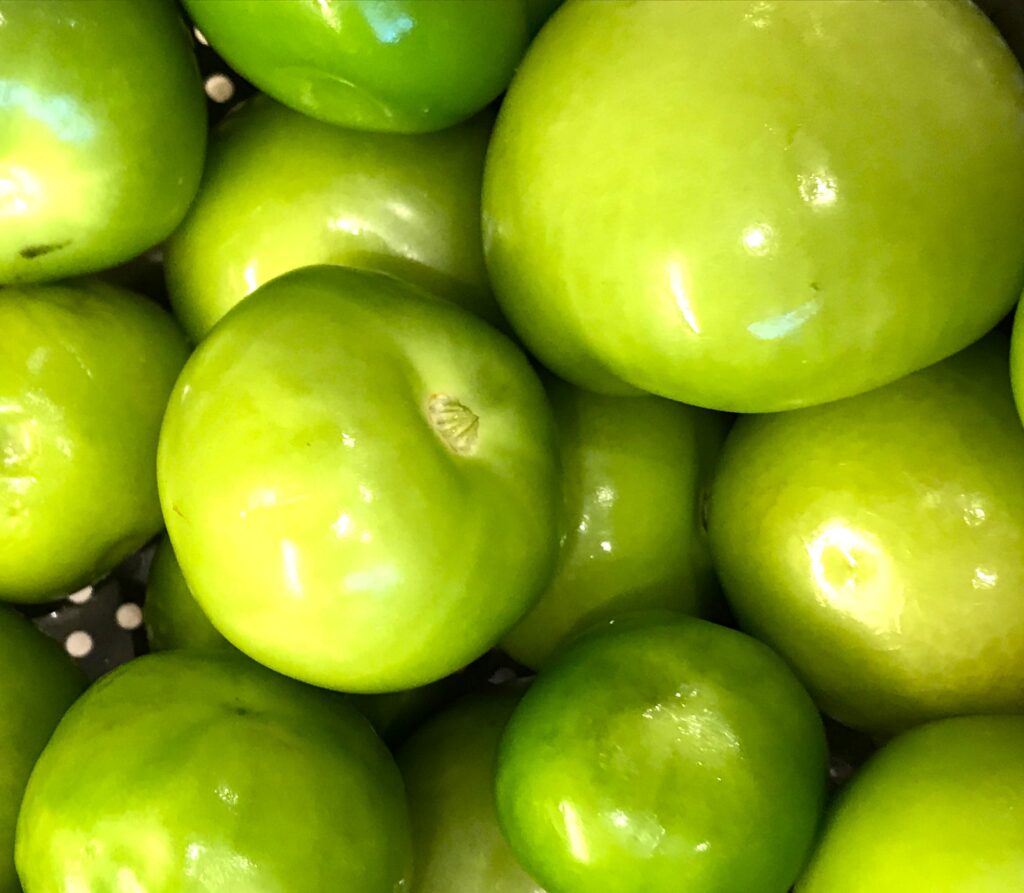
- Tomatillos
- Garlic
- White Onion
- Anaheim Chilis
- Jalapenos
- One Bunch of Cilantro Leaves
- Fresh Lime Juice
- Salt and Pepper
- Red Chili Flakes (optional)
Is Tomatillo Salsa the same as Verde?
Yes, it’s true! Salsa Verde is also called Tomatillo Salsa or Green Salsa. Those names help to differentiate this from the Italian version of “Salsa Verde” but the ingredients are different and include olive oil, parsley and capers.
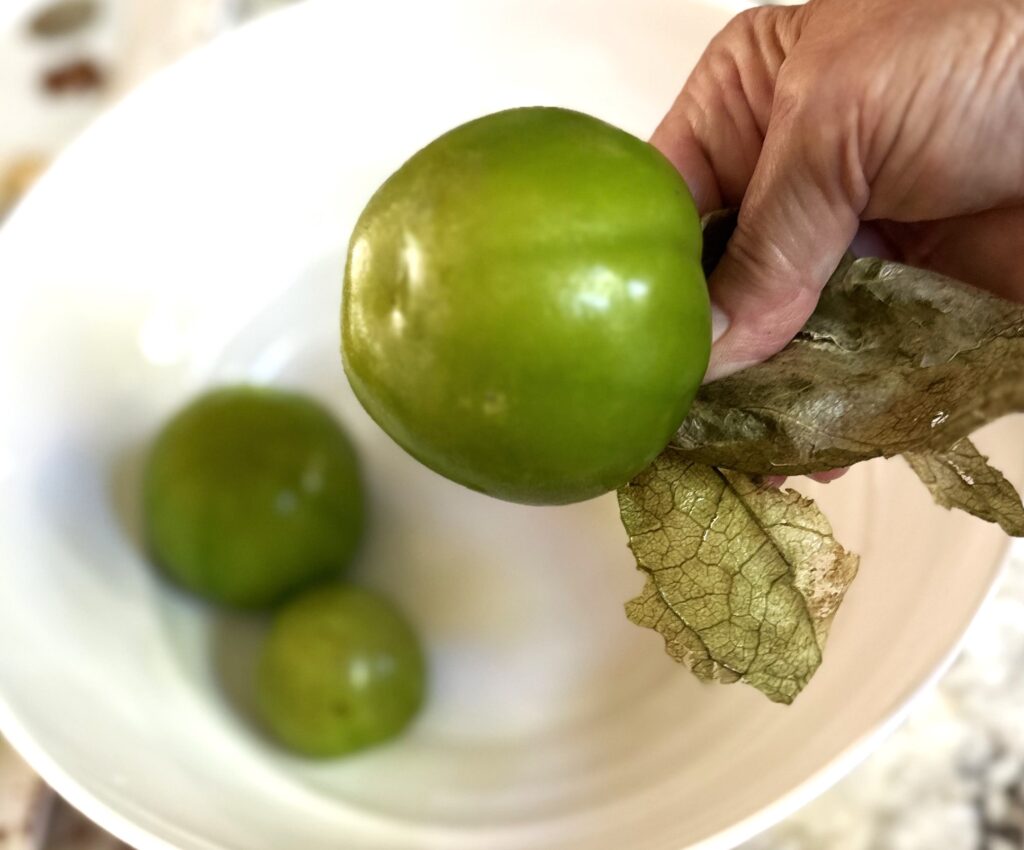
Tomatillos are the main ingredient in Mexican Salsa Verde. They resemble small tomatoes but have a papery husk. Tomatillos are often roasted when added to salsas or a variety of other recipes.
How to make Verde Salsa or Green Salsa
First Step:
- Remove the papery husks from the tomatillos. Tomatillos have a sticky coating under the papery husk. Remove the husk and soak the tomatillos in warm water for about 50 seconds. Afterward, rinse them by hand. This is an important part of making the finished salsa so don’t skip it!
- Pat each tomatillo dry with a paper towel and set aside.
- Preheat the oven to the high broil setting.
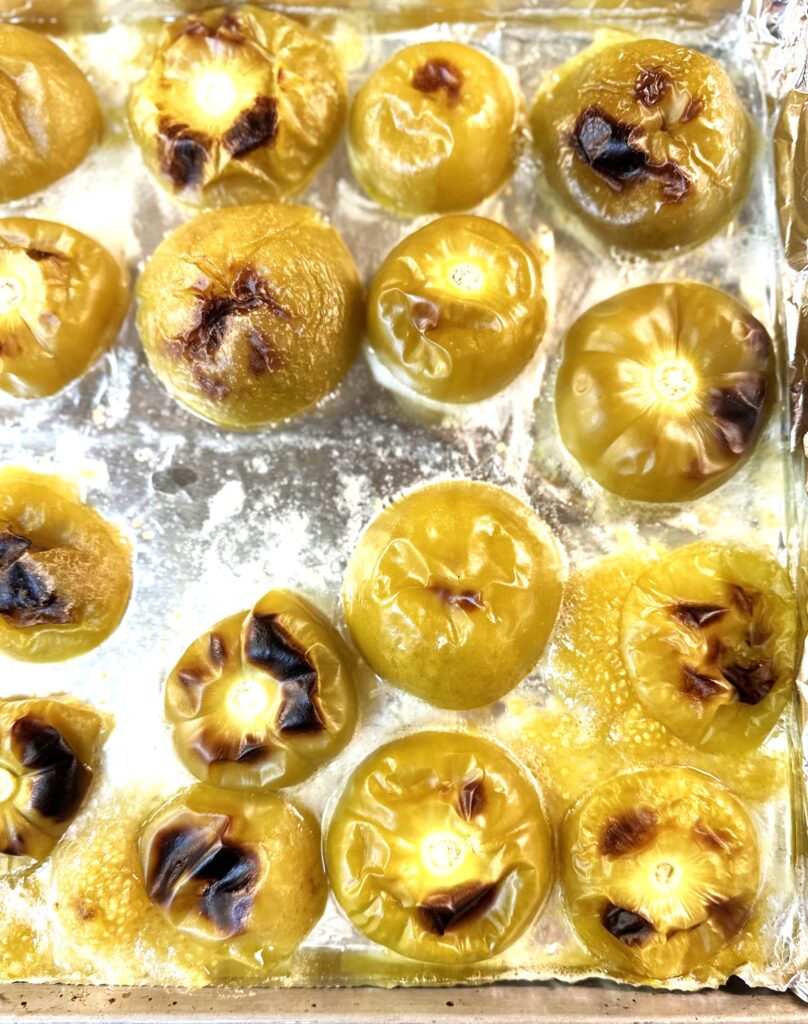
- Cut tomatillos in half and place them cut side down on a foil-lined baking sheet.
- Broil tomatillos in the oven on high for 5-7 minutes. When tomatillos are done the outer skin will have a slightly blackened appearance and look charred and toasty.
- Remove from the oven and let the tomatillos rest until completely cooled. Reserve all the juices that have collected during cooking on the foil. This is another important part of making the finished salsa.


Second Step:
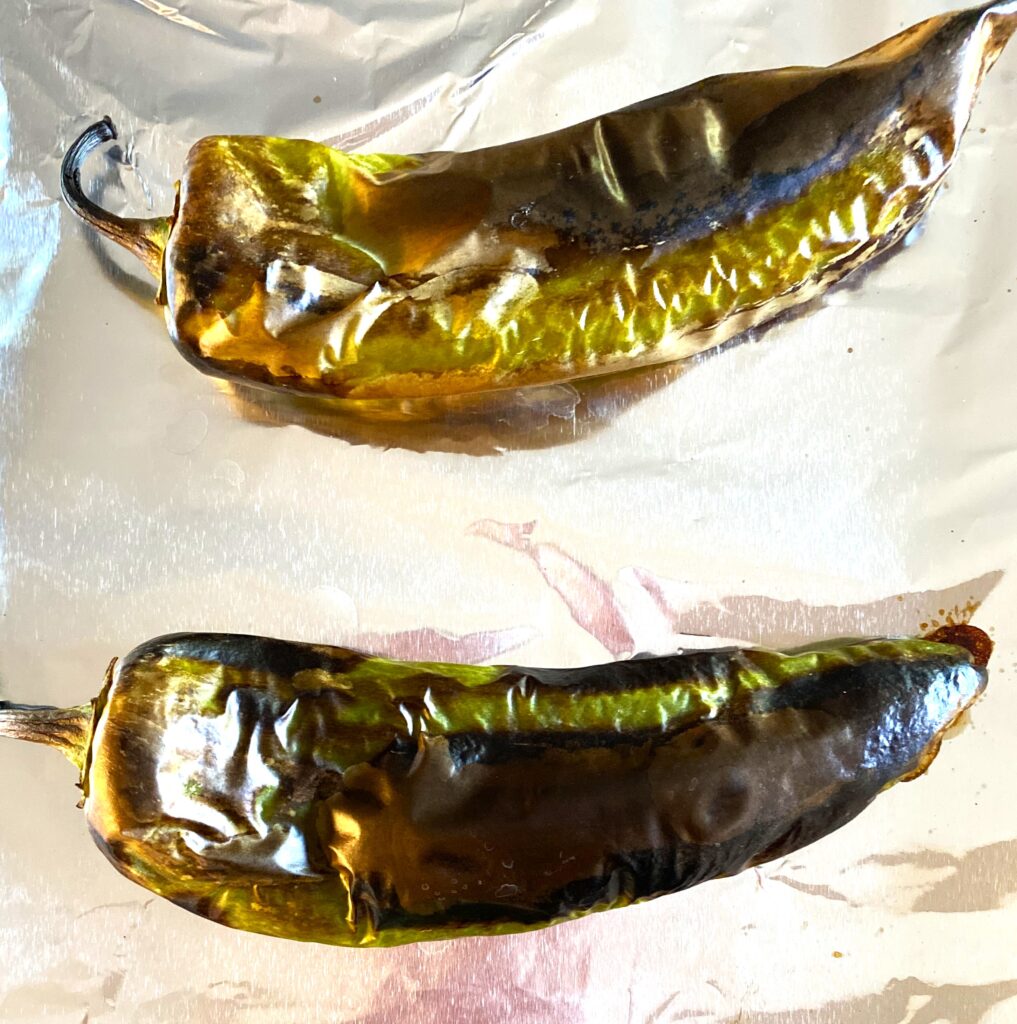
- On another sheet pan broil the whole Anaheim chilis along with the garlic cloves (still in their skin) in the oven, turning once until blackened on both sides and the skin appears to lift. This will take about 3-5 minutes per side.
- Let the chilis and garlic cool completely, then remove the skin, seeds, and stems from the chilis, and remove the skin from the garlic. Set both aside.
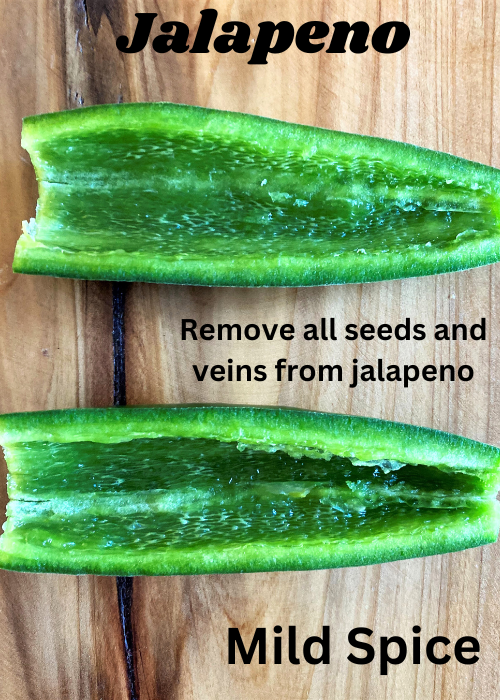
- Halve the jalapenos, remove seeds and ribs to the spice level desired, (see chart below to choose your spice level), roughly chop, and set aside.
- Clean, dry, and chop off the stems from the cilantro, and set aside.

Third Step:
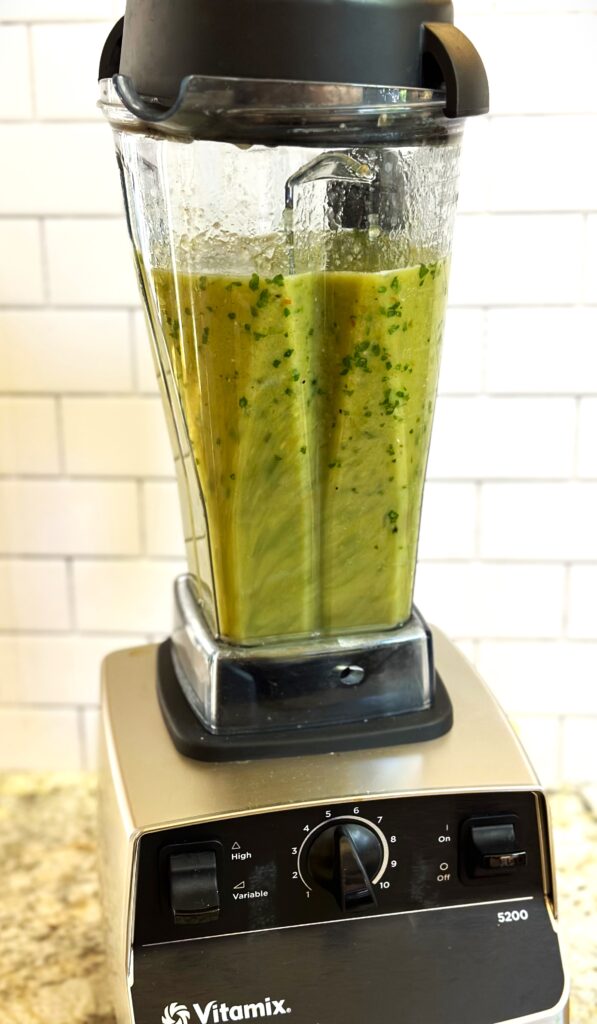
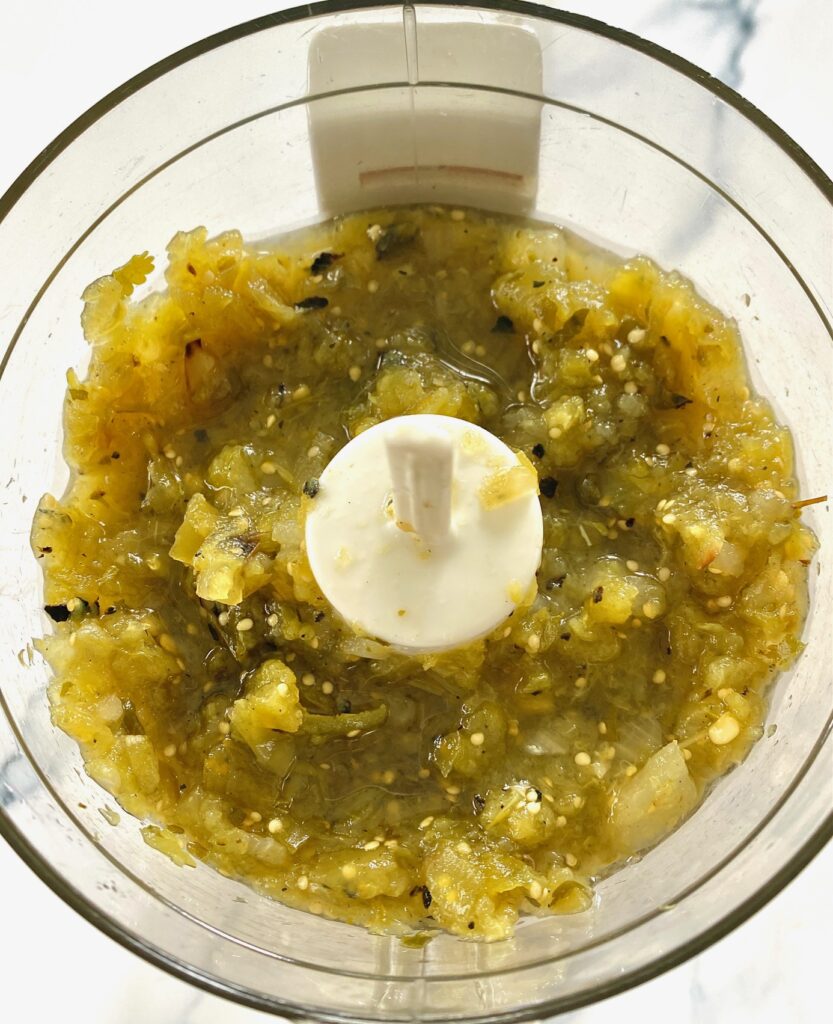
- In a blender or food processor place roasted cooled tomatillos with skin, accumulated juices, chilis, jalapenos, garlic, onion, cilantro, lime juice, salt, pepper, and red chili flakes.
- Turn blender or processor on low for a few seconds, then turn it up to high and blend well until all ingredients are mixed together.
- This salsa is best when you make it ahead of time because that allows all the flavors to meld and pop which makes an incredible tasting Salsa Verde!
What is the difference between salsa and salsa verde?
Besides color, there are a few key differences between the two. Salsa is traditionally red in color and made with a tomato base. Verde salsa is green and made with tomatillos, peppers, and green chilis.
Is verde spicier than regular salsas?
Traditional red salsas have a sweeter flavor and are generally hotter than green verde salsa. Red salsas are traditionally served chilled. Green salsas are best when served either at room temperature or warm, and generally are less spicy.
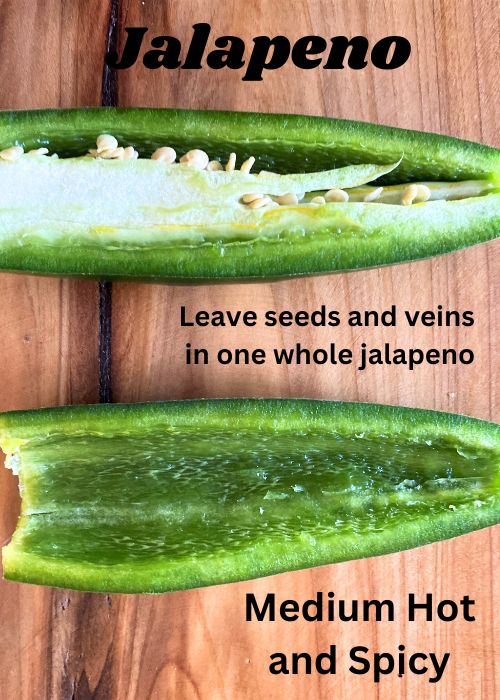
How to adjust the spice levels in salsas and sauces:
- Hot and spicy – Do not remove the seeds and veins from the jalapenos and add it all to the sauce.
- Medium hot and spicy – Leave the seeds and veins in just one of the two jalapenos that will be added to a sauce.
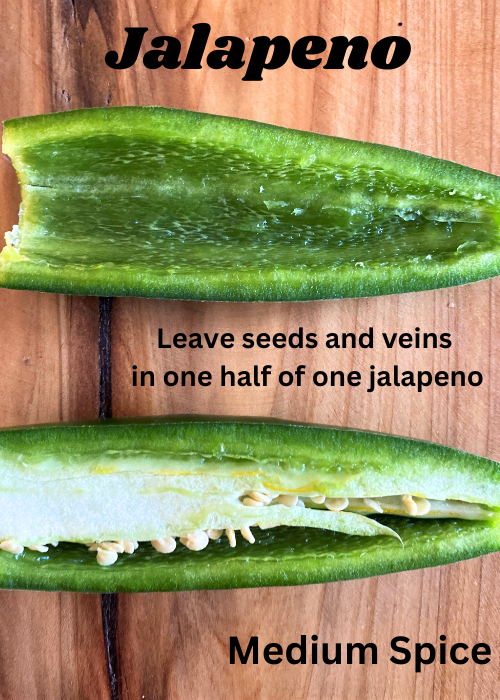
- Medium spice – Leave the seeds and veins in just one-half of one jalapeno that will be added to the sauce.
- Mild spice – Remove all seeds and veins from the jalapenos that will be added to the sauce.

How long can you store Salsa Verde?
REFRIGERATING: Salsa Verde can be stored in the refrigerator for one week in a covered container. We suggest bringing the salsa to room temperature after refrigerating.
FREEZING: Salsa Verde will also freeze well for up to 2 months. The smoother version freezes better than a chunkier style version. Freeze in a tightly sealed container. When ready to serve allow the salsa to come to room temperature and stir well before serving.
Pro Tips for Making the Perfect Salsa
- Tomatillos are high in pectin, which can result in your salsa tasting soapy or becoming jellied when refrigerated. For this reason, it’s important to soak the tomatillos for about 50 seconds and then rinse them with warm water, before broiling, this is to remove the sticky coating on the tomatillo.
- Pat the tomatillos dry with a paper towel before roasting.
- Let tomatillos, chilis and garlic cool completely before adding to the blender.
- Don’t overprocess any type of salsa in the blender because you want the salsa to have some texture.
- If time allows make the salsa ahead of time and let the flavors marinate in the refrigerator
What are tomatillos?
The tomatillo is also known as the Mexican Husk Tomato and is part of the nightshade family. Tomatillos are small, spherical, and green or green-purple and have a slightly sour flavor. They originated in Mexico and are best known for their use in Salsa Verde and Chili Verde.

Other delicious salsas and sauces to make at home:
- Pineapple Salsa – also perfect with chips
- Cocktail Sauce – great with any seafood
- Sweet Chili Sauce – lightly spicy and sweet – we love it on Grilled Corn on the Cob
- Teriyaki Sauce – a favorite all-around sauce and the perfect sauce for a touch of Asian flavor

Salsa Verde Recipe
Ingredients
- 1½ pounds Tomatillos, skinned and washed
- 1 bunch Cilantro, stems removed
- ½ cup white onion, roughly chopped
- 5 cloves whole garlic
- 2 large Anaheim chiles,
- 2 medium Jalapeno peppers
- 4 Tablespoons Lime juice, freshly squeezed
- ½ teaspoon Kosher salt
- ¼ teaspoon pepper
- 1 pinch red pepper flakes, optional
Instructions
- Remove the papery husks from the tomatillos. Tomatillos have a sticky coating under the papery husk. Remove the husk and soak the tomatillos in warm water for about 50 seconds. Afterward, rinse them by hand. This is an important part of making the finished salsa so don't skip it!
- Pat each tomatillo dry with a paper towel and set aside.
- Preheat the oven to the high broil setting.
- Cut tomatillos in half and place them cut side down on a foil-lined baking sheet.
- Broil tomatillos in the oven on high for 5-7 minutes. When tomatillos are done the outer skin will have a slightly blackened appearance and look charred and toasty.
- Remove from the oven and let the tomatillos rest until completely cooled. Reserve all the juices that have collected during cooking on the foil. This is another important part of making the finished salsa.
- On another sheet pan broil the whole Anaheim chilis along with the garlic cloves (still in their skin) in the oven, turning once until blackened on both sides and the skin appears to lift. This will take about 3-5 minutes per side.
- Let the chilis and garlic cool completely, then remove the skin, seeds, and stems from the chilis, and remove the skin from the garlic. Set both aside.
- Halve the jalapenos, remove seeds and ribs to the spice level desired, (see chart in post to choose your spice level), roughly chop, and set aside.
- Clean, dry, and chop off the stems from the cilantro, and set aside.
- In a blender or food processor place roasted cooled tomatillos with skin, accumulated juices, chilis, jalapenos, garlic, onion, cilantro, lime juice, salt, pepper, and red chili flakes.
- Turn blender or processor on low for a few seconds, then turn it up to high and blend well until all ingredients are mixed together.
- This salsa is best when you make it ahead of time because that allows all the flavors to meld and pop which makes an incredible tasting Salsa Verde!
Notes
- Want to cut the spice a little? Cut back to 1 Jalapeno pepper
- Salsa Verde can solidify when refrigerated. Let come to room temperature before serving and if too thick drizzle in one Tablespoon of water at a time
- Red pepper flakes are optional if you want a little extra heat
Nutrition
With just three ingredients it is quick and simple to make at home

Lavender flowers represent calmness, serenity, relaxation, and grace
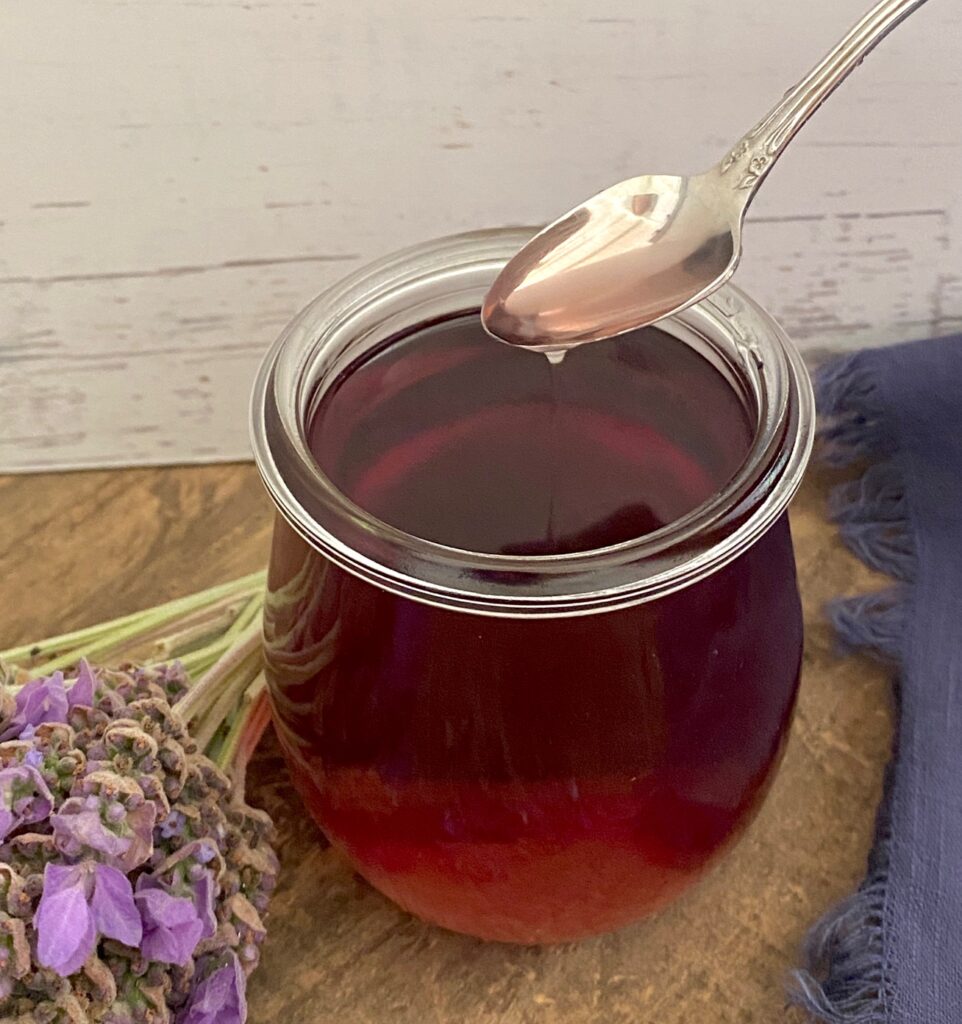
The aromatic floral properties of lavender simple syrup combined with its herbal flavor add a semi-sweet essence and light violet color to beverages and cocktails.
Jump to RecipeThis post may contain affiliate links. Please see our affiliate disclosure for more details.
What are the benefits of Lavender?
Lavender has been found to have the following benefits:
- Lavender is widely used as aromatherapy, and supplements, and may be helpful with anxiety, depression, and fatigue
- It can be used to help boost sleep
- Some feel it improves skin health
Ingredients for Lavender Syrup
- Dried culinary lavender buds or Organic fresh lavender buds
- Sugar
- Water

When selecting the right lavender to use for your recipes you have two options:
- Use organically grown fresh lavender buds, if they are available, but be sure they are organic and well rinsed and cleaned before using
- Use “culinary-grade” dried lavender. There are plenty of options and we used TooGet brand which comes in a handy 4-ounce resealable bag and is 100% pure and natural
(Please refer to the recipe card for exact quantities)
What makes lavender “culinary grade”?
Lavender is considered culinary by the way it is processed. The cooking grade of lavender goes through multiple rounds of sifting. All that remains are the pure lavender buds. All stems, leaves, and calyxes have been removed from the final product.
How to Make Lavender Simple Syrup:
Lavender Simple Syrup is easy to make at home. It only takes a few minutes and provides a semi-sweet and flavorful addition to use in cocktails, coffee, cookies, baked goods, and ice cream.
- The first step is to make a simple syrup. Simple Syrup can be infused with countless amounts of different ingredients, which will provide you with numerous flavors, that will rival the best mixologist or barista recipes!
- The second step is infusing the lavender to complete the flavored syrup
How to make Simple Syrup
For a complete tutorial visit our post on How To Make Simple Syrup
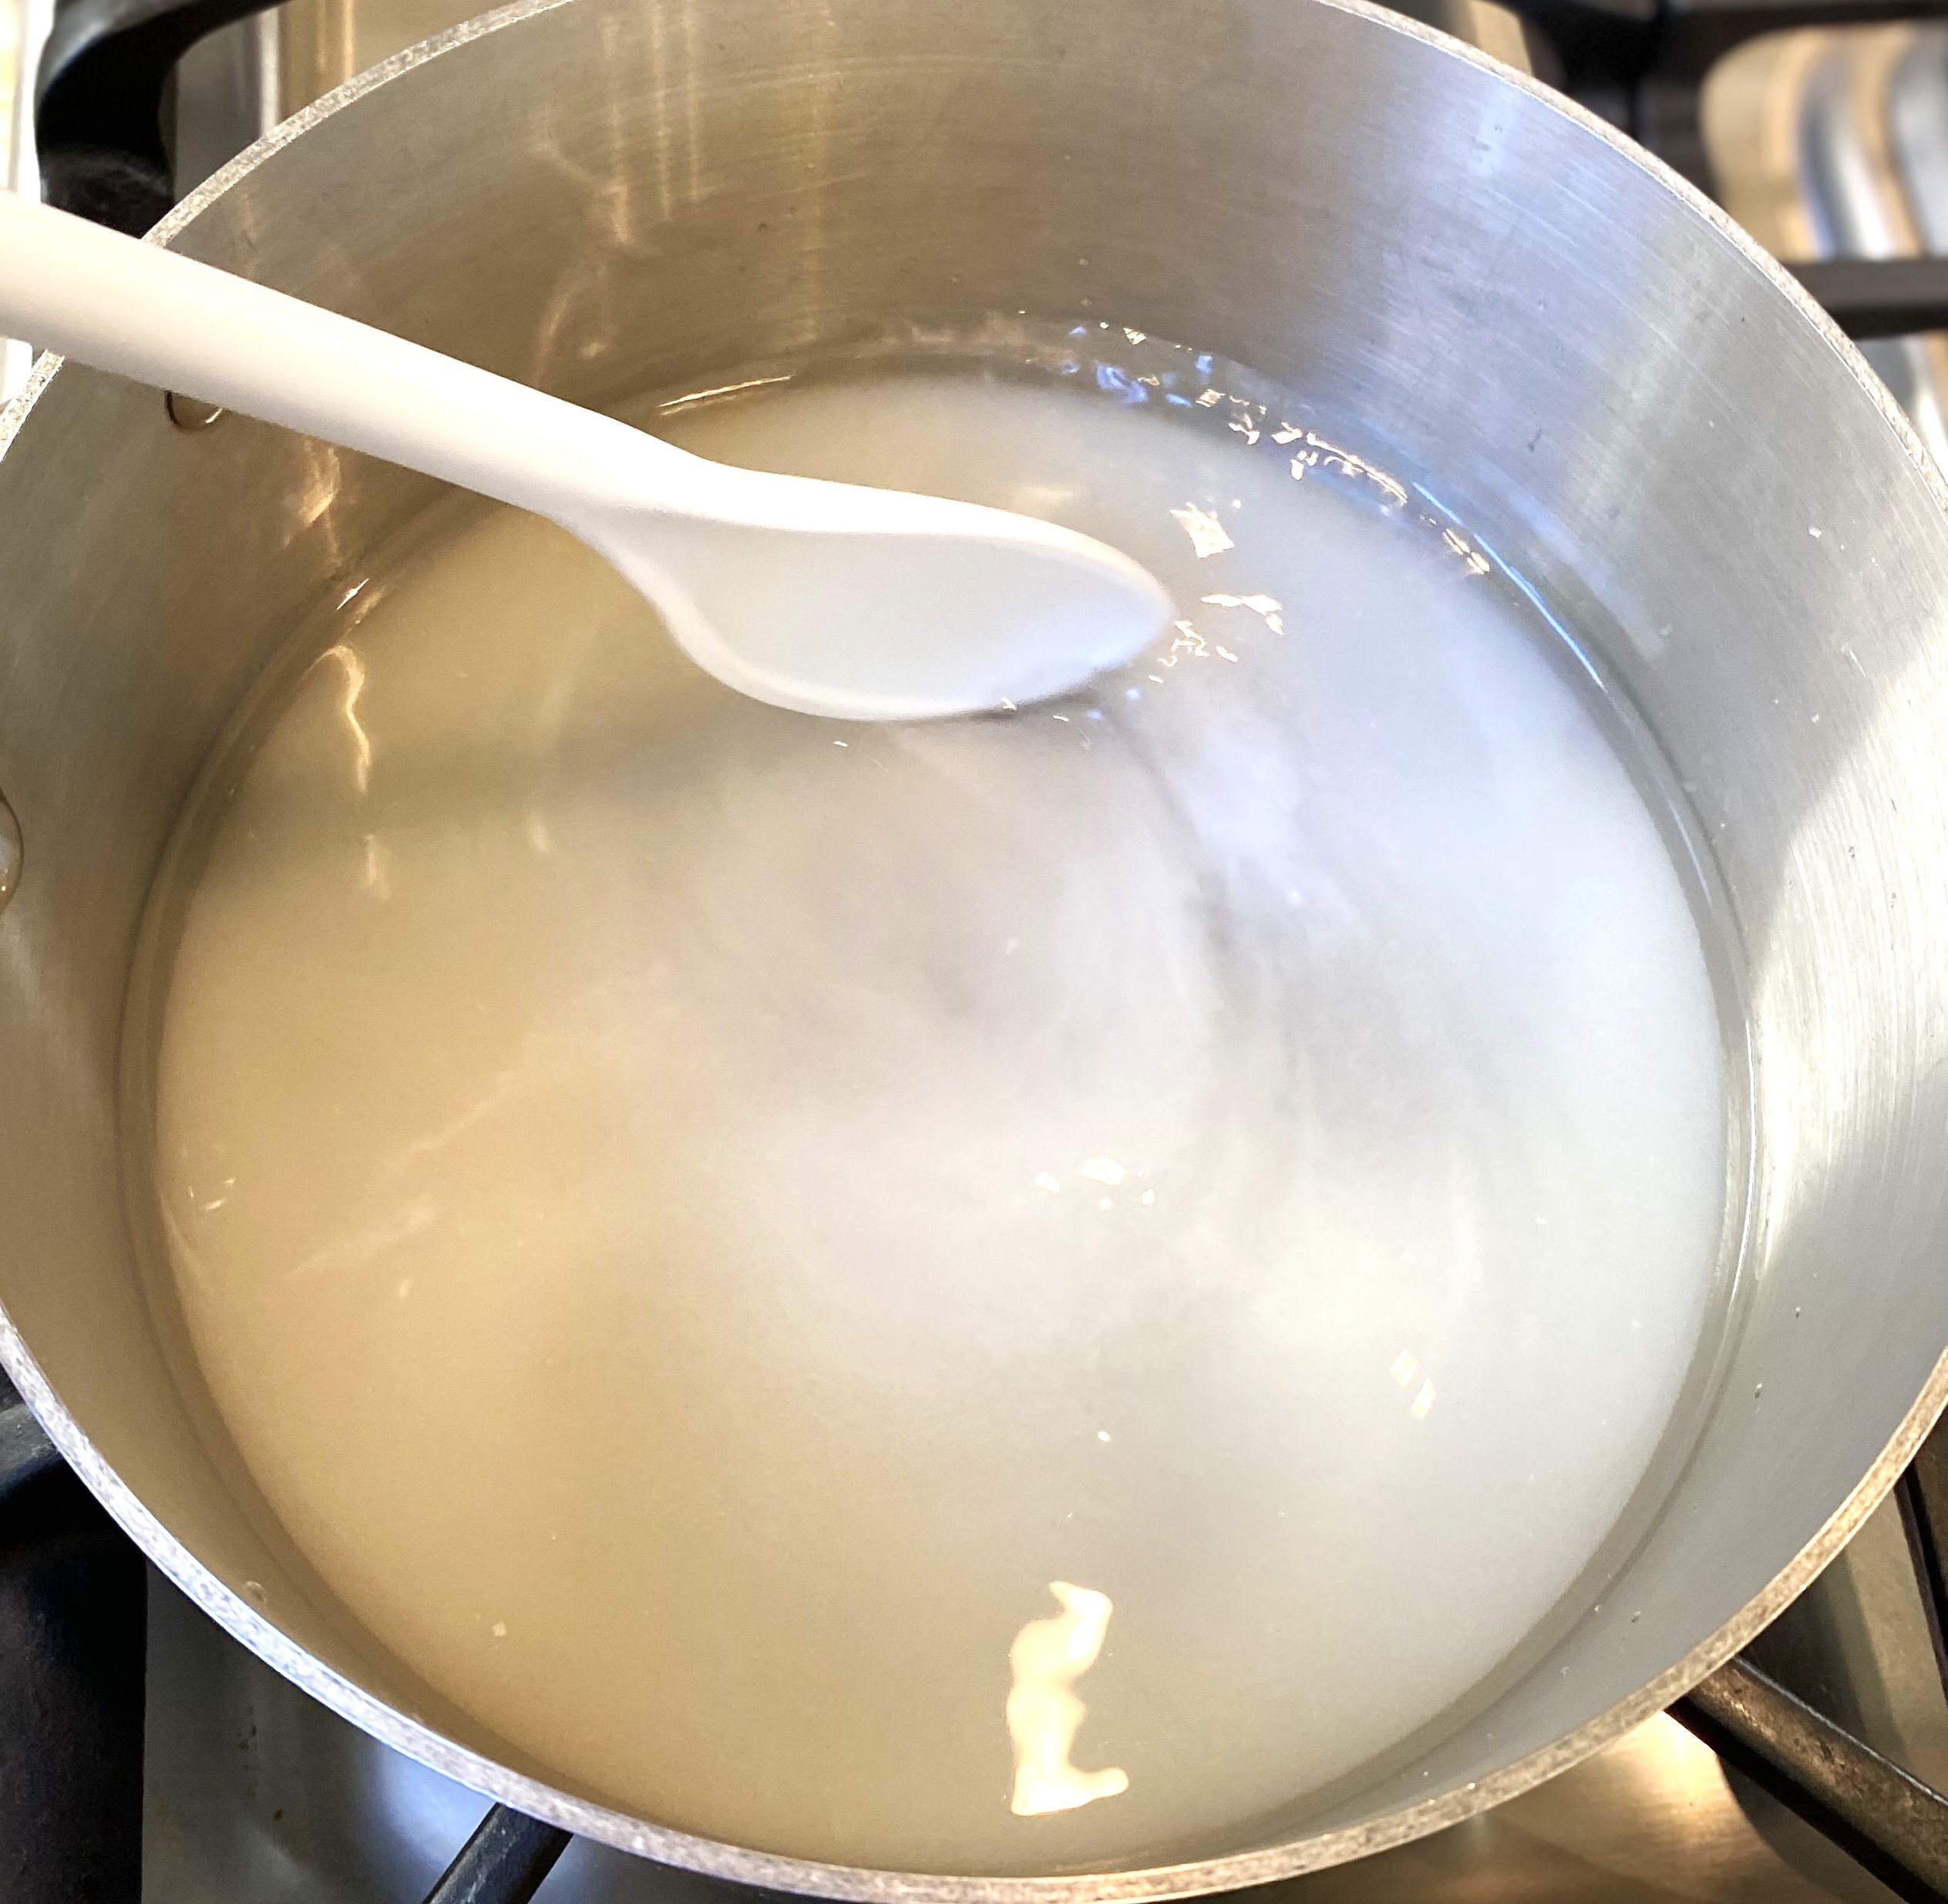
Step One: Homemade simple syrup can be used as a universal ingredient for many beverages and cocktails. It is quick and easy to make with equal parts sugar and water.

Step Two: Adding lavender to make lavender syrup
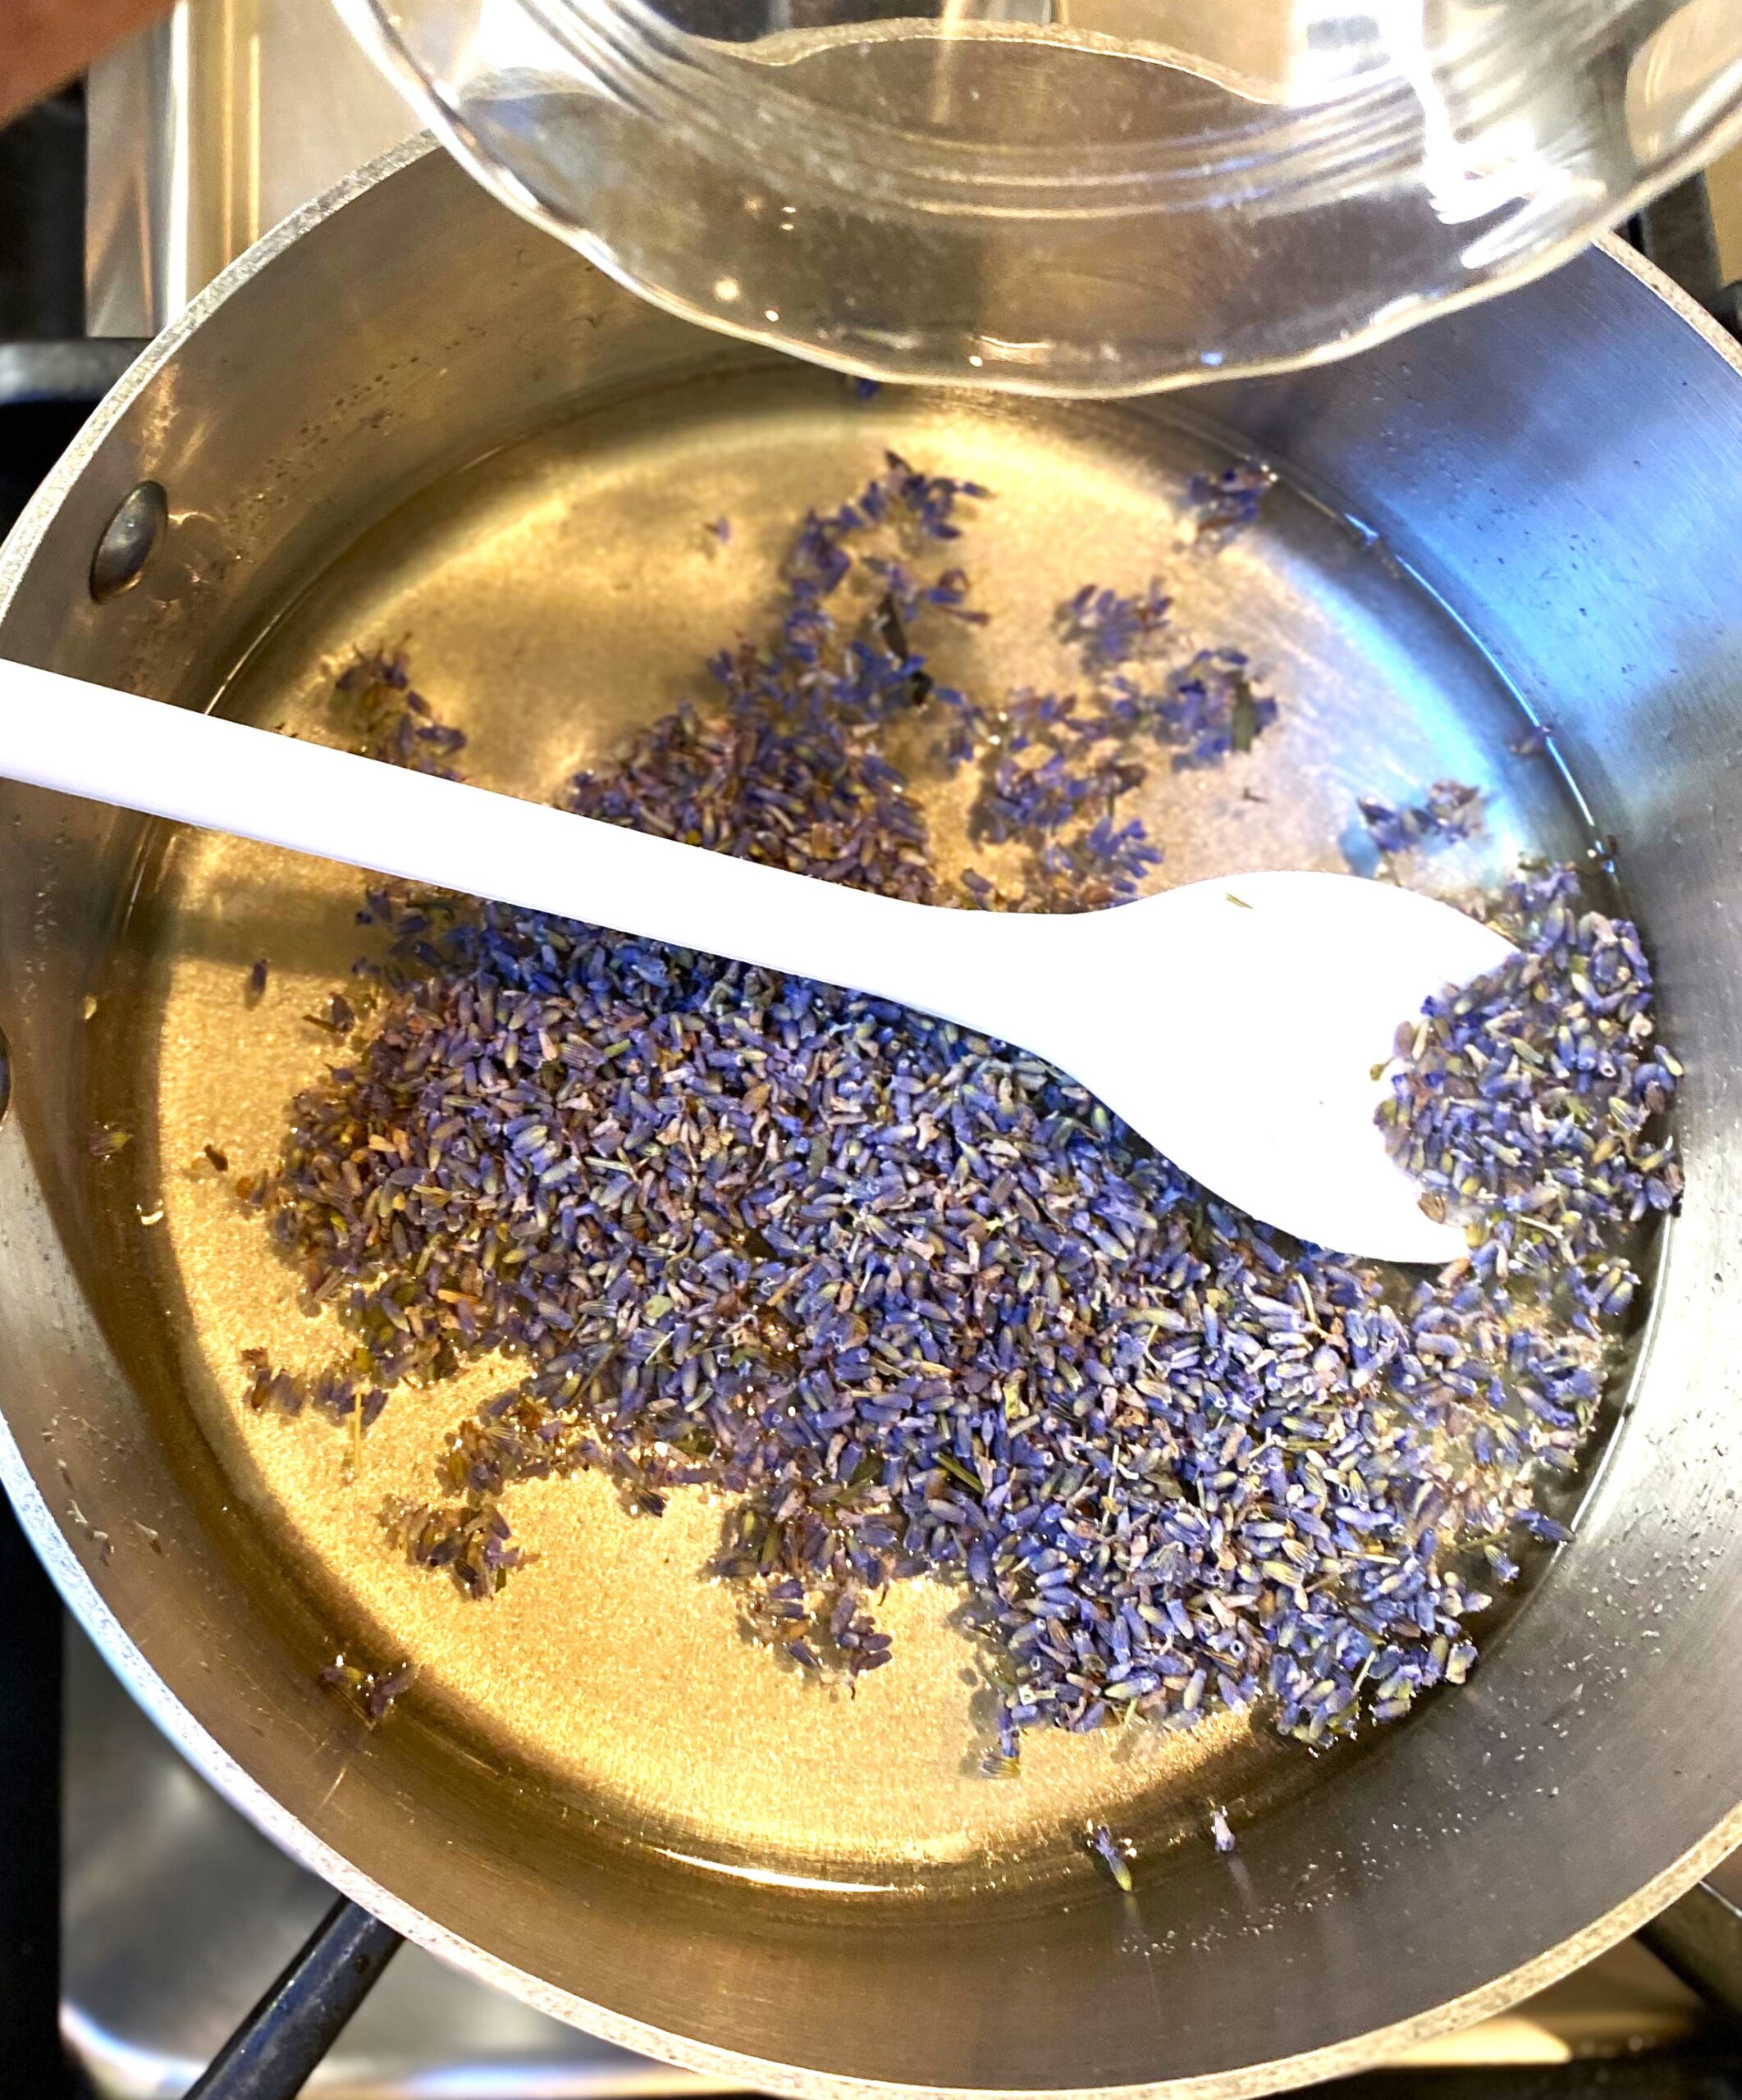
- Make the simple syrup first by blending equal parts sugar and water. For this recipe, we use 1 cup of sugar and 1 cup of water.
- Cook over medium heat and allow the sugar to be fully dissolved into the water. Stir frequently.
- Add 3 tablespoons of lavender buds to the simple syrup and bring to a boil. Stirring occasionally.
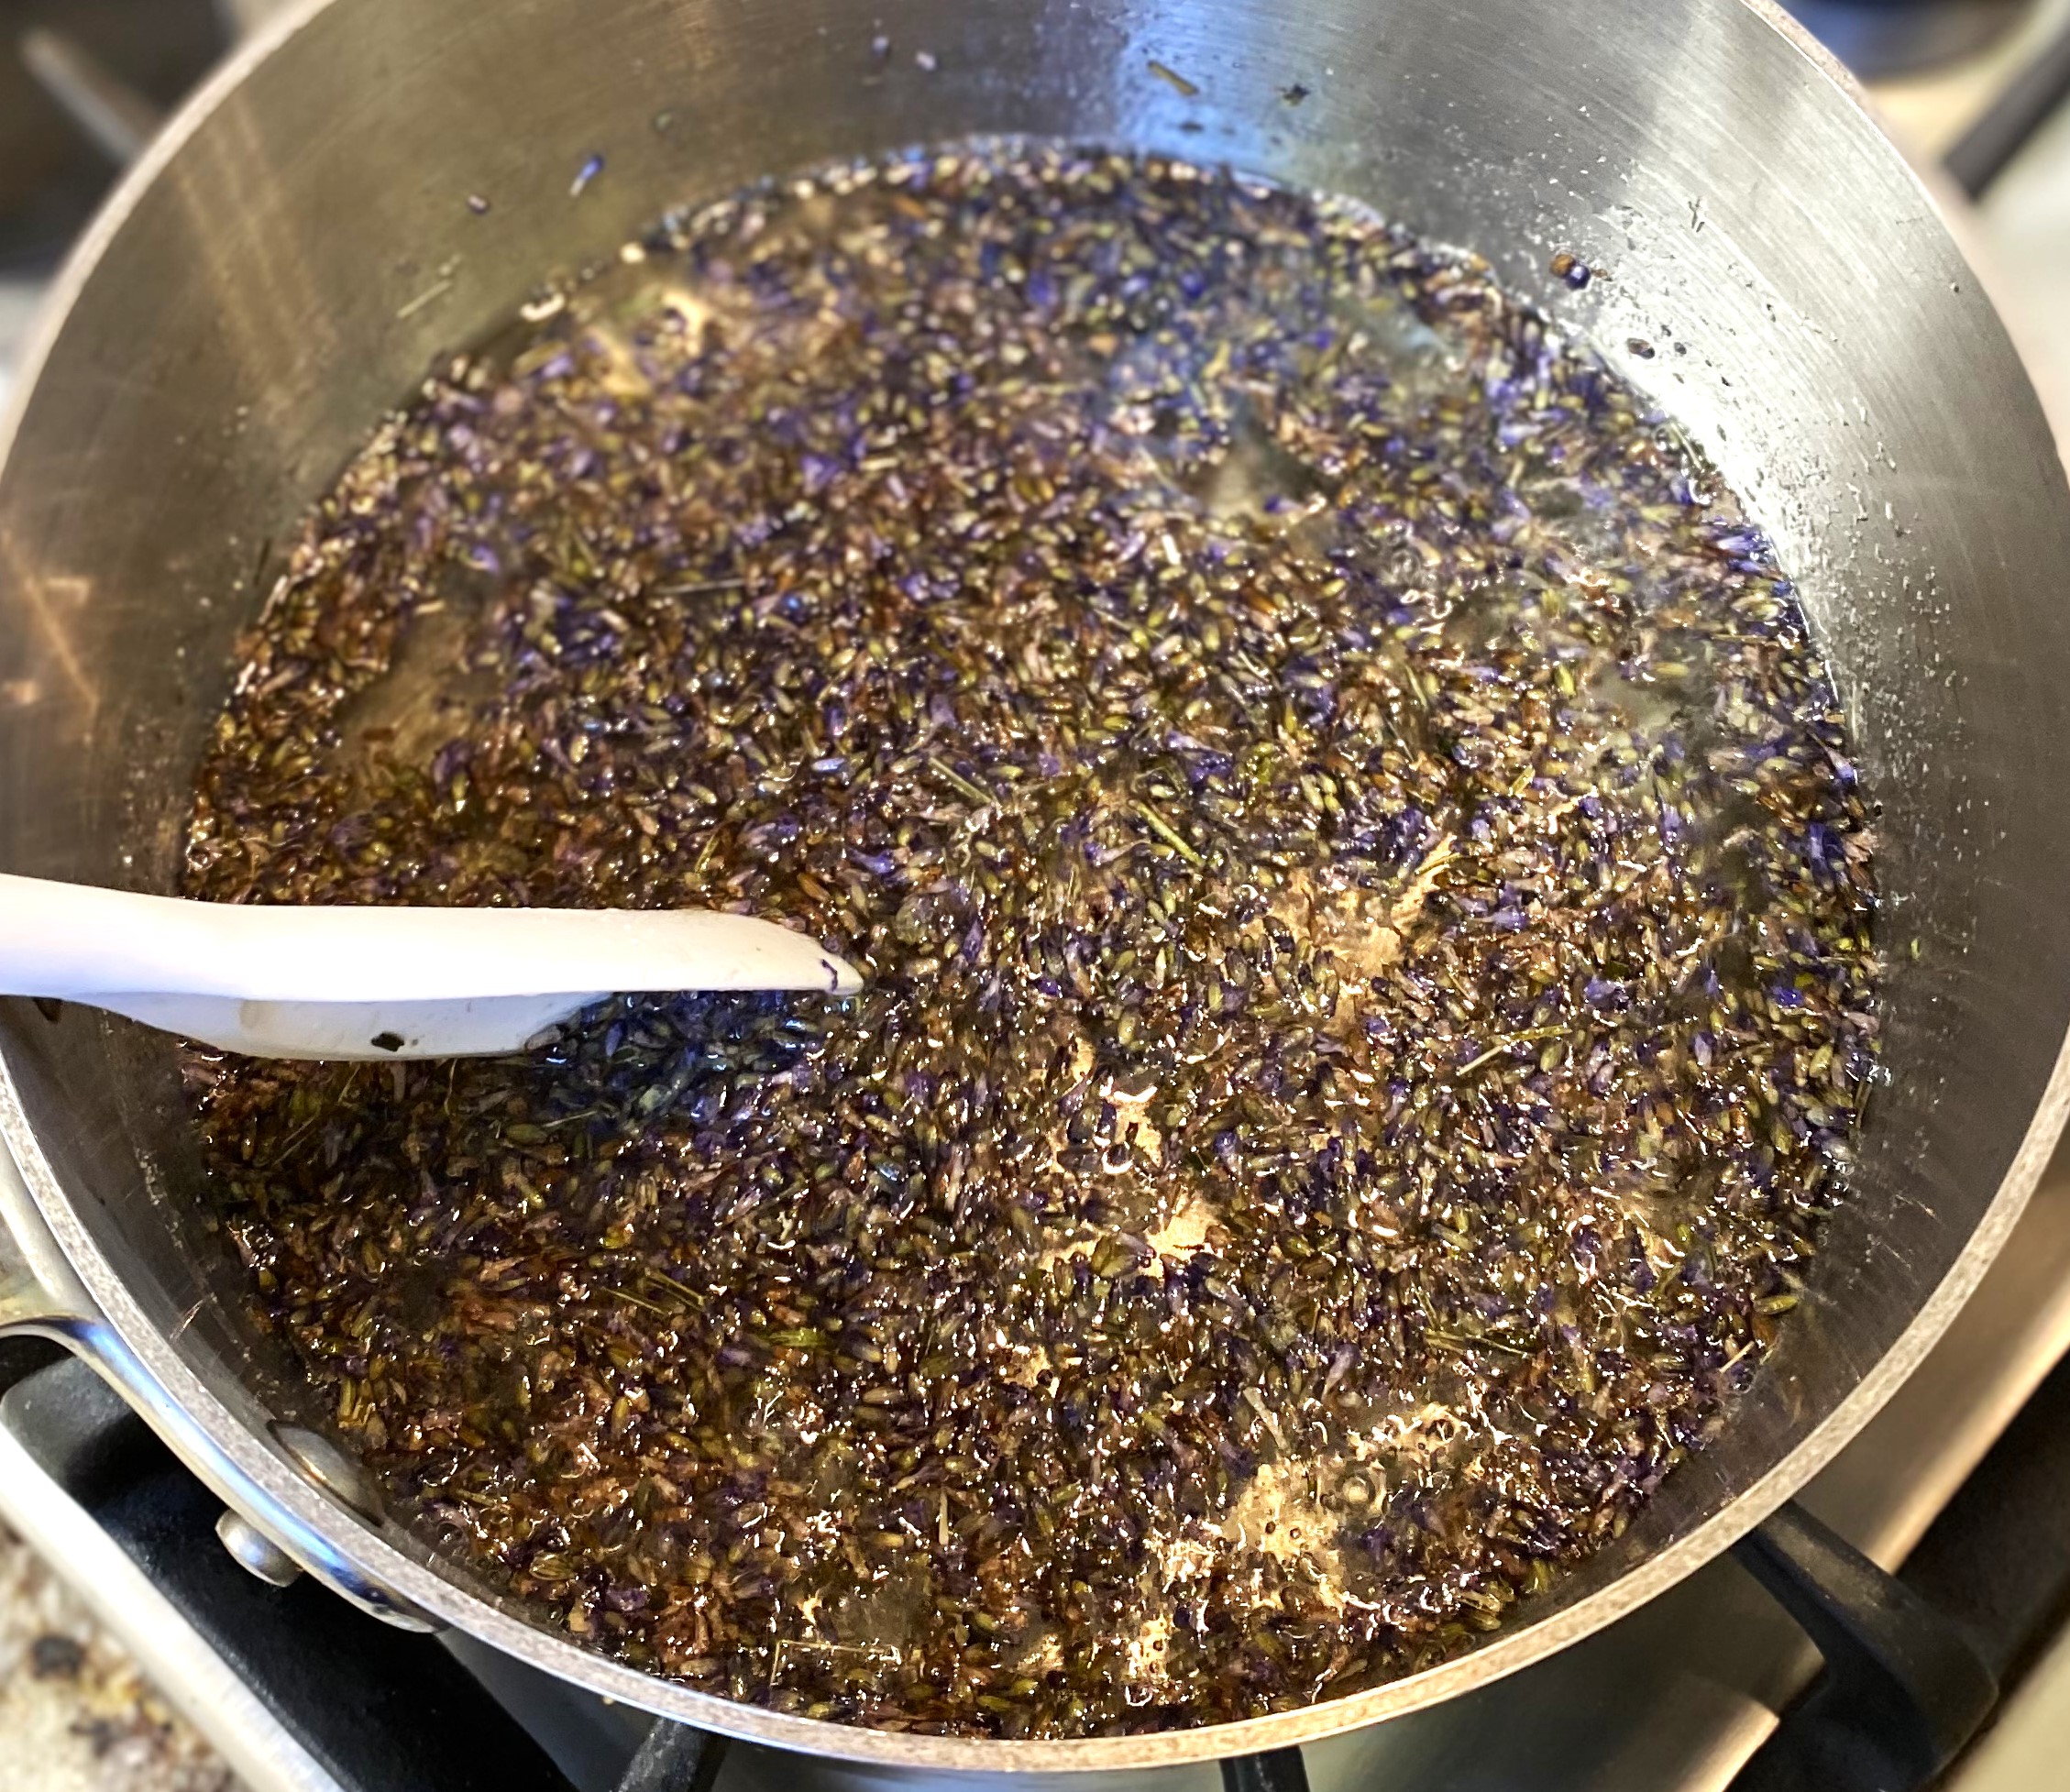
- Reduce heat and simmer gently for 15 minutes.
- Remove the syrup from heat and allow it to cool for 1 hour or until you achieve the desired lavender flavor.
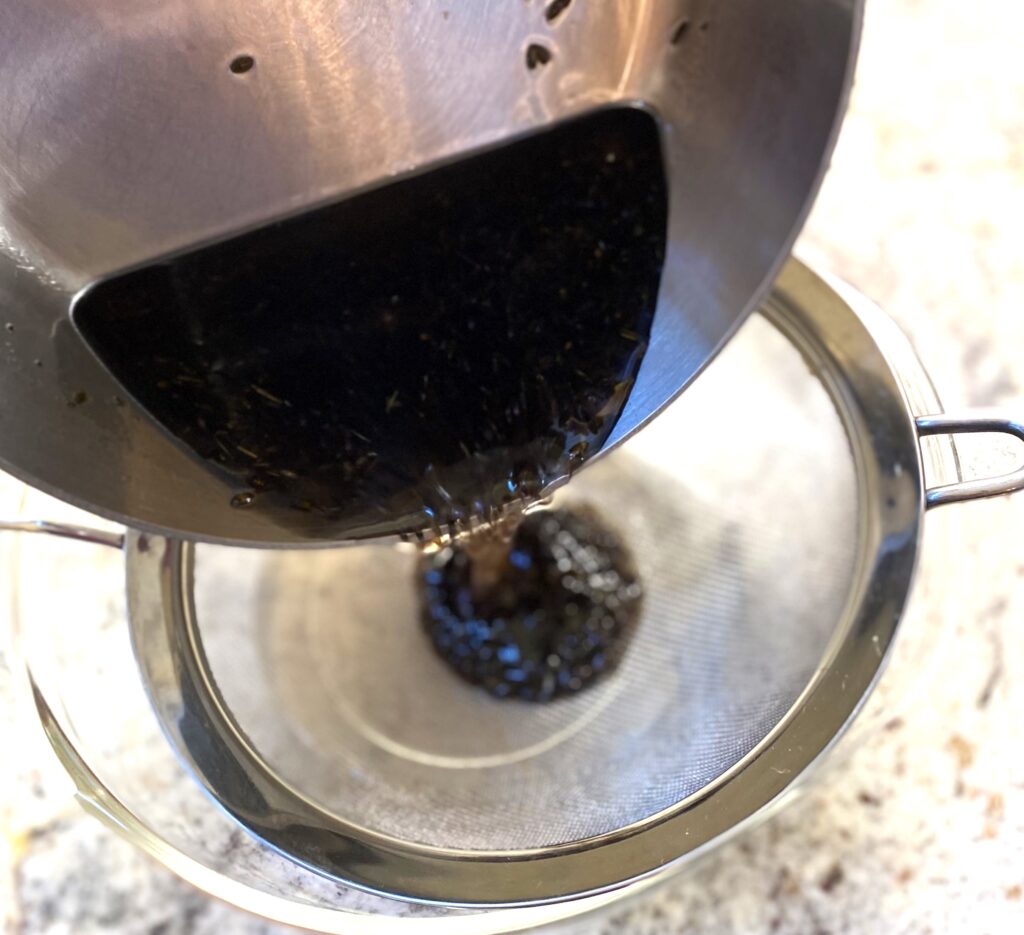
- Once the syrup has cooled, strain the lavender flowers and buds from the syrup. Make sure you use a fine mesh strainer. You may need to strain multiple times to remove all the particles.
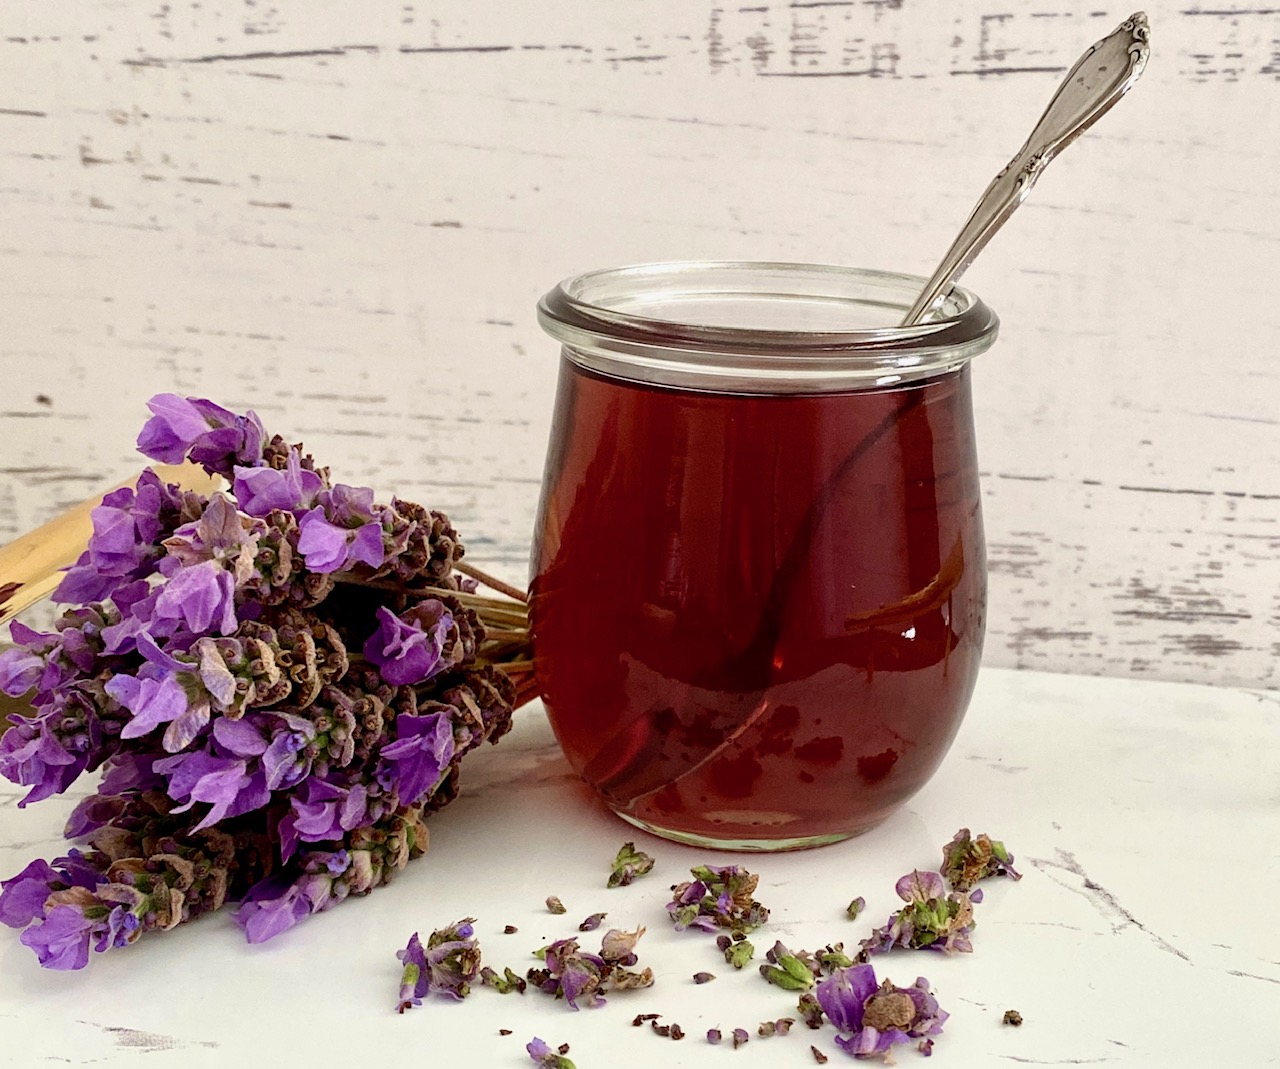
- Transfer syrup to an airtight container. We like to use small glass jars or glass flasks.
- Lavender simple syrup holds up well in the refrigerator for up to one month.
PRO TIP – Strain the syrup using a fine mesh strainer for the best results. Nobody wants bits of lavender buds in their latte or scones.
Substitution ideas for white sugar
If you are looking for a substitute for white sugar here are three of our favorites. Please note that substitutions can change the flavor of the finished syrup.
White sugar will allow for a hint of purple color in your finished syrup. When you use a substitute with a darker color the finished syrup will take on a darker color
- Honey – makes a lovely substitute for white sugar. Honey has its own distinctive flavor and your syrup will have more of the flavor of honey in the finished product. Try lavender honey for a more forward flavor. Keep in mind that honey is much sweeter than sugar so use 1/2 to 2/3 cups of honey for every one cup of sugar.
- Coconut Sugar – This makes a great substitute for white sugar. It is a 1:1 ratio, meaning one cup of coconut sugar for one cup of white sugar. Some people believe since coconut sugar is plant-based it is more natural.
- Light Brown Sugar – This is the easiest substitute for white sugar. To substitute use a 1:1 ratio of brown sugar to white sugar. Note that your syrup will take on a darker color using light brown sugar. Dark brown sugar is not recommended.
Culinary Grade vs. Fresh Lavender
We tested both culinary-grade and fresh-picked organic lavender. The taste was the same but the color was more vibrant with the fresh lavender. Here are side-by-side comparison photos:

Best way to store Lavender Simple Syrup
After you have strained all the lavender flowers and buds from the syrup, pour the syrup into an air-tight container or jar.
Lavender simple syrup will keep well in the refrigerator for up to one month.
FAQ: Why is my lavender syrup bitter?
If you let the lavender simmer and steep too long it can take on a bitter note, so be sure to limit your simmering to 15 minutes and your steeping to no more than one hour.
Additional cocktails using simple syrup or infused simple syrup
- Cucumber Mint Cocktails
- Blueberry Vodka Cocktail
- Lemon Drop Martinis
- Watermelon Vodka Cocktail
- Blackberry Champagne Cocktail

Lavender Syrup
Equipment
- 1 Medium sauce pan
- 1 measuring cup
- 1 Fine mesh strainer
Ingredients
Lavender Syrup
- 1 cup sugar
- 1 cup water
- 3 Tbsp Dried Lavender buds or Organic Fresh Lavender buds food grade
Instructions
- Make your simple syrup first by blending equal parts sugar and water. For this recipe use 1 cup sugar and 1 cup water.
- Add 3 tablespoons of Lavender buds to simple syrup and bring to a boil.
- Reduce heat and simmer for 15 minutes.
- Remove the syrup from heat and allow it to cool for 1 hour or until you achieve your desired lavender flavor.
- Once syrup has cooled strain the lavender flowers and buds from the syrup. Make sure you use a fine mesh strainer. You may need to strain multiple times to remove all bud particles.
- Transfer syrup to an air tight container.
- Lavender simple syrup holds up well in the refrigerator for up to one month.
Notes
White sugar will allow for a hint of purple color in your finished syrup. When you use a substitute with a darker color the finished syrup will take on a darker color
- Honey – makes a lovely substitute for white sugar. Honey has its own distinctive flavor and your syrup will have more of the flavor of honey in the finished product. Try lavender honey for a more forward flavor. Keep in mind that honey is much sweeter than sugar so use 1/2 to 2/3 cups of honey for every one cup of sugar.
- Coconut Sugar – This makes a great substitute for white sugar. It is a 1:1 ratio, meaning one cup of coconut sugar for one cup of white sugar. Some people believe since coconut sugar is plant-based it is more natural.
- Light Brown Sugar – This is the easiest substitute for white sugar. To substitute use a 1:1 ratio of brown sugar to white sugar. Note that your syrup will take on a darker color using light brown sugar. Dark brown sugar is not recommended.
Nutrition
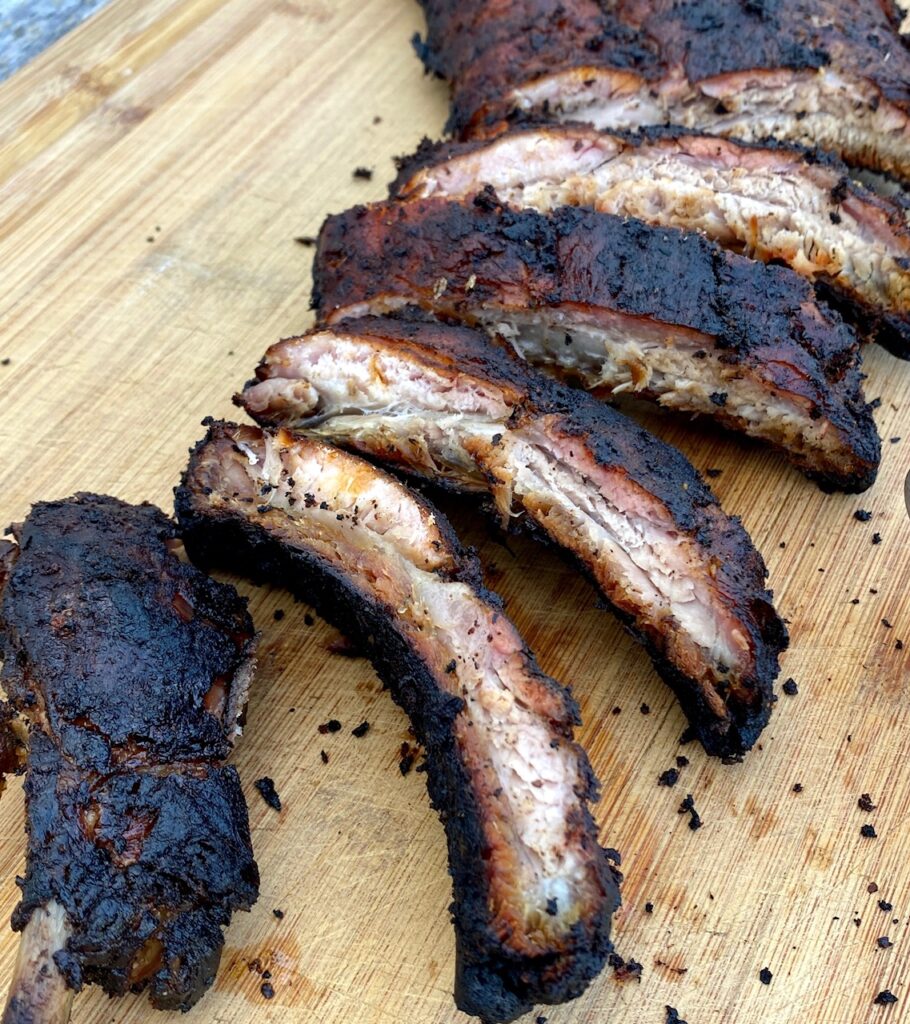
The best part of ribs is that big hit of flavor you get with every finger-licking bite!
Our classic recipe for dry rub for ribs is the key to supercharged flavor. Using a handful of pantry staple spices you can transform every rack of ribs, including pork ribs, spare ribs, and beef ribs!
We use this spice mixture in all of our baby back ribs recipes. Our Oven Baked Ribs, flavorful Smoked Ribs, and Slow Cooker Ribs start as dry rub ribs and use this flavorful rib seasoning.
This post may contain affiliate links. Please see our affiliate disclosure for more details.
Ingredients needed for homemade Rib Rub
When we say easy, we aren’t kidding! This super flavorful spice blend has the perfect balance and comes together in about 5 minutes!
Below is the list of the handful of seasonings needed to make your own dry rub, and some thoughts on why we chose each of them. Be sure to use fresh spices for the best results!
(The exact measurements are listed in the recipe card below)
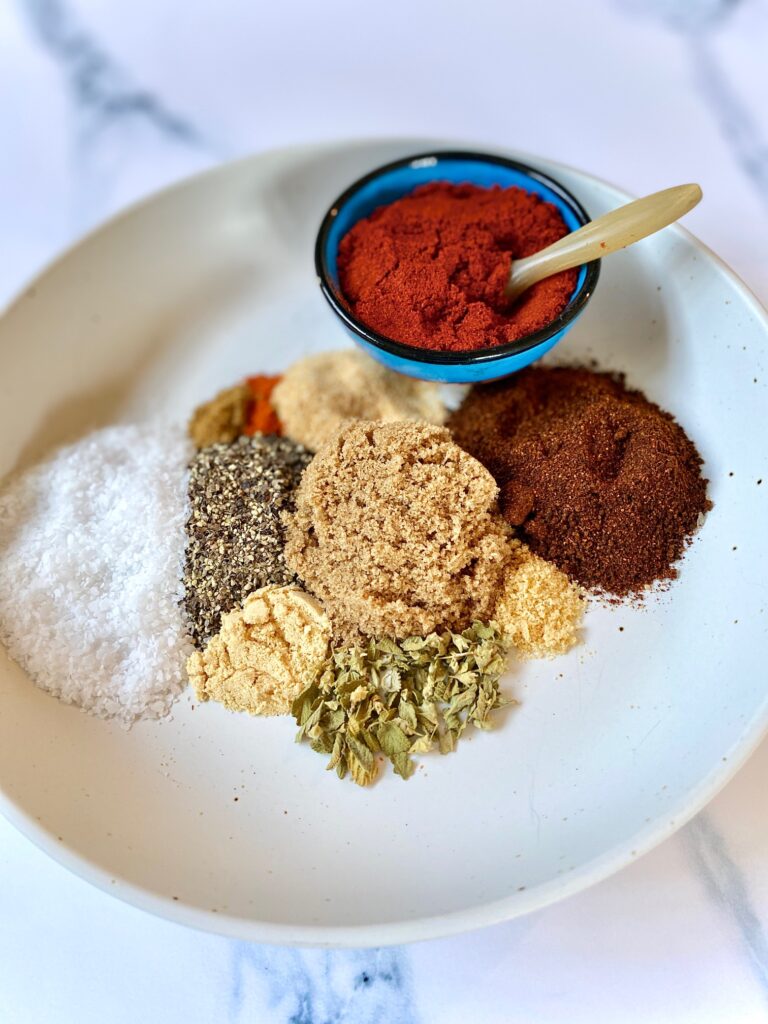
- Paprika – Use the best quality sweet paprika from Hungary, if possible. You can also substitute smoked paprika if you want added wood-fired smoky flavor
- Chili Powder – Chili powder is a mixture of herbs and spices but is mainly made up of a combination of dried chile varieties. Any type will work!
- Dark Brown Sugar – We love the deep flavor of dark brown sugar, due to the presence of molasses. Light brown can be substituted if that is all you have on hand. If you are paleo-friendly use coconut sugar instead
- Black Pepper – Freshly ground pepper gives this rub a kick!
- Kosher Salt – This type of salt has wider, coarser crystals and no additives. The larger size allows it to salt food more gently. If you don’t have kosher salt the best substitute is coarse sea salt. If you use regular table salt cut back the amount used by half
- Garlic Powder – Garlic salt can be a substitute, but if using cut back on the kosher salt
- Dried Oregano – You could also use dried rosemary
- Dry Mustard Powder – Made with ground mustard seeds, also called ground mustard, this powder adds a distinct tangy flavor. Dry mustard is quite acidic which helps tenderize meat
- Cumin – This popular spice adds earthy warm flavors and enhances any dish. Be sure to use ground cumin, rather than cumin seed
- Onion Powder – Onion salt can be used as a substitute but cut back on the kosher salt if you use onion salt instead of onion powder
- Cayenne Pepper – We use a generous pinch but if you want an extra punchy flavor use 2 pinches – or none at all if you don’t like as much heat!
How to Make Homemade Rib Rub
- Measure each ingredient into a small bowl and whisk together with a fork to make sure it is well-blended
- This makes 2 cups of rub and enough rib rub for 6+ racks of ribs (about 12 ribs per rack)
- Use the rub mix right away, or make it ahead of time, and store it in sealed mason jars or a spice jar to keep it fresh for future use

How to apply Dry Rib Rub
- Always rinse racks of ribs and then pat them dry with a paper towel so you begin with dry ribs
- Apply the dry rub liberally on all sides, including the back of the ribs, and the ends of the rib rack. The best way to make sure every part is covered is to massage the rub in with your hands
- Allow the rub to sit on the ribs for the absolute best flavor. We recommend a minimum of 30 minutes resting time at room temperature, but ideally, up to 12 hours in the refrigerator
- You will need about 1/3 cup of spice rub for each rack
- Cook as directed using your preferred method and follow up with our 10-minute Homemade Barbecue Sauce or your favorite sticky BBQ sauce
- This recipe is enough for 6 racks so if you are only making two racks adjust accordingly, or save the remainder in an airtight container for your next batch of barbecue ribs
Using homemade dry rub on meats
This spice blend is the perfect combo for ribs but will also work with any cut of pork. Try it on pork loin, pork tenderloin, pork chops, or pork shoulder. It also tastes great on chicken, wings, and beef ribs.
This blend is easy and inexpensive, with no secret ingredients, so make extra to keep on hand. Sprinkle it on french fries, sweet potatoes, or baby potatoes too.
How to Store Dry Rub
- Store this rub mixture in an airtight container in your spice cabinet or a cool dry place. Label (and date) it so you have it ready anytime. We like to use these 6 oz spice jars and this recipe is enough for about 3 jars
- Spice blends will keep for about 6 months before they start to lose their potency, but they are best used within 3 months
- Be sure to use fresh spices. The best way to check to see if your spices are still flavorful is to rub a little between your fingers and see if they are still aromatic
- This recipe can easily be doubled or tripled or can be cut in half

Sides to Serve with Ribs
- Grilled Corn on the Cob with Sweet Chili Sauce
- Easy Grilled Caesar Salad
- Baked Beans
- Black Bean and Corn Salad
- Asian Coleslaw with Peanut Dressing
Our favorite drinks to serve with ribs
- White Sangria – great for a group!
- Dirty Shirley Cocktails – cherries are always a match with BBQ ribs
- Watermelon Vodka Cocktails – a perfect summer match!
We love to make our own rubs, sauces, and seasonings so jump on over for more ideas

Dry Rub for Ribs
Ingredients
- ½ cup paprika
- ⅓ cup chili powder
- ¼ cup dark brown sugar
- ¼ cup black pepper, ground
- ¼ cup kosher salt
- 3 Tablespoons garlic powder
- 1 Tablespoon dried oregano
- 1 teaspoon dry mustard powder
- ½ teaspoon ground cumin
- ½ teaspoon onion powder
- 1 pinch cayenne
Instructions
- Combine all ingredients in a bowl and blend well
- Use immediately or store in an airtight container
Notes
- The yield is about 2 cups of dry rub
- This recipe is enough to generously coat 6+ racks of ribs
- Store for up to 6 months
Nutrition
Gremolata is a great topping for veggies, meat, soups, pasta, and seafood. It’s one of the best ways to add a finishing touch of fresh flavor to any meal and it only takes 5 minutes to make!
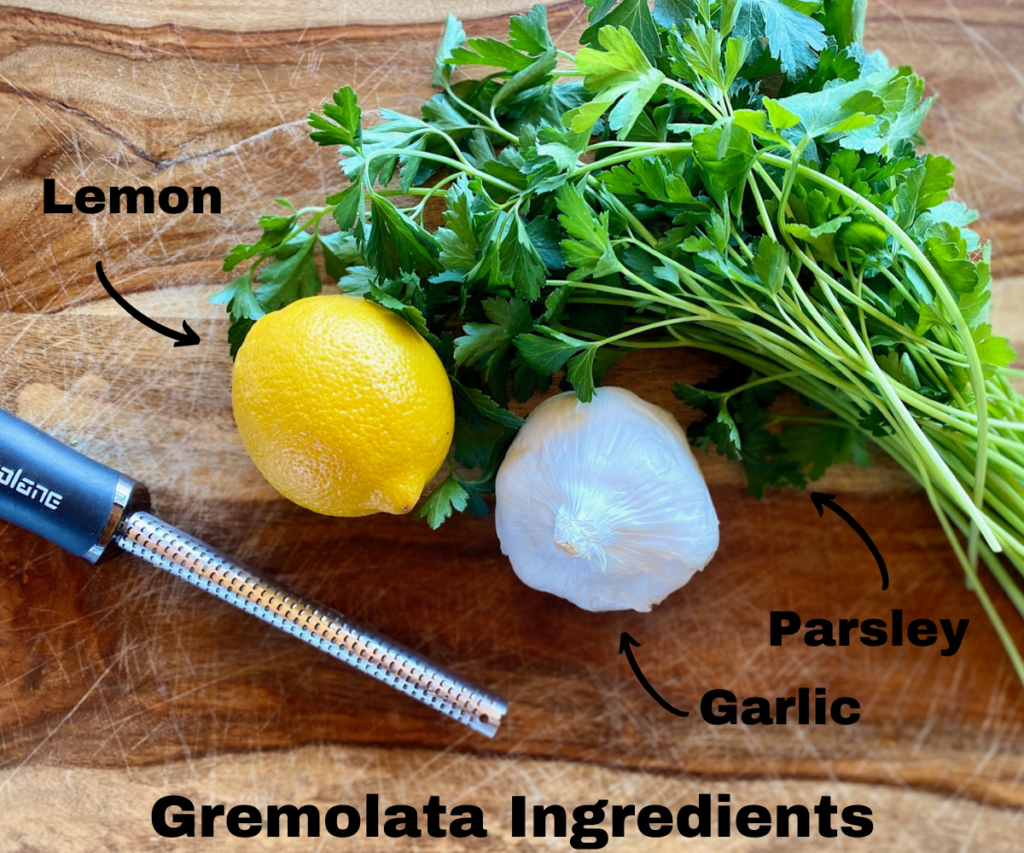
What is Gremolata?
It’s just 3 basic ingredients: Parsley, garlic and lemon zest!
This bright herby condiment originated in Italy and was traditionally served sprinkled on top of Osso Bucco (a braised veal shank to has been slow-cooked for hours) or lamb. The flavor combination really balances out any rich dish.
But, gremolata is also a perfect match for grilled chicken and fish, roasted vegetables, and most any other grilled or roasted meat. It’s nice swirled into soups, sprinkled over eggs, or added into bean or pasta salads.
Jump to RecipeThis post may contain affiliate links. Please see our affiliate disclosure for more details.

Ingredients for our Gremolata Recipe
With just 3 simple ingredients this is a condiment you should have on repeat!
- Fresh Italian Parsley – use flat-leaf parsley for the best flavor. Cut off the thicker stems from the bottom, but the tender part of the stems, toward the leaves, are ok to use
- Garlic Cloves – we use 2 cloves because we just love garlic but you can use 1 clove for a milder taste. Be sure to use fresh garlic, not jarred for this recipe. Since the garlic is raw you will want to use the freshest cloves possible
- Lemon Zest – choose a bright firm lemon for the freshest tasting zest
It’s handy to use a zester or Microplane tool to zest the lemon. If you don’t have one then carefully grate just the yellow part of the peel. Don’t use the white part, called the pith, because it is bitter.
You can also use the Microplaner to grate the garlic if you want it really finely minced.
How to make Gremolata (2 methods)
Gremolata is super easy to make by hand or in a mini food processor. If you are making a larger batch then the food processor is a nice time saver.
- By Hand: Cut off the thicker ends of the parsley stems and discard. Finely chop the parsley, grate the lemon zest, and mince the garlic. Mix everything together in a small bowl until well combined.
- In a mini Food Processor: Remove the stems from the parsley, add to the processor bowl, then add the lemon zest and the garlic cloves (no need to mince the cloves). Process until very well combined. You may need to stop and scrape down the bowl once or twice.
Gremolata works best if the parsley is very dry when you start to prepare it. I like to put mine in a salad spinner after I wash it, if I am in a rush.
If your mixture looks a little wet and clumpy (this happens more commonly if you use a food processor) just spread it out on a baking sheet and let it air dry for about an hour. Give it a fluff every 20 minutes or so to break up any clumps.

How to serve Gremolata
There are so many ways to use this delicious condiment! Like its herby cilantro-based cousin, Chimichurri Sauce, the possibilities are endless.
Here are some of our favorite way to use gremolata:
- Perfect for topping vegetables. Roasted Asparagus and cauliflower are perfect with Gremolata sprinkled on top
- Swirl a little gremolata into your soup to give it an extra kick!
- We like to add it to our Oven Roasted Potatoes after they come out of the oven to give them a pop of flavor
- Delicious on top of most red meats, as well as chicken and pork
- Ideal on salmon and most white fish
- A great way to add flavor to pasta with a drizzle of olive oil
- Sprinkle a little on your avocado toast!

Making a Marinade or Dressing:
It’s simple to turn this condiment into a super flavorful marinade to be used on meats or seafood.
We like it drizzled on a sizzling steak or a freshly seared piece of halibut. It’s ideal for marinating shrimp or scallops, as well.
Marinade:
- Add 1/4 cup of extra virgin olive oil to 4 tablespoons of the prepared gremolata and blend (or shake) well
- Use as you would any other marinade
Salad Dressing:
- To make Salad Dressing: Add some of the base gremolata mixture and the juice from the zested lemon together. Then drizzle in olive oil until you achieve the consistency you like, and whisk well to combine
- Store in the refrigerator in a glass jar with a lid. When ready to use allow the dressing to come to room temperature for about 10 minutes. Shake well to combine before serving. Will keep for about 10 days.

How to store:
Gremolata is best used the day it is made. The flavor remains bold and bright on day one but will lose some of those qualities after a day or so. However, you can actually keep it for up to 5 days in the refrigerator in an airtight container.
More Sauces and Condiments to try:
- Pesto Sauce and Chimichurri Sauce can both be used in many of the same ways as gremolata
- Our easy Teriyaki Sauce is great on chicken and fish
- Spicy Peanut Sauce will liven up noodles and Chicken Skewers
- Sweet Asian Chili Sauce is delicious slathered on Grilled Corn on the Cob or used to dip your Coconut Shrimp or egg rolls


Gremolata (Italian Herb Condiment)
Ingredients
- 1 cup Flat-leaf (Italian) parsley (1 bunch)
- 2 garlic cloves, peeled
- 1 lemon, zest only
Instructions
- Wash parsley and spin or pat dry. (Don't skip the drying step. This will help avoid clumps in the sauce).
- Remove stems and finely chop the parsley to equal one cup.
- Peel the garlic cloves and finely mince. Zest the lemon.
- Combine parsley, garlic, and lemon zest in a bowl, stir to mix, and reserve until ready to use.
- If not using immediately store the prepared gremolata, in an airtight container, for up to 5 days, in the refrigerator.
- If preparing in a mini food processor: combine stemmed parsley, whole cloves of garlic, and lemon zest. Pulse to chop and combine completely.
Notes
- This recipe makes 8 ounces and can be doubled
- Store in an airtight container, refrigerated.
Nutrition
It takes just a few simple ingredients to make this amazingly flavorful Teriyaki Sauce recipe
We love to make this homemade sauce because it’s not only delicious and packed with flavor, but it’s also preservative and additive-free!
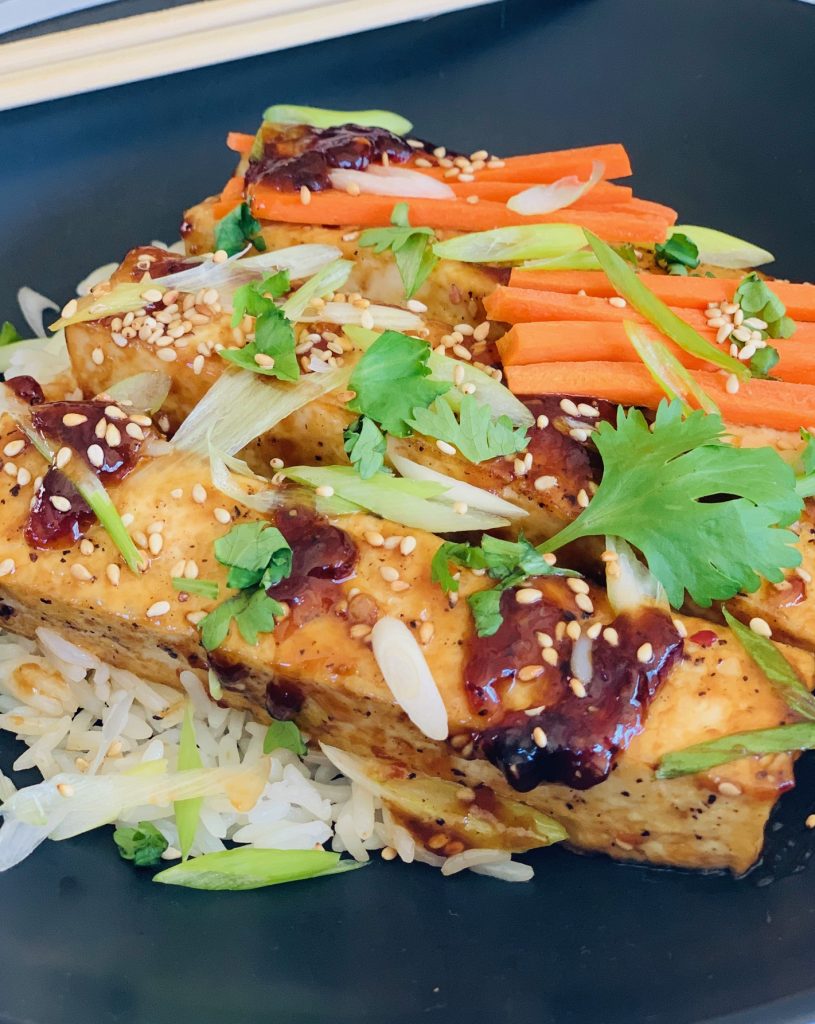
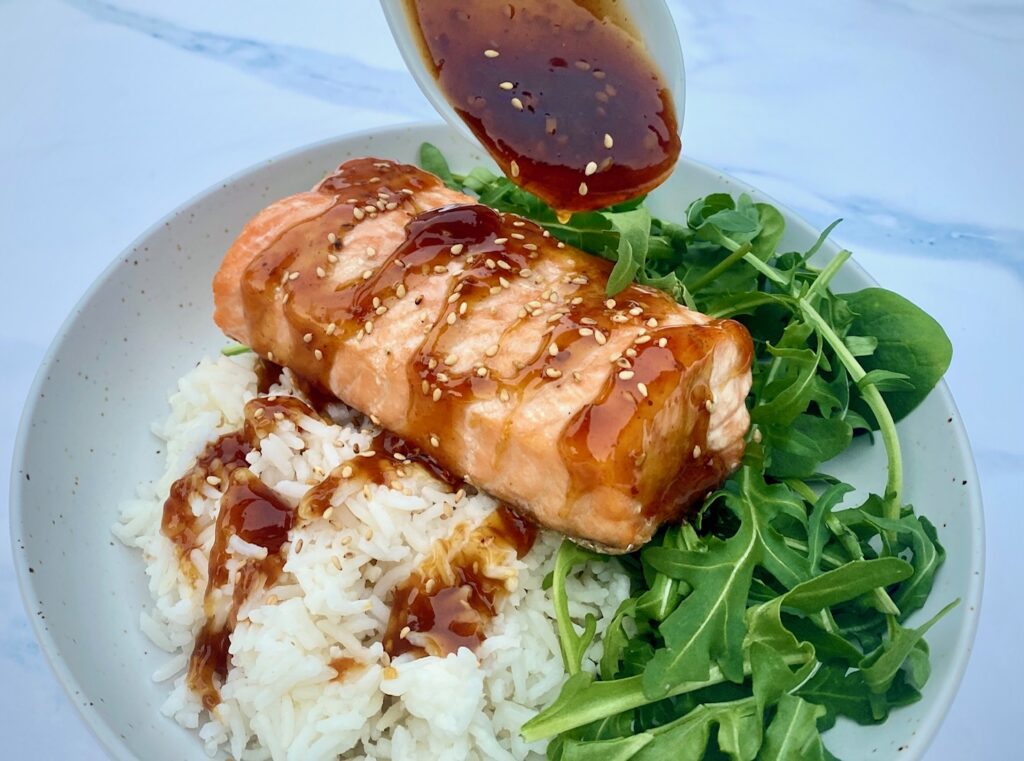
This quick, sweet, and easy sauce is ready in just 15-minutes. A versatile sauce, teriyaki is great on beef, chicken, salmon, pork, and tofu.
It’s also perfect added to any stir fry or rice bowl. You’ll find the possibilities unlimited so make a double batch and keep it on hand for a quick last minute dinner.
Ready to get started? Just click on our “Jump To Recipe” button below to go straight to the recipe card. For tips, processes, and substitutions keep reading. This post may contain affiliate links. Please see our affiliate disclosure for details. We only recommend products we love and use.
Jump to RecipeWhat is Teriyaki Sauce?
Teriyaki, a term used in Japanese cooking, is the process of marinating or adding a glaze to beef, chicken, fish or tofu. The word “Teriyaki” is derived from the Japanese words teri, to shine, and yaki, to broil or grill.
The flavor of this popular sauce is bold but has a blend of sweet, savory and salty ingredients, which make it super versatile.
Teriyaki can be both a sauce and a marinade. Below we will detail how to make each and the differences between them.

Ingredients for Homemade Teriyaki Sauce
- Brown Sugar – we use light brown but if you prefer a deeper flavor substitute in dark brown sugar
- Soy Sauce – if you are salt sensitive use low sodium soy sauce
- Honey – this gives the sauce a touch of sweetness
- Ginger and Garlic – both bring big flavor to the sauce so don’t skip them!
- Rice Wine Vinegar – the tartness helps to balance the sweetness (in a pinch you can use white vinegar)
- Sesame Oil – we like toasted sesame oil but untoasted will work too
- Toasted Sesame Seeds – just a sprinkling since a little goes a long way
- Water with cornstarch – teriyaki marinade uses water only and teriyaki sauce uses added cornstarch as the thickener

How to make Teriyaki Sauce and Teriyaki Marinade:
Our teriyaki sauce recipe is so simple to make you will never want to buy store bought teriyaki sauce again. Leaving out the cornstarch will make a perfect marinade.
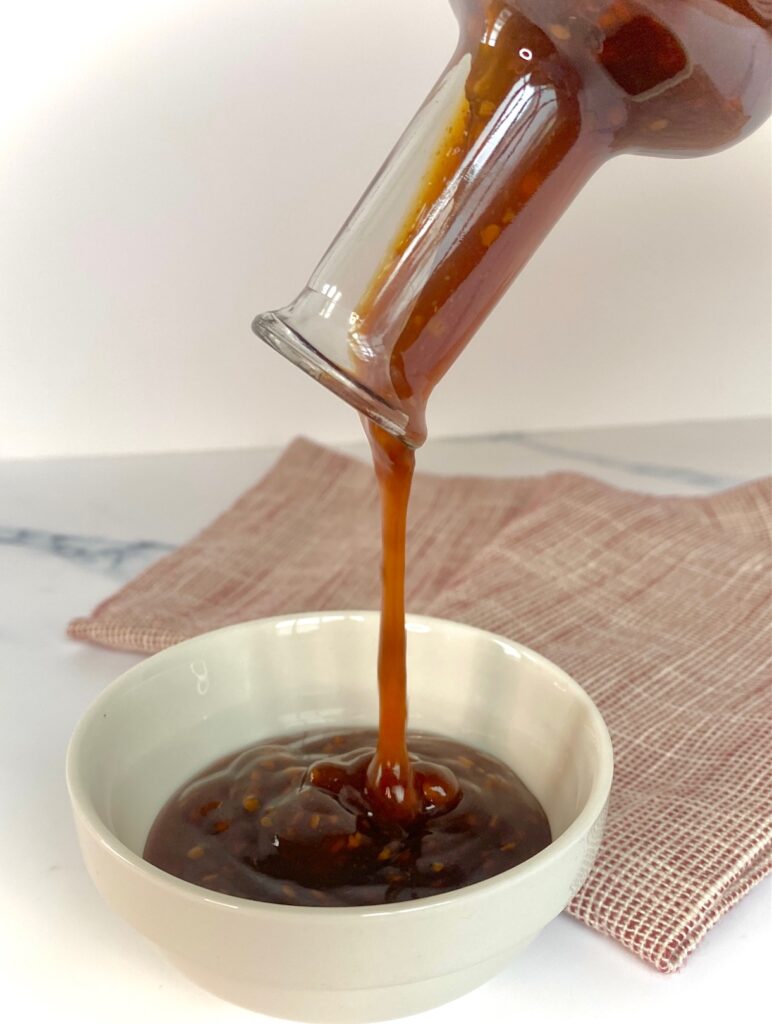
Marinade:
The photograph below is a marinade, not a super thick sauce, so it’s perfect for marinating chicken, pork or tofu for longer periods of time, or fish for a quick marinade. We use it as a marinade on our scrumptious Chicken Skewers.
Sauce:
Turning the marinade into a sauce is easy. Adding cornstarch and cooking the mixture a little longer will create a thicker consistency which makes it a sauce rather than a marinade. It’s just that simple!
Here are the step by steps:
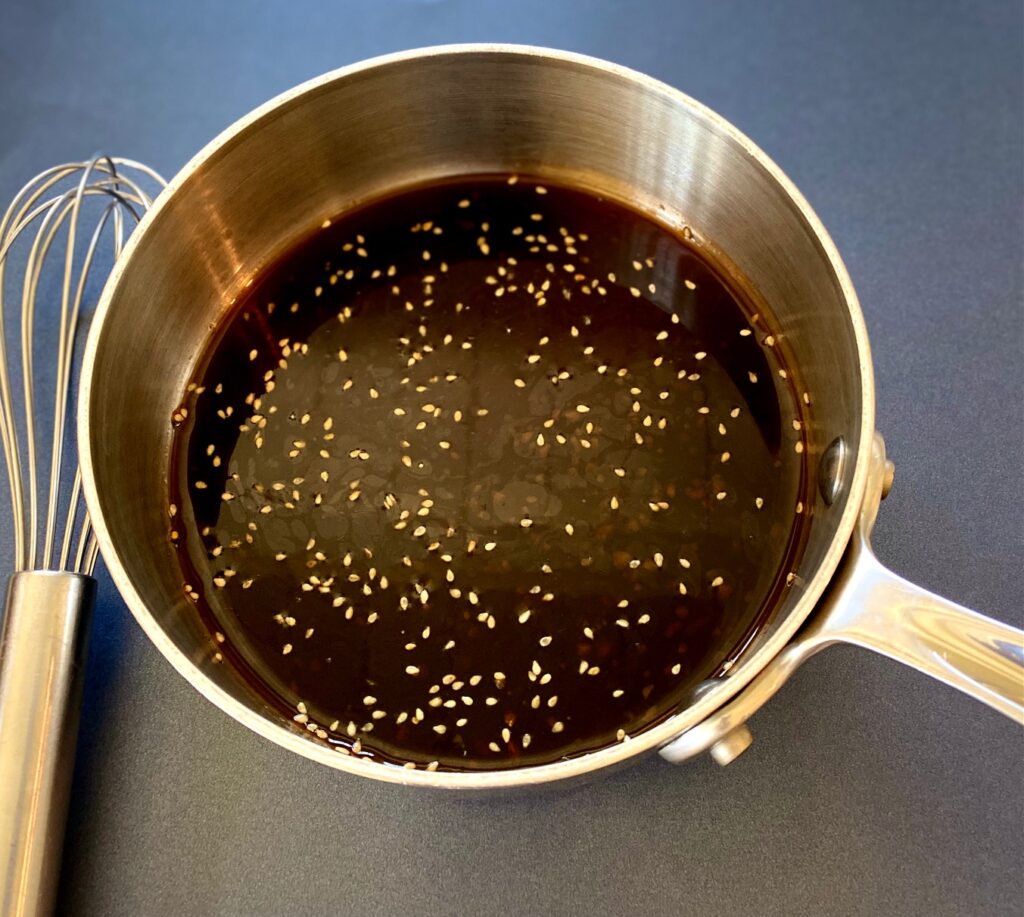
- In a sauce pan, whisk together the soy sauce, brown sugar, honey, ginger, garlic, rice vinegar and sesame oil and blend together
- Bring to a vigorous boil
- If making a sauce instead of a marinade: In a small bowl, mix the water and the cornstarch together to make a paste. Whisk cornstarch mixture into soy sauce mixture and return to a boil
- Reduce heat and simmer gently for about 2 minutes
- The sauce will begin to thicken as it simmers
- Remove pan from the heat, let cool completely, and whisk in the sesame seeds
- If not using the sauce immediately store in a sealed glass jar in the refrigerator for up to one month
- Shake well before using
How to thicken the sauce?
Sauces can be thickened with either cornstarch or flour. When it comes to making the decision on which one to use there are a couple of things to consider.
- Cornstarch is a gluten-free product and the most common choice to thicken any Asian recipes. Rice flour is another great gluten-free option.
- Wheat flour contains fiber and protein.
- Standard all-purpose white flour also works well for thickening.
Adding either cornstarch or flour to your sauce will lighten the color of the finished product.

What’s the difference between Teriyaki Sauce and Teriyaki Marinade?
The main difference between Teriyaki Sauce and Teriyaki Marinade is how they are used.
- Marinades add flavor when they are slowly absorbed by meat (or tofu). The protein is covered with the marinade and acts as a sponge to absorb all the amazing flavors.
- Marinating meat for 2+ hours it will allow it to be infused with bigger flavor. In most meats the marinade will add tenderness.
- A marinade is typically thinner in texture. Often herbs, spices and chopped ingredients will be added to a marinade to enhance the flavor even further.
- Sauces act as more of an immediate gratification and boost of flavor. They are used for basting and quick cooking meat. Sauces can also be served as a condiment.
- A sauce is thicker than a marinade with a consistency that is more syrupy. You want it to be thick enough to coat but still thin enough to pour easily.
How to store Teriyaki Sauce:
- REFRIGERATE: Store in a sealed jar for up to one month
- LONG TERM: High acid foods can be safely Water Bath Canned. “Hot Water Canning” is an excellent way to preserve high acid fruits and vegetables. It is a straight forward easy process and we walk you through it step-by-step.
Love sauces and Dips? We’ve got plenty of delicious choices
- Cocktail Sauce – a classic and easily made in 5 minutes – perfect on seafood and with our Crab Cakes
- Sweet Chili Sauce – a great Asian-style spicy dipping sauce
- Pesto Sauce – perfect for pasta and meats
- Chimichurri Sauce – an herb lover’s dream sauce that is equally delicious on meats and fish
- Blue Cheese Dip – perfect for wings and vegetables
- White Bean Dip – a great variation on hummus

Teriyaki Sauce Recipe
Ingredients
- ½ cup Brown sugar
- ⅓ cup Soy sauce
- ½ cup Water
- 2 Tablespoon Honey
- 2 teaspoons Minced ginger
- 1 teaspoon Minced garlic
- 1 teaspoon Rice wine vinegar
- 1 teaspoon Sesame oil
- 1 Tablespoon Cornstarch + additional 2 Tablespoons water
- ½ teaspoon Toasted sesame seeds
Instructions
- Combine all marinade ingredients, except cornstarch and sesame seeds, in a small saucepan.
- Bring to a boil, reduce heat to medium, and simmer for 1 minute.
- If making a sauce (instead of marinade): Mix cornstarch with 2 tablespoons water and mix into a paste. Whisk into the sauce and simmer for about 2 more minutes.
- Remove from heat and let cool completely. Whisk in sesame seeds.
- If not using immediately store in a glass container in the refrigerator.
Notes
- For a thicker sauce use 1 additional teaspoon of cornstarch
- This recipe can be doubled
- For a deeper flavor use dark brown sugar
Nutrition
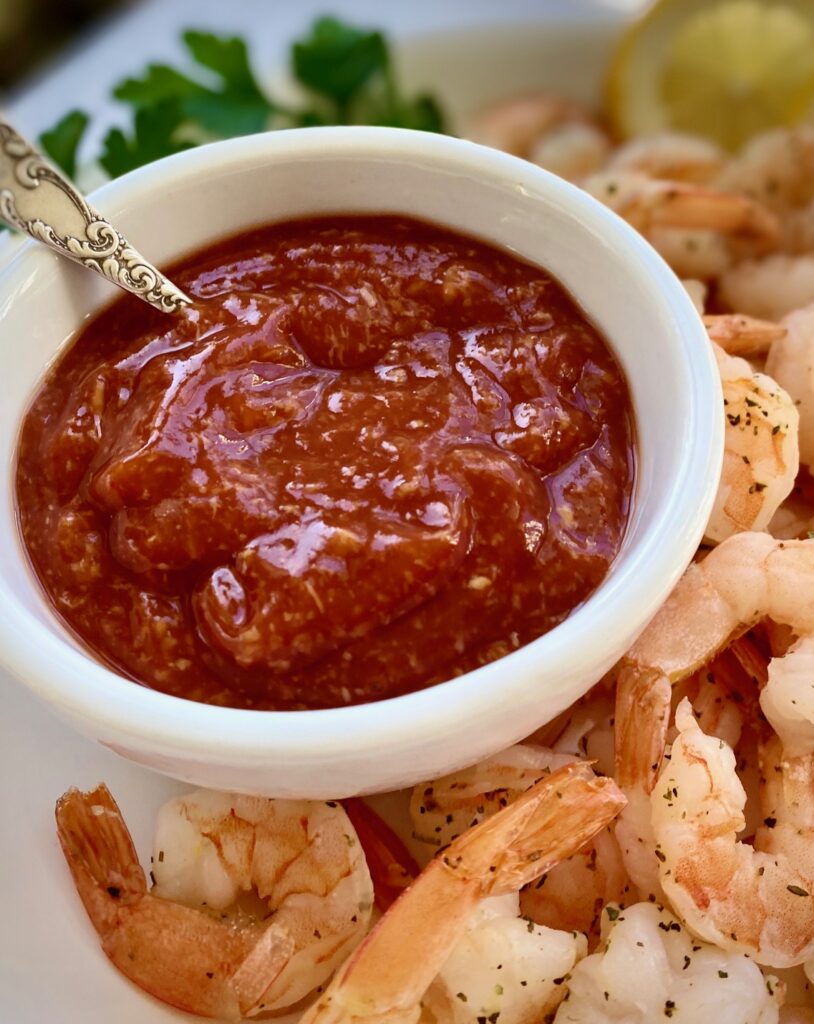
Homemade cocktail sauce is easy to make at home. There are just 5 ingredients needed to make this flavorful yet simple and delicious sauce
This seafood sauce can be made in just a few minutes and this version allows you to adjust the spice levels. It’s easy to make ahead of time too!
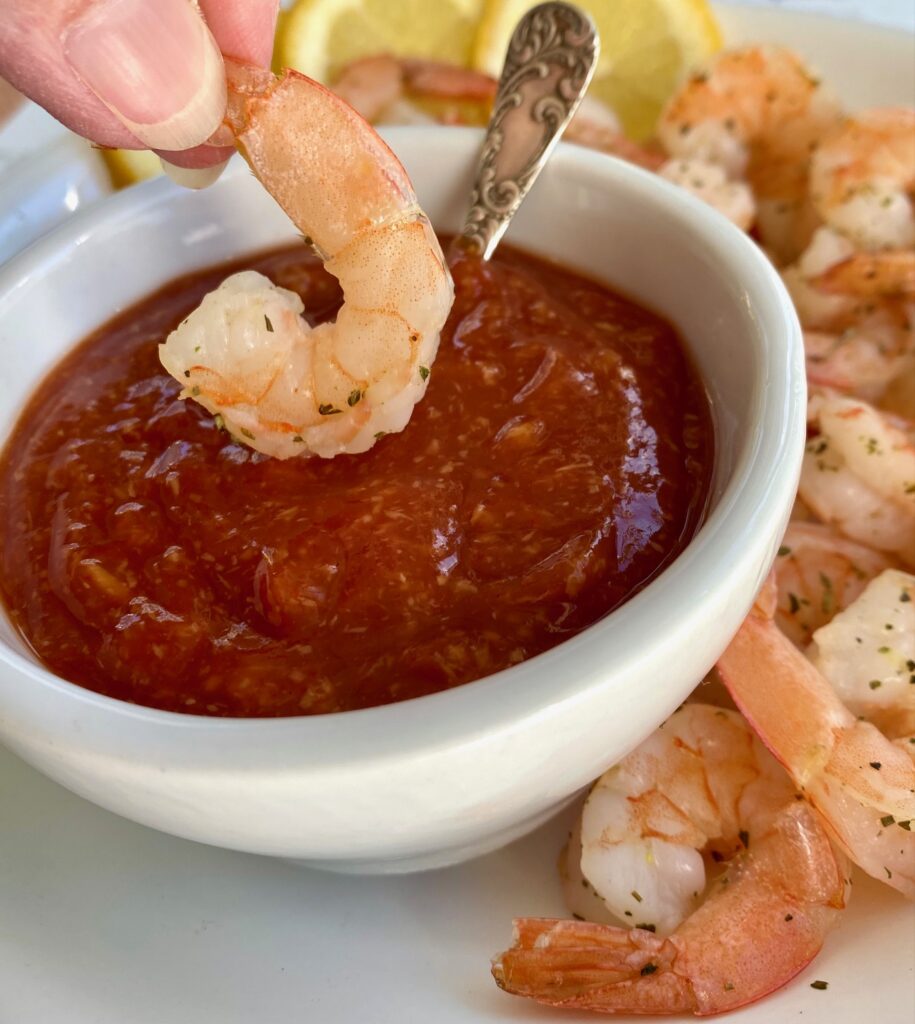
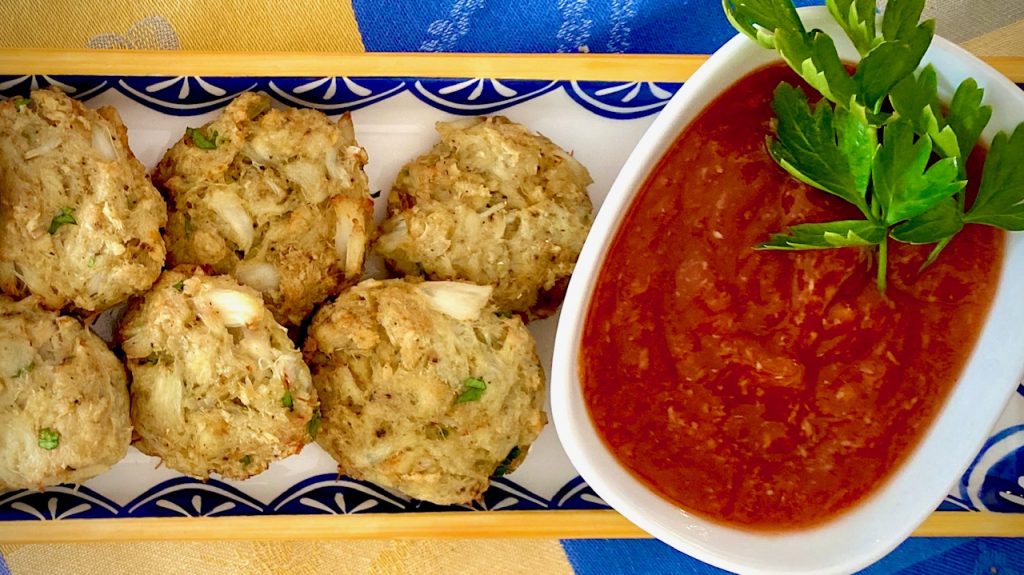
Our cocktail sauce pairs perfectly with our Homemade Crab Cakes. With this simple and flavor filled recipe, you will never buy cocktail sauce from the store again! Classic shrimp cocktail sauce is great to have on hand for a quick appetizer with baked or steamed shrimp.
This post may contain affiliate links. Please see our affiliate disclosure for more details.
Jump to Recipe
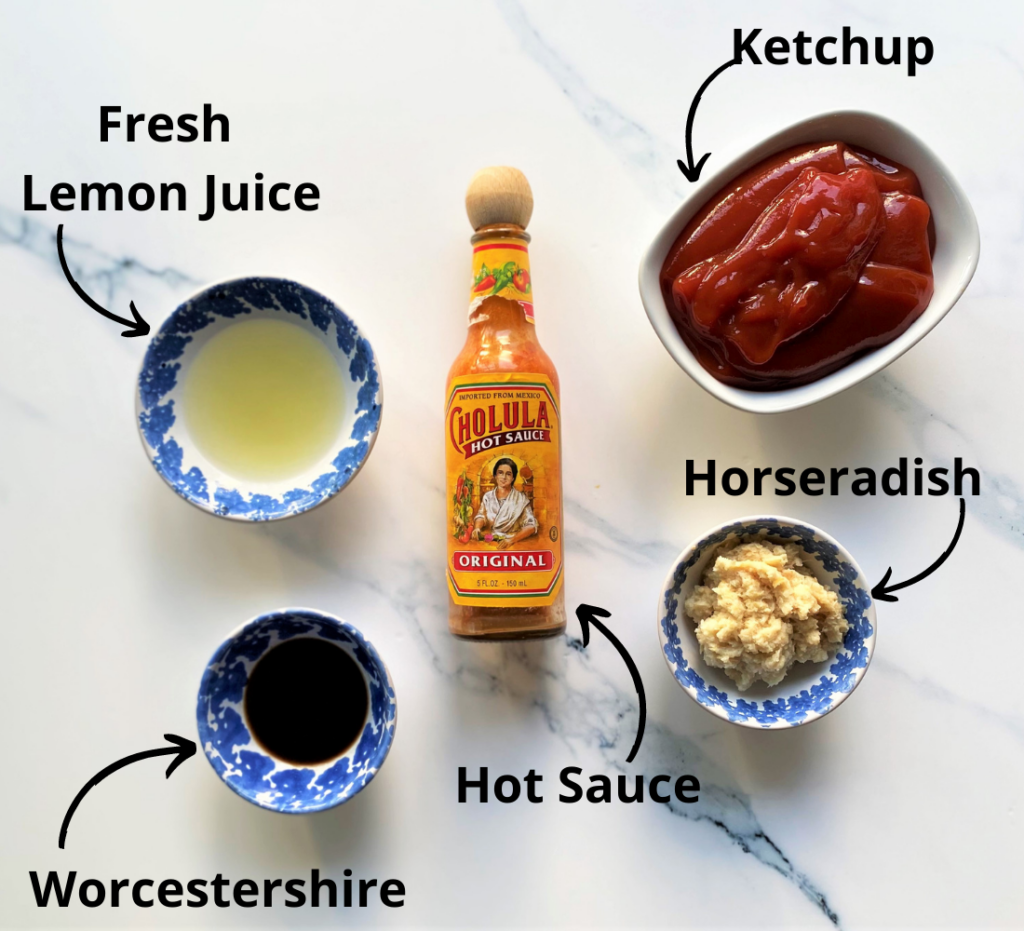
Cocktail Sauce Recipe Ingredients:
Just 5 simple ingredients needed
- Ketchup – Catsup or Ketchup? However you spell it, ketchup brings a sweet and tangy flavor to this sauce so be sure to use a good brand and make sure it’s a fresh bottle
- Worcestershire Sauce – this unique ingredient gives complex flavor to the sauce
- Lemon Juice ~ freshly squeezed is strongly recommended for a bright fresh flavor
- Hot Sauce ~ such as Tabasco, Tapatio or Cholula. Any hot sauce will work for this recipe so use whatever you prefer or have on hand. In a pinch you could substitute a dash of cayenne pepper
- Prepared Bottled Horseradish – prepared horseradish is shredded or grated and often has vinegar added. It is found bottled in the condiment section of any market, and once opened keeps well, refrigerated, for at least a year.
What is Fresh Horseradish and how to use it:
For homemade cocktail sauce, you could also opt for freshly grated horseradish. It’s in the mustard family and looks similar to a daikon. The flavor is much spicier and it’s more pungent than bottled horseradish. Much like ginger or garlic, it is most strong the day it’s grated. For best results use a microplaner to grate it.
The pungency of fresh horseradish doesn’t last as long as bottled. Initially, it tastes stronger than prepared, but over time its flavor fades. If you decide to use fresh instead of bottled start with a smaller amount and then be sure to mix well before serving if your not using it the same day.
We use prepared horseradish in our amazing Homemade Bloody Mary Mix and Bloody Mary Shooters with Shrimp or Oysters, but you could easily use fresh here as well.
A general rule of thumb is:
1 tablespoon fresh grated horseradish = 2 tablespoons prepared horseradish
How to make Cocktail Sauce
- Blend the ketchup and the horseradish in a bowl and mix together
- Add in the lemon juice, Worcestershire sauce and the hot sauce, and again blend thoroughly
- Taste and adjust spicy flavors to taste (this is the best part of making your own sauce!)
- To make it spicier add either more hot sauce or horseradish
- If the sauce is a bit too spicy add more ketchup
- Want a tangier sauce? Add a touch more fresh lemon juice
- You can make this cocktail sauce ahead of time and refrigerate for up to 7 days
- Note: This cocktail sauce tastes best at room temperature
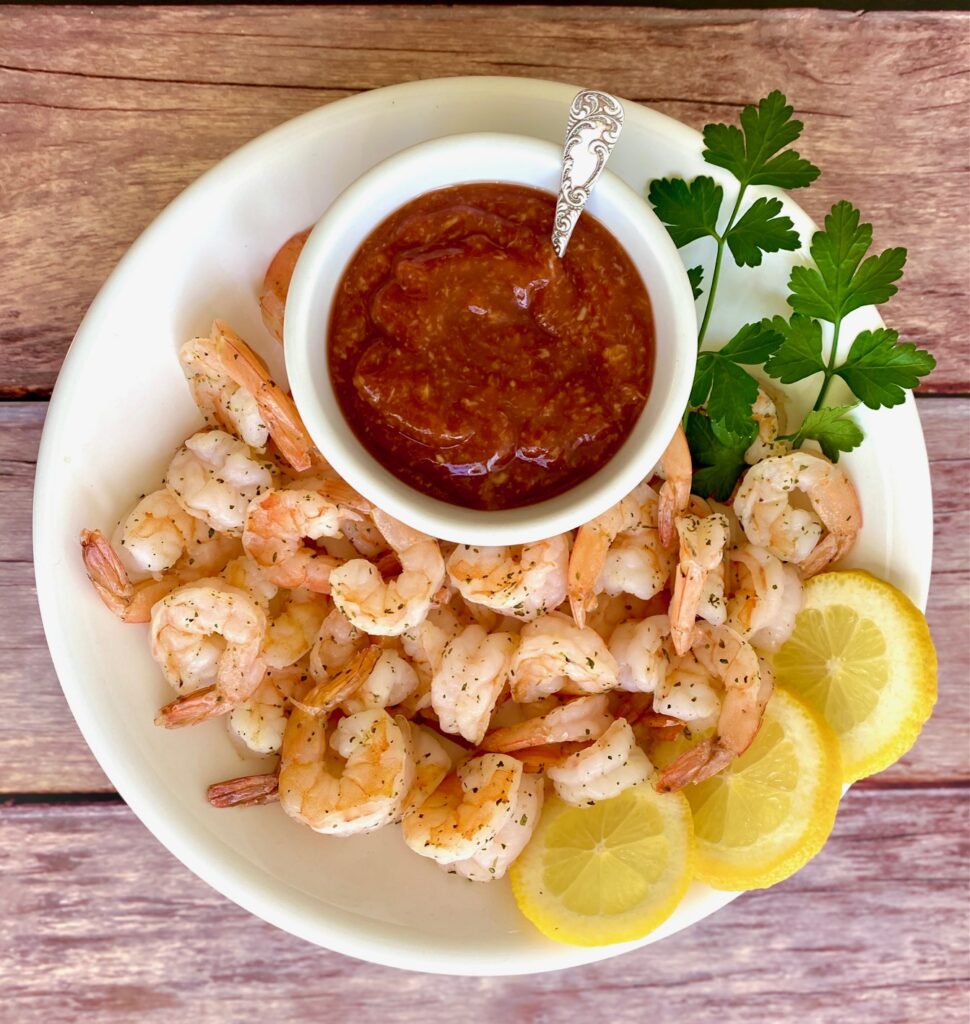
Great ways to enjoy spicy Cocktail Sauce
This lightly spicy condiment is so versatile and can be served with many different seafood dishes. We’ve paired this delicious sauce in a variety of ways and here are a few of our favorite ideas:
- Crab Cakes – these can be made individual size or full size, and sautéed, or baked
- Shrimp Cocktail is the classic use of this sauce
- Add a dollop to a Bloody Mary
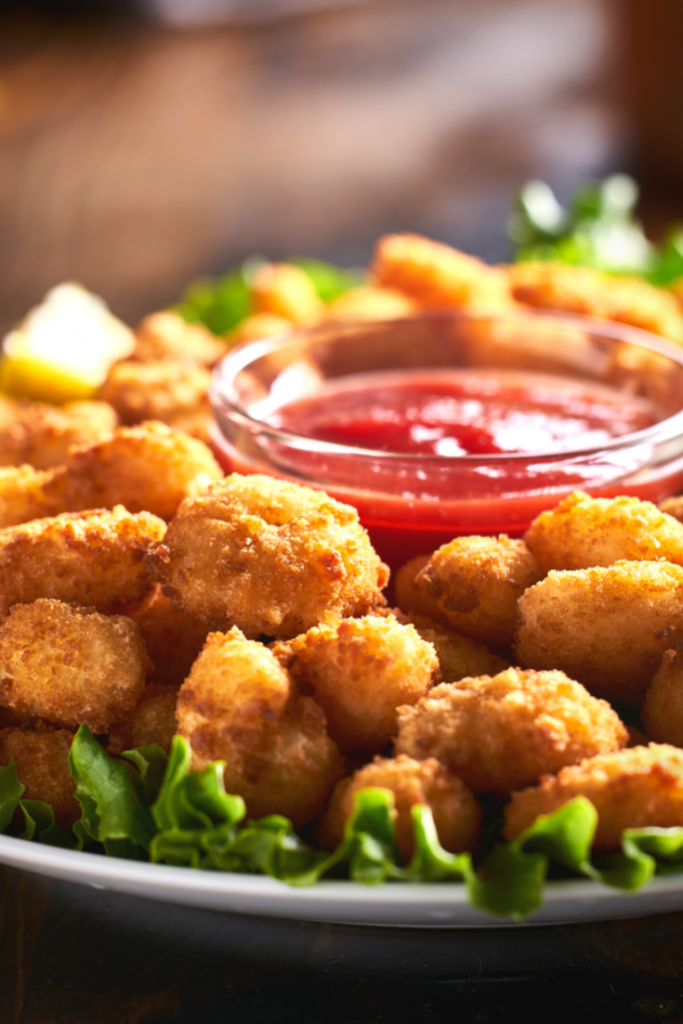
- A dip for Mozzarella Sticks or Onion Rings
- Perfect for dipping fried or sauteed calamari
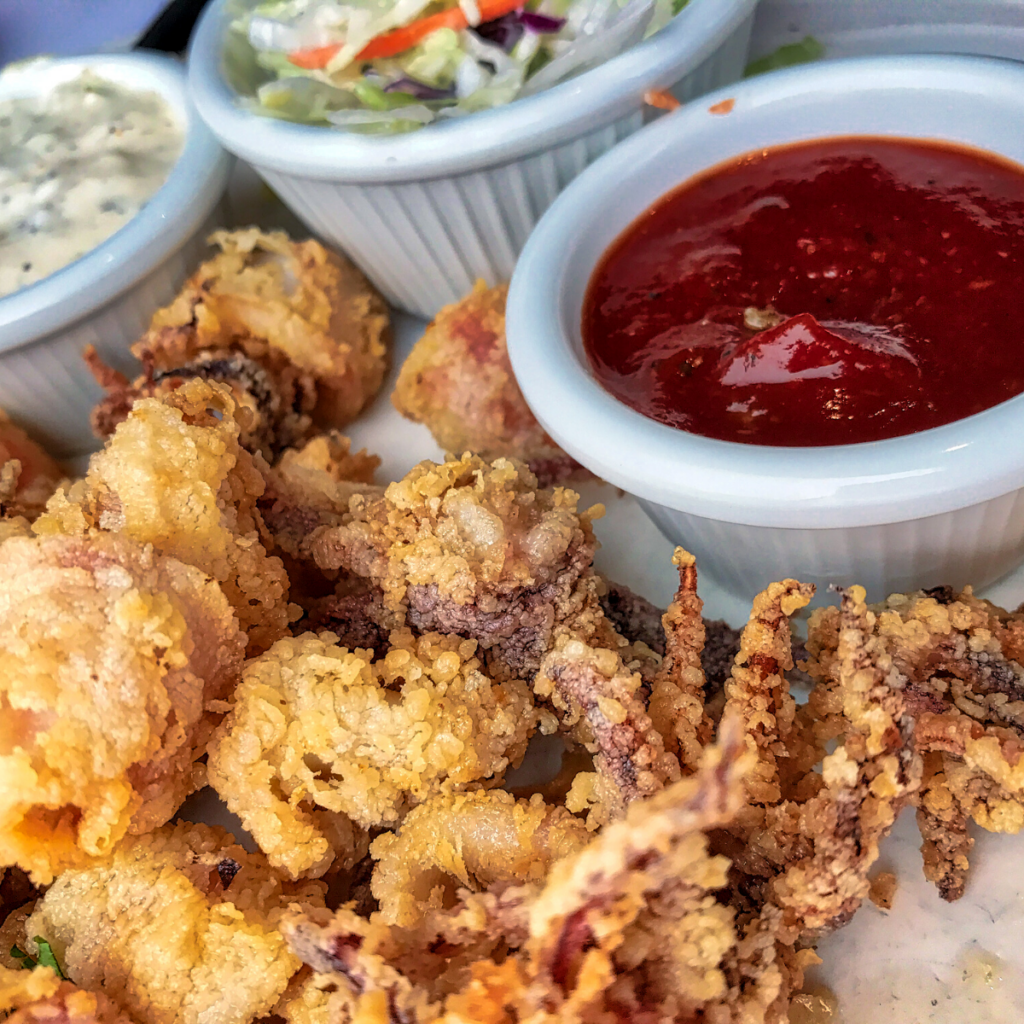
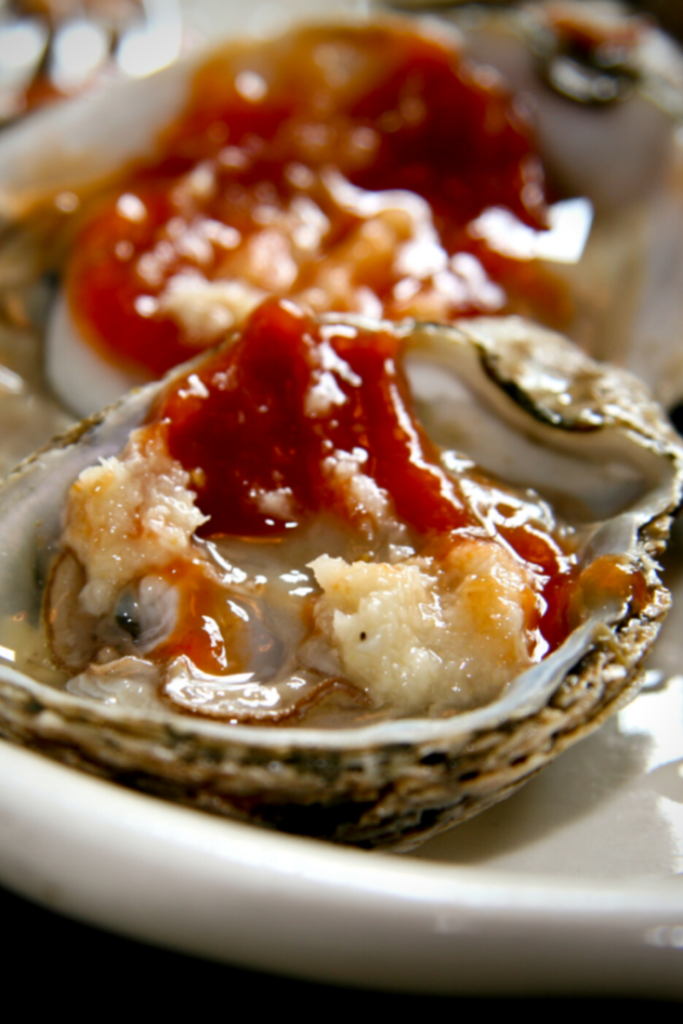
- Dip any Fish & Chips, or Popcorn Shrimp, or drizzle over Oysters on the Half Shell
Make ahead and storing homemade Cocktail Sauce
- REFRIGERATE: One of the greatest parts of this recipe is that it can be made up to 7 days before you plan to serve it. This really helps if you are making a lot of appetizers for a gathering.
- Store the prepared sauce in a glass jar or sealed container and refrigerate until ready to use. Bring to room temperature and whisk before serving for the best flavor.
- CANNING: High-acid foods can be safely Water Bath Canned. We’ll walk you thru it step-by-step!
More delicious sauces and dips to try:
- Sweet Chili Sauce is a spicy sauce also great for shrimp
- Chimichurri Sauce is fresh herb sauce for shrimp or steak
- Easy Homemade Pesto Sauce is perfect on pasta, chicken or shrimp
- Our Blue Cheese Dip is versatile and great for dunking veggies or Buffalo Chicken Tenders
- Easy White Bean Dip with Rosemary is a great alternative to hummus
Cocktail Sauce Recipe
Ingredients
- 1 cup Ketchup
- 1 Tbsp Worcestershire Sauce
- 3 Tbsp Fresh Lemon Juice
- 3 Tbsp Prepared Horseradish
- 1 Dash Hot Sauce
Instructions
- Blend the ketchup and horseradish in a bowl, making sure they are thoroughly mixed together
- Add in the lemon juice, Worcestershire sauce and hot sauce, again blending thoroughly
- Taste and make any flavor adjustments
- To make it spicier: Add more hot sauce or horseradish
- To make sauce less spicy: Add more ketchup
- Use at room temperature or keep sealed in refrigerator for up to 7 days. Bring to room temperature before serving for best flavor
Notes
- If fresh horseradish is preferred use about 1 Tablespoon and taste for spiciness, then add more if desired
- High acid foods can be safely preserved with Water Bath Canning
- “Hot Water Canning” is an excellent way to preserve high-acid fruits and vegetables. It is a straightforward and easy process and we walk you through it step-by-step.