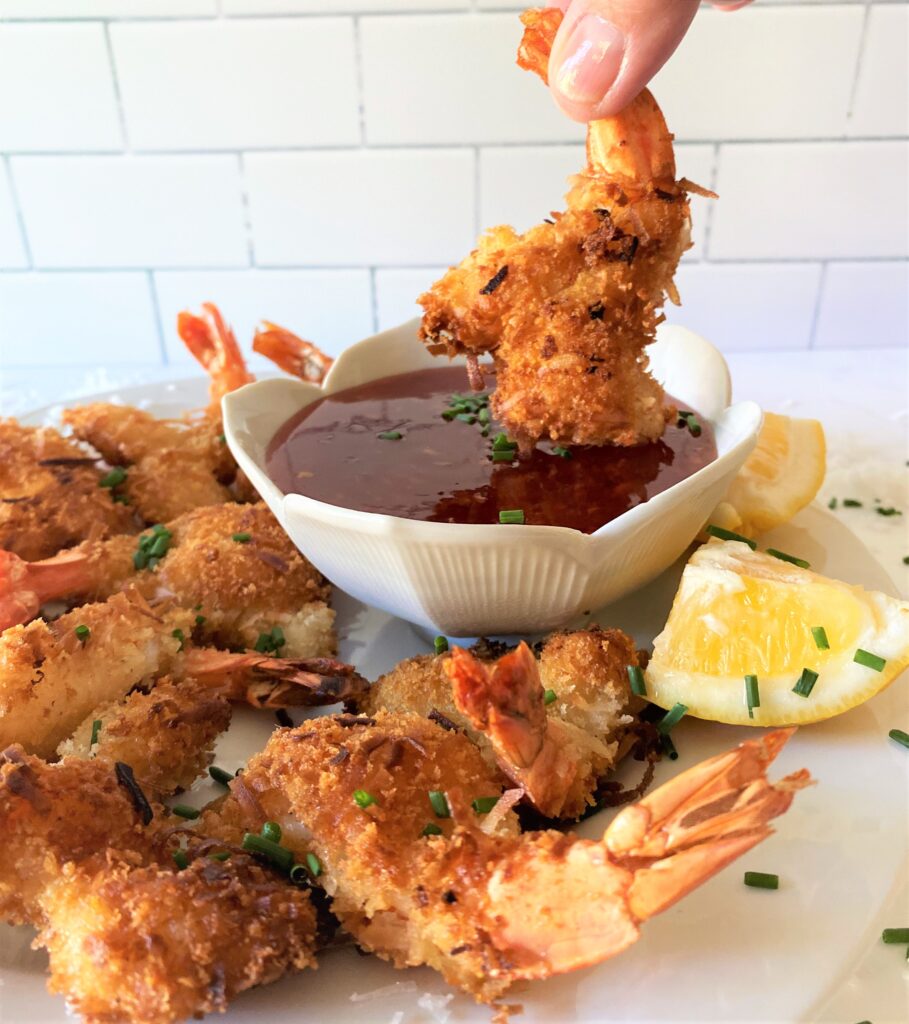
These spicy treats make a great appetizer, side dish, or snack that you can have on the table in just 10 minutes. With all its savory garlicy goodness, it will keep your guests asking for more!
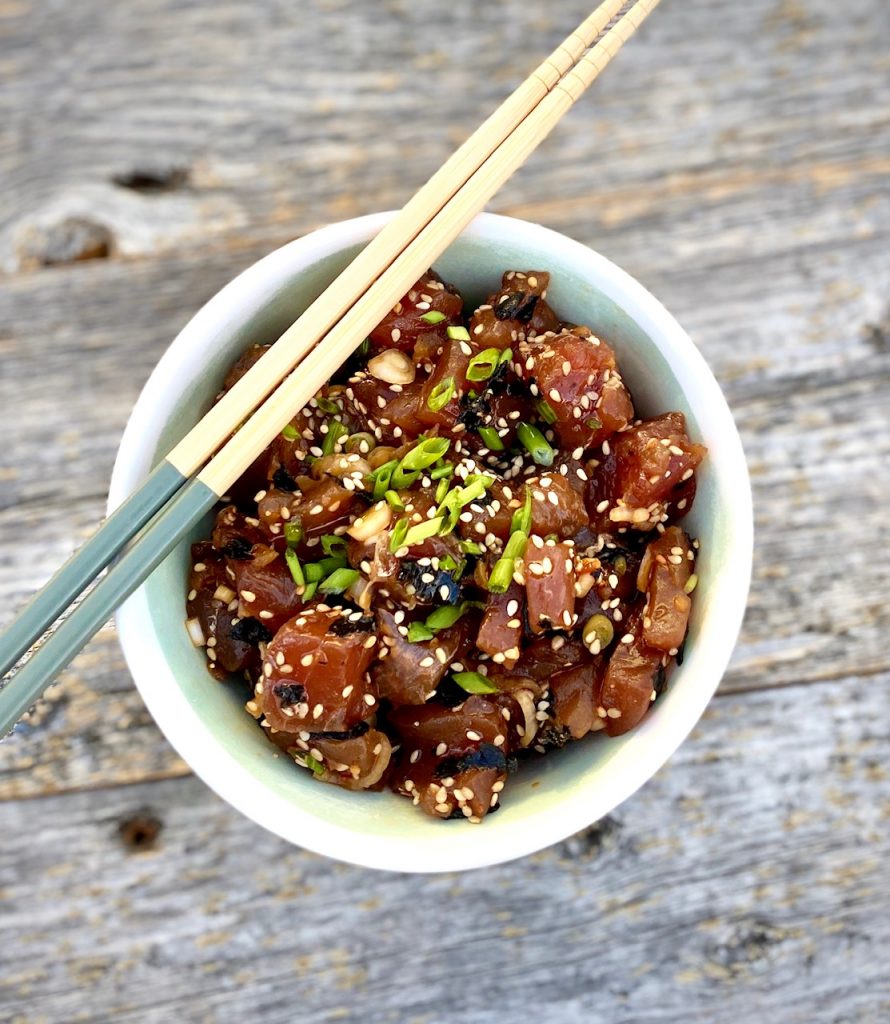
We love to serve them with our Coconut Shrimp, Ahi Poke, or Chicken Skewers with Peanut Sauce.
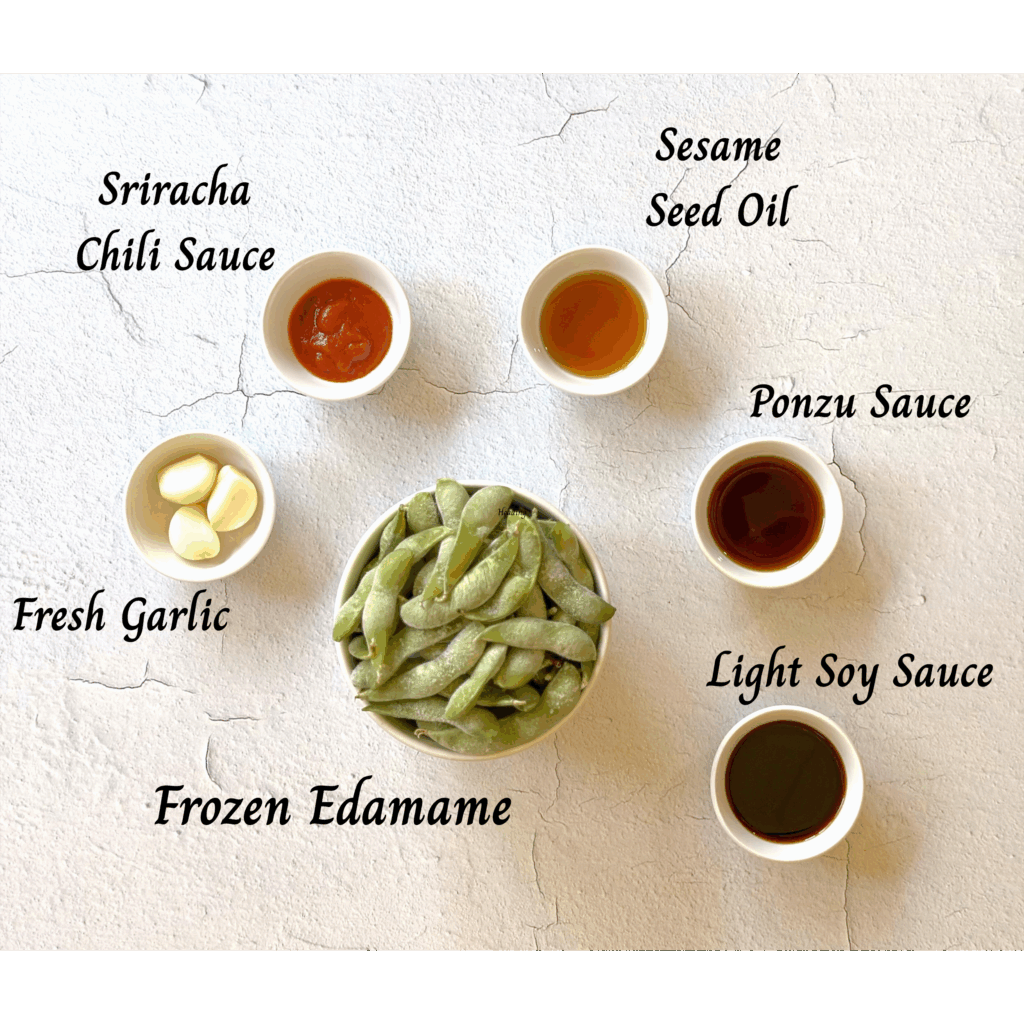
Ingredients needed for Spicy Garlic Edamame
- Frozen edamame – one package
- Fresh minced garlic
- Soy sauce – we use light soy sauce
- Ponzu sauce – an Asian condiment with a light citrus flavor
- Sesame seed oil – found in the Asian section of the supermarket
- Siracha sauce or chili oil
- Cooking oil – use for browning garlic
How to make Spicy Garlic Edamame
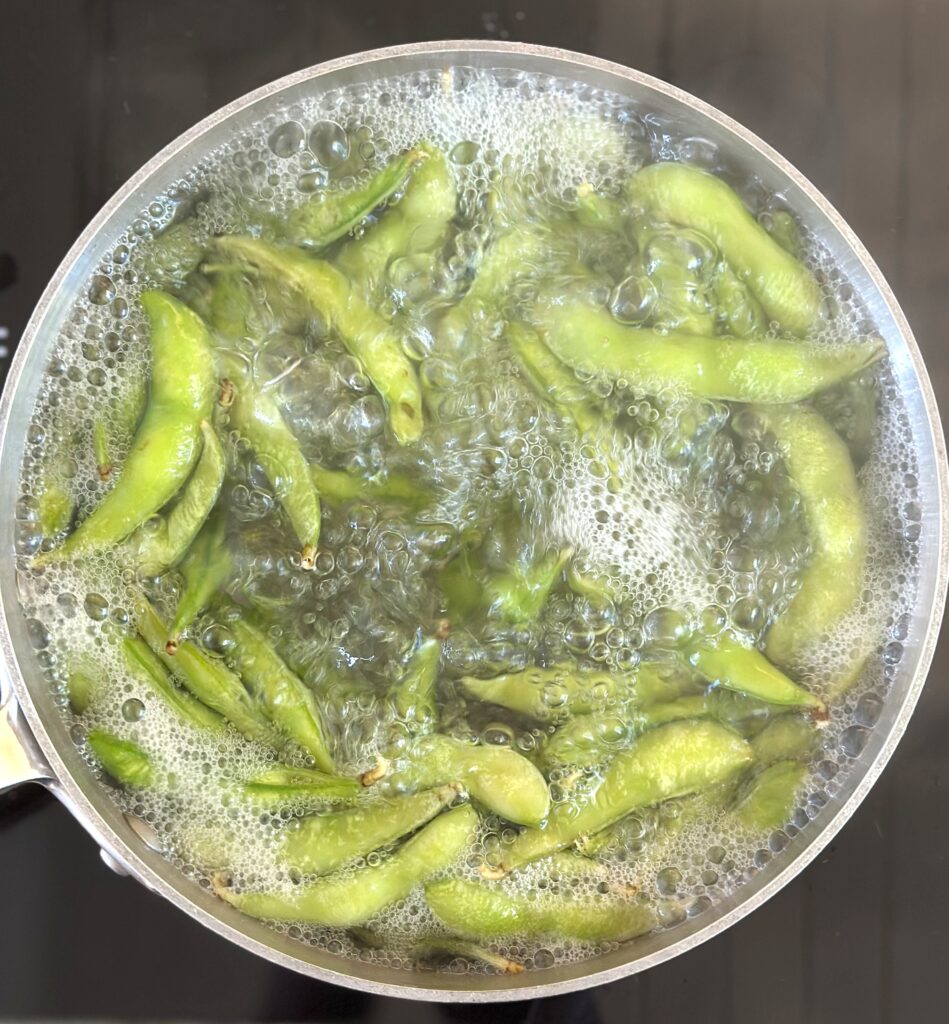
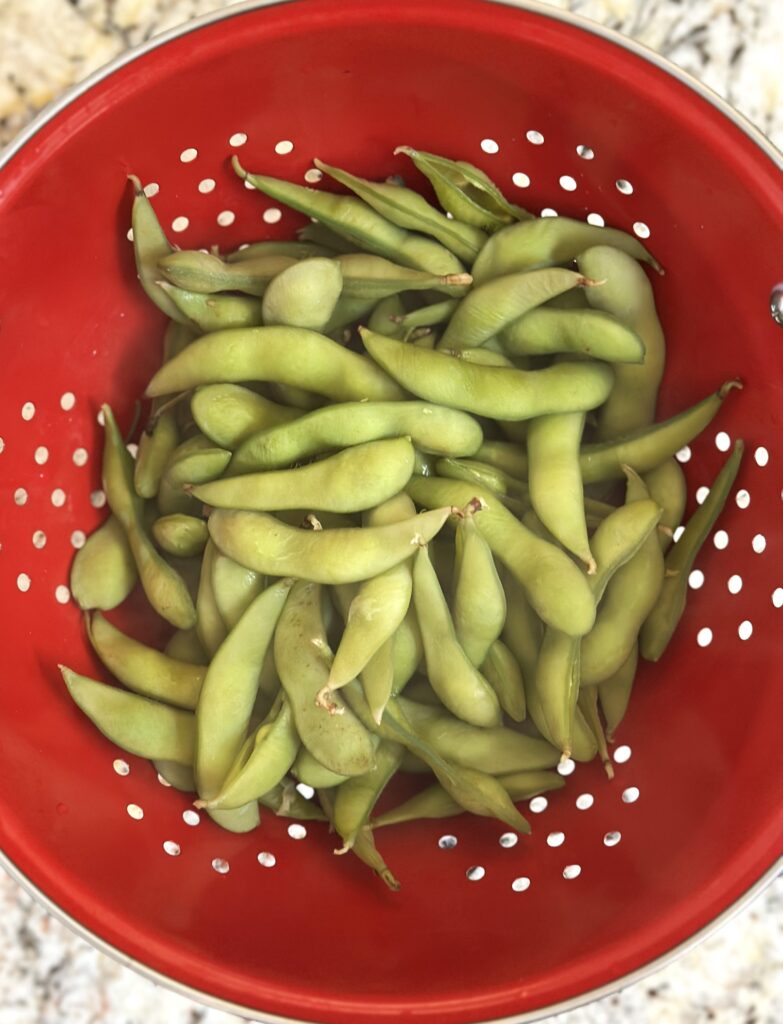
- Fill a medium saucepan 3/4 full of water and add 1 teaspoon salt. Bring to a boil. Add frozen edamame and follow the cooking instructions on the package.
- While the edamame are cooking, add 1 Tablespoon of cooking oil to a small skillet. Heat the oil over medium heat, and then add minced garlic.
- Sauté until garlic is light brown and fragrant.
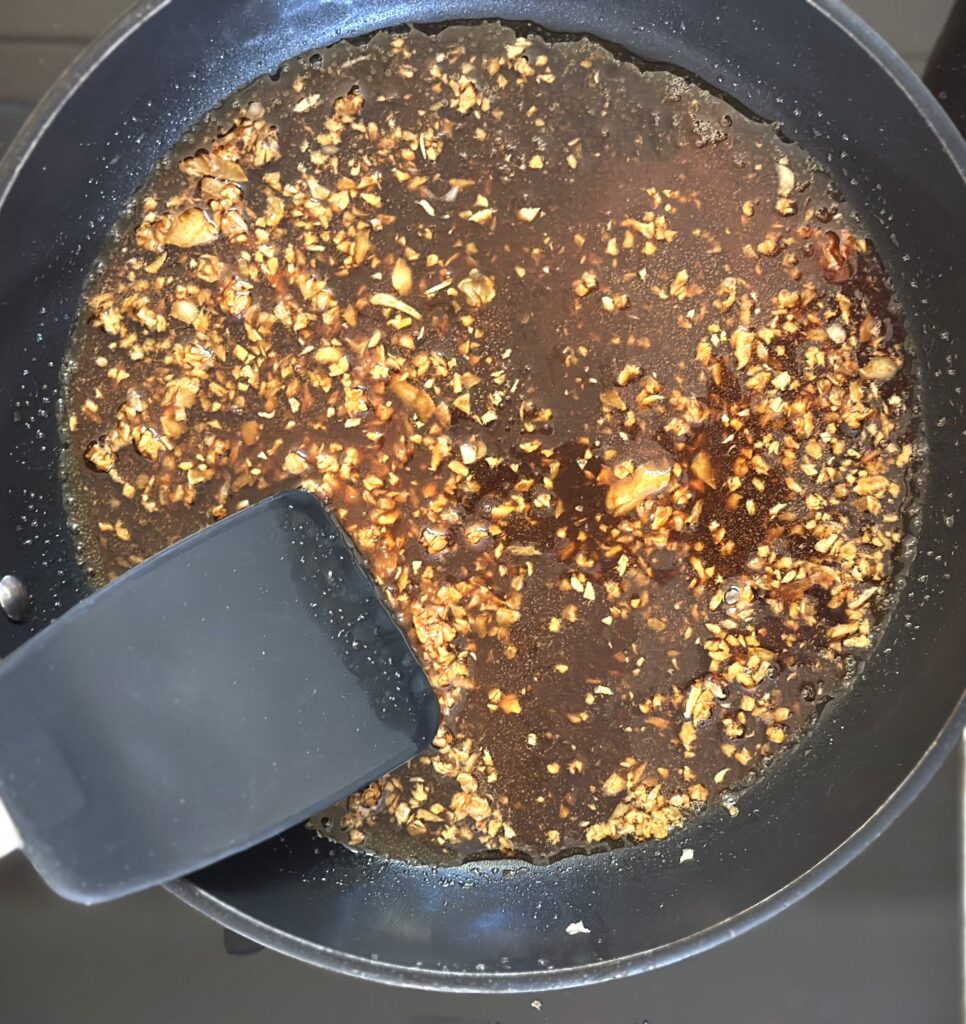
- Add all of the additional ingredients: soy sauce, ponzu sauce, sesame seed oil, and sriracha or chili oil.
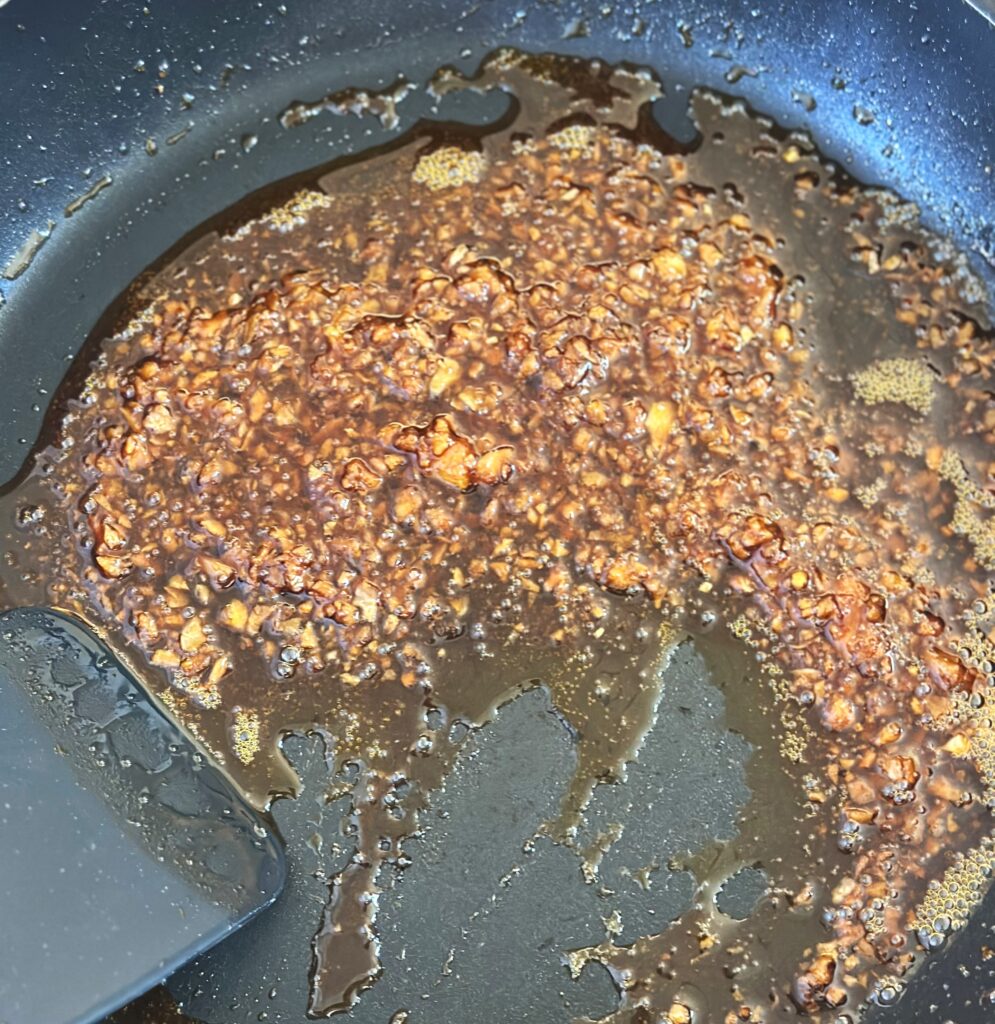
- Bring the mixture to a low boil, and continue cooking to reduce the mixture down until it thickens. This takes about 2 to 3 minutes. Remove from heat.
- Once edamame have finished cooking, drain them in a colander while you finish preparing the spicy garlic sauce.
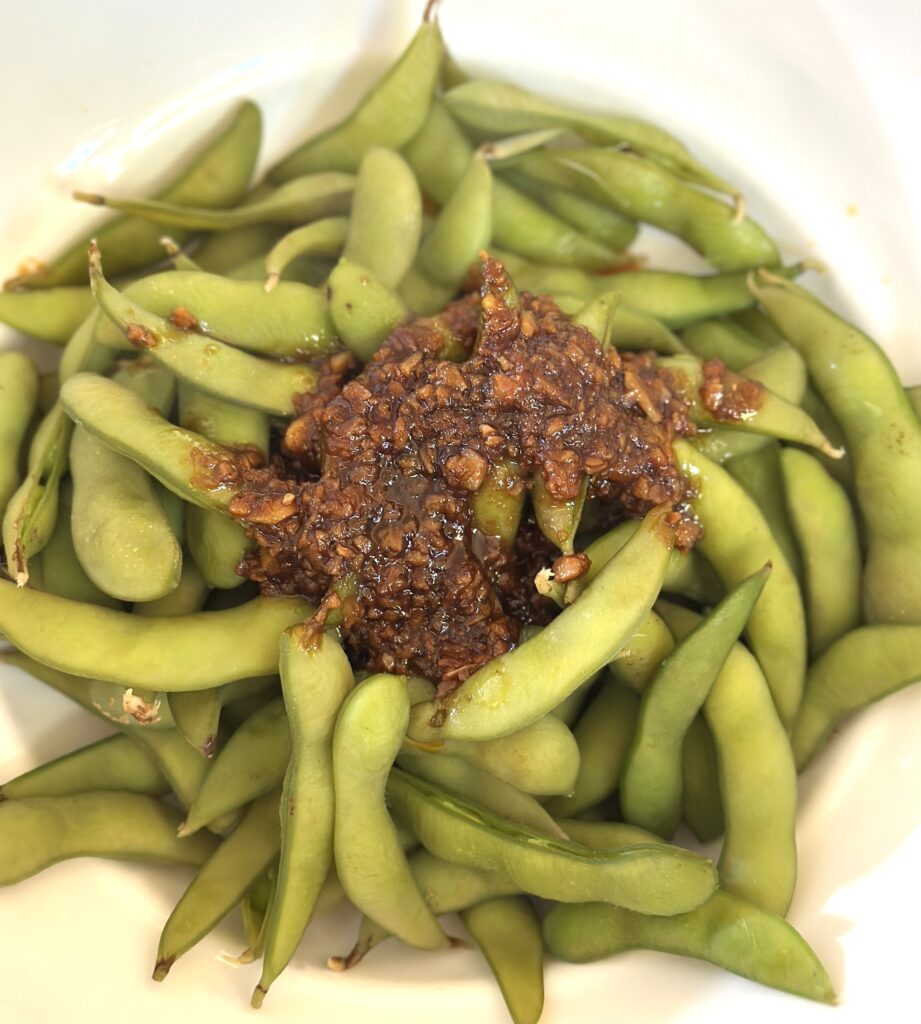
- Add edamame to a serving bowl and top with the spicy garlic sauce.
- Toss edamame to coat them with sauce and serve warm.
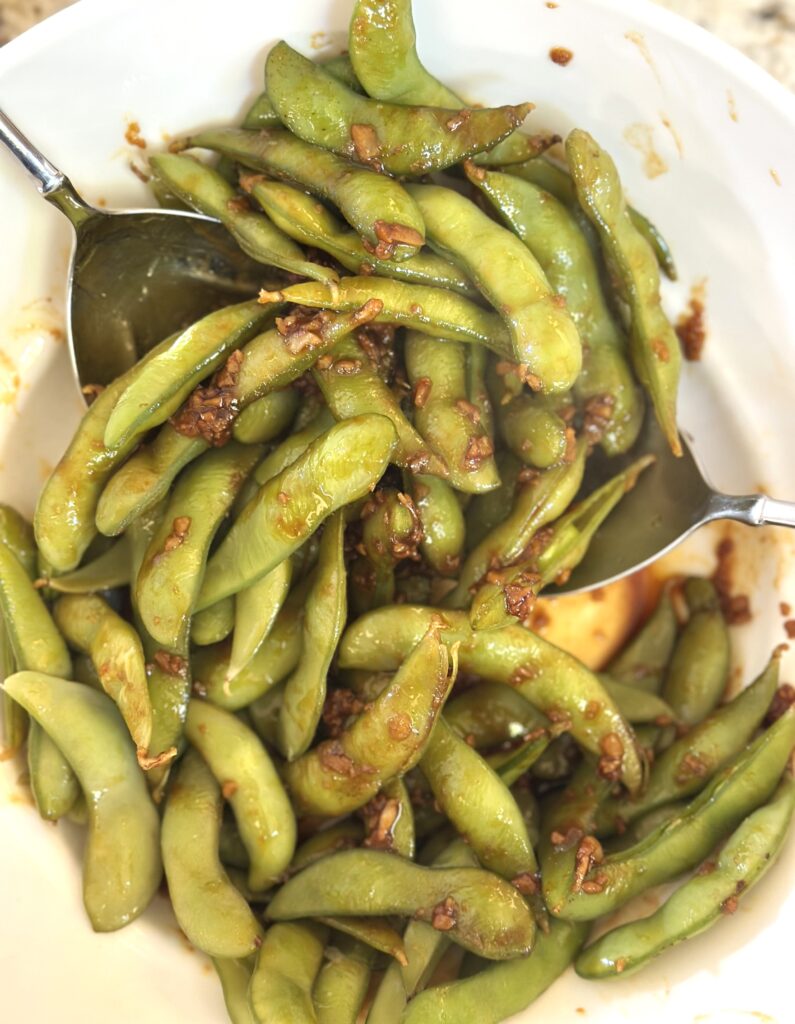
- Want more heat add additional sriracha. Want less heat, cut back on the sriracha or chili oil.
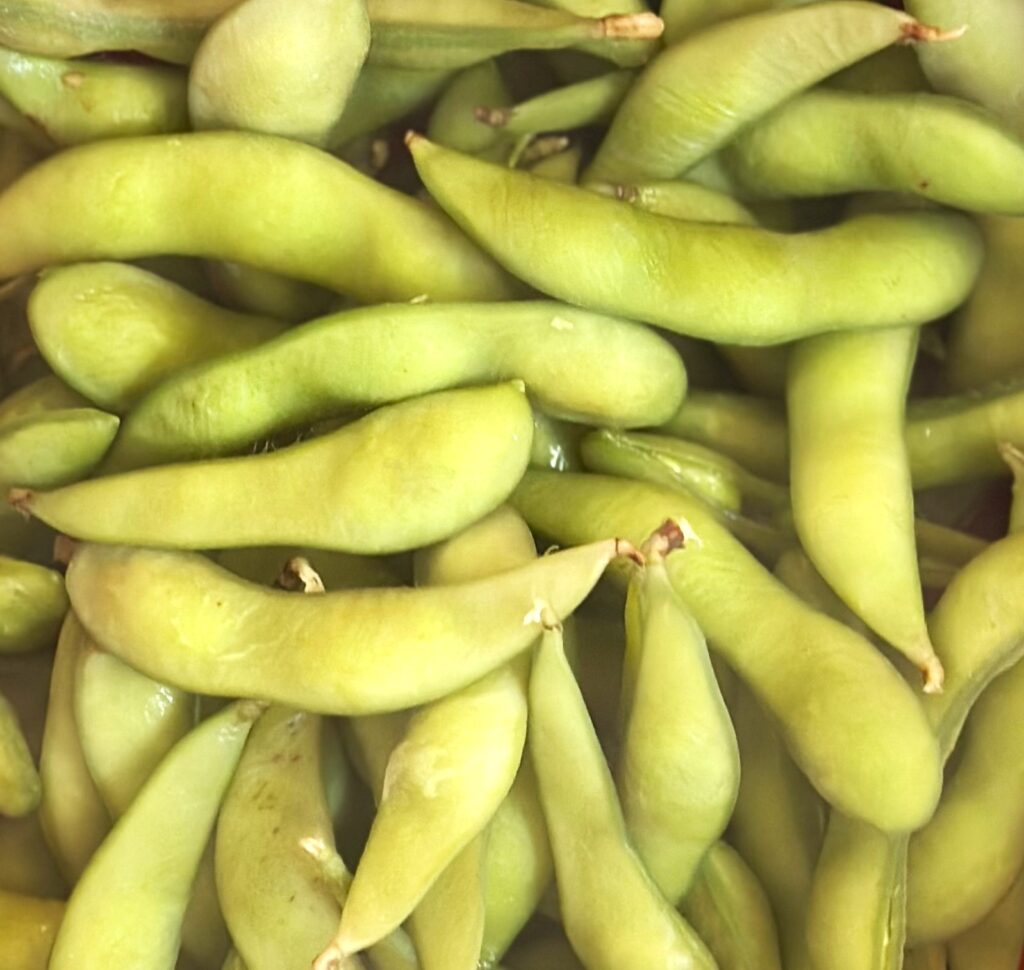
What is Edamame?
Edamame is simply the Japanese name for young soybeans which are harvested before they reach full maturity. They are still green and have not hardened yet. They have a nutty flavor and are a little on the sweet side. Soybeans grow naturally in a pod, but are often served shelled.
You can find edamame in the frozen food section of your grocery store next to other bean varieties, along with other vegetables.
You can boil, steam, or even cook them in a microwave. Often they are seasoned with salt, but our recipe takes these snacks to an entirely new level!
What are the health benefits of Edamame?
Edamame is part of the legume family and is low in carbohydrates. They are a wonderful source of protein and a good source of fiber.
This little bean contains a wealth of antioxidants and is rich in vitamins and minerals, including vitamin K, vitamin E, folate, zinc, potassium, and magnesium to name a few.
Potential health benefits include improving blood sugar levels, helping to lower cholesterol, and promoting heart health.
Here are some variations of Spicy Edamame:
Get creative here! This recipe can include a wide range of variations, so let yourself explore new tastes and combinations. There are endless sweet and savory ingredient substitutions to add to create this tasty dish.
Here are a few ideas. Any combination of these ingredients will work.
- Maple syrup, brown sugar, miso paste, or oyster sauce.
- Want some heat? Add red pepper flakes, sambal oelek, or fresh ginger.
- For garnish, you can add black or white sesame seeds.

Leftovers and reheating instructions:
This dish is best served warm. You can reheat any leftovers over medium heat in a small skillet. You can add a little water to the skillet to keep the beans moist.
Refrigerate any leftovers in a sealed container for up to 3 days.
Serve these tasty dishes alongside Spicy Edamame:
- Korean Beef Bulgogi
- Beef and Broccoli Stir Fry
- Tofu Rice Bowl with Vegetables
- Asian Cucumber Salad
- Coconut Shrimp
- Ahi Poke Recipe

Spicy Garlic Edamame
Equipment
- 1 Medium sauce pan
- 1 Small skillet
- 1 Colander to drain cooked edamame
Ingredients
- 1 Package Frozen Whole Edamame
- 1 Tablespoon Cooking Oil, such as canola oil
- 1½ Tablespoons Fresh Garlic, Minced
- 2 Tablespoons Soy Sauce (light soy sauce preferred)
- 2 Tablespoons Ponzu Sauce
- 2 teaspoons Sesame Seed Oil
- 1 Tablespoon Sriracha Sauce or Chili Sauce (more or less to taste)
Instructions
- Fill a medium saucepan 3/4 full of water and add 1 teaspoon salt. Bring to a boil. Add frozen edamame and follow the cooking instructions on the package.
- While the edamame are cooking, add 1 Tablespoon of cooking oil to a small skillet. Heat the oil over medium heat, and then add minced garlic. Sauté until garlic is light brown and fragrant.
- Once edamame have finished cooking drain them in a colander while you finish preparing the spicy garlic sauce topping..
- Add in all remaining ingredients: soy sauce, ponzu sauce, sesame seed oil and sriracha. or chili oil Bring the mixture to a low boil, and continue cooking to reduce the mixture until it thickens. This takes about 2 to 3 minutes. Remove from heat.
- Add edamame to a serving bowl and top with spicy garlic sauce. Toss edamame to coat completely with sauce and serve.
Notes
- To tame the heat, use less sriracha or chili oil.
- This dish is best served warm. You can reheat leftovers over medium heat in a small skillet.
- Refrigerate any leftovers in a sealed container for up to 3 days.
Nutrition
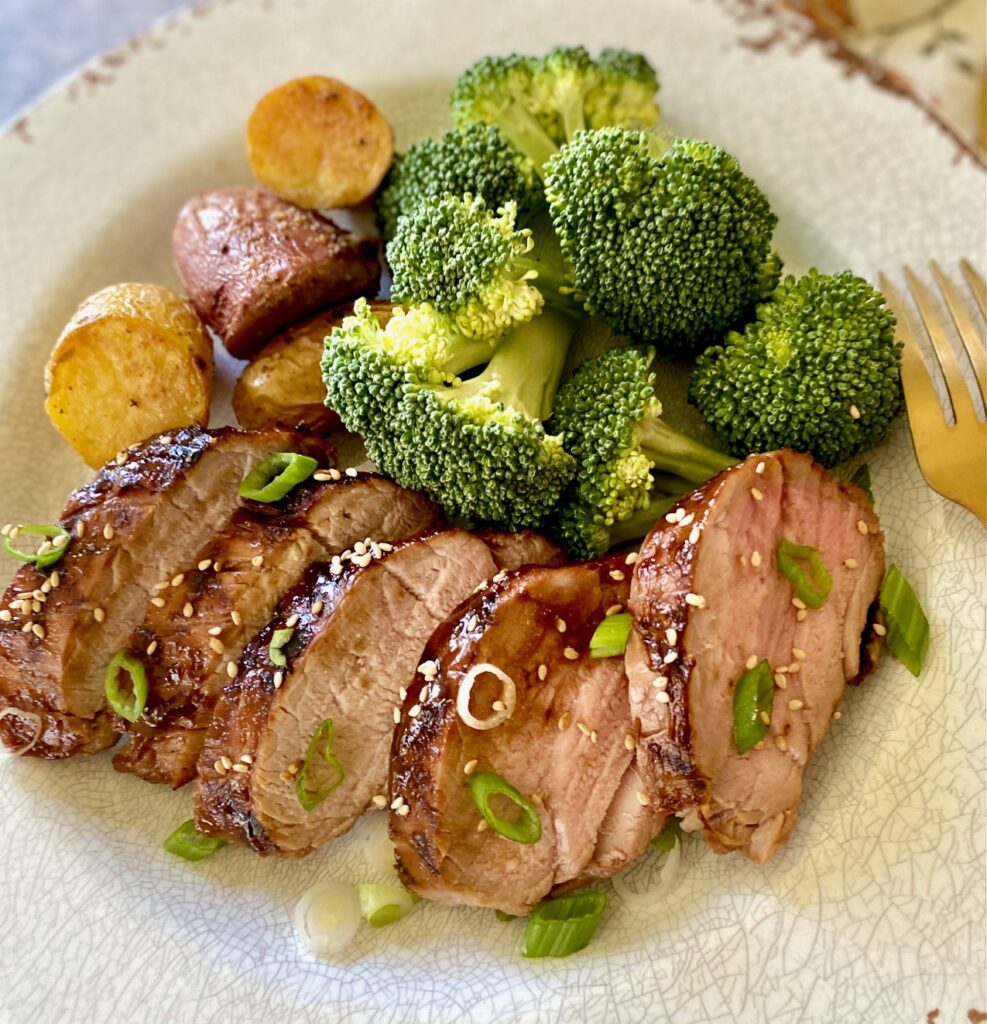
This is one of our regular go-to family dinners because it comes out perfect every time! The marinade and quick cooking method, on the grill, on the stovetop, or in the oven, keep this pork tenderloin moist and flavorful.
It’s great as a “make-ahead” dinner because you can marinate it and then cook it later. Pair it with a cool Asian Coleslaw, Grilled Vegetables, Oven Roasted Potatoes, white rice, roasted Brussels Sprouts, or Rice Pilaf and you’ve got dinner!
Ingredients Needed
MARINADE SAUCE INGREDIENTS:
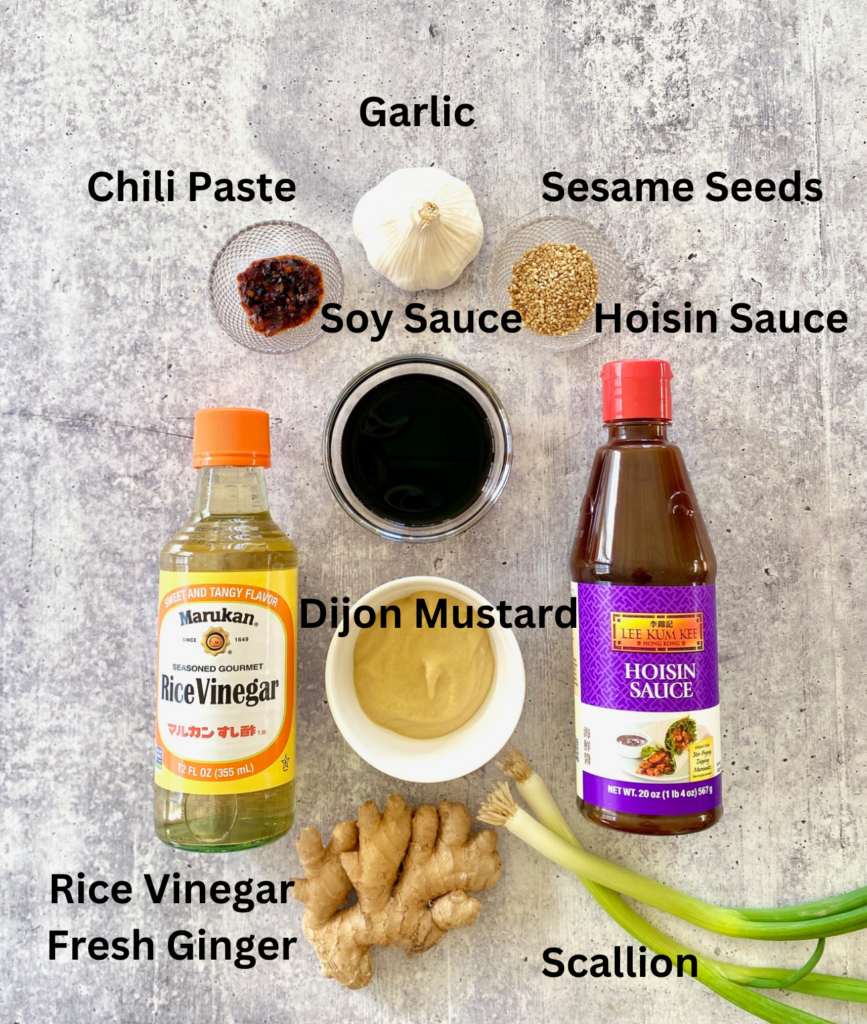
- Hoison Sauce – this thick gorgeous sauce is sweet and salty, and a staple in Asian foods. We use hoisin sauce instead of brown sugar.
- Rice Vinegar – the acid in vinegar helps relax the fibers in meat
- Soy Sauce – substitute tamari for a gluten-free sauce, or use light soy sauce
- Dijon-style Mustard – any brand will work and we love the intense flavor it adds
- Fresh Ginger – or substitute ginger powder
- Fresh Garlic Cloves – or use garlic powder
- Chili Paste – add more or less to suit your individual taste, but we love the added punch this paste gives to the finished Asian sauce. Red pepper flakes make a good substitute.
OPTIONAL GARNISH:
- Toasted Sesame Seeds – if you don’t have the toasted version just toast them yourself in a dry pan over medium heat for about 2 minutes
- Scallion – (aka green onions) we like to use the white part and some of the green part, sliced on the bias, for a great pop of color
PORK:
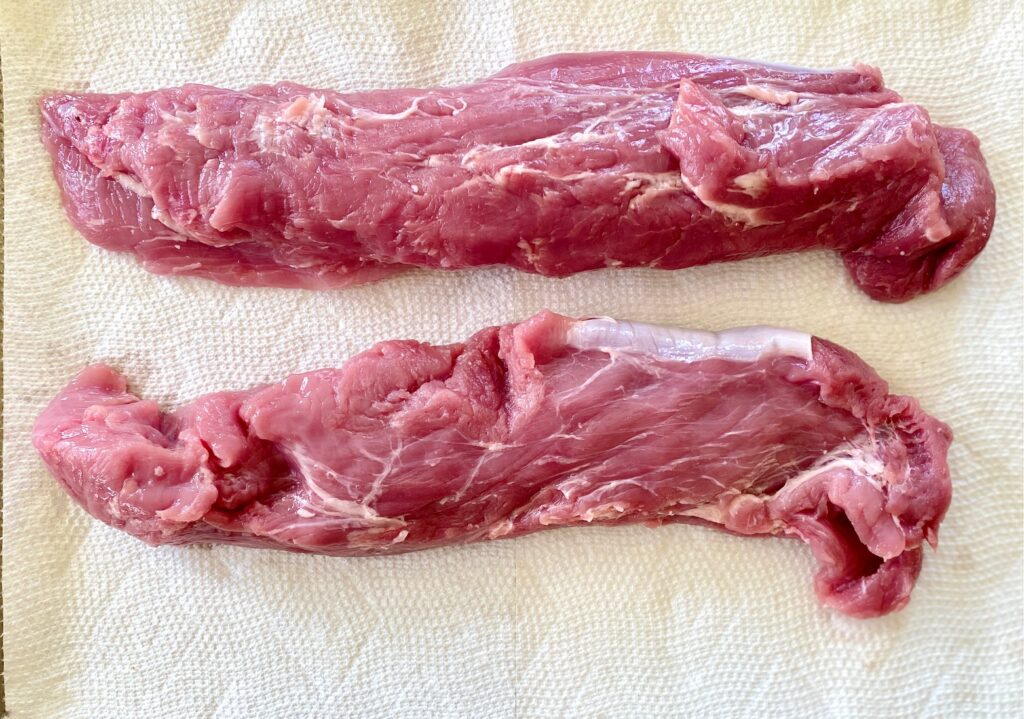
- Pork Tenderloins – generally they are sold in packs of 2, so this marinade is enough for two 1.5-pound tenderloins (make sure you are using pork tenderloins, not a pork loin). Be sure to trim off the excess fat and, if needed, the silverskin
How to prepare Asian Pork Tenderloin
This simple recipe delivers big flavor in just a few easy steps thanks to the simple Asian pork tenderloin marinade.
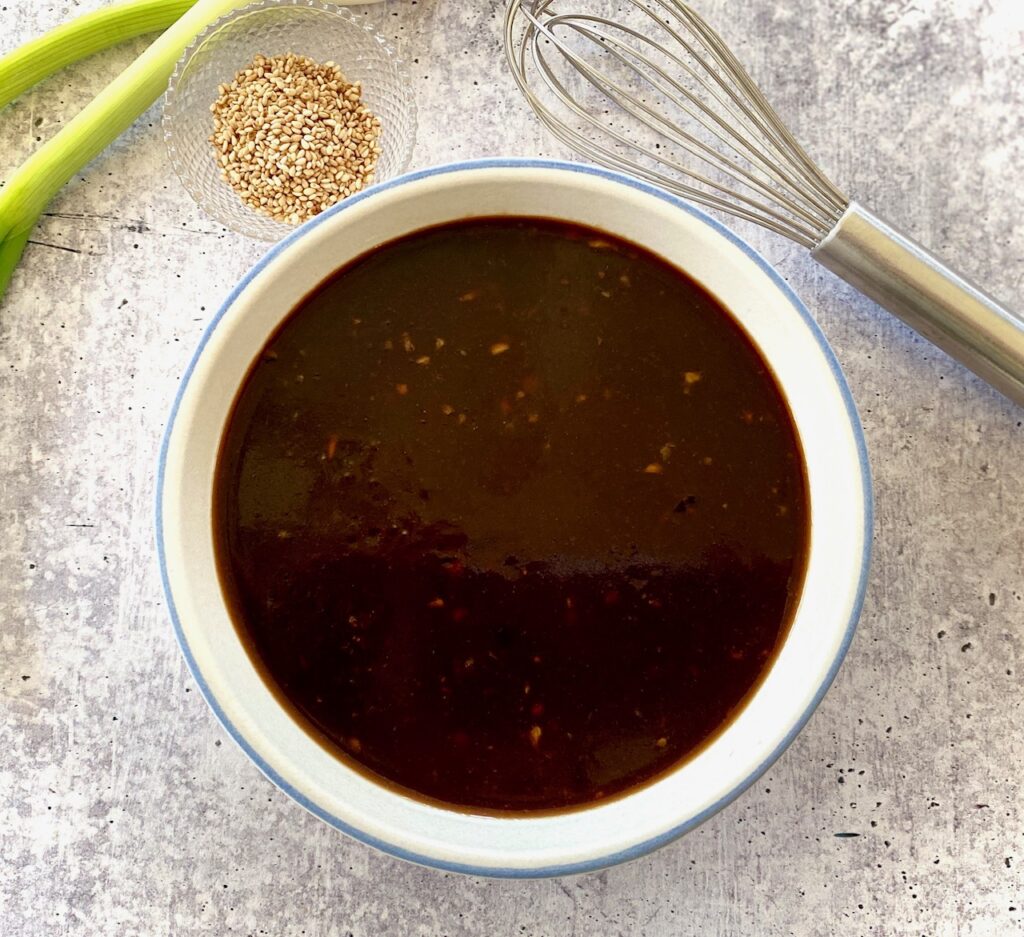
- Make the Asian Marinade – whisk all of the marinade ingredients in a medium saucepan. Heat on medium-low, stirring occasionally, for 10 minutes. The sauce should thicken slightly and intensify in flavor. Remove the sauce from the heat, give it a good stir, and let marinade cool to room temperature.
- Reserve 4-5 Tablespoons to use for basting the pork while it’s grilling.
- Slice the scallion and set aside for garnish
- Make-Ahead Tip: You can make the sauce up to one week ahead of time and store it in the refrigerator until ready to use.
- Trim the Tenderloins – Most packages are sold with 2 tenderloins per package. Remove and rinse the tenderloins, then pat dry with paper towels.
- If needed, trim any excess fat and remove the tough silver skin.
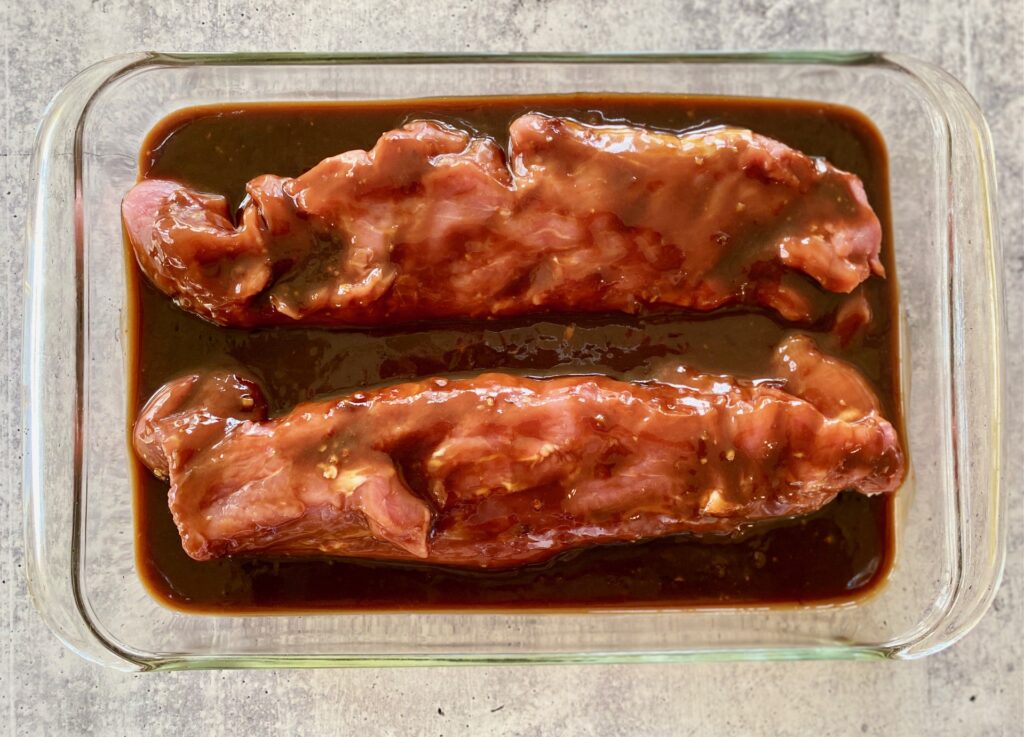
- Marinate the Pork – Add to a shallow dish or a gallon-sized ziptop freezer bag
- Pour cooled marinade over the top of the pork and let it marinate for 30 minutes in the refrigerator.
- NOTE: If not cooking right away, seal tightly in an airtight container, and refrigerate for up to 2 days, or freeze for up to 3 months.
Cooking Pork Tenderloin
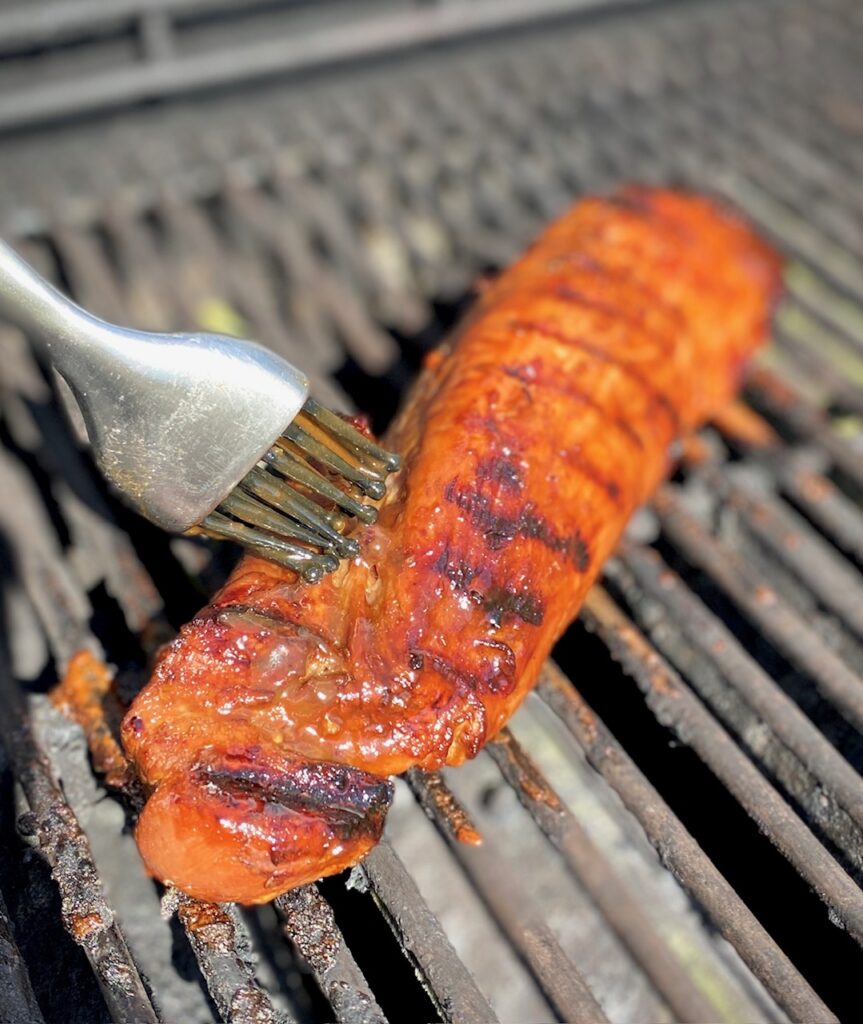
There are 3 ways to cook this amazingly easy pork. Our favorite is the grilling method because it imparts an extra bit of smoky flavor. Whichever cooking method you choose it is best to remove the marinated pork from the refrigerator 30 minutes before heating to ensure even cooking.
GRILLING and STOVE TOP GRILLING:
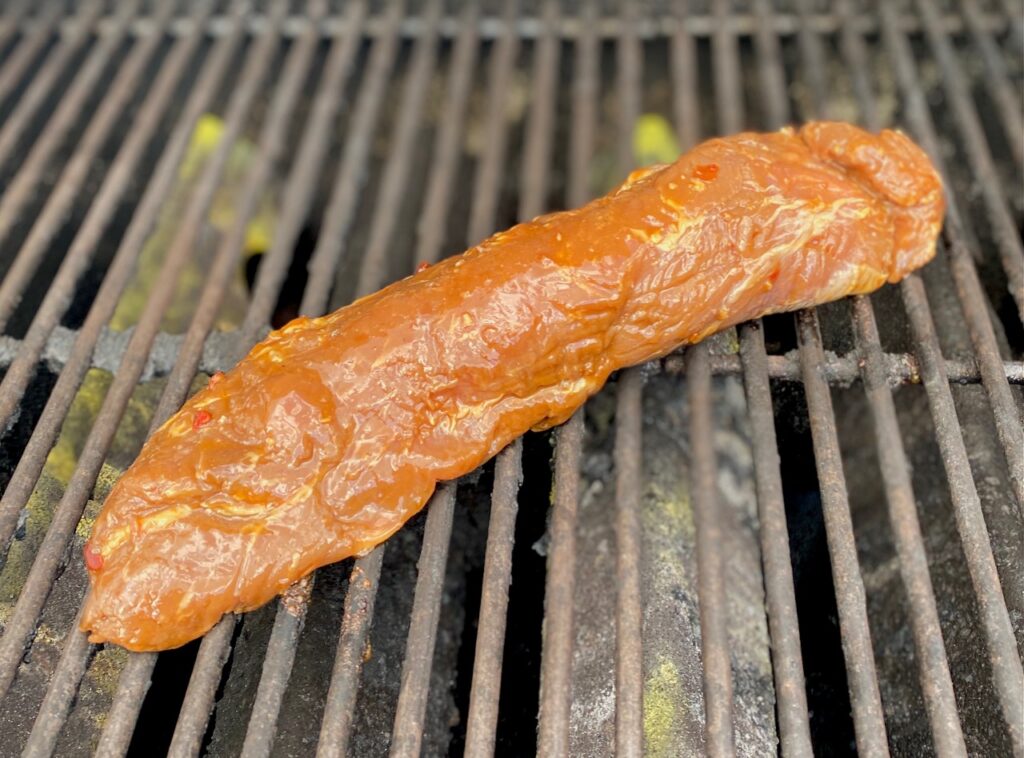
- Preheat the grill or grill pan to medium-high heat. If using a stovetop grill pan it is helpful to brush it with a small amount of sesame oil before cooking to prevent sticking.
- Remove from the pork marinade and place the tenderloins on the hot grill.
- Flip about every 7 minutes and baste with some of the reserved marinade each time you turn it.
- Pork is done when an instant-read thermometer, inserted into the center, reaches 145˚-150˚ F. This generally takes 18-22 minutes but cooking time can vary based on your grill. Tenderloin should be golden brown and seared but still slightly pink on the inside.
BAKING:
- Preheat the oven to 400˚F. Line a baking sheet with aluminum foil or parchment paper.
- Remove pork from the marinade and place on the prepared sheet pan.
- Bake in a preheated oven for about 20 minutes, turn the pork over at the ten-minute mark, and baste it every 5 minutes with reserved sauce.
- Pork is done when it reaches an internal temperature of 145˚-150˚ F.
For all methods:
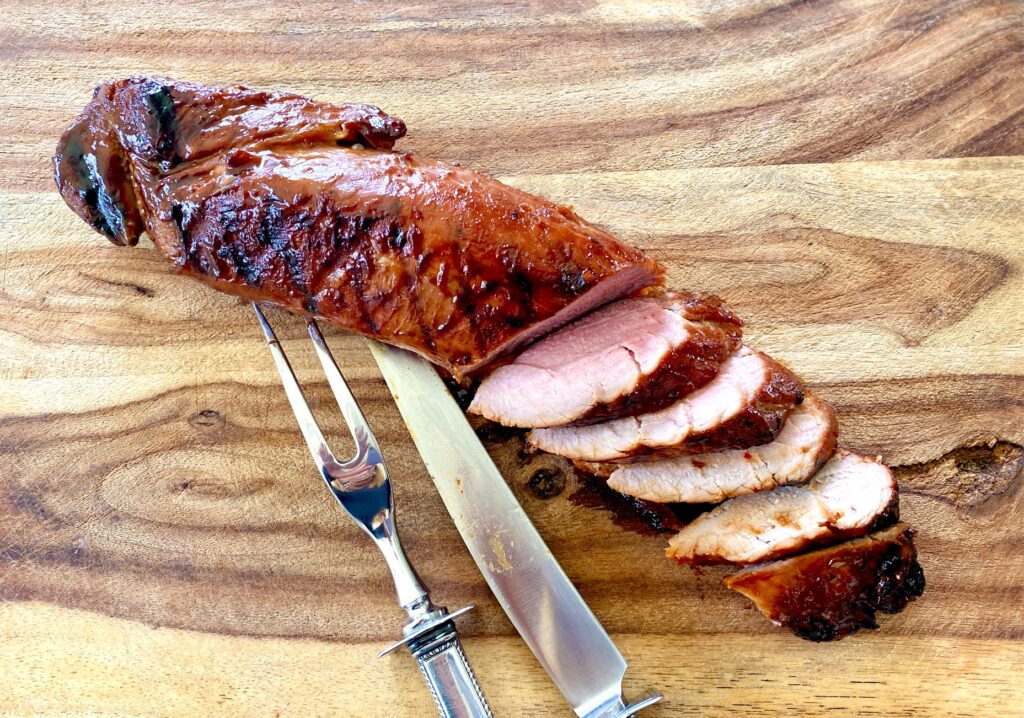
- Remove pork from the heat at an internal temperature of 145˚-150˚ F on a meat thermometer and place on a cutting board. Cover loosely with foil and allow the pork to rest for 5 minutes to allow the juices to redistribute. Don’t skip the resting step because this will give you the juiciest results.
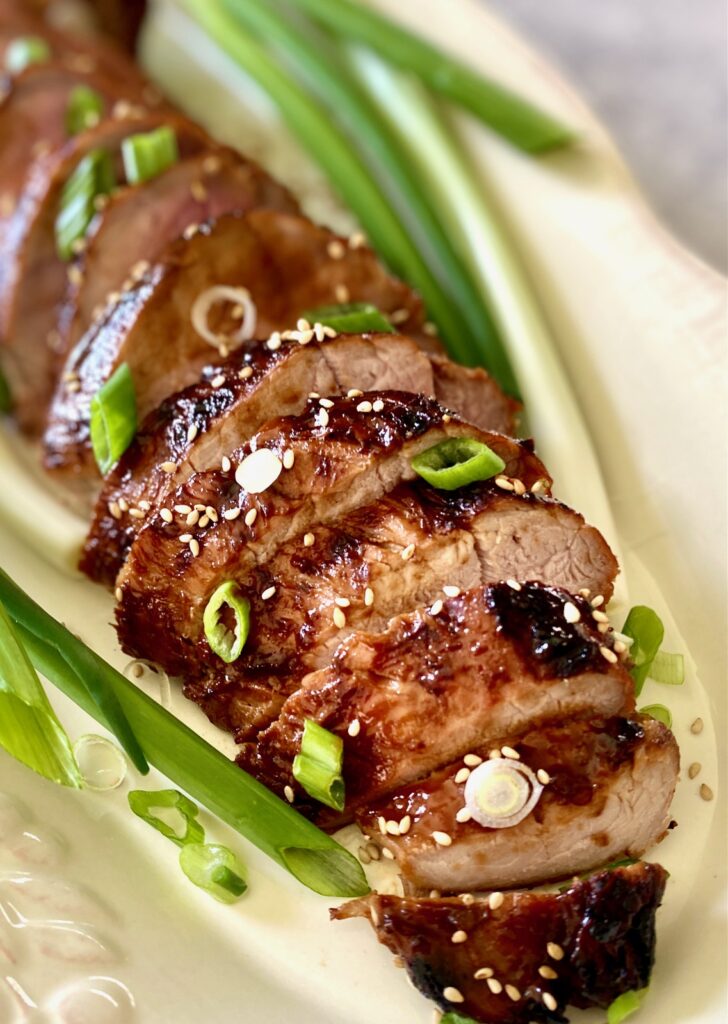
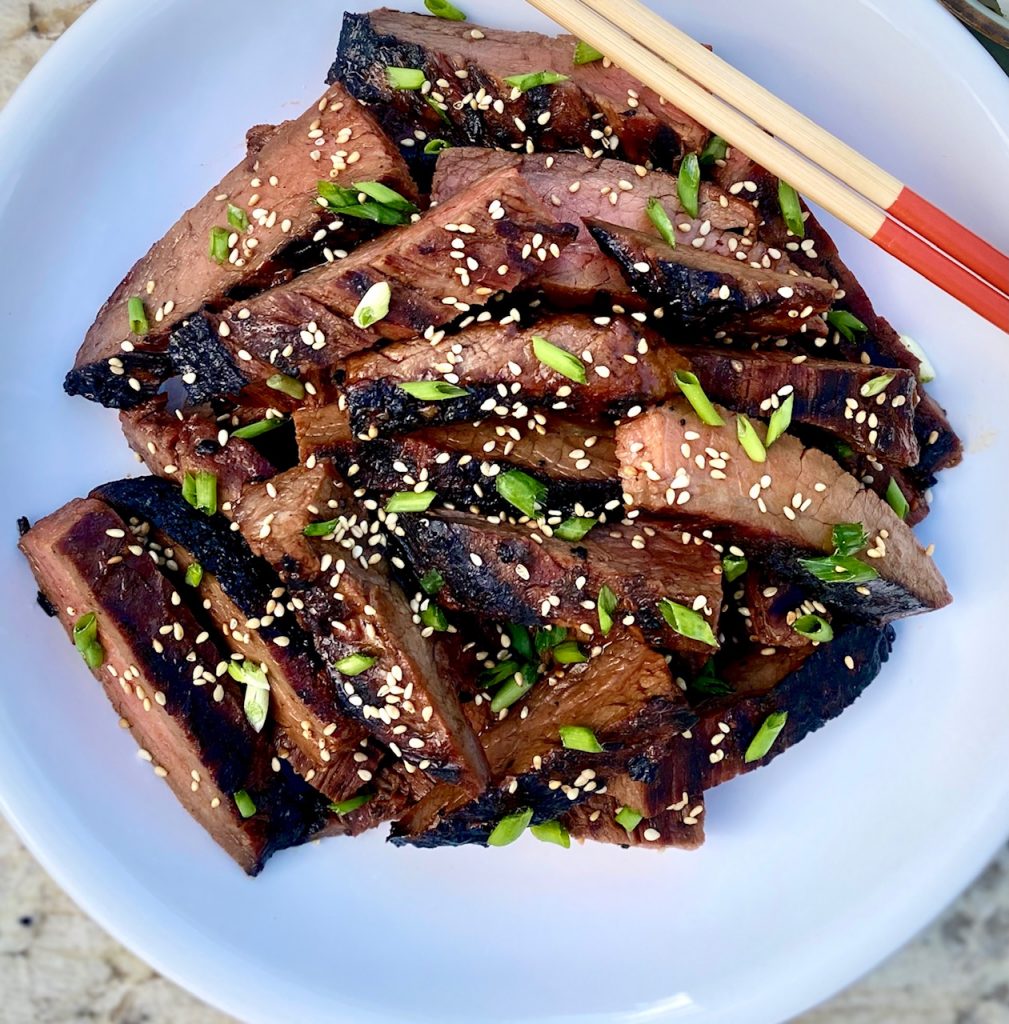
- Slice into pork medallions. Sprinkle sesame seeds and scallions over the sliced pork before serving.
Make Ahead
This dish is the ultimate make-ahead! Every part can be prepped in advance, making it an easy meal.
- Make the marinade up to one week ahead and store it in the refrigerator until ready to use.
- Marinate the pork for a minimum of 30 minutes, but up to 2 days, in advance.
- Each pork tenderloin will feed 3-4 people so if you have a smaller group then make one and freeze one for later.
Freezer Option
- Place pork in an airtight container, or zip-top freezer bag, and pour in marinade to coat. Freeze for up to 3 months. Allow to thaw in the refrigerator before cooking and then proceed as directed above.

Storing Leftovers
- Allow the cooked pork to cool
- Place in an airtight container for up to 3 days in the refrigerator or up to 2 months in the freezer
- Reheat in the oven, at 350˚F, covered with foil, for about 10 minutes.
Best Cooking Temperature for Pork
- Pork is a lean meat so to ensure you have juicy Asian pork tenderloin we recommend removing it from the grill or oven at 145˚-150˚Farenheit
- The very best way to check is to use an instant-read thermometer inserted into the thickest part of the pork.
- For a great visual guide check out this cooking guide from Pork.org
Love Pork? Try these pork favorites
- This Pork Loin with Garlic and Herbs is simple and flavorful!
- Juicy and authentic Carnitas are ideal on their own but great for tacos, burritos, and nachos.
- Grilled Chili Lime Pork Tenderloin has a tangy and citrusy flavor.

Asian Pork Tenderloin
Ingredients
- 2 (1.5 pound) pork tenderloins trimmed of fat and silverskin
Marinade
- 4 ounces Hoison sauce
- 2 ounces rice vinegar
- 1 ounces soy sauce (low sodium recommended)
- 1 Tablespoons Dijon style mustard
- 1 teaspoons fresh ginger peeled and finely minced (or ½ teaspoon ground ginger)
- 1 teaspoon garlic minced (or ½ teaspoon garlic powder)
- ½ teaspoon chili paste (or red pepper flakes)
Garnish (optional)
- 1 Tablespoon toasted sesame seeds
- 1 scallion, sliced into rounds sliced on the bias, white and green part
Instructions
Marinade:
- Combine all of the ingredients for the marinade in a medium saucepan and heat on medium-low for about 10 minutes (do not boil) until the sauce begins to thicken a little.Remove from heat and cool to room temperature. Reserve 4 Tablespoons for basting the pork while its cooking.Make-ahead Tip: Prepare marinade, cool, and store it in the refrigerator for up to one week.
Marinating the Pork:
- Rinse, pat dry, trim the pork of excess fat, and remove the silver skin.Add the pork to a gallon-size freezer bag, or a shallow glass dish, and cover with the cooled marinade.Allow the pork to marinate for 30 minutes in the refrigerator.If not cooking right away, seal tightly, and refrigerate for up to 2 days, or freeze for up to 3 months. If frozen thaw before cooking.
Cooking / Grilling:
- Stovetop:Heat a grill pan to medium. Once the pan is hot add the marinated tenderloin.Grill:Heat the grill to medium-high and add the tenderloins. Bake:Preheat the oven to 400℉. Line a baking sheet with foil or parchment paper.Bake for 18-20 minutes, turning after 10 minutes and basting. Pork is done when it reaches an internal temperature of 145˚-150˚ F.Discard the remaining marinade.
- Cook for about 7 minutes and flip the meat over. Baste with some of the reserved marinade.Continue cooking, and turning every 6-7 minutes, for about 18-22 minutes, or until the pork reaches an internal temperature of 145-150℉, basting each time you turn the pork.
- Remove from the heat, place on a cutting board, and loosely tent with foil for 5 minutes to allow the juices to reabsorb.
- Slice pork into medallions, sprinkle with sesame seeds and scallions, and serve.
Notes
- Marinate both tenderloins and freeze them separately. Each tenderloin will serve 3-4 people.
- Once ready to cook, defrost overnight in the refrigerator before cooking.
- Cut the marinade recipe in half if you have just one pork tenderloin to marinate.
Nutrition
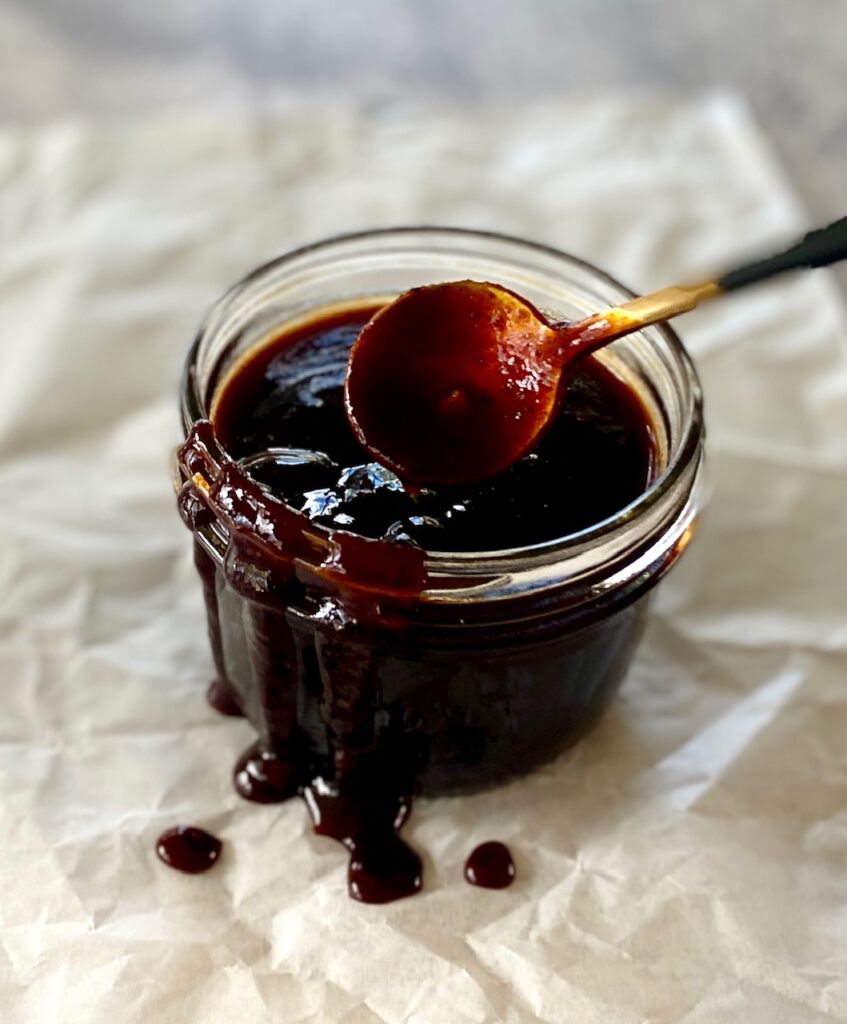
Quickly make your own BBQ sauce with (mostly) basic pantry staples. It only takes 15 minutes from start to finish to create a big, sweet, sassy sauce!
We love to slather this sauce on EVERYTHING including our fall-off-the-bone Oven Baked Ribs, Slow Cooker Ribs, Oven Baked Chicken Wings, and Slow Cooker Pulled Chicken
This post may contain affiliate links. Please see our affiliate disclosure for more details.
Ingredients Needed
The beauty of homemade sauce is that you know what’s in it and it’s a great way to steer clear of added preservatives. Even the best grocery store sauces have high fructose corn syrup. This zesty sauce is prepped in 5 minutes!
You don’t need a lot of ingredients or a secret ingredient for the best BBQ sauce.
For the full recipe, ingredient quantities, and nutritional information refer to the printable recipe card below.
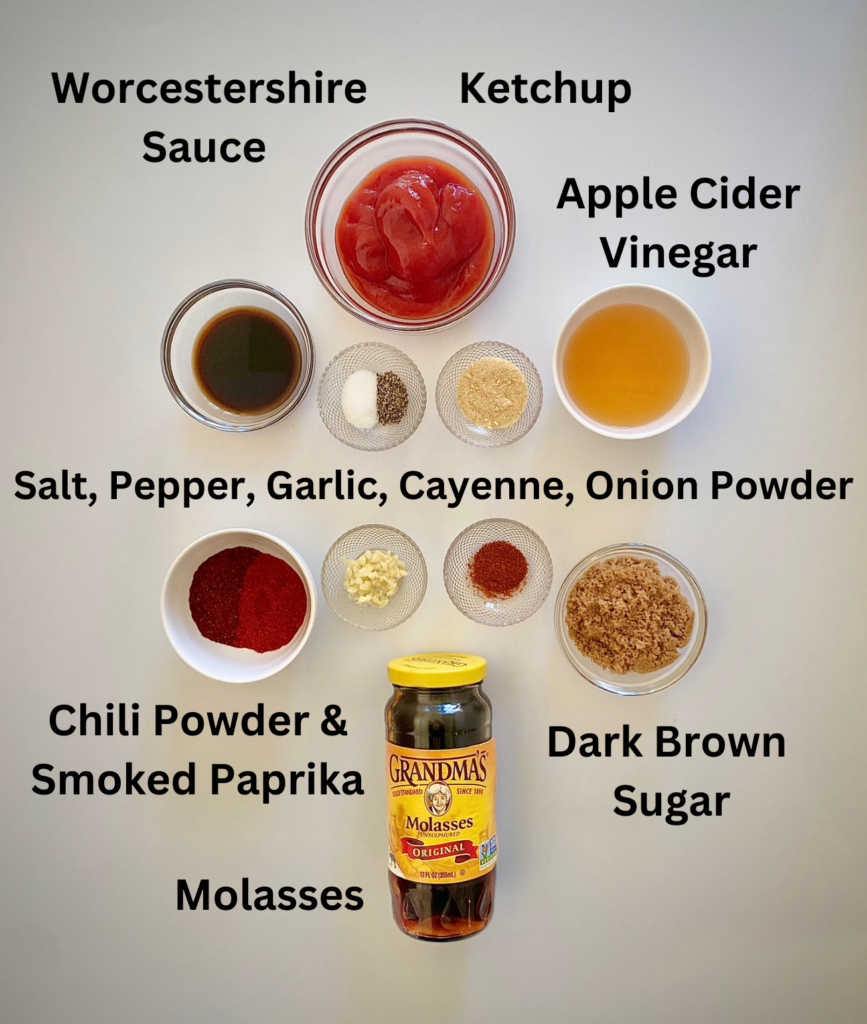
- Ketchup – this is the tomato base for the sauce
- Molasses – we like unsulphered molasses, and use it in our Easy Baked Beans too. It adds sweetness but also a warm, earthy, and slightly smokey flavor. If needed, substitute maple syrup which will lend a lighter flavor, no smokiness, and produce a sweeter sauce.
- Dark Brown Sugar – adds a caramel note to the sauce.
- Apple Cider Vinegar – gives the sauce a slightly fruity and tangy flavor that pairs well with the smoky savory elements of barbecue sauce
- Worcestershire Sauce – you could substitute soy sauce if needed
- Spices: chili powder, smoked paprika, onion powder, salt, and black pepper
- Garlic – freshly minced (garlic powder works in a pinch)
- Cayenne Pepper or Hot Sauce – optional, if you want medium heat in your sauce
- Liquid Smoke – an optional ingredient if you want a bigger smoky barbecue sauce. (We don’t use it but that’s just our personal taste)
How to make Homemade BBQ Sauce
This is an easy one-pan sauce that takes so little time and comes together quickly.
- In a medium saucepan whisk together all of the ingredients: ketchup, molasses, dark brown sugar, apple cider vinegar, Worcestershire sauce, chili powder, minced garlic, paprika, onion powder, salt, pepper, and if using, add liquid smoke and/or hot sauce.


- Once blended cook over medium heat until the sauce comes to a simmer. (Taste to see if you want to add more hot sauce or cayenne for a spicy BBQ sauce).
- Cover and cook for 5 minutes.
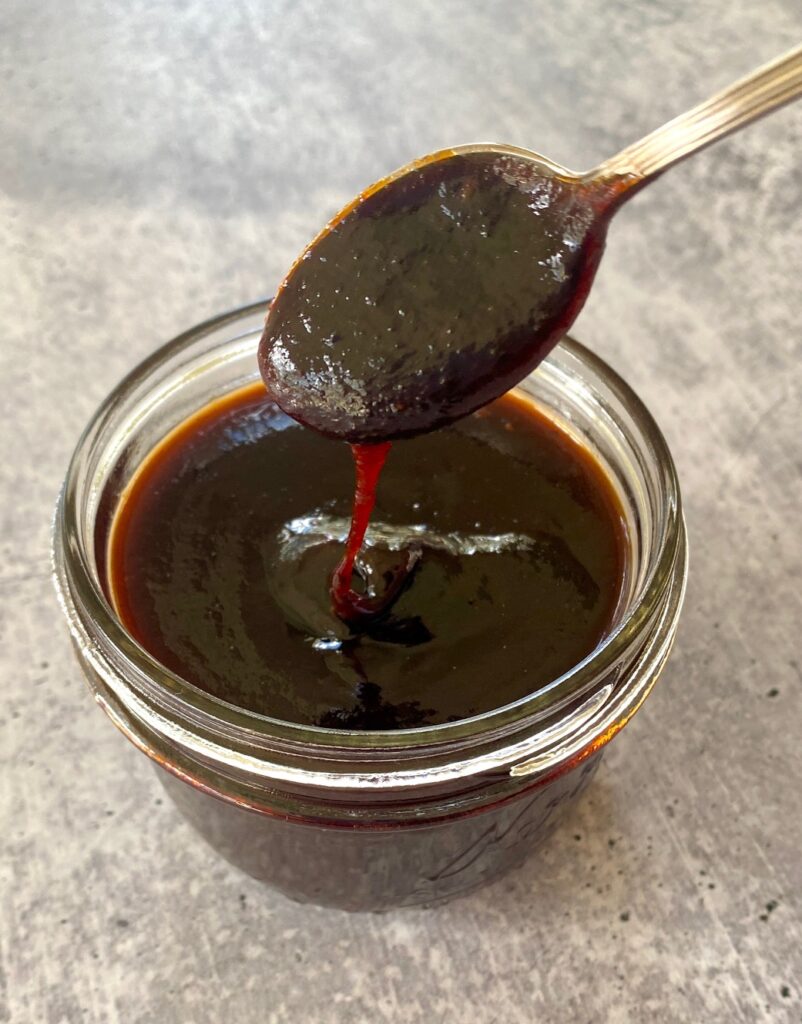
- Uncover, whisk, cover, and cook for an additional 7-8 minutes or until the sauce reaches a thick but pourable consistency.
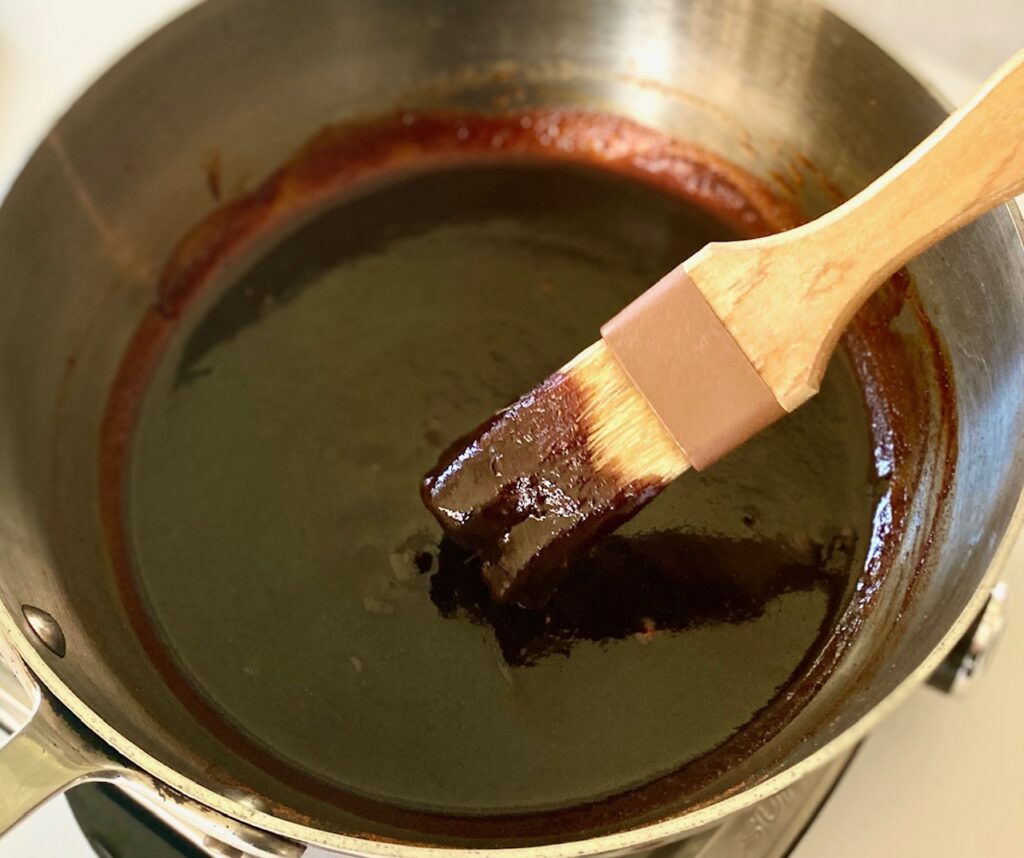
- Remove from the heat, whisk again, and use right away, or let the sauce cool if using later.
- Brush it on everything!
- Makes about 2 cups of sauce.
Make Ahead and Storage
- This sauce can be made ahead and stored in the refrigerator for about 2 weeks or in the freezer for 3 months. Thaw frozen sauce in refrigerator before using. (The next time you make a batch of pulled pork or pulled chicken it’s ready to go!)
- Once the sauce is cooled to room temperature put it in an airtight container or a tightly sealed glass mason jar
- This homemade barbeque sauce recipe can be rewarmed over low heat before using it.

You can “water bath can” your own homemade BBQ sauce
- Water bath canning is a simple process that can extend the life of your BBQ sauce for future use. It also makes a wonderful homemade gift idea.
- Notes for canning BBQ sauce: Place jars in hot water. Heat to medium-high, place the lid over the canning pot and bring water to a rolling boil. Process pint jars for 20 minutes, adjusting for altitude. Refer to the full instructions on our step-by-step process for Water Bath Canning.
- Sauce can be stored in a cool, dark space for up to 6 months.
Variations and substitution ideas
- Use maple syrup instead of molasses
- Love a sweet sauce? Skip the hot sauce or cayenne
- Instead of Worcestershire sauce use soy sauce or coconut aminos
- If you use light brown sugar the sauce will still be delicious but a bit lighter in flavor
- For a smoky BBQ sauce add liquid smoke or blackstrap molasses
Best ways to use this easy BBQ sauce
Like all great recipes, this Kansas City-style sauce has many great uses!
- Perfect on any kind of beef or pork ribs
- Great on BBQ Chicken Pizza
- Makes a delicious dipping sauce for french fries or chicken wings
- Slather it on a pork tenderloin, pork chops, or chicken
Chef’s Tip on BBQ Brushes: Use separate brushes for your barbecue needs because they tend to retain some of the smokey flavor. (You don’t want your pastries or garlic bread to taste like BBQ!). We like a wooden handled brush with natural bristles or a silicone brush.
Other great sauces and rubs for meats
- This zesty Dry Rub for Ribs is a great first layer of flavor that pairs well with this sauce
- Teriyaki Sauce is a reader favorite and is also ready in just 15 minutes
- Pork and chicken always taste better with Sweet Chili Sauce
- Chimichurri Sauce is an easy, fresh, herb-flavored sauce that works with chicken and steak
- Classic Italian Gremolata Sauce is made with fresh lemon zest, parsley, and minced garlic. It’s a great topping for vegetables, steak, and seafood.
Homemade BBQ Sauce
Ingredients
- 1 cup ketchup
- ⅓ cup molasses
- ¼ cup dark brown sugar
- 4 Tablespoons apple cider vinegar
- 2 Tablespoons Worcestershire sauce
- 1 Tablespoon chili powder
- 2 teaspoons smoked paprika
- 1 teaspoon garlic, minced
- 1 teaspoon onion powder
- ½ teaspoon salt
- ½ teaspoon black pepper, freshly ground
- 1 pinch cayenne pepper, optional
- 1 teaspoon liquid smoke, optional
Instructions
- In a medium saucepan stir together all of the ingredients: ketchup, molasses, dark brown sugar, cider vinegar, Worcestershire sauce, chili powder, minced garlic, paprika, onion powder, salt, pepper, and if using, liquid smoke and cayenne/hot sauce.
- Heat over medium heat and bring to a simmer. Cover and let cook for 5 minutes on a low simmer, stir, cover again and, cook another 7-8 minutes, or until thickened.
- Remove from heat, stir, and use immediately.If not using right away, cool the BBQ Sauce to room temperature, pour it into a sealed glass container, and store it for up to 2 weeks in the refrigerator.
Notes
- This recipe makes about 2 cups of BBQ Sauce
- Want it spicier? Add a little more cayenne
Nutrition
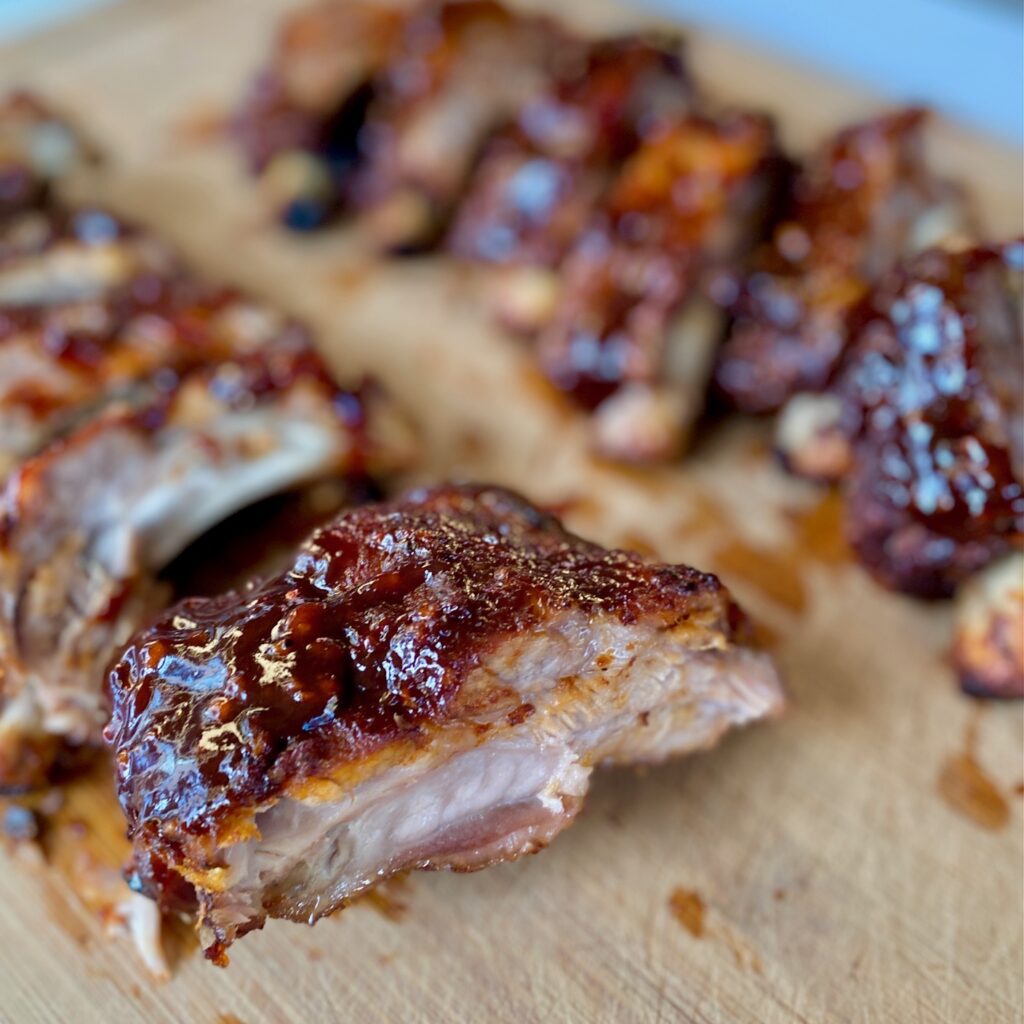
These tender ribs are fall off the bone tender and everything you want in an easy and delicious dinner for the whole family
Baby back ribs are coated in a spicy rib rub, covered in rich and tangy barbecue sauce, then slow-cooked to perfection. We are big fans of Oven Baked Ribs and Smoked Ribs but the beauty of this method is that it’s a simple recipe for any time of the year
Slow cooking ribs in the crock pot is perfect for weeknights. Meat becomes melt in your mouth tender after cooking in a slow cooker. We rely on slow cooker recipes, such as our Slow Cooker Pulled Chicken and Irish Pot Roast, because it makes life so easy.
Prep the ribs quickly in the morning (or even the night before), let them cook low and slow all day, and enjoy a delicious dinner.
Ingredients Needed for Slow Cooker Ribs
(See the recipe card below for the exact quantities)
Ribs – One rack of ribs. Our favorite is baby back ribs, but feel free to pick your favorite kind of ribs because any type, such as pork spare ribs, St. Louis style ribs, or beef ribs, will work for crockpot ribs.
Barbecue Sauce – Make our 15-minute Homemade BBQ Sauce or use your favorite grocery store brand
Dry Rib Rub – we use our favorite homemade Dry Rub for Ribs recipe blend, which includes dark brown sugar, paprika, chili powder, garlic powder, onion powder, oregano, cumin, salt, and black pepper. You can also keep it simple and use just salt and pepper.


How to Make Slow Cooker BBQ Ribs
Prep:
- Blend the spice rub mixture in a small bowl and set aside.
- Prepare the ribs by patting them dry with a paper towel. Trim excess fat.
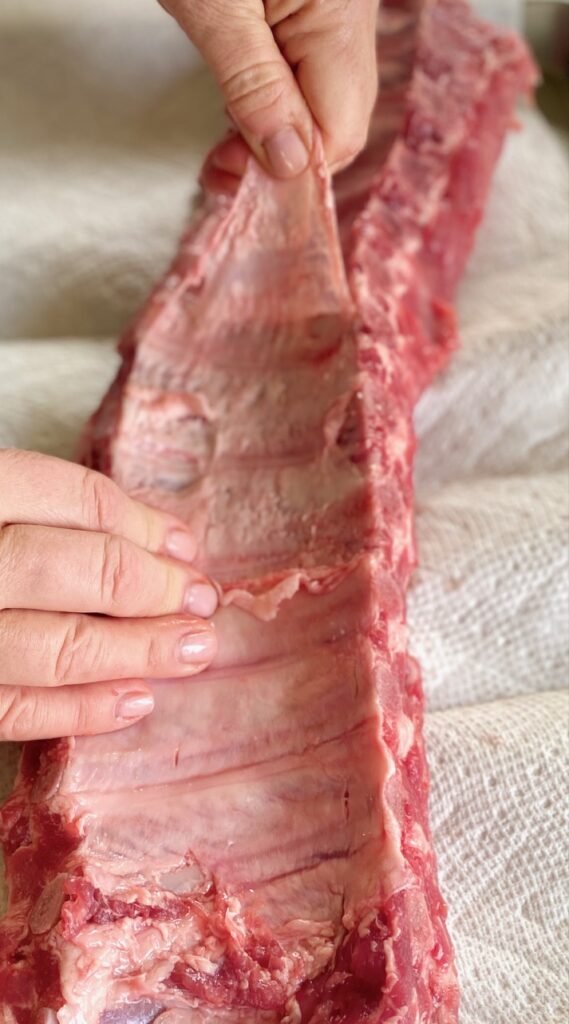
- Turn the ribs over and remove the thin membrane from the back of the ribs (see photos and the How-To below).
- Rub the ribs all over with the rib rub, including the sides of the ribs. Make sure they are well coated.

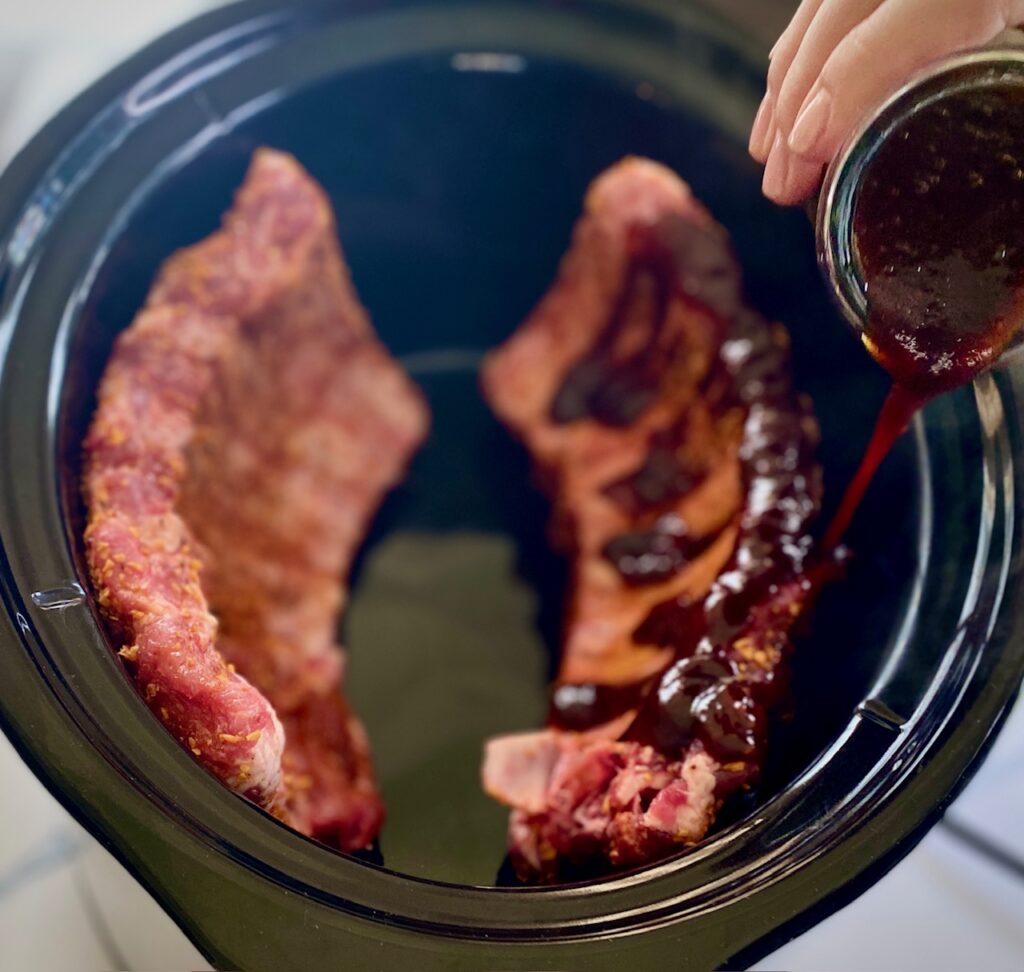
- Cut the rack in half and place them in the slow cooker.
- If using a large crockpot you can stand the ribs up on their side and wrap them around the inside of the slow cooker bowl. If you are using a smaller slow cooker you can cut the racks into 4 pieces instead of 2 to make sure they fit in the pot.
- Pour your favorite BBQ Sauce all over the ribs, making sure they are coated all over.

Cook:
- Cover the slow cooker with the lid.
- For baby back ribs cook for 6-7 hours on low, or about 3 ½ hours on high, until the ribs are tender. Other types of ribs may have a longer cooking time. Cooking them on low will result in the most tender ribs.
- Ribs are ready when they reach an internal temperature of 190˚- 200˚F, and they are falling off and pulling away from the bone.
- Preheat the oven broiler. Line a baking sheet with aluminum foil.
- Remove the ribs from the slow cooker and place them on the prepared baking sheet.
- Spoon or brush some of the sauce from the crock pot over the ribs.
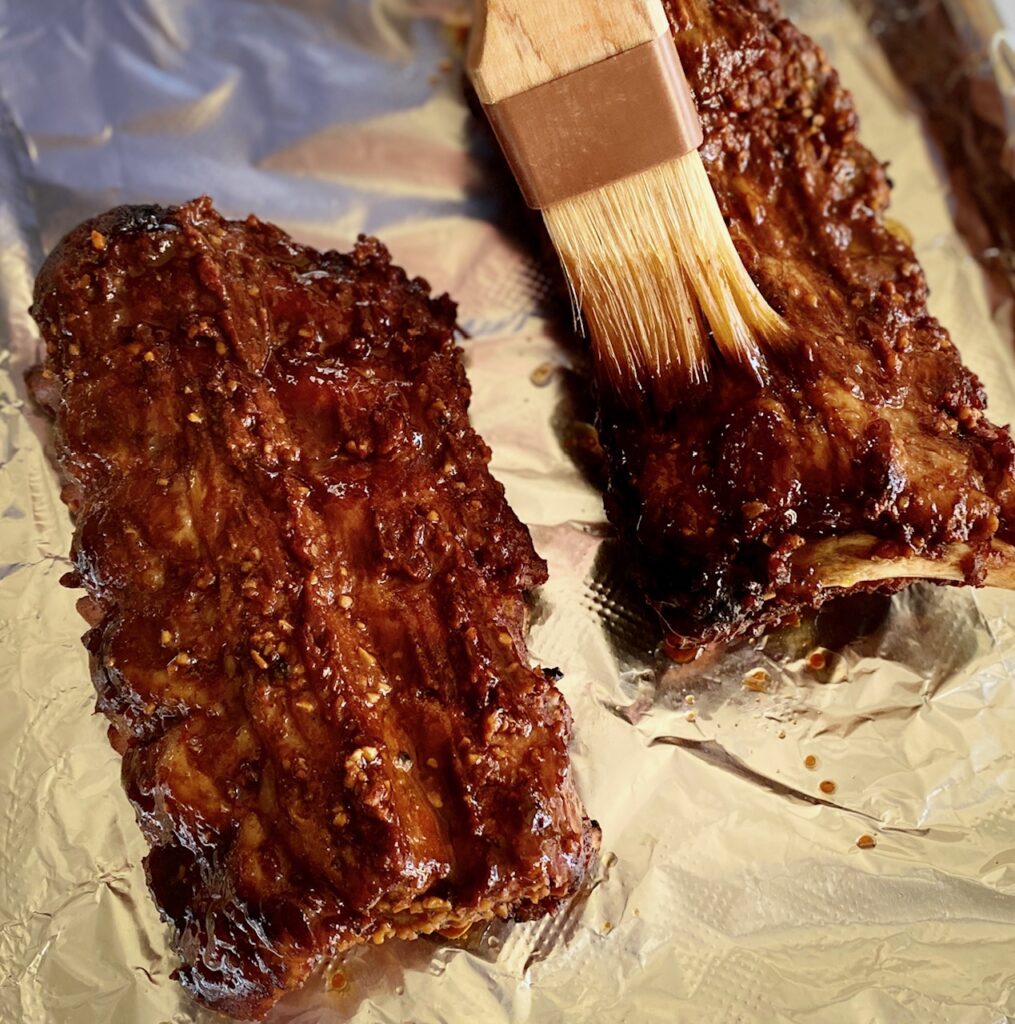
- Broil for about 5 minutes until the sauce on the ribs starts to caramelize.
- Remove from the broiler. Place on a cutting board and let cool for 5 minutes.
- Cut the racks into individual riblets.
- If desired, brush some more of the leftover sauce from the slow cooker onto the ribs and serve.
How to Store
These make a great make-ahead meal which saves you a lot of time.
Once cooked and cooled the ribs can be stored in an airtight container or freezer bag in the refrigerator for 3-4 days or can be frozen for up to 3 months.
How to Reheat Ribs
- Preheat the oven to 250˚F
- Place the ribs in an oven-safe baking dish. Brush with BBQ sauce and cover tightly with foil. Bake for 15-20 minutes.
- If frozen bake for about 30 minutes. No need to thaw.
Variation Ideas
- Instead of traditional BBQ sauce substitute an Asian based BBQ sauce
- Use a simple salt and pepper rub in place of our Dry Rub mixture
- Want your ribs spicier? Try adding a pinch of cayenne pepper to the rib rub mixture
- Love a smoky flavor? Use smoked paprika and chipotle chile powder
- If you have a large slow cooker you can easily cook 2 racks of ribs instead of 1

How to Remove the Membrane from Ribs
Ribs come with a thin white membrane that runs along the back side of the rack. It can become tough and chewy when cooked so it’s best to remove it. This also allows the seasonings and BBQ sauce to fully flavor the meat.
To remove it run a knife under the membrane in one spot to loosen it, then grasp it and pull it off in a sheet. Use a paper towel if needed to get a better grip on the membrane. The membrane should come off in one or two whole pieces but you may need to remove it in smaller pieces. Discard the membrane once removed.

What to Serve with Crock Pot Ribs
These ribs are so versatile and here are some of our favorite side dishes to serve alongside them.
- Baked Beans
- Asian Coleslaw with Peanut Dressing
- Grilled Vegetables or Grilled Corn on the Cob
- Black Bean and Corn Salad (aka Cowboy Caviar)
- Rice Pilaf or Oven Roasted Potatoes

Slow Cooker Baby Back Ribs (with BBQ Sauce)
Equipment
- 1 Slow Cooker
Ingredients
- 4 pounds baby back ribs (1 large rack)
- 2 cups BBQ sauce, homemade or store-bought
Dry Rib Rub
- 2 Tablespoons dark brown sugar
- 1 Tablespoon paprika
- 1 Tablespoon chili powder
- 1 Tablespoon garlic powder
- 1 Tablespoon onion powder
- 2 teaspoons black pepper, freshly ground
- 2 teaspoons Kosher salt (or 1 teaspoon regular salt)
- ½ teaspoon dried oregano
- ¼ teaspoon cumin
Instructions
- Blend together the spice rub mixture and set aside.
- Prepare the ribs by patting them dry with a paper towel and removing the membrane.
- Coat the ribs all over with prepared spice rub mixture. Cut the rack in half.
- Add the rib racks to the slow cooker. Pour half of the BBQ sauce on top to coat and then flip the racks over and pour in the remaining BBQ sauce on the ribs. If your crock pot is large enough, you can stand the ribs on their side and wrap them around the inside of the crock pot.
- Cover the slow cooker with the lid.Cook the ribs for about 6 hours on low or 3½ hours on highThe ribs are ready when the internal temperature is 190-200℉ and they are beginning to fall off the bone. If possible use an instant read thermometer. The ribs should be pulling away from the bone and easy to shred.
- Preheat the oven broiler to high and line a baking sheet with foil.
- Remove the ribs from the crockpot and lay them on the prepared baking sheet. Spoon some of the sauce from the slow cooker on top of the ribs.
- Broil for 5 minutes or until the sauce is beginning to caramelize.Remove from the oven, place on a cutting board, let cool for 5 minutes, and slice the ribs into individual riblets. Serve with additional sauce if desired.
Notes
- Instead of traditional BBQ sauce substitute an Asian based BBQ sauce
- Use a simple salt and pepper rub in place of our dry rub mixture
- Want your ribs spicier? Try adding a pinch of cayenne pepper to the rib rub mixture
- Love a smoky flavor? Use smoked paprika and chipotle chile powder
- If you have a large slow cooker you can easily cook 2 racks of ribs instead of 1 rack
Nutrition
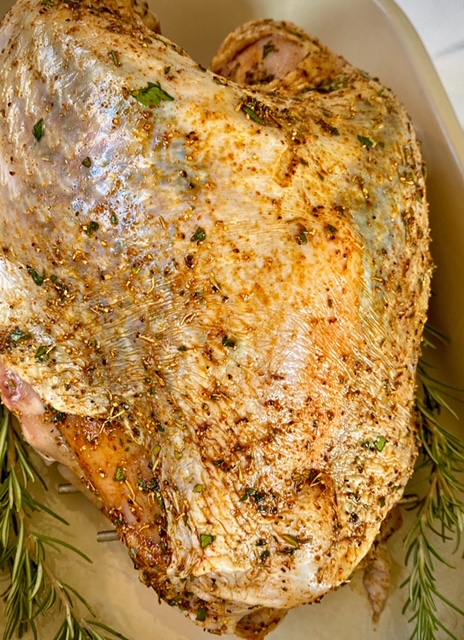
This turkey seasoning rub features an aromatic blend of classic seasonings that you probably already have in your spice cabinet to make the perfect dry rub. This can also be made into an herb paste, as well.
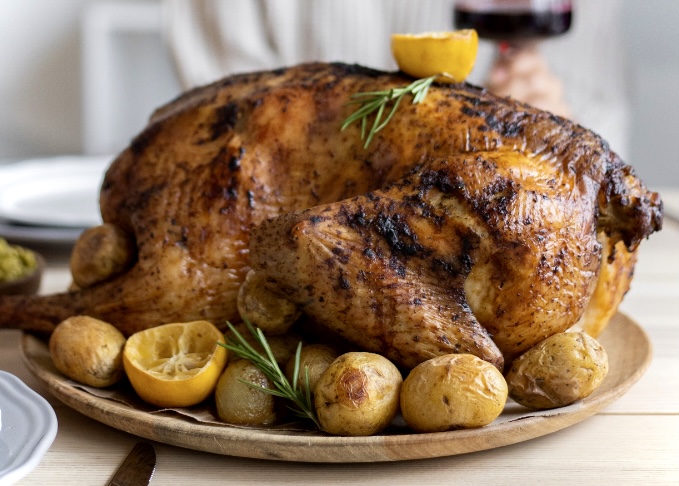
Prep is so easy! It takes just 5 minutes to combine everything and then rub the blend onto your turkey (or chicken) to roast or grill!
Ready to get started? Just click the “jump to recipe” button below or keep reading for more tips and ideas. This post may contain affiliate links. Please see our affiliate disclosure for more details. We only recommend products we love and use.
Jump to Recipe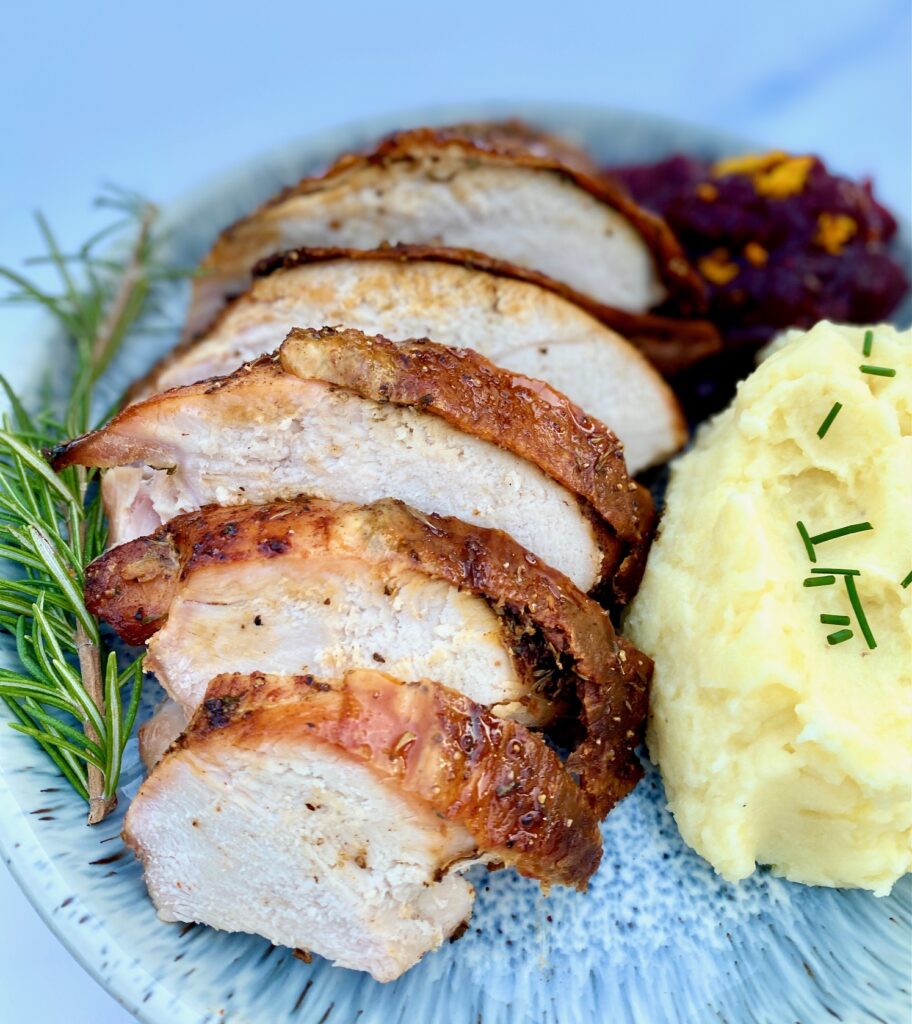
Create the perfect turkey dinner with the addition of creamy Garlic Mashed Potatoes, Cranberry Orange Sauce, and Green Beans Almondine. If you are hosting a smaller holiday or family dinner, try our savory Easy Oven Roasted Turkey Breast which is perfect for a smaller crowd.
Homemade seasoning mixes are a smart way to go for 3 reasons:
- HEALTHIER: You know exactly what’s in your mix – no artificial flavors or additives
- PERFECT QUANTITY: This poultry seasoning recipe makes just the right amount for 2 turkeys or 3 large chickens. So, no leftover stale seasoning mix hiding in the back of the spice cabinet (hey, we’ve all done it!)
- ECONOMICAL: Why spend $7-$20 on a small can of seasonings that you can likely make for $2.00 in 5 minutes?
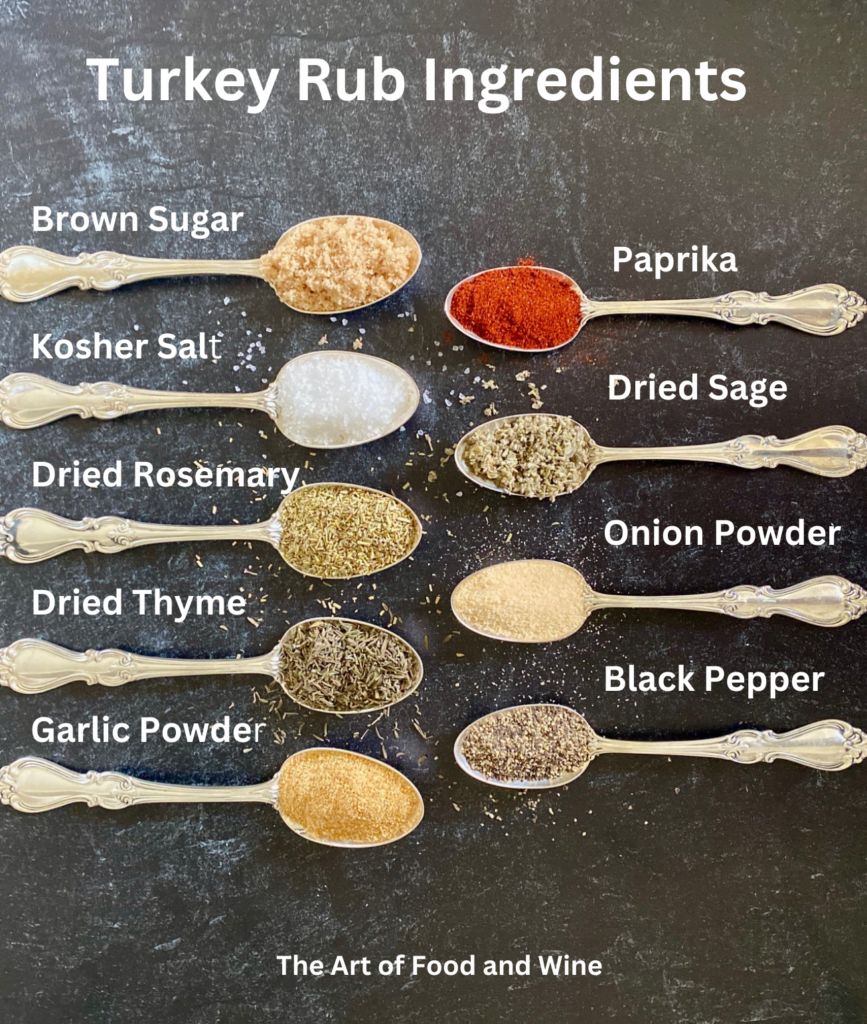
Ingredients in Turkey Seasoning Rub
- Light Brown Sugar – This is optional but it gives the skin a gorgeous crackly brown color as well as helping to balance the spices. If you’re going sugar-free you can omit the sugar
- Kosher Salt – it’s important to use Kosher salt, rather than table salt. Kosher salt is larger and more coarse which makes it easier to evenly spread on the turkey and helps prevent over-salting. If you need to use table salt just use 1 teaspoon, instead of 2 Tablespoons.
- Dried Rosemary, Thyme, and Sage – the “trifecta” of herbs for poultry! (See below if you want to use fresh herbs instead)
- Garlic Powder and Onion Powder– If you substitute garlic salt or onion salt then cut back a little on the kosher salt.
- Paprika – We use regular sweet paprika, but if you want a smoky flavor use smoked paprika, or if you’d like a bit of spice, try hot paprika
- Black Pepper – freshly ground
How to substitute fresh herbs for dried herbs: We use dried herbs for this recipe but if you decide to use fresh herbs make sure to finely chop them, double the amount (just the herbs, not the spices), and use the mixture within 3 days.
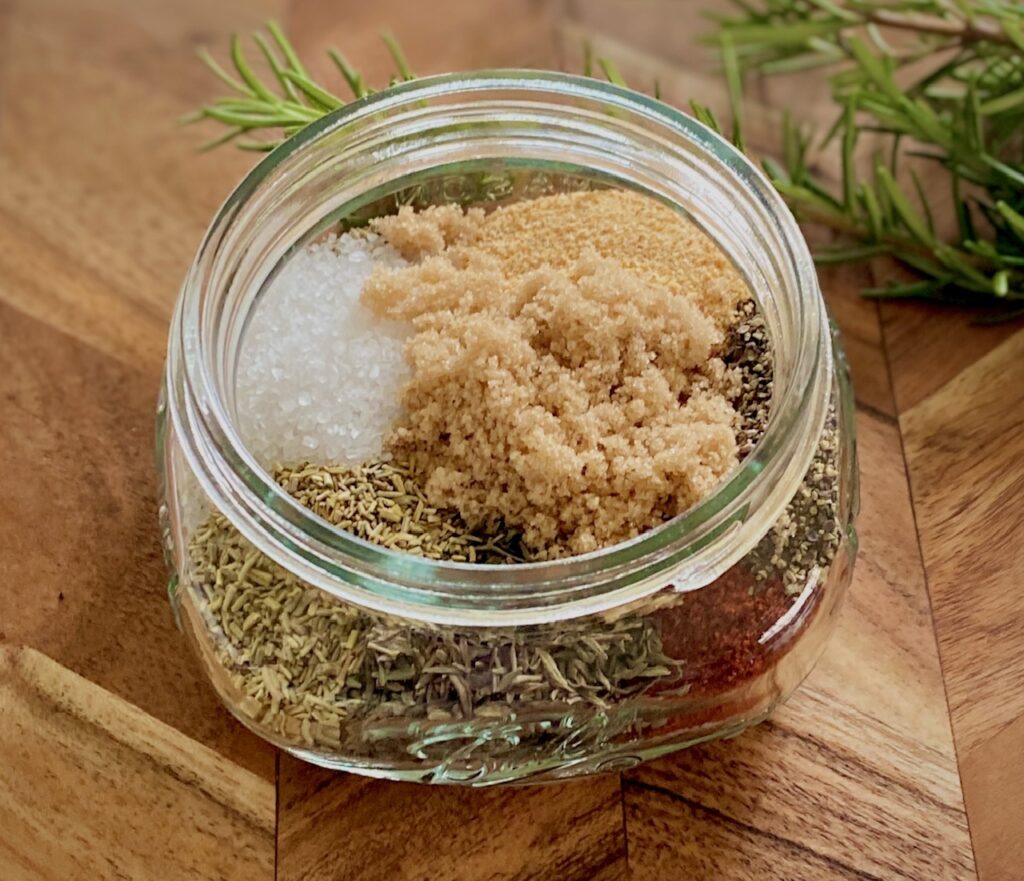
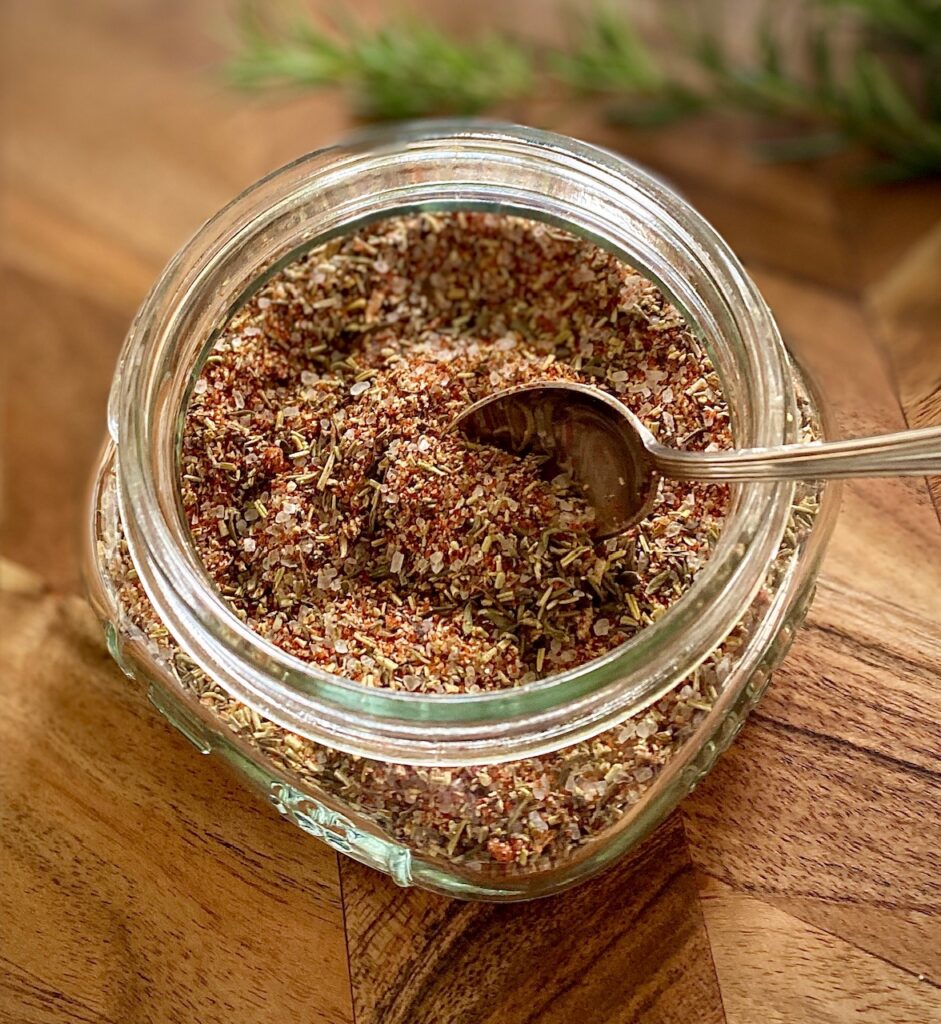
How to make Turkey Dry Rub
- Combine all of the ingredients together in a bowl or jar and whisk or stir to combine. Or simply place the lid on and shake to combine.
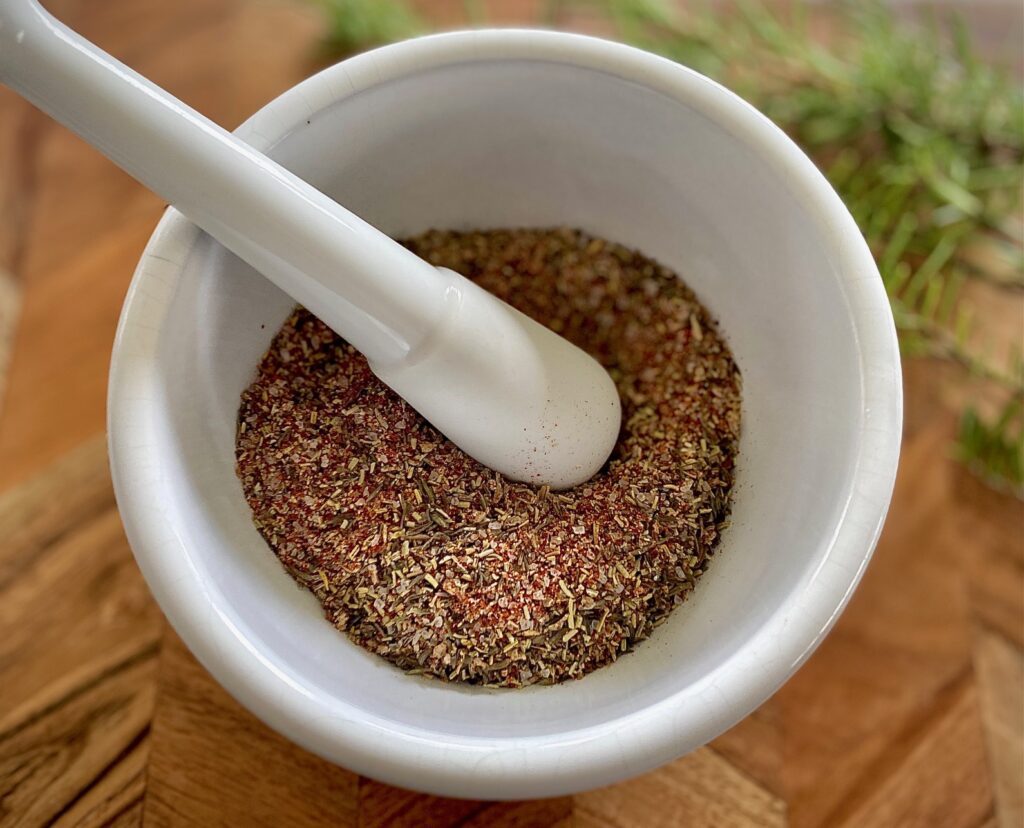
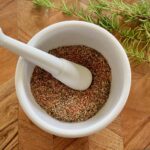
- If you want the dried herbs to be slightly more fine place them in a mortar and pestle and crush lightly.
- If not using the turkey seasonings immediately we recommend storing the blended mix in a sealed glass jar in a cool dry place.
Using this rub to season your Thanksgiving Turkey:
- Coat the thawed bird with a thin layer of olive oil and rub the mixture all over the turkey. Make sure to fully coat the bird.
- We recommend gently loosening the skin around the breast and thighs and putting some of the mixture directly on the meat. Great for an added pop of flavor.
- The turkey can be rubbed 30 minutes before cooking and up to 24 hours ahead of time. (if not cooking within one hour place the turkey back in the refrigerator)

Making a seasoned spice paste or wet rub:
- For a very thick paste – mix the blended mixture with about 2 Tablespoons of olive oil, melted coconut oil, or melted and slightly cooled butter
- For a looser “wet” rub – add 4 Tablespoons of olive oil, coconut oil, or melted butter to the poultry seasoning and blend together
- Smear the paste with a spatula all over the bird. Finish by using your hands to smooth out the paste. Make sure the entire surface area of the bird is covered with the rub. For more flavor, allow the meat to marinate in the refrigerator for 30 minutes, or up to 24 hours.
Ingredient Variation Ideas:
It’s easy to customize this blend and very forgiving of substitutions!
- Herbs: Herbs you could add include basil, oregano, marjoram, parsley
- Sugar: substitute raw sugar or coconut sugar, or use honey if making a paste
- Spices: Like it a little hot? Add hot paprika, a pinch of cayenne, or add chili powder. Smoked paprika will give it a lovely smoky flavor even without grilling
- Use fresh minced garlic if you are making a fresh herb rub and paste
- Try adding some lemon zest for added zing!
Storage
- This Turkey Rub recipe can be doubled, tripled or even cut in half
- Store tightly sealed in a jar, container, or zip-up plastic bag for up to 3 months. Keep in a cool dry place
We ♥️ fresh spice mixtures and rubs!
Here are a few of our other favorites:
- Potlatch Seasoning – great for fish, especially salmon
- Dry Rub for Ribs – a reader favorite!
- Homemade Taco Seasoning Mix – packed with flavor and a must for Taco Tuesday!
- Pumpkin Pie Spice Mix – perfect for pie but also the base for our popular Pumpkin Spice Syrup for your favorite Fall coffee: the Pumpkin Spice Latte
Turkey Seasoning
Ingredients
- 2 Tablespoon Light brown sugar
- 2 Tablespoon Kosher salt (or 1 teaspoon table salt)
- 1 Tablespoon Dried rosemary
- 1 Tablespoon Dried thyme
- 1 Tablespoon Garlic powder
- 1 Tablespoon Paprika
- 2 teaspoons Dried sage
- 2 teaspoons Onion powder
- 2 teaspoons Black pepper
Instructions
Dry Rub Seasoning for two 10-12 pound turkeys
- Combine all of the ingredients in a small dish and whisk to combine
- Store in a sealed container and use within 3 months for the best flavor
- Spread the rub all over the turkey, up to 24 hours before cooking
For a wet rub:
- Combine the seasoning blend with 4 Tablespoons of olive oil, coconut oil, or melted butter. Spread evenly all over the turkey.
Notes
- Need more? This recipe can be doubled or tripled
- Store: tightly sealed in a container for up to 3 months
- Prefer no sugar? Just omit the brown sugar
- Using fresh herbs? Double the amount of herbs
Nutrition
This recipe could not be simpler and you’ll want to make it over and over. The total time is 45 minutes but 30 minutes of that is hands-off!
This post may contain affiliate links. Please see our affiliate disclosure for details. We only recommend products to you that we love and use.

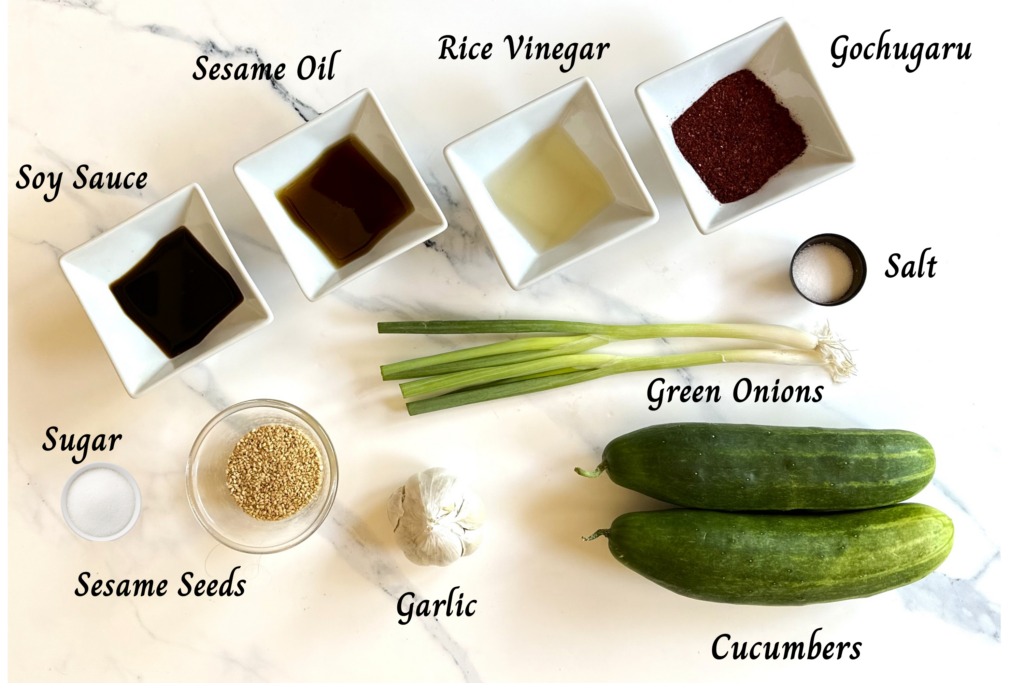
Ingredients for Korean Cucumber Salad
- 1 – 2 Cucumbers – we used 2 average garden-grown cucumbers. Keep in mind you’ll need 2 cups of thinly sliced cucumbers for this recipe
- 2 Green Onions – also known as scallions
- Garlic – a must in Korean cooking
- Gochugaru – this amazing Korean chili powder has a unique flavor with smoky notes. See below for more information on this spicy powerhouse
- Rice Wine Vinegar – Compared to plain white vinegar, rice vinegar is less acidic with a delicate, mild, and somewhat sweet flavor
- Soy Sauce – regular or low-sodium both work equally well
- Sesame Oil – regular or toasted both works in this salad
- Sugar – adds a little touch of sweetness
- Salt – just a pinch balances the flavors
- Sesame Seeds – buy the roasted variety if you can for the best flavor
How to make a Korean Cucumber Salad
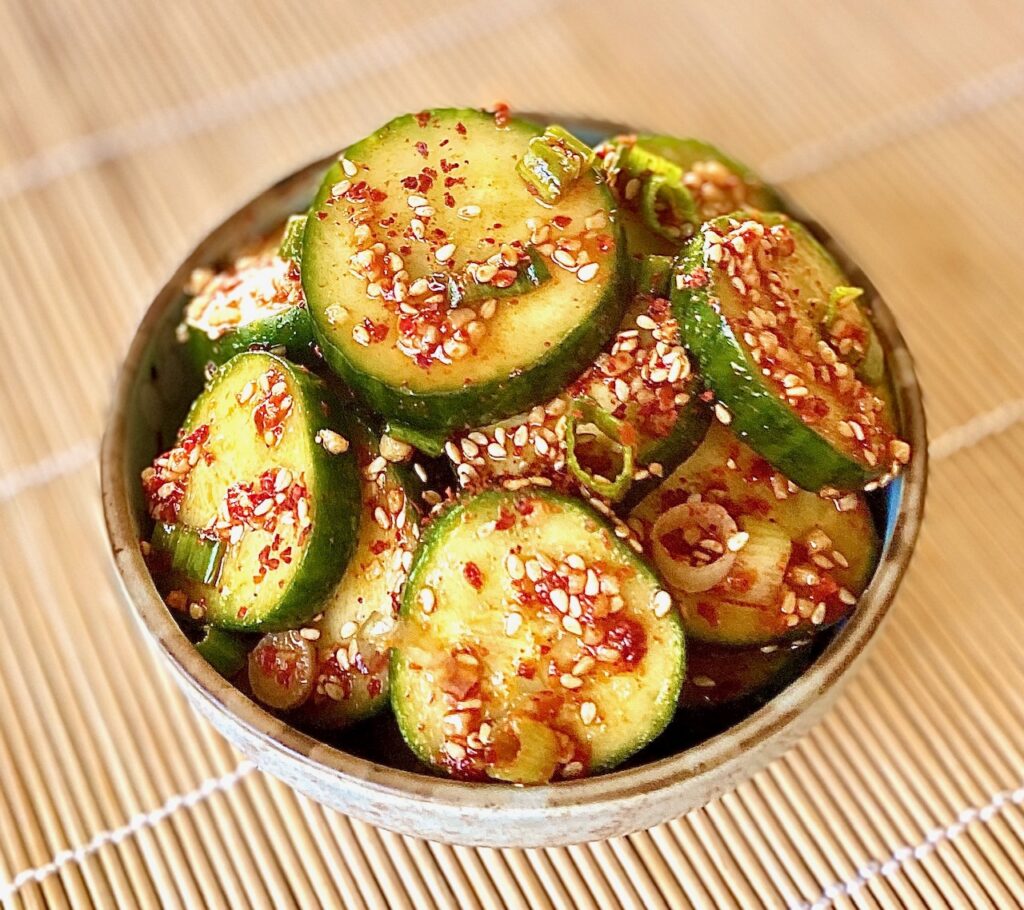
In Korea, this salad is known as Oi Muchim. The word “Oi” means cucumber, and “muchim” means mixed with seasonings. Making this spicy salad is an everyday staple in the Korean kitchen and the most popular banchan side dish.
Making this salad could not be easier and requires no cooking, so let’s get started:
- Slice cucumbers into thin slices, about 1/8-inch thick.

- Toss them with 1 teaspoon salt and place them in a colander to drain. The salt helps draw out the water in the cucumbers. Let the colander drain over a bowl for 30 minutes. This is a very important step so don’t skip it!

- In a medium-size bowl blend the minced garlic, soy sauce, rice wine vinegar, sesame oil, and sugar and whisk to combine. Set aside.
- In a small bowl blend the Gochugaru and sesame seeds together.

- Add the Gochugaru and sesame seed mixture to the soy sauce mixture, one teaspoon at a time, blending after each addition.
- Taste test after you have added each teaspoon to get your desired spice/heat level.
- Adding slowly will help you control the spice/heat level of the salad. Add up to 4 teaspoons, if desired. Some of us like it hot and some do not!
- Slice two green onions, white and part of the green, into 1/4-inch pieces and add to the sauce.
- Pour the sauce over the cucumbers, stir together, and serve.

Which cucumbers to use for Korean salad?
Cucumbers come in many interesting varieties. They are botanically a fruit with high water content, which is why you’ll want to salt them before using to eliminate some of the water (nobody wants watery salad!).
One choice for this salad is to use Korean cucumbers which are on the crunchy side with fewer seeds. The best place to find these beauties is in a specialty Asian market or at your local farmers market. This cucumber was developed in Korea and is typically longer and more slender than other cucumber varieties.
Other delicious varieties you could use for this salad include English, Persian, Japanese, and of course, Kirby.
We like to use whatever cucumbers are growing in our garden during the summer. Keep in mind, any variety will work to make this amazing Korean Cucumber Salad.
What is Gochugaru?


To start, “Gochugaru” is not misspelled! However, it is commonly confused with “gochujang” paste which has become much more popular recently.
The differences are easy to understand once you dissect each word. The Korean meaning for “gochu” includes a variety of red chili peppers or Korean chili peppers. The word “garu” means flakes or a powder. While the word “jang” translates to a paste or a sauce.
Gochugaru is characterized by its deep red color and lightly smoky spice.
Lastly, but most important, “Gochugaru” comes in different spice levels which can be confusing. When purchasing a bottle of Gochugaru it’s important to check the spice level which is usually listed on the package. Here is a quick reference:
- “dol maewoon” is moderately spicy to mild
- “maewoon” will be hotter
So, in conclusion, it’s best to taste-test your Gochugaru for spiciness so you can adjust the ingredient measurement for your personal spice level preference.

Pro tips, tricks, and questions:
Is there a substitute for Gochugaru?
When it comes to this unique smoky spice you have a few substitute options that will work and may already be in your kitchen cabinet.
- Crushed Red Pepper – About 1/4 teaspoon of crushed red pepper is equal to 1 teaspoon of gochugaru.
- Paprika – 1 teaspoon of smoked paprika is equal to 1 teaspoon of gochugaru. When swapping we like to use smoked hot paprika as the closest substitute
- Cayenne Pepper – A great spice substitute is fiery Cayenne pepper. 3/4 teaspoon will be equal to 1 teaspoon of gochugaru.
- Cayenne and Smoked Paprika – blend 1/2 teaspoon cayenne and 1/4 teaspoon smoked paprika for the ideal combination
Storing Cucumber Salad:
How long can you store Cucumber Salad?
This salad can be stored in the refrigerator for up to 4 days in a tightly sealed container. We suggest draining off any excess liquid and adding a few freshly chopped green onions and a sprinkle of sesame seeds to freshen it up.
Perfect Dinner pairings with Cucumber Salad Recipe

We love to pair our Cucumber Salad with two great Korean dishes on our site.
- Our Korean Scallion Pancakes are a great starter or side dish and are simple to make at home. We pair them with a Ginger Soy Dipping Sauce.
- Korean Beef Bulgogi – bulgogi means “fire meat” and is Korean-style marinated beef or pork with sweet, smoky flavors.
Wine pairing for Korean inspired dishes:
Korean-based dishes pair well with a light-bodied Sauvignon Blanc or German Riesling. It helps to remember that both of these wine varietals help cut the heat in spicy dishes.
Other great salad recipes to try:
- Arugula Beet and Goat cheese Salad
- Asian Cucumber Salad
- Asian Coleslaw with Peanut Dressing
- Spinach Salad with Warm Bacon Dressing

Korean Cucumber Salad (Oi Muchim)
Ingredients
- 2 cups Cucumbers – sliced 1/8 inch thick 1-2 cucumbers depending on size
- 1 teaspoon salt
- 2 teaspoons garlic, minced
- 2 teaspoons soy sauce
- 2 teaspoons rice wine vinegar
- 2 teaspoons sesame oil
- 1 teaspoon sugar
- 1 – 4 teaspoons gochugaru depending on desired heat level
- 1 – 4 teaspoons sesame seeds add as desired for flavor
- 2 Green onions, white and green part, sliced 1/4 inch thick around
Instructions
- Slice cucumbers into thin slices, about 1/8 inch thick. Toss them with 1 teaspoon of salt and place in a colander, and let it rest over a bowl for 30 minutes.The salt will help to draw out the water in the cucumbers. Do not skip this step.
- In a medium bowl blend minced garlic, soy sauce, rice wine vinegar, sesame oil, and sugar. Mix and set aside.
- In a small bowl add gochugaru and sesame seeds and mix together.
- Add gochugaru sesame seed mixture one teaspoon at a time to the soy sauce mixture, blend, then taste test. This will help you to control the heat level of your salad. Then add one teaspoon at a time, taste after each additional, until you have your desired spice/heat level.
- Add the sliced green onions to the mixture and mix them in.
- Blot any excess salt off of the cucumbers.Pour over the cucumbers, stir everything together, and serve.
Notes
- Crushed Red Pepper – About 1/4 teaspoon of crushed red pepper is equal to 1 teaspoon of gochugaru.
- Paprika – A teaspoon of paprika is equal to 1 teaspoon of gochugaru. When substituting with paprika we like to use a hot paprika.
- Cayenne Pepper – 3/4 of a teaspoon will be equal to 1 teaspoon of gochugaru.
- Cayenne Pepper + Smoked Paprika – use 1/2 tsp cayenne plus 1/4 tsp smoked paprika
Nutrition
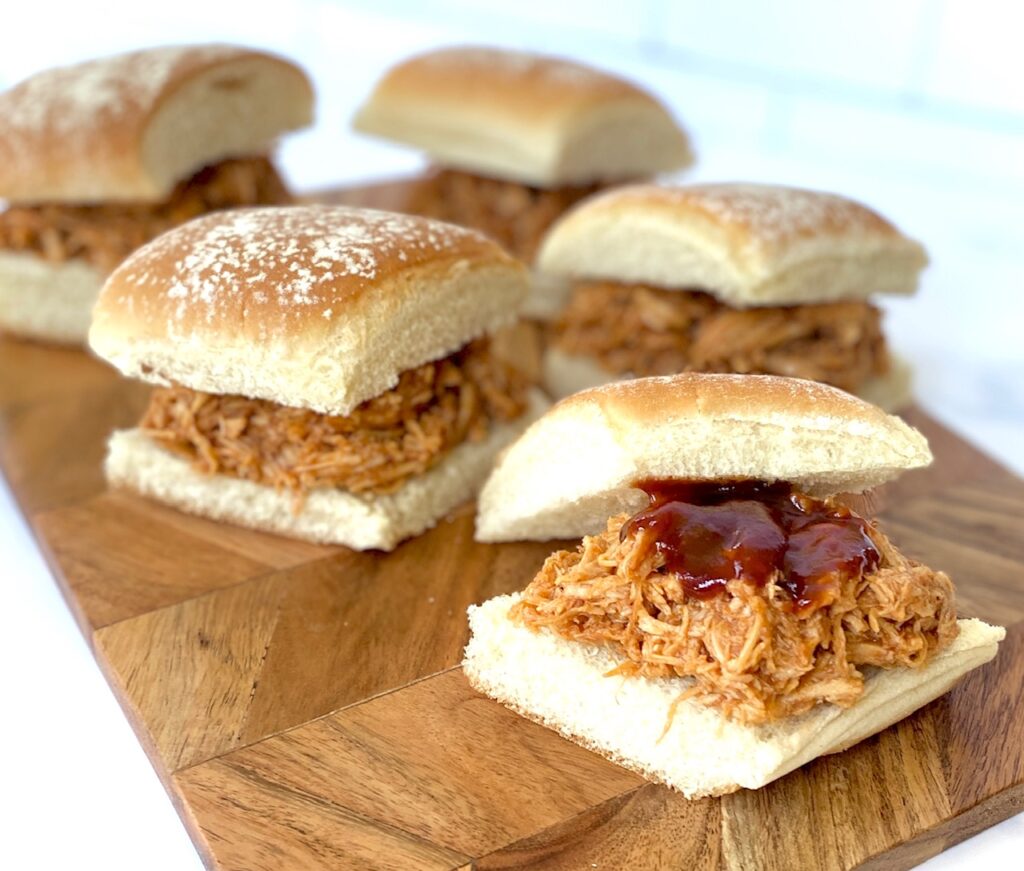
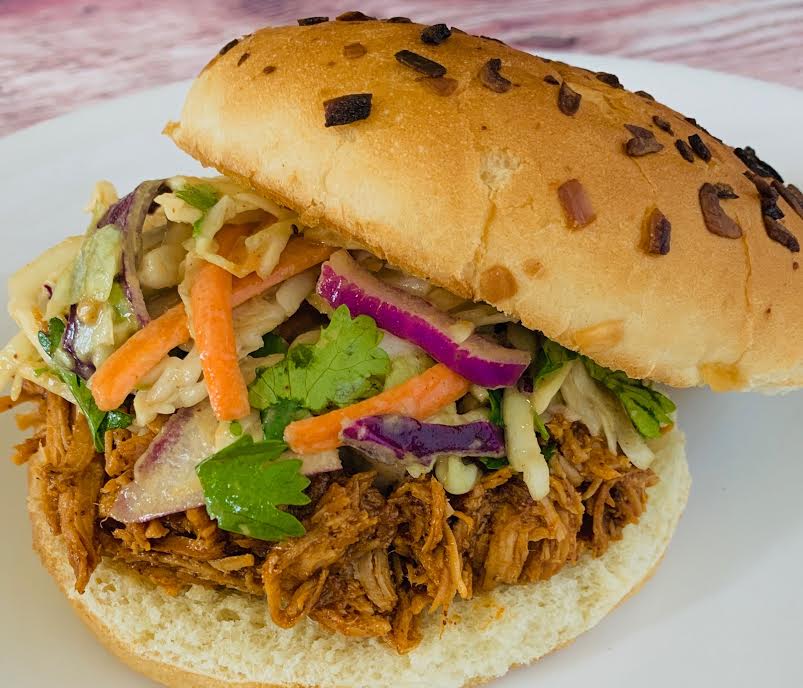
Turn this zesty chicken into a sandwich by piling it high on a bun and topping it with our Asian Coleslaw for a cool twist
The magic of the slow cooker is that you can prep everything in the morning and have dinner ready without much hassle. Win-win, right? This one takes just 15 minutes of prep time!
There are only 5 basic ingredients for this crockpot BBQ chicken recipe and you probably have them in your refrigerator and pantry right now.
This post may contain affiliate links. Please see our affiliate disclosure for details. We only recommend products to you that we love and use.
Ingredients for Pulled Chicken:

- BBQ Sauce – pick your favorite brand or make our 15-minute Homemade BBQ Sauce
- Garlic Cloves – we use 3 cloves but add a few more if you love garlic
- Cumin – this spice has an earthy flavor and is a great flavor boost
- Chili Powder – this is where the kick of spice comes in but you can tone it down by adding a little less if desired
- Chicken Breasts – 2 pounds of boneless and skinless breasts

If making Pulled Chicken Sandwiches or Pulled Chicken Sliders add:
- 6 large or 12 slider buns
- Asian Coleslaw with Peanut Dressing
How to make Slow Cooker Pulled Chicken:
This recipe is super simple with just a few steps:
- Whisk all of the sauce ingredients together in a bowl
- Place whole skinless, boneless chicken breasts in the slow cooker
- Pour the BBQ Sauce mixture over the chicken and make sure it is well-covered
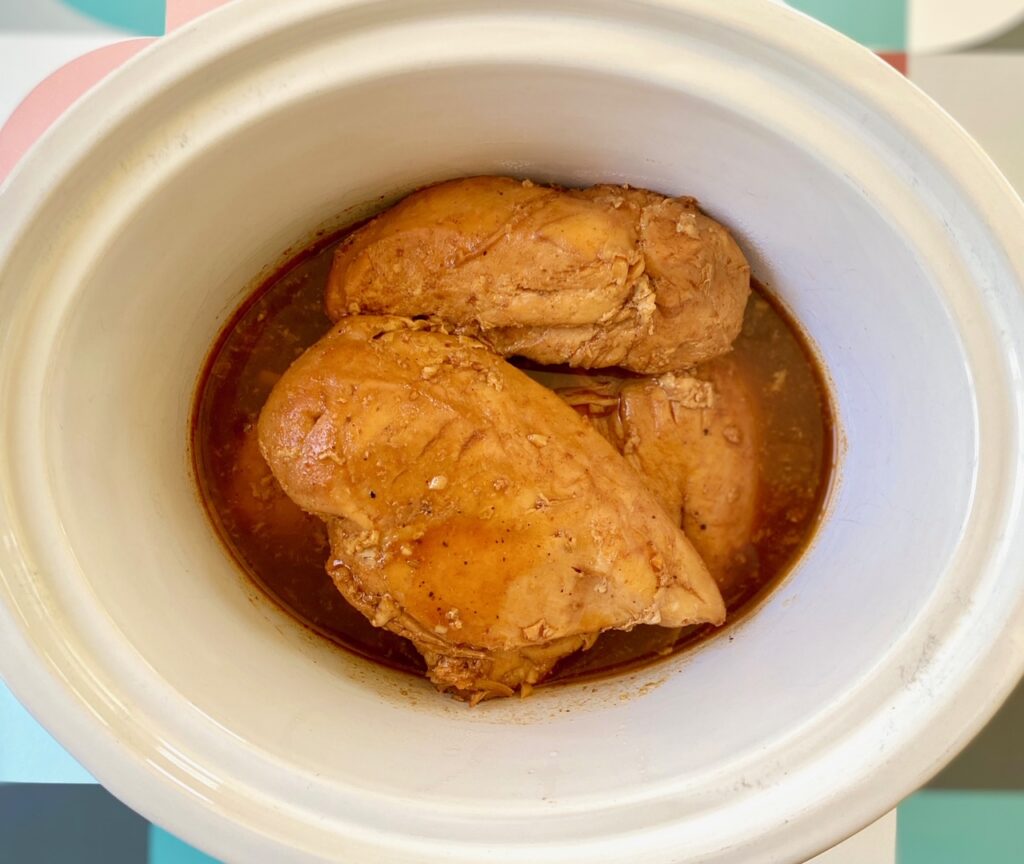
- Put the cover on the slow cooker
- If you have all day you can cook the chicken on low for about 8 hours, but if time is an issue it can be cooked on high for 4 hours
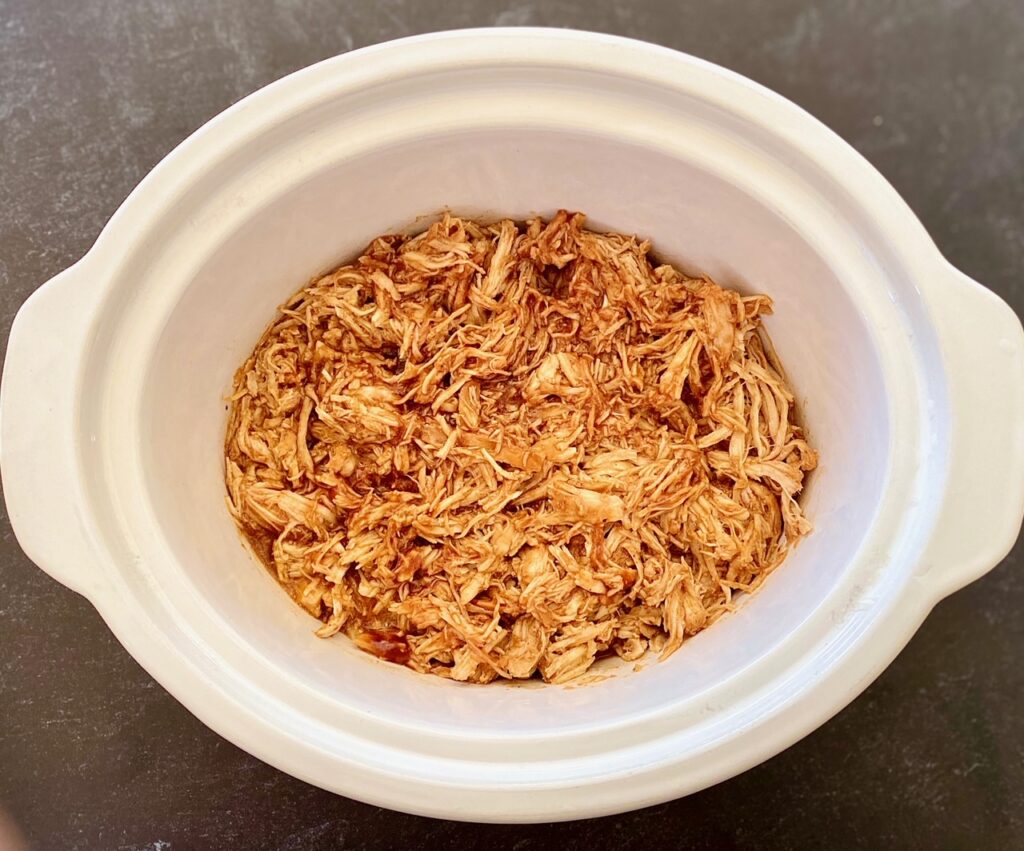
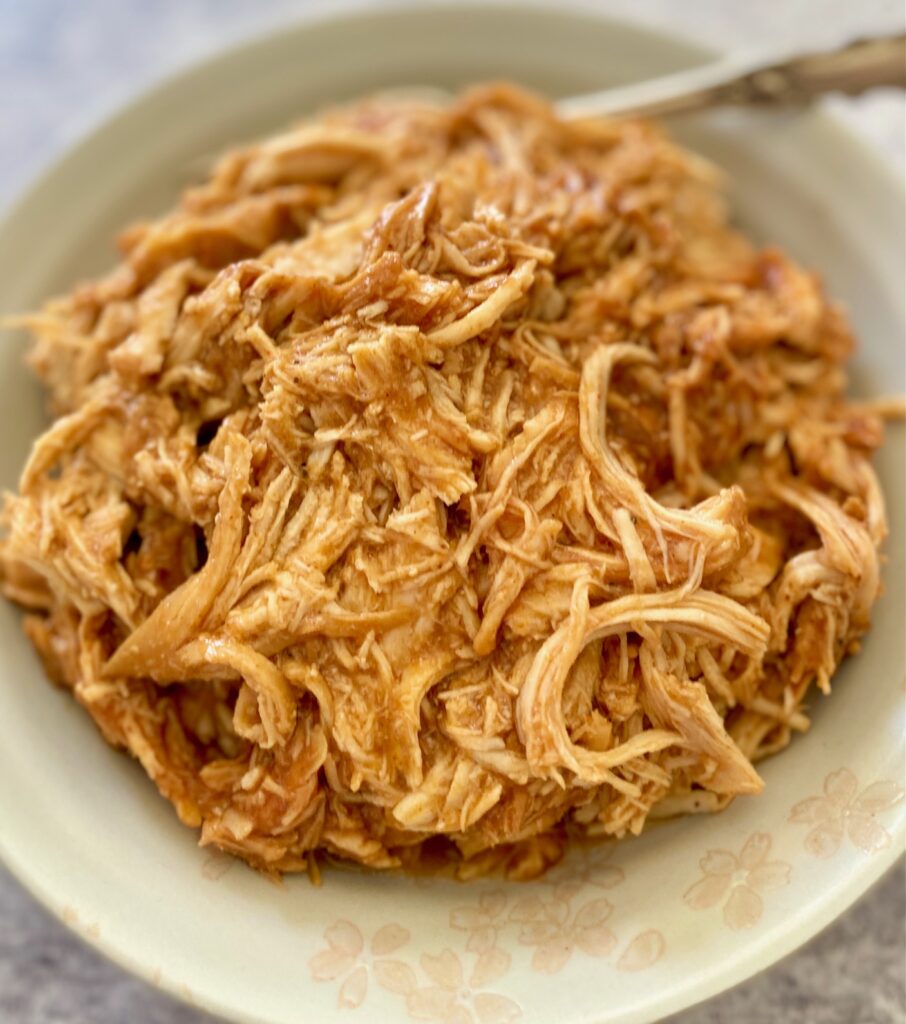
- Once the chicken is finished cooking (165˚F recommended), and tender, take it out of the slow cooker and shred it on a cutting board using two forks to pull it apart


- Return the shredded chicken back to the slow cooker, mix it thoroughly with the sauce, and heat for another 15 minutes. If needed, add more BBQ sauce.
- Serve as is or as sandwiches or sliders
Different ways to use Slow Cooker Pulled Chicken:
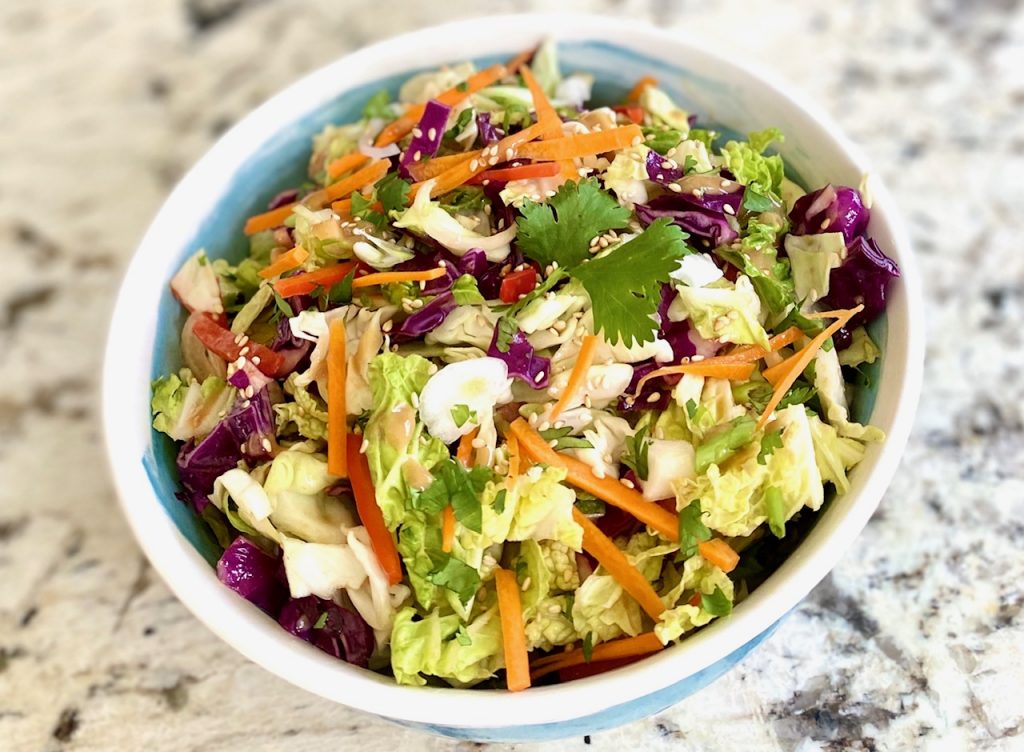
My favorite way to eat this chicken is to create a pulled chicken slider or sandwich topped with our cool Asian Coleslaw.
To make:
- Start with a bun that is sturdy enough to hold both the chicken and the slaw. I like a poppy seed, sesame seed, or an onion bun, but whole wheat works well too.
- Top the shredded chicken with about 1/3 cup of Asian Coleslaw. The flavors really meld well together.
Other Variation Ideas:
- If you don’t want to use a bun you could also wrap this amazing chicken up in a big piece of sturdy lettuce for a tasty chicken lettuce wrap
- Put it right on your plate and top it with any coleslaw!
- Use the chicken as the protein base in a rice bowl
- Make a burrito or use the mix in tacos or nachos
Storing leftover Pulled Chicken:
FREEZER: Pulled chicken freezes very well which makes it great for meal prep. Be sure to let it cool completely, then separate it into serving sizes that work for you, and store tightly sealed in the freezer for up to 3 months.
REFRIGERATOR: Store in a sealed container for up to 3 days
Suggestions for beverage pairing:
- Our Spicy Mango Margarita or refreshing Paloma Cocktail are both great matches
- Asian beer is a great accompaniment for a pulled chicken sandwich
- Light to medium-bodied Chenin Blanc or Rose is a good contrast to the sweet and salty flavors in the BBQ sauce
Other easy main dishes to try:
- Asian Baked Chicken
- Sheet Pan Salmon
- Skirt Steak with Mustard Sauce
- Garlic Shrimp with Roasted Tomatoes
Perfect side dishes to pair with pulled chicken
- Refreshing Citrus Salad is a light side
- Try our zesty Black Bean and Corn Salad
- An easy Grilled Caesar Salad adds a smoky touch to dinner
- Grilled Corn with Sweet Chili Sauce adds a spicy touch to match the chicken
Read more about making the perfect Shredded Chicken, which is a great technique to have on hand!

Slow Cooker Pulled Chicken
Equipment
- Slow Cooker or Crock Pot
Ingredients
- 1 cup BBQ sauce
- 3 garlic cloves, minced
- 1 -2 Tablespoon chili powder (depending on the spice level wanted)
- 2 teaspoon ground cumin
- 2 pounds chicken breasts, boneless and skinless
- 1 cup water
Optional for Sandwich:
- 6 large buns, such as poppy seed, onion or sesame seed
- 2 cups Asian coleslaw, See recipe link below
Instructions
Prepare Sauce:
- In medium bowl, whisk BBQ sauce, garlic, cumin, chili powder and water.
Slow Cooker Directions:
- In a 4-6 quart slow cooker add whole chicken breasts and cover with BBQ mixture.
- Cover and cook on high for 4 hours or on low for 8 hours, or until chicken is very tender. (chicken pieces should be cooked to an internal temperature of 165℉)
- Transfer the cooked chicken to a cutting board. Shred the chicken by pulling it apart with 2 forks and then add the chicken back into the slow cooker, stirring to combine with the sauce, and cook for an additional 15 minutes. Keep warm until ready to serve.
To Make Sandwiches
- Prepare your favorite Asian slaw or use our recipe for Asian Coleslaw with Peanut Dressing
- Serve shredded chicken on buns and top with about 1/3 cup slaw.
Notes
- Use boneless pork instead of chicken
- Use small rolls, such as Hawaiian Rolls, to make 12 sliders
Nutrition
This method is as easy as slicing up the best fresh veggies and throwing them on the hot grill. (This is more a method than a recipe)
Lately, we’ve been drizzling these seared veggies with herby Chimichurri Sauce, or dipping them in a creamy Tzatziki Sauce, and pairing them with Cedar Plank Salmon or Carne Asada for the perfect dinner
Below you will find great tips and tricks to make a gorgeous and delicious grilled vegetable platter. And, YES, you can grill them indoors on a stove-top grill pan because Summer (unfortunately) doesn’t last forever!
Ready to get started? Just click on our “jump to recipe” button just below 👇.
For tips, processes, and substitutions keep reading. This post may contain affiliate links. Please see our affiliate disclosure for details. We only recommend products to you that we love ♥️ and use.
Jump to RecipeIngredients needed:
- Olive Oil – you could also use avocado or coconut oil
- Salt and Pepper – we like kosher salt because it has a great texture
- Fresh Vegetables – see below for ideas
- Condiment Sauces – such as Chimichurri Sauce and Tzatziki Sauce, optional but fun to drizzle on top
Which vegetables are good for grilling?
The sky is the limit so pick your favorites and go with what is in season. Nearly every vegetable can be grilled. The key is to cook them for just the right amount of time so that they become beautifully charred but not mushy!

Here are some suggestions for a gorgeous platter that will make 6-8 servings. Keep in mind that this is just a guide and you can add or subtract vegetables based on your personal preference.
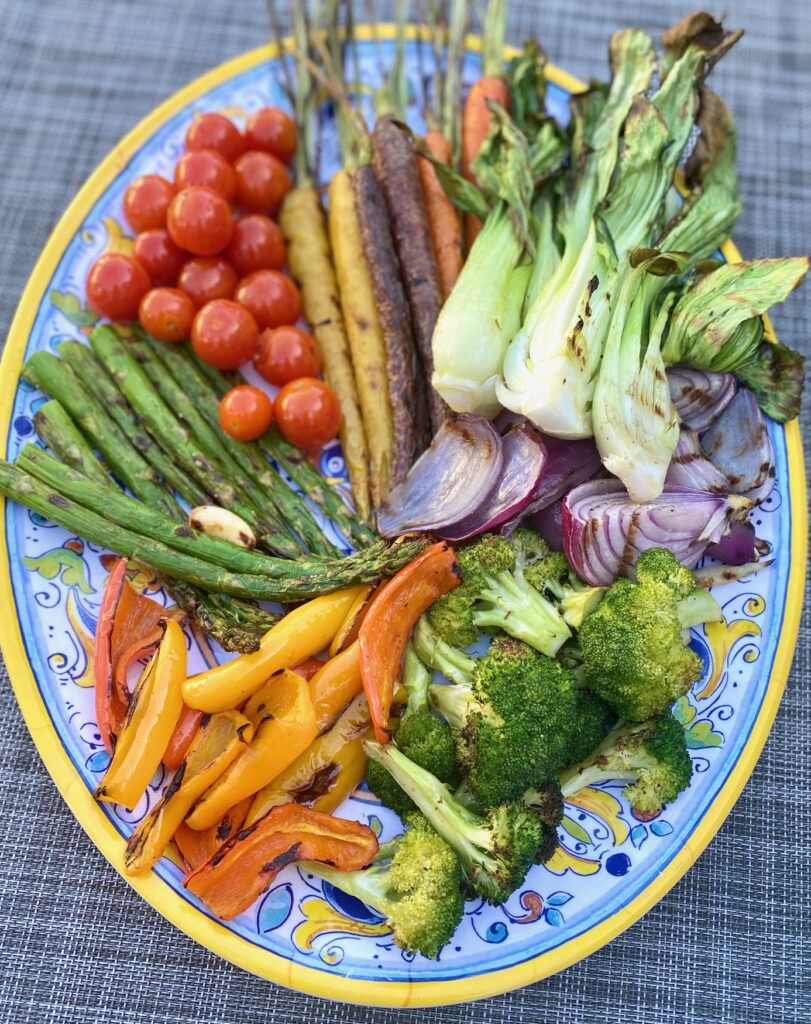
NOTE: The picture at the very top of this post is doubled (serves 16+) and is great for a grilled vegetable platter for a party!

Below are the amounts recommended for 6-8 servings as a side dish.
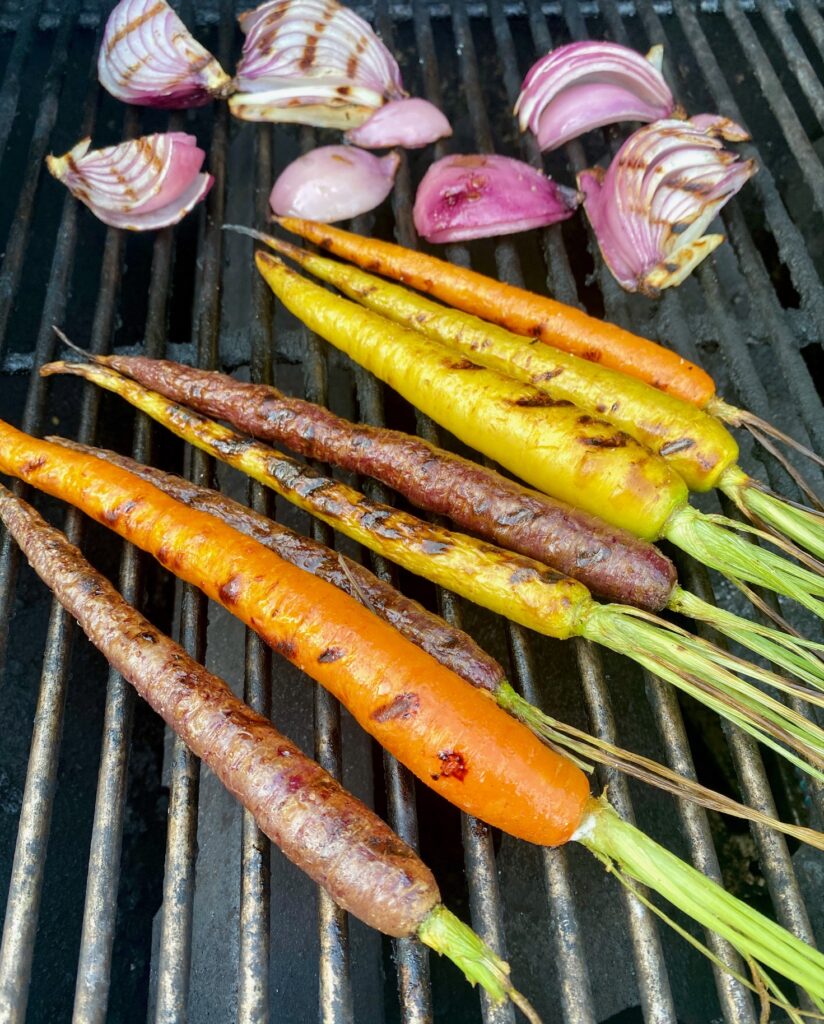
- 8 Carrots – we love the flavor and look of smaller whole rainbow or orange carrots. No need to peel them just give them a scrub before using. If you choose carrots with their green leafy tops still on (called fronds), be sure to wash and trim that part a little. Alternately, 12-16 baby carrots work as well.
- 1 Red Onion – peel the onion, and cut it into 6 equal pieces, lengthwise, but leave the root intact. This will help keep the onion sections together. You could sub in yellow or white onions, as well.
- 4 Zucchini and/or Yellow Squash – Trim the ends and then quarter them lengthwise. No need to peel them.
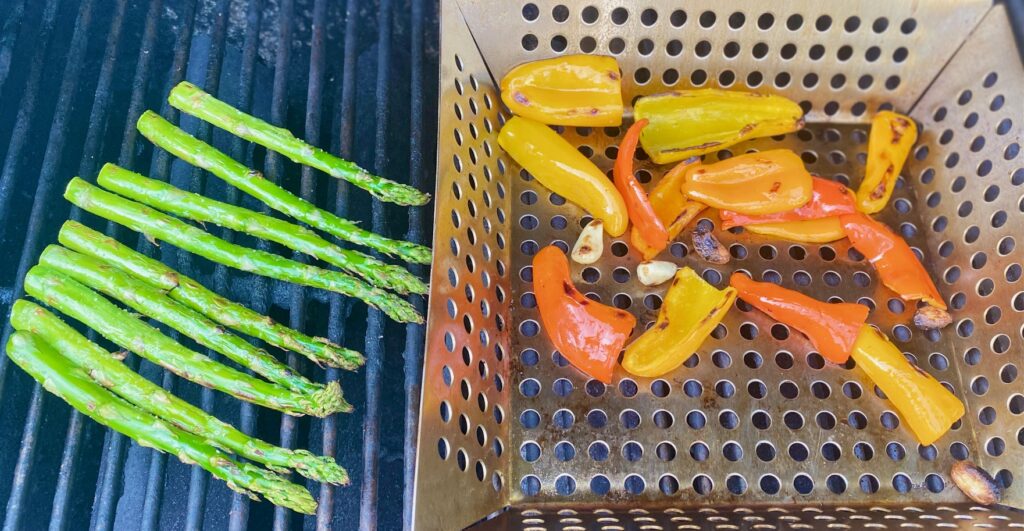
- 12 Asparagus – choose thicker spears, but trim the woody ends. Thin spears can be used but they cook in about one minute, so try to find thicker ones.
- 8 Mini Bell Peppers – these normally come in a bag with a variety of colors. If they are very small you can grill them whole, otherwise just cut them in half and de-seed. You can also use 2 regular-sized bell peppers that have been deseeded and then cut into wide pieces.
- 1 bunch Broccolini or Broccoli – broccolini are fun because they have naturally long stems which makes them great for grilling, but be sure to trim the stems just a little. Regular broccoli florets work as well but are easier to cook if you use a grill basket.
- 20 Cherry Tomatoes – if you can find them still attached to the stem they are simple to grill right on the grates, otherwise we recommend skewering them or tossing them in a grill basket so that you’re not chasing them around the grill!
- 1 head Baby Bok Choy – these sturdy but leafy vegetables are perfect for grilling. Just cut them in half or quarters lengthwise leaving the stem intact.
- 6 Garlic Cloves – optional, but adds really great flavor when used in a grill basket.
Other ideas for the best grilled vegetables:
- Cauliflower florets – if you leave the stems longer it’s easy to grill right on the grill grate, otherwise toss them in a grill basket.
- Eggplant – trim the top, leave the skin on, and slice in 3/4 inch rounds
- Sweet Potatoes – peeled and sliced into 1/4 inch rounds
- Green Beans – you’ll need a grill basket for best results
- Portabello Mushrooms – we recommend removing the stem and gills before grilling them whole, or cut into large chunks
- Brussels Sprouts – baby Brussels can go straight into a grill basket whole, but larger ones will benefit from being sliced in half but keeping the stem end intact
- Other Lettuces – Cabbage, kale, or romaine work very well. We used grilled romaine for our Easy Grilled Caesar Salad
- Corn – leave it on the cob for grilling, then cut the kernels off, or cut the cob in half for a platter. The flavor of charred corn is amazing. We love Grilled Corn with Sweet Chili Sauce and these kernels would be delicious in our Black Bean and Corn Salad.
How to cook fresh veggies on a grill
The trick to perfectly grilled veggies is to cook them in stages since each vegetable needs a different amount of time on the grill.
- Prepare all of the vegetables ahead of time by cutting and trimming as needed.
- Place on a big sheet pan and toss in olive oil to coat.
- Sprinkle with salt and pepper.
- Preheat the grill to Medium High (380˚- 400˚F).
- If using a grill basket for smaller vegetables be sure to spray or coat it liberally with oil before heating.
- We recommend spraying or brushing the grill grates with oil, as well.

- Once the grill is pre-heated begin with the vegetables that take the longest to cook. Cook on both sides. (see timing chart below)
- Place any long-shaped vegetables perpendicular to the grates to ensure the pieces don’t slip through.
- Turn the vegetables halfway through, using either long grilling tongs or a heat-proof spatula.
- If using a grilling basket push the pieces around a few times to ensure even grilling.
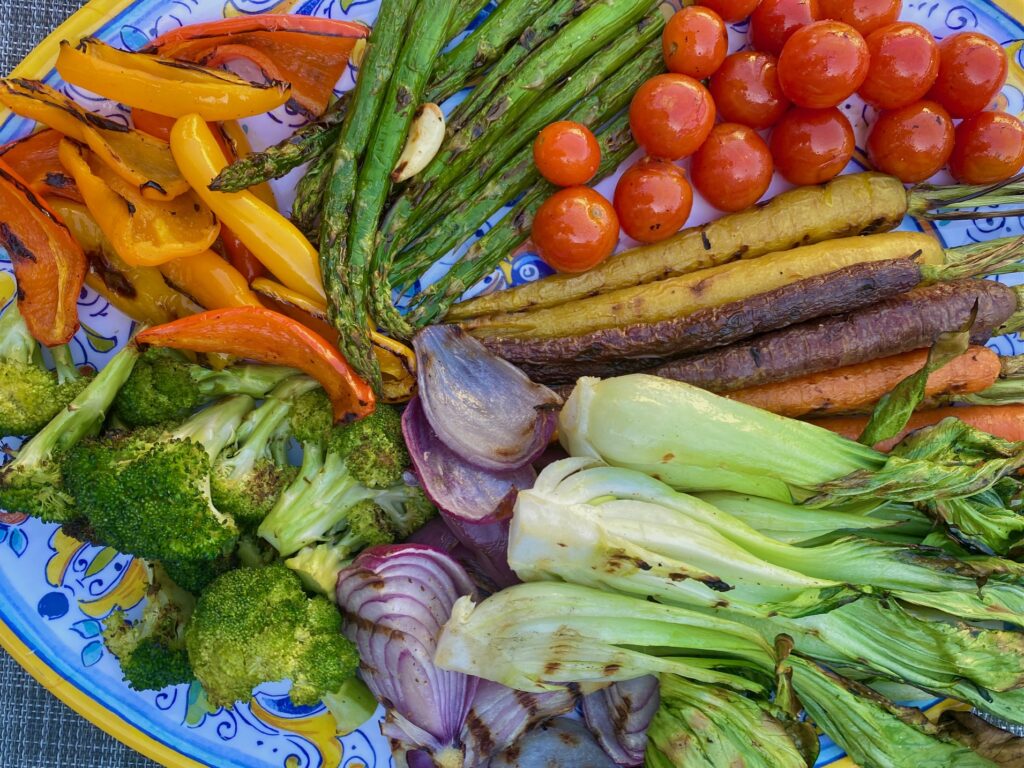
- Remove the finished vegetables from the grill, arranging them on a large platter as you go, and begin cooking the next batch of vegetables until all of them are grilled.
- Once all of the vegetables are cooked add a small dish of Chimichurri, Pesto Sauce, or Tzatziki Sauce to the platter for drizzling.
- Serve warm or at room temperature.
How long to grill fresh vegetables:
Here is our time guide recommendation for BBQ vegetables.
**Keep in mind that this can vary because different grills heat differently and vegetable sizes are rarely uniform. So, use this as your guide but watch carefully with your eyes.
The vegetables should be lightly soft, and have a gorgeous char to them when they are finished grilling
4 Minutes, per side:
- Carrots, Onions, Broccoli, Broccolini, Sweet Potatoes, large Peppers, Garlic Cloves, Eggplant, Brussels Sprouts
3 Minutes, per side:
- Squash, Zucchini, small Peppers, thicker Asparagus, Cauliflower, Green Beans, Portabella Mushrooms
1 1/2 – 2 Minutes, per side:
- Cherry Tomatoes, Baby Bok Choy, other Lettuces
Other times:
- Corn on the Cob will take anywhere from 11-15 minutes depending on the size of the cob and the kernels.
- Super thin asparagus should grill for just 1 minute per side.
Serving Ideas
This amazing vegetable grill is perfect on its own but it’s fun to add side dishes for drizzling on the veggies.
- Our favorite choices are Chimichurri Sauce, Pesto Sauce, and cool Tzatziki Sauce.
- Drizzle homemade Teriyaki Sauce over grilled vegetables for an Asian flair!

Great matches for Grilled Vegetables
- Already making herby Chimichurri Sauce? Make a double batch and pair the veggies with Chimichurri Shrimp or Chimichurri Steak
- Sprinkle a simple Gremolata mixture over the top – just 3 ingredients needed: parsley, lemon zest, and garlic
Grilling vegetables on a stove-top grill
This method works well on a stove-top grill pan, as well. We love this option for the colder months when outdoor grilling isn’t possible.

Grilled Vegetables
Equipment
- 1 grill basket, optional
- 1 outdoor grill or stovetop grill pan
Ingredients
- ¼ cup olive oil (or avocado oil/ coconut oil)
- 1 Tablespoon sea salt or kosher salt
- 1 Tablespoon freshly ground black pepper
- 8 ounces chimichurri sauce, optional
Grilling vegetable options:
- 8 carrots, medium size (rainbow or orange) or 16 baby carrots
- 1 large red onion Peel, cut lengthwise into 6 pieces, leaving root intact
- 4 zucchini or yellow squash, or combo of both, trim ends and quarter lengthwise
- 12 thick asparagus spears, woody ends trimmed
- 8 mini bell peppers cut in half and de-seeded (or 2 large bell pepper, de-seeded and cut into wide pieces)
- 1 bunch broccoli florets or broccolini ends trimmed
- 20 cherry tomatoes, on the vine
- 1 head baby bok choy cut in half or quarters lengthwise, leaving stem intact
- 6 garlic cloves, peeled
Instructions
- Preheat the grill to medium-high (380℉ – 400℉) direct heat grilling.
- Oil the grill grates and oil the grill basket, if using.
- Clean, trim, and chop all vegetables, as described above
- Prepare Chimichurri Sauce, optional, and set aside in a small bowl
- Put all veggies on a sheet pan, drizzle with oil, and toss to coat. Sprinkle with salt and pepper.
- Place the longer cooking vegetables on the grill first. (see cooking times below)TIP: Place elongated vegetables perpendicular to the grates to prevent them from falling thru the grates
Cooking Times:
- 4 minutes, per side: Carrots, Onions, Broccoli, Broccolini, Sweet Potatoes, large Peppers, Garlic Cloves, Eggplant, Brussels Sprouts3 minutes, per side: Squash, Zucchini, small Peppers, thicker Asparagus, Cauliflower, Green Beans, Portabella Mushrooms1 1/2 – 2 minutes, per side: Cherry Tomatoes, Baby Bok Choy, other Lettuces
- Grill halfway, turn with a spatula or tongs and finish cooking. Vegetables should be lightly softened and charred.
- Remove to a serving tray and continue with the remaining vegetables.
- Serve warm or at room temperature with Chimichurri or other sauces.
Notes
- Easy homemade Chimichurri Sauce
- Nutritional facts do not include chimichurri or other sauces
Nutrition
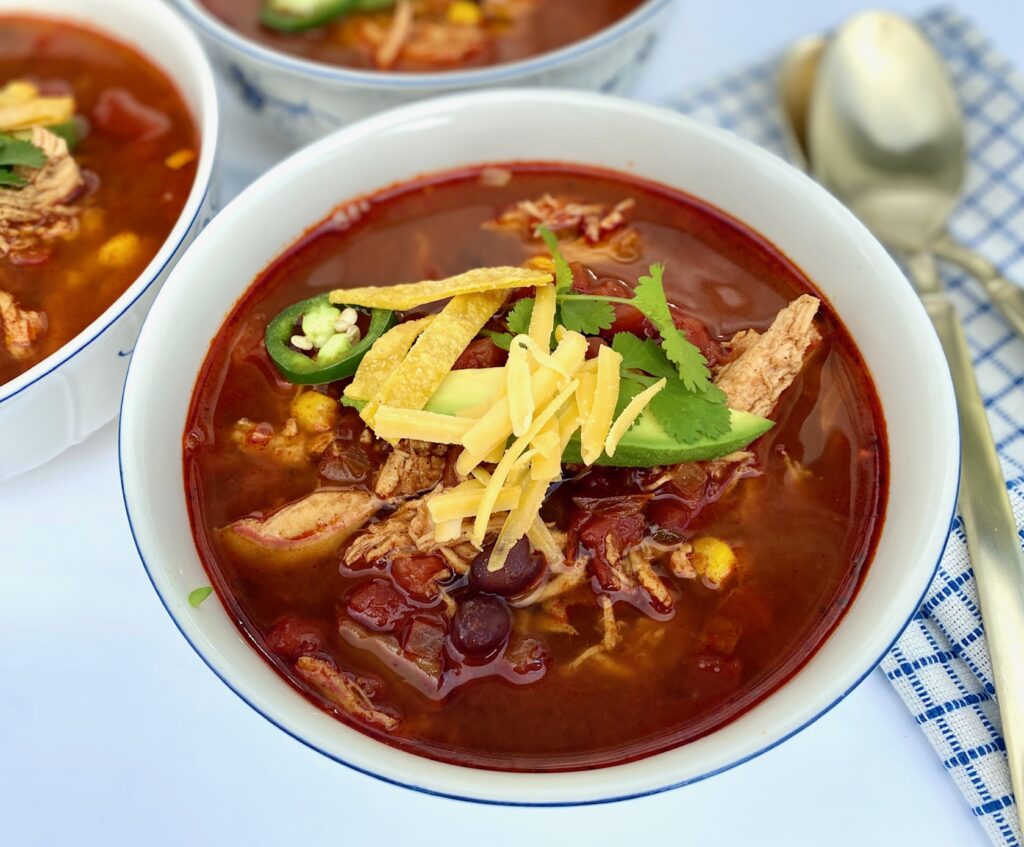
This amazing easy recipe is also called “Chicken Enchiladas Casserole”
These step-by-step instructions are a great way to make flavor-packed Green Chicken Enchiladas, this means you’ll have dinner on the table in no time. Add a side dish of Spanish Rice and a refreshing Paloma for a complete Mexican food meal.
Ready to get started? Just click on our “jump to recipe” button below to go straight to the recipe card. For tips, processes, and substitutions keep reading. This post may contain affiliate links. Please see our affiliate disclosure for details. We only recommend products to you that we love ♥️ and use.
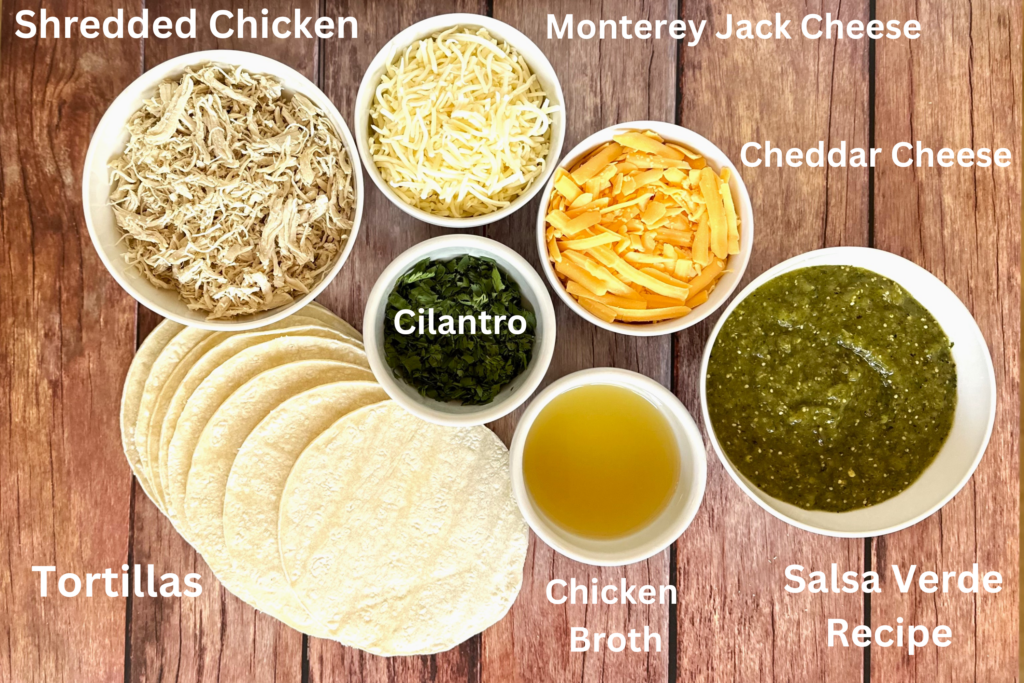
Jump to RecipeIngredients for Green Chicken Enchiladas
- Shredded Chicken – follow our quick step by step instructions on Making shredded chicken, we like to start with chicken breast.
- Corn Tortillas – we use a 7-inch size
- Shredded Cheddar Cheese – we like sharp cheddar for its tangy flavor
- Shredded Monterey Jack Cheese – or spice it up with pepper jack cheese
- Fresh Cilantro – not a fan? skip it or substitute flat-leaf parsley
- Chicken Broth
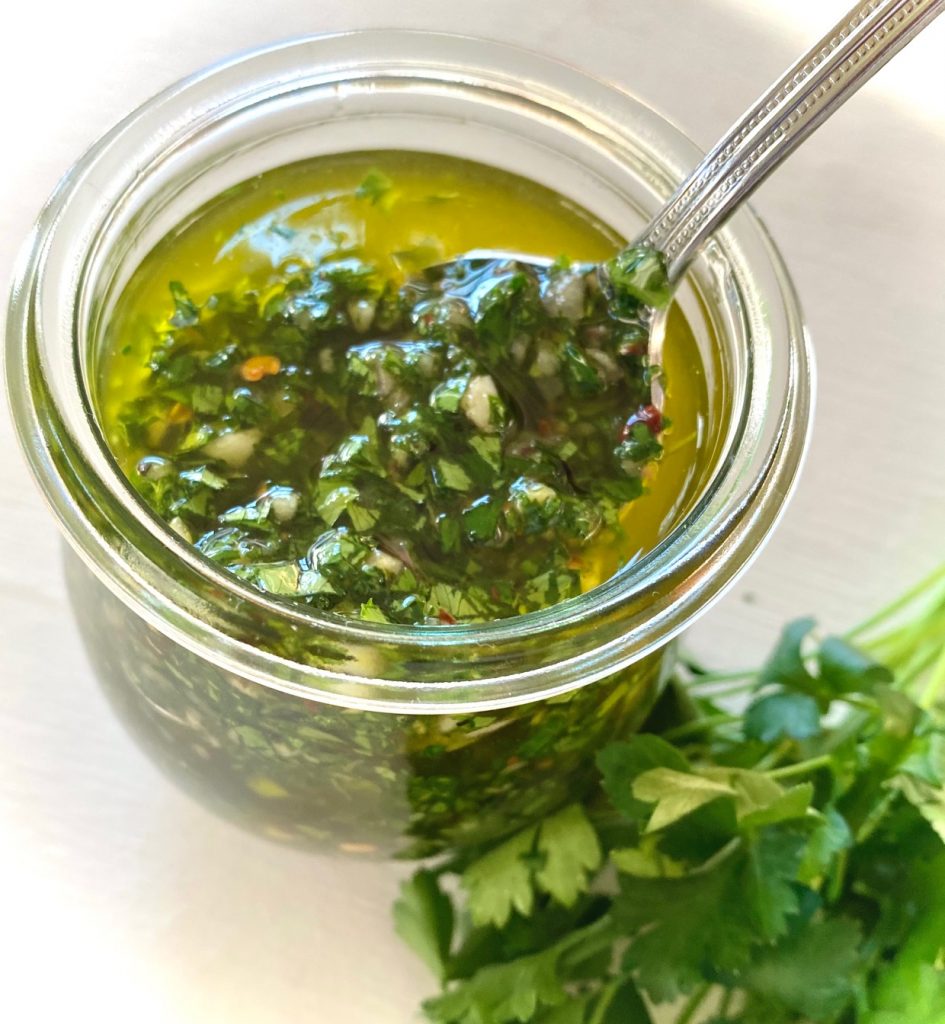
- Our homemade Salsa Verde – packed with herbs and spices this sauce gives these traditional enchiladas their signature color and flavor
How to make Green Chicken Enchiladas with homemade Salsa Verde
We made our Chicken enchiladas a simple recipe with limited ingredients. Follow this step-by-step for deliciously spicy salsa verde chicken enchiladas.
First Step
- Preheat oven to 350˚degrees F.
- Prepare our Salsa Verde Recipe and make Shredded Chicken. Set aside. Both of these steps can be done the day before and refrigerated until ready to use.
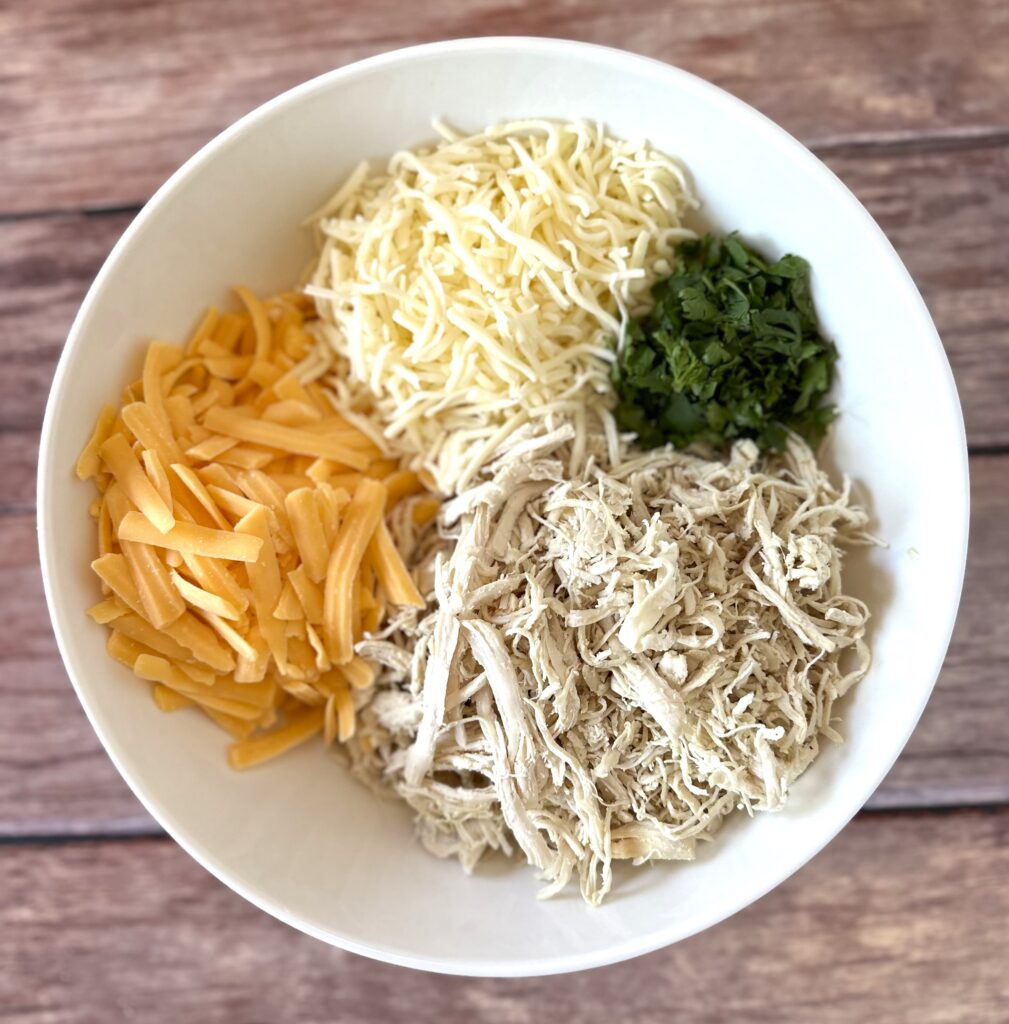
- Combine filling ingredients: Add shredded chicken, 1/2 of the cheddar cheese, 1/2 of the Monterey Jack cheese, and 1/2 of the chopped cilantro, to a medium mixing bowl and toss together. Set aside.

Second Step
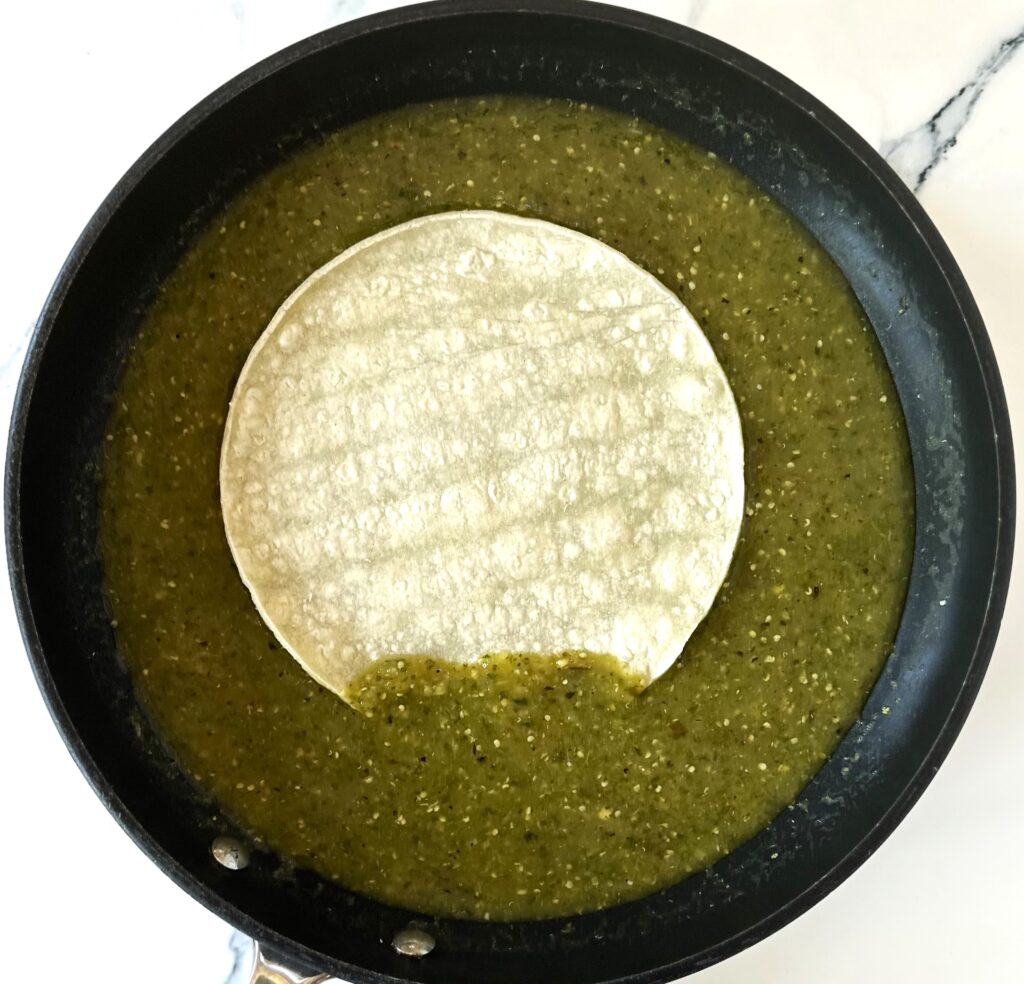
- In a medium skillet add 1 cup of the salsa verde recipe with the chicken broth and mix to combine. Warm salsa over low heat, then turn off heat before dipping tortillas.
- Warm the tortillas by wrapping in a damp towel or damp paper towel and heat for 30 seconds in the microwave until they are soft, pliable, and easy to roll.
- Dip each tortilla into the warm green salsa mixture until coated on each side.
- Pour a light layer of salsa to coat the bottom of a 9″ x 13″ baking dish – about 2 Tablespoons.
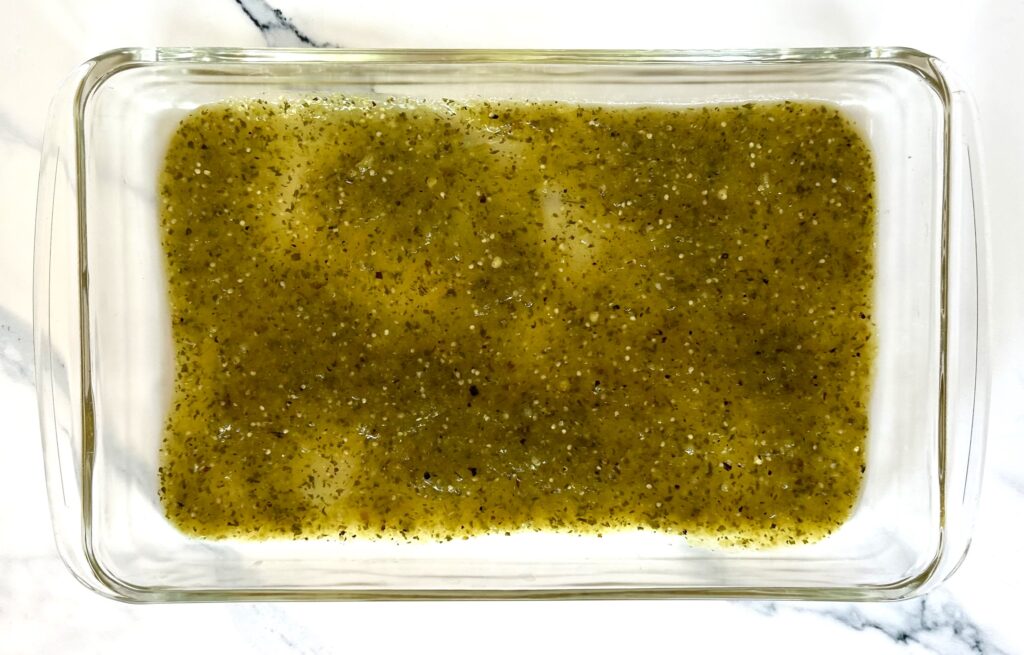
- For each tortilla add 3-4 Tablespoons of chicken mixture.
- Gently roll each tortilla up and place seam side down in the prepared baking dish. Repeat with the remaining tortillas.

- FYI: a 9″ x 13″ casserole dish will hold 8 rolled tortillas.
- Pour the homemade enchilada sauce over the top of the enchiladas.
- Sprinkle with the remaining cheddar and Jack cheeses.

Final Step – Baking
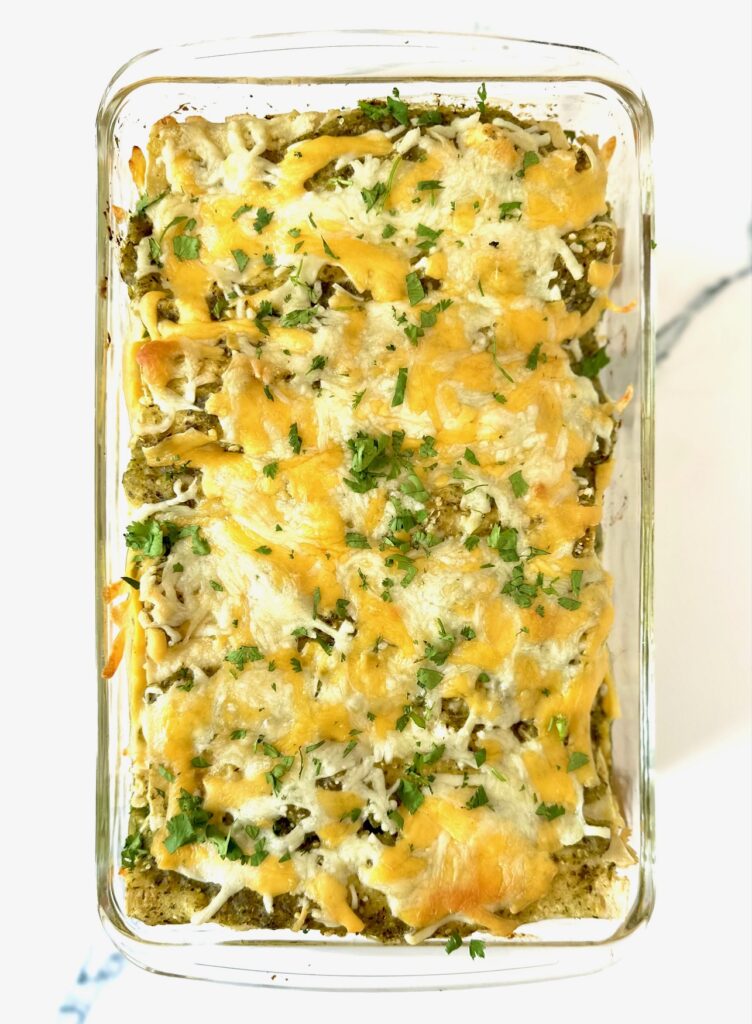
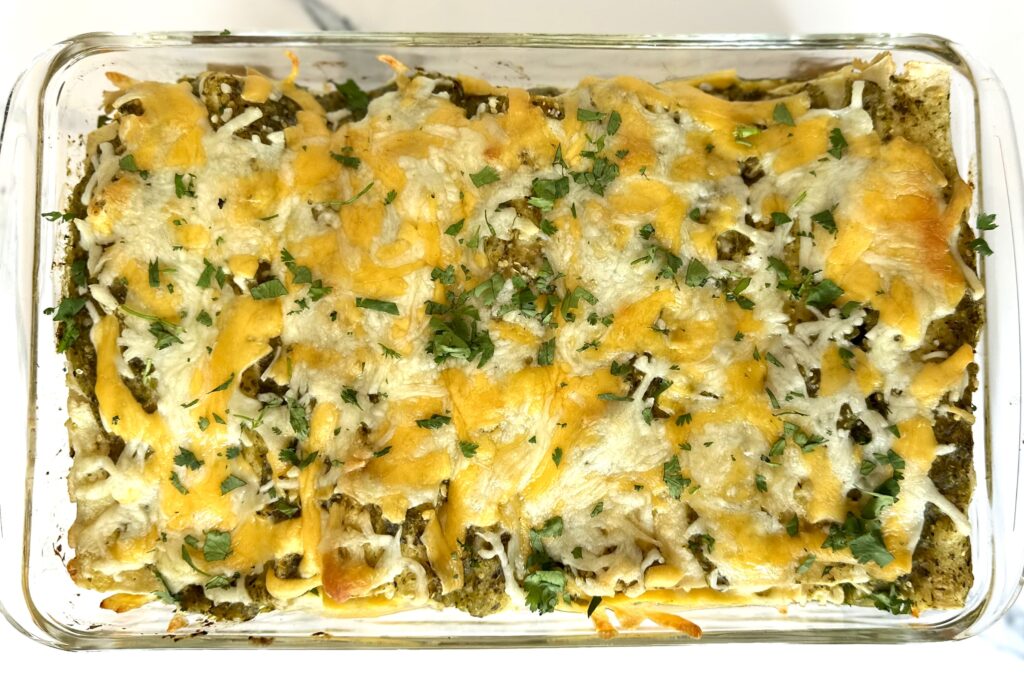
- Bake, uncovered, in the preheated oven at 350˚F for 30 minutes. (See bullet point below for less browning). Now for the best part, since the chicken has been already cooked the enchiladas just need to be baked until all the filling ingredients and remaining cheese become wonderfully bubbly and gooey!
- If you prefer your enchiladas not as brown on the top and prefer them more bubbly and gooey, then cover them with foil for the first 10-15 minutes of baking and then uncover them for the last 15 minutes.
- Remove the pan from the oven and garnish with the remaining chopped cilantro.
- Let rest for about 10 minutes, and serve. We also like to serve our enchiladas topped with a bit of pico de gallo and a dollop of sour cream.
What is the difference between Salsa Verde and Green Enchilada sauce?
Let’s clear up the difference between salsa and sauce. Salsa is the Spanish term for “sauce”. It has also come to mean the same thing in English. So, verde sauce is the same as salsa verde.
The difference between a traditional red enchilada sauce and a salsa verde sauce is that salsa verde is made and served raw and red sauce is cooked.
Salsa verde is blended together and served uncooked, and it is only cooked when added to a cooked recipe such as this enchilada recipe.
Traditional red enchilada sauce is cooked and includes a liquid, such as water or broth. Both styles have delicious flavors and make the most fabulous enchiladas.
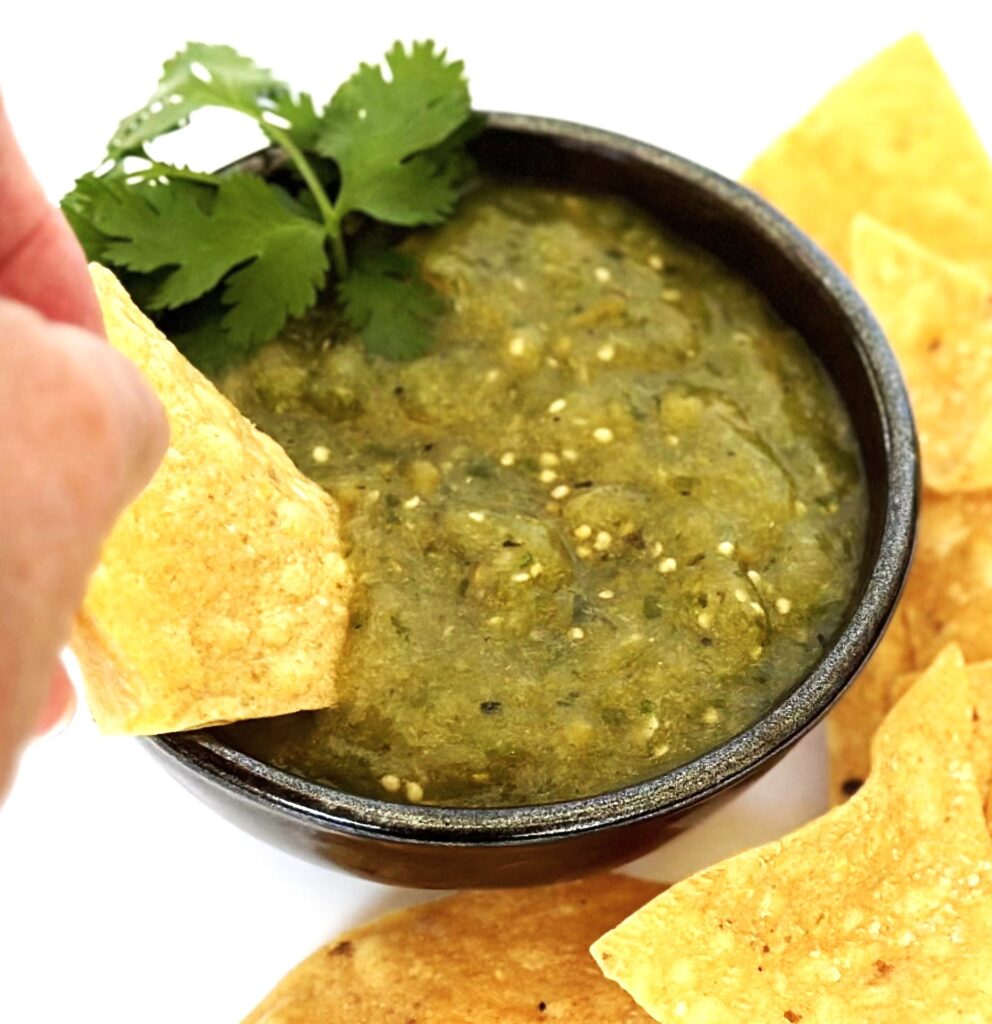
Mildly spicy Salsa Verde is the perfect dipping sauce
Is green enchilada sauce hotter than a red sauce?
The main difference between the two sauces is simply the ingredients. Red sauce is made from red chilis or chili powders. Green, or verde, sauce is made from green chilis, tomatillos, and jalapenos. Green sauces have a higher heat range or tend to be the “hot sauce” of the two.
In our Green Chicken Enchiladas recipe the heat and the spice come from the salsa verde.
How to store enchiladas before, and after, you bake them:
Refrigerator:
One of the best parts of making homemade enchiladas is they can be made the day before, refrigerated, and baked the next day.
Baked enchiladas can be refrigerated for up to 3 to 4 days in an airtight container and gently rewarmed in the oven or microwave.
Freezer:
You can freeze the prepared enchiladas uncooked to bake at a later time. Fully cool and place in a sealed container before freezing. You can also freeze cooked and cooled enchiladas to rewarm later.

Here are a few traditional Mexican dish recipes we love
We are crazy for Mexican-based dishes and here are some of our faves!
- Spanish Rice – the perfect side dish!
- Chicken Tortilla Soup – also uses shredded chicken!
- Chili Verde Recipe – slow-cooked tender pieces of pork and a zesty green sauce
- Chili Colorado Recipe – mildly fiery beef chunk in dark red sauce
- Carne Asada Recipe – an easy marinated and quickly grilled beef dinner
- Pork Carnitas Recipe – herbs and citrus give this shredded pork its big flavor
- Grab a cool Paloma cocktail or a sweet Spicy Mango Margarita to complete your dinner!

Green Chicken Enchiladas
Equipment
- 1 9" x 13" baking dish
Ingredients
- 2 ½ cup cooked chicken breasts, shredded
- 8 Corn tortillas 7-inch round
- 2 cups Cheddar Cheese shredded
- 2 cups Jack Cheese shredded
- 2 ½ cups Salsa Verde sauce
- ½ cup Chicken Broth
- ½ cup Cilantro leaves, chopped for garnish
Instructions
- Preheat oven to 350℉
- Prepare salsa verde and shredded chicken. Set aside. (see links below for both recipes)These can be prepared the day before and refrigerated until ready to use.
- Add filling ingredients to a medium-sized bowl: shredded chicken, 1/2 of the cheddar cheese, 1/2 of the Monterey Jack cheese, and 1/2 of the chopped Cilantro. Toss together and set aside.
- In a medium skillet add one cup of the salsa verde with the chicken broth and mix together. Heat on low.
- Warm the tortillas by wrapping in a damp towel and heating for 30 seconds in the microwave until they are soft, pliable, and easy to roll. Coat the bottom of a 9" x 13" baking dish with 2 Tablespoons of salsa verde.
- For each tortilla add about 3-4 Tablespoons of chicken/cheese filling.Gently roll each tortilla up and place seam side down in the prepared pan. Repeat with the remaining tortillas.
- Baking dish will hold 8 finished tortillas. Pour remaining salsa verde over the prepared enchiladas, and sprinkle with the remaining cheddar and Jack cheese.
- Bake, uncovered, at 350℉ for 30 minutes. If you would like your enchiladas to not brown as much you can cover them with foil for the first 15 minutes and then uncover them for the last 15 minutes.
- Remove from the oven and garnish with the remaining chopped cilantro. Let rest for 10 minutes and serve.
Notes
- Our easy Salsa Verde recipe
- Check out How to Make and Shred Chicken
- FYI: A 9″x 13″ pan will hold 8 rolled tortillas
- Baked enchiladas can be refrigerated for up to 3 to 4 days in a sealed container and gently rewarmed in the oven or microwave.
- You can freeze the prepared enchiladas uncooked to bake at a later time. Fully cool and place in a sealed container before freezing.
- You can also freeze a pan of cooked and cooled enchiladas to rewarm later.
Nutrition
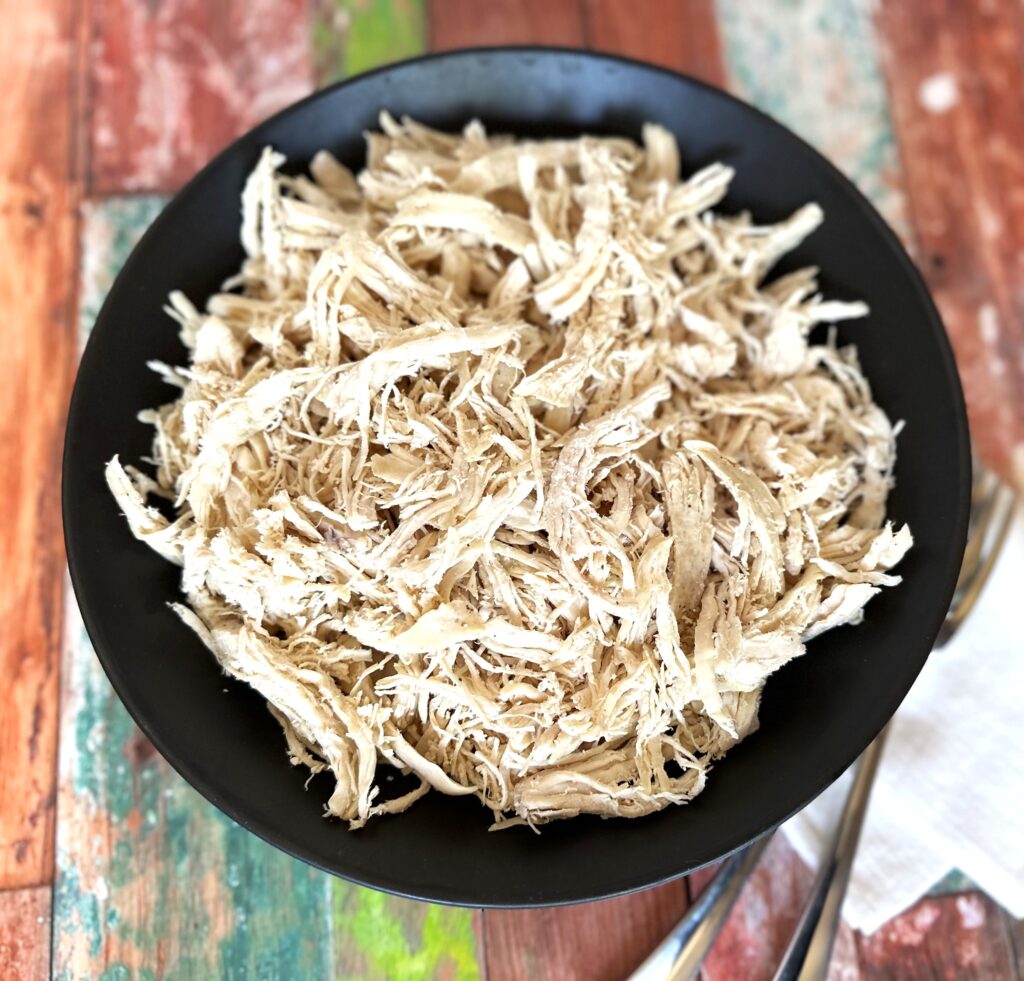
Learning how to make tender shredded chicken could not be easier! Below you’ll find our simple step-by-step instructions for making the best shredded chicken.
Shredded or pulled chicken can be used in a variety of delicious ways from salads to tacos to enchiladas, pasta dishes and much more.
Ready to get started? Just click on our ” Jump to Recipe” button below to go straight to the recipe card. For tips, processes, and substitutions keep reading. This post may contain affiliate links. Please see our affiliate disclosure for details. We only recommend products to you that we love ♥️ and use.
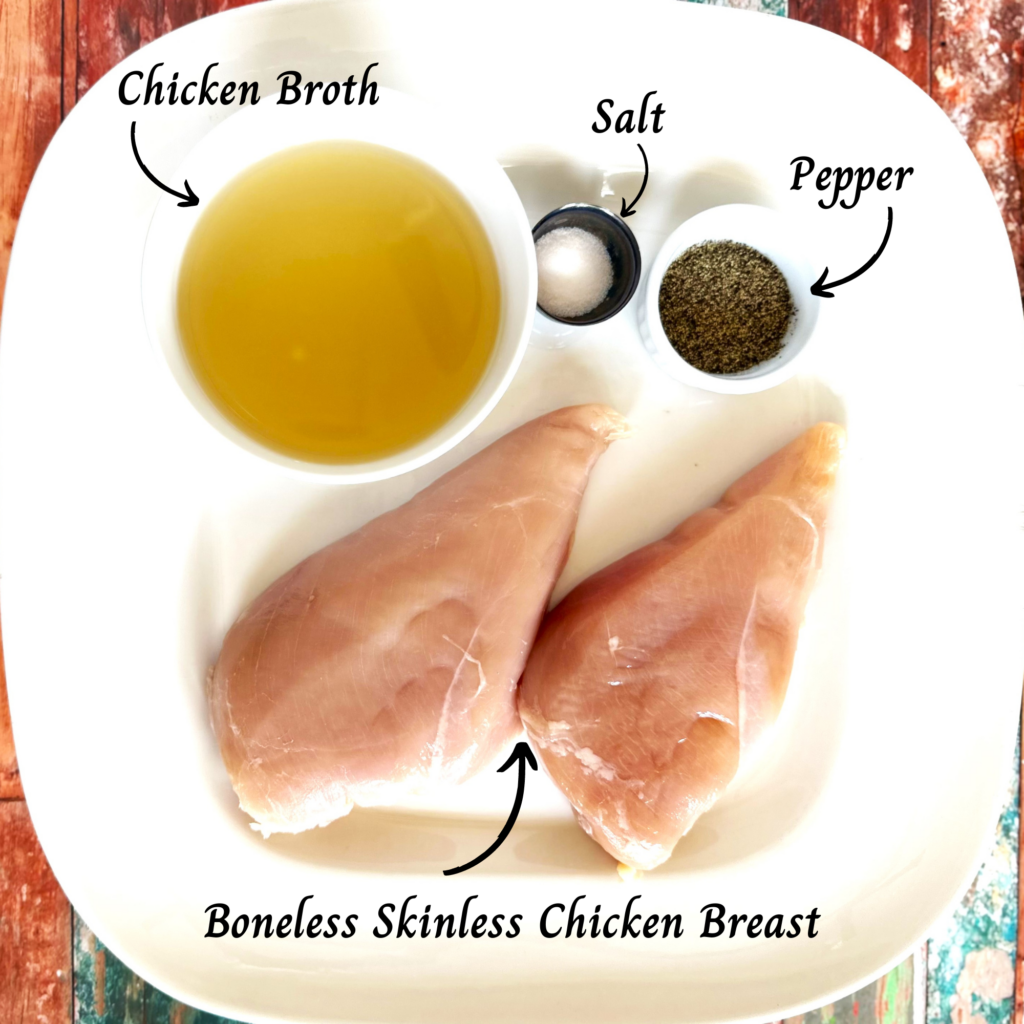
Jump to RecipeIngredients needed for this easy recipe:
- Fresh Chicken Breast – Boneless skinless chicken breasts are the best choice for best results. You can also use skinless chicken thighs, we prefer skinless and boneless chicken thighs.
- Chicken Broth or Chicken stock – This keeps the tender chicken super moist and infuses extra flavor
- Salt or Sea salt – Just a pinch makes a big flavor difference in the end results
- Pepper – We used black pepper but you could use white pepper if the recipe you’re making the cheese for is a purely white dish
- Olive Oil – For sautéing the chicken
What is the easiest way to make shredded chicken?
The process of making shredded or pulled chicken is quite simple and straightforward. Once you find out how easy it is you’ll never need to buy store-bought rotisserie chicken again.
Our tried and true method is to give the chicken breasts a light sauté and then gently poach them
Follow the step-by-step guide below and you will have delicious chicken that you can use in a variety of recipes in no time. Note: This method does not include any added herbs or flavoring so it can be used for any dish.
Step-by-step: How to make shredded chicken
Our lightly sautéed and poaching method makes for a flavorful moist finished chicken breast that is easy to shred.
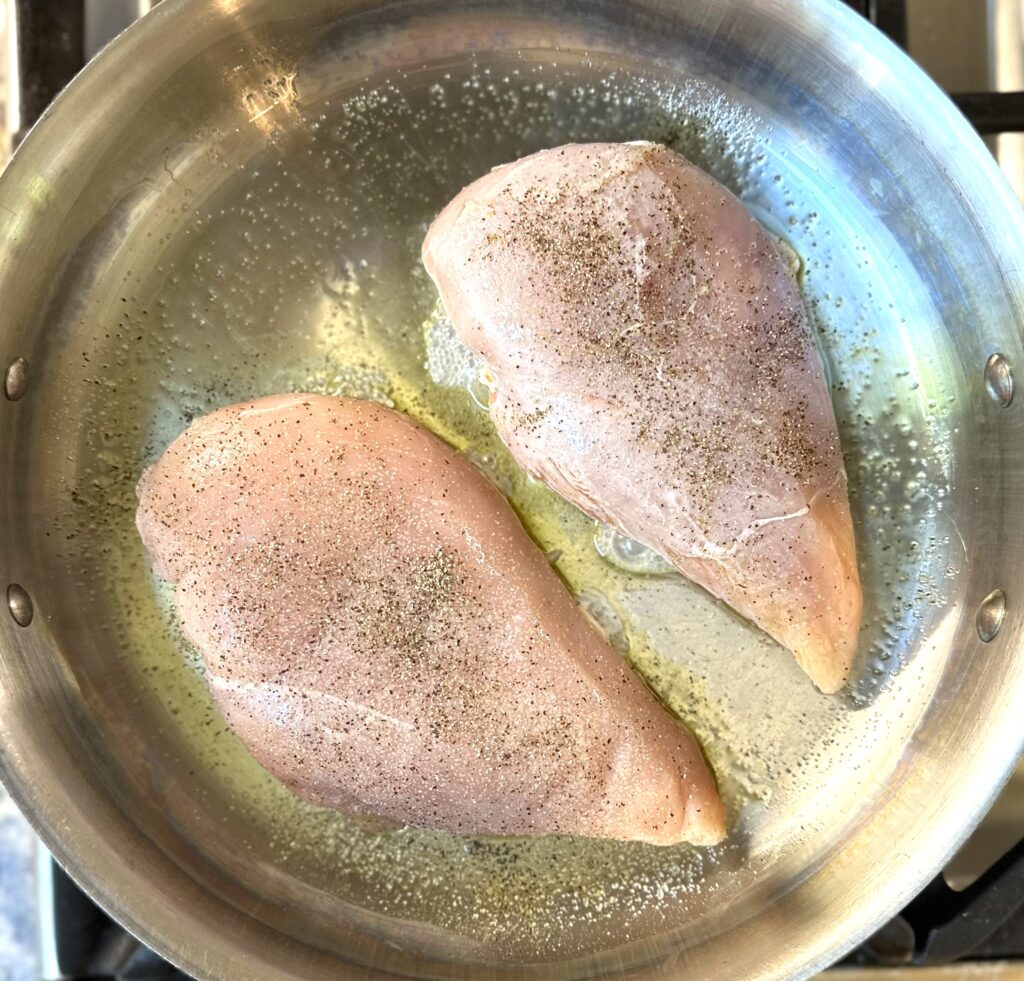
- Heat one Tablespoon of olive oil into a high-rimmed sauté pan over medium heat.
- Add chicken breasts. Sprinkle the top with salt and pepper.
- Sauté for about 2 minutes on each side until they are very lightly browned. Sautéing the breasts adds flavor, but be careful not to overcook the beast meat the goal is to keep the outer skin moist.
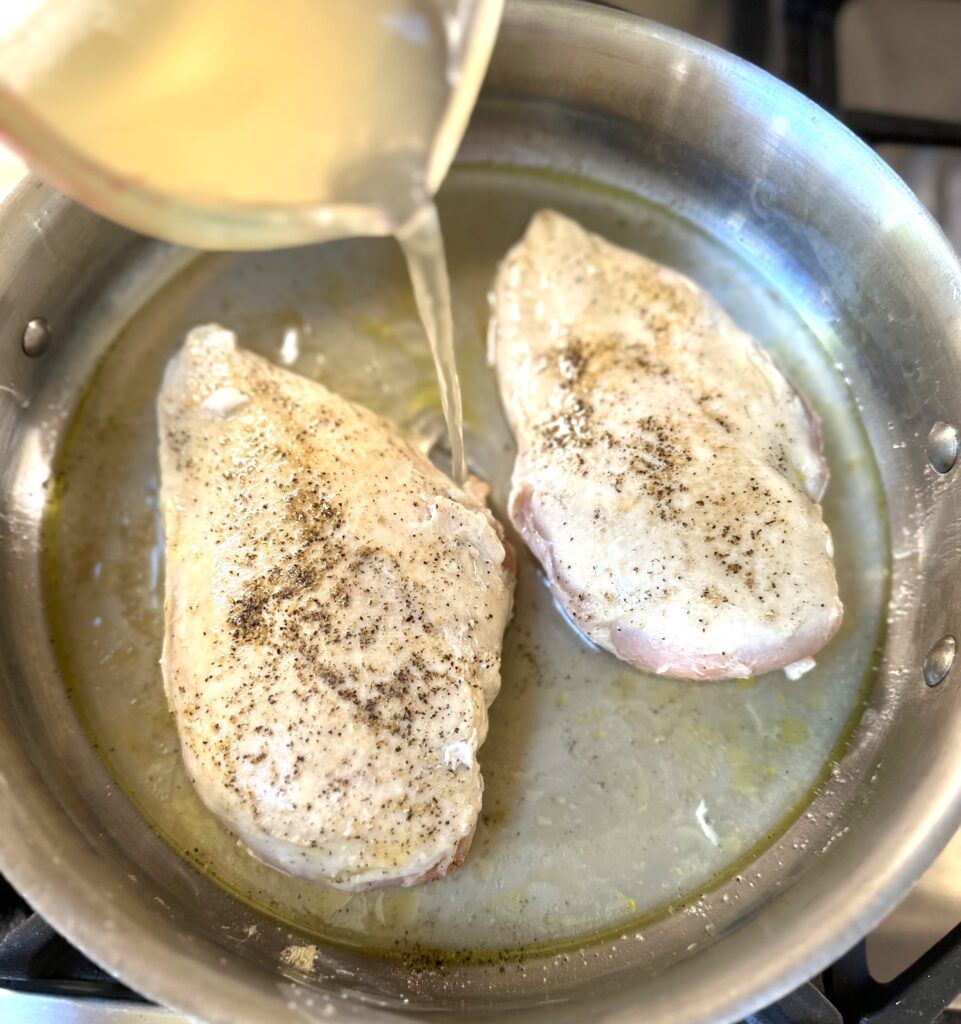
- Slowly pour in room-temperature chicken broth. Cover the chicken with a lid and poach.
- Bring liquid to a simmer (but do not boil).
- Reduce heat to medium-low, cover the pan with a lid, and poach chicken until the internal temperature of the chicken reaches 165˚F.
- Timing will vary depending on the size and thickness of your chicken breast meat. Poaching can take anywhere from 5 to 10 minutes for each side.
- We flip the breasts mid-way through the cooking to make sure they are evenly poached. If possible use a meat thermometer to ensure the meat is thoroughly cooked.
- Remove breasts from the pan and shred them using one of the methods below.
Can you save the cooking liquid?
- YES! Strain the cooking liquid and reserve it in case you want to add some moisture back into the chicken later. If not using right away, cool and refrigerate or freeze.
What is the easiest way to shred chicken?
There are 3 basic ways to easily shred chicken. All of these methods work well but if you are using bone-in chicken then use method #1
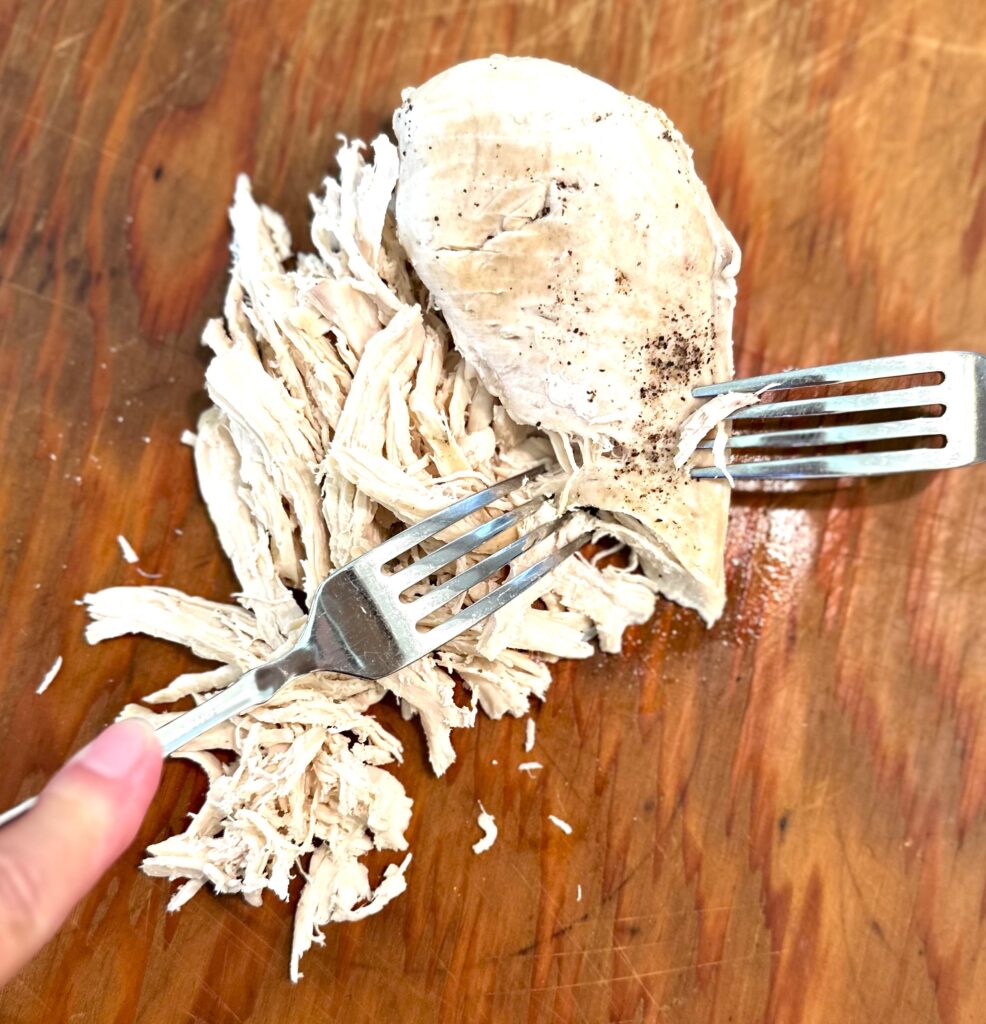
- Use Two Forks – Place chicken on a cutting board, while the meat is still warm, use 2 forks to separate the chicken along the grain and continue pulling at the chicken until shredded. It’s easiest if you use one fork to anchor the chicken and the other one to pull. The fork method is our favorite method because you have a lot of control over the size of your pieces. Want to get really fancy? Try a pair of meat shredder claws which makes this fast work!
- Hand Mixer or Stand Mixer – Place chicken pieces into the bowl. On the a low speed place the blades directly onto the chicken and mix for about 15 seconds, or until the chicken is shredded. (If using a stand mixer – we like Kitchen Aid – use the paddle attachment blade and be sure the tilt-head is locked down to avoid the blade bouncing up). This is a great method if you have a large amount of chicken to shred because it’s a fast and easy way and results in nice bite-size pieces.
- Food Processor or Blender – This method is similar to the mixer method but works even faster so be sure to simply use the pulse option until you get desired shredded size.
OPTION 1: 2 Forks
OPTION 2: Mixer method

What’s the difference between pulled chicken and shredded chicken?
Both of these terms – shredded and pulled – are correct and they can be used interchangeably. The chicken meat is cooked until tender then “shredded” or “pulled” along the grain of the meat until you get the size of shreds desired. The size of the final shred can vary based on how you will be using it in your chicken recipe.
This versatile method to cook chicken is the basis for many popular chicken dishes. Try it for tacos, nachos, salads, enchiladas, burritos, casseroles, sandwiches, soups, and even pizza.
Recipes with Shredded Chicken:
The uses for this style of chicken are endless but here are a few of our favorite recipes that incorporate shredded chicken:
- Chicken Tortilla Soup – cooking the chicken ahead of time is a great way to save time on this recipe
- Greek Lemon Chicken Soup – want to do it all in the instant pot? Try this instead.
- Chicken Pot Pie – the perfect way to use this method!
- Slower Cooker Pulled Chicken Sandwiches – this is an all-in-one method so great if you need to “set it and forget it”


Other ideas for using pulled chicken:
This recipe is the basic method but you can easily add seasonings to ramp up the flavor once you have it shredded.
- We LOVE adding our Homemade Taco Seasonings Blend to this chicken for any type of taco or nacho recipe
- Drizzle in some Sweet Chili Sauce and add it to your favorite Asian-style salad or on top of Asian Coleslaw
- Flavor it up with our Easy Pesto Sauce and add on top of your favorite pasta!
FAQ’s:
How much will this recipe make?
- 1 pound of cooked, boneless chicken breasts will make about 2 ½ cups of shredded chicken.
Can I make shredded chicken in a slow cooker?
Yes! This is a great way to make it and a real timesaver for meal prep. Keep in mind you won’t have the browned bits on the surface like you do with the traditional sauté/poach method.
- Simply add the chicken, chicken broth, salt, and pepper to the slow cooker, cover, and cook
- It takes about 3 hours on high or 5 hours on low to fully cook the chicken.
- Each crockpot or slow cooker will vary so use your best judgment.
- After cooking just shred as instructed above.
How to store:
This chicken is perfect for make-ahead meal planning, so consider making a big batch. When reheating you may want to add a touch of water or broth.
- Refrigerator – Cool and store tightly sealed in an airtight container or ziplock bag for up to 3-4 days.
- Freezer – Let cool completely, shred, seal, and freeze for up to 3 months (seasoned or unseasoned).

How to Make Shredded Chicken
Ingredients
- 1 pound Chicken breasts, boneless, skinless
- 4 cups Chicken broth, room temperature
- 1 dash Salt
- 1 dash Pepper
- 1 Tablespoon Olive oil
Instructions
- Heat one Tablespoon of olive oil into a high-rimmed sauté pan over medium heat.
- Add chicken breasts. Sprinkle the top with salt and pepper.
- Sauté for about 2 minutes on each side until they are very lightly browned. Sautéing the breasts adds flavor, but be careful not to overcook them because the goal is to keep the outer skin moist.
- Slowly pour in room-temperature chicken broth. The chicken should be covered with liquid.
- Bring liquid to a simmer (but do not boil).
- Reduce heat to medium-low, cover the pan with a lid, and poach chicken until the interior temperature reaches 165˚F.
- Timing will vary depending on the size and thickness of your chicken breasts. Poaching can take anywhere from 5 to 10 minutes for each side.
- We flip the breasts mid-way through the cooking to make sure they are evenly poached. If possible use a meat thermometer to ensure the meat is thoroughly cooked.
- Remove breasts from the pan and shred while warm, using one of the following methods:1. Use Two Forks – While the meat is still warm, use 2 forks to separate the chicken along the grain and continue pulling at the chicken until shredded. It’s easiest if you use one fork to anchor the chicken and the other one to pull. This is our favorite method because you have a lot of control over the size of your pieces.2. Hand Mixer or Stand Mixer – Place chicken pieces into the bowl. On the lowest speed place the blades directly onto the chicken and mix for about 15 seconds, or until the chicken is shredded. (If using a stand mixer – we like Kitchen Aid – use the paddle blade and be sure the tilt-head is locked down to avoid the blade bouncing up). This is a great method if you have a large amount of chicken to shred because it’s fast and easy!3. Food Processor or Blender – This method is similar to the mixer method but works even faster so be sure to simply use the pulse option until you get desired shredded size.
Notes
-
- Refrigerator – Cool and store tightly sealed for up to 3 days
-
- Freezer – Let cool completely, seal, and freeze for up to 3 months (seasoned or unseasoned)
- SLOW COOKER/ CROCKPOT Instructions:
- To make chicken in a slow cooker or crockpot simply omit the sauté step and add everything to the slow cooker. Cover and cook for about 5 hours on low or 3 hours on high setting.