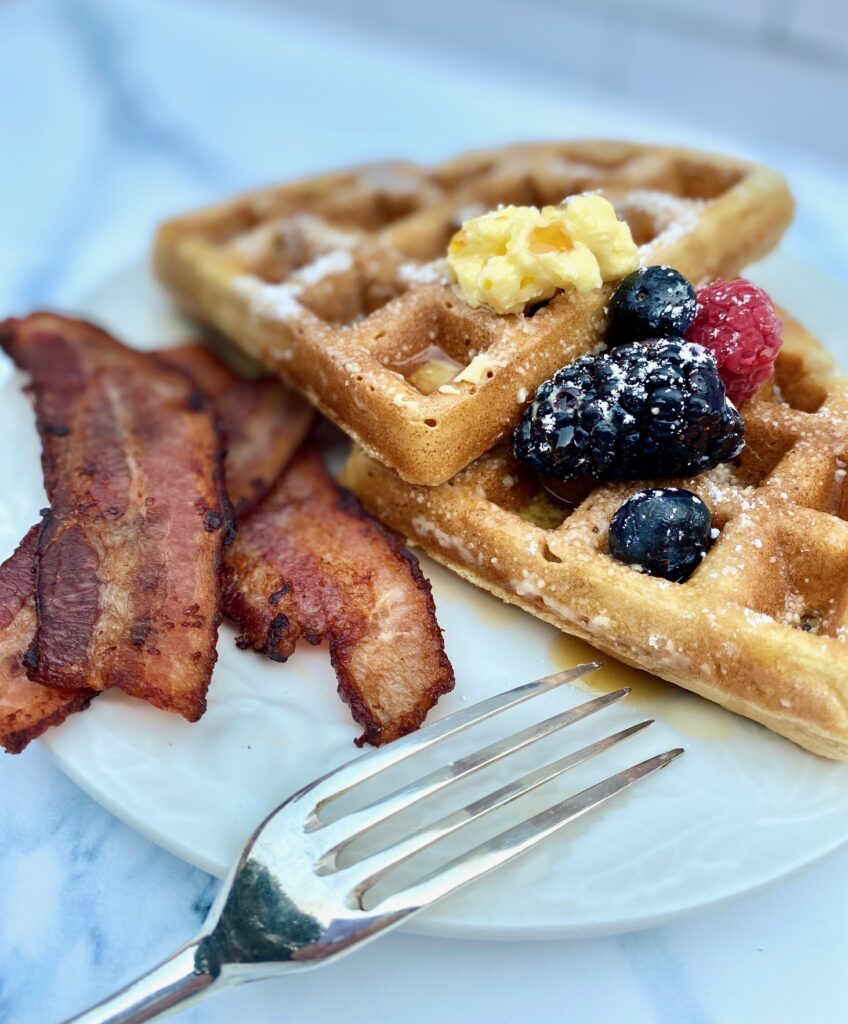
There’s nothing better than a piping hot waffle fresh from the waffle iron. Add toppings and it’s a breakfast made in heaven! Both our Buttermilk Pancakes and these Belgian waffles are true favorites in our house, especially on Sunday mornings
The best part is how easy these buttermilk waffles are to make at home, with a few simple ingredients, and a quality waffle iron. By the way, this recipe will work in both a Belgian waffle iron and a regular waffle iron.
OK, who’s starving? Let’s get cookin’
Ready to get started? Just click on our “jump to recipe” button below to go straight to the recipe card. For tips, processes, and substitutions keep reading.
Jump to RecipeThis post may contain affiliate links. Please see our affiliate disclosure for more details
Ingredients for Homemade Belgian Waffle Mix:
This recipe works best when all of the ingredients are closer to room temperature, so be sure to pull everything out of the refrigerator first, when you are prepping your recipe, to take the chill off.
- All-purpose flour
- Sugar
- Baking Powder – make sure it’s fresh so you’ll have tall fluffy waffles
- Baking Soda and Salt
- Milk – we prefer whole or 2% for this recipe but any type will do
- Buttermilk – if you don’t have buttermilk on hand see our handy tip below to make your own or just use regular milk. Buttermilk gives these waffles a tang and tenderness we love
- Butter – melted and cooled to room temperature
- Vanilla Extract – have you tried making your own? Here’s how – it’s easy with just 2 ingredients!
- Eggs – we’ll separate them and use both the whites and yolks. Did you know, it’s easier to separate eggs when they are cold?

How to make fresh Belgian Waffles from scratch:
- Gather all of your refrigerated ingredients first and give them a chance to warm up
- Melt the butter and let it cool to room temperature (we don’t want to scramble the eggs!)
- Heat your waffle maker to medium, or according to the manufacturer’s suggestion
- Separate the eggs. Reserve the whites in a medium mixing bowl. Blend yolks in a small bowl and set aside
- Whisk dry ingredients together in a large bowl – flour, sugar, baking powder, baking soda, and salt
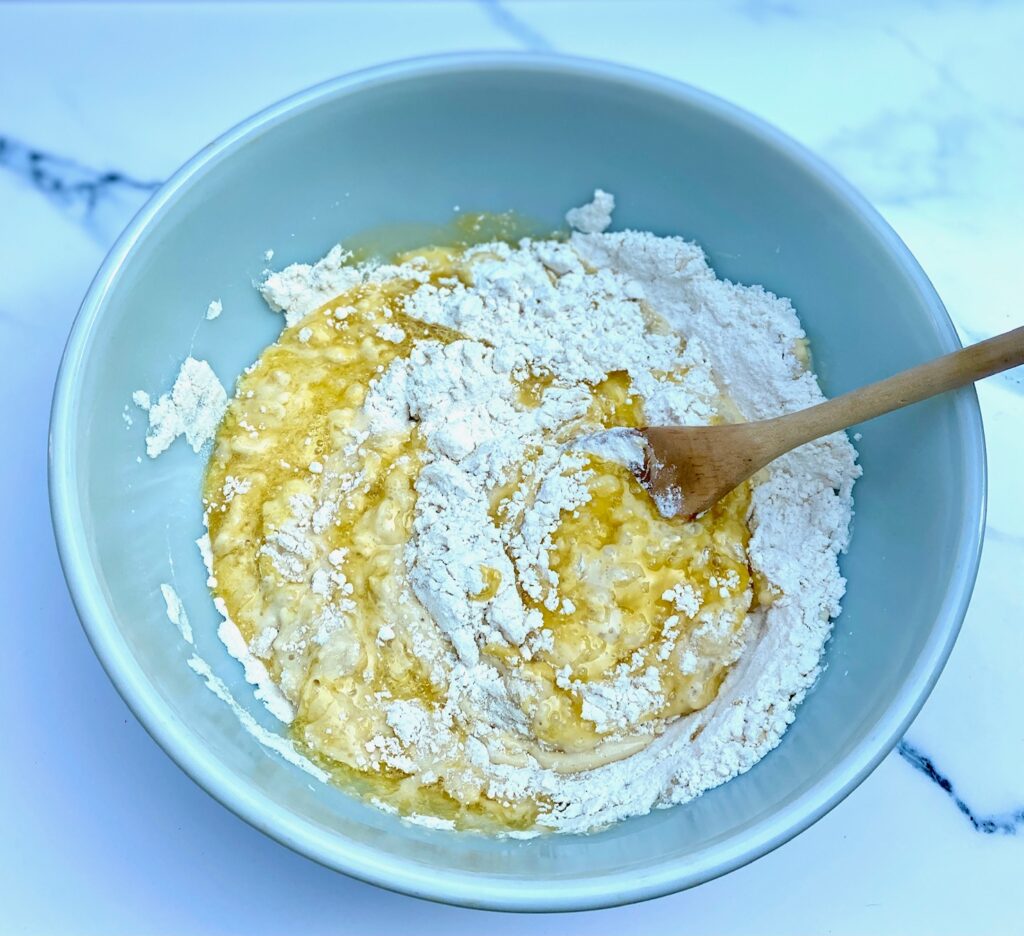
- Create a well in the middle of the dry ingredients and pour in the milk, buttermilk, cooled melted butter, vanilla extract, and blended egg yolks
- Whisk together to combine. The batter will be thick at this point
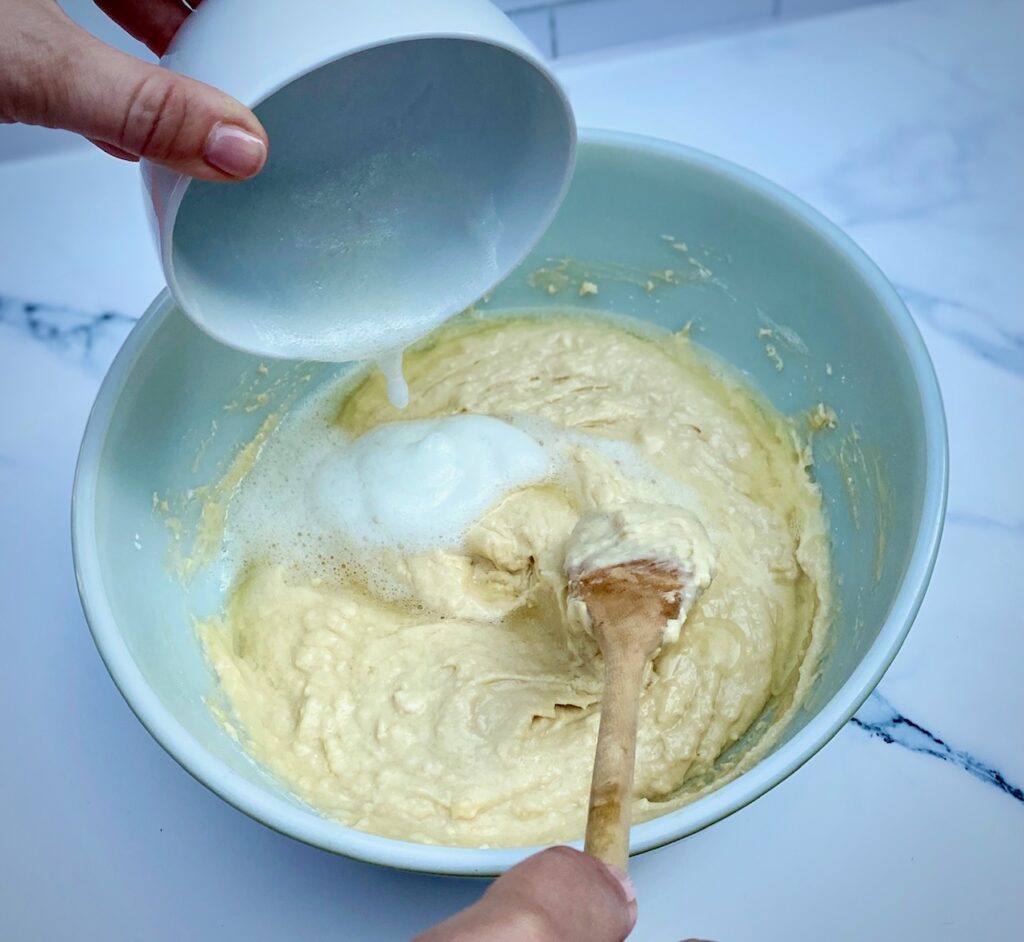
- Vigorously whisk the egg whites until they reach the soft peak stage. Alternately, blend with a mixer but be careful not to over whisk
- Now gently fold the whites into the batter. Be gentle so you don’t deflate the whites. It’s ok if the batter looks a little streaky
- Let batter rest and heat the waffle iron (anywhere between 5 – 30 minutes)
- Pour about 1/2 – 3/4 cup of batter into the center of the Belgian waffle maker. Make sure the batter spreads to the edges. If it doesn’t then give it a quick nudge with a heat-proof spatula. This helps fill in the nooks and crannies all the way to the edge and ensures beautiful full waffles. * Each waffle iron will require a different amount of batter depending on the model
- Close the lid and cook for about 5-6 minutes, or until the waffle iron beeps that your waffles are ready (most models). The waffles should be lightly crisp and golden
- Remove the cooked waffle from the hot waffle iron and place it on a wire rack, on top of a baking sheet. This keeps the waffles from getting soggy on the bottom.
- Continue cooking the rest of the batter
- To keep cooked waffles warm and crispy while finishing the rest of the batch, place the baking sheet in a warm oven (175˚F)

Looking for a good quality waffle iron?
We’ve tested a few and we keep coming back to this silver Cuisinart 4-slice Belgian waffle maker. It heats consistently across all of the surface areas, has a great non-stick texture, and is easy to clean afterward. There are a lot of choices out there but we think this is a reliable waffle maker at an affordable price.

Topping ideas for Homemade Belgian Waffles:
The best thing about waffles is the little pockets that are created because they just beg for toppings! Here are some of our favorites, but it’s easy to get really creative here.
- Whipped butter and Pure Maple Syrup
- All types of fresh fruit or fruit compotes
- A nice dusting of powdered sugar
- Super rich whipped cream
- Nutella, small chocolate chips, or our Easy Salted Caramel Sauce
- Try these with a dollop of our warm Homemade Applesauce, which is loaded with cinnamon!
- Sauteed bananas or strawberries
- How about a classic Waffles and Fried Chicken combo?

Should you let the waffle batter rest?
This simple answer is yes! The minimum resting time is 5 minutes but 30 minutes is ideal to allow the gluten to relax.
If you let the batter rest, you’ll actually get a little more volume than if you cook them right away (up to 1 extra waffle). Additionally, the rested batter will give your waffles a crusty and airy, tender texture. The resting time is a great time to prepare delicious toppings for the warm waffles.
What is the difference between a Belgian waffle and a regular waffle:
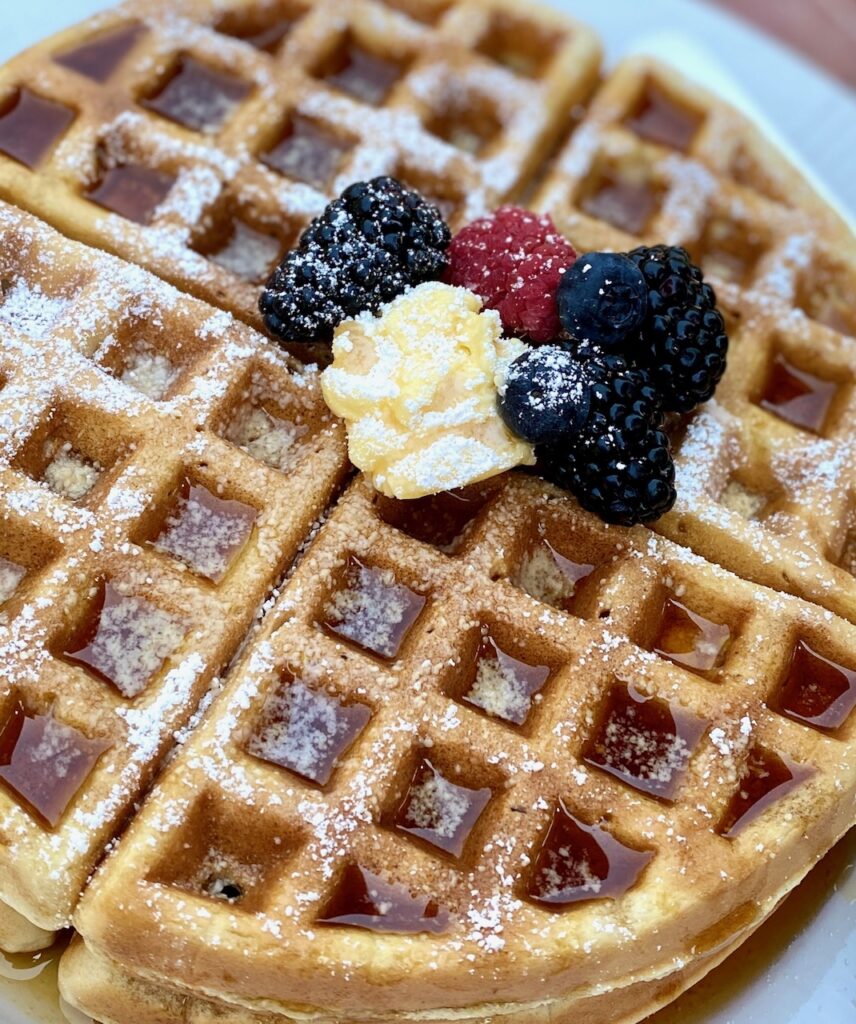
Basically, Belgian waffles have deeper pockets than American waffles, which, of course, makes them great for holding little pools of syrup and butter. The texture is also lighter and crispier.
To make a true Belgian waffle, you need a waffle iron with a deep, large grid pattern. Many of the original Belgian waffle recipes use yeast instead of baking powder. The beaten egg whites also help the waffles rise more when they are cooking.
If you have a regular waffle iron you can use this recipe but will need to adjust the amount of batter you use (you will likely use less).
How to freeze Homemade Belgian Waffles
Waffles freeze beautifully! Let them cool completely, wrap them individually, and store them in a resealable plastic bag for up to 3 months. When ready to eat we recommend heating in a low temperature oven. Microwaving isn’t recommended.
How to ensure crispy waffles:
- Make sure the waffle iron is hot enough
- Let the batter rest
- Don’t overwork the batter
- Don’t stack the cooked waffles – this will make them soggy and limp
Need a buttermilk substitute?
In case you don’t have buttermilk on hand it’s easy to make with this substitution formula:
- The ratio: 1 Tablespoon of white vinegar or lemon juice for every 1 cup of regular milk
- Mix together and let stand for a few minutes then mix again

Homemade Belgian Waffles
Equipment
- waffle iron
Ingredients
Waffle Mix
- 2 ¼ cups all-purpose flour
- ⅓ cup sugar
- 2 teaspoon baking powder
- ½ teaspoon baking soda
- ½ teaspoon salt
- 1 cup milk
- ½ cup buttermilk
- ¼ cup butter, melted and cooled
- 1 Tablespoon vanilla extract
- 2 eggs, separated
Garnish Ideas (optional)
- 4 Tablespoons whipped butter
- 4 Tablespoons pure maple syrup
- ¼ cup mixed berries, blueberries, blackberries, raspberries
- 1 Tablespoon powdered sugar
Instructions
Making Belgian Waffles:
- Melt the butter and let cool to room temperature.
- Heat a Belgian waffle iron to medium, or heat according to your specific waffle iron's directions for Belgian waffles.
- Separate the eggs. Reserve the whites in a medium mixing bowl. Blend yolks in small bowl and set aside.
- In a large bowl whisk together the flour, sugar, baking powder, baking soda, and salt.
- Create a well in the center of the flour mixture. Pour in milk, buttermilk, cooled melted butter, vanilla extract, and blended egg yolks. Whisk together to combine. The batter will be thick, but don't over blend.
- Whisk egg whites vigorously until you have soft peaks, either by hand or with a mixer.
- Gently fold egg whites into the batter until combined, but again don't over blend.
- Let batter rest for 5-30 minutes while the waffle iron is heating.
- Pour about 1/2 – 3/4 cup of batter into the center of the Belgian waffle maker. make sure the batter spread to the edges.Close the lid and cook until lightly brown. (FYI: Most waffle makers will beep when ready). *Note: My waffle iron (a round Cuisinart) takes about 1/2 cup of mixture and cooks for 5-minutes but each waffle iron cooks slightly differently so follow your manufacturer instructions
- Remove cooked waffle from the hot waffle iron and place on a wire rack on top of a baking sheet. This keeps the waffles from getting soggy on the bottom. Continue cooking the rest of the batter.
- To keep the cooked waffles warm and crisp, while cooking remaining batches, put the baking sheet in a warm oven (175˚F)
Serving waffles:
- Serve waffles warm with butter and syrup. Garnish with berries and a dusting of powdered sugar, if desired.
Notes
- This recipe works in a traditional waffle iron or Belgian waffle iron
- These waffles freeze beautifully. Cool them completely, wrap in foil, and store in an airtight container or freezer bag
- Topping ideas:
- warm syrup
- powdered sugar
- fruit compote
- fresh fruit
- whipped cream
- Nutella
Nutrition
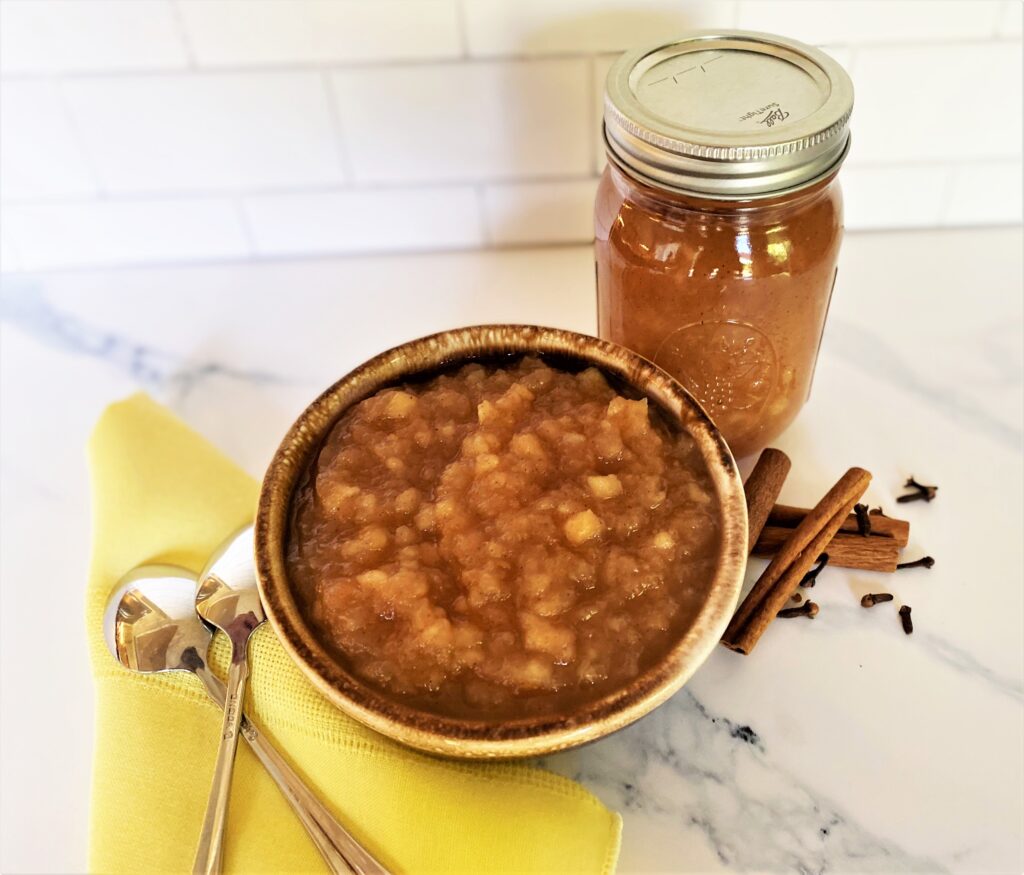
Growing up, my mother and grandmother would make homemade applesauce every apple season. The aroma of cooking apples and cinnamon would fill the kitchen. You can’t beat the taste of homemade applesauce.
Making the best applesauce was always a labor of love in our house. As a family we would head out to the apple orchards for fresh apples and apple cider. It was a fun way to spent the afternoon.
This is my grandmother’s treasured recipe, which has been lovingly handed down through our family. It is a easy recipe to make and delicious to serve. We are excited to share it with you.
This post may contain affiliate links. Please see our affiliate disclosure for more details.

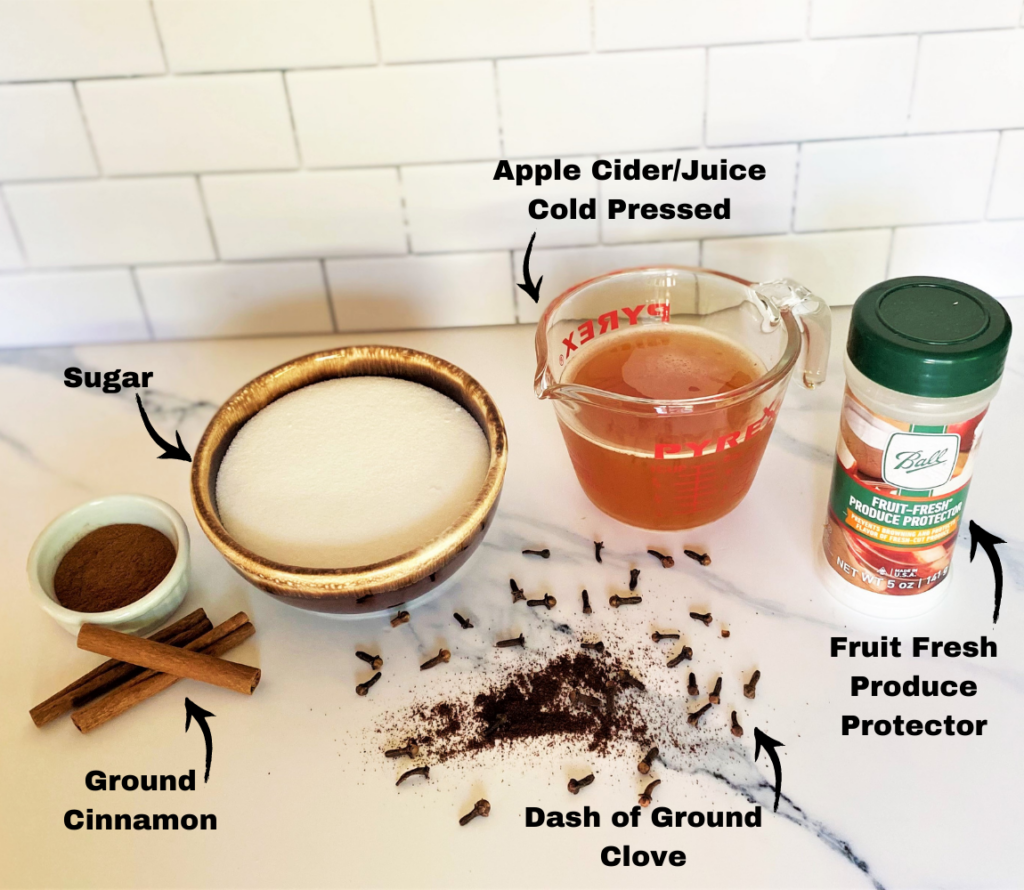
Simple ingredients for our Homemade Applesauce
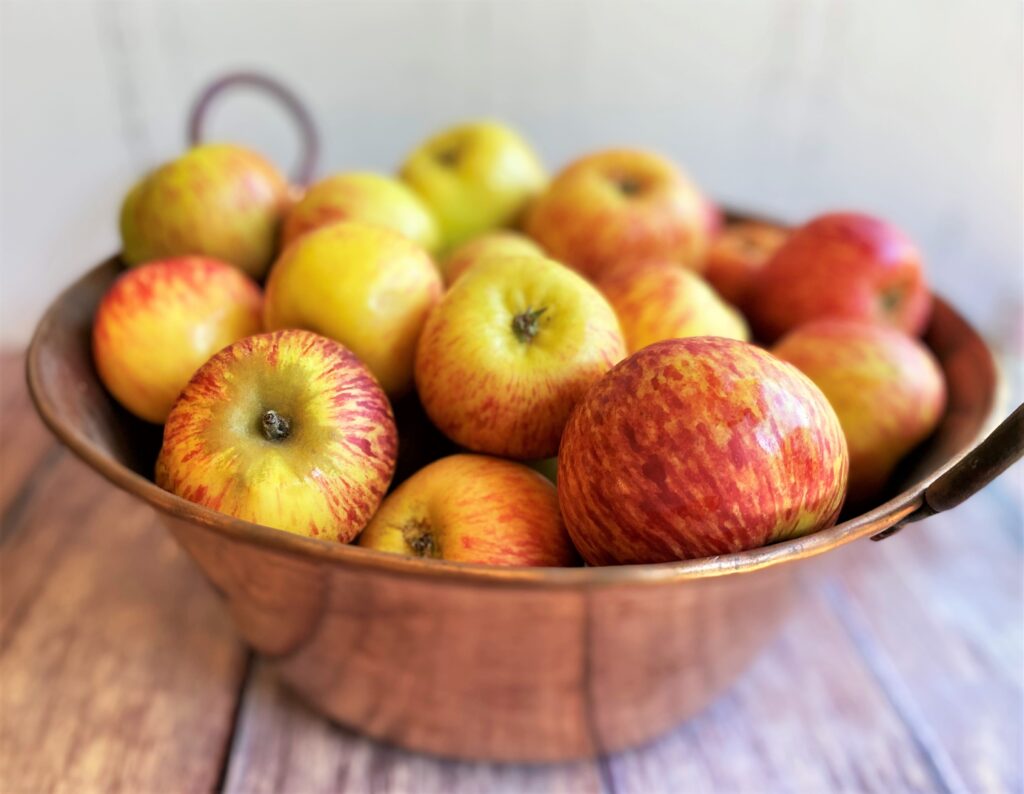
- Gravensteins, Honeycrisp, Gala, Pink Lady or Golden Delicious apples (6 lbs)
- Apple cider or juice – the best choice here is cider.
- Sugar
- Ground Cinnamon
- Ground Clove
How to make Grandmother’s Homemade Applesauce
First Step
- Thoroughly rinse the apples and pat dry
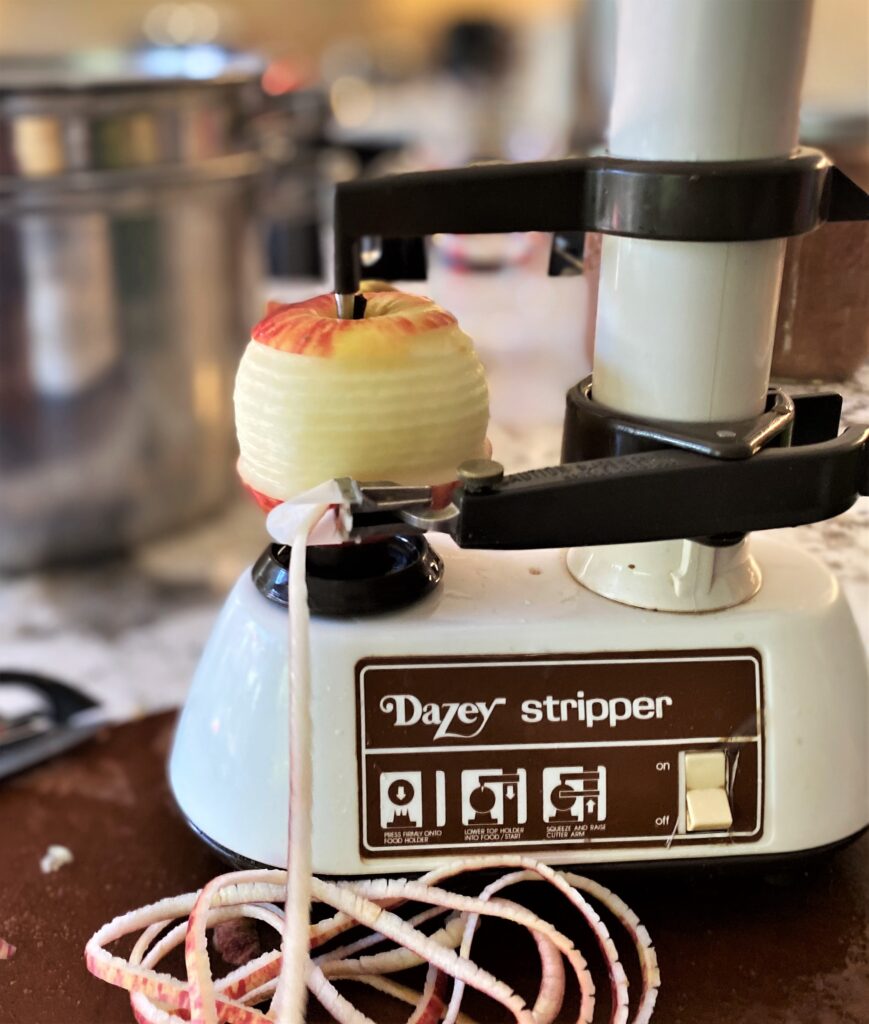
- Peel and core each apple. Because you need to peel numerous apples we use an automatic peeling machine, along with a manual apple corer . (More on that below)
The Dazey Stripper brand automatic peeler was retired years ago. However, mom’s is still going strong! There are many on the market today and we like the Starfrit Rotato Express 2.0. This device is worth it because it is a time saver and it works great for pears and potatoes.

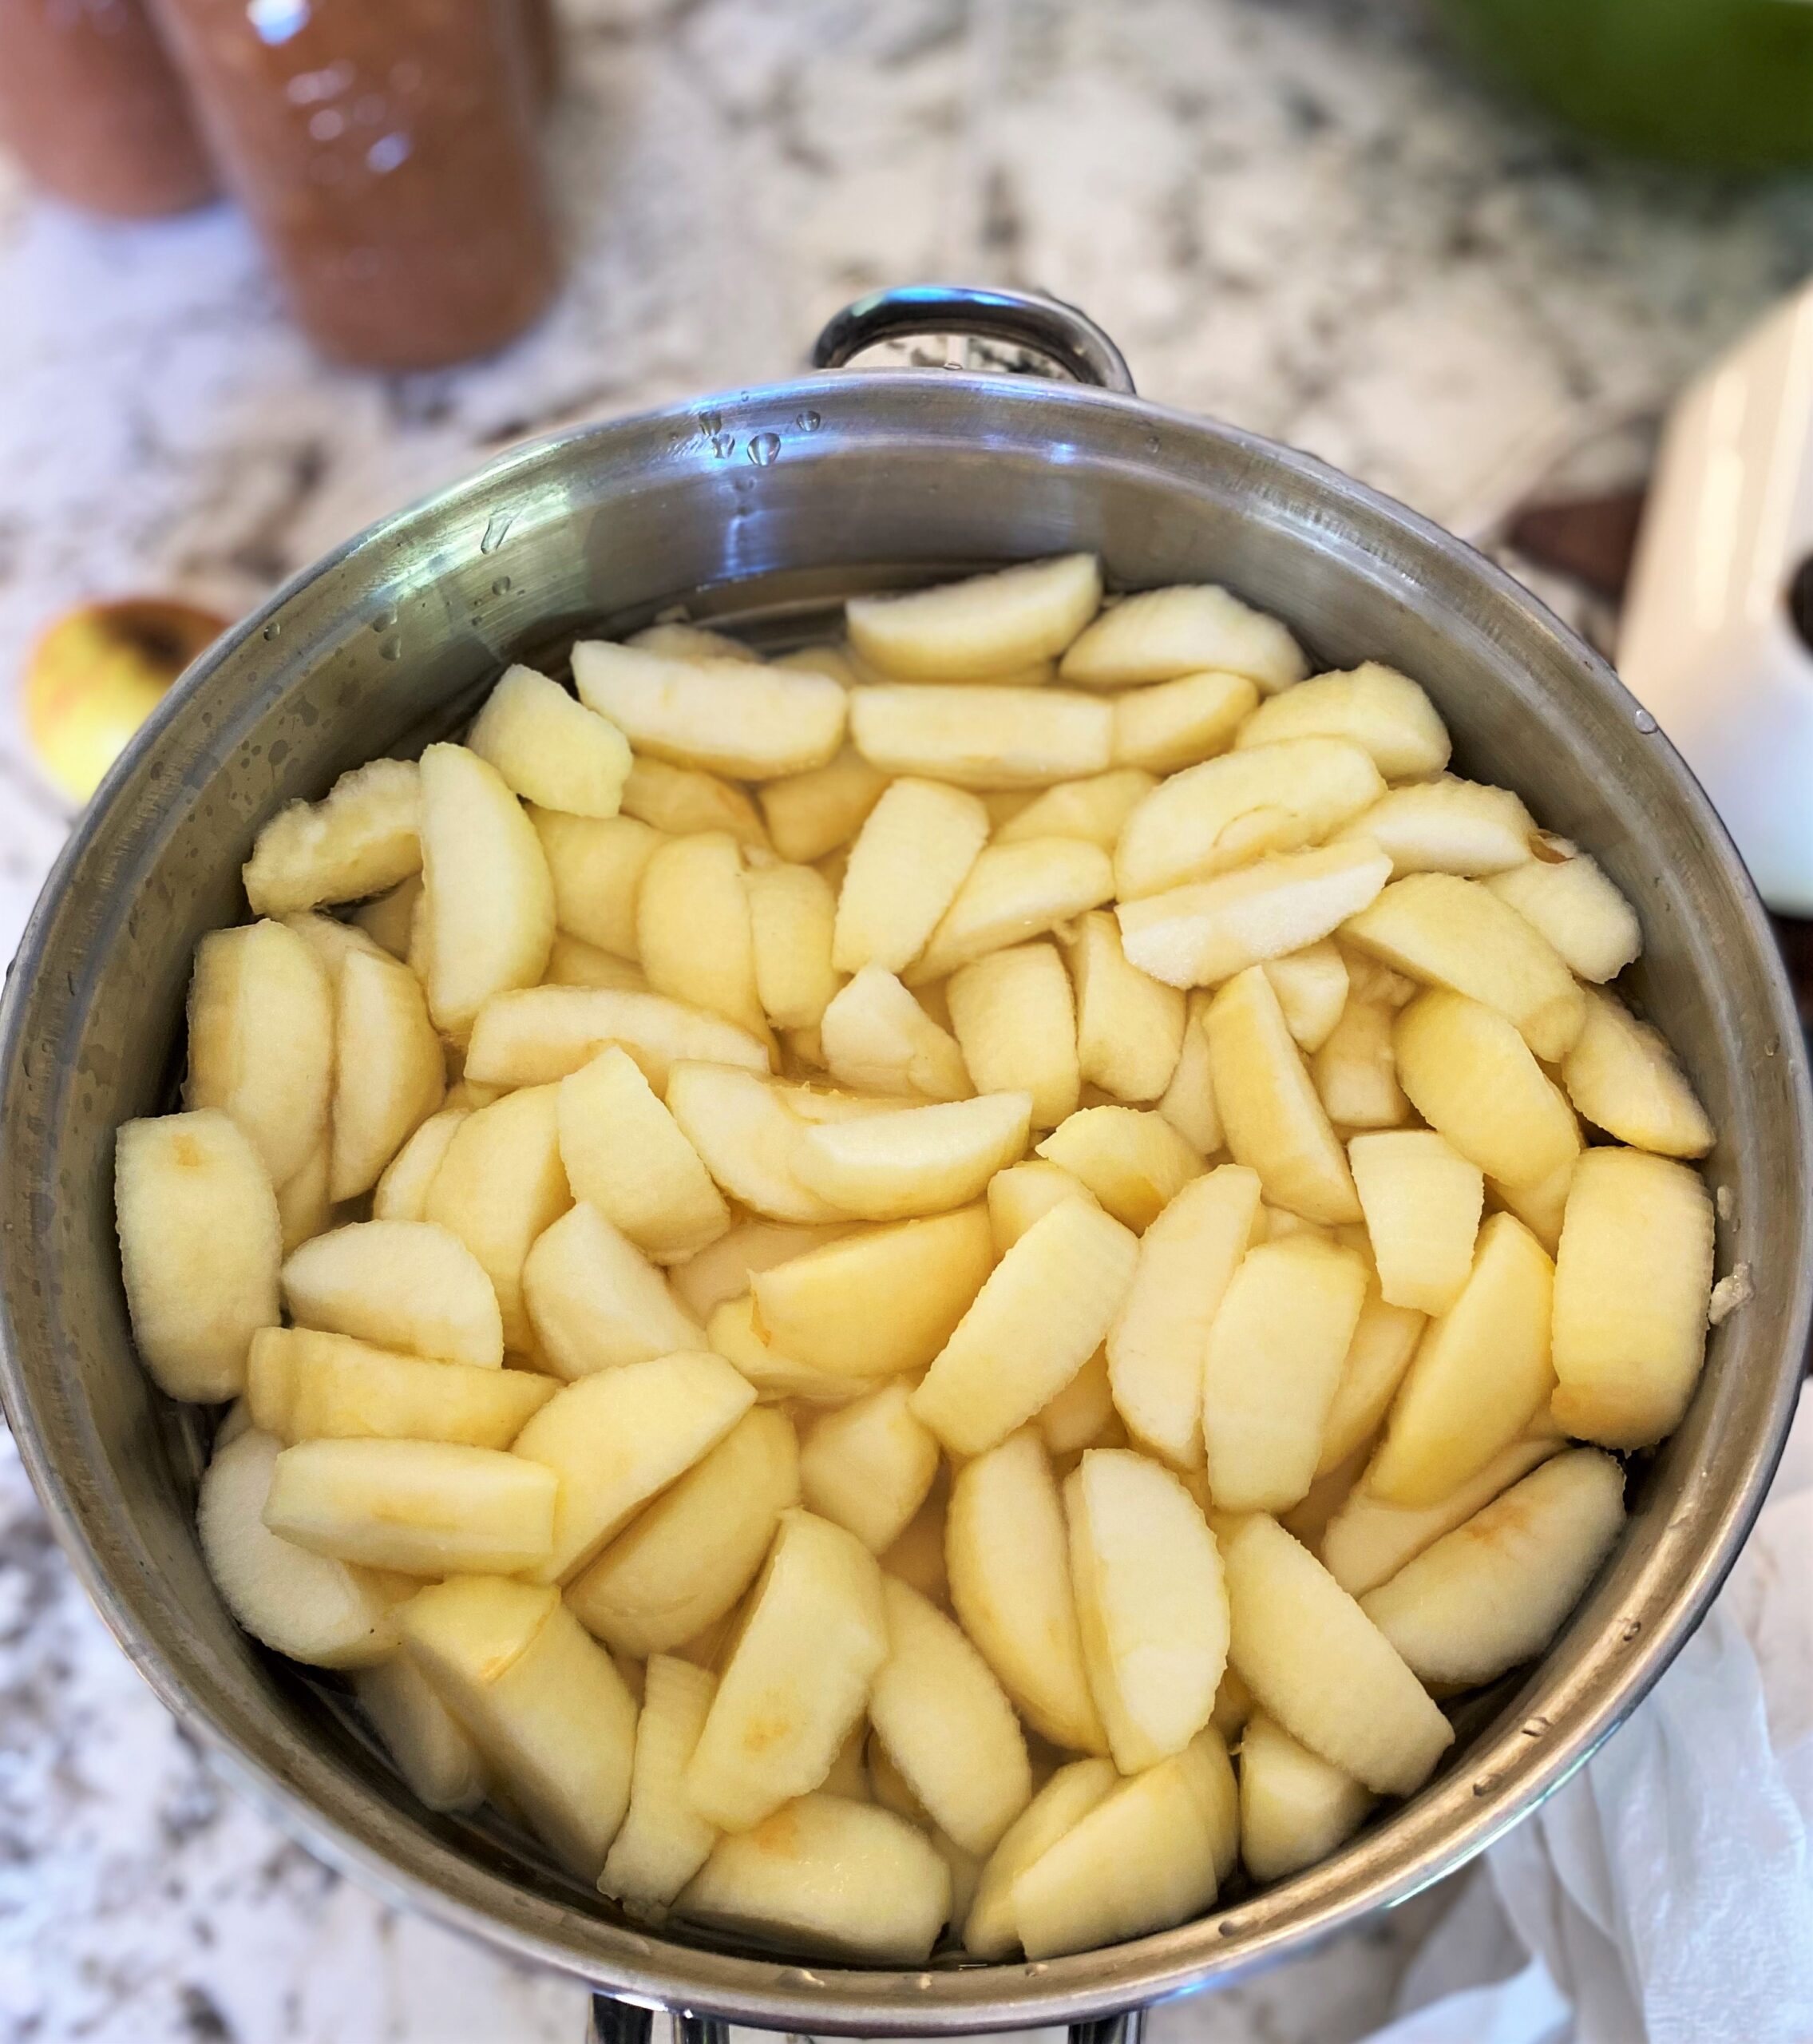
- After the apple are peeled and cored (we love the Deiss PRO Apple Slicer and corer) place the cut pieces in a water bath and add Fruit Fresh Produce Protector to the water. This is the best way to will help protect the color of the apples and keep them from browning, it also will protect the flavor while you continue prepping the rest of the apples.
We chose Ball’s Produce Protector because it contains antioxidants but no artificial flavors or colors.
Second Step
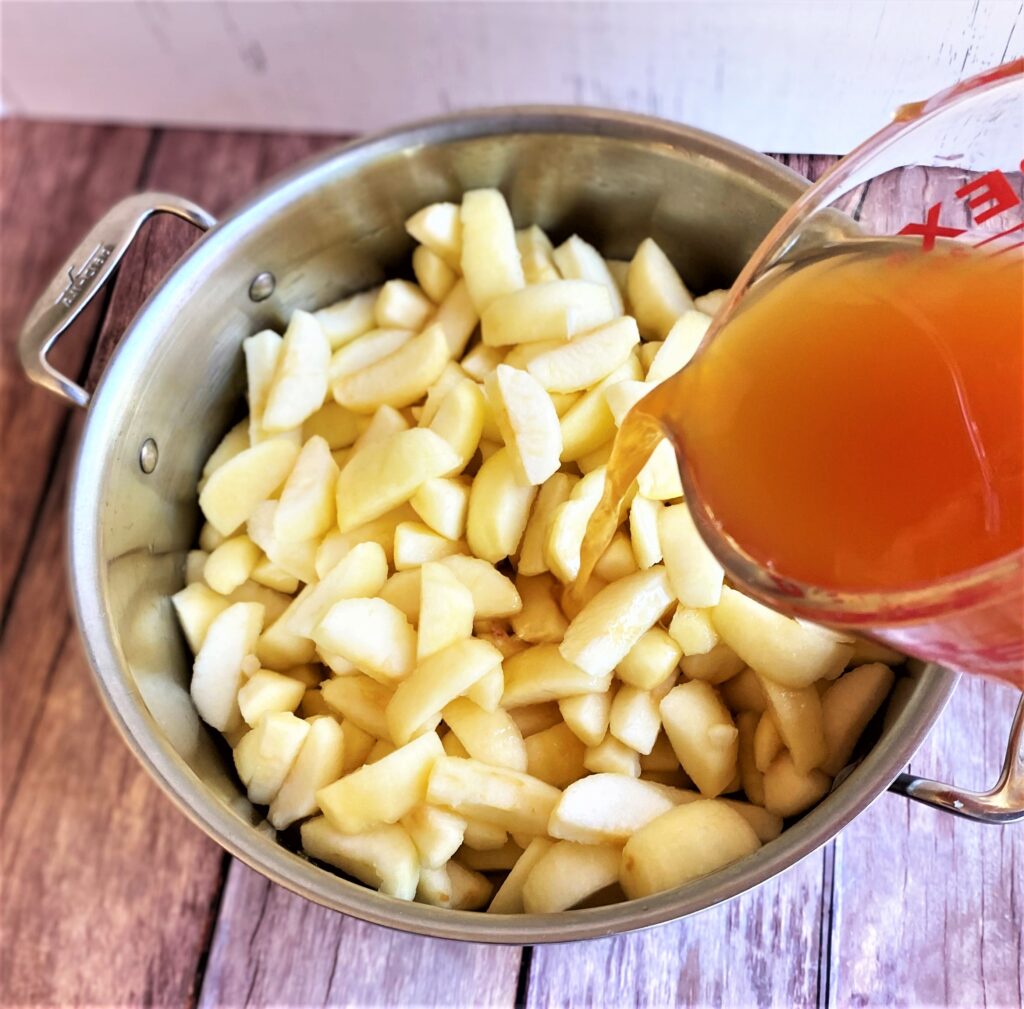
- Drain the water off of the apples and place them in a 6-quart cooking pot.
- Pour in apple cider or juice.
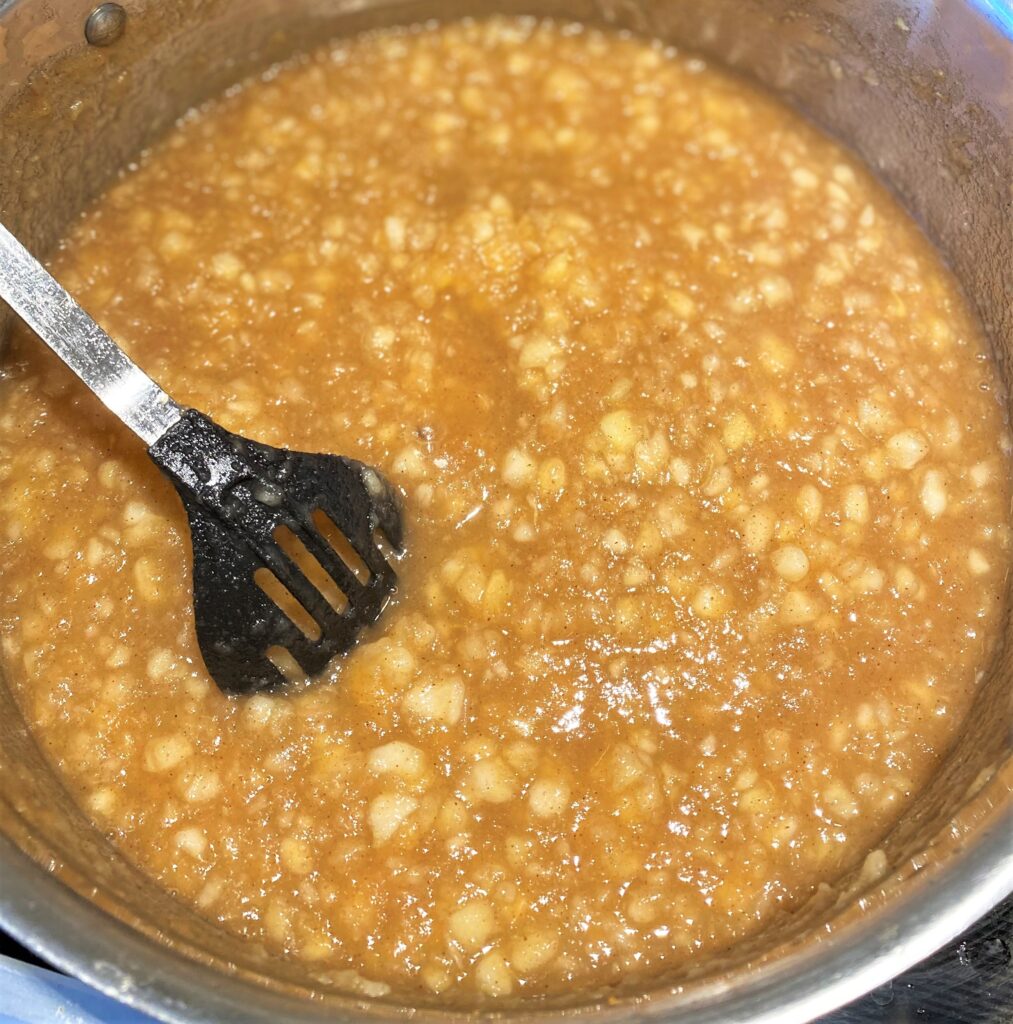
- Cook over low heat until the cooked apples are soft and easy to mash. This generally takes about 15 to 20 minutes.
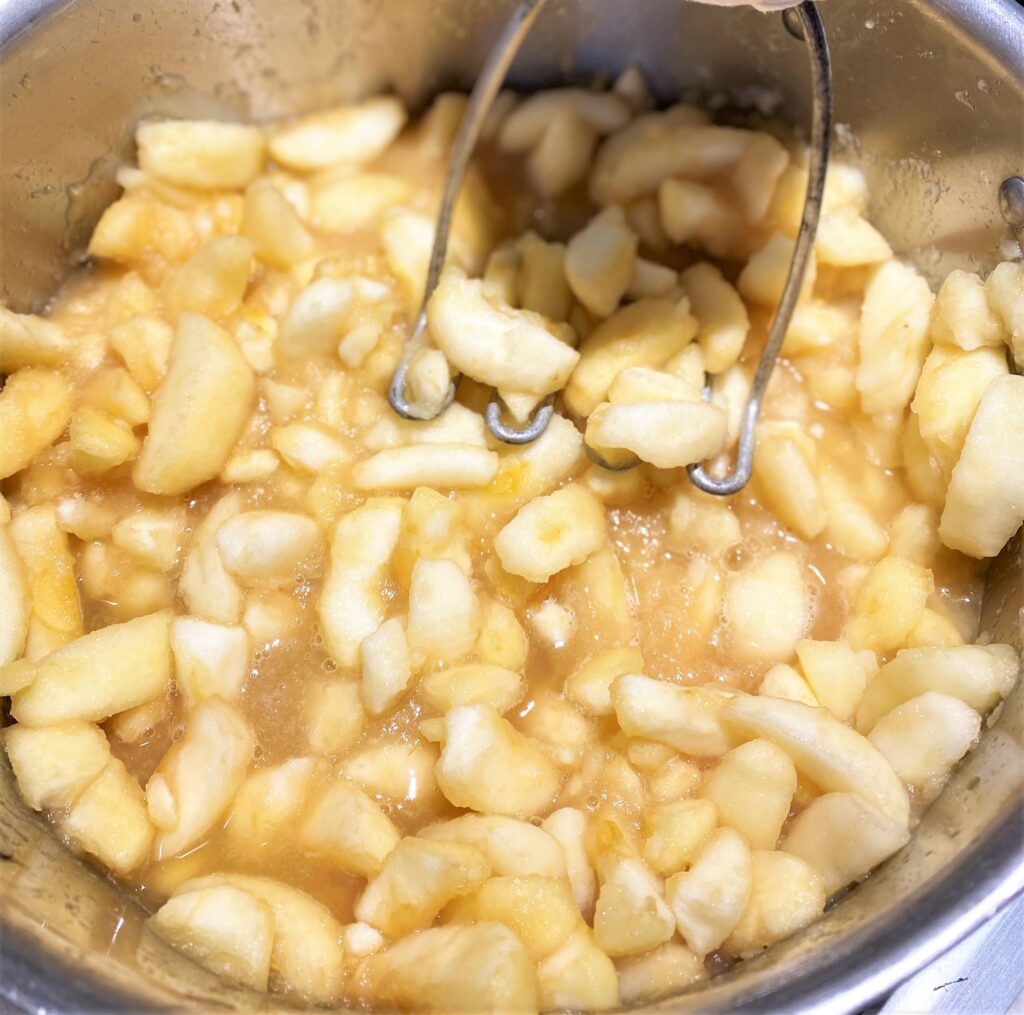
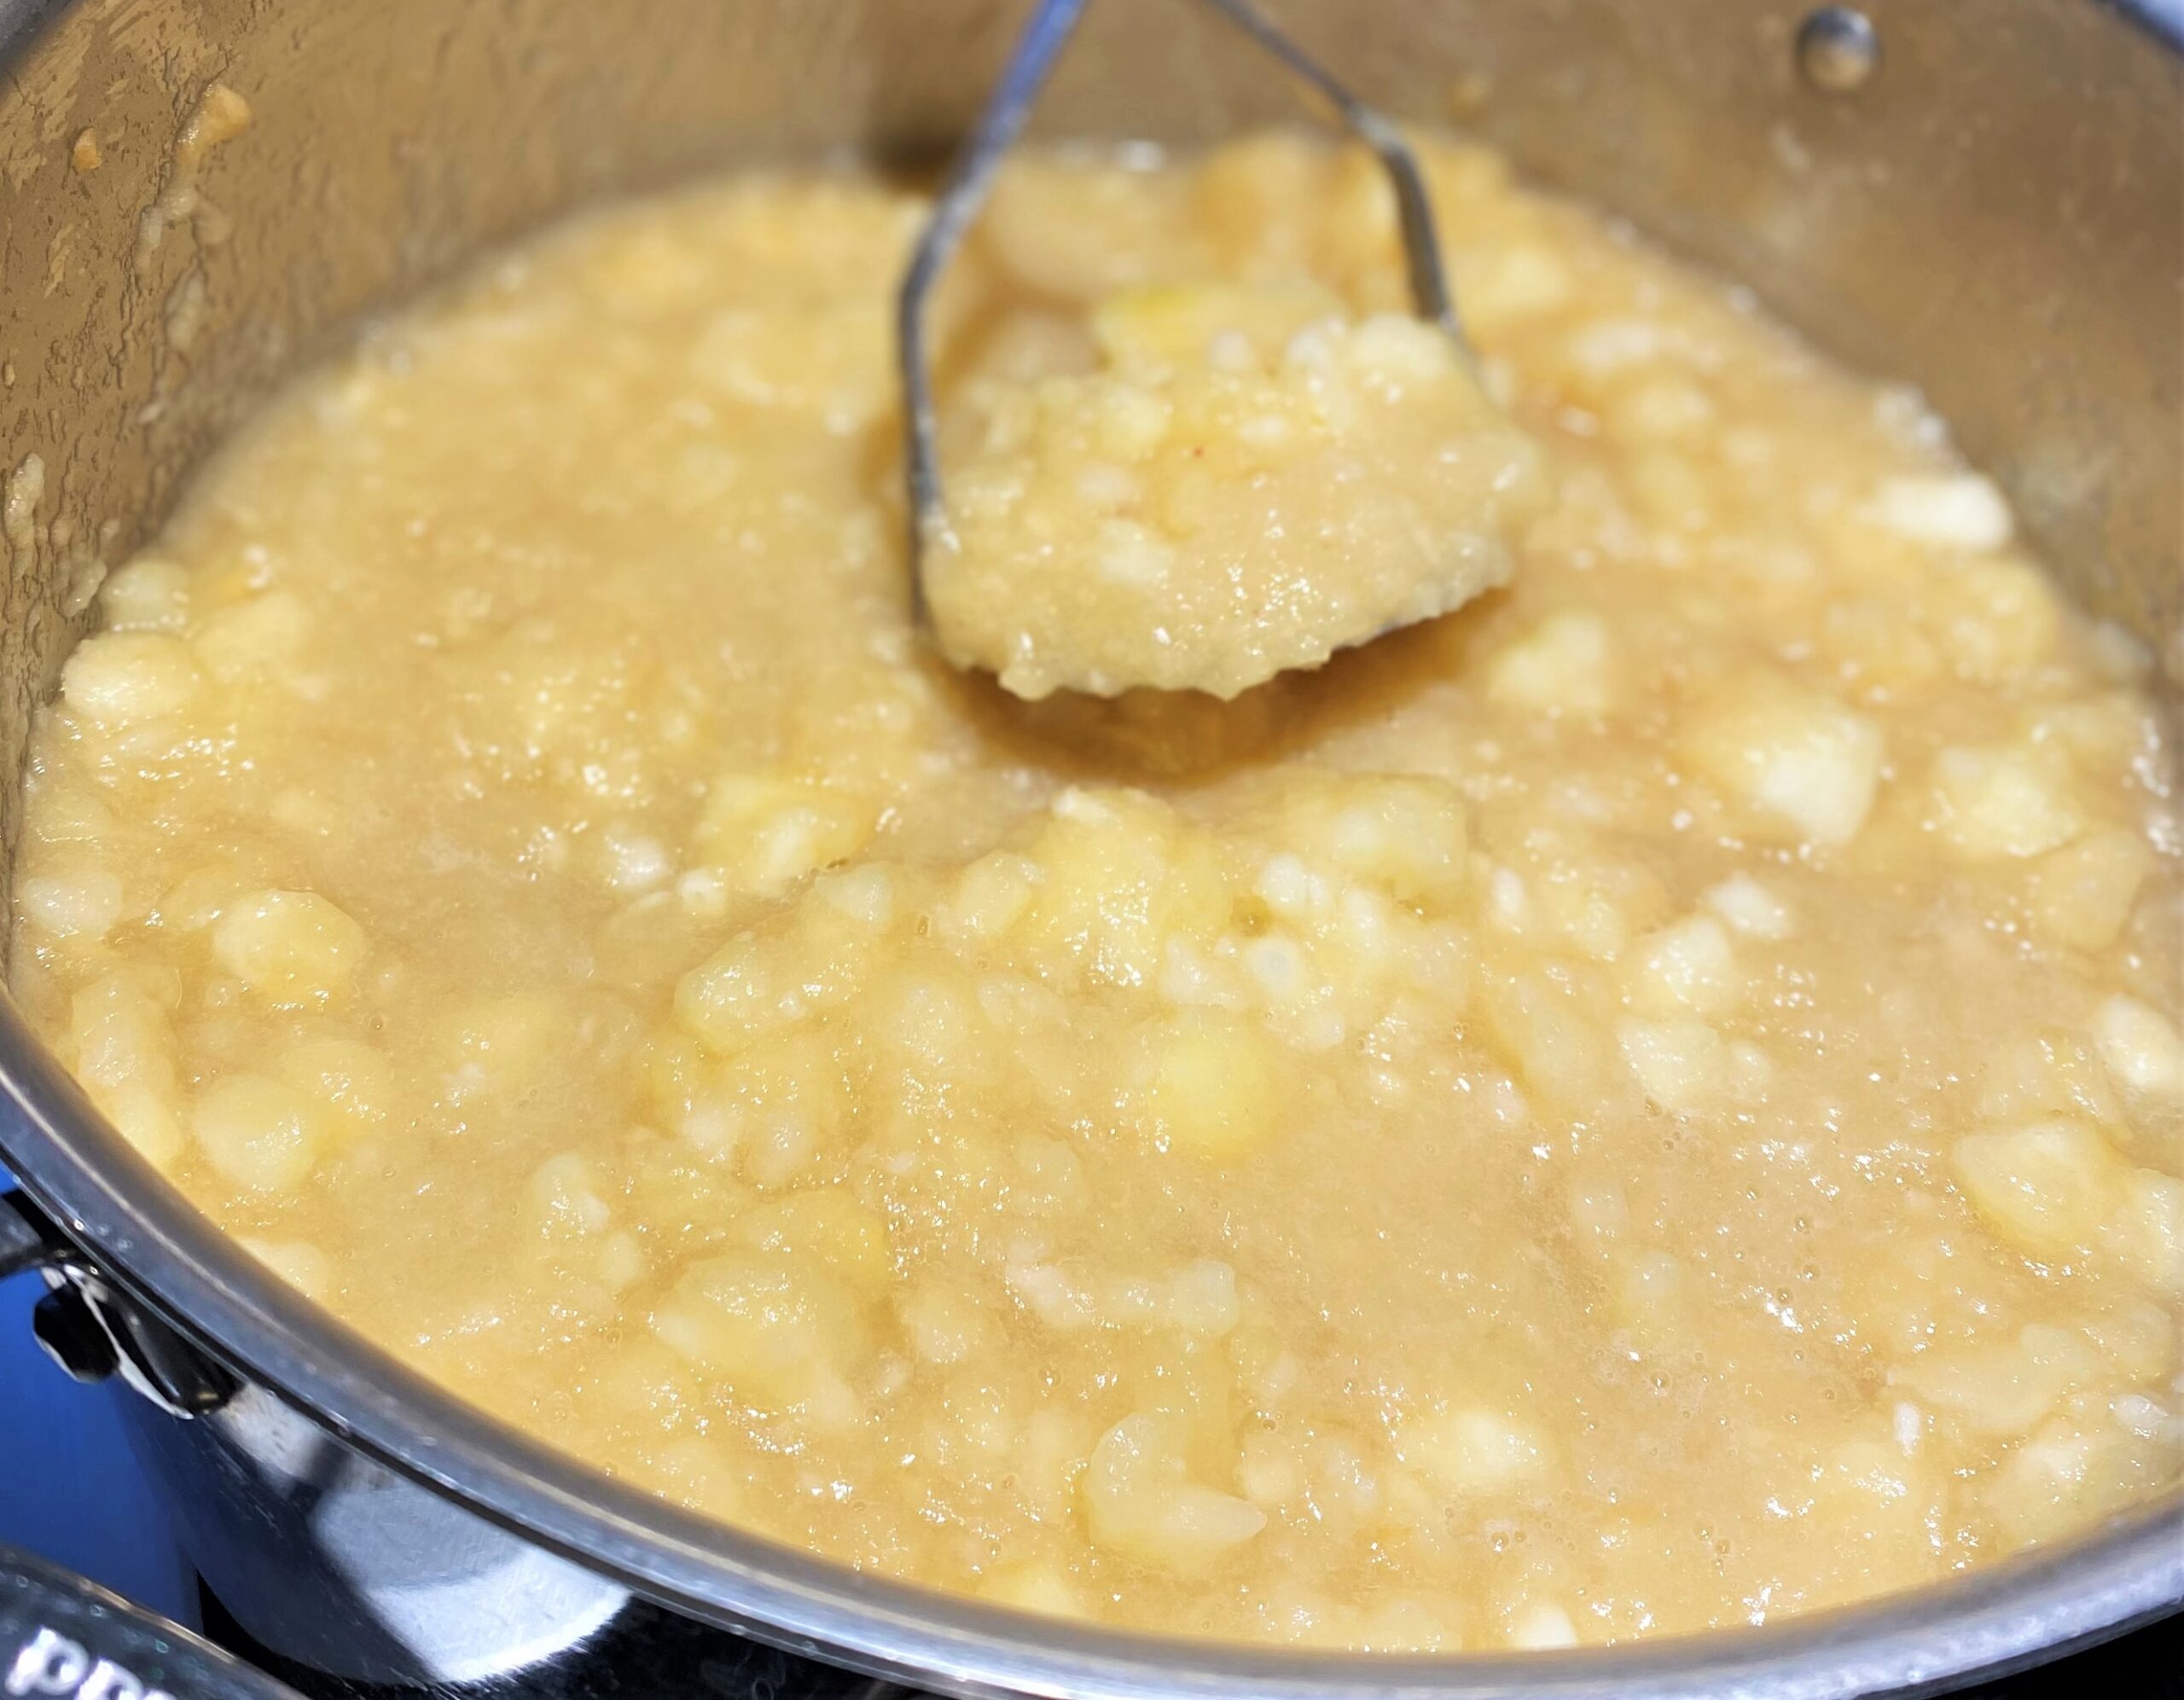
- To make chunky applesauce, which we prefer, we use a potato masher and mash to get the consistency that you want. Again, we prefer our applesauce with some larger chunks of apples remaining in the sauce.
- If you prefer a smoother texture to your puréed applesauce. Use a food processor or regular blender on a medium speed, or even an immersion blender, to blend the sauce to a smooth consistency.
- Once blended return to the 6 quart large pot and continue cooking.
Third Step
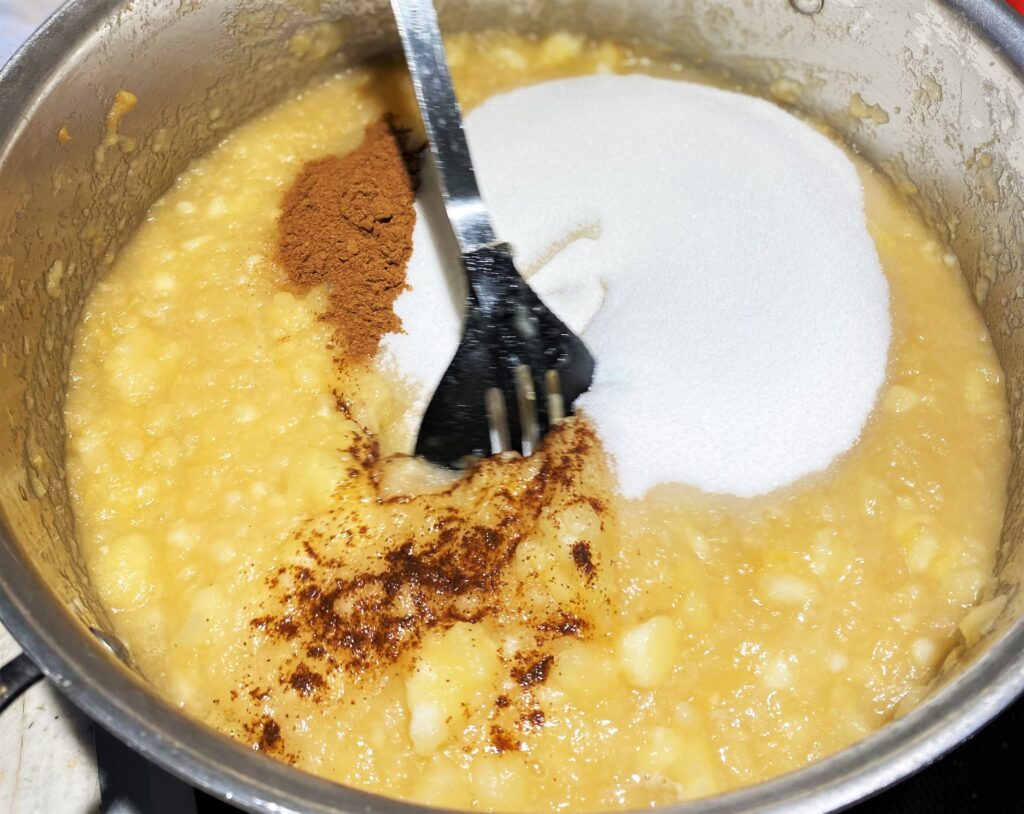
- Once the sauce has reached the desired consistency mix in sugar, cinnamon and dash of cloves.
- Over medium high heat bring the homemade apple sauce mixture to a boil.
- Reduce heat to low and let applesauce simmer for 20 to 30 minutes.
- Taste test the flavor after 15 minutes. At this point you can add any additional spices, if desired.
- Applesauce is now ready for canning, serving, or freezing.
- Canning should be done while applesauce is still hot.
- If you decide to refrigerate or freeze then let applesauce cool at room temperature before storing. Once you make your own applesauce you will not go back to store-bought applesauce again.
- We like to drizzle the warm applesauce over vanilla ice cream! It tastes just like apple pie filling. Who can resist?!
What variety of apples are best for Homemade Applesauce
We love to use Gravenstein apples for our applesauce. The fruit has a tart flavor and is excellent for cooking. It is only available during it’s growing season and does not keep well. For this reason we also use another kind of apple when they are not available.
Here are a few apple varietals we recommend because they work well for cooking and baking, and they are available almost everywhere.
These apples are perfect baking and cooking apples, because they are crisp and tart with a hint of honey. They cook down easily which makes them ideal for baking, cooking into applesauce, or pressing into cider.
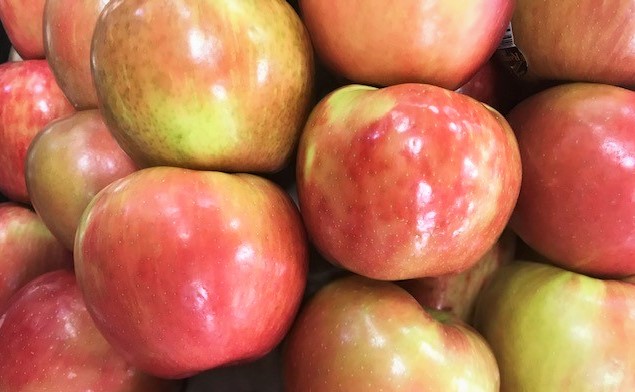
- Honeycrisp – These apples are crisp, juicy with a sweet tart flavor. They are ideal for baking and applesauce.
- Gala – Among some of the best apples to use for applesauce and cider. These apples have a milder flavor, and are crisp, but sweet.
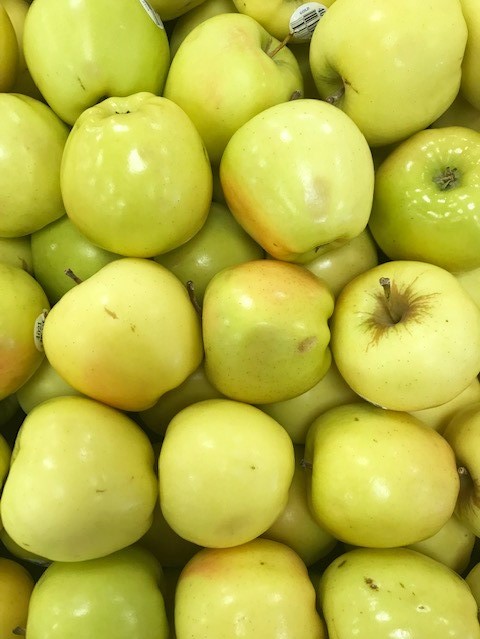
- Golden Delicious – This varietal is the best overall cooking and baking apple. With a mild rich flavor it still adds the sweetness you want in a cooking apple.
How can you store Homemade Applesauce?
There are several simple ways to safely store Homemade Applesauce:
- Refrigerate: Applesauce can be refrigerated in an airtight container or mason jar for a week to 10 days. Stir well before serving.
- Freeze: You can freeze applesauce in airtight containers or bags. Make sure you leave room for expansion at the top of any container. Applesauce will keep well frozen for 8-10 months. Once frozen you will need to thaw the applesauce. Simply remove container from the freezer and place in the refrigerator for a few hours or overnight.
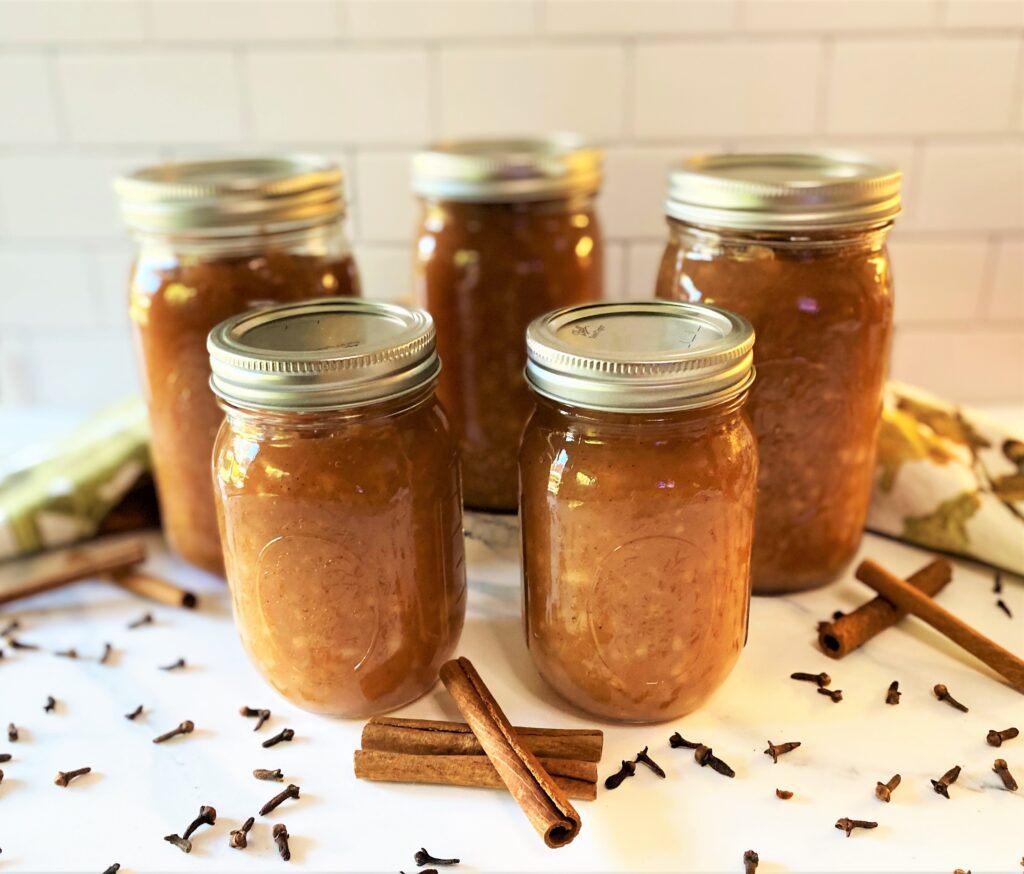
- Water Bath Canning – We use glass mason jars for canning. Once canned you can safely store applesauce up to 18 months. Never tried Water Bath Canning? It’s a super fun project and easier than you think. Hop on over and read our Printable step-by-step guide to canning.
Check out our step-by-step method for Water Bath Canning
Looking for more Fall favorites?
- Cinnamon Baked Pears are a cinch and the perfect Fall snack
- Easy Apple Crisp Recipe is a great way to use up those extra apples!
- Pear and Walnut Cake Recipe bring warm fall flavors together
- Cherry Almond Muffins are perfect for breakfast or a quick snack
- Don’t forget to jump start your day with our Pumpkin Spice Latte

Homemade Applesauce Recipe
Ingredients
- 6 pounds whole apples Weight before peeling and coring
- 1 cups apple juice or cider
- 1½ cup sugar
- 2 tsp cinnamon
- 1 dash clove
Instructions
- Throughly rinse the apples and pat dry.
- Peel and core each apple. Because we are peeling numerous apples my family used an automatic peeling machine.
- After the apple is peeled and cored place the pieces in a water bath with a fruit fresh produce protector added to the water. This keeps the fruit from browning and will protect the flavor while you continue preparing the rest of the apples.
- Drain water off apples and place them in a 5 quart cooking pot.
- Pour in apple cider or juice.
- Cook on low heat until apples are soft and easy to mash. This takes about 15-20 minutes.
- To make chunky applesauce we use a potato masher to get the consistency that we like. We prefer our applesauce with larger chunks of apples remaining in the sauce.
- For have smooth pureed applesauce use a blender on a medium speed to blend the sauce to your preferred consistency. Then return to pot and continue with cooking.
- Once the sauce has reached the desired consistency add in sugar, cinnamon and dash of clove.
- On medium high heat bring to a boil.
- Reduce heat let applesauce simmer for 20 – 30 minutes.
- Taste test after 15 minutes, At this time you can add any additional spices, which is optional.
- Applesauce is now ready for canning or freezing. Canning can be done while applesauce is still hot. If you decide to refrigerate or freeze let applesauce cool completely before storing.
Nutrition
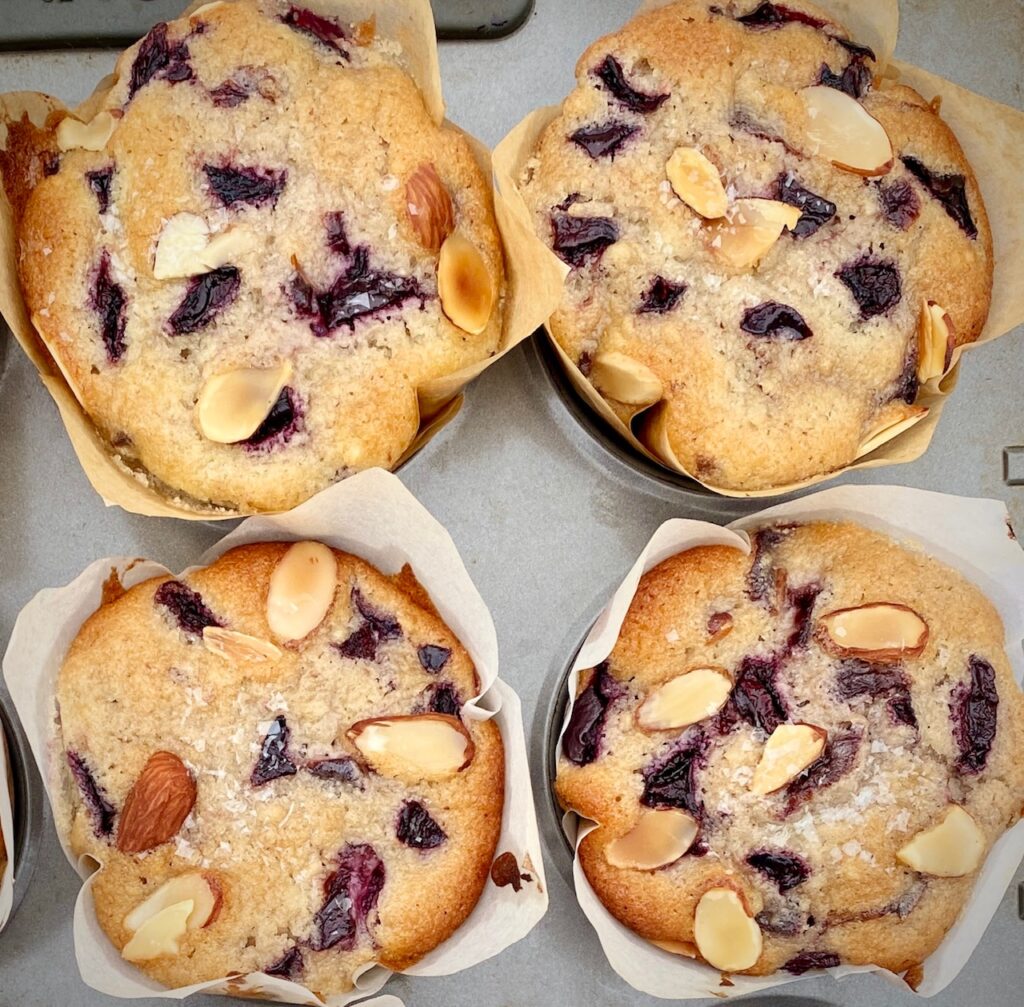
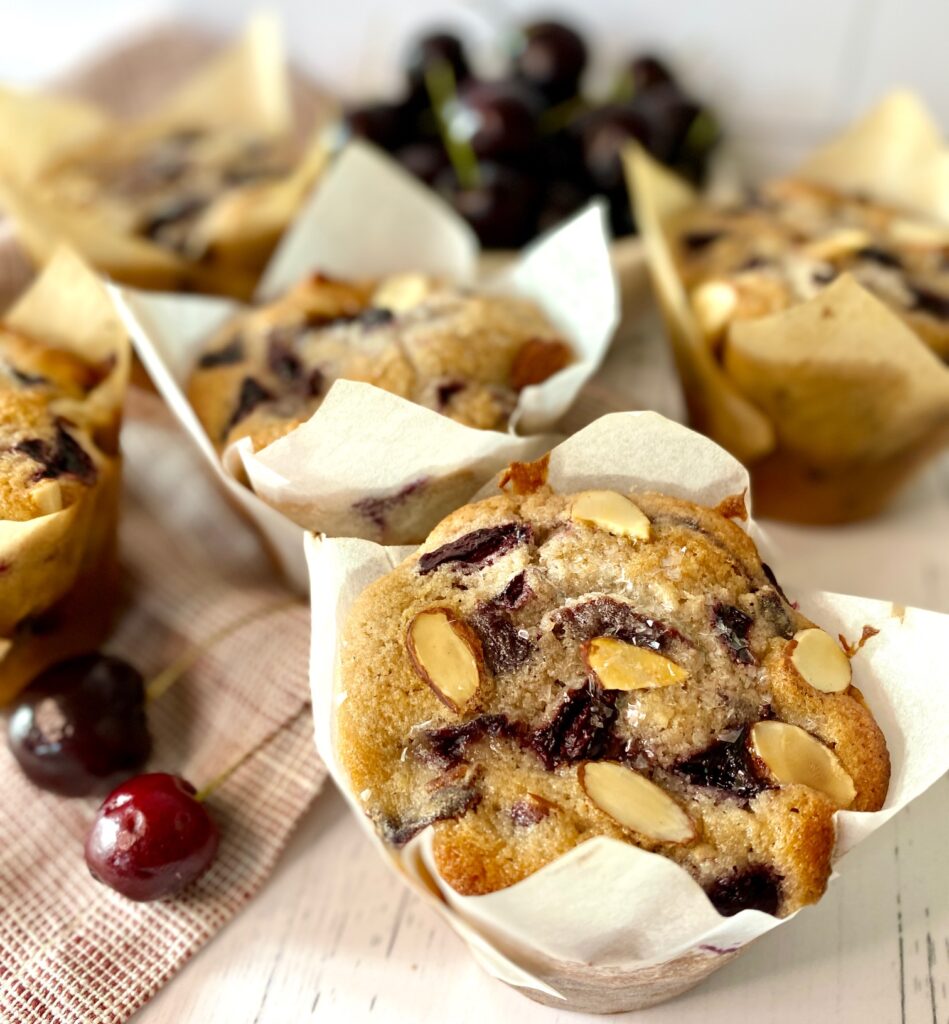
These beautiful muffins are loaded with juicy cherries because everyone loves getting a little cherry in every bite. Almonds and cherries are a well-known match and these delicious cherry almond muffins prove it!
We added a bit of almond extract to the muffin batter and some slivered toasted almonds to the top for a perfect delicious pairing of flavors. The muffins will have you longing for a cherry tree in your backyard.
This post may contain affiliate links. Please see our affiliate disclosure for more details.
Ingredients for Cherry Almond Muffin
The exact ingredients and directions are at the bottom of this post in the printable recipe card.
- Butter – we use unsalted, you can use salted and omit the added salt in the ingredient list
- Sugar – both regular sugar and an optional sprinkling of demerara sugar on the top
- Almond Extract and Slivered Almonds – the extract can be swapped for vanilla and chopped almonds can stand in for slivered
- Eggs – 2 eggs are our binder
- Flour – all-purpose flour works best
- Baking Powder – this is what gives our muffin a tall rise
- Salt – a little bit to balance the sweet flavors
- Cardamom – this is optional, but recommended if you have it on hand
- Whole Milk – or sub in buttermilk for a little tang
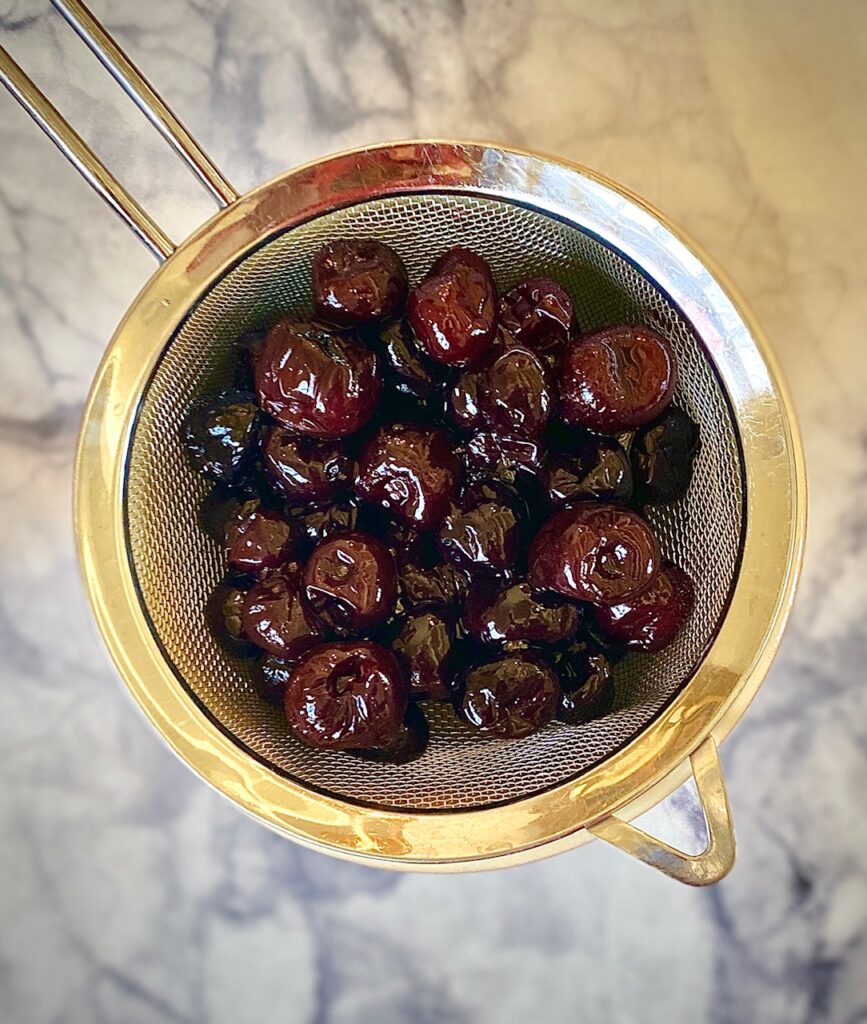
- Cherries – we use frozen dark sweet cherries but tart cherries or sour cherries are a delicious option, as well as fresh cherries (fresh cherry season is May-August in the U.S.)
Also needed:
- Muffin Tins, Muffin Cups, or Muffin Pan – we used a standard 12-cup muffin tin
- Muffin Liners – optional but paper liners will make clean up a breeze

How to make Cherry Muffins:
PREP:
- Preheat the oven to 375˚F. Line your muffin tins with liners or generously grease each muffin cavity.
- Lightly toast the almond slivers (or chopped almonds) in a dry skillet until just fragrant and set aside to cool.
- Cherries: if using frozen, thaw, drain, and roughly chop into quarters. If using fresh, remove stem and pit, and chop (see below for more info on fresh vs. frozen cherries)
- In a large bowl cream the room temperature butter and sugar until light and fluffy, which will take 3-5 minutes (Photo # 1)
- Beat in the almond extract, and add the eggs one at a time. Lightly mix until blended (Photo # 2)


- In a separate bowl sift all the dry ingredients together – flour, baking powder, salt, and cardamom
- Add 1/3 of the flour mixture into the butter mixture along with 1/3 of the milk.
- Blend gently and continue alternately adding all the milk and flour until all is added and evenly combined
- Do not over-mix the muffin batter – this is important for creating a light fluffy muffin (which we all love!). The batter will be thick
- Gently fold in the chopped cherries and lightly blend by hand

BAKE:
- Spoon the batter evenly into the muffin tins until it reaches almost the top of the liners
- Sprinkle a little demerara sugar and slivered toasted almonds on tops of the muffins
- Bake for about 22-25 minutes or until muffins are springy when touched
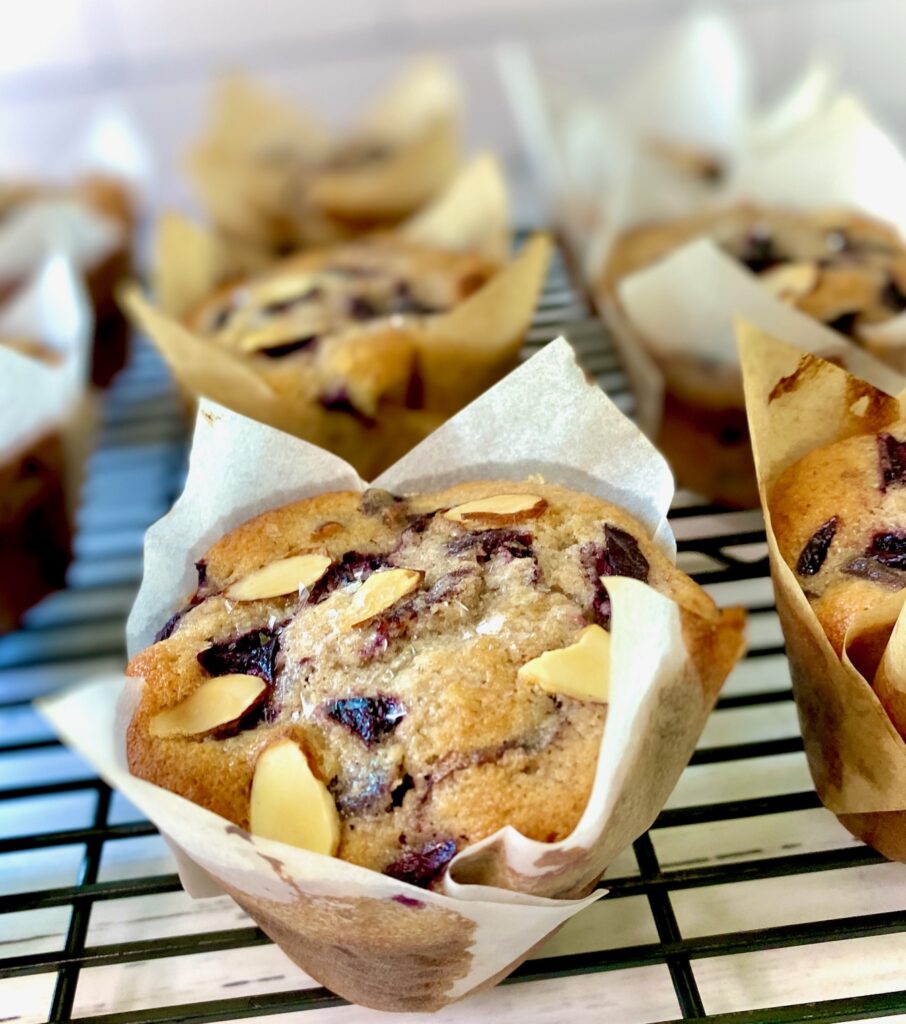
- Let cool in pan for 5 minutes and then remove to a wire rack to finish cooling

The secret to great muffins
We’ve all had over-baked dry muffins. No thanks! There are a few simple tricks to making moist muffins that turn out delicious, light, and fluffy! These tips are also recommended when making pancakes, waffles, and quick breads.
- Start with room temperature ingredients – butter, eggs, milk
- Mix wet ingredients and dry ingredients in separate bowls before combining
- Add the dry ingredients to the wet ingredients and DO NOT over mix – this is critical because you do not want to overwork the gluten that’s in the flour
- Add your fruit last and gently fold it in by hand so that everything is just combined
- Line your muffin tins – it really makes everything easier! We love to use a variety of interesting muffin liners and one of our favorites are the parchment tulip liners like the ones in our photos
- Fill the liners evenly – we use an ice cream scoop to make it easier
- Don’t overfill the liners or the muffins won’t rise properly
- Bake immediately
Are Fresh or Frozen Cherries better?
- The simple answer is – both are good!
- If fresh cherries aren’t available in the grocery stores or at farmers markets (or aren’t in season) then choose a quality bag of frozen fruit.
- We used frozen, thawed, organic cherries for this cherry muffin recipe. We roughly cut the pieces into quarters.
- Most fruit is flash-frozen right after being picked to maintain peak freshness. In some cases, frozen fruit is preferred over the fresh variety because it is frozen immediately upon picking.
- If you are trying to save a little time frozen is a great option for cherries because they are already pitted. If you are using fresh then a cherry pitter is a great time saver.
- We’ve used frozen and fresh blueberries in our Blueberry Lemon Scones with equal success, and this is true for most scone or muffin recipes.
Chefs Pro Tip
- If using frozen cherries be sure to thaw them in a strainer over a bowl to capture the amazing cherry juice!
- Save the fruit juice for another use because it is truly delicious. Use the juice in mixed drinks, as part of a vinaigrette, or as flavoring added to cakes and other sweets.
How do you know when muffins are done baking?
- Every oven cooks a little differently so the best and easiest test to determine if muffins are ready is to insert a toothpick into the center of one of the muffins. If it comes out clean or with a few small crumbs clinging to the toothpick then the muffins are done.
- If you have an instant-read thermometer the internal temperature of baked muffins should be 200-205˚F.
How to store Cherry Almond Muffins:
- Let cool completely
- Line an airtight container with paper towels (this will help absorb any moisture), add muffins, and seal the container
- Store at room temperature for up to 4 days
- Do not refrigerate muffins – this will dry them out quickly
- You can easily freeze muffins. Store in a resealable freezer bag or container for up to 3 months. Let them come to room temperature before eating.
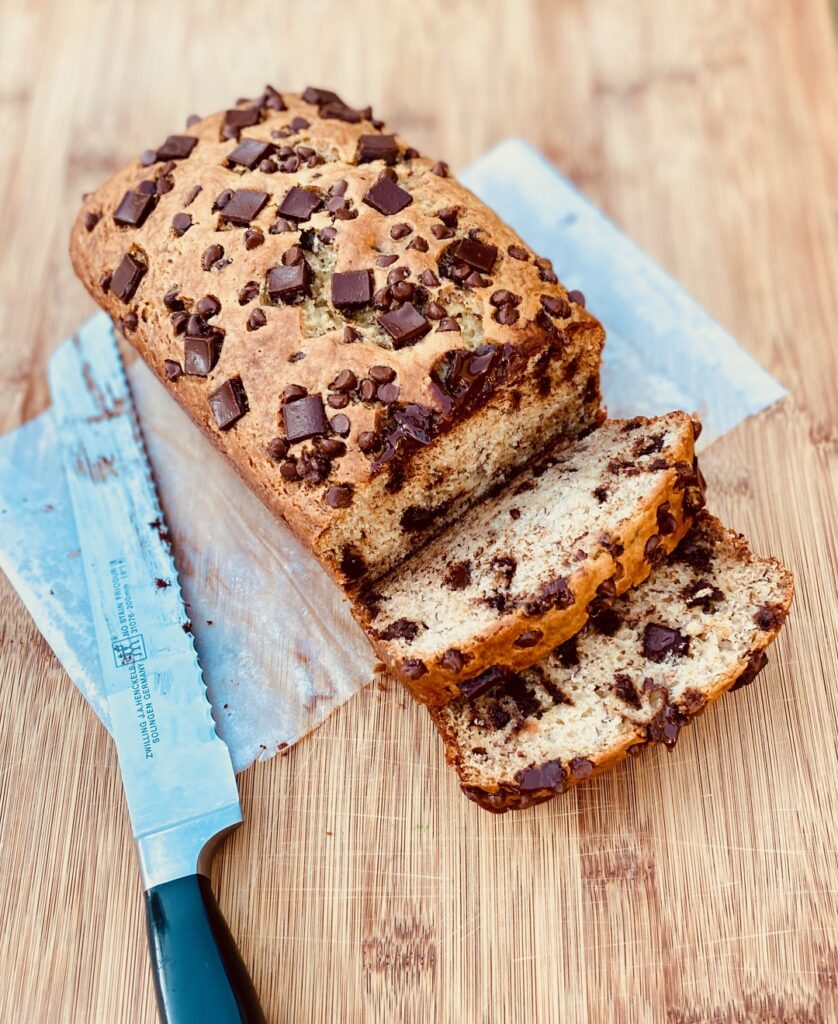
- These storage tips also work well with quick breads such as our Buttermilk Banana Bread, Easy Zucchini Bread, Pumpkin Bread, and Blueberry Apple Bread
Substitution ideas and tips:
- Any berry or stone fruit works well in place of cherries – try blueberries or cranberries
- Substitute buttermilk for whole milk for a nice tangy upgrade
- Try adding pecans instead of slivered almonds, or use 2 Tablespoons of chopped almonds to the muffins
- Vanilla Extract works in place of almond extract if needed. Have you tried our 2-ingredient easy homemade Vanilla Extract yet?
- Make 6 Jumbo Muffins or 24 Mini Muffins with this recipe
- Toss in some mini chocolate chips or chunks to make Chocolate Cherry Muffins. Cherries and chocolate are a naturally delicious pairing
- We made this successfully with 1:1 Gluten-Free baking flour (do not use all-purpose gluten-free flour). No other substitutions are needed.
- Sprinkle some Demerara sugar on top of the muffins before baking for an extra sparkly top. Demerara sugar is a large granule sugar that provides a nice, crunchy texture in baked goods.

Cherry Muffins with Almonds
Equipment
- Muffin tin
Ingredients
- 4 ounces butter, softened (8 Tablespoons)
- 1 cup sugar
- 1 Tablespoon almond extract
- 2 eggs
- 8 ounces Flour (2 cups)
- 2 teaspoons baking powder
- 1 teaspoon salt
- ½ teaspoon cardamom (optional)
- ½ cup whole milk
- 2 cups cherries, fresh or frozen drained, pittted and roughly chopped
- 2 Tablespoons toasted slivered almonds
- 2 Tablespoons Demerara sugar or regular sugar (for tops of muffins)
Instructions
- Preheat the oven to 375°F with the rack in the middle of the oven.
- Lightly toast the almonds slivers in a dry skillet and set aside.Lightly grease a 12-well muffin pan, or line with paper liners.
- In a large bowl cream the butter and sugar until light and fluffy, about 3-5 minutes.
- Beat in the almond extract and then the eggs, one at a time, until blended.
- In a medium bowl whisk together the flour, baking powder, salt, and cardamom.
- Add 1/3 of the flour mixture into the butter mixture with 1/3 of the milk, blend lightly and continue adding alternately until all flour and milk is combined.
- Fold in the chopped cherries and blend by hand until combined.
- Spoon the batter into the muffin tins until it reaches almost the top of the liner or tin. Sprinkle a little of the sugar and slivered almonds on the top of each muffin.
- Bake for about 22-25 minutes or until muffins are springy when touched. Let cool in pan for about 5 minutes and then remove to a cooling rack to finish cooling
Notes
- Muffins can be stored, sealed, at room temperature for about 3-4 days
- If freezing: tightly sealed in a freezer-proof container or bag for up to 3 months. Thaw at room temperature.
- Do not refrigerate muffins – this will dry them out quickly
Nutrition
This simple recipe is a nostalgic beverage and is one of the all-time favorite coffee flavor drinks. The best way to enjoy one is to grab a seat at the Buena Vista Café in San Francisco
Sipping a frothy Irish Coffee, with the Golden Gate Bridge in the background, well, it just doesn’t get better than that!
Our single memory of this became the inspiration for this post, along with the fact that we both love to brew up these amazing cocktails on a chilly night for friends and family. We could not resist sharing this recipe with you.
This post may contain affiliate links. Please see our affiliate disclosure for more details.

Irish Coffee Recipe Ingredients:
This true Irish coffee drink uses only four ingredients.
These drinks are easy to make and a great addition to brunch or happy hour, and they also make a perfect after-dinner drink. We love to make them on a chilly Fall night or during a winter storm because they are such a cozy drink! It’s the pick-me-up cocktail you will want to make over and over!
Here are the ingredients you will need to make a great cup of coffee:
- Fresh Brewed Dark Roast Coffee – make sure it’s piping hot!
- Irish Whiskey – choose your favorite brand – we have a list below of favorites
- Sugar Cubes – we like the taste and look of raw sugar cubes
- Heavy Whipping Cream – whipped until lightly firm (it’s sometimes labeled heavy cream)

How to make a classic Irish Coffee recipe:
The key ingredient in making an original Irish Coffee is fresh whipped cream. The cream needs to be whipped to just the right consistency so that it will float on top of the coffee. The coffee is meant to be sipped through the cream.
- Prepare your coffee
- PRO TIP: For best results when making the perfect hot drink heat up the cup while preparing the coffee. Make sure the cup is a heatproof glass. Fill the cup with hot water and let it sit, allowing the cup to get hot. Pour out the hot water once you are ready to pour in the drink. The San Francisco Chronicle called these the best Irish Coffee mugs, and they have been used since the early 1940s.
- Use a milk frother to whip the cream until lightly frothed and foamy, but not firm. This will take about a minute to a minute and a half.
- Next, place 2 raw sugar cubes into the warm cup. One cube of sugar is equal to one teaspoon. If you don’t have cubes you can use 2 teaspoons of sugar.
- Pour in hot brewed coffee until the cup is ¾ full.
- Stir the cup and allow the sugar to fully dissolve.
- Add one ounce of Irish Whiskey.
- Gently pour the frothed whipped cream over the back of a spoon into the drink. Allow cream to spill over the edges of the spoon. This will allow the cream to float on top of the coffee.


The milk frother we used in this recipe is the affordable Aerolatte Milk Foamer.
Choose a great Irish Whiskey to use in Irish Coffee
As you would assume, Irish Whiskey comes from the country of Ireland. The word Whiskey comes from the Irish word “Gaelic”, which means “water of life”. At one time in history, it was the most popular spirit in the world. In the United States, Jameson has become the Irish Whiskey of choice.
The process to make Irish Whiskey begins with a yeast fermentation mash of corn, wheat, and barley and is distilled three times. This extra step in the distilling process makes for a lighter smoother finish on the palate.
Depending on the process used to make the whiskey the end product can have overtones ranging from spicy to fruity. You will want to choose a whiskey whose flavor profile does not overpower your drink.
You will find many great Irish Whiskey brands on the market. We used Tullamore Dew Whiskey in this recipe, but we also love Jameson Irish Whiskey, which we used in our Irish Cream Liqueur (which you’ll love because it tastes just like Baileys!).
Here are a few we recommend:
- Tullamore Dew Irish Whiskey – a classic that is used at the original Buena Vista
- Jameson Irish Whiskey – it’s a classic at a great price point
- Bushmills Irish Whiskey – has a spicier edge
- Green Spot Irish Whiskey – has a fruity flavor
Enjoy these additional delicious drinks on our site:
- Pumpkin Spiced Latte
- Homemade Irish Cream liqueur
- Homemade Bloody Mary Mix
- Classic Bellini Cocktails


Irish Coffee Recipe
Equipment
- One milk frother
Ingredients
- 2 cubes raw sugar
- 6 ounces brewed coffee
- 1 ounce Irish Whiskey
- 2 tbsp frothed whipping cream
Instructions
- Use a milk frother and whip the cream until lightly frothed and foamy, but not firm. This will take about a minute to a minute and a half.
- The first step in making the perfect Irish Coffee is to heat up the cup. Fill cup with hot water, let sit for a few seconds allowing cup to get hot. Pour out water.
- Next place 2 raw sugar cubes into the warm cup. One cube of sugar is equal to one teaspoon. If you don't have cubes you can use 2 teaspoons of sugar.
- Pour in hot brewed coffee until the cup is ¾ full. Give the cup a stir, allowing sugar to dissolve.
- Add one ounce of Irish Whiskey.
- Gently pour frothed whipped cream over the top of a spoon. Allowing cream to spill over the edges. This will allow the cream float on top of the coffee.
Nutrition
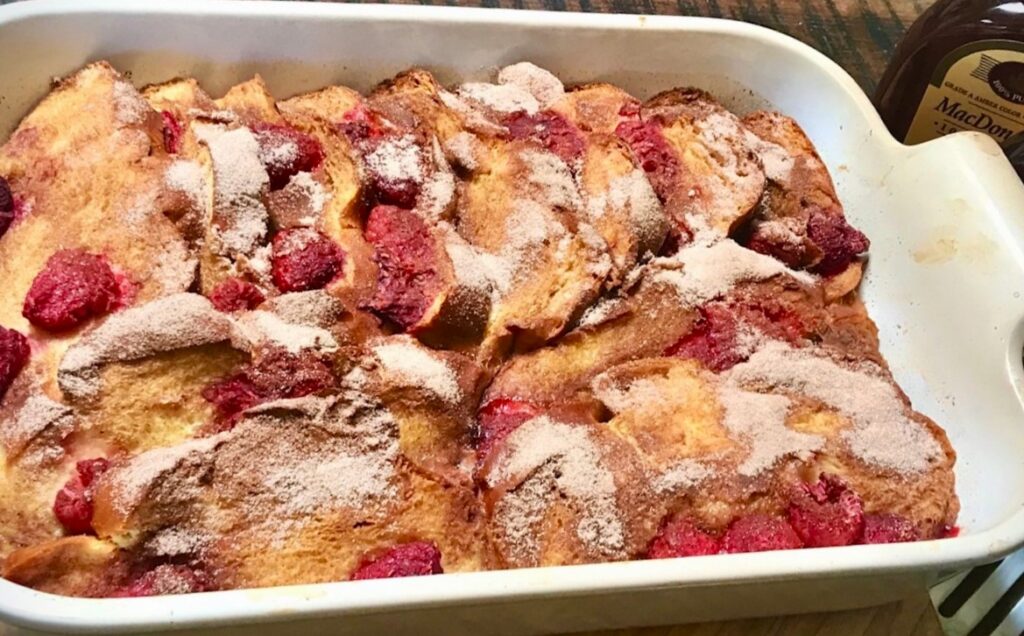
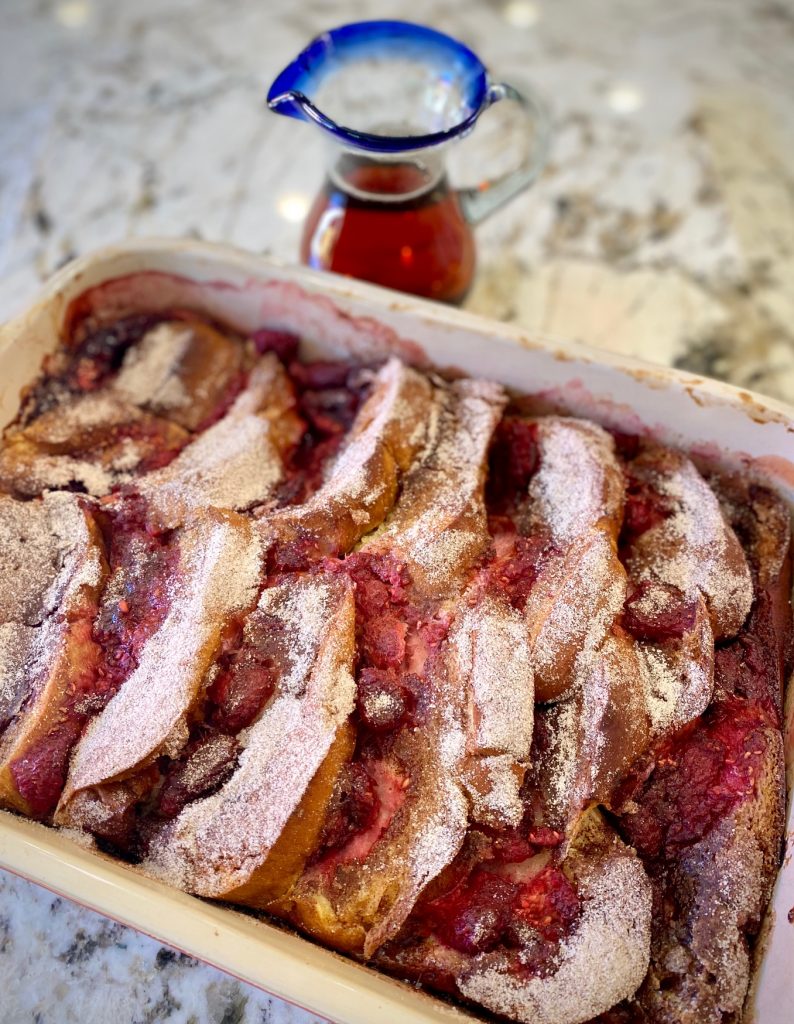
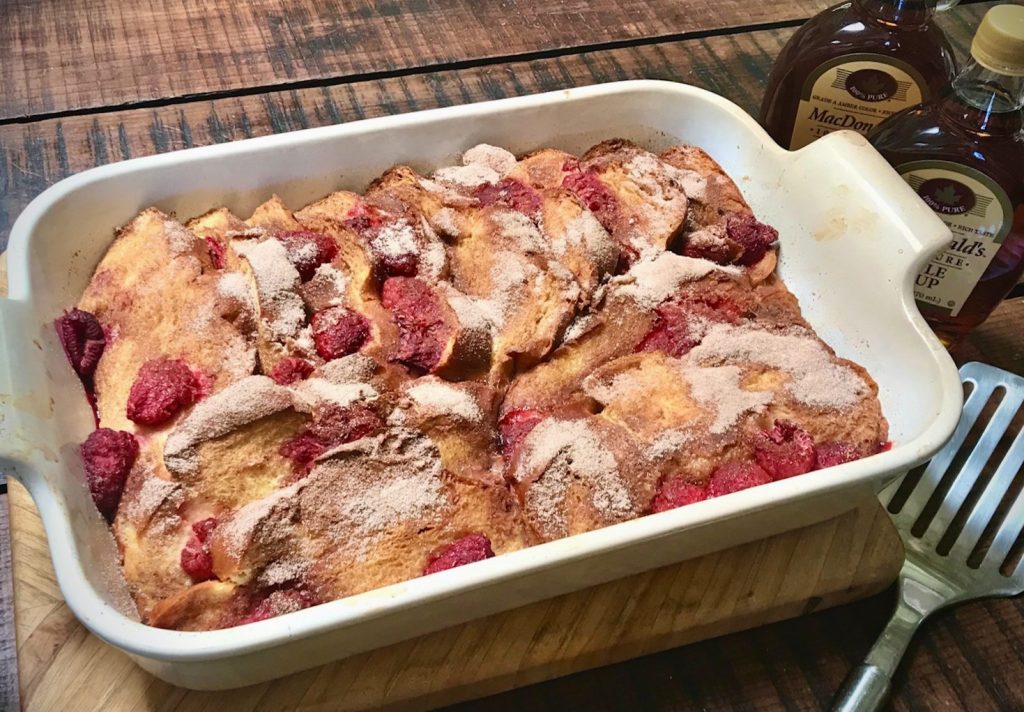
This easy to make French Toast Casserole is amazing for any occasion and especially perfect for a crowd, or brunch, because most of the work can be done ahead of time!
Because this recipe is made early and needs to bake for an hour it allows you time to set your table, cook up some bacon or sausages, and enjoy a Mimosa or Spicy Homemade Bloody Mary with your guests! A win-win in our books!
This post may contain affiliate links. Please see our affiliate disclosure for more details.
French Toast Casserole Ingredients
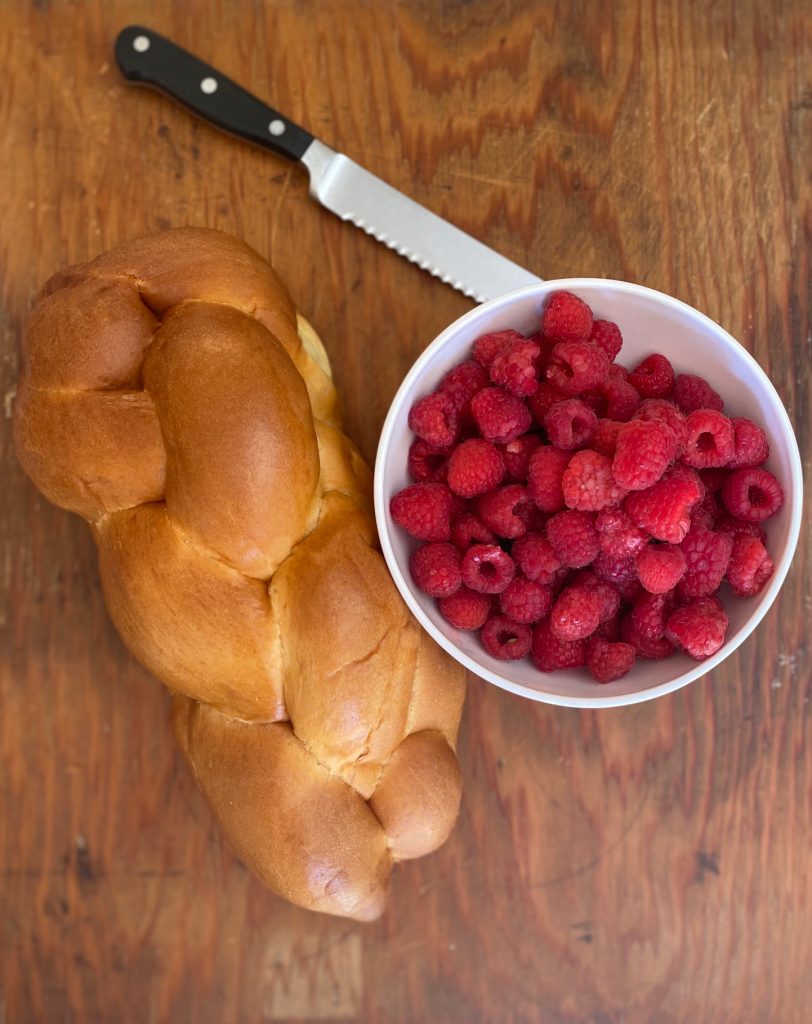
- Challah Bread or Brioche Bread– great bread is the key to this recipe so seek out the best challah or brioche bread you can find. You could also substitute any other thick-sliced bread
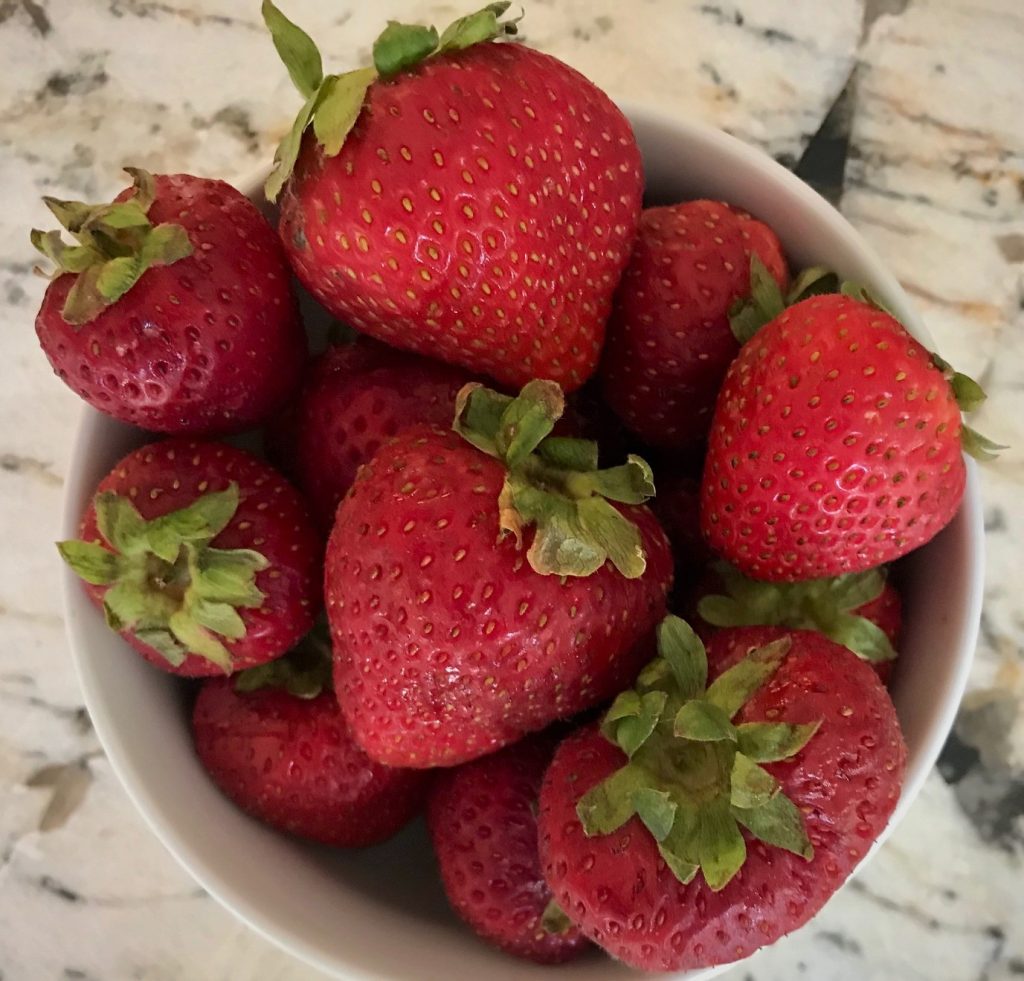
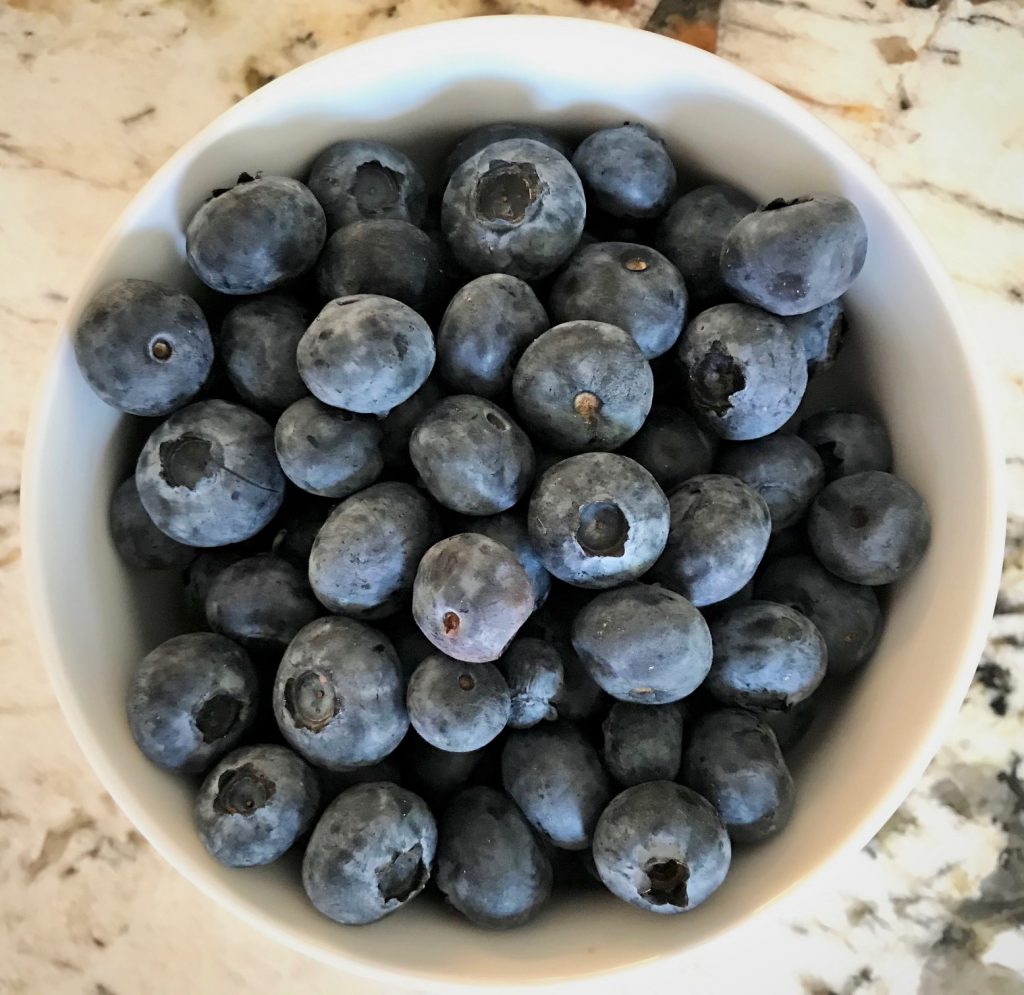
- Fresh Raspberries – strawberries, blackberries, or blueberries will work too. Or try a combo of all of these fruits!
- Eggs – you’ll need 8 whole eggs to create really lovely custardy goodness!
- Vanilla Extract – we love to make our own Vanilla ~ trust us, it’s easy!
- Cinnamon – this is an essential part of any French Toast, and sometimes we add a little more!
- Sugar – this is, after all, a sweet breakfast treat
- Salt – salt helps to balance all the sweet flavors in this recipe
How to make French Toast Casserole
A Step-by-Step Guide:
First Step
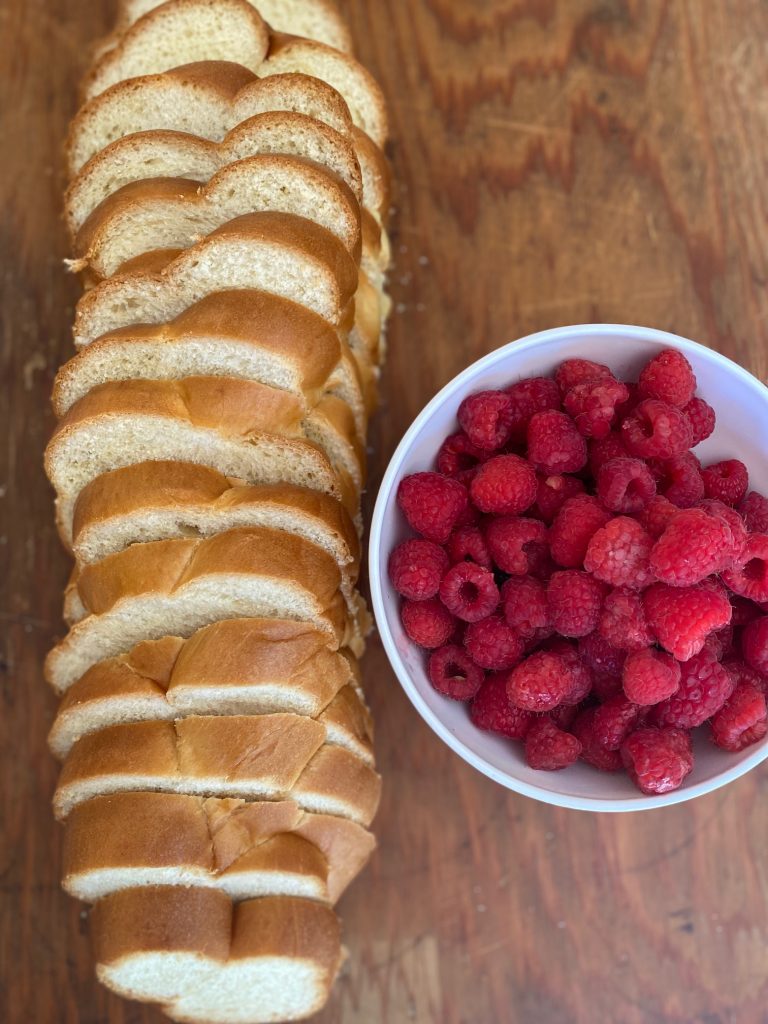
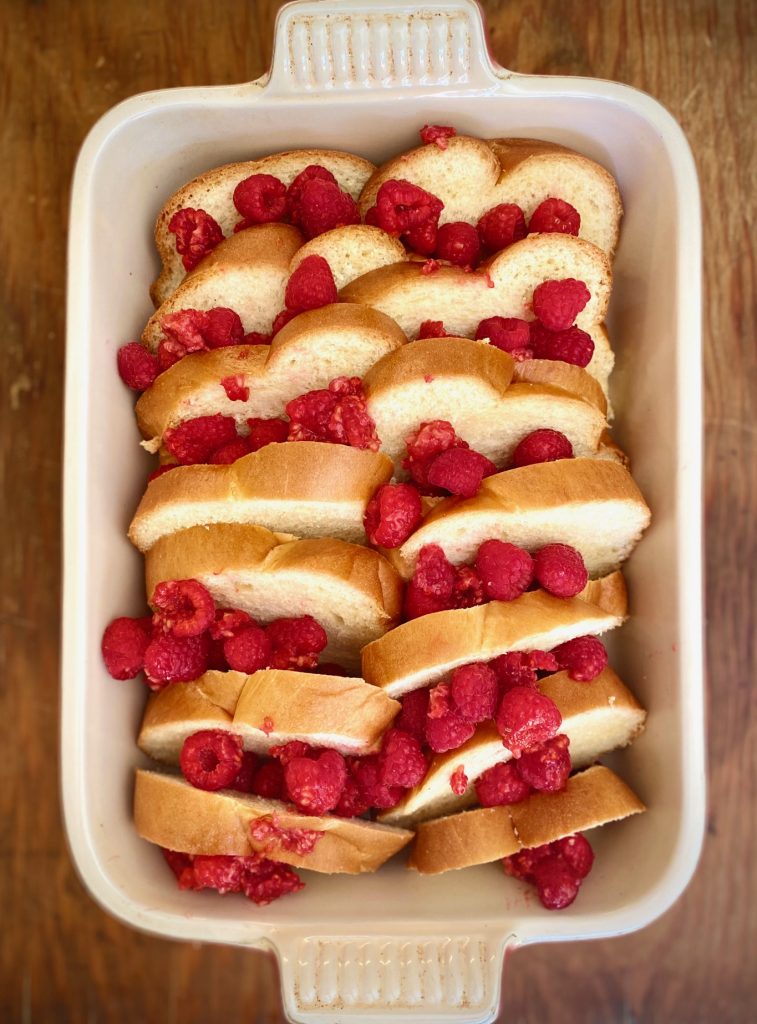
- Cut challah bread into 3/4-inch slices
- Arrange sliced bread in a 3-quart baking dish with overlapping layers
- Place fruit evenly in between each layer
- Spread the remaining fruit over the top

Second Step
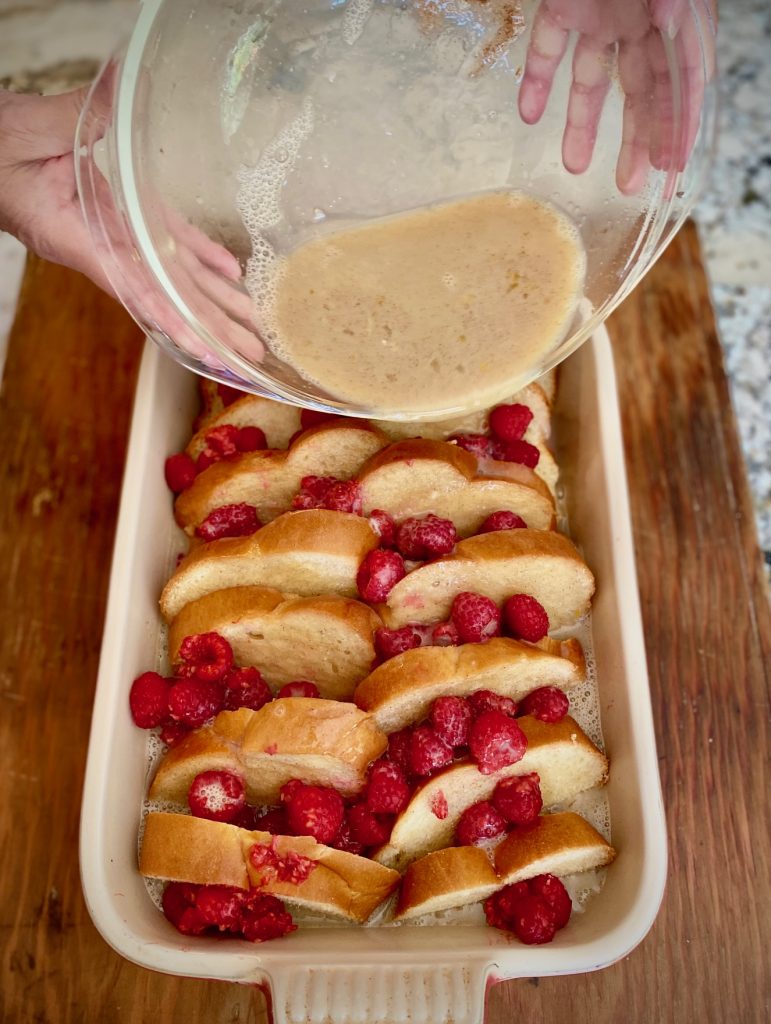
- In a large mixing bowl combine 1/2 cup of sugar, 2 teaspoons of cinnamon, and the salt, and whisk to blend
- Add eggs, milk, and vanilla extract and whisk again to combine completely
- Pour the mixture evenly over the bread and fruit
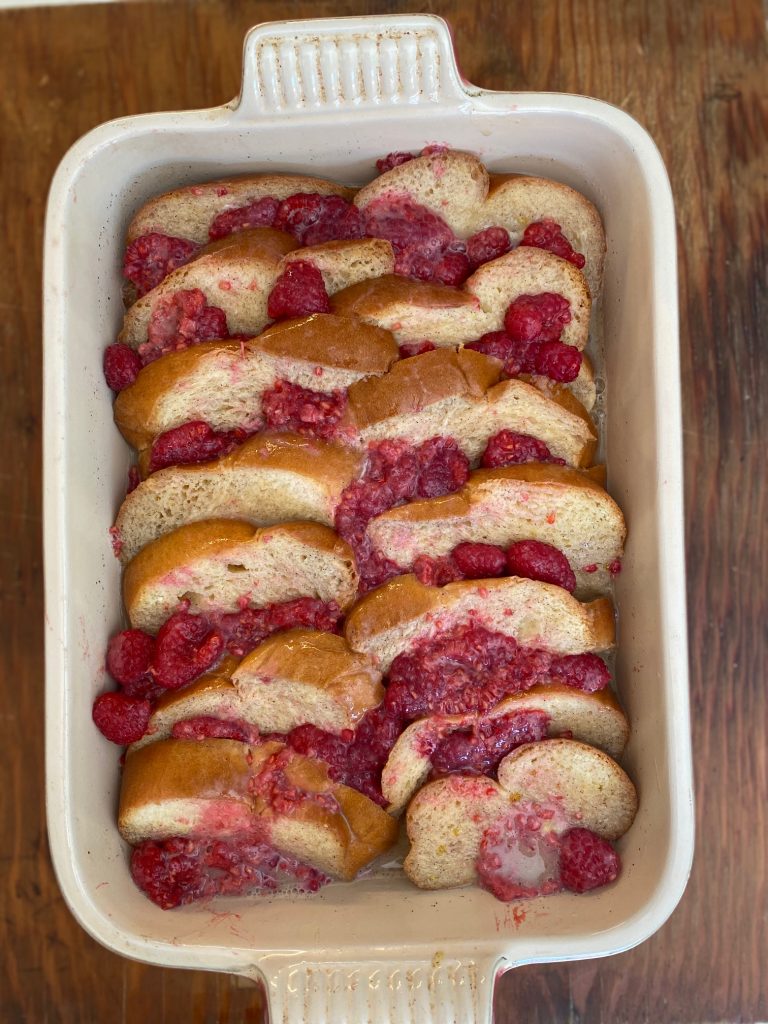
- Press down on the bread and fruit to submerge it in the egg mixture
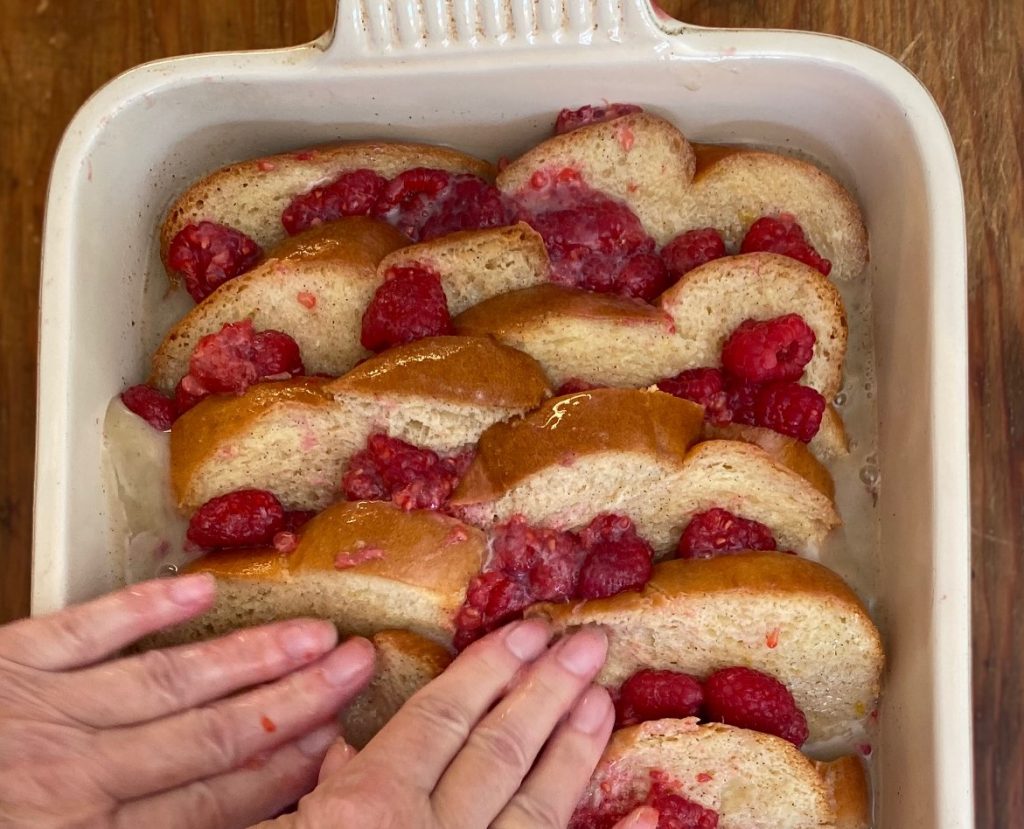
- Allow the French toast to rest, at room temperature, for 1 hour
Third Step
- Preheat oven to 350° F
- Mix 1/3 cup of the remaining sugar and 1 teaspoon of the remaining cinnamon
- Evenly sprinkle over the top of the French toast

- Bake for 1 hour. The casserole should be golden brown on the top
- Rest for 10 minutes prior to serving to allow the custard to settle
- Serve with warm maple syrup
Delicious variations for French Toast Casserole
This sweet breakfast favorite will be the hit of your next gathering. It’s an easy, fun recipe with lots of room for variations.
One of the best things about this breakfast bake is all of the flavor variations you can try! Here are just three of our favorites:
- Use blueberries, blackberries, or strawberries for the fruit
- Instead of maple syrup drizzled on top try it with any fruit syrup or sift some powdered sugar on top
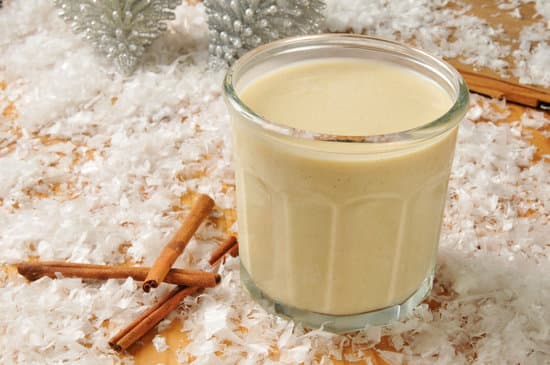
- Replaced the milk 1:1 with egg nog for a delicious holiday twist
Tips and frequently asked questions:
- What caused my French Toast to become soggy?
- Too much milk mixture will prevent the eggs from cooking properly
- If you don’t bake the casserole long enough it can cause the finished toast to be soggy. If it looks at all soupy keep it in the oven longer
- The ideal French toast will be soft on the bottom of the casserole and crisp golden brown on top
- Bread substitute – If you aren’t able to find challah bread we recommend brioche bread as a good substitute
- Warm your maple syrup on the stove or in the microwave before serving. Nothing better than warm syrup!
Fun drinks to serve with your brunch:

Looking for more breakfast & brunch ideas?
- Homemade Fluffy Buttermilk Pancakes
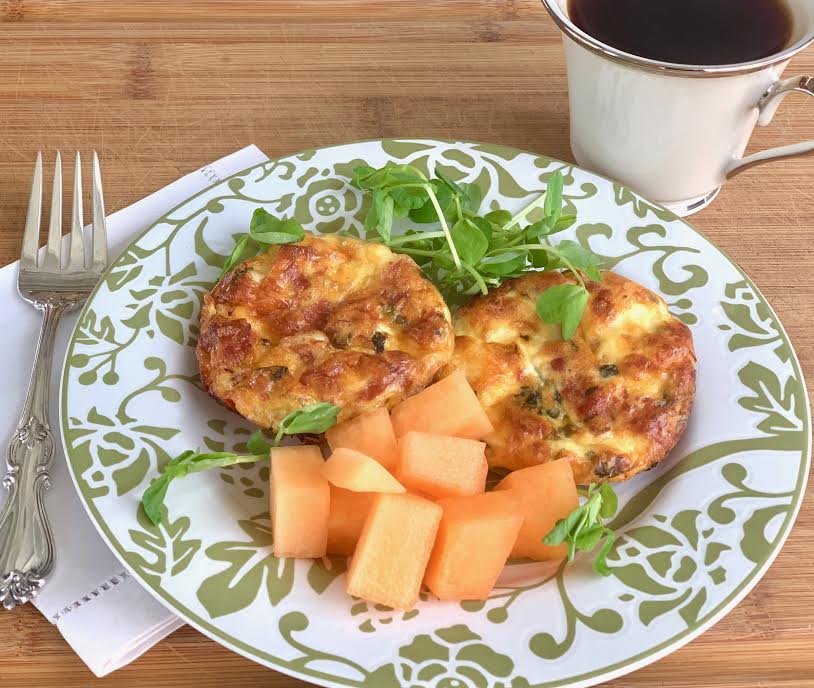
- Crustless Mini Quiche Bites
- Belgian Waffles
- Lemon Blueberry Scones
French Toast Casserole
Equipment
- 9" x 12" Baking Dish
Ingredients
- 1 loaf Challah Bread or Brioche
- 18 ounces Fresh Raspberries, Blueberries or Strawberries
- 8 whole eggs
- 2 cups milk
- 3 tsp vanilla
- ½ cup sugar
- 2 tsp cinnamon
- 1 tsp kosher salt
For Topping
- ⅓ cup sugar – set aside for topping
- 1 tsp cinnamon – set aside for topping
Instructions
- Cut bread into 3/4 inch slices
- Arrange in a 3 quart baking dish with overlapping layers
- Place fruit evenly into each layer and spread remaining fruit over the top
- In a large mixing bowl combine 1/2 cup sugar, 2 teaspoons cinnamon, and 1 teaspoon salt
- Add eggs, milk and vanilla, and whisk thoroughly to combine
- Pour egg mixture evenly over bread and fruit. Press bread and fruit down to submerge in the liquid
- Allow to stand at room temperature for 1 hour
- Preheat oven to 350° F
- Mix remaining 1/3 cup sugar and 1 teaspoon cinnamon together and evenly sprinkle over the top of casserole
- Bake for 1 hour until casserole is golden brown on top
- Rest for 10 minutes prior to serving. Serve with warm maple syrup
Nutrition
It’s fun to plan, easy to do and your guest will rave. Here’s a step-by-step for your next celebration, get-together, brunch, baby or bridal shower.
A complete guide to building your own Mimosa Bar!
Mimosa Bars are a great way to host friends or have a holiday party because the whole bar can be prepared ahead of time. You can let your guests make their own mimosas by choosing their favorite flavors and fruit garnishes. It’s the perfect way to spend a weekend morning!
Ready to get started? Just click on our “JUMP TO RECIPE” button below. For tips, processes, and substitutions keep reading. This post may contain affiliate links. Please see our affiliate disclosure for details. We only recommend products to you that we love ♥️ and use.
Jump to RecipeWhat you need to set up a perfect Mimosa Bar:
- A variety of cold fruit juices/purees – 4 flavors are ideal – Orange juice is a crowd favorite so consider having double the orange juice. Other favorite flavors include: grapefruit, mango, pineapple, blackberry, strawberry, peach, pomegranate, and blueberry juices
- Champagne – or sparkling wine, on ice. Hosting a baby shower? Include a bottle of non-alcoholic bubbly or ginger ale for the mom-to-be.
- Glass Champagne Flutes – we recommend having a few extra glasses just in case! Tall glasses look gorgeous but stemless wine glasses works, as well. Worried about breakage? There are lots of cute non-breakable glasses available too.
- Garnishes – fresh fruits, you can make fruit slices or wedges, pomegranate seeds, and fresh herbs like rosemary or mint sprigs. The choices are endless!
- A fun sign – optional, of course, but a great way to encourage guests to the self-serve bar and make their own drinks
- Labels for the juice bottles – these make it easy to see what’s what and they look cute too. We like to use black labels with raffia ribbons and write the names in gold ink.

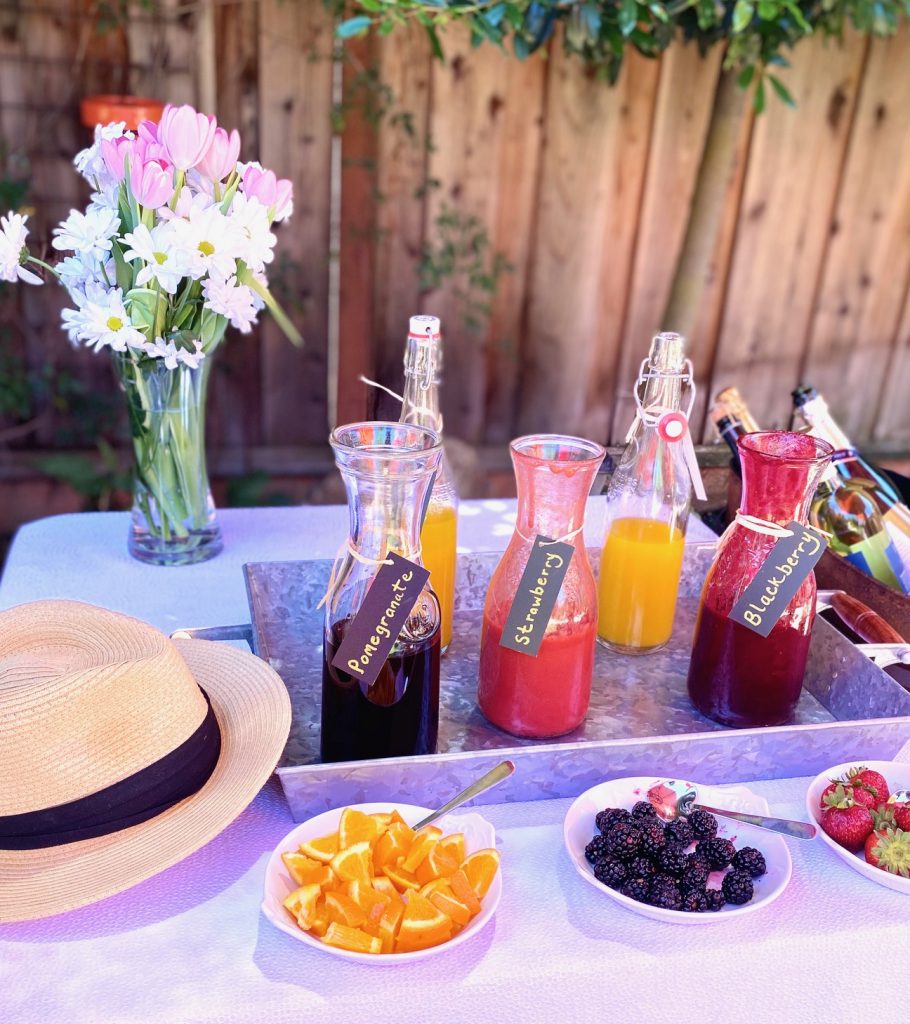
We set this bar up with Pomegranate, Strawberry, Blackberry, and Orange juices, plus garnishes that complement the fresh juices
How to set up the ultimate Mimosa Bar
The beauty of a mimosa bar is that guests serve themselves, so be sure to set it up in an area where there is room to move around. It’s best to keep the brunch food in another area.
- Use a table, or countertop, for all of the champagne glasses, variety of juices, and garnishes
- The Champagne bottles should be very cold, so set up a wine bucket, or ideally a larger ice bucket container that can hold a few bottles. The fizzy needs to be chilled!
- If possible use tall Champagne flutes because they will show off the beautiful colors of the mimosas. Pull out your prettiest flutes, and don’t worry if they don’t all match.
- Label your juice carafes so your friends know what type of juice is in each one. We labeled our carafes with black tags and tied the label on with raffia to keep it simple.
- Set out small bowls of garnishes that complement your juices
- We made a fun sign to make the party complete!

Mimosa Bar Fresh Fruit Juice Ideas:
We suggest having 4 different flavors of juice and purees for your bar. Use fresh juice or make your own purees (see below for how to make juice puree).
Here are our favorites for color and variety:
- Orange Juice – this is the traditional juice for mimosas so consider having double the amount
- Strawberry Puree
- Pomegranate Juice
- Blackberry Puree
You might also want to consider these juices and purees:
- Watermelon
- Mango
- Pineapple
- Raspberry
- Blueberry
- Peach
- Cherry
How to make fruit juice purees:
Making your own fruit puree is easy and makes the best tasting mimosas!
- Blend 2 cups of fresh fruit in a blender
- Add 1 cup of Simple Syrup and blend again
- Taste for sweetness and add more simple syrup if needed
- Strain to remove any seeds
- Chill before serving
- Put each juice into its own labeled carafe
- This makes about 22-24 ounces of fresh juice or puree
To see more about making simple syrup check out detailed directions on our How to Make Simple Syrup story. Simple syrup can be made quickly by combining 1 cup sugar and 1 cup water in a small saucepan. Bring to a boil, stirring to combine, until all the sugar is dissolved.

Pomegranate, orange, blackberry, and strawberry Mimosas
How to make Mimosas:
The best part of making mimosas is it’s super simple! This ratio will give you the information you need to start planning for your next special occasion or large oparty.
- Combine 1 part juice/puree
- Add 2 parts Champagne to a flute
- Add the garnish
How much Champagne do you need for a Mimosa bar?
Each 750 ml bottle of Champagne contains 25 ounces of bubbly, which will give you 6 glasses with 4 ounces of Champagne in each. Of course, the amount you need depends on your friends and the size of glasses you use.
Here’s an easy to use guide:
Garnishes:
Garnishes add to the fun so be sure to put out some gorgeous berries and other things to top your bubbly!
Garnish Ideas:
- Choose berries that match your juices. We like strawberries, blackberries, and orange slices
- Pomegranate seeds
- Fresh herb sprigs, such as rosemary, mint, or lavender
What is the best Champagne to use?
Our favorite choice for a great Mimosa is Brut Champagne or Sparkling wine. You can purchase a medium-priced wine for Mimosas or even use a Spanish cava.
Champagne is our first choice, but you can also use Cava or Prosecco. Both are well priced. Champagne or Sparkling wines will give you fine, persistent bubbles.
Some great brunch menu ideas:
- Buttermilk Pancakes
- Homemade Belgian Waffles
- Cherry Almond Muffins
- Baked French Toast
- Crustless Quiche Bites
- Blueberry Lemon Scones
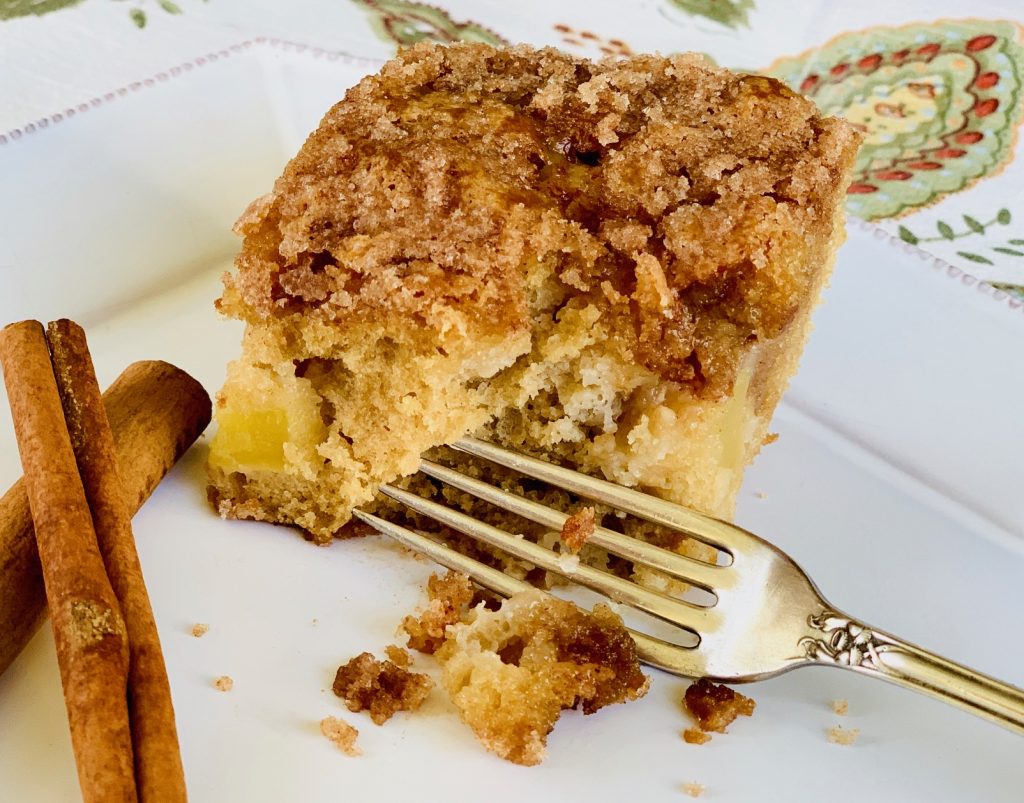
- Cinnamon Coffee Cake with Apples
- Buttermilk Banana Bread with Chocolate Chips

Mimosa Bar Recipes
Equipment
- Blender
- Strainer
- Juice Carafes
- Champagne glasses
Ingredients
For 24 ounces of Fresh Fruit Juice
- 16 oz of any fresh fruit – blackberries, strawberries, blueberries, oranges, mangos, pineapple, peaches
- 8 oz simple syrup, more or less to taste
For 6 Mimosas
- 750 ml Champagne (1 bottle)
- 24 ounces Juice or Fruit Puree
- Garnishes – fresh fruit, pomegranate seeds, mint sprigs
Instructions
Fruit Purees:
- Blend fresh fruits in a blender. Add simple syrup and blend again. Taste for sweetness and add more simple syrup if needed.
- Strain to remove any seeds. Chill before using. Put in a labeled carafe.
Mimosas:
- Chill Champagne for about 2 hours before serving and then add bottles to a wine bucket filled with ice to keep cold
- Arrange chilled juices around the mimosa bar
- Put garnishes in small bowls and add to the mimosa bar table
- For each mimosa: fill a champagne flute with 2 ounces fruit juice or puree and top with 4 ounces chilled Champagne
- Add garnish and enjoy!
Nutrition
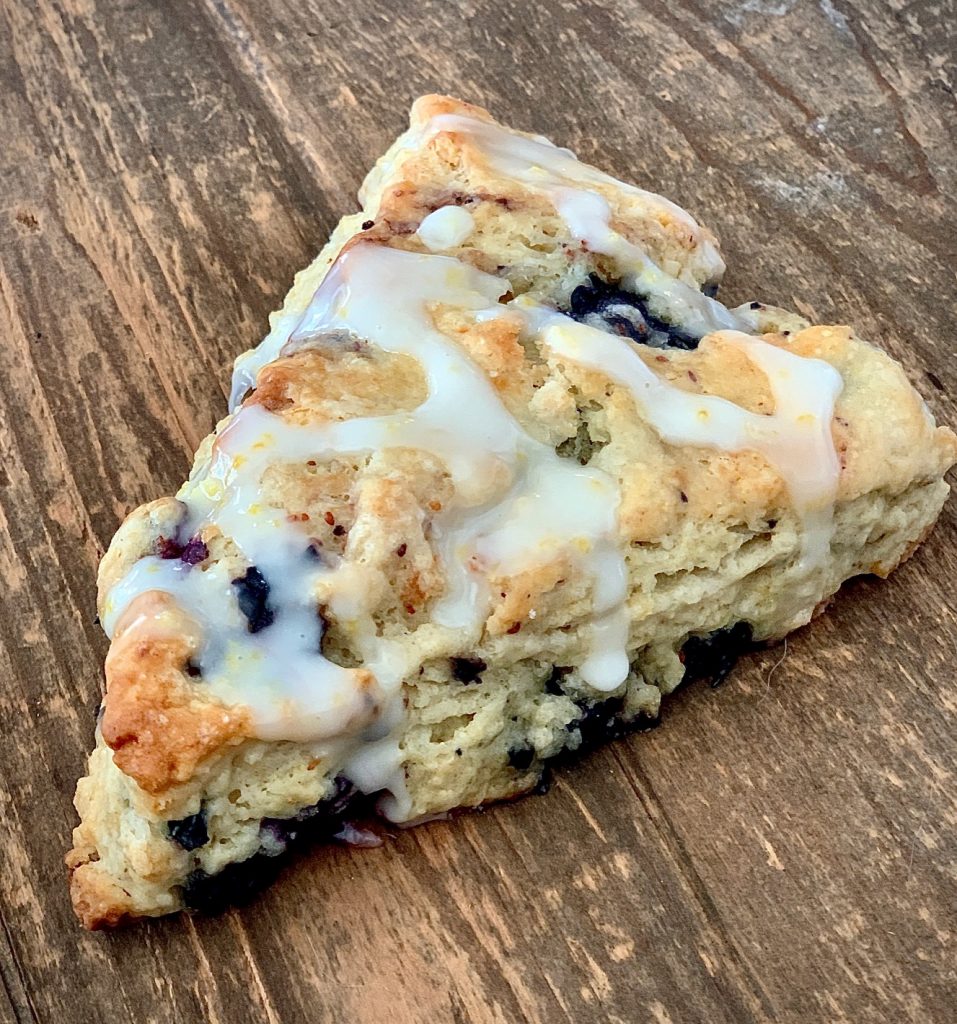
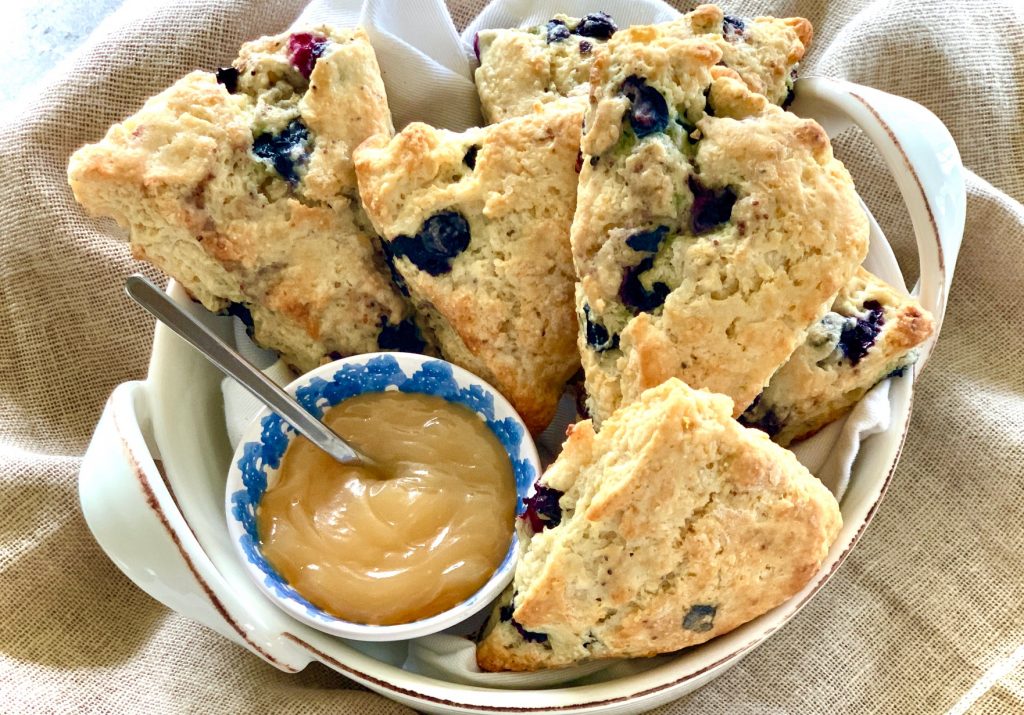
Blueberry Lemon Scones are soft, crumbly, and bursting with flavor!
Most scones tend to be dry so we’ve developed a recipe that is perfectly moist and tender, as well as easy
Blueberries and lemon pair perfectly together, however this recipe is very flexible, so you can use almost any fruit you have on hand. Sprinkle with coarse sugar or drizzle with zesty lemon glaze
This post may contain affiliate links. Please see our affiliate disclosure for more details.
Ingredients Needed
DRY INGREDIENTS:
- Flour and Sugar – the basics for any great baked good
- Baking Powder and Baking Soda – brings the lift and the rise to these scones
- Salt – to balance the sweetness in these scones, and any baked goods
- Lemon Zest – provides a bright burst of flavor
OTHER INGREDIENTS:
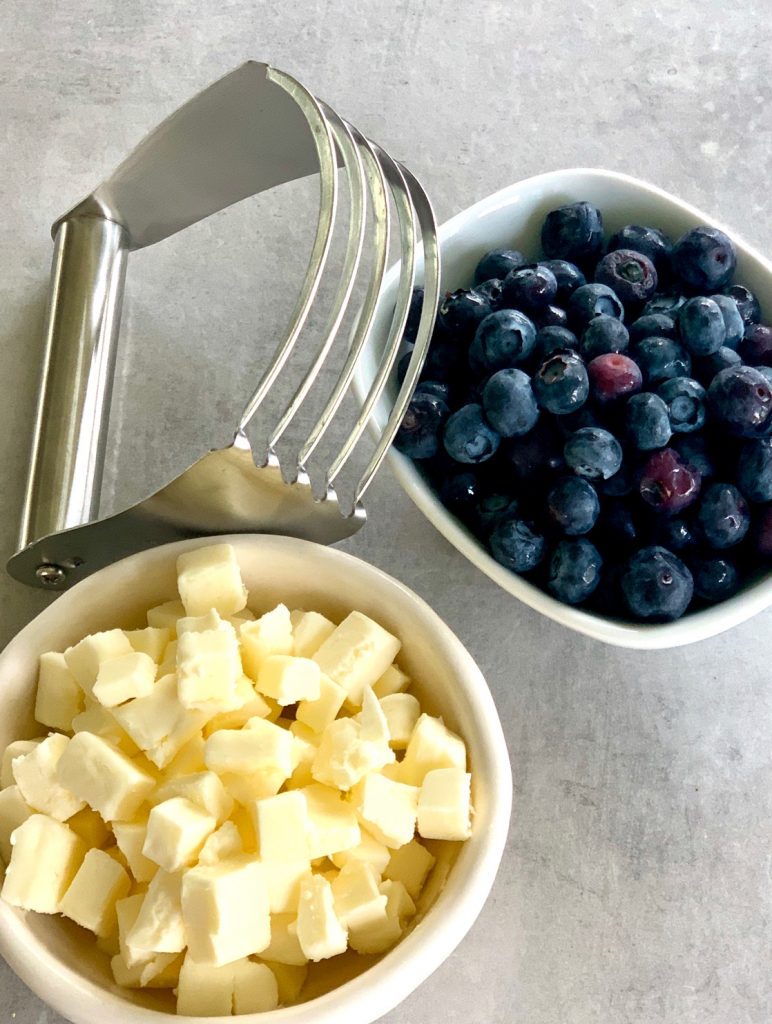
- Butter – unsalted is best but salted will work too
- Lemon Juice – fresh lemon juice will give the best flavor
- Buttermilk – we think this is the secret to tender baked goods
- Blueberries – fresh berries are preferred
- Heavy Cream – just a touch for brushing to top of the scones
- Coarse Sugar – a sprinkling gives the scones a sweet finish and a sparkly top
OPTIONAL LEMON GLAZE – this glaze is optional but an added bonus!
- Powdered Sugar – also called confectioners sugar
- Lemon Juice – fresh and sunny lemon juice makes the glaze zesty
- Vanilla Extract – we love to make our own – give it a try!

Qualities of the best buttermilk scones
- Soft and a bit crumbly
- Golden brown tops and edges
- Moist and soft on the inside
- Slightly sweet and packed with flavor

How to make Lemon Blueberry Scones
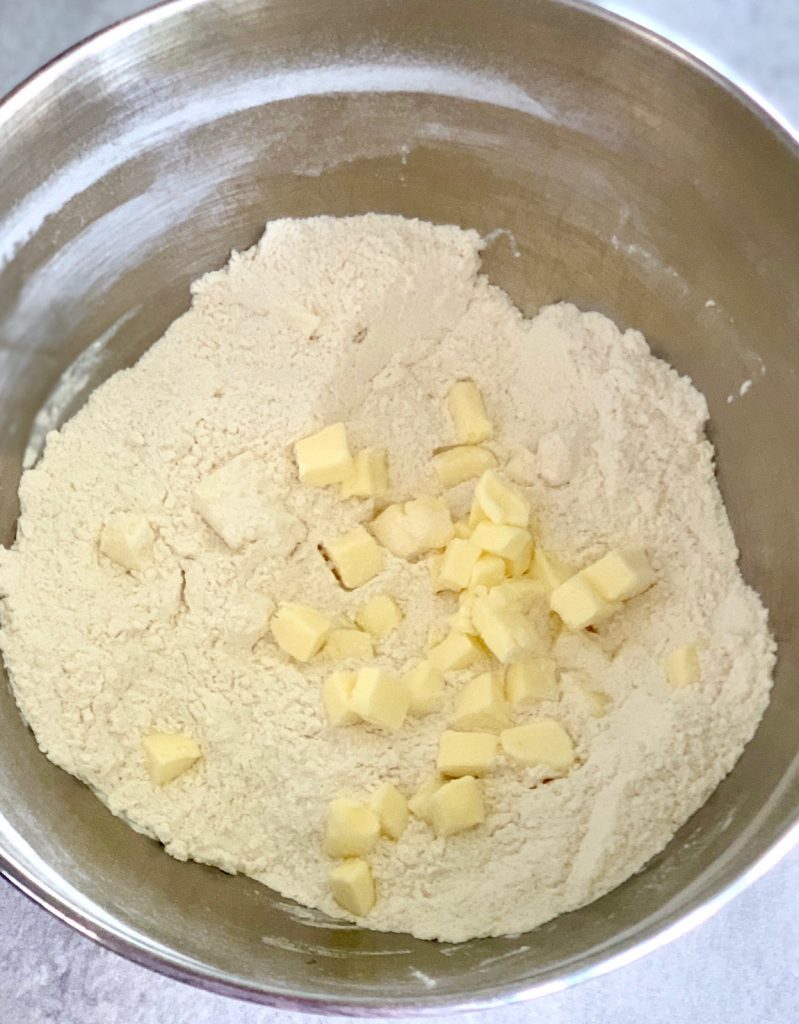
- Whisk all dry ingredients together, including the lemon zest.
- Scatter cold butter pieces into the flour mixture and mix together with a pastry blender or the back of two forks. (I don’t recommend using your hands to blend because the temperature of your hands is too warm and it will cause the butter to start softening.)
- Blend in the butter until the pieces are the size of peas. Be careful not to overmix because too much blending will develop the gluten and make the scones less tender.
- Add in the cold buttermilk, lemon juice, and blueberries and blend very gently. The dough will still be shaggy, which is OK.

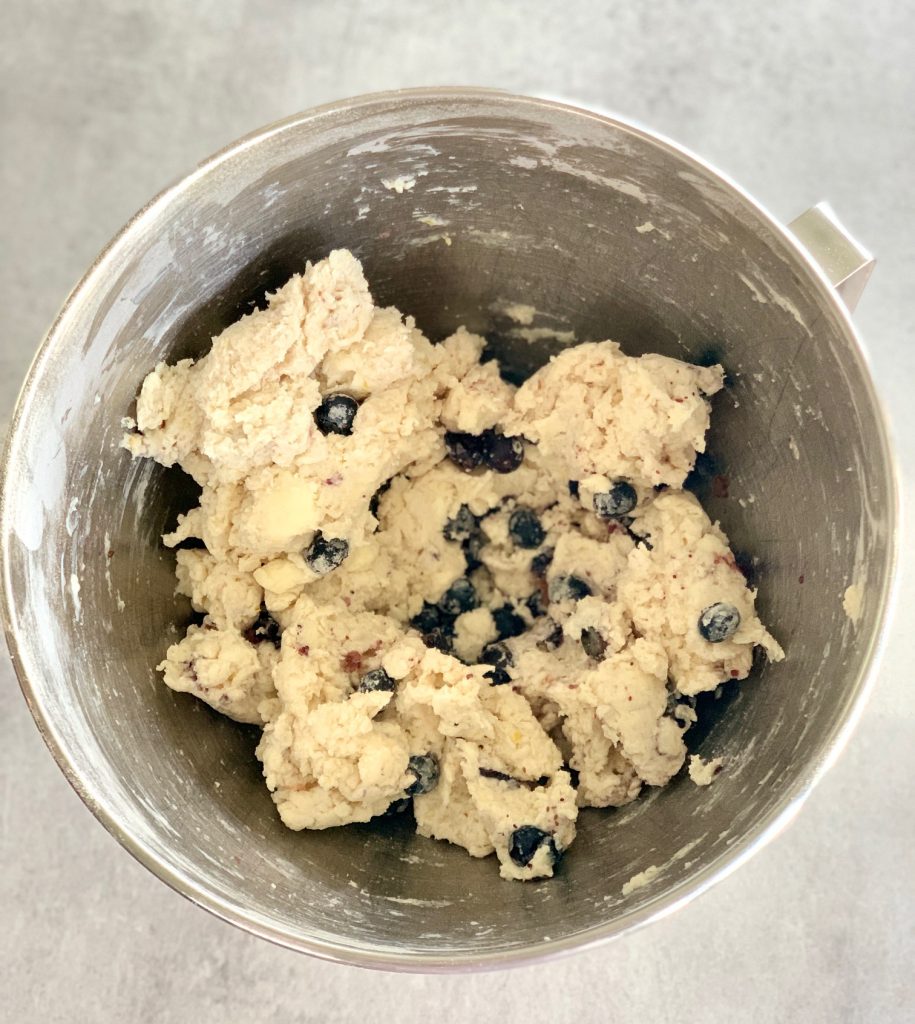
- Lightly flour your work surface, turn the dough out, and gently knead for about 30-seconds,
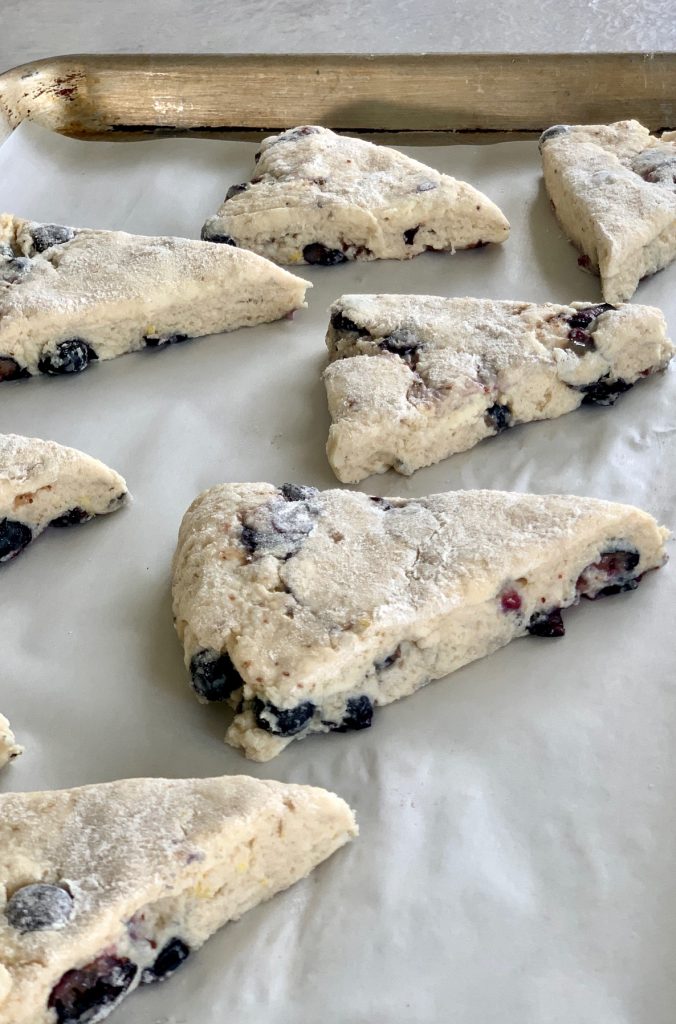
- Shape dough into a large 1 1/2″ thick disk.
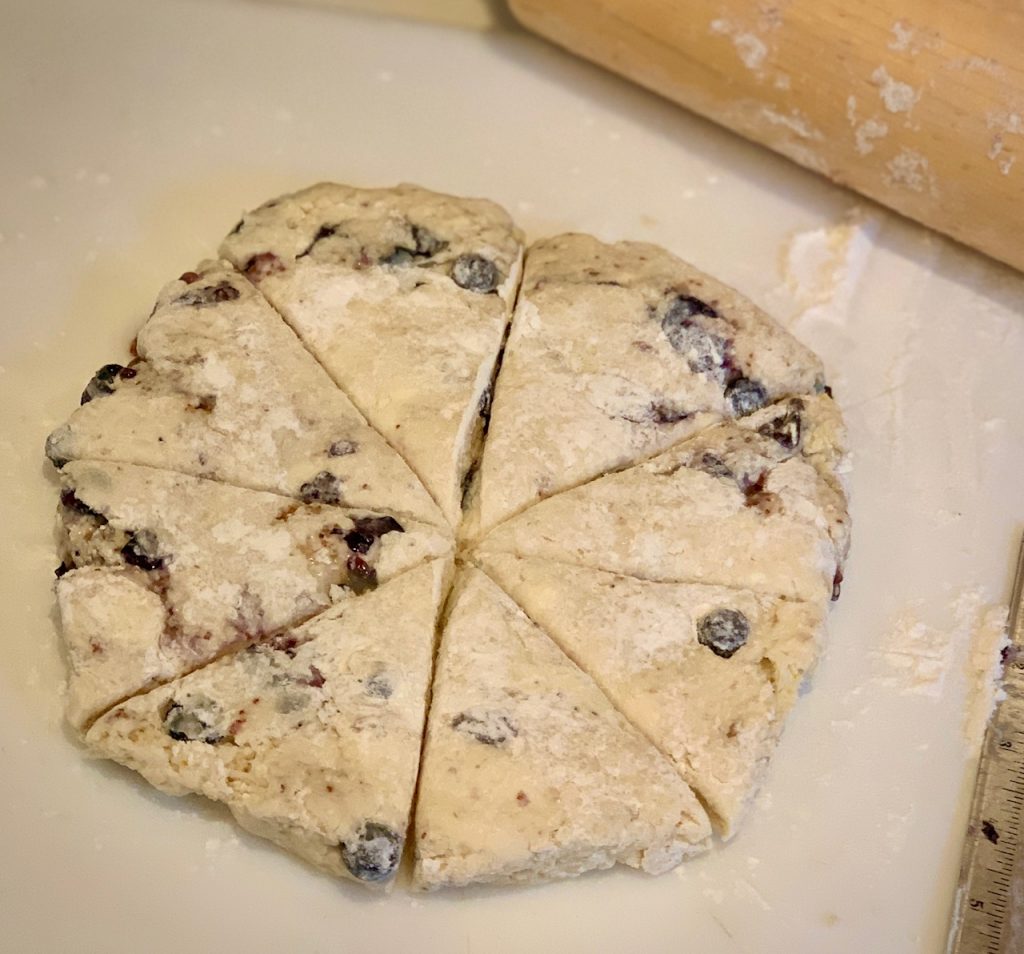
- Cut scones into 8 triangle wedges.
- Place onto a baking sheet, brush with cream, sprinkle with coarse salt and place the tray in the refrigerator for 15-minutes before baking
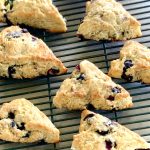
- Bake about 25 minutes. Scones should be lightly browned and easy to pull up off the baking tray and cool completely.
- If making lemon glaze prepare while the scones are cooling.
- Whisk together the powdered sugar, lemon juice and vanilla until smooth.
- Once scones are cool drizzle them with icing.

Tips for perfect lemon blueberry scones
Scones are easy to make but there are lots of small tricks that go into making the best scones.
- The colder the ingredients the better the results, so keep your scone dough cold.
- Start with frozen butter because it helps make the scones flaky. If it’s very warm in your kitchen you may want to refrigerate all of your ingredients before you start.
- Use very cold buttermilk
- Gently mix the dough by hand. The butter should be pea-sized after mixing the flour. The key to flaky scones is do not over blend the butter.
- The dough shouldn’t be too wet and should be able to stand up on its own.
- If you use frozen blueberries (or any fruit) do not thaw them before adding. Blending the berries with a teaspoon of flour will help them keep their shape during baking.
- Use fresh lemon juice and zest for a bright tangy flavor
- Chill the scones for 15-minutes before baking to get fluffy scones and avoid the chance of them overspreading in the oven.
- Make scone dough ahead of time, cut into shapes and freeze. Add about 3-5 minutes to the cooking time.
- If you want smaller scones, form dough into a rectangle, and cut into smaller wedges
Use this as your master scone recipe
Use the basic on the recipe card below and add or omit flavors for any type of buttermilk scones. The process for making the scones will be the same each time. Some favorite combinations:
- Cherries and almonds – we use this combo in our Cherry Almond Muffins
- Strawberries, raspberries, or blackberries
- Currants
- Dried ginger and rosemary
- Dried apricots, pineapple, cranberries
- Chocolate chips or chocolate chunks
Need a buttermilk substitute?
In case you don’t have buttermilk on hand it’s easy to make a substitution:
- The ratio: 1 Tablespoon of white vinegar or lemon juice to every 1 cup of regular milk.
- Mix together and let stand for a few minutes
More breakfast and brunch ideas
- Buttermilk Pancakes
- Buttermilk Banana Bread
- Baked Churro Donuts
- Fresh Cherry Almond Muffins
- Cinnamon Coffee Cake with Apples
- Crustless Mini Quiche Bites
Blueberry Lemon Scones
Ingredients
Scone Ingredients
- 2 ⅓ cups All-purpose flour, plus 1 teaspoon for blueberries
- ¼ cup sugar
- 2 tsp baking powder
- 1 tsp salt
- 1 tsp lemon zest
- ¼ tsp baking soda
- ½ cup unsalted butter (4 ounces), very cold, Cut into ½" pieces
- 1 Tbsp lemon juice, freshly squeezed
- ¾ cup buttermilk, very cold
- 1 cup blueberries
- 2 Tbsp heavy cream
- 2 Tbsp coarse sugar, optional
Lemon Glaze, optional
- ½ cup powdered confectioners sugar
- 1 Tbsp lemon juice, freshly squeezed
- ¼ tsp vanilla extract
Instructions
Scones:
- Preheat oven to 400°F. Line a baking sheet with parchment paper, Silpat liner or grease lightly.
- Whisk together flour, sugar, baking powder, salt, lemon zest, and baking soda.
- Scatter the butter pieces over the flour mixture. Using a pastry cutter, or the back of 2 forks, cut the butter into the flour until the butter is dispersed throughout, and butter is about the size of peas. Be careful not to overwork because you want the butter to stay very cold.
- In a small bowl toss cold blueberries with 1 teaspoon of flour to coat
- Add the buttermilk, lemon juice, and flour-coated blueberries to the dough and gently mix until just combined. The dough should be combined but rough and shaggy, and should hold together.
- Dust a work surface lightly with flour and turn the dough out onto the floured surface. With floured hands knead the dough for about 30-seconds. Shape the dough into a large disk about 1½" thick. Cut into 8 equal wedges.
- Place wedges onto prepared baking sheet, brush with cream and sprinkle with coarse sugar.
- Chill in refrigerator for about 15-minutes. Bake for about 25 minutes, or until tops are lightly browned.
- Remove scones from baking sheet and cool for about 15-minutes.Drizzle with lemon glaze and serve.
Lemon Glaze
- In a small bowl whisk confectioners sugar to remove any lumps. Slowly drizzle in vanilla and enough lemon juice to make a smooth glaze. If too thick add more lemon juice.
Nutrition
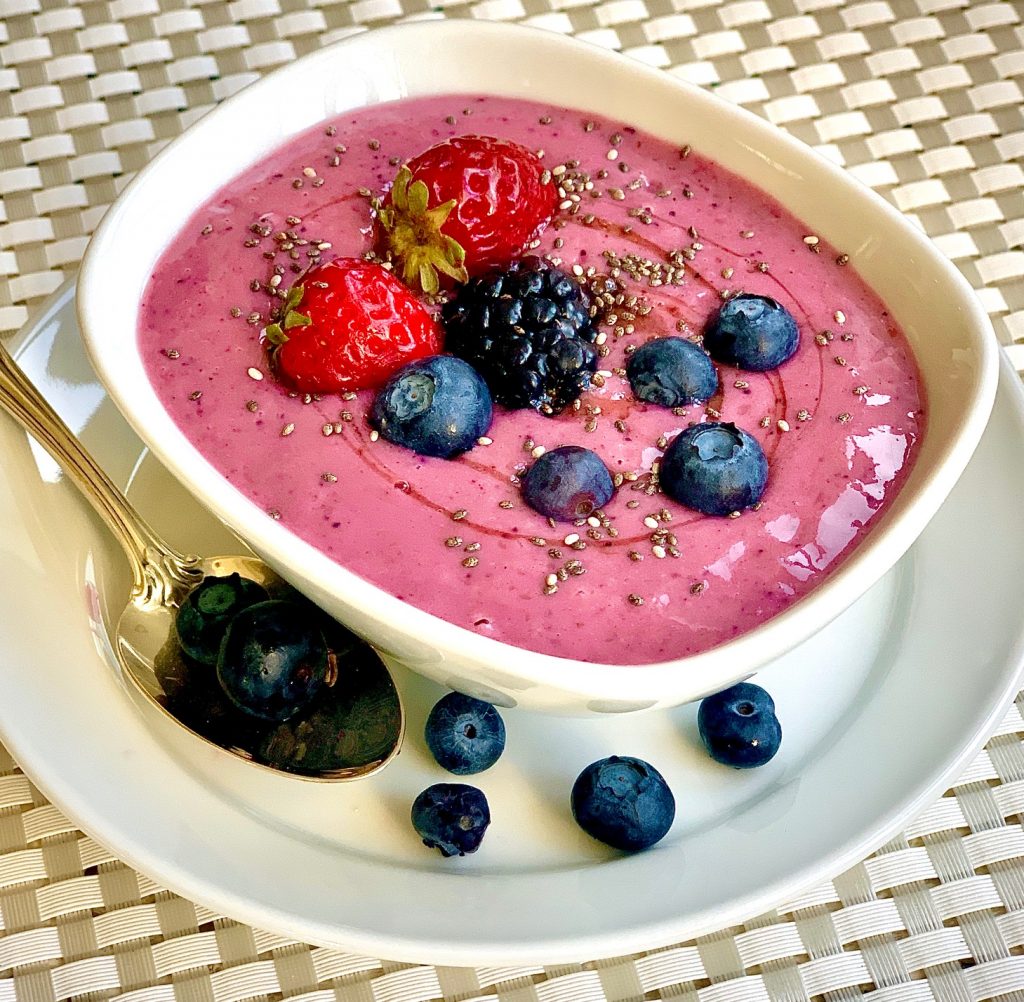
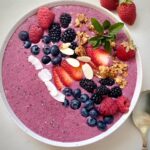
This Berry Banana Smoothie Bowl is a colorful and healthy breakfast and also great as a snack
Smoothie bowls are all the rage these days and for good reason. They are super easy to make and more substantial than a smoothie that you drink
You can dress them up with a variety of delicious toppings which gives your bowl more substance and a little crunch!
What is a smoothie bowl?
Smoothie bowls differ from smoothie drinks because they are thicker, thanks to the added yogurt. You actually eat them with a spoon, which makes them feel more like an actual meal. Most people like to have something crunchy when they eat, so if you add some toppings this bowl really delivers!
Jump to RecipeThis post may contain affiliate links. Please see our affiliate disclosure for more details.
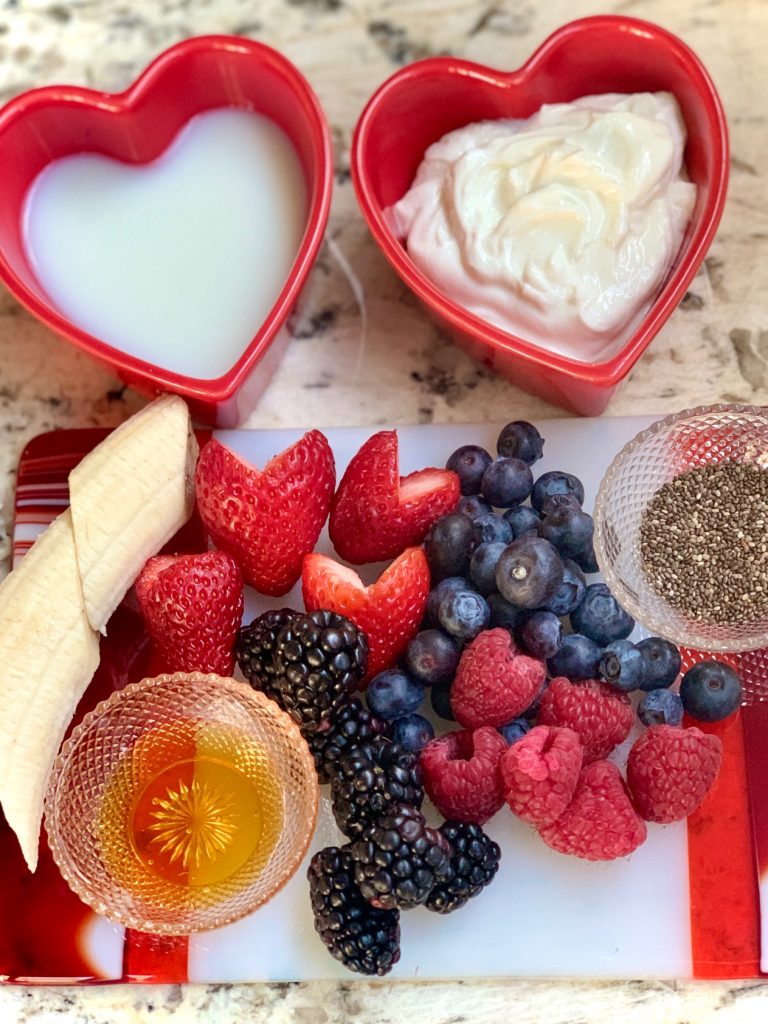
Ingredients needed:
This smoothie bowl is made with lots of colors!
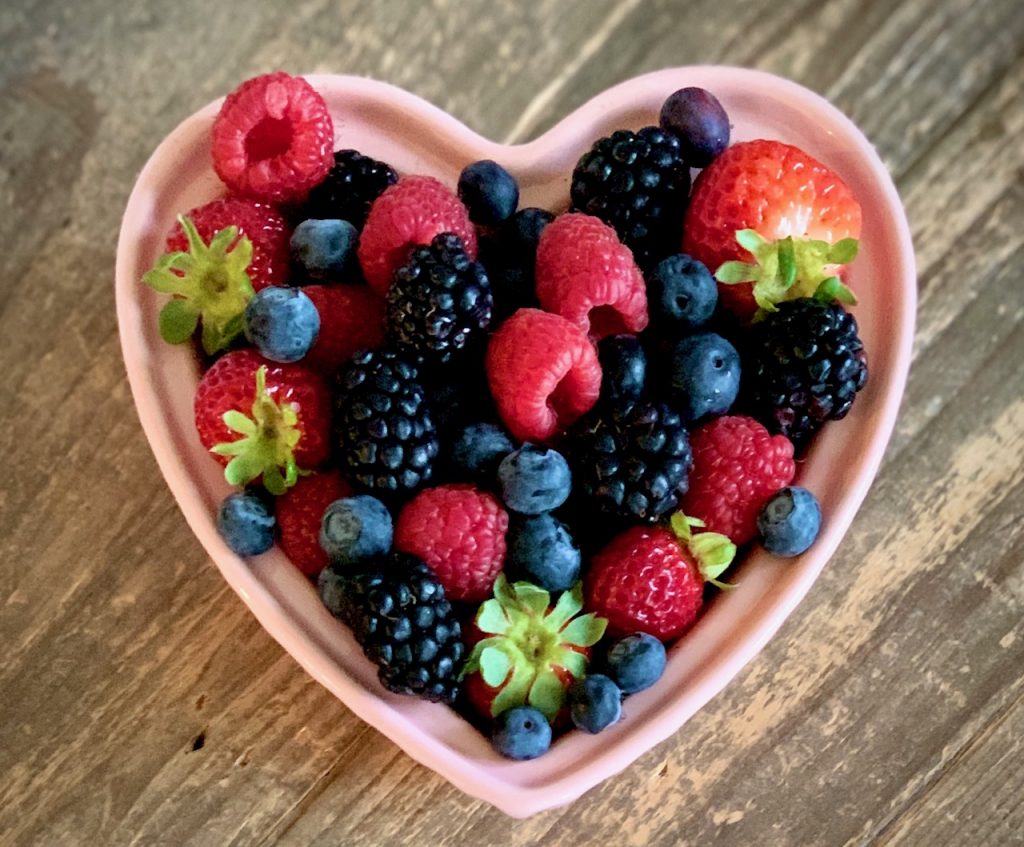
- Variety of berries – we use blueberries, raspberries, strawberries, and blackberries. Feel free to use whatever berries you have on hand. If fresh berries aren’t in season you can easily replace the fresh berries with frozen berries, and frozen will produce a thicker result
- Banana – if you have time to freeze your banana ahead of time it will make your smoothie bowl thicker. Peel the banana and break it into pieces before freezing
- Milk – or any alternative milk, such as almond, oat, or soy milk
- Greek Yogurt – we like fat-free plain or vanilla, but any fruit flavor will work
- Honey – or any sweetener you prefer, such as agave, maple syrup, or stevia
- Chia Seeds – full of antioxidants and fiber
- Vanilla Extract – optional, but recommended
- Crushed Ice – only needed if you use fresh fruit rather than frozen
How to Make a Smoothie Bowl:
5 minutes is all you need to make the perfect bowl!
I like to get all of my ingredients rinsed and ready to go before I start blending. You’ll want all of your ingredients to be very cold for the best results.
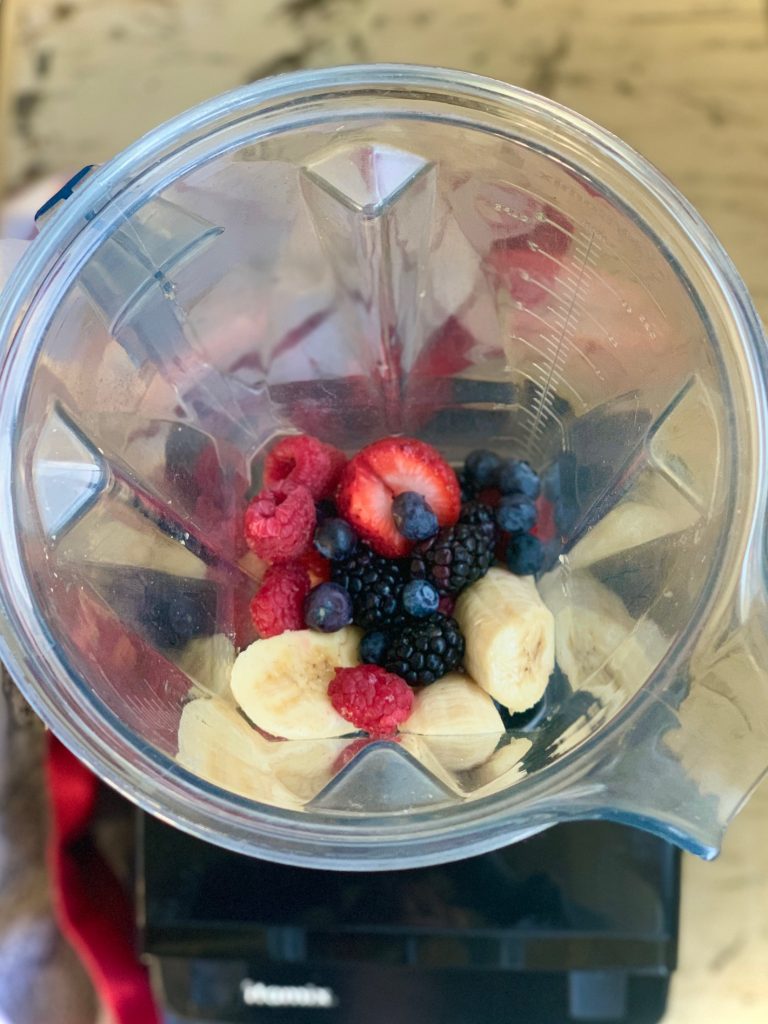
Add the ingredients, in the order below, for even blending:
- Start with very cold milk or alternate milk
- Add your favorite variety of berries
- Put bananas in the blender on top of the berries
- Add the Greek yogurt
- Pour in honey and sprinkle in chia seeds
- If using, add the vanilla extract
- Optional – add a 1/4 cup of crushed ice for a super cold and thicker bowl. (If using frozen berries you can omit adding ice to the process)
- Blend on high for about 1 minute until smooth, scrape the blender down if needed
- Pour evenly into 2 bowls and add your chosen toppings


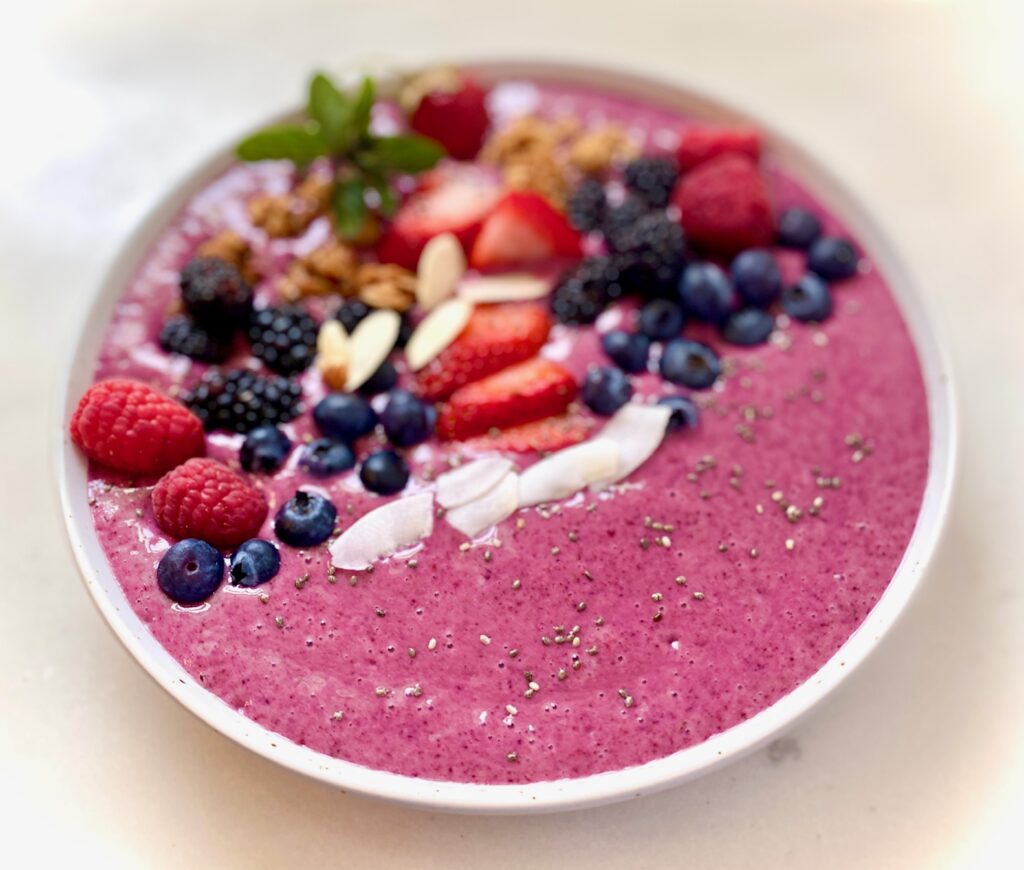
Topping ideas for your Bowl:
Smoothie bowls are delicious and versatile because you can really personalize them with toppings.
Sometimes you need a little extra “crunch” to really make it feel like a meal. There are so many great options available because berries are so adaptable.
Here are a few toppings that we think work well:
- Extra whole berries (not frozen) and sliced bananas
- Nuts such as pecans, walnuts, slivered almonds, and cashews, which will add protein
- Seeds – extra chia seeds, flax seeds, or sunflower seeds for flavor and protein
- Shredded or slivered coconut
- Crunchy pieces of granola
- An extra drizzle of honey or maple syrup
- A sprinkling of cinnamon or nutmeg
Are smoothie bowls healthy?
Smoothie bowls can be a great source of fiber, protein, healthy fats, and carbohydrates to start your day or help you refuel if you’ve just done a workout.
They aren’t super low-cal if you add granola or nuts, but they are still considered healthy.
If you really want to fill up you can add a tablespoon of nut butter, such as almond butter, to the blend. Be sure to add as little honey as possible if you are watching calories.
How to thicken a Smoothie Bowl:
Here are a few tips and tricks for thickening any smoothie bowl
- Use frozen fruit
- Make sure all the liquids are super cold
- Include a few ice cubes or crushed ice in your blender
- Add a handful of uncooked oats to the blender
- Use extra chia seeds
- Cut back slightly on the milk (if your smoothie is too thick you can always add a little more)
Looking for other great breakfast ideas?
- Buttermilk Pancakes
- Cinnamon Baked Churro Donuts
- Crustless Quiche Egg Bites
- Cinnamon Baked Pears
- Blueberry Lemon Scones
- Cinnamon Coffee Cake with Apples
The best blender to use:
We love our high-powered Vitamix Blender, but any powerful blender will work. If your fruit is frozen you will likely need to blend a bit longer, depending on the type of blender you use.

Berry Banana Smoothie Bowl
Equipment
- Blender
Ingredients
Smoothie Ingredients:
- ½ cup Milk or Almond Milk
- ½ cup Greek yogurt, plain or vanilla
- 1 Tbsp Honey
- 2 cups Fresh or Frozen Berries, such as raspberries, blueberries, strawberries, blackberries
- 1 cup Banana
- 1 Tbsp Chia Seeds
- ½ tsp vanilla extract, optional
- ¼ cup crushed ice, optional if the fruit isn't frozen
Optional Toppings:
- Granola
- Sunflower Seeds
- Slivered Almonds
- Coconut ,slivers or flakes
- Fresh Berries
Instructions
- In a blender add, in this order, milk, berries, bananas, yogurt, honey, chia seeds, and vanilla. If the fruit isn't frozen add the ice.
- Puree until completely smooth, about 1-minute
- Divide smoothie mixture into 2 bowls.
- Sprinkle with optional toppings. Drizzle with additional honey, if desired.
Notes
- Frozen fruits and very cold liquids will result in a thicker smoothie bowl
- Reserve some fresh berries for topping your bowl
Nutrition
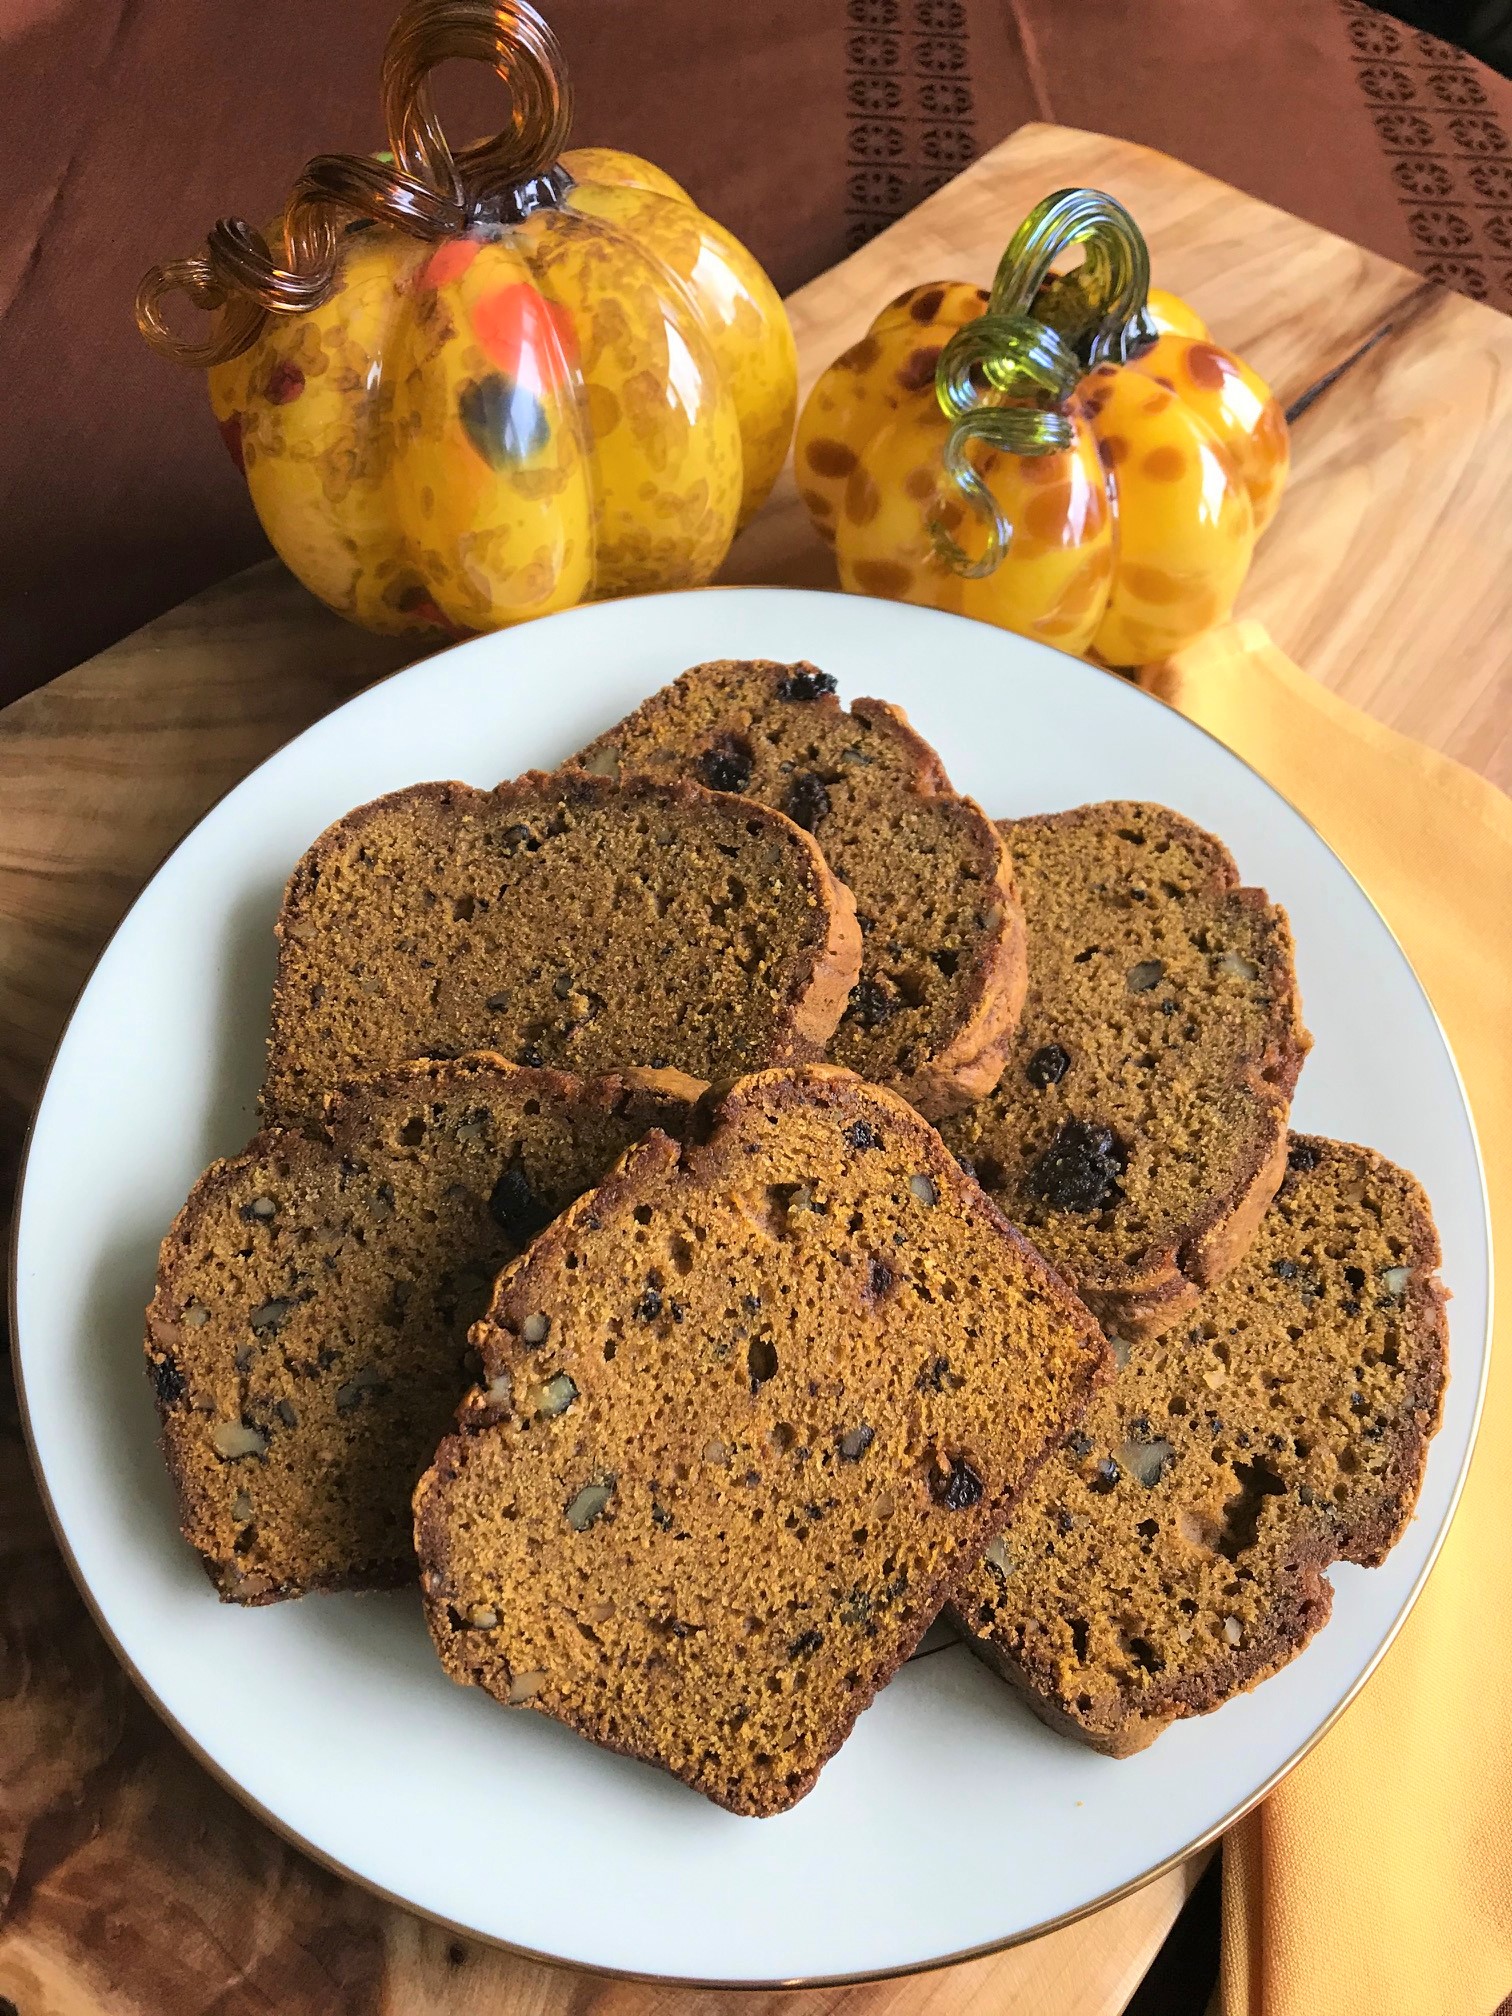
This quick bread is extra moist, easy to make, and will become one of your fall favorites!
Ready to get started? Just click the “jump to recipe” button just below or keep reading for more tips and ideas. This post may contain affiliate links. Please see our affiliate disclosure for more details. We only recommend products we love and use.
Jump to RecipeThis Pumpkin Bread recipe has been a family tradition for years. It takes me straight back to my mother’s kitchen. It warms the house with all the spicy aromas of your fall favorites.
The recipe has several steps and we always make sure to blend each ingredient as we go along. It will add to the process and take extra time but the end result is well worth the investment of your time.
Ingredients for making our Pumpkin Bread Recipe
- Flour
- Baking Soda
- Allspice
- Cinnamon
- Salt
- Eggs
- Granulated Sugar
- Vegetable Oil
- 100% Pumpkin Puree
- Walnuts (optional)
- Raisins (optional)
How to make Pumpkin Bread Recipe from scratch
Step One:
- Grease and flour loaf pans, or line them with parchment paper. Grease and flour muffin tins, or use paper liners.
- In a large mixing bowl mix together flour, salt, baking soda, allspice, and cinnamon and set aside


Step Two:
- In a 5-6 quart mixing bowl beat the eggs.
- Add in sugar 1/3 at a time and blend completely before adding more sugar.
- Add vegetable oil 1/3 at a time and blend completely before adding more.
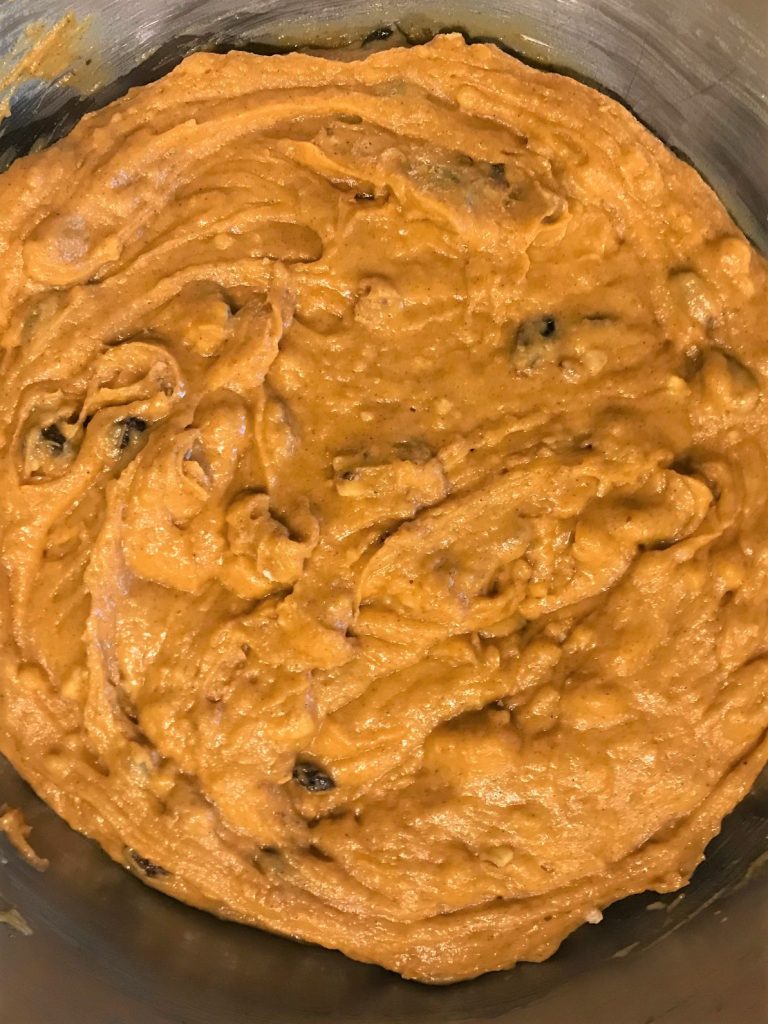
- Lastly, add pumpkin mixture 1/2 at a time, and blend thoroughly.


Step Three:
- Add flour mixture to pumpkin mixture 1 cup at a time.
- Blend thoroughly before adding the next cup of flour mixture.
- Repeat this step until both mixtures are well blended.
Step Four:
- Now you have the option of adding in the walnuts and raisins. Both are optional ingredients. We like them both and always add them. This is a personal preference.

This is where this recipe gets fun!
There are so many size options that everyone will find their favorite.
From large and small loaves to cakes or muffins, there is something for everyone!
This recipe will make these sizes:
- 3 regular-size loaves, plus 6 muffins
- 2 regular loaves, 3 mini loaves, plus 6 muffins
- The options are endless and it’s up to you as to what you want to make. I like making mini loaves to bring as hostess gifts. The muffins make a great breakfast on the run or afternoon snack.
How much batter to use:
- Regular size loaves – use 3 cups of batter
- Mini loaves – use 1 cup of batter
- Muffins – use 2 large tablespoons of batter


Bake all sizes at 350°F.
- Regular size loaves bake for 1 hour and 15 minutes
- Mini loaves bake for 45 minutes
- Muffins bake for 25 minutes
How do you know when the bread is done?
Test the loaves and muffins to make sure they are done cooking by using a wooden toothpick inserted into the center of the loaves. The toothpick should be clean when removed, but if not, add additional time to the baking process, a few minutes at a time until done.


What pairs well with Pumpkin Bread?
Wondering what to serve with your Pumpkin Bread? We like to mix it up depending on the time of day you serve the bread.
In the morning, we love to serve it next to our Pumpkin Spice Latte and spread on butter or cream cheese.
In the evening try serving with vanilla ice cream or with a touch of whipped cream. Spreading on some buttercream frosting would be delicious. Serve alongside our Pumpkin Spice Latte or Irish Coffees. They are excellent to serve all day long!


What is the best way to store Pumpkin Bread?
To Refrigerate:
- Once bread has fully cooled you should wrap the bread in plastic wrap.
- Bread can be stored at room temperature for up to 5 days.
- If you want to extend the life of the bread refrigerate it after 3 days.
- Store bread in the refrigerator for up to 7 days.
To Freeze:
- When freezing Pumpkin Bread double wrap the bread first with aluminum foil and then place it in a resealable freezer bag or air-tight container.
- Bread can be frozen for up to 3 months.
- When you are ready to serve let the bread rest on the counter to defrost. Once you have defrosted the bread unwrap it and bring to room temperature.
- Serve and enjoy.
How to serve Pumpkin Bread?
We love to serve our Pumpkin Bread with these spreadable sides.
- Salted butter
- Buttercream frosting
- Cream Cheese spread
- Orange Honey Butter
Need the perfect loaf pans? Here are the links to see the full-size loaf pan or the mini loaf pans that we use and love.
Other Easy Quick Bread Recipes:

Pumpkin Bread Recipe
Equipment
- regular size muffin tins, loaf pans – large (9"x5"x3") or Mini (5"x3")
Ingredients
- 5 ¼ cups flour
- 1 Tablespoon baking soda
- 1 Tablespoon ground allspice
- 1 ½ Tablespoon cinnamon
- 1 ½ teaspoon salt
- 6 large eggs
- 4 ½ cups sugar
- 1 ½ cups vegetable oil
- 1 29 oz can 100% pure pumpkin puree, (not pumpkin pie filling)
- 1 ½ cups walnuts, chopped, optional
- 1 cup raisins, optional
Instructions
- Preheat oven to 350° F.
- Grease and flour, or line with parchment paper, loaf pans. Grease and flour muffin tins, or use paper liners.
- In a large bowl combine flour, salt, baking soda, ground allspice, and cinnamon. Mix well and set aside.
- In a separate 6-quart bowl, beat eggs. Add in the sugar 1/3rd at a time and blend completely before adding more sugarAdd oil 1/3rd at a time and blend completely before adding more oil Next, add pumpkin 1/2 at a time and blend thoroughly.
- Add the flour mixture 1 cup at a time to the pumpkin mixture. Blend thoroughly between each addition and repeat until flour mixture is gone.
- Add in walnuts and raisins, if desired, and gently stir until well blended.
- Fill large loaf pans with 3 cups of batterFill mini loaf pans with 1 cup of batterFill muffins with about 2 Tablespoons of batter
- Bake the large loaves for 1 hour, 15 minutes. Bake mini loaves for 45 minutes. Bake muffins for 25 minutes.
- Test loaves or muffins with a wooden toothpick by inserting toothpick into the middle of each loaf, and make sure the toothpick is clean when removed. If not, add additional baking time, checking every few minutes until done, and toothpick comes out clean.
Nutrition
Just 5 ingredients to a heavenly dessert or snack
Baked pears are a warm addition to breakfast when combined with your favorite yogurt and granola. Roasted pears also make a great dessert! Who doesn’t love a simple yet versatile dish!
Ingredients for Cinnamon Baked Pears
This recipe uses just 5 ingredients:
- Pears
- Maple Syrup
- Coconut oil or butter
- Cinnamon
- Nutmeg
How to make Baked Pears:
This recipe is so simple that anybody can make it without fail. Your kitchen will smell insanely good and the end result is super impressive. You can also substitute in apples for the pears using the same technique.
- Melt butter or coconut oil and whisk with the maple syrup, cinnamon, and nutmeg
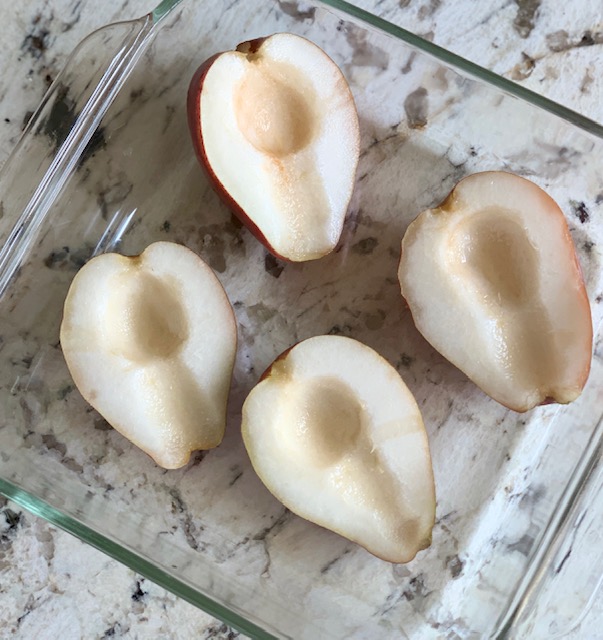
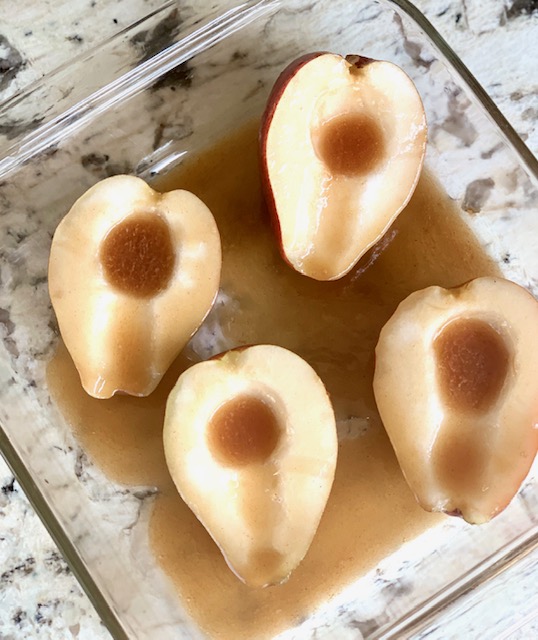
- Halve the pears from stem to bottom
- Scoop out the seeds and the core. If you have a melon baller that makes it even easier to scoop out a round center
- Place the pears skin side down (flesh side up) in a baking dish
- Drizzle the maple syrup mixture over the pears
- Cover the dish tightly with foil and bake for 40-75 minutes, depending on the ripeness of the pears
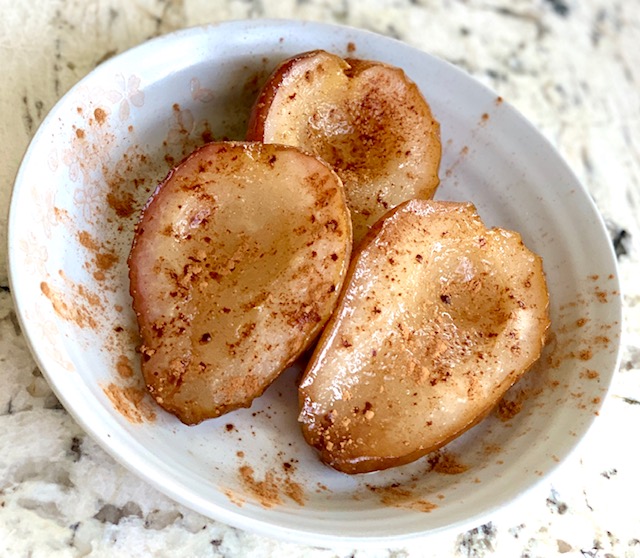
- Pears are done when you can easily pierce with a knife
- The pears should be soft, but not mushy, and the syrup should be lightly caramelized and thickened
- Let rest for 5 minutes and then serve
Using different baking spices:
I love to add cinnamon and nutmeg to baked pears, and occasionally a splash of our homemade Vanilla Extract, but there are so many great spice options. A squeeze of lemon over the top can help cut the sweetness if desired.
Try any combination of these spices:
- Cardamon
- Homemade Pumpkin Pie Spice
- Cloves
- Allspice
- Ginger
- Cinnamon
- Nutmeg
Best Pears for Baking:
Bosc and Anjou (red or green) varieties are the best baking choices because they hold their shape and texture during baking. In a pinch, Bartletts and other varieties work fine, too. These pears are available year-round in any market.
Avoid using Comice pears for cooking because the tender, juicy flesh tends to fall apart when baked whole or used in pies. Do not peel the pears because the flesh will soften when baked.
How long should I bake pears?
Baking time for pears will vary based on ripeness. If your pears are very ripe baking time can be as short as 40 minutes. Less ripe can take up to 1 hour, 15 minutes. It’s easy to test to see if the pears are done. Just poke with a sharp knife or toothpick to see if the flesh gives easily.
The end result will be a beautifully soft pear, infused with maple syrup and cinnamon. When done baking a wonderful syrup will be at the bottom of the baking dish so be sure to pour that on top of your pears when you serve them!
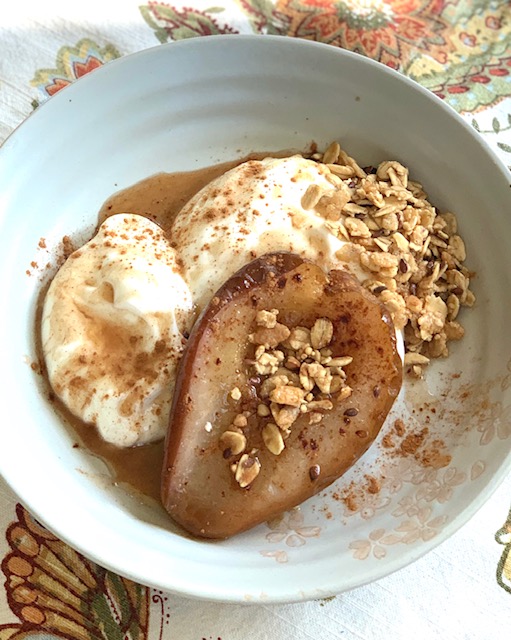
Best ways to serve Cinnamon Baked Pears
Serving baked pears can be as simple as spooning them into a dish with some of the delicious maple syrup drizzled on top.
I love to add plain Greek yogurt and some granola to the bowl for a breakfast treat, or an afternoon snack.
These pears make an amazing dinner dessert. Imagine a 10-minute easy prep and then just baking your dessert while everyone eats dinner.
Add some vanilla bean ice cream and a drizzle of Easy Salted Caramel Sauce for a complete hassle-free dessert. Your house will smell like heaven on earth!
How long can you store baked pears?
Baked pears are delicious warm or cold, and you can store them in the refrigerator for 3-4 days.
Looking for more dessert ideas?
- Our Pear and Walnut Cake Recipe is another great way to use pears
- Easy Apple Crisp has all the warm cinnamon flavors you could want!
- Super easy Mixed Berry Cobbler will be a hit with any berry lover
- Start your morning with a warm piece of Cinnamon Coffee Cake with Apples
Cinnamon Baked Pears
Ingredients
- 4 Pears, ripe, Bosc or Anjou
- 2 Tbsp maple syrup
- 2 tsp coconut oil (or butter)
- 1 tsp cinnamon
- ½ tsp nutmeg
Instructions
- Preheat oven to 350°F
- Halve the pears and scoop out the seeds and core. Place skin side down in a heatproof baking dish.
- Melt butter and whisk with maple syrup, cinnamon, and nutmeg.
- Drizzle maple syrup sauce over the pears.
- Cover tightly with aluminum foil and bake for about 40 minutes for more ripe pears, or up to 75 minutes for less ripe pears. The syrup should be caramelized and the pears are soft but not mushy.
- Allow to cool for about 5 minutes and then spoon into serving dishes.
Notes
- This recipe also works great with apples