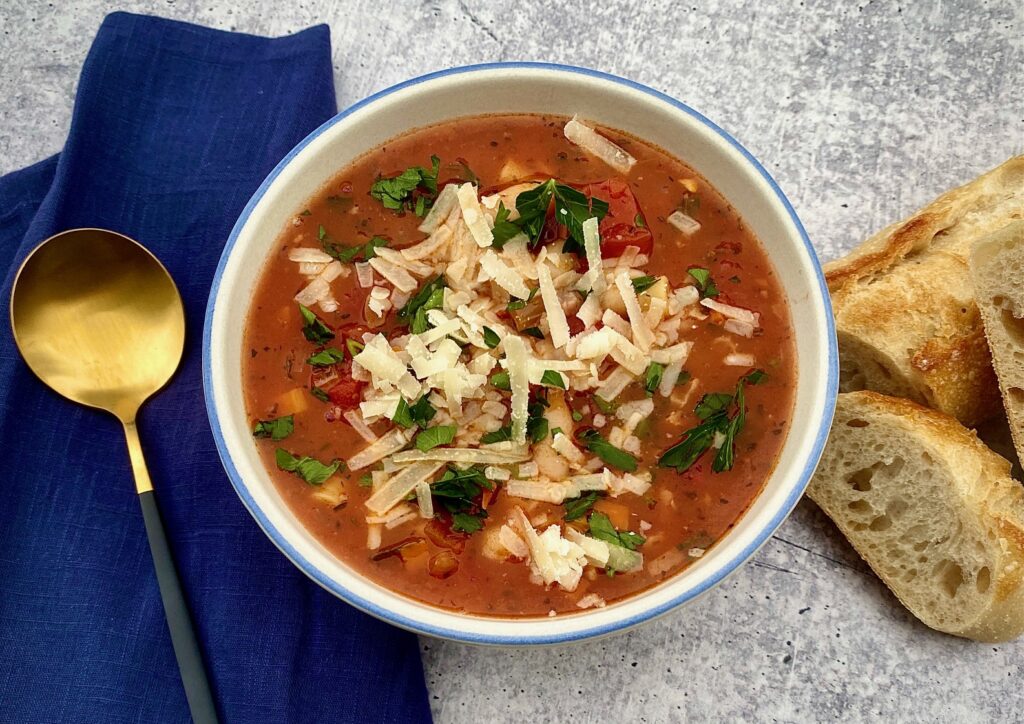
This simple and rustic one pot soup takes about 15 minutes to prepare. Serve it with a loaf of warm crusty bread for the perfect lunch or dinner
Translated to English this classic recipe means “pasta and beans”. You may have also heard this soup referred to as “Pasta Fazool“
Simple ingredients but big flavor in one large pot. Perfect for a chilly night!
Please see our affiliate disclosure for more details. We only recommend products we love and use.
Ingredients for Pasta e Fagioli Soup
Don’t let the lengthy list of ingredients deter you because they are basic and many of them you may already have in the pantry or refrigerator. This hearty soup is a great way to use up leftover vegetables too!

- Olive Oil – any oil will work but this is an Italian recipe so we prefer olive oil
- Pancetta – Pancetta is a salt-cured pork and works well in soups and stews. If you cannot find pancetta you can substitute thick-cut bacon. If you want to make this bean soup vegetarian just omit it altogether
- Vegetables: carrot, yellow onion, garlic
- Herbs: fresh rosemary, dried or fresh basil and oregano, fresh parsley (for garnish)
- Diced Tomatoes and Tomato Sauce
- Chicken Broth – or vegetable broth
- Salt, Pepper, and Sugar
- Dry Pasta – small tube pasta is traditional, such as Ditalini or Tubetti. Conchigliette or small elbow variety will work as well
- Cannellini Beans – you can use any small white beans
- Parmesan Cheese – use Parmigiano Reggiano for the best taste
How to make Pasta Fagioli
- In a large soup pot or Dutch oven heat olive oil until shimmering, over medium heat.
- Add diced pancetta and sauté, stirring until browned and cooked through (about 4 minutes). The pancetta should be browned but not super crispy. Remove the pancetta and let it drain on a paper towel-lined bowl or plate.

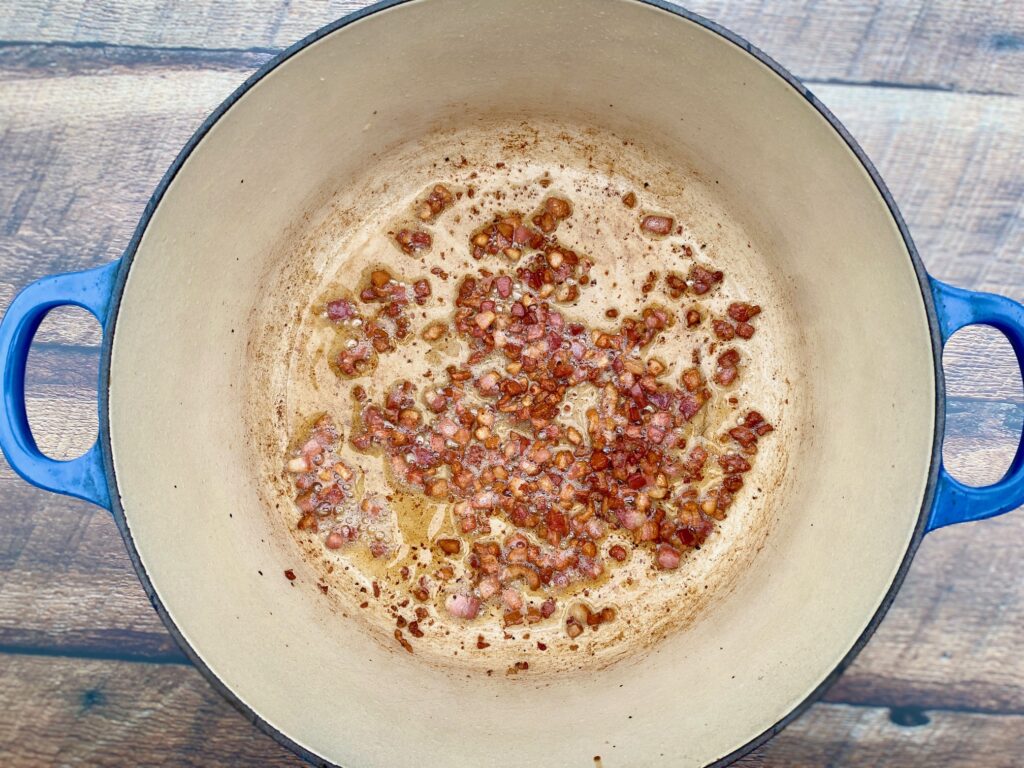
- Drain off any excess fat, so that only about 2 Tablespoons remain in the pot, and add carrots and chopped onions. Sauté and stir until onions are softened (3-5 minutes).
- Add minced garlic cloves and cook for 1 more minute. Stir often so that garlic doesn’t burn.
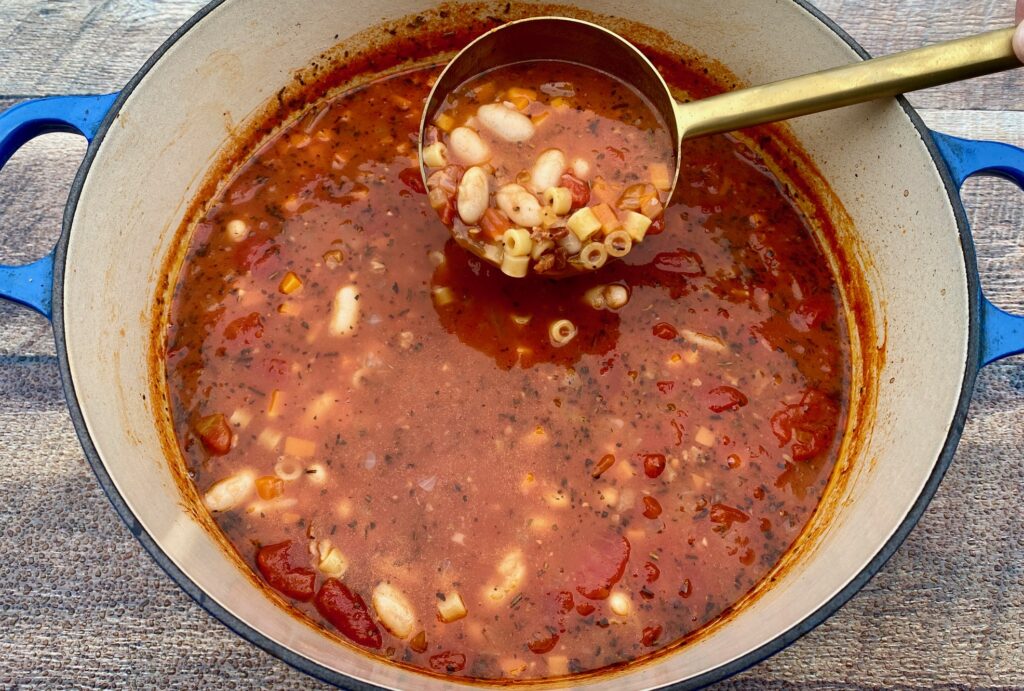
- Stir in diced tomatoes, tomato sauce, chicken broth, rosemary, basil, oregano, salt, pepper and sugar. Stir to combine everything and add 1 cup of water (more can be added later if you want a looser soup).
- Bring the pot to a boil and add the dried pasta. Stir well and then reduce to medium-high heat and cook the pasta until it is al dente. This should take 12-14 minutes, depending on the pasta.
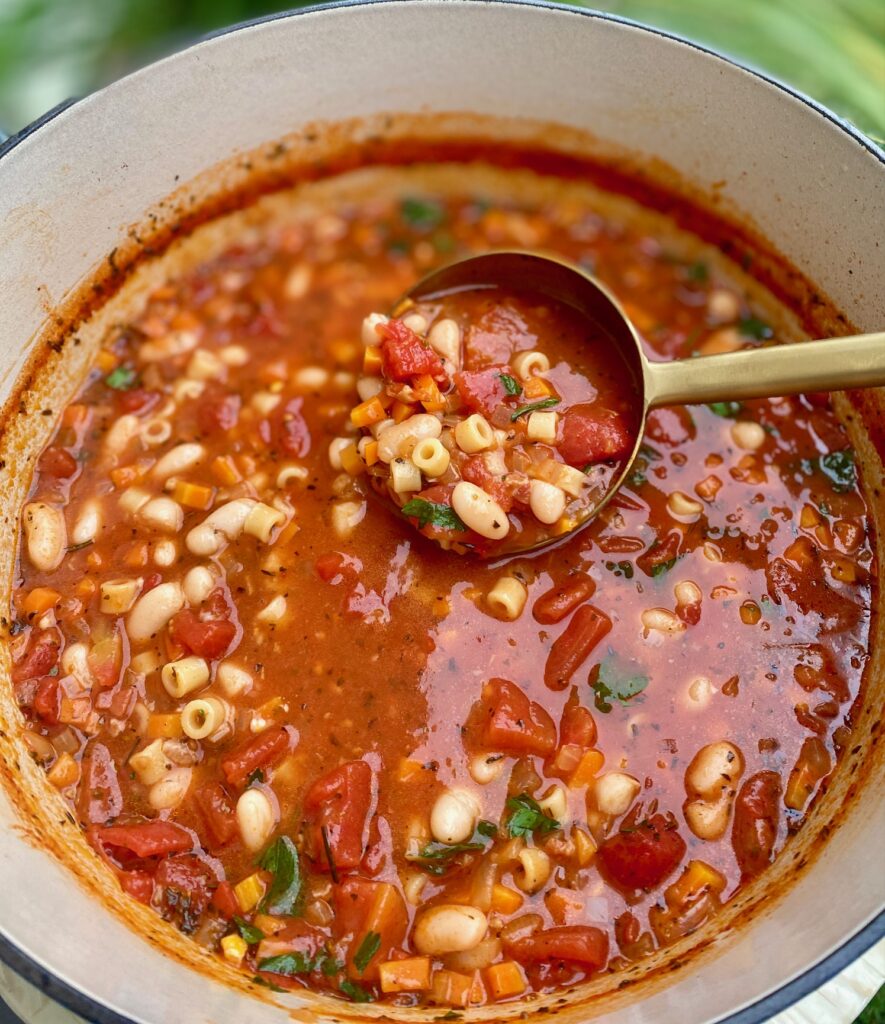
- Add the drained, rinsed cannellini beans, stir to combine, and cook gently for 2 minutes to allow all of the flavors to melt. Taste, and if needed, add more salt and pepper.

- Remove the pan from the heat and stir in 1/4 cup of the shredded parmesan. Stir gently.
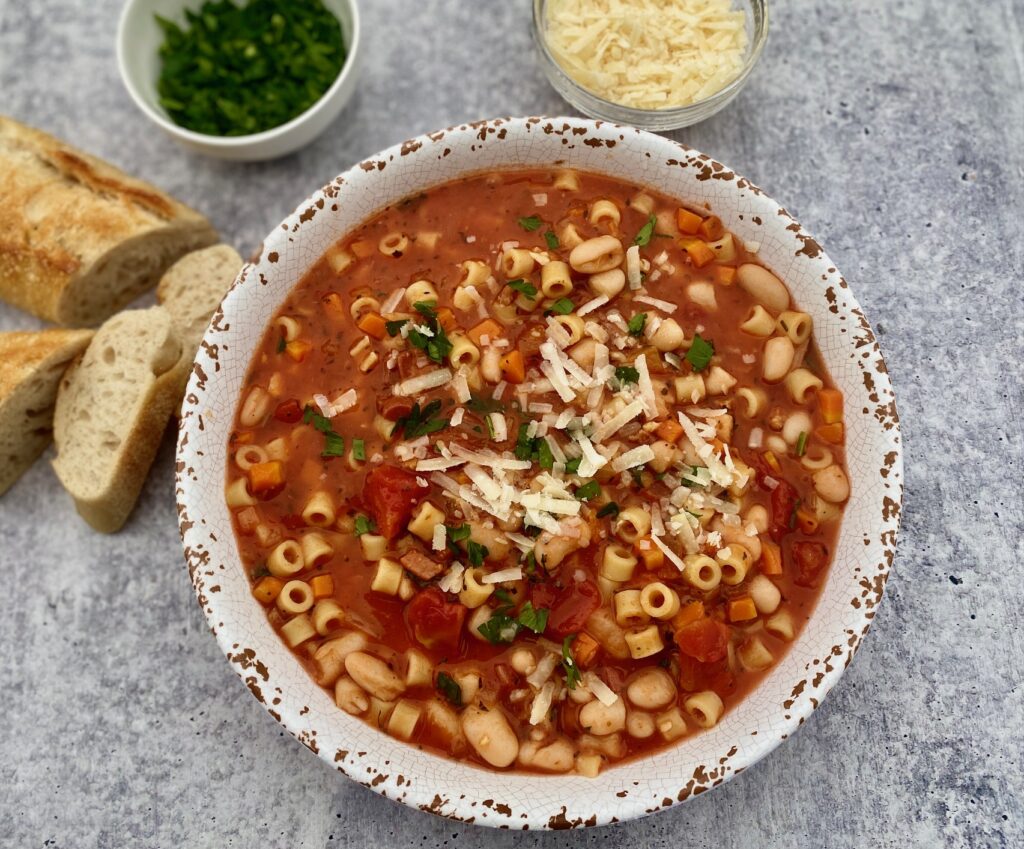
- Serve in shallow soup bowls. Sprinkle each bowl with chopped parsley and the remaining parmesan cheese.
- Serve with warm crusty bread for dunking in this hearty soup. Add light and fresh Citrus Salad or Tricolore Salad with Oranges for a complete meal.
Make Ahead and Storage
REFRIGERATOR:
- The soup can be made ahead of time and gently reheated. However, we recommend waiting to add the parmesan until right before serving, as well as the garnish
- Be sure to cool the soup completely before placing it in an airtight container for up to 3 days
FREEZER:
- Soup can be frozen for up to 3 months in freezer safe containers. Because this is a big batch soup consider freezing it in individual portions for smaller servings. Great for lunch!
- Note: Pasta will continue to absorb the liquid as it cools, and can become less firm. To avoid this you can prepare the soup up until the step where you add the pasta. Freeze up until that step, then thaw, and proceed as directed to finish.
Variation and Additional Ideas
- Use dried Italian seasoning mix in place of the fresh and dried herbs
- Instead of store-bought tomato sauce substitute our Homemade Marinara Sauce
- Substitute thick-cut bacon for the pancetta. Pancetta is often sold in 4-ounce precut and packaged containers in the deli and meat section at the market which makes it super convenient to use.
- Want more protein? Add Shredded Chicken, precooked lean ground beef, or Italian sausage to the prepared soup.
- If you love spice add 1 teaspoon of red pepper flakes
- Cook your own dried beans ahead of time
- Add a Parmesan rind to the soup when you add the pasta for added flavor
Vegetarian and Vegan Pasta e Fagioli
- Vegetarian: Skip the pancetta altogether and substitute vegetable broth for the chicken broth
- Vegan: Leave out the parmesan or use a vegan parmesan
Other One Pan Meals and Soups to try
Pasta e Fagioli Soup
Ingredients
- 1 Tablespoon Olive Oil
- 4 ounces pancetta diced (or bacon)
- 1 cup yellow onion, small dice
- 1 cup carrot, small dice
- 4 cloves garlic, minced
- 14 ounces diced tomatoes, (1 can)
- 14 ounces tomato sauce (1 can)
- 32 ounces chicken broth or stock
- 8 ounces water
- 2 teaspoon kosher salt or sea salt
- 1 teaspoon black pepper, freshly ground
- 1 Tablespoon fresh rosemary, finely minced (or 1 tsp dried)
- 1 teaspoon dried basil (or 1 TBSP fresh, finely chopped)
- 1 teaspoon dried oregano (or 1 TBSP fresh, finely chopped)
- 1 teaspoon sugar
- 1 cup pasta, dry, small tube such as Ditalini, tubetti, Conchigliette, or small elbow
- 30 ounces cannellini beans or small white beans, (2 cans) drained and lightly rinsed
- ½ cup Parmesan Cheese, freshly shredded, divided
- ¼ cup flat leaf parsley, roughly chopped for garnish
Instructions
- In a large pot or Dutch oven, heat olive oil until shimmering. Add diced pancetta and saute, stirring occasionally until browned and cooked through (about 4 minutes).Remove pancetta with a slotted spoon and let it drain on paper-towel lined bowl or plate.
- Drain off excess fat, if needed, so that only about 2 Tablespoons remain. Add carrots and onions and saute, stirring occasionally, until softened, about 3-5 minutes. Add garlic and cook for 1 minute, stirring continuously to ensure it doesn't burn.
- Stir in diced tomatoes, tomato sauce, chicken broth, water, rosemary, basil, oregano, salt, pepper, and sugar.
- Bring to a boil and add the dried pasta. Stir well and reduce heat to a medium simmer. Cook for about 12 minutes or until the pasta is cooked.
- Add the drained beans, stir, and cook for 2-3 minutes over medium heat to allow all of the flavors to meld. Check seasonings and add additional salt and pepper if needed.
- Remove the soup from the heat. Stir in 1/4 cup of the shredded parmesan.
- Serve in shallow bowls, sprinkled with chopped parsley and the remaining parmesan.
Notes
- Calorie count includes the parmesan garnish
- Need more protein? Add 8 ounces of cooked shredded chicken, turkey, ground beef, or Italian sausage
- Substitute mixed dried Italian herbs for any of the herbs in the recipe
- Thick-cut bacon can be used in place of the pancetta
Nutrition
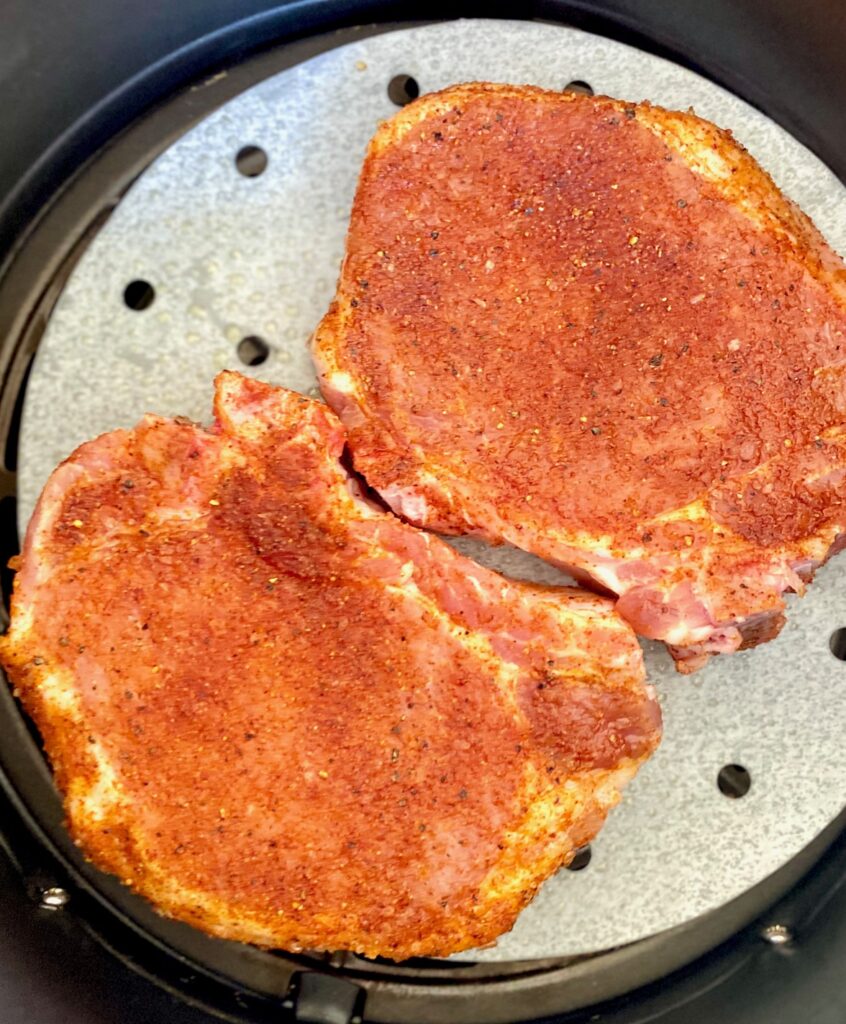
These chops are juicy, tender, and lightly spicy thanks to a flavorful seasoning mix using common seasonings
15 minutes and no more dry pork chops ~ Hurray!
Ready to get started? Just click the “jump to recipe” button below or keep reading for more tips and ideas. This post may contain affiliate links. Please see our affiliate disclosure for more details. We only recommend products we love and use.
Jump to RecipeIn addition, these air fryer pork chops have no breading which makes them a protein bomb!

Ingredients Needed:
- 2 Bone-in Pork Chops – each chop should weigh 7-8 ounces, and measure about 1.5 inches thick. We prefer to use pork chops with a small bone because they tend to be juicier than boneless pork chops. Our top choice is “rib eye chops” which have a curved rib bone (see more below about choosing pork chops)
- Olive Oil – any oil will work but we like the flavor of olive oil
- Paprika – you could also use smoked paprika if you like the smoky flavor
- Kosher or Sea Salt – any type of salt will work but we prefer flaky Kosher salt, or sea salt because it enhances the flavor of food rather than making it taste salty, and it sticks well to meat
- Garlic Powder and Onion Powder – if you need to use garlic salt or onion salt then delete the Kosher salt
- Black Pepper – freshly ground pepper is always best
You can also substitute our popular Dry Rub for Ribs if you want a spicier pork chop.

How to make Air Fryer Pork Chops (bone in):
This recipe is super simple. The important part is the timing when cooking in the air fryer. The high heat and quick cooking time makes the air fryer ideal for pork chops.
NOTE: Our air fryer fits 2 bone-in pork chops perfectly so we cook 2 at a time. If your air fryer is larger you can cook 4 at a time by simply doubling this recipe. Our chops were at room temperature (65˚F) when we started cooking.
- Set the air fryer to 400˚F and preheat it for 5 minutes while preparing the chops.
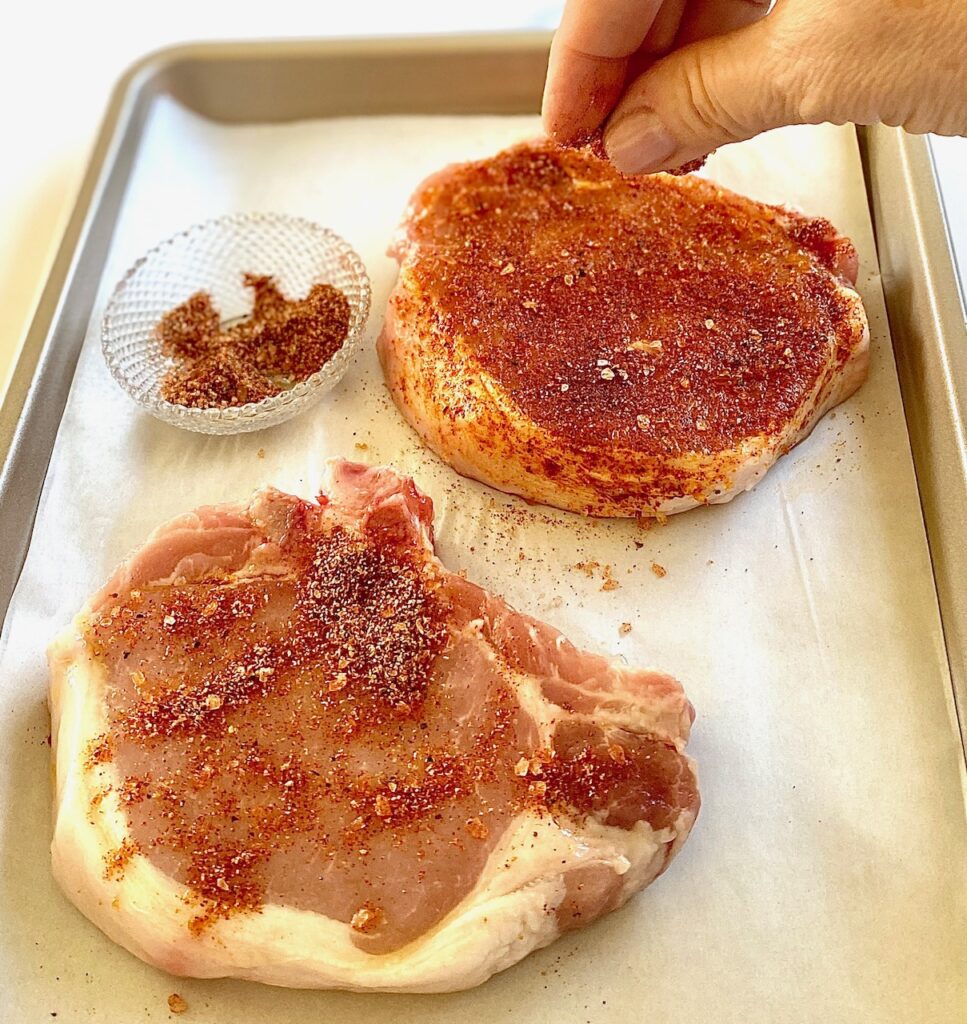
- Combine the seasoning ingredients together in a small bowl (paprika, kosher salt, garlic powder, onion powder, and pepper).
- Pat the pork chops dry and coat them with olive oil on both sides and on the edges.


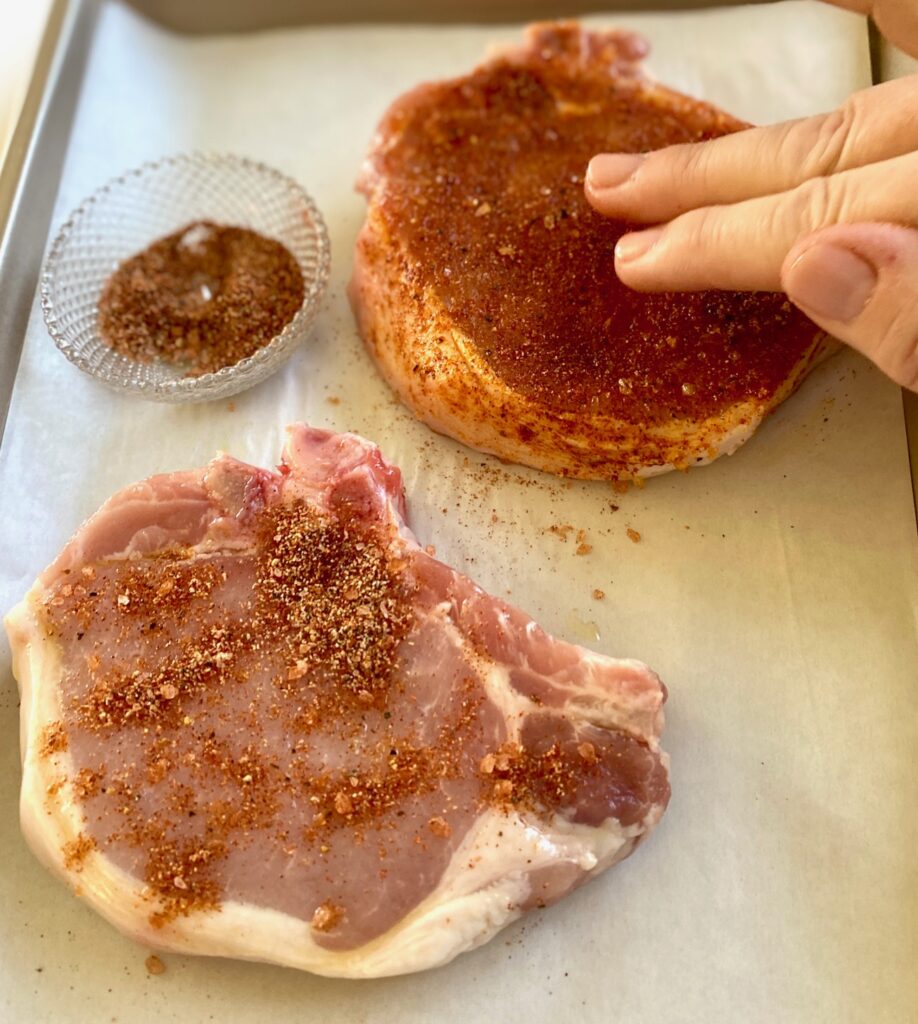
- Generously coat the pork chops, including the sides, with the seasoning blend. Pat the seasonings on to make sure they stick and that the chops are well coated.
- Remove the air fryer basket and spray generously with non-stick spray, or add an air fryer parchment liner to the basket, which makes for much easier cleanup.
- NOTE: If using parchment paper do not add it until you are ready to add the food because the air in an air fryer will cause the parchment to fly around and and can cause the paper to burn. Use parchment with holes in it (we buy them this way) or cut a few holes in yours. This is necessary for proper air circulation.

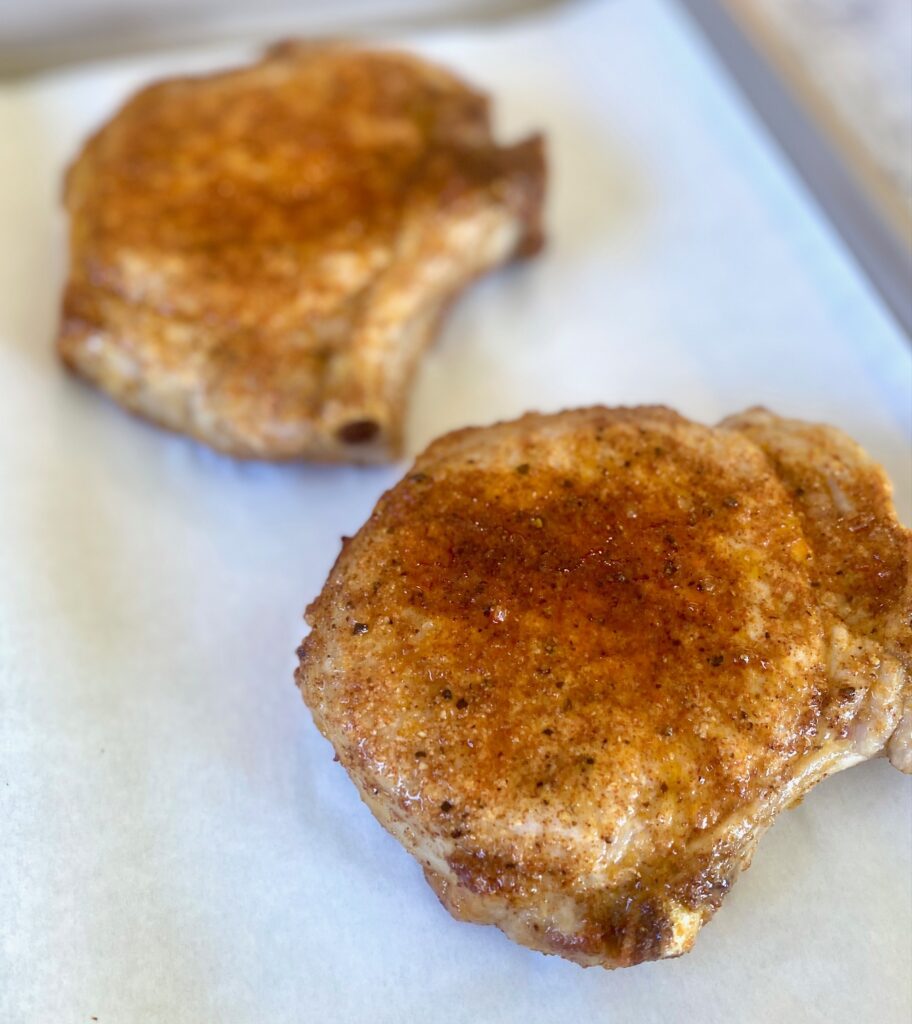
- Place the chops in the air fryer basket side by side, and cook for 7-9 minutes, flipping halfway through.
- Remove when the pork chops reach an internal temperature of 140˚F. Pork chops will continue to cook slightly while resting.

- Let rest, uncovered, for 3-5 minutes, or until the pork chops reach an internal temperature of 145˚F.
How long to cook pork chops in the air fryer:
- Cooking times will always vary based on the model of your air fryer and the size of your pork chops.
- We highly recommend using an instant-read digital cooking thermometer for the most accurate results. They are an inexpensive, but highly valuable, kitchen tool.
- Cook pork chops until they reach 140˚F, remove, and let rest for a few minutes until the internal temperature reaches 145˚F (3-5 minutes)
Checking doneness without a thermometer
If you don’t have a thermometer there a two good ways to check for doneness.
- Prick the pork chops with a fork and check to see if the juices run clear
- Press the top of the chop with your fingertip (or tongs). The pork should feel firm but spring back to shape with clear juices
Slicing and serving:
These chops can be served whole, or sliced on the bias, and served along with their bone. We love to serve them with Lemon Vinaigrette mixed greens and easy oven Roasted Asparagus for a quick weeknight dinner. If pairing with wine we suggest a buttery Chardonnay, a light Pinot Noir, or a crisp Rosé.

Choosing pork chops for the air fryer:
Pork chops are a lean, mild-flavored, and ultra-versatile cut of meat. They lend themselves to so many flavor combinations but can also overcook quickly and become dry. For that reason, it’s important to consider which cut of chops is best for each cooking method.
For the juiciest air fryer pork chops we like bone-in pork chops. They have so much flavor, thanks to a little fat around the bone. The Ribeye Pork Chop is our top choice. They contain some rib and back bone in them which keeps them juicy.
Learn more about cuts of pork chops from the pork.org website.
A few things to keep in mind:
- Boneless pork chops – cook faster and are ultra lean
- Bone-in pork chops – fuller flavor but slightly higher in calories

Looking for other pork recipes?
- This Pork Loin Roast with garlic and herbs is simple but so flavorful
- Juicy and authentic Carnitas are also ideal for the air fryer. Great for tacos, burritos and nachos.
- Grilled Chili Lime Pork Tenderloin has a tangy and citrusy flavor.

Air Fryer Pork Chops
Equipment
- Air Fryer
Ingredients
- 2 8 ounce pork chops bone-in, 1.5" thick, rib eye cut
- 1 Tablespoon olive oil
- ½ teaspoon paprika
- ½ teaspoon salt (preferably kosher salt)
- ¼ teaspoon garlic powder
- ¼ teaspoon onion powder
- ¼ teaspoon black pepper, freshly ground
Instructions
- Preheat the air fryer to 400℉ for 5 minutes.
- Pat the pork chops dry, place on a plate, and coat all over with the olive oil.
- In a small bowl combine all the seasonings (paprika, salt, garlic powder, onion powder, and pepper) and mix well to blend.
- Generously coat the pork chops, including the sides, with the seasoning blend.
- Spray the air fryer basket with non-stick spray or line it with a parchment air fryer liner.
- Place the pork chops in the air fryer basket side by side, and cook for 7-8 minutes, flipping halfway through cooking. Remove when the internal temperature is 140℉. Let the pork chops rest, uncovered, for 3-4 minutes until they reach an internal temperature of 145℉.
Notes
- Prick with a fork and check that the juices run clear
- Press the top of the meat with your fingertip (or tongs). The pork should feel firm but spring back to shape with clear juices
Nutrition
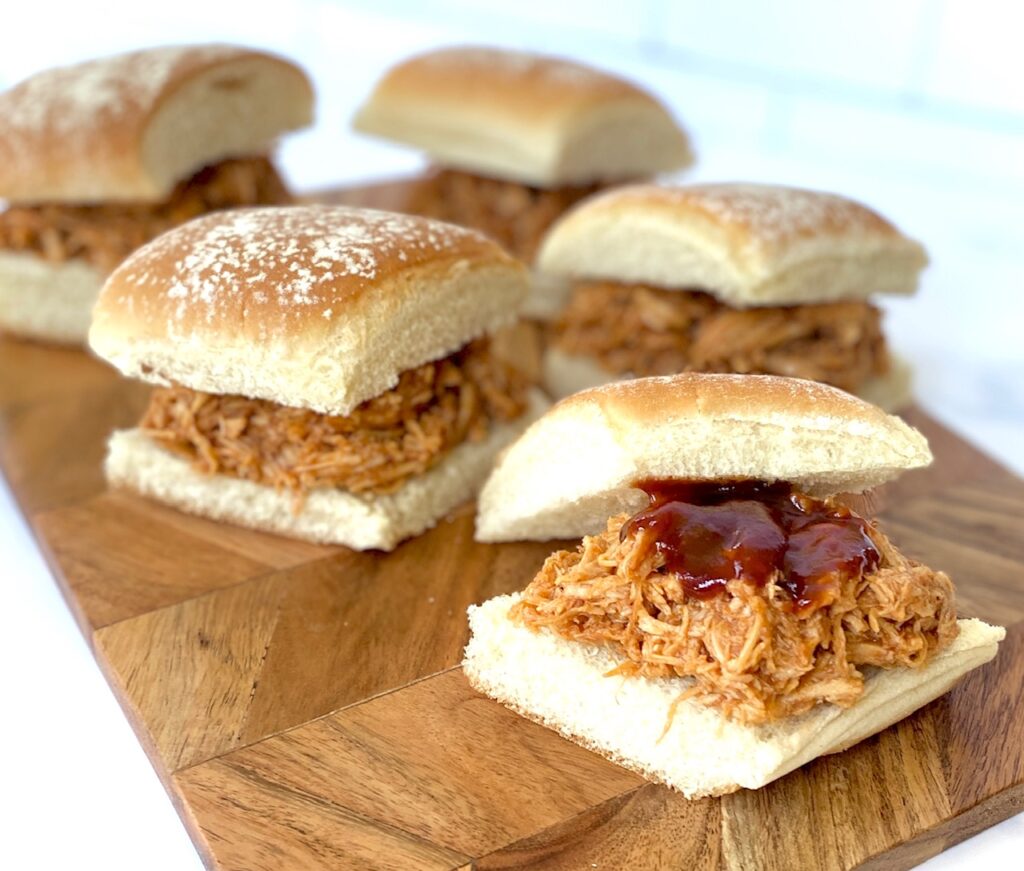
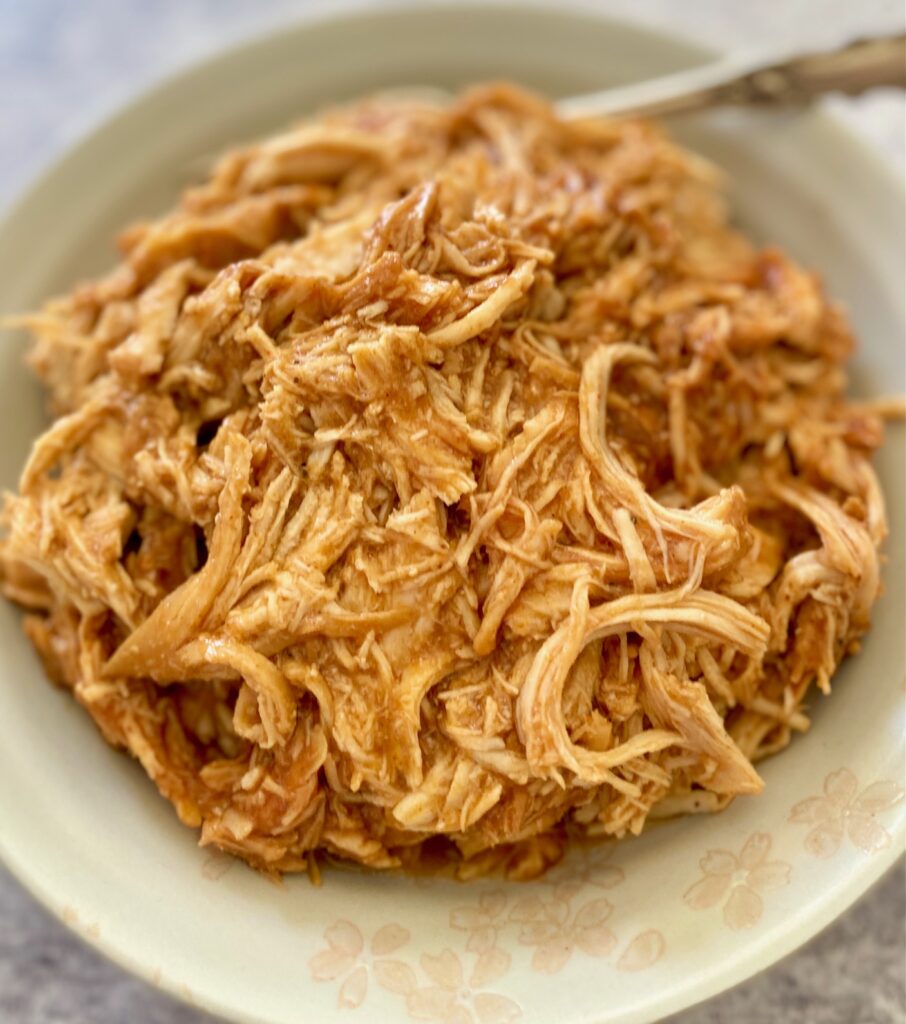
Turn this zesty chicken into a sandwich by piling it high on a bun and topping it with our Asian Coleslaw for a cool twist
The magic of the slow cooker is that you can prep everything in the morning and have dinner ready without much hassle. Win-win, right? This one takes just 15 minutes of prep time!
There are only 5 basic ingredients for this crockpot BBQ chicken recipe and you probably have them in your refrigerator and pantry right now.
This post may contain affiliate links. Please see our affiliate disclosure for details. We only recommend products to you that we love and use.
Ingredients for Pulled Chicken:

- BBQ Sauce – pick your favorite brand or make our 15-minute Homemade BBQ Sauce
- Garlic Cloves – we use 3 cloves but add a few more if you love garlic
- Cumin – this spice has an earthy flavor and is a great flavor boost
- Chili Powder – this is where the kick of spice comes in but you can tone it down by adding a little less if desired
- Chicken Breasts – 2 pounds of boneless and skinless breasts

If making Pulled Chicken Sandwiches or Pulled Chicken Sliders add:
- 6 large or 12 slider buns
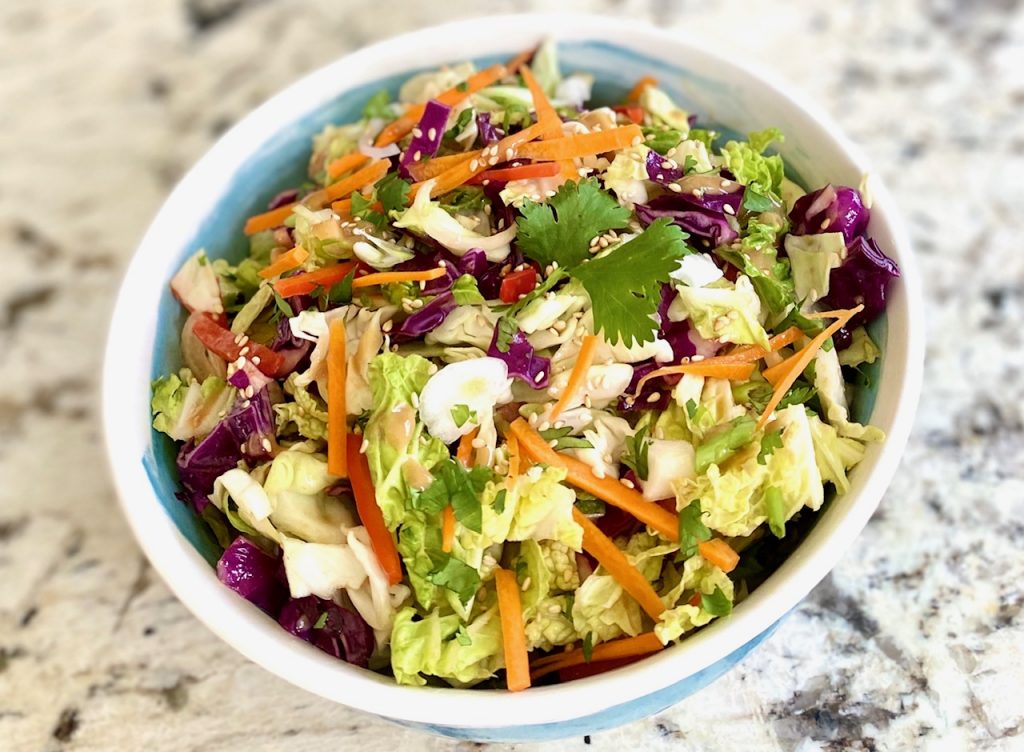
- Asian Coleslaw with Peanut Dressing
How to make Slow Cooker Pulled Chicken:
This recipe is super simple with just a few steps:
- Whisk all of the sauce ingredients together in a bowl
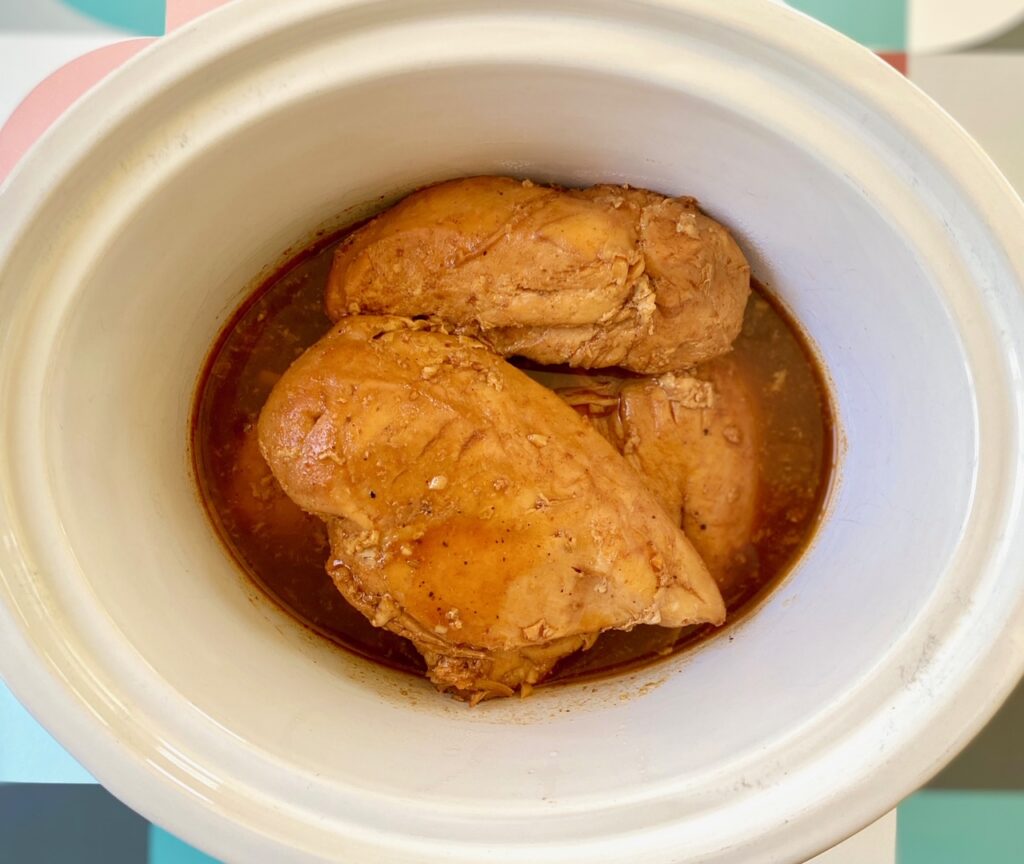
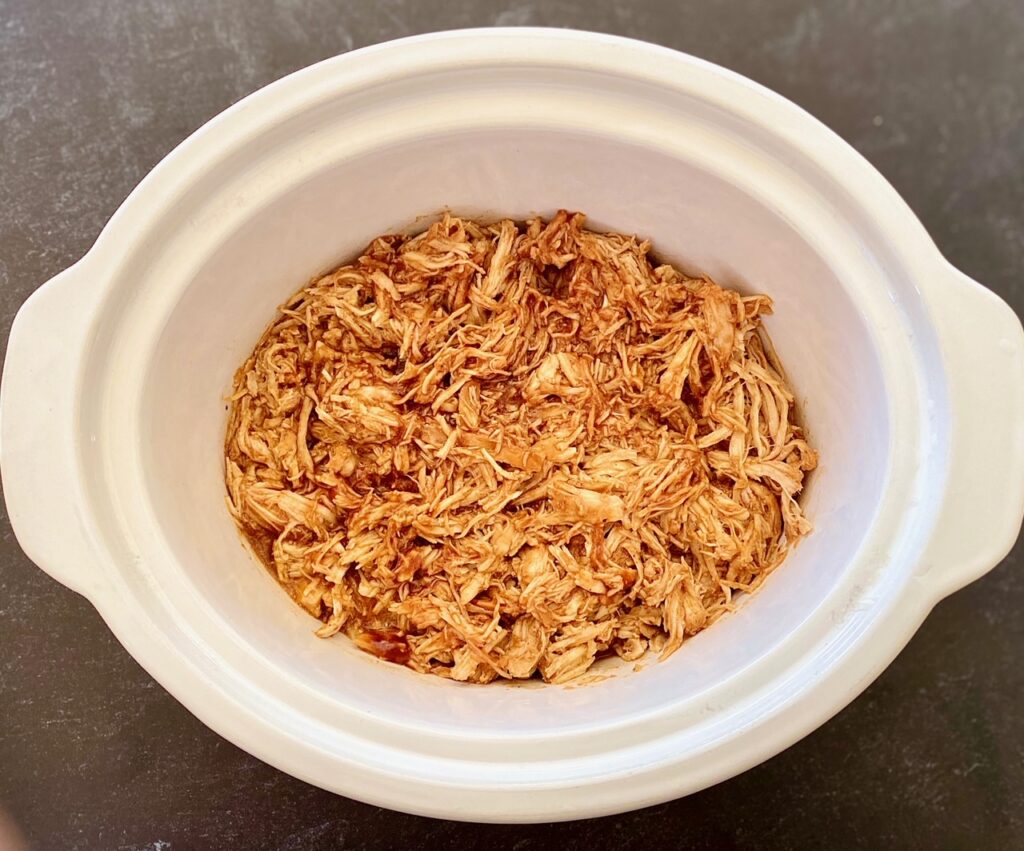
- Place whole skinless, boneless chicken breasts in the slow cooker
- Pour the BBQ Sauce mixture over the chicken and make sure it is well-covered
- Put the cover on the slow cooker
- If you have all day you can cook the chicken on low for about 8 hours, but if time is an issue it can be cooked on high for 4 hours
- Once the chicken is finished cooking (165˚F recommended), and tender, take it out of the slow cooker and shred it on a cutting board using two forks to pull it apart


- Return the shredded chicken back to the slow cooker, mix it thoroughly with the sauce, and heat for another 15 minutes. If needed, add more BBQ sauce.
- Serve as is or as sandwiches or sliders
Different ways to use Slow Cooker Pulled Chicken:
My favorite way to eat this chicken is to create a pulled chicken slider or sandwich topped with our cool Asian Coleslaw.
To make:
- Start with a bun that is sturdy enough to hold both the chicken and the slaw. I like a poppy seed, sesame seed, or an onion bun, but whole wheat works well too.
- Top the shredded chicken with about 1/3 cup of Asian Coleslaw. The flavors really meld well together.
Other Variation Ideas:
- If you don’t want to use a bun you could also wrap this amazing chicken up in a big piece of sturdy lettuce for a tasty chicken lettuce wrap
- Put it right on your plate and top it with any coleslaw!
- Use the chicken as the protein base in a rice bowl
- Make a burrito or use the mix in tacos or nachos
Storing leftover Pulled Chicken:
FREEZER: Pulled chicken freezes very well which makes it great for meal prep. Be sure to let it cool completely, then separate it into serving sizes that work for you, and store tightly sealed in the freezer for up to 3 months.
REFRIGERATOR: Store in a sealed container for up to 3 days
Suggestions for beverage pairing:
- Our Spicy Mango Margarita or refreshing Paloma Cocktail are both great matches
- Asian beer is a great accompaniment for a pulled chicken sandwich
- Light to medium-bodied Chenin Blanc or Rose is a good contrast to the sweet and salty flavors in the BBQ sauce
Other easy main dishes to try:
- Asian Baked Chicken
- Sheet Pan Salmon
- Skirt Steak with Mustard Sauce
- Garlic Shrimp with Roasted Tomatoes
Perfect side dishes to pair with pulled chicken
- Refreshing Citrus Salad is a light side
- Try our zesty Black Bean and Corn Salad
- An easy Grilled Caesar Salad adds a smoky touch to dinner
- Grilled Corn with Sweet Chili Sauce adds a spicy touch to match the chicken
Read more about making the perfect Shredded Chicken, which is a great technique to have on hand!

Slow Cooker Pulled Chicken
Equipment
- Slow Cooker or Crock Pot
Ingredients
- 1 cup BBQ sauce
- 3 garlic cloves, minced
- 1 -2 Tablespoon chili powder (depending on the spice level wanted)
- 2 teaspoon ground cumin
- 2 pounds chicken breasts, boneless and skinless
- 1 cup water
Optional for Sandwich:
- 6 large buns, such as poppy seed, onion or sesame seed
- 2 cups Asian coleslaw, See recipe link below
Instructions
Prepare Sauce:
- In medium bowl, whisk BBQ sauce, garlic, cumin, chili powder and water.
Slow Cooker Directions:
- In a 4-6 quart slow cooker add whole chicken breasts and cover with BBQ mixture.
- Cover and cook on high for 4 hours or on low for 8 hours, or until chicken is very tender. (chicken pieces should be cooked to an internal temperature of 165℉)
- Transfer the cooked chicken to a cutting board. Shred the chicken by pulling it apart with 2 forks and then add the chicken back into the slow cooker, stirring to combine with the sauce, and cook for an additional 15 minutes. Keep warm until ready to serve.
To Make Sandwiches
- Prepare your favorite Asian slaw or use our recipe for Asian Coleslaw with Peanut Dressing
- Serve shredded chicken on buns and top with about 1/3 cup slaw.
Notes
- Use boneless pork instead of chicken
- Use small rolls, such as Hawaiian Rolls, to make 12 sliders
Nutrition
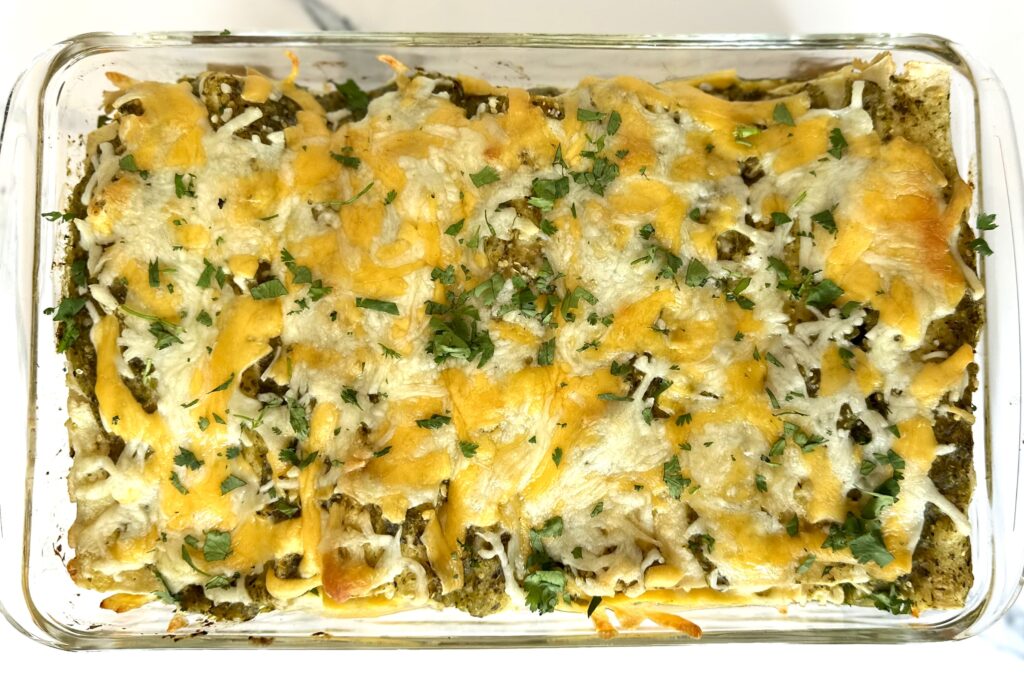
This amazing easy recipe is also called “Chicken Enchiladas Casserole”
These step-by-step instructions are a great way to make flavor-packed Green Chicken Enchiladas, this means you’ll have dinner on the table in no time. Add a side dish of Spanish Rice and a refreshing Paloma for a complete Mexican food meal.
Ready to get started? Just click on our “jump to recipe” button below to go straight to the recipe card. For tips, processes, and substitutions keep reading. This post may contain affiliate links. Please see our affiliate disclosure for details. We only recommend products to you that we love ♥️ and use.
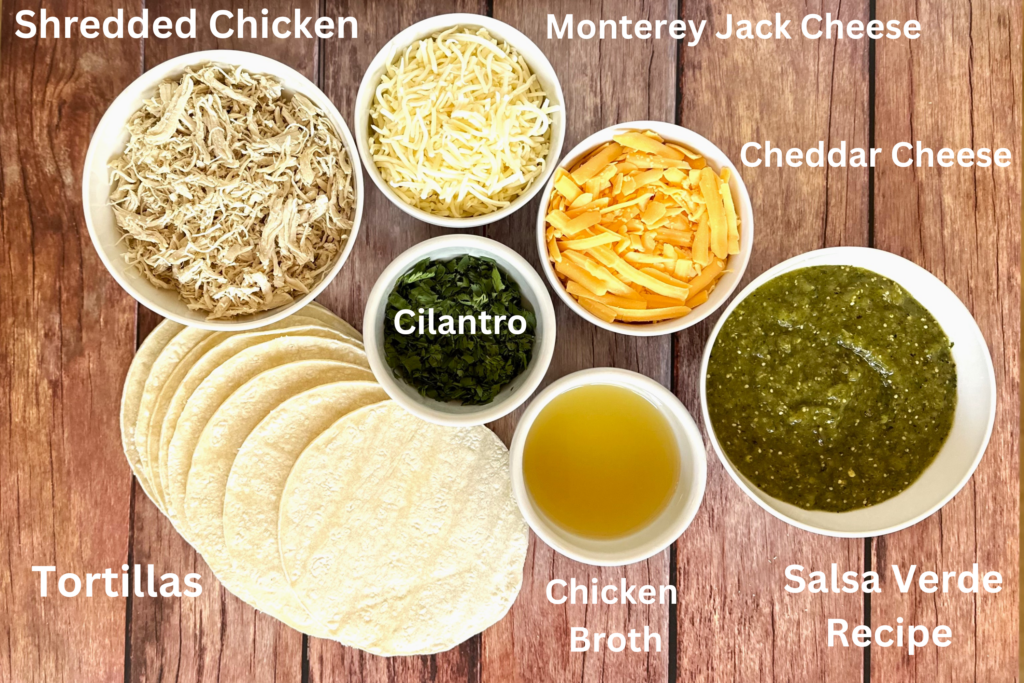
Jump to RecipeIngredients for Green Chicken Enchiladas
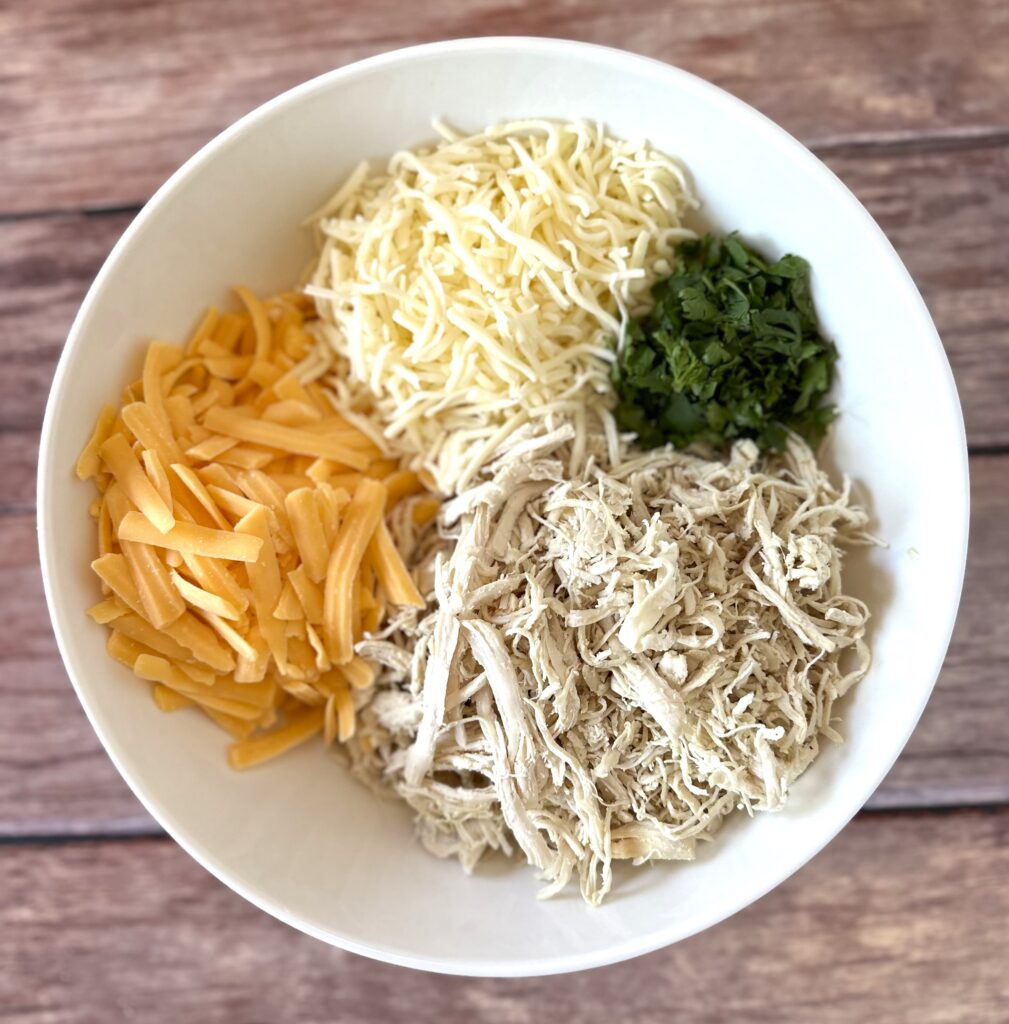
- Shredded Chicken – follow our quick step by step instructions on Making shredded chicken, we like to start with chicken breast.
- Corn Tortillas – we use a 7-inch size
- Shredded Cheddar Cheese – we like sharp cheddar for its tangy flavor
- Shredded Monterey Jack Cheese – or spice it up with pepper jack cheese
- Fresh Cilantro – not a fan? skip it or substitute flat-leaf parsley
- Chicken Broth
- Our homemade Salsa Verde – packed with herbs and spices this sauce gives these traditional enchiladas their signature color and flavor
How to make Green Chicken Enchiladas with homemade Salsa Verde
We made our Chicken enchiladas a simple recipe with limited ingredients. Follow this step-by-step for deliciously spicy salsa verde chicken enchiladas.
First Step
- Preheat oven to 350˚degrees F.
- Prepare our Salsa Verde Recipe and make Shredded Chicken. Set aside. Both of these steps can be done the day before and refrigerated until ready to use.
- Combine filling ingredients: Add shredded chicken, 1/2 of the cheddar cheese, 1/2 of the Monterey Jack cheese, and 1/2 of the chopped cilantro, to a medium mixing bowl and toss together. Set aside.

Second Step
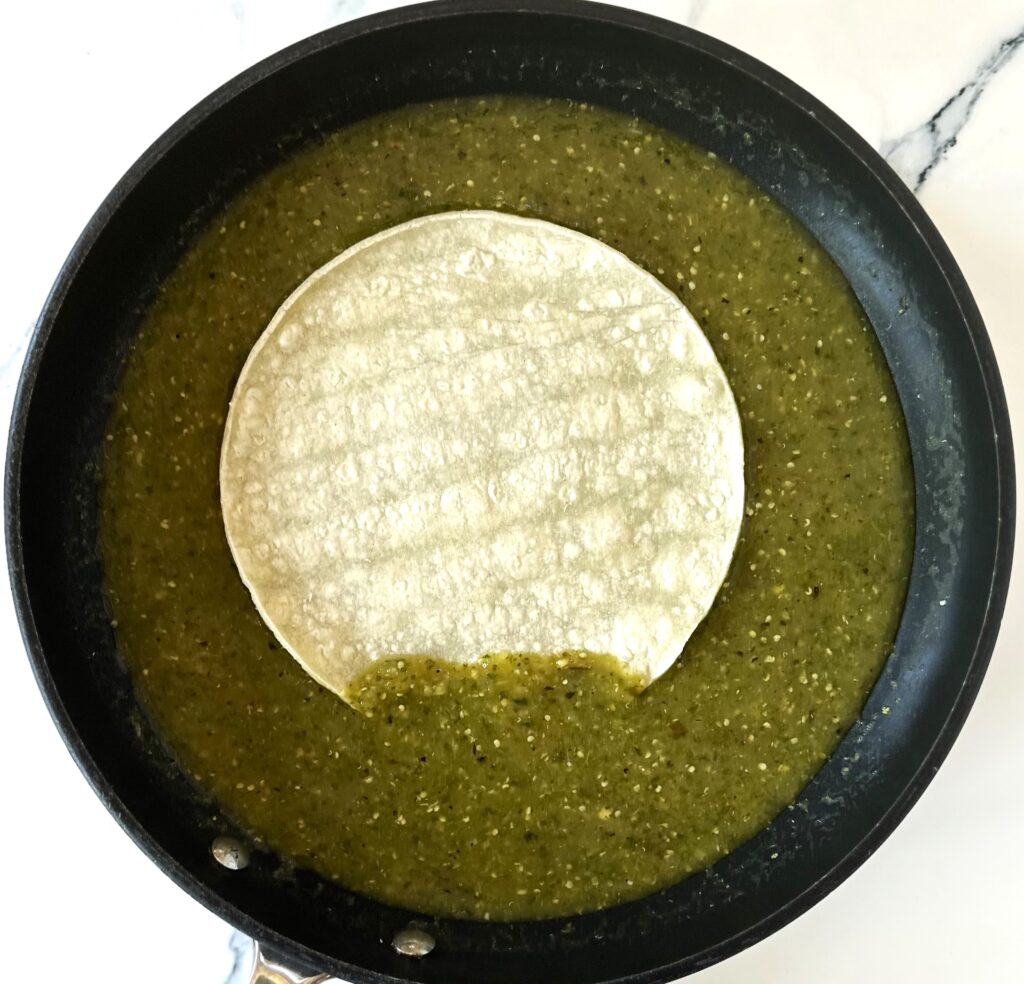
- In a medium skillet add 1 cup of the salsa verde recipe with the chicken broth and mix to combine. Warm salsa over low heat, then turn off heat before dipping tortillas.
- Warm the tortillas by wrapping in a damp towel or damp paper towel and heat for 30 seconds in the microwave until they are soft, pliable, and easy to roll.
- Dip each tortilla into the warm green salsa mixture until coated on each side.
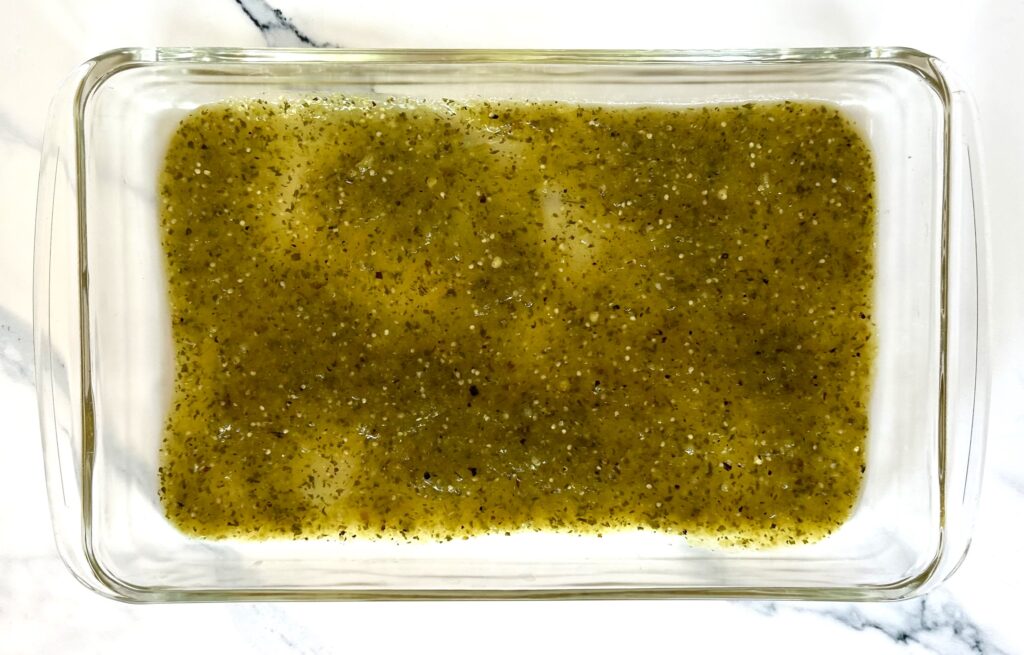
- Pour a light layer of salsa to coat the bottom of a 9″ x 13″ baking dish – about 2 Tablespoons.
- For each tortilla add 3-4 Tablespoons of chicken mixture.
- Gently roll each tortilla up and place seam side down in the prepared baking dish. Repeat with the remaining tortillas.

- FYI: a 9″ x 13″ casserole dish will hold 8 rolled tortillas.
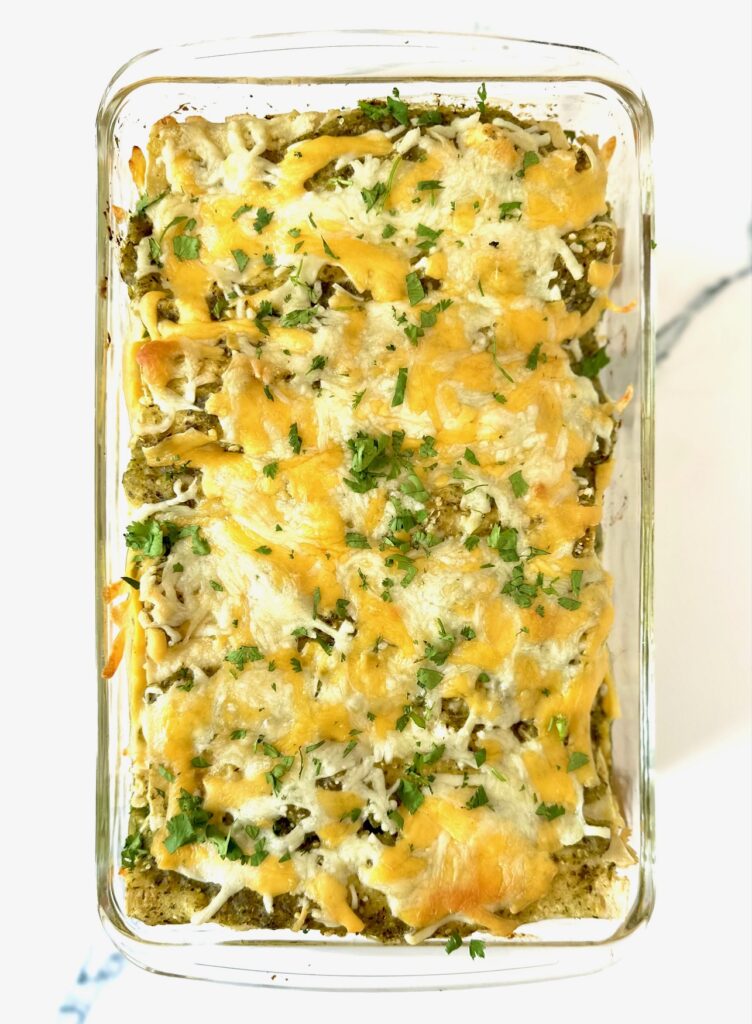
- Pour the homemade enchilada sauce over the top of the enchiladas.
- Sprinkle with the remaining cheddar and Jack cheeses.

Final Step – Baking
- Bake, uncovered, in the preheated oven at 350˚F for 30 minutes. (See bullet point below for less browning). Now for the best part, since the chicken has been already cooked the enchiladas just need to be baked until all the filling ingredients and remaining cheese become wonderfully bubbly and gooey!
- If you prefer your enchiladas not as brown on the top and prefer them more bubbly and gooey, then cover them with foil for the first 10-15 minutes of baking and then uncover them for the last 15 minutes.
- Remove the pan from the oven and garnish with the remaining chopped cilantro.
- Let rest for about 10 minutes, and serve. We also like to serve our enchiladas topped with a bit of pico de gallo and a dollop of sour cream.
What is the difference between Salsa Verde and Green Enchilada sauce?
Let’s clear up the difference between salsa and sauce. Salsa is the Spanish term for “sauce”. It has also come to mean the same thing in English. So, verde sauce is the same as salsa verde.
The difference between a traditional red enchilada sauce and a salsa verde sauce is that salsa verde is made and served raw and red sauce is cooked.
Salsa verde is blended together and served uncooked, and it is only cooked when added to a cooked recipe such as this enchilada recipe.
Traditional red enchilada sauce is cooked and includes a liquid, such as water or broth. Both styles have delicious flavors and make the most fabulous enchiladas.
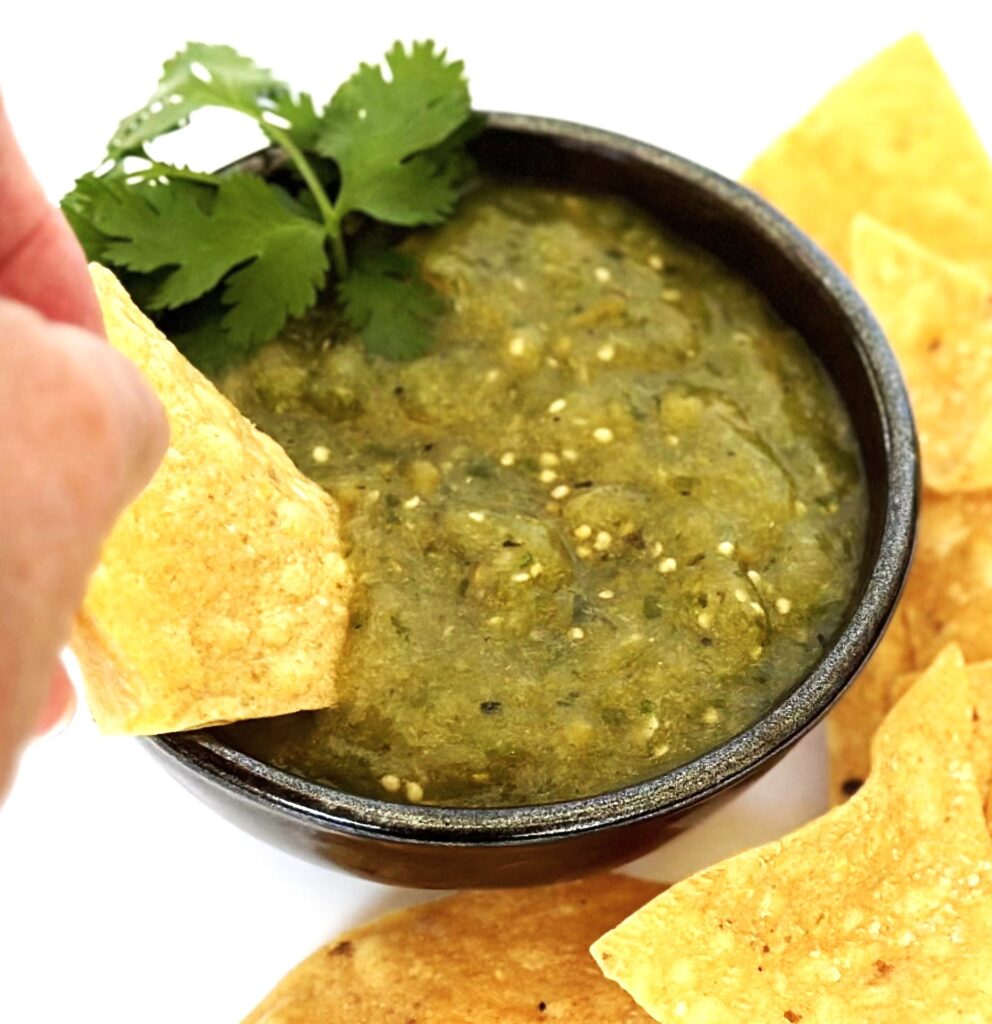
Mildly spicy Salsa Verde is the perfect dipping sauce
Is green enchilada sauce hotter than a red sauce?
The main difference between the two sauces is simply the ingredients. Red sauce is made from red chilis or chili powders. Green, or verde, sauce is made from green chilis, tomatillos, and jalapenos. Green sauces have a higher heat range or tend to be the “hot sauce” of the two.
In our Green Chicken Enchiladas recipe the heat and the spice come from the salsa verde.
How to store enchiladas before, and after, you bake them:
Refrigerator:
One of the best parts of making homemade enchiladas is they can be made the day before, refrigerated, and baked the next day.
Baked enchiladas can be refrigerated for up to 3 to 4 days in an airtight container and gently rewarmed in the oven or microwave.
Freezer:
You can freeze the prepared enchiladas uncooked to bake at a later time. Fully cool and place in a sealed container before freezing. You can also freeze cooked and cooled enchiladas to rewarm later.

Here are a few traditional Mexican dish recipes we love
We are crazy for Mexican-based dishes and here are some of our faves!
- Spanish Rice – the perfect side dish!
- Chicken Tortilla Soup – also uses shredded chicken!
- Chili Verde Recipe – slow-cooked tender pieces of pork and a zesty green sauce
- Chili Colorado Recipe – mildly fiery beef chunk in dark red sauce
- Carne Asada Recipe – an easy marinated and quickly grilled beef dinner
- Pork Carnitas Recipe – herbs and citrus give this shredded pork its big flavor
- Grab a cool Paloma cocktail or a sweet Spicy Mango Margarita to complete your dinner!

Green Chicken Enchiladas
Equipment
- 1 9" x 13" baking dish
Ingredients
- 2 ½ cup cooked chicken breasts, shredded
- 8 Corn tortillas 7-inch round
- 2 cups Cheddar Cheese shredded
- 2 cups Jack Cheese shredded
- 2 ½ cups Salsa Verde sauce
- ½ cup Chicken Broth
- ½ cup Cilantro leaves, chopped for garnish
Instructions
- Preheat oven to 350℉
- Prepare salsa verde and shredded chicken. Set aside. (see links below for both recipes)These can be prepared the day before and refrigerated until ready to use.
- Add filling ingredients to a medium-sized bowl: shredded chicken, 1/2 of the cheddar cheese, 1/2 of the Monterey Jack cheese, and 1/2 of the chopped Cilantro. Toss together and set aside.
- In a medium skillet add one cup of the salsa verde with the chicken broth and mix together. Heat on low.
- Warm the tortillas by wrapping in a damp towel and heating for 30 seconds in the microwave until they are soft, pliable, and easy to roll. Coat the bottom of a 9" x 13" baking dish with 2 Tablespoons of salsa verde.
- For each tortilla add about 3-4 Tablespoons of chicken/cheese filling.Gently roll each tortilla up and place seam side down in the prepared pan. Repeat with the remaining tortillas.
- Baking dish will hold 8 finished tortillas. Pour remaining salsa verde over the prepared enchiladas, and sprinkle with the remaining cheddar and Jack cheese.
- Bake, uncovered, at 350℉ for 30 minutes. If you would like your enchiladas to not brown as much you can cover them with foil for the first 15 minutes and then uncover them for the last 15 minutes.
- Remove from the oven and garnish with the remaining chopped cilantro. Let rest for 10 minutes and serve.
Notes
- Our easy Salsa Verde recipe
- Check out How to Make and Shred Chicken
- FYI: A 9″x 13″ pan will hold 8 rolled tortillas
- Baked enchiladas can be refrigerated for up to 3 to 4 days in a sealed container and gently rewarmed in the oven or microwave.
- You can freeze the prepared enchiladas uncooked to bake at a later time. Fully cool and place in a sealed container before freezing.
- You can also freeze a pan of cooked and cooled enchiladas to rewarm later.
Nutrition
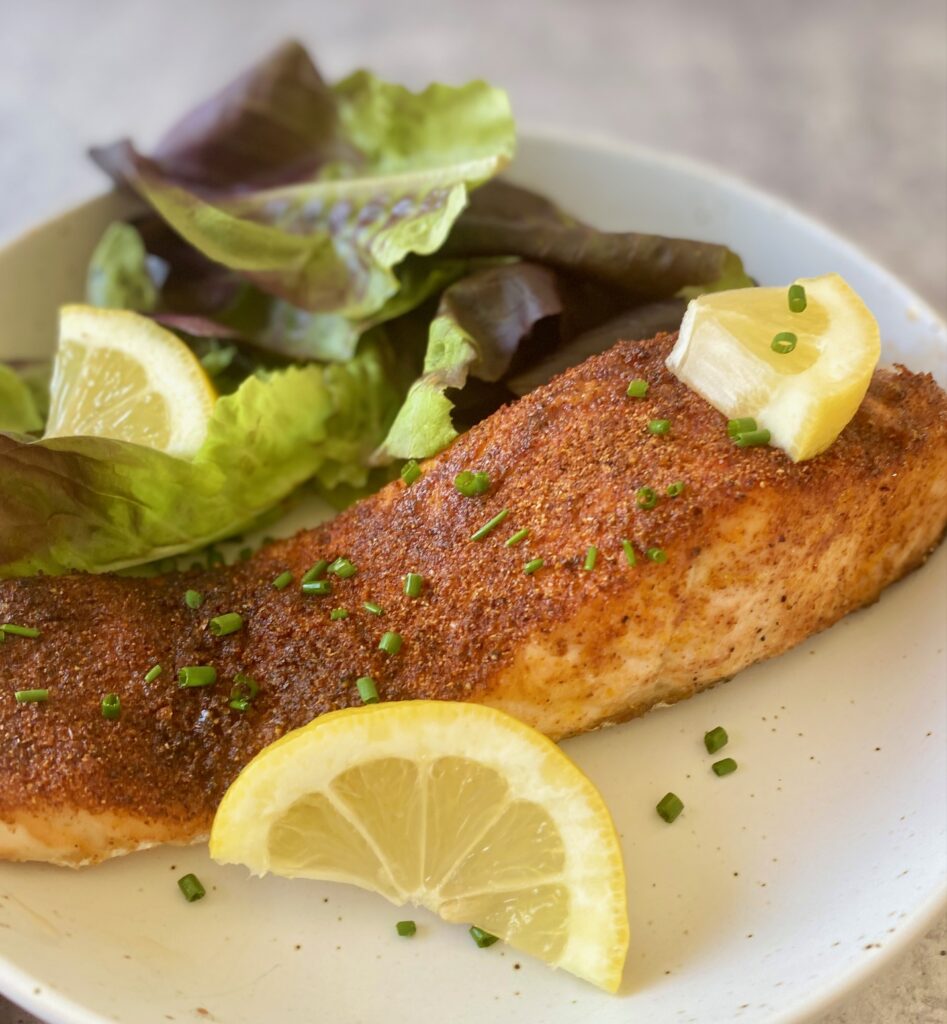
In just 15 minutes you can make an easy and delicious weeknight dinner
Making salmon in the air fryer is about to become your new favorite way to prepare salmon. Like most air fryer recipes, it’s fast and practically fail-proof. The results are amazing!
This recipe is perfect for those days when dinner needs to get on the table fast (did we mention 15 minutes?), because the salmon cooks quickly. It’s also perfect for days when firing up the barbeque isn’t an option
We love the versatility of salmon, from grilled Cedar Plank Salmon, with its crispy skin, or easy side of Baked Salmon with a creamy mustard dill sauce. It adapts to almost any seasoning or sauce.
This post may contain affiliate links. Please see our affiliate disclosure policy for details. We only recommend products we love and use.
Ingredients for Salmon in the Air Fryer
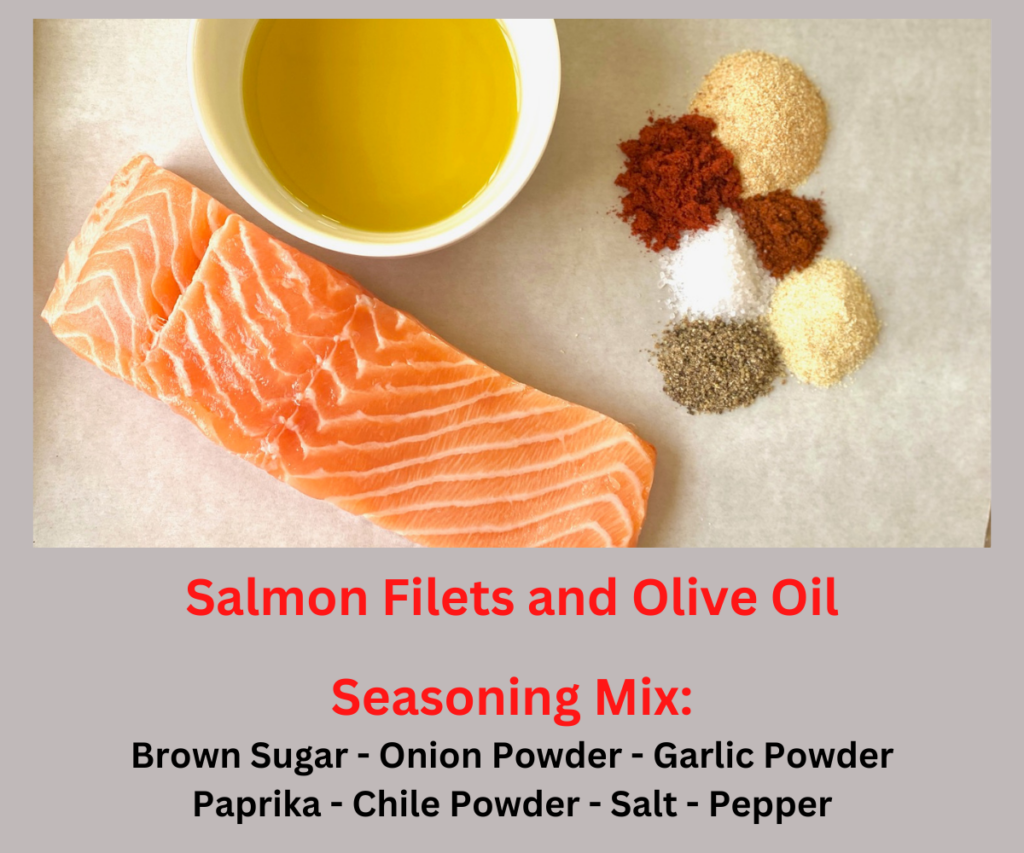
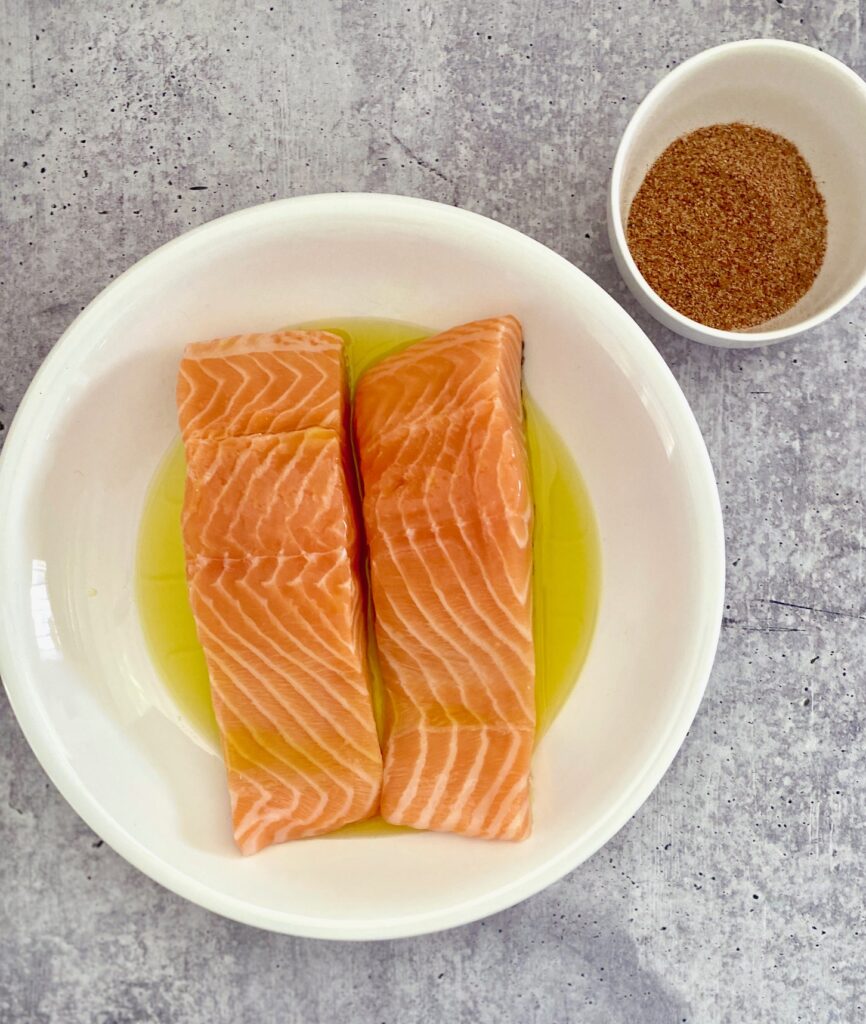
- 2 Salmon fillets – skin-on fillets are highly recommended for best results. Even if you don’t plan to eat the salmon skin it protects the fish during the high cooking temp and the end result is juicy salmon
- Olive Oil – or melted coconut oil
- Simple Ingredients for Salmon Seasoning:
- Light Brown Sugar – helps the salmon develop a gorgeous light crust
- Garlic Powder – if using garlic salt omit the regular salt
- Onion Powder – if using onion salt you can omit the regular salt
- Paprika – use regular or smoked paprika
- Salt and Black Pepper
- Chile Powder – looking for less spice? Leave this spice out
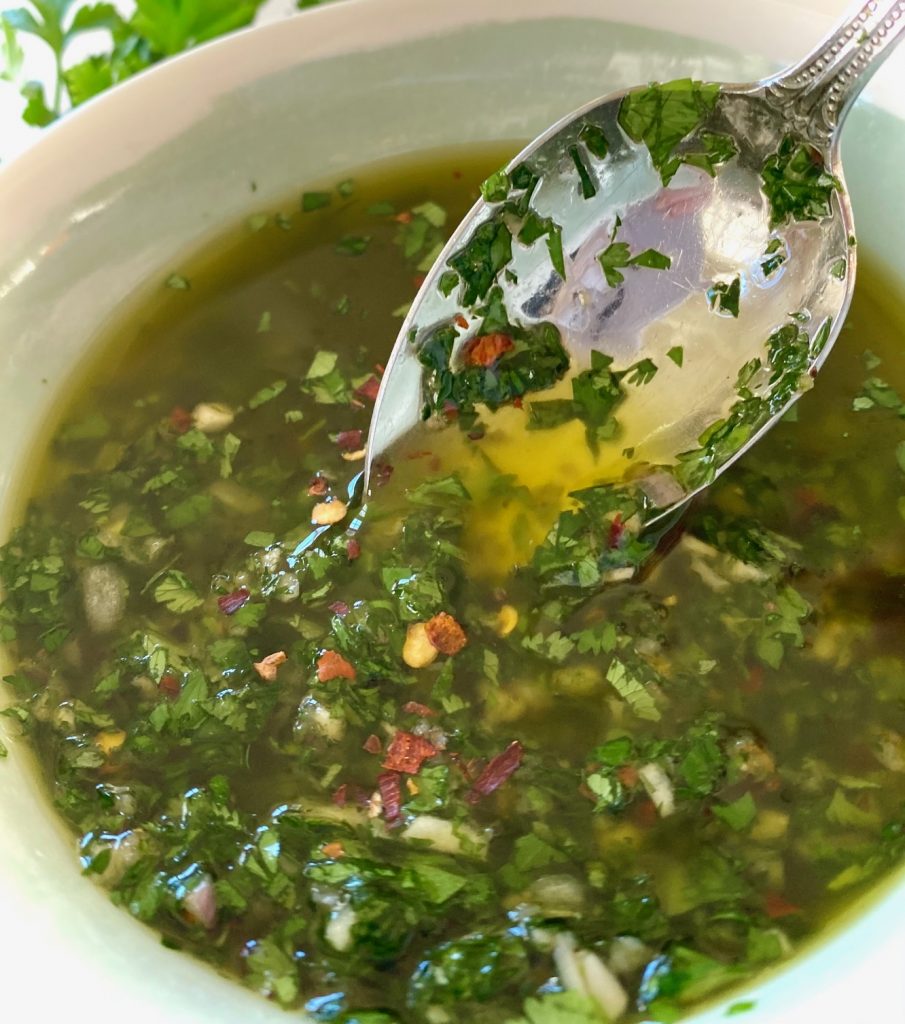
- For variation season with our Potlatch for Fish seasoning blend which is perfect for salmon, or try a sassy cajun seasoning.
How to make Air Fryer Salmon:
This method could not be easier! Below (and in the recipe card) are the step-by-step tips for perfect salmon.
Chefs Tip: Blend the seasoning mix ahead of time and store in an airtight container, for an even quicker dinner prep.
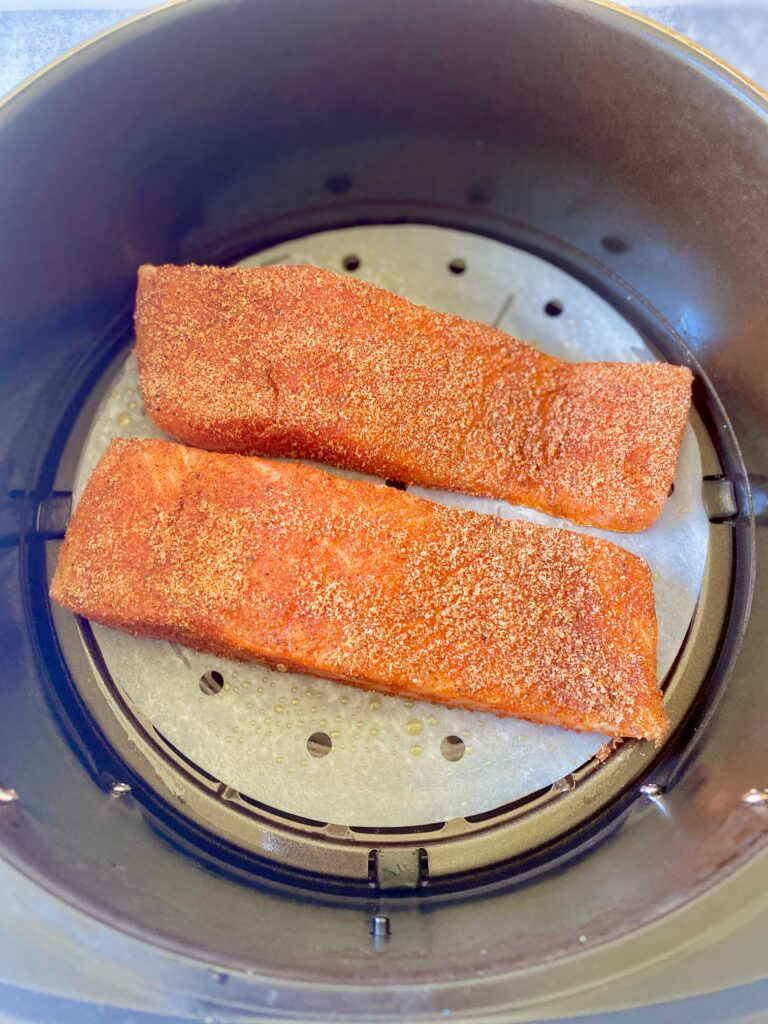
Preparing the salmon
- Preheat the air fryer to 400 degrees F for about 5 minutes while you are prepping the ingredients
- Pat the salmon dry with a paper towel – this helps give the salmon a nice crispy exterior
- Blend all of the seasoning ingredients in a small bowl
- In a shallow bowl (such as a pasta bowl) add the olive oil
- Coat both pieces of salmon all over by dredging them through the olive oil
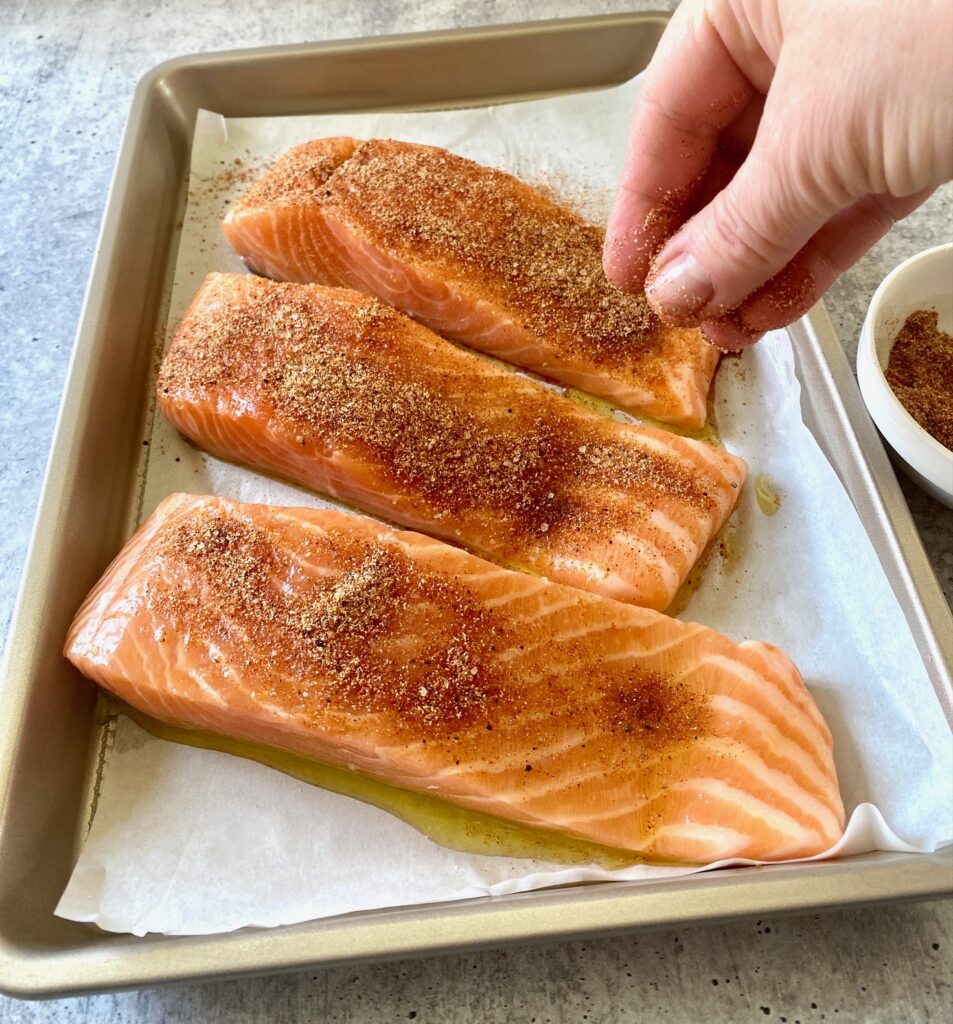
- Place salmon on a plate or tray lined with aluminum foil or parchment paper
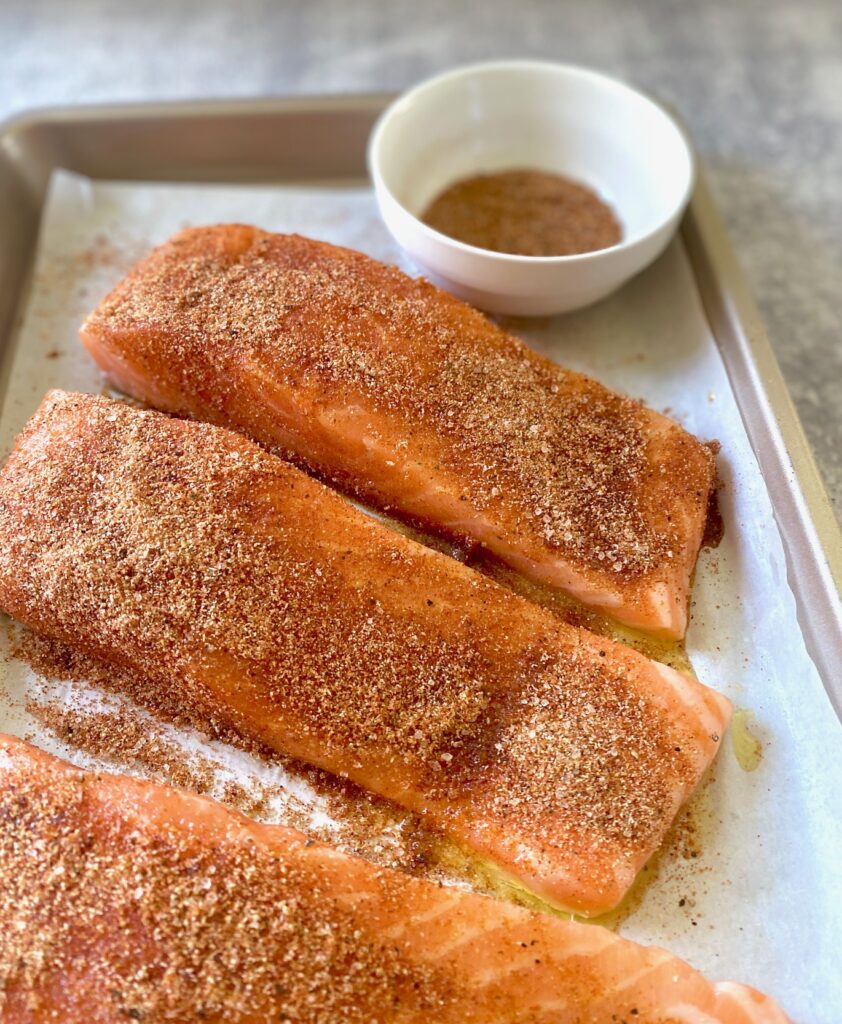
- Sprinkle the salmon pieces generously all over with the spice mixture
Preparing easy air fryer salmon:
There are 2 methods for cooking salmon in the air fryer – with OR without parchment paper
- Without Parchment: Remove the preheated basket from the air fryer and generously coat the basket with non-stick cooking spray or brush it with oil
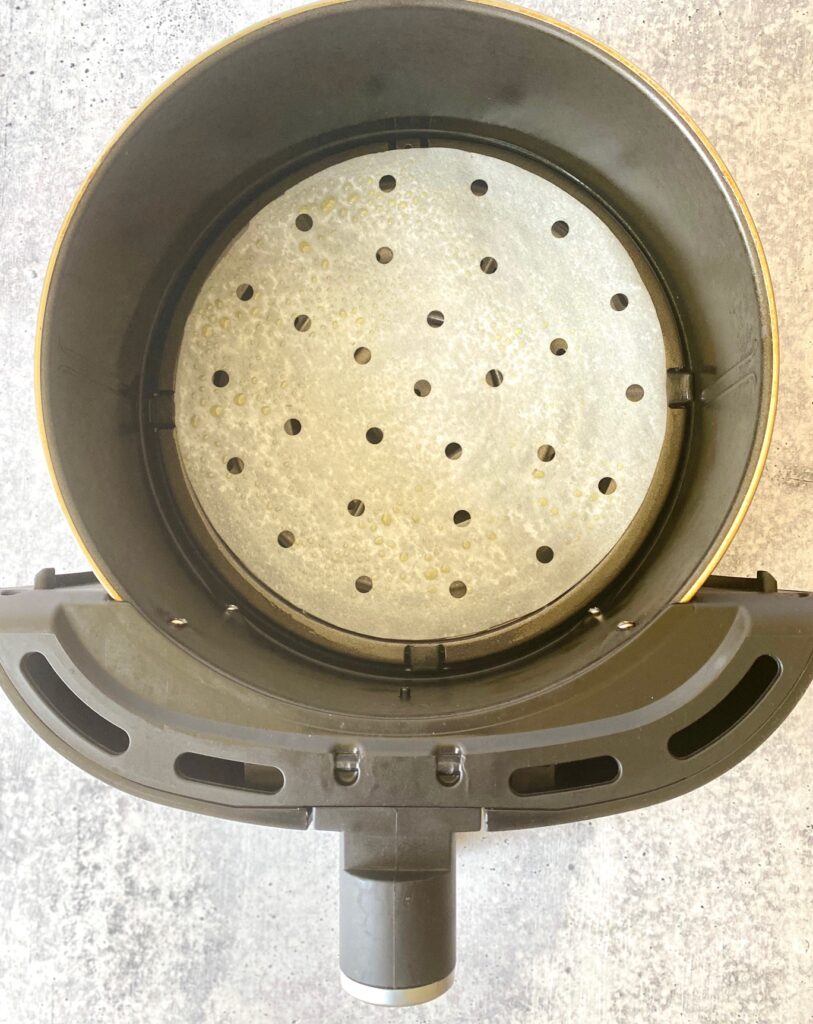
- With Parchment: After preheating remove the basket and add the parchment to the basket of the air fryer. Use parchment with small holes (I buy mine with the holes already punched out – see photo below) or snip some little holes with scissors. It’s important to have these holes so that the air can properly circulate in the air fryer because the hot air is what cooks the salmon. I also recommend lightly spraying the parchment with nonstick spray too.
Important Safety Note: Do not add the parchment liner during the preheating. The air in the air fryer will lift the paper up and around the heating element which will cause the paper burn!
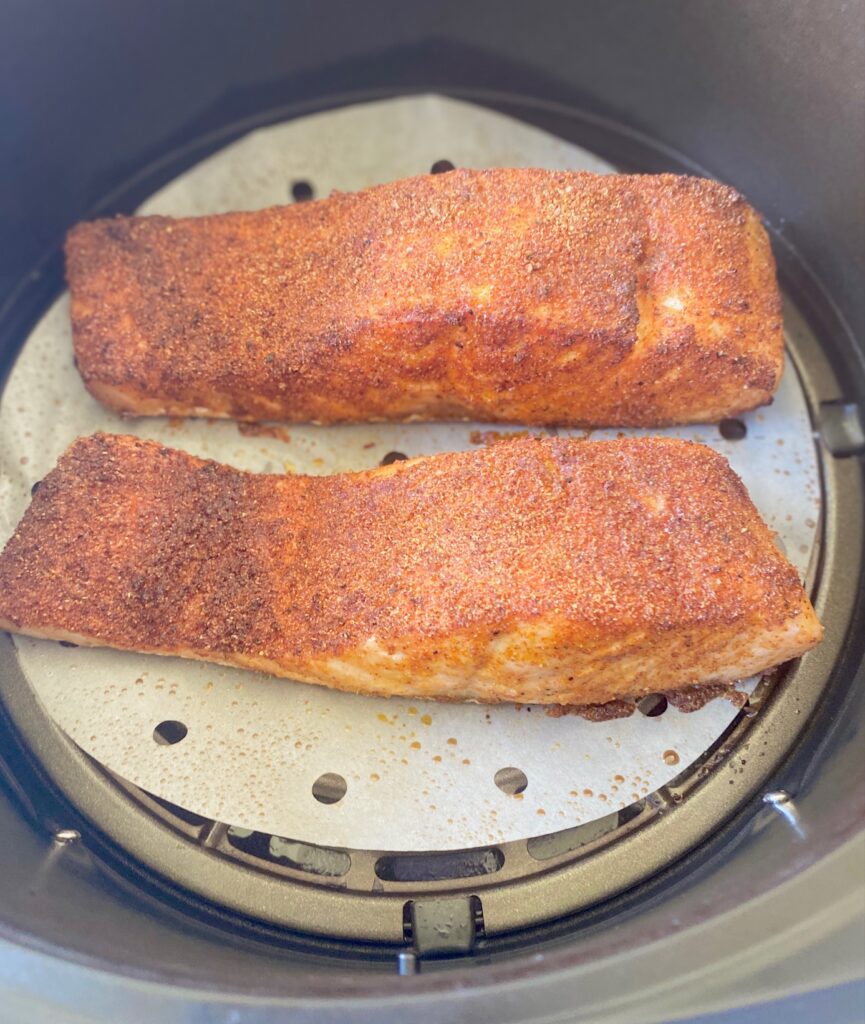
Cooking the Salmon:
- Place the prepared salmon fillet’s skin side down in the air-fryer basket in a single layer. To ensure the best airflow the pieces should not be touching each other.
- Air fry at 400˚F for 9-11 minutes, or until the thickest part of the salmon reaches an internal temperature of 130˚F on a meat thermometer. The easiest way to test the temperature of the salmon is by using a instant-read thermometer.
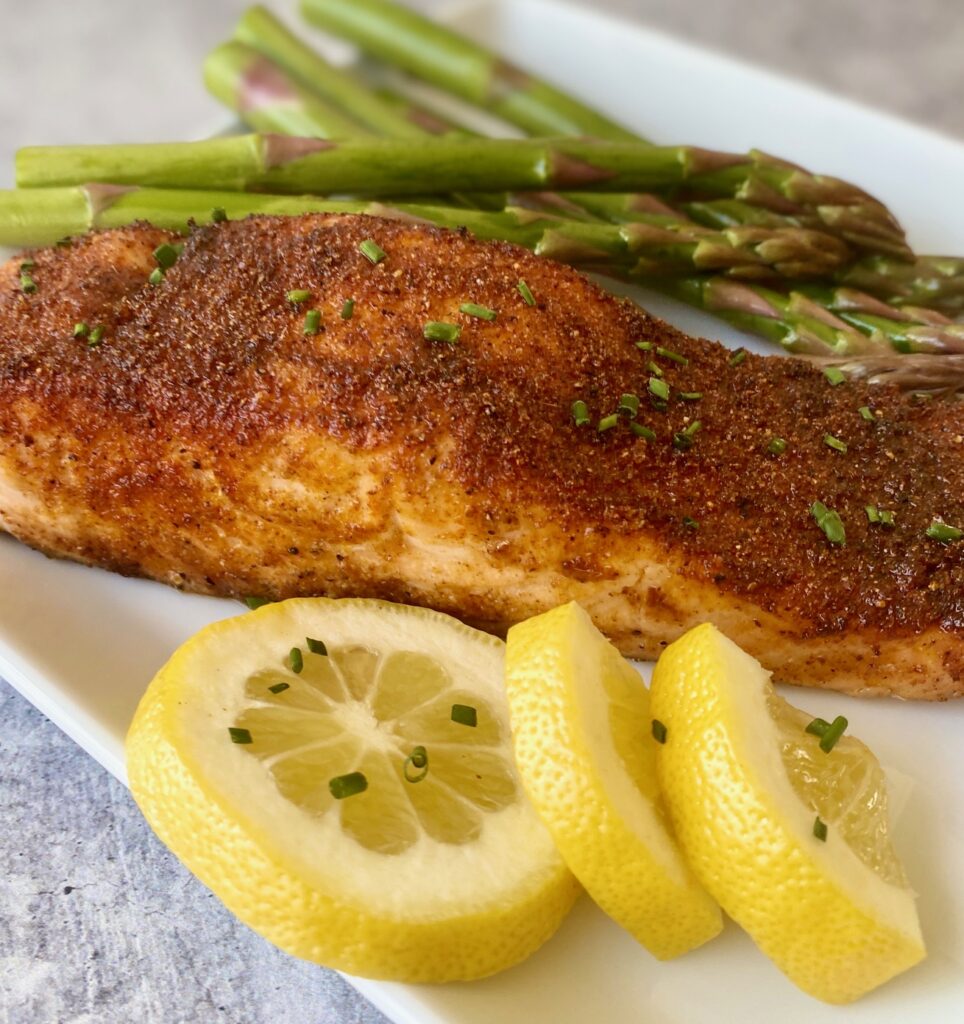
- Remove the pieces from the basket and let rest for 3-5 minutes so that the finished temperature is 135˚F. Serve with lemon slices for garnish.
- If you like your salmon a little more rare just adjust the cooking time slightly. The actual cook time will vary based on the thickest part of the fillet.
Frequently Asked Questions:
Do you need to flip salmon in the air fryer?
Nope! Just start it skin side down and let the air fryer do all the work. Because the air circulates all around the cooking remains even every single time without flipping it. Even if you don’t plan to eat the skin we recommend cooking with it on because it keeps the whole filet more moist.
What is the best temperature for cooking air fryer salmon?
We have found, after testing salmon at a few different temperatures, that 400˚F created the best salmon with a perfectly done center and a nice crispy exterior in our air fryer. Keep in mind that air fryer results can vary based on the air fryer model, so you may need to adjust the temperature in your model.
How do you cook air fryer salmon without it sticking?
- Use parchment with holes – this is our method of choice for easy clean up too!
- Without parchment, the best way is to generously spray or brush the basket with oil before adding salmon
What is the perfect temperature for cooked salmon?
What temperature salmon is “done” cooking depends on your personal consumption preference. It’s important to remember that salmon continues to cook internally for a few minutes after it is removed from the heat. Here’s a guide to help you decide.
- The FDA recommends cooking salmon to an internal 145˚F, but many think that this results in overcooked, dry salmon (and we agree). The salmon will be very firm.
- The well-regarded Cooks Illustrated advises cooking salmon to an internal temperature of 120˚- 125˚F. This will result in mostly firm flaky salmon with a silky interior
- After many tests we liked the results of salmon cooked to 130˚F, then resting for 5 minutes to reach a finished temperature of 135˚F.
How to Store Leftovers
Leftover air fryer salmon is the best! It can be stored, tightly sealed, in the refrigerator for up to 2 days. Gently reheat, serve at room temperature, or serve chilled, on top of salad greens for a great next-day lunch.
If you have a large air fryer you can easily double this recipe. Be sure to add some delicious sides, such as garlic mashed potatoes and a simple green salad with tangy lemon juice vinaigrette.
Easy substitutions:
- We love the flavor combo of this dry rub spice mix but feel free to add and delete seasonings based on your personal taste
- We often season this salmon with our popular Potlatch Seasoning Blend for Fish because we always have some on hand.
- Want to make it more Asian Style? Skip the seasoning and brush the fish with our easy Teriyaki Sauce or Sweet Chili Sauce. (Both are gluten-free). Or pop it in the oven with veggies, like we do, in our Asian-style Sheet Pan Salmon with Asparagus.
Other scrumptious Air Fryer recipes
- Air Fryer Chicken Wings – Finished with a Szechuan soy sauce marinade
- Air Fryer Pork Chops – Juicy and tender every time! Great for busy weeknights because they are ready in 7-9 minutes.

Air Fryer Salmon Recipe
Equipment
- Air Fryer
Ingredients
- 2 salmon fillets, 6 ounces, skin on
- 1½ Tablespoons olive oil
- 2 teaspoons light brown sugar
- 1 teaspoon garlic powder
- ½ teaspoon onion powder
- ½ teaspoon paprika
- ½ teaspoon salt
- ½ teaspoon black pepper, freshly ground
- ¼ teaspoon chili powder (optional)
Instructions
- Spray the basket of an air fryer with non-stick spray. Preheat for about 5 minutes at 400℉
- in a small bowl combine brown sugar, garlic powder, onion powder, paprika, salt, pepper, and chile powder.2 teaspoons light brown sugar, 1 teaspoon garlic powder, ½ teaspoon onion powder, ½ teaspoon paprika, ½ teaspoon salt, ½ teaspoon black pepper, freshly ground, ¼ teaspoon chili powder
- Coat salmon fillets all over with olive oil and then coat the fillets with the spice mixture.1½ Tablespoons olive oil, 2 salmon fillets, 6 ounces, skin on
- If lining the air fryer basket with parchment paper add it and place the fillets skin side down on the parchment.
- Air fry the salmon for 9-11 minutes, or until the salmon reaches an internal temperature of 130℉ (use an instant-read thermometer for best results). Remove salmon fillets from the air fryer and allow them to rest for 3-5 minutes until they reach an internal temperature of 135℉.If you like your salmon rarer just reduce the cooking time slightly.
Notes
- This recipe can easily be doubled
- Looking for spicier salmon? Try our Potlatch Seasoning rub instead
- Skip the chile powder for a less spicy version
Nutrition
Are you ready to make a simple delicious seared steak with a sauce that packs a punch?
Trust me, you are!
This Argentinian specialty will become your new go-to dinner!
Our Chimchurri Sauce is simple to make and super flavorful. Skirt steak cooks quickly, so everything comes together fast. You can get dinner on the table in about 30-minutes.
We love to pair this tender steak with our Grilled Corn with Sweet Chili Sauce and our zesty Tricolore Salad with Orange or a simple arugula salad with our Classic Lemon Vinaigrette Dressing.
This post may contain affiliate links. Please see our affiliate disclosure for more details.
Ready to get started? Just hit the Jump to Recipe button below to go straight to the recipe card.
Jump to Recipe
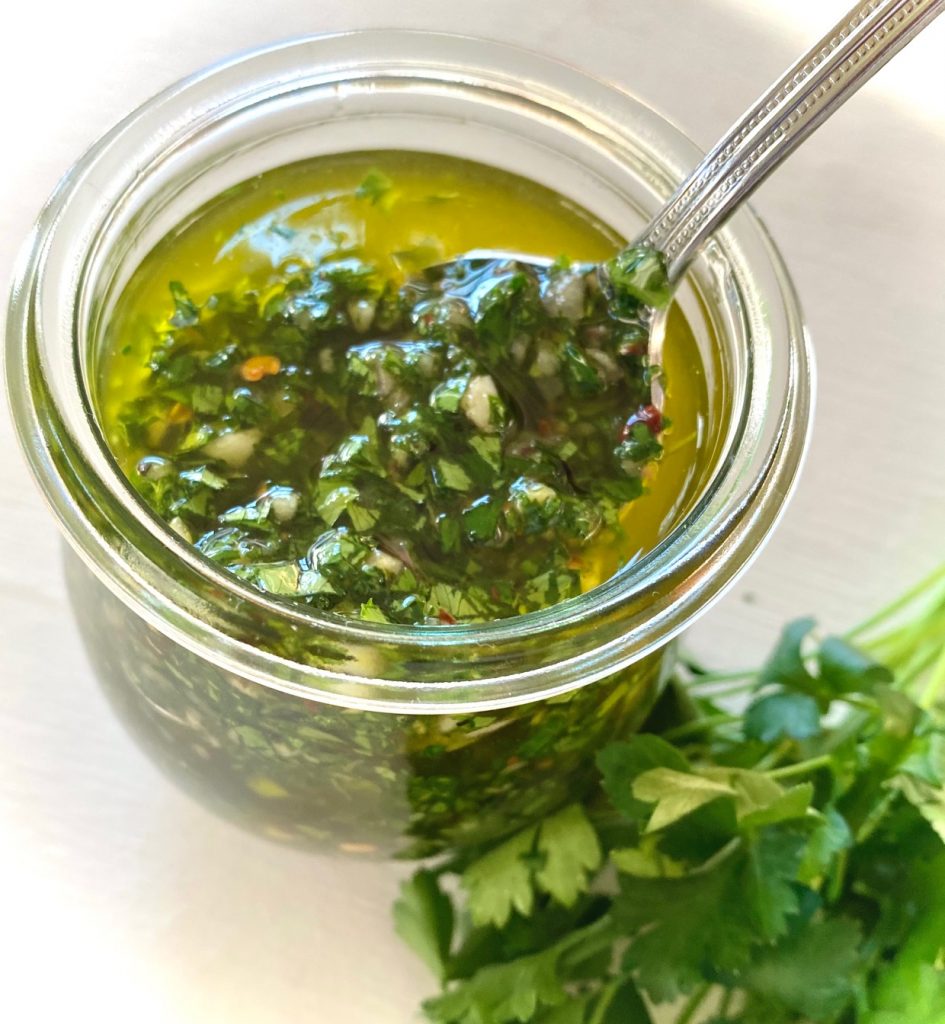
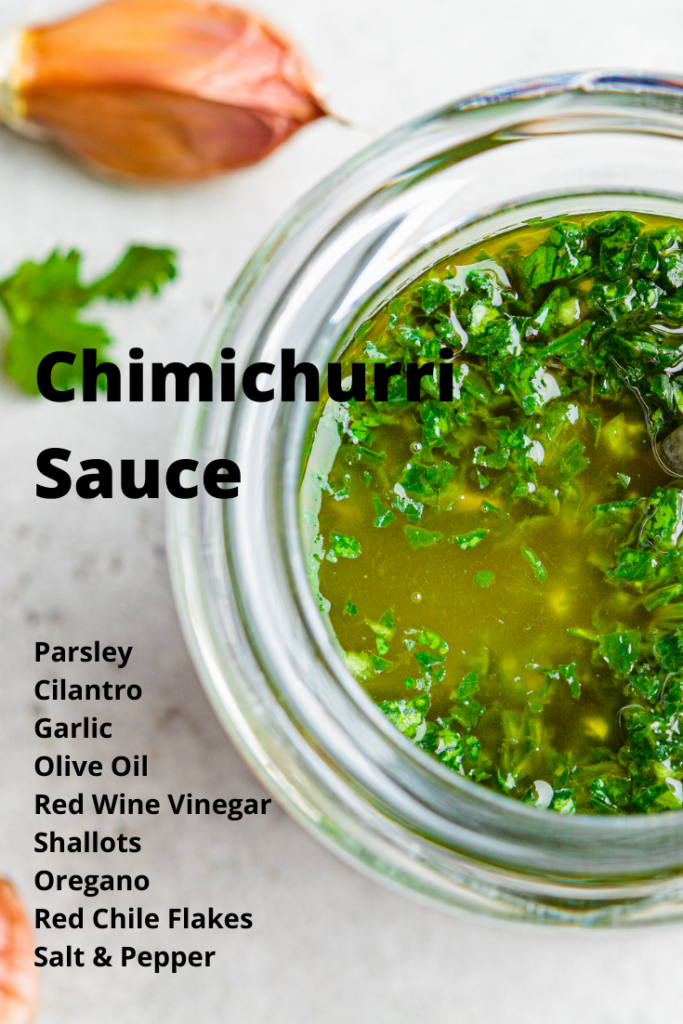
What is Chimichurri Sauce?
Chimichurri sauce originated in Argentina and Uruguay and is used as both an ingredient in cooking but also as a condiment to drizzle over grilled meats and more. Grilled steak is the most common way to use Chimichurri sauce.
It’s an herb lover’s dream come true with parsley, oregano, and cilantro. Add garlic, shallots, red wine vinegar, and zesty chile flakes, along with olive oil, and you have the perfect herby sauce.
Chimichurri sauce always has parsley and usually oregano. Some have cilantro (ours does!) but if you don’t like cilantro you can replace it with all parsley. We are huge fans of cilantro so we love the addition.
Ingredients for Chimichurri Skirt Steak
This recipe is super simple and you just need a few ingredients to get started:
- 1.5 pounds Skirt (or Flank) Steak – you could also use flap meat
- Olive Oil – we like extra virgin olive oil but any type will work
- Sea Salt – for extra tang
- Freshly ground Black Pepper – adds a little bit of spice
- Chimichurri Sauce – This is the link to our easy 5-minute recipe or grab a container of freshly made at the market
How to make Chimichurri Steak
Skirt steak is our top choice for this recipe but you can use flank steak, or flap meat, with equal success. This cut of meat cooks very quickly over high heat and is perfect when topped with our Chimichurri steak marinade.
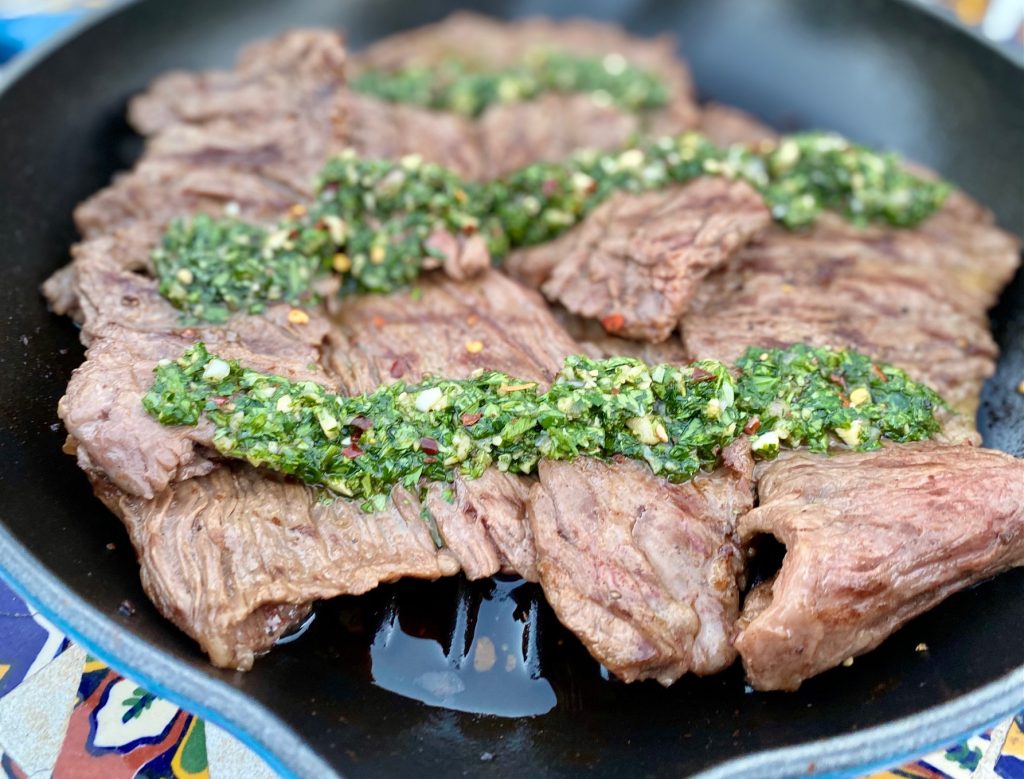
You can grill the steak on an outdoor grill or in a heavy-duty stovetop grill pan, which is what we have done for this recipe. We use the Le Creuset Enameled Cast Iron round grill pan which always delivers top quality results and even grilling.
- Prepare the Chimichurri Sauce up to 1 week in advance and store it in the refrigerator until ready to use. Bring it to room temperature if cold.
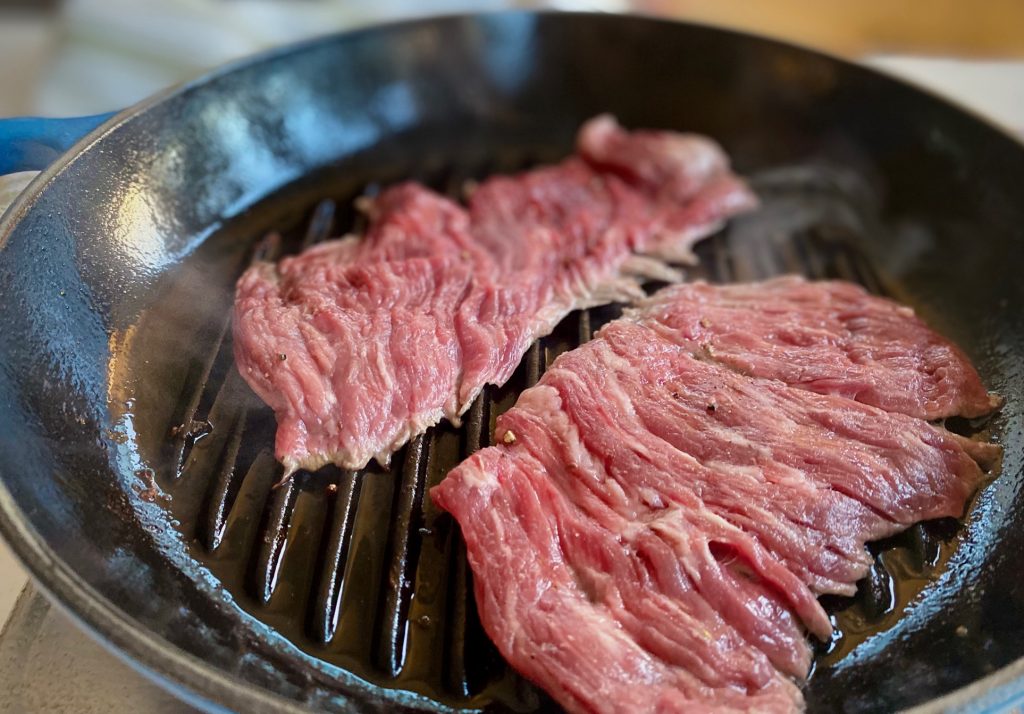
- Bring the skirt steak to room temperature before grilling. Trim into smaller pieces if necessary to fit in the pan because you want a single layer in the pan. Pat dry.
- In a shallow dish coat the steak with 1 Tablespoon of olive oil and sprinkle liberally with sea salt and black pepper on both sides.
- Heat a grill pan on medium-high, add remaining oil, and heat until shimmering but not smoking.
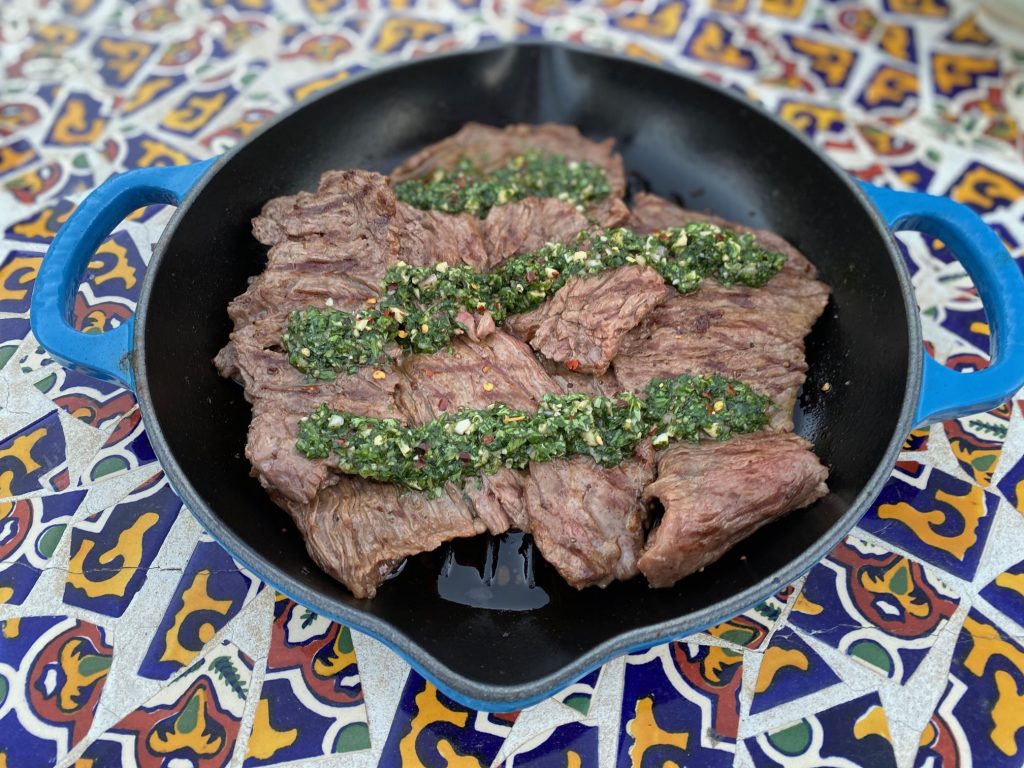
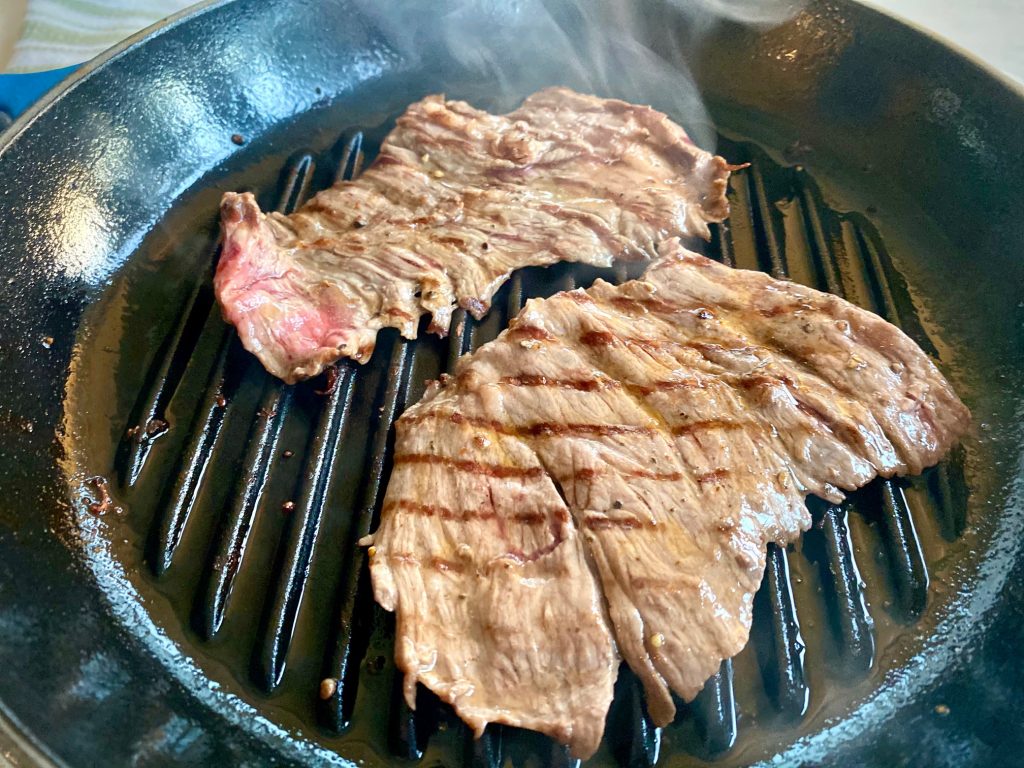
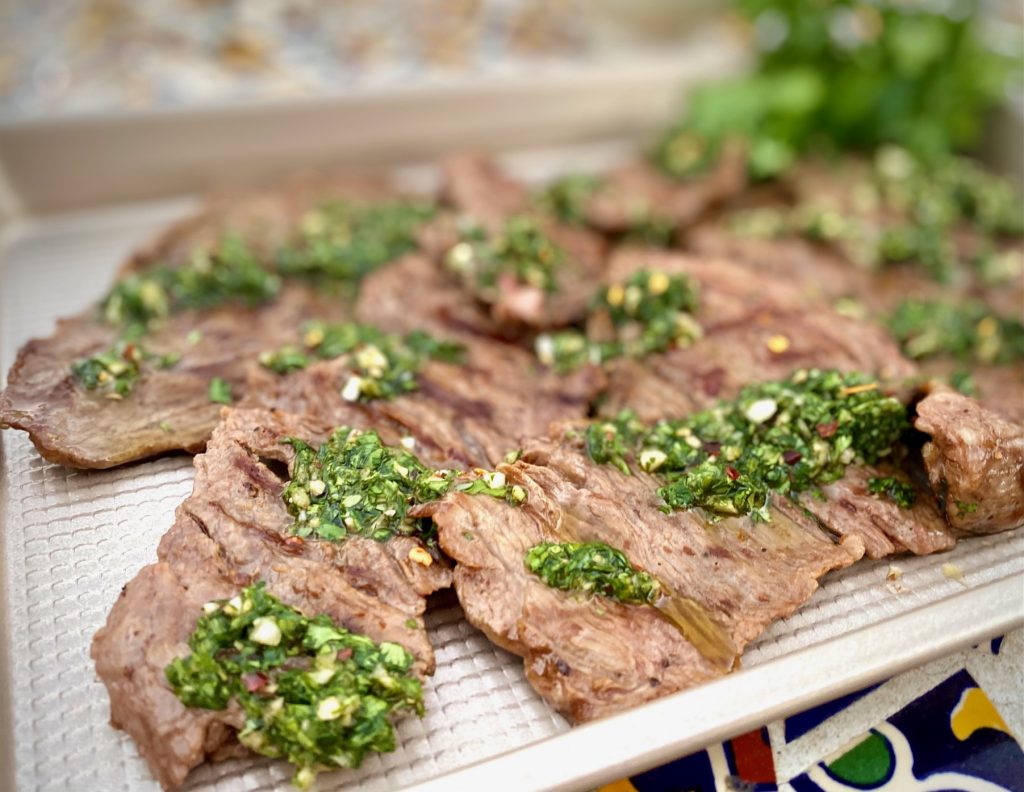
- Sear the steak on each side for 4-6 minutes. The actual cooking time depends on the thickness of the steak and how well done you like your steak. Medium-rare will take about 5 minutes per side. The steak should have a nice char on the outside and a light pink center. (see photos below)
- Remove steak, place on a plate, cover loosely with foil, and let it rest for 5-10 minutes.
- Slice the steak, across the grain, into thin slices (see below for “how to slice against the grain”)
- Drizzle generously with Chimichurri Sauce and serve!
How to cut steak against the grain:
It’s a familiar term but what does it actually mean? In the simplest terms, it just means it’s the direction of the muscle fibers in meat. So carve across those fibers, rather than parallel with the fibers. This will result in a more tender bite of meat.
What is the difference between skirt steak and flank steak?
Skirt steak is a thin, quick-cooking cut of meat that delivers a big flavor. The cut is a long thin piece, but it’s a Prime grade high-quality cut. Skirts normally come in pieces weighing 3/4 to 1-1/2 pounds, and you should look for thicker pieces because they will cook more evenly and stay juicier when cooking.
Flank steak is similar, and has lots of intense beefy flavor, but can be a little less tender so may require some marinating.
Both cuts are great steaks for marinating, but skirt steak tends to be more tender even without marinating. Eat both thinly sliced and cut against the grain to maximize tenderness.
Skirt and Flank steak should be cooked fast over high heat to remain tender.
Your Sommelier Wine Pairings:
When pairing wine with our Chimichurri Steak be mindful of this herbaceous sauce that serves as the signature for this dish.
Originating in Argentina, Chimichurri sauce is packed with garlic aromas and fresh herb flavors. It pairs nicely with fruit-forward red wines.
When looking for a great wine pairing travel no further than Argentina itself. Argentina brings us some of the world’s best Malbec wine. The climate and terroir of Argentina make for intense fruit and floral tones with rich and velvety textures.
Here are some of our favorite wine pairings for chimichurri recipes:
- Malbec – check out Argentinean wines, they are a great value
- Cabernet Sauvignon – excellent vintages are coming out of Argentina
- Syrah – a smooth wine that always pairs well with steak
- Zinfandel – a perfect match with spice
Looking for more ways to use Chimichurri Sauce?
- Our Chimichurri Shrimp Recipe is a quick dinner idea
- Drizzle on your veggies for added herb flavor
More great steak recipes:
- The Tomahawk Steak – a complete guide to cooking the “King of Steaks”
- Skirt Steak with a tangy mustard sauce – a 30-minute meal!
- Garlic Butter Steak Bites – great as a meal or as an appetizer to share
Chimichurri Steak Recipe
Ingredients
- 1 ½ pounds Skirt Steak (or flank steak)
- 2 Tablespoons Olive oil, divided
- 1 teaspoon sea salt
- ½ teaspoon black pepper
- ⅔ cup chimichurri sauce (see note below for recipe link)
Instructions
- Prepare Chimichurri sauce ahead to time and reserve.
- Bring the skirt steak to room temperature for about 30-minutes. Trim into manageable pieces, based on the size of your grill or grill pan. Pat dry with paper towels.
- In a shallow dish coat the steak with 1 Tablespoon of olive oil and sprinkle with salt and pepper on both sides.
- Heat a grill pan on medium-high heat and add remaining 1 Tablespoon olive oil. Heat until the oil is shimmering but not smoking.
- Sear the steak pieces for 4-6 minutes on each side depending on how well you want it cooked. The steak should be well seared on the outside but still lightly pink on the inside.(Medium rare will take about 5 minutes per side)
- Remove the steak, cover loosely with foil and let rest for 5-10 minutes
- Slice steak against the grain into thin slices, and drizzle with Chimichurri Sauce.
Notes
Nutrition
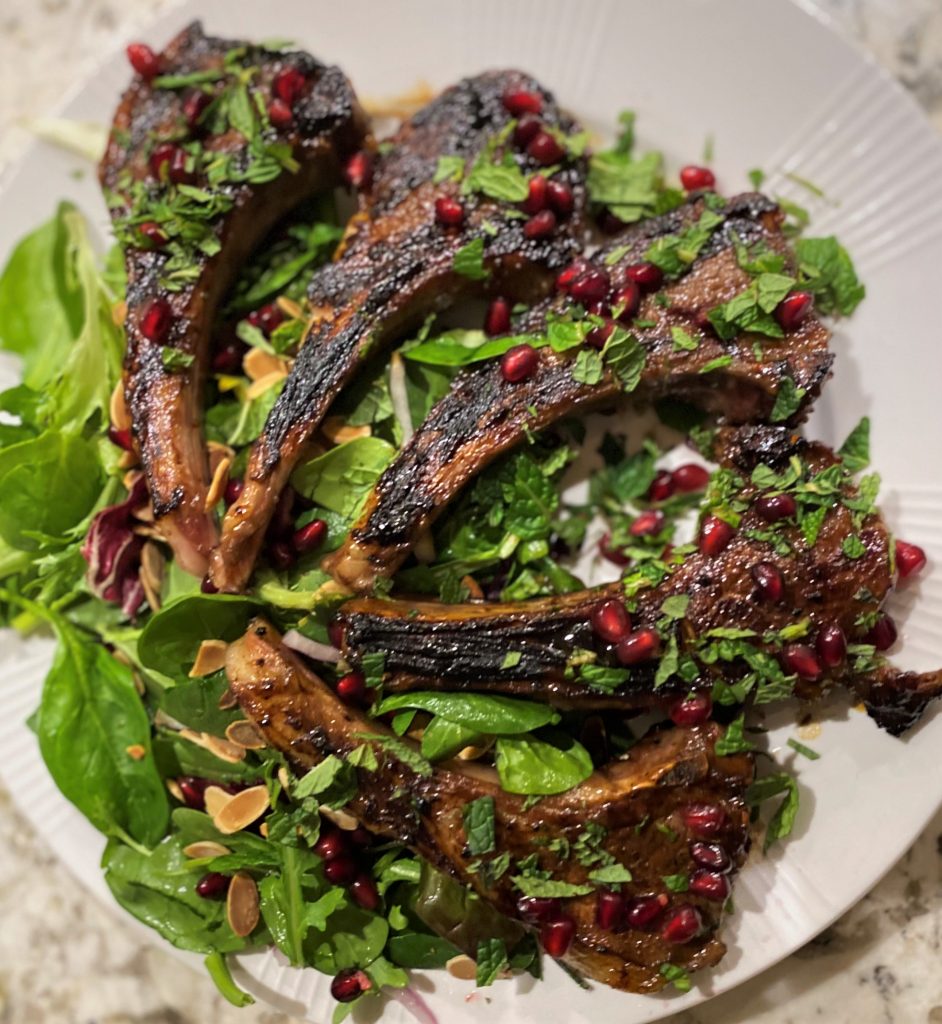
This recipe makes an easy gourmet dinner for two!
The Pomegranate Glaze is the key to this fabulous dish. It adds an intense earthly richness without overwhelming the inherent flavors of the lamb.
This post may contain affiliate links. Please see our affiliate disclosure for more details.
What cut of the lamb are Lamb Chops?
Lamb chops are the most delicious and tender cut of the lamb. They are the ribs of the lamb and are commonly cooked individually. We normally grill or barbecue lamb in our house. When the ribs are left whole they are referred to as a rack of lamb. A rack of lamb is an incredibly decadent and delicious meal.
Ingredients for our Grilled Lamb Chops with Pomegranate Glaze
Lamb Chops
- 12 – 3 ounce lamb chops
- Salt
- Pepper
- Chopped fresh mint leaves
- Pomegranate seeds
Pomegranate Glaze
- Olive oil
- Pomegranate molasses – see instructions and ingredient list below
- Dark brown sugar
- Garlic
- Dijon mustard
What is Pomegranate Molasses? How do I make it at home?
Pomegranate Molasses is a great drizzle for many dishes and is often added as an ingredient for meat glazes. This one ingredient adds amazing flavor to our Grilled Lamb Chops. Quick tip! You can find it in the international aisle of grocery stores. However, it is very simple to make and can be done ahead of time.
How to make Pomegranate Molasses
With just 4 ingredients Pomegranate Molasses comes together easily and will take about an hour to prepare and turn into syrup. Once you have your molasses finished you can complete the glaze recipe and prepare the lamb chops.
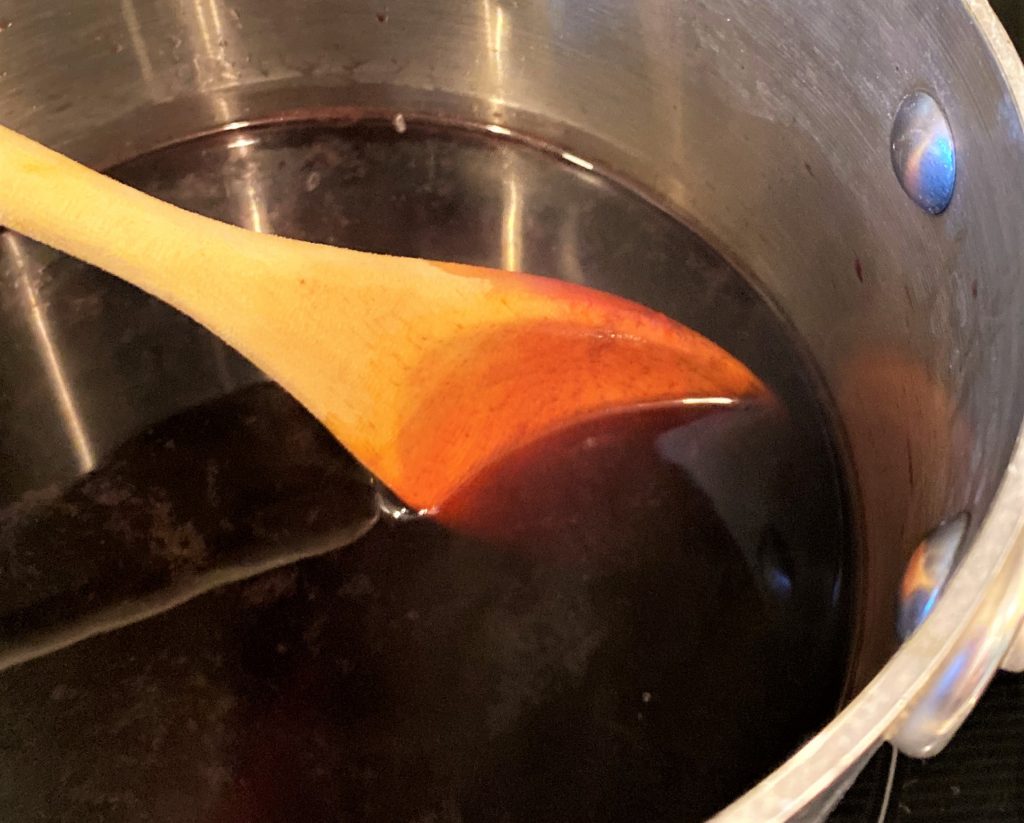
Dissolve ingredients 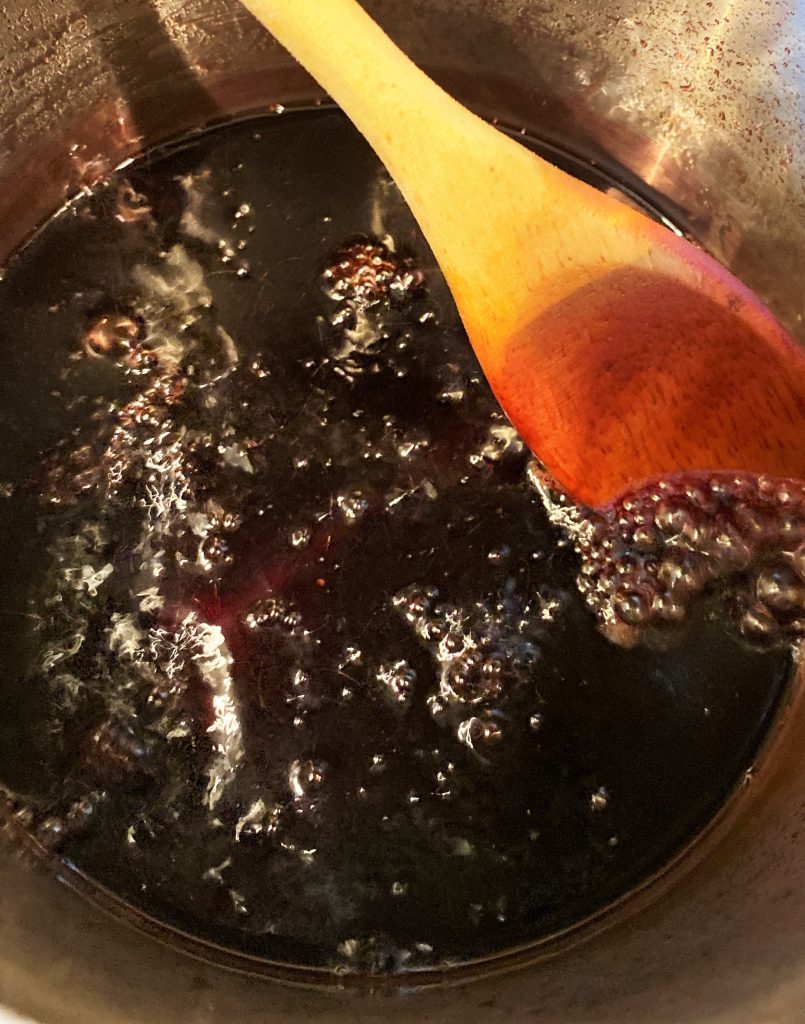
Simmer and reduce to syrup
Ingredients
- 4 cups pomegranate juice
- 1/2 cup sugar
- 2 tablespoons fresh lemon juice
Instructions to make molasses
- In large uncovered saucepan heat pomegranate juice, sugar, and lemon juice on medium high heat.
- Once all ingredients have dissolved reduce heat to a simmer.
- Allow the juice to simmer and reduce to a syrup. This takes about an hour.
- Once it has reached a syrup like consistency, let it cool.
- Pour into a container and store extra syrup in the refrigerator, or if not using immediately.
Instructions for making Grilled Lamb Chops with Pomegranate Glaze
The Pomegranate glaze will only take a few minutes to prepare and is the cornerstone of our recipe. Once you have completed the glaze, you can prepare the lamb chops for grilling.
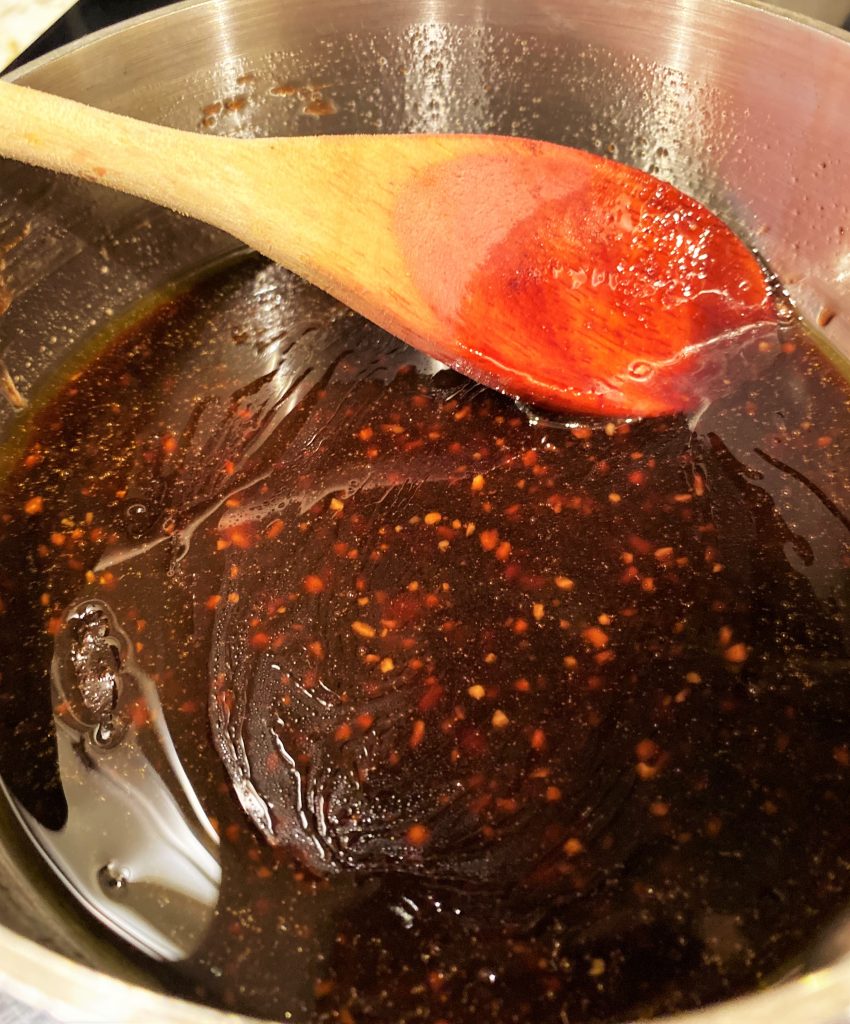
Pomegranate Glaze 
Glaze Lamb Chops
Preparing the Glaze – Glazing Lamb Chops
- In a small saucepan over low heat whisk together the olive oil, pomegranate molasses, and dark brown sugar. Whisk until ingredients are dissolved and well blended.
- Add in garlic and Dijon mustard, and whisk to thoroughly blend all ingredients.
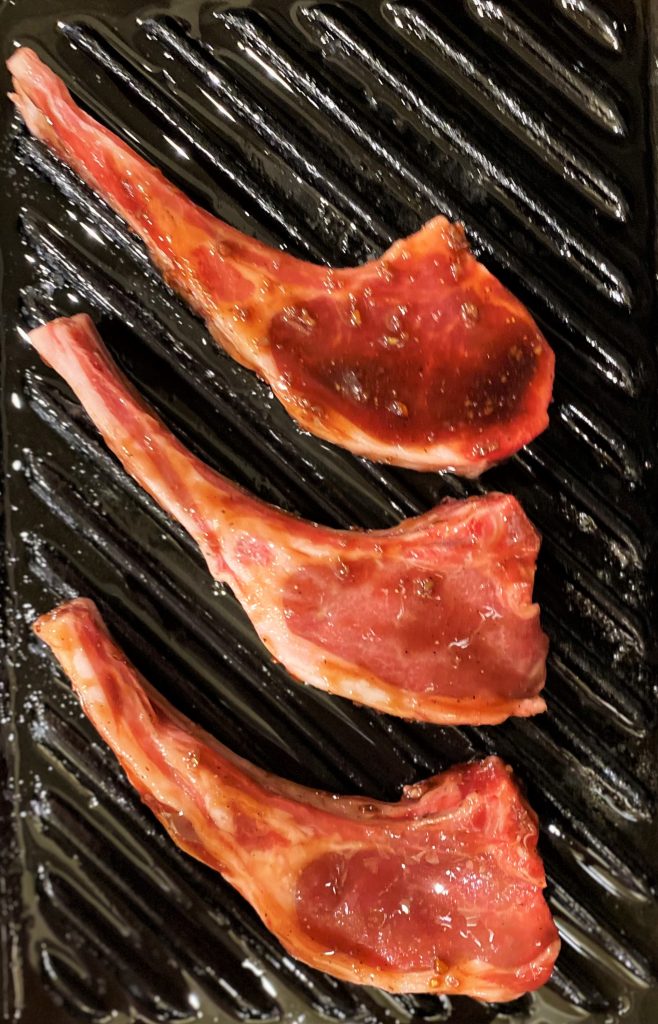
- Season lamb chops with salt and pepper.
- Lavishly brush both sides of the lamb chops with the glaze. Retain some extra glaze to use later while grilling the chops.
Grilling Lamb Chops
- Heat grill pan over high heat.
- Grill the lamb chops in batches.
- Grill lamb chops for 3 to 4 minutes on each side until meat has a nice light grill char.
- Flip once and brush chop with the reserved glaze.
- For rare to medium-rare cook on each side for 3 minutes, depending on the thickness of the chop.
- For medium-rare to medium cook on each side for 4 minutes, depending on the thickness of the chop.
- Do not overcook as it can make the lamb chops tough and dry.
- Let lamb sit a couple of minutes. Garnish and serve.
Grilling Glazed Lamb Chops 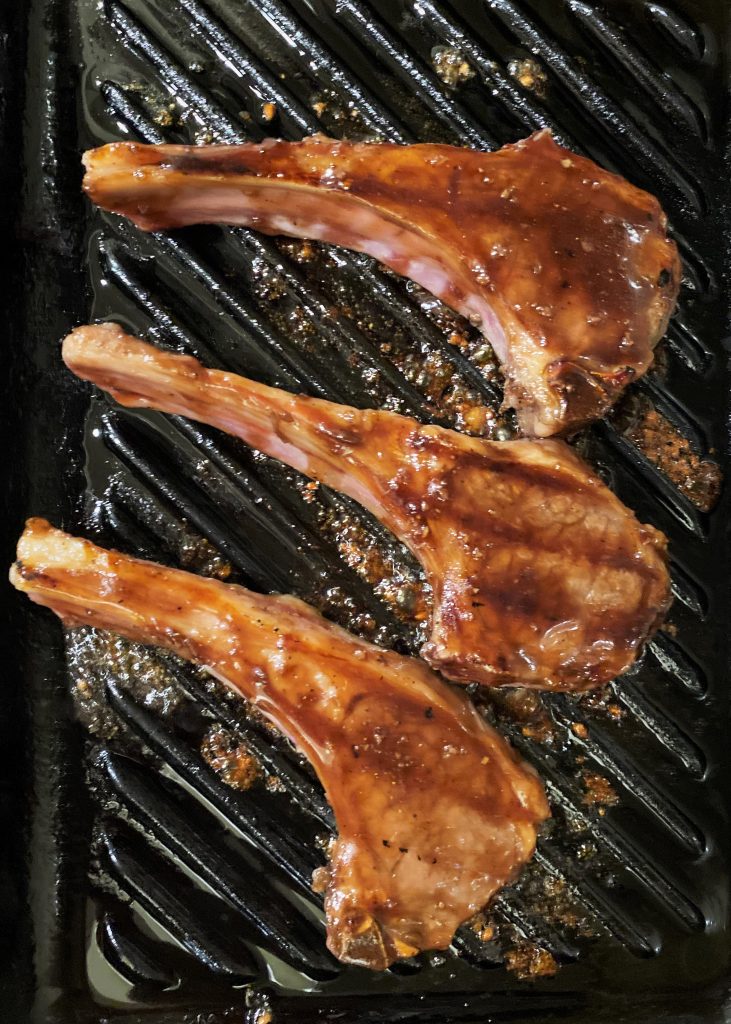
Turn once add glaze
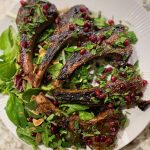
Garnish Grilled Lamb Chops with Pomegranate seeds and
Chopped Mint leaves.
Serve and enjoy this amazing flavorful dish!
Need a great stovetop grill pan? For this recipe, we used this Le Creuset Enameled Cast Iron Deep Round Grill Pan. It provides even heating and gives your meat beautiful grill marks.
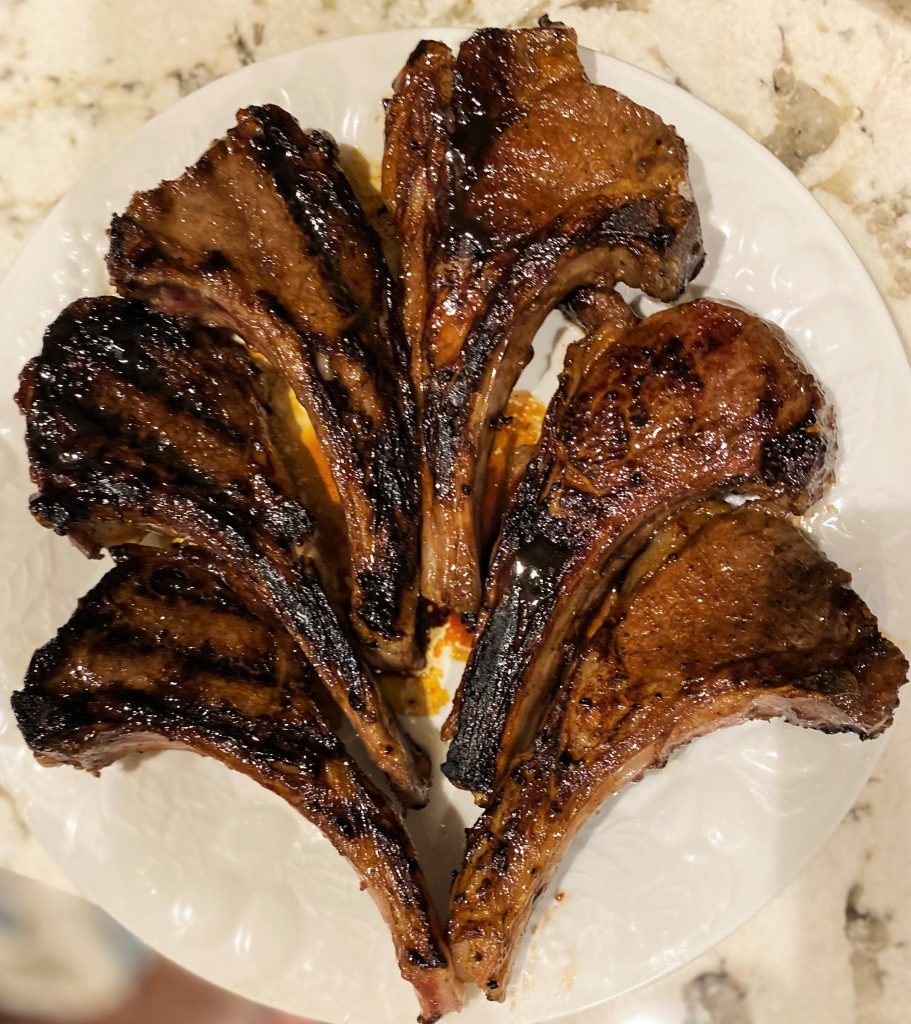
Nicely charred Lamb Chops 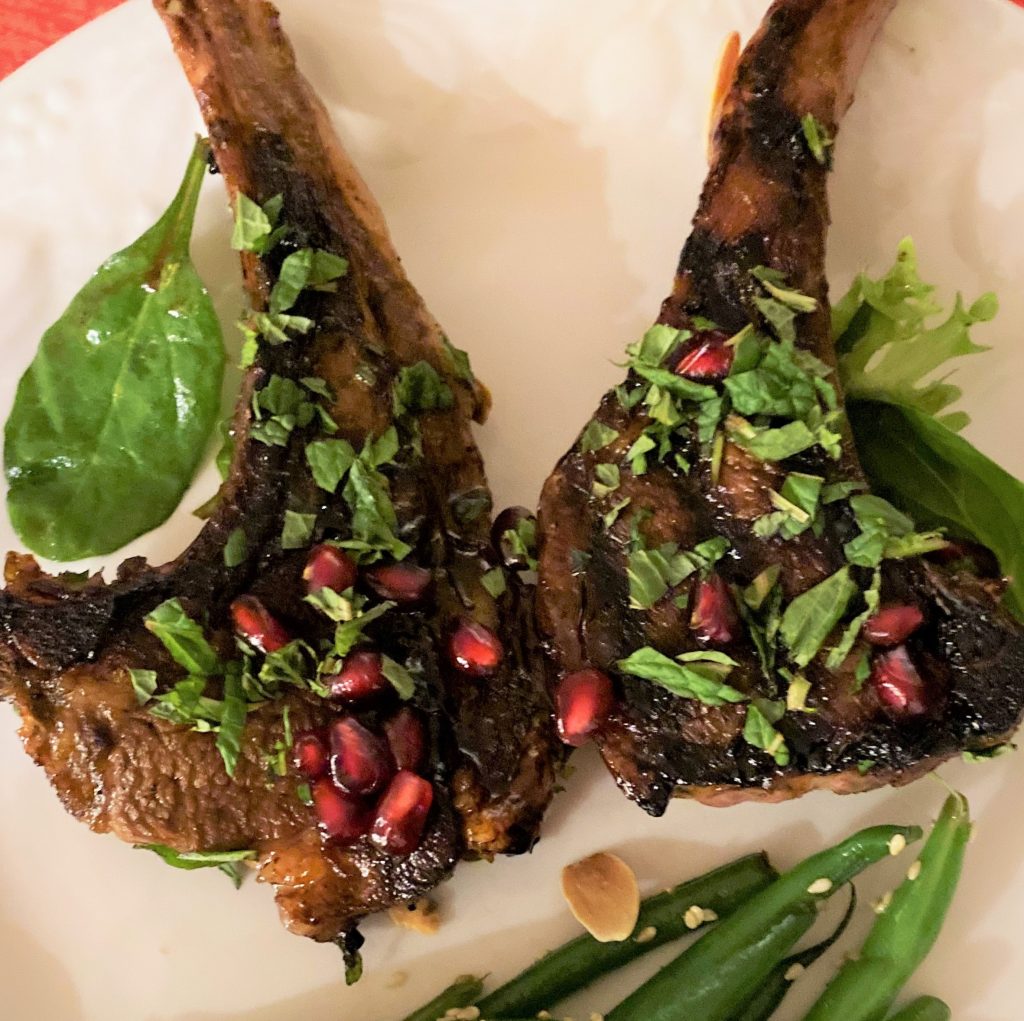
Garnish and Serve
Suggestions for Wine Pairings:
The best wine pairings for lamb will be found in the red wine family. For these Grilled Lamb Chops we suggest a light to medium-bodied Oregon or Russian River, California Pinot Noir. A lovely Italian Chianti is perfect and makes a great pairing.
White wine drinkers should not fear a full-bodied California Chardonnay, it also makes a good pairing for this great meal.
These Lamb Chops pair well with following dishes
- Brussels Sprout Pomegranate Salad
- Strawberry Spinach Salad
- Roasted Butternut Squash with Pomegranate
- Classic French Onion Soup
Grilled Lamb Chops with Pomegranate Glaze
Equipment
- Grill pan
Ingredients
- 12 3-ounce Lamb chops
- 2 tbsp olive oil
- 2 tbsp dark brown sugar
- 2 tbsp pomegranate molasses
- 1 clove minced garlic
- 1½ tsp Dijon mustard
- ¼ cup chopped fresh mint leaves
- ¼ cup pomegranate seeds for garnish
- Kosher salt
- Black pepper
Pomegranate Molasses
- 4 cups Pomegranate juice
- ½ cup Sugar
- 2 tbsp Juice from a fresh lemon
Garnish
- 1 Tablespoon Fresh mint, roughly chopped
Instructions
Making Pomegranate Molasses:
- In large uncovered saucepan heat pomegranate juice, sugar, and lemon juice on a medium high heat.
- Once all ingredients have dissolved reduce heat to a simmer.
- Allow juice to simmer and reduce to a syrup. This takes about an hour.
- Once it has reached a syrup like consistency, let cool.
- Pour into a container and store any extra in the refrigerator.
Making the Pomegranate Glaze and preparing Lamb Chops:
- In a small saucepan over low heat whisk together the olive oil, pomegranate molasses and dark brown sugar. Whisk until ingredients are dissolved and well blended.
- Add in garlic and Dijon mustard, whisk to thoroughly blend all ingredients.
- Season lamb chops with salt and pepper.
- Lavishly brush both sides of the lamb chops with glaze. Retain extra glaze to use later while grilling chops.
Grilling Lamb Chops:
- Heat grill pan over high heat.
- Grill the lamb chops in batches.
- Grill lamb chops for 3 to 4 minutes on each side until meat reaches a nice light grill char.
- Flip once and brush chop with reserved glaze.
- For rare to medium-rare cook on each side for 3 minutes, depending on thickness of chop.
- For medium-rare to medium cook on each side for 4 minutes, depending on thickness of chop.
- Do not over cook as it can make lamb chops become tough and dry.
- Let chops sit a couple of minutes. Then garnish with Pomegranate seeds and chopped Mint leaves. Serve and enjoy!
Notes
- Left over pomegranate glaze keeps well in the refrigerator
Nutrition
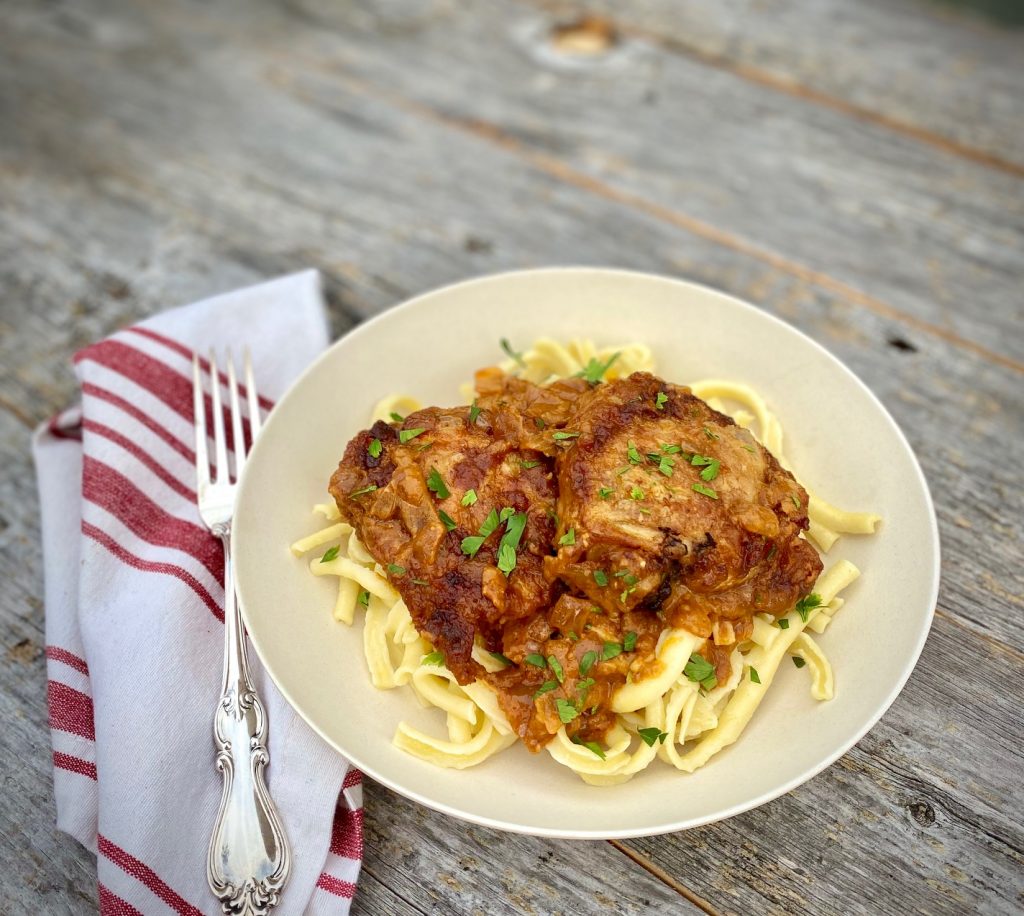
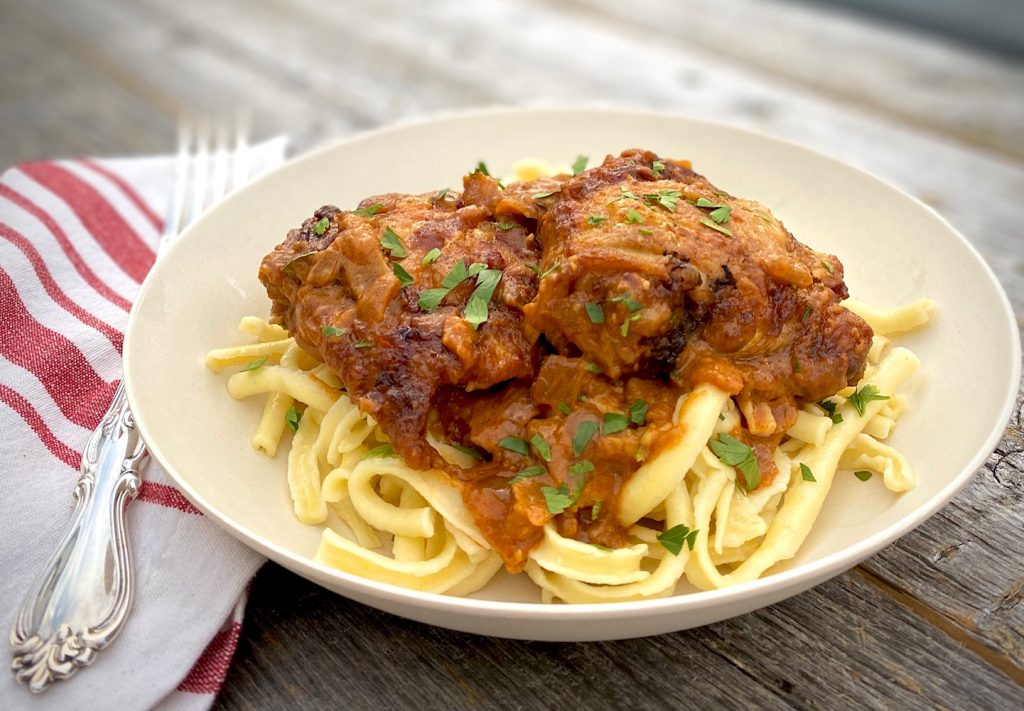
This traditional Hungarian dish is a rich and flavorful combination of tender chicken and onions cooked in a creamy sauce seasoned with paprika. It is simple comfort food.
This post may contain an affiliate link. Please see our affiliate disclosure policy for more details.
What is Chicken Paprikash?
- Hungarian Chicken Paprikash, also known as Paprika Chicken or Paprikás Csirke, is a traditional easy Hungarian dish.
- It is simply braised chicken, with onions, cooked in flavorful seasonings of paprika and garlic. The sauce is super flavorful, especially with the addition of sour cream at the end. The deep red color is amazing and the flavor is rich.
Ingredients needed:
- Bone-In Chicken Thighs – Large, skin-on, or thigh/leg combo. Or buy a whole chicken cut up. Bone-in chicken pieces will result in the most tender chicken.
- Olive Oil and Butter – we use salted butter for a little extra flavor but unsalted is fine too. Canola oil can be used.
- Flour – serves as the main thickening agent for the sauce
- Salt and Black Pepper – use white pepper if you want a pure red color
- Onion and Garlic – feel free to add more garlic if you like (we often do!)
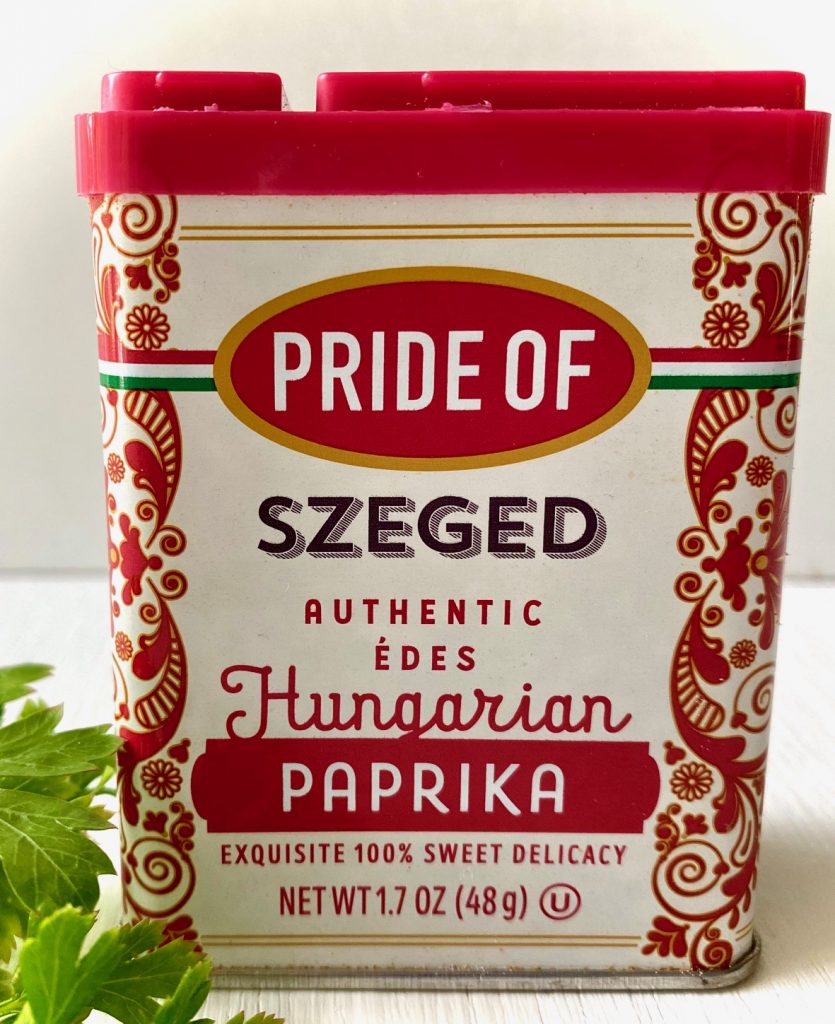
- Sweet Hungarian Paprika – the key ingredient needed to make Chicken Paprikash so use the very best for this recipe. We prefer Szeged brand because it’s got the best flavor! If you prefer a spicy sauce use half Hungarian Sweet Paprika and half Hot Paprika (see more about paprika choices below)
- Chicken Broth – look for a good organic brand or use homemade
- Sour Cream – we recommend full-fat sour cream. This gives the sauce its signature tang and creaminess
- Flat Leaf Parsley – optional but it adds a gorgeous pop of color when sprinkled on top
- Optional: egg noodles, spaetzle noodles, or dumplings, for serving

How to make Hungarian Chicken Paprikash:
This chicken Paprika recipe is a typical braise so, as a result, once you’ve mastered it, any braise recipe will be similar in technique.
- Heat oil/butter in a large Dutch oven, large ovenproof pan, or a deep large skillet that is ovenproof, over medium heat until shimmering
- In a shallow bowl combine flour, salt, and pepper. Dredge the chicken thighs in the flour
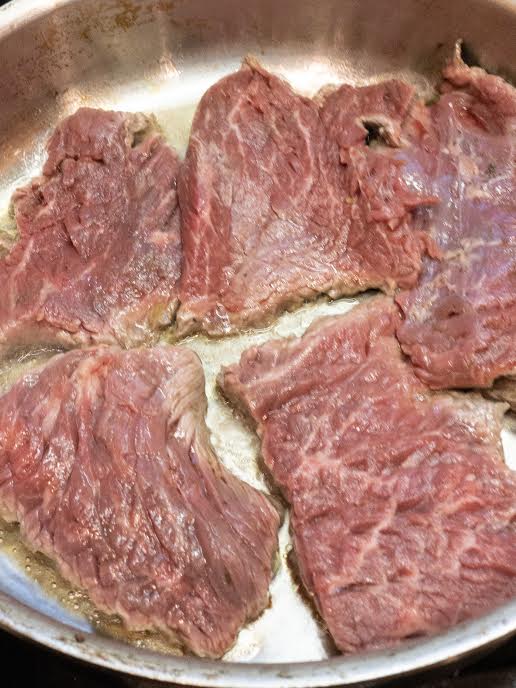
- Sear on both sides until lightly browned and the skin is golden and crispy. You won’t be cooking the chicken all the way through during the searing stage, instead, it will finish later in the oven
- Searing is important for crispy skin, so sear in batches if needed, and do not overcrowd the pan otherwise the chicken will steam instead of sear
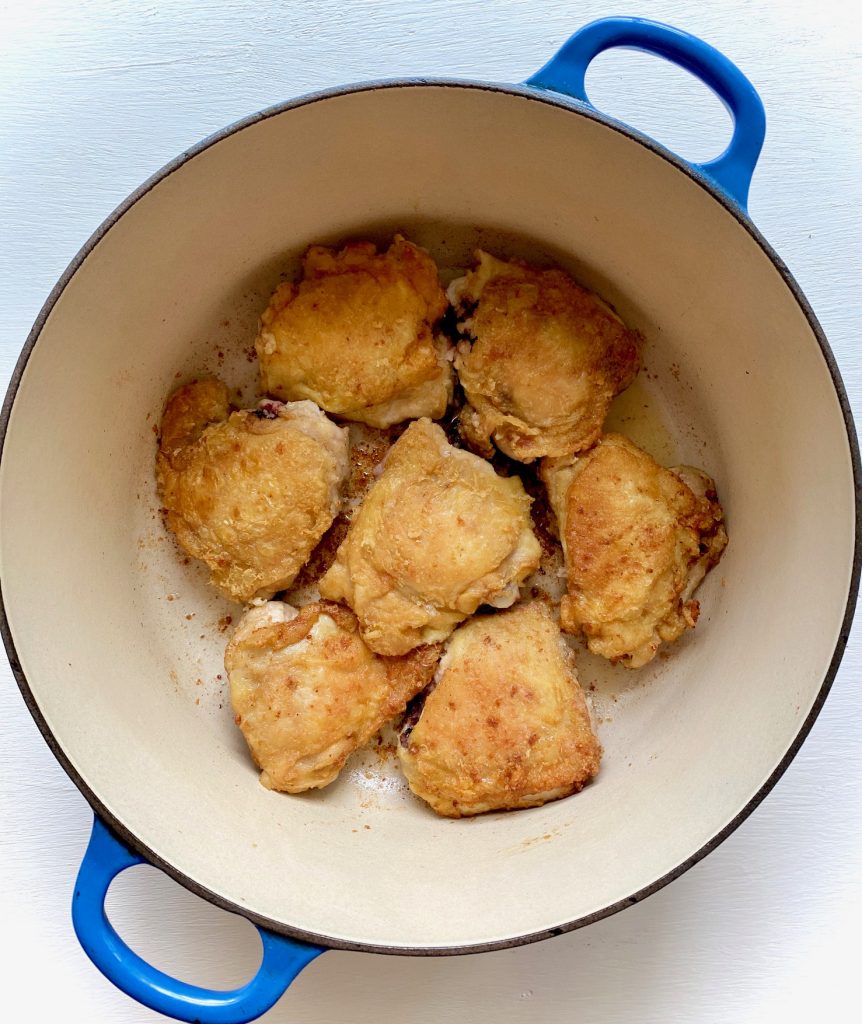
Sear chicken on both sides so the skin is crispy and lightly golden
- Once seared, remove the chicken from the pan, and set aside on a plate
- Reserve about 1 Tablespoon of the oil in the pan and saute the onions until clear
- Add the minced garlic and saute for 30 seconds until fragrant
- Add the flour and Hungarian paprika to the pan. Stir continually for 5 minutes as paprika can easily burn if not stirred
- Whisk in the chicken stock and mix well
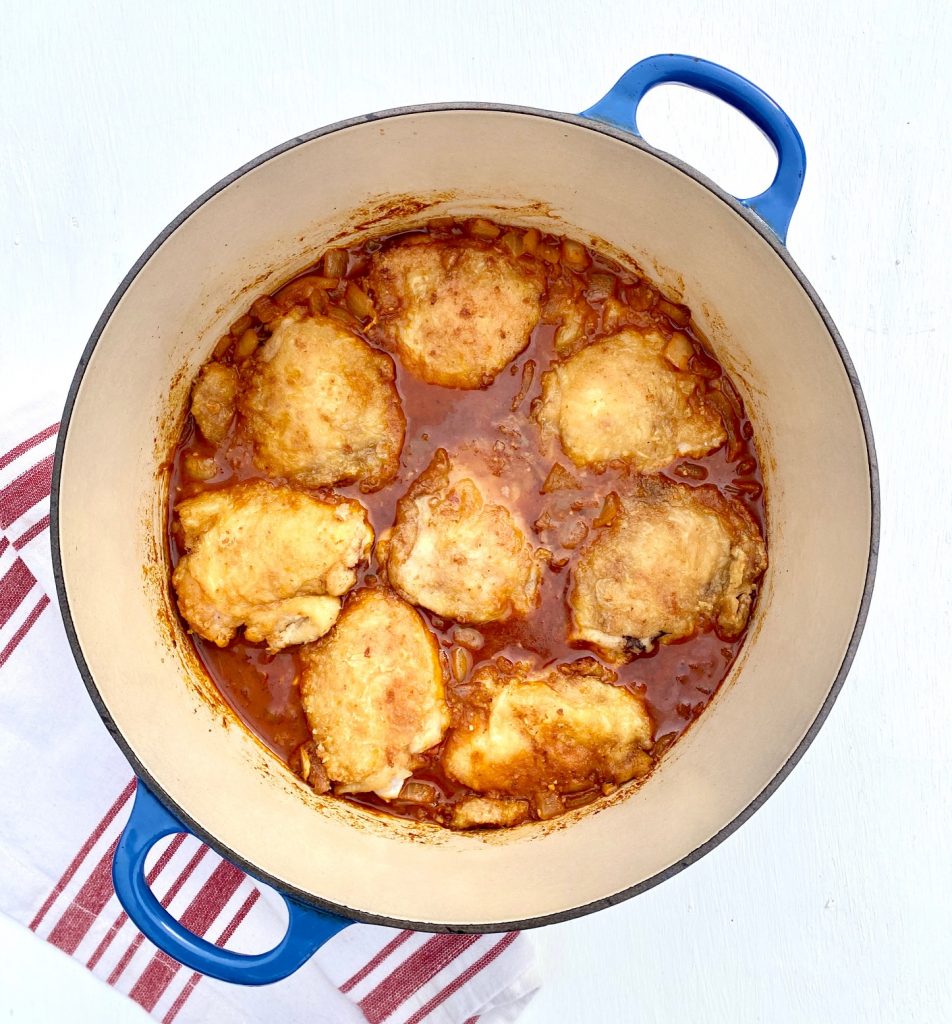
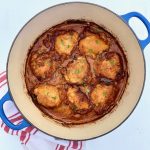
- Add the seared chicken pieces back into the pot in a single layer, skin side up
- Bake, uncovered, in a preheated oven for about 30 minutes or until the thighs are cooked through, and the sauce is thickened. The actual cooking time can vary as a result of the size of the chicken pieces you choose, but chicken is cooked when the internal temperature is 165˚F
- While the chicken is cooking remove the sour cream from the refrigerator so that it can come to room temperature before using it
- Remove the pan from the oven and remove the chicken pieces to a plate
- Temper the sour cream before adding: Add a spoonful of the hot sauce to the room temperature sour cream and whisk. Add another spoonful and whisk again. The goal is to bring the temperature up on the sour cream so that when you add it to the hot sauce it doesn’t curdle. This step is important so DON’T skip it!
- Whisk the tempered sour cream mixture into the pot with the sauce and onions
- Add chicken pieces back to the pot and return to the oven, skin side up, and cook uncovered for an additional 7-10 minutes in the creamy sauce
- Remove from the oven and sprinkle with parsley
- Serve in a shallow bowl to capture the creamy paprika sauce, or serve over precooked noodles


Sauce with sour cream added and finished Chicken Paprikash
What kind of paprika is best for Hungarian Chicken Paprikash?
There are 3 types of paprika available:
- Sweet Hungarian Paprika
- Smoked Paprika
- Hot Paprika
- The best paprika comes from Hungary and it is their national spice. Sweet Hungarian Paprika is traditional for this dish and you can easily find it at any major market or on Amazon. It’s worth the small investment for a good Hungarian paprika and a little goes a long way! This is our choice for an authentic chicken paprikash recipe.
- Regular paprika is made with generic red sweet peppers, whereas Sweet Hungarian Paprika is made from a specific sweet pepper with a vivid red color. These Hungarian peppers are grown in cooler climates so they retain more sugar, therefore there is no heat in Sweet Hungarian Paprika. If you like a little heat add a dash of hot Hungarian paprika or cayenne to the sauce.
What to serve with Chicken Paprikash:
- This dish is traditionally served with rice, small new potatoes, Hungarian dumplings, or over noodles.
- The two best types of noodles for this chicken are medium-wide egg noodles or Spaetzle, which is a thick irregularly shaped German egg noodle. Both of these noodles are perfect because they capture the thick, delicious, paprika-based sauce.
How to store leftover Chicken Paprikash:
REFRIGERATOR: This dish is the perfect make-ahead dish. You can store the chicken and sauce together in the refrigerator for 3-4 days in an airtight container.
FREEZER: Also, this dish is easily stored in the freezer for 2-3 months. It’s always nice to double the recipe and freeze it for a quick dinner later. To serve, just rewarm, add a bit of chicken broth if needed, boil some noodles, and dinner is served! Perfect for a cold winter night.
What is the difference between goulash and paprikash?
- Chicken Paprikash and Hungarian Goulash are similar one-pan dishes but goulash is made with beef. Hungarian food is often simple meats with a flavorful sauce.
Side dishes to serve with Chicken Paprika
- Our Arugula Beet Salad with Goat Cheese is a light starter
- This Tricolore Salad with Oranges is gorgeous and zesty with a clean citrus flavor
- Our Fresh Peach Salad with Cumin Port Vinaigrette has flavorful fresh peaches, crunchy candied pecans, and tangy blue cheese
Chicken Paprikash (Paprika Chicken)
Equipment
- Large Pot or Dutch Oven
Ingredients
- 8 large chicken thighs, skin on (or leg/thigh combo)
- ½ cup all purpose flour
- 1 tsp salt
- ½ tsp freshly ground pepper
- 2 Tbsp canola or olive oil, or bacon fat
- 2 Tbsp butter
- 12 ounces yellow onion, peeled and large diced
- 6 cloves garlic, peeled and minced
- 4 Tbsp Hungarian Paprika, sweet (or 3 Tbsp sweet and 1 Tbsp hot)
- 2 Tbsp all-purpose flour
- 1¼ cup chicken broth
- ½ cup sour cream
Instructions
- Preheat oven to 375°F
- Heat 1 Tablespoon oil and 1 Tablespoon butter in a large oven-safe saute pan or Dutch Oven pan, over medium-high heat. Butter should be foamy and oil shimmering.
- In a shallow bowl combine flour, salt, and pepper. Dredge the chicken thighs in the flour
- Sear half of the chicken, skin side down, until the skin is crispy and golden brown, about 5-6 minutes. Flip chicken and sear the other side for 5 minutes. Remove to a plate.Add remaining oil and butter if needed, and repeat with the other half of chicken. Remove to a plate and set aside.
- Pour off all but 1 Tablespoon of the oil in the pan.
- Turn heat down to medium and add the onions. Cook about 7-8 minutes or until the onions are soft and clear. Be sure to scrape the browned bits from the bottom of the pan.
- Add garlic and cook for about 1-2 minutes. Add paprika and 2 Tablespoons of flour. Stirring constantly for about 5 minutes. Paprika can burn so be sure to keep stirring.
- Add the broth and blend well.
- Nestle the chicken back in the pot, skin side up.
- Cook in preheated oven and cook for about 30 minutes or until chicken thighs are cooked through, and the sauce has thickened slightly. (Cooking time will vary depending on the size of chicken pieces)
- Put sour cream in a bowl and leave out to come to room temperature while the chicken is cooking.
- If making noodles to accompany prepare them while chicken is cooking.
- Remove pan from the oven and remove the cooked chicken.
- Add a spoonful of the sauce to the sour cream bowl and whisk to "temper" the sour cream. Then add another spoonful and repeat. Don't skip this step. If you add sour cream to the hot sauce it could curdle, so it's important to temper it first.
- Whisk tempered sour cream into the pan to combine thoroughly.
- Place chicken pieces back into sauce, skin side up, and return to oven for 7-10 minutes to reheat.
- If desired, serve over noodles with sauce and 2 pieces of chicken on top.
Notes
- Be sure to use high-quality sweet Hungarian paprika for the best flavor
- Tempering the sour cream before adding it to the sauce is essential so don’t skip this step
- This recipe can be doubled
Nutrition
Steak and Sauce is a classic pairing and this Pan Seared Skirt Steak with Mustard Sauce is a prime example. It never fails to impress and comes together in about 30 minutes. That’s my idea of a great dinner!
Jump to RecipeIngredients needed for Skirt Steak with Mustard Sauce:
This recipe uses basic ingredients but delivers big flavor
- Skirt Steak – about 1.5 pounds
- Olive Oil
- Shallots and Garlic
- Dry White Wine – such as Chardonnay or Sauvignon Blanc
- Soy Sauce
- Dijon Mustard
- Sugar
- Cilantro
- Cream or Half & Half
- Salt and Pepper
The best pan for searing Skirt Steak
Skirt steak cooks best on quick high heat in order to retain its tender texture. I recommend searing in a large heavy bottomed stainless steel pan. If needed, cut your pieces smaller so there is no overlap in the pan. Be sure to add the pieces only when your pan is very hot. This will ensure an even crust.
What is Skirt Steak?
Skirt steak is versatile and budget-friendly, which makes it perfect for a weeknight meal or a big barbeque. All you need is a good pan, the correct cut of meat and a handful of basic ingredients.
Skirt steak is a thin, quick-cooking cut of meat that delivers BIG flavor. The cut is a long thin piece, but it’s a prime cut between the brisket and the flank on the belly of a cow. Skirts normally come in pieces weighing 3/4 to 1-1/2 pounds, and you should look for thicker pieces.
Sear skirt steak on very high heat 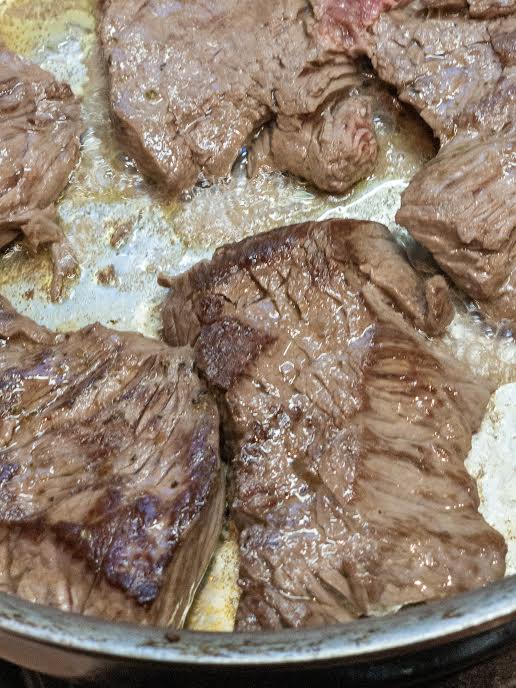
Only turn once to ensure an even crust 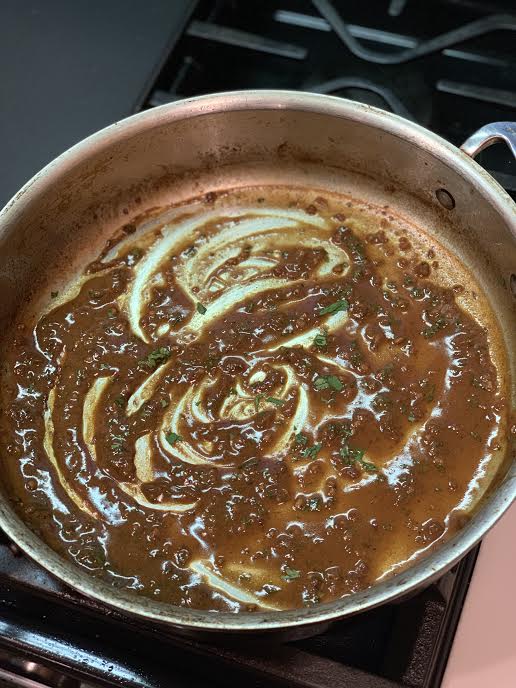
Pan sauce using the soy sauce, mustard, cilantro and half & half
How to Pan-Sear Skirt Steak and make a Classic Pan Sauce
Skirt steak is perfect for the 1-2-3 cooking method:
- STEP#1: Searing the Meat
- Sear the steak in a very hot pan until it is browned on both sides, but still pink in the middle. Only turn once. You will know its time to turn your steak when the edges start to brown and it is easy to lift a corner with a pair of tongs, about 3 minutes.
- Flip and sear the other side for about 2 minutes. Remove steak from the pan and transfer to a cutting board, cover with foil, and allow to rest. Do not skip the resting stage because that is when the juices are settling back into the steak.
- STEP #2: Making a Pan Sauce
- Make a pan sauce while the steak rests. Use the same pan you cooked the steak in to make a quick pan sauce.
- This soy mustard sauce is a version of a Classic Pan Sauce. With the fat that is left in the pan add your aromatics, in this case, we use garlic and shallots and saute until golden.
- Deglaze the pan with wine and scrape up all the delicious browned bits on the bottom of the pan. Add the flavorings – soy sauce, sugar, and Dijon – and whisk until a little bubbly. Remove from heat and whisk in cilantro and half & half.
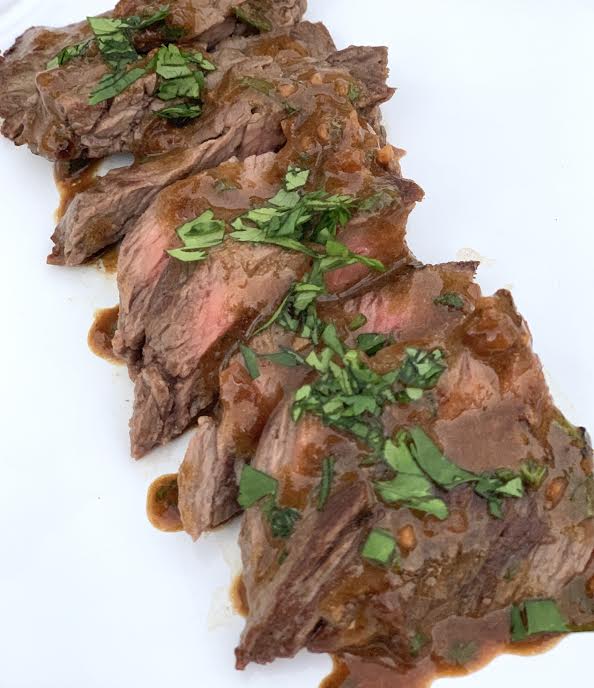
- STEP #3: Finishing and Serving
- Slice the rested steak thinly, against the grain
- Serve with sauce and garnish
How to cut a steak against the grain:
It’s a familiar term but what does it mean? In simple terms, it just means it’s the direction of the muscle fibers in meat. So carve across those fibers, rather than parallel with the fibers. This will result in a more tender slice of meat.
Suggestions for wine pairings:
The light flavors in this mustard sauce, alongside the skirt steak, make for a wonderful pairing with the Pinot Noir’s from Oregon, Merlot’s from France, and the beautiful red blends of Rhone, France.
Your weekday wines:
- Joel Gott Pinot Noir, California
- Chateau La Bastienne Montagne, St. Emilion France (Merlot grape)
Your weekend wines:
- Ponzi Pinot Noir, Willamette Valley Oregon
- Guigal Crozes Hermitage Syrah, Rhone France
A special occasion wine:
- Beaux Freves Pinot Noir, “Beaux Freves vineyards” Willamette Valley Oregon
- Chateau de Vaudieu Val de Dieu, Chateauneuf du Pape, Rhone Valley France
Other dinner ideas you might like:
- Stir Fry Beef with Broccoli
- Garlic Shrimp with Roasted Tomatoes
- Garlic Herb Mushrooms with Pasta
- Carne Asada with skirt steak
Pan Seared Skirt Steak with Mustard Soy Sauce
Ingredients
- 1.5 lbs skirt steak, trimmed, or Flank Steak
- 3 Tbsp Extra virgin olive oil, divided
- ½ tsp salt
- ½ tsp freshly ground black pepper
- 2 tsp fresh shallots, diced
- 1 tsp fresh garlic, minced
- ¼ cup dry white wine, such as chardonnay or Sauvignon Blanc
- 2 Tbsp soy sauce
- 2 Tbsp Dijon mustard
- 1 tsp sugar
- 3 Tbsp fresh cilantro, roughly chopped, divided
- 3 Tbsp Half & Half or heavy cream
Instructions
Marinate the Skirt Steak:
- Cut skirt steak into pieces about 4" long and place in a resealable container. Add 1 tablespoon of the olive oil, plus the salt and pepper. Coat steak all over and let marinate in the refrigerator 30 minutes or up to 8 hours.
Preparing Steak:
- Remove steak from the refrigerator and bring to room temperature (about 15-20 minutes).Heat a large saute pan (or a grill pan) over high heat for about 1 minute. Add remaining 2 tablespoons olive oil, heat and swirl to coat.
- Add steak pieces carefully to the pan and cook for about 3-4 minutes without moving the pieces. When the steak is easy to turn you know it is time to flip and cook the other side, about 3 more minutes for medium-rare and 4 minutes for medium.
- Remove steak from the pan and keep warm on a plate covered with foil.
Making the Pan Sauce:
- Lower heat to medium. Add shallots and garlic to the pan and saute for about 30 seconds or until fragrant. Be careful not to burn the garlic. Add wine to deglaze the pan, scraping up any bits of steak on the bottom of pan and cooking until wine is about 2/3rds evaporated.
- Add soy sauce, sugar and mustard to the pan and whisk until smooth and lightly bubbling, about 1 minute. Remove pan from the heat. Whisk in any juices that have accumulated on the plate with the steak.
- Whisk in 2 tablespoons of the cilantro and the half & half until smooth.
- Cut steak diagonally across the grain into thin individual pieces. Place on a platter. Spoon sauce over steak and scatter with remaining cilantro for a garnish
Nutrition
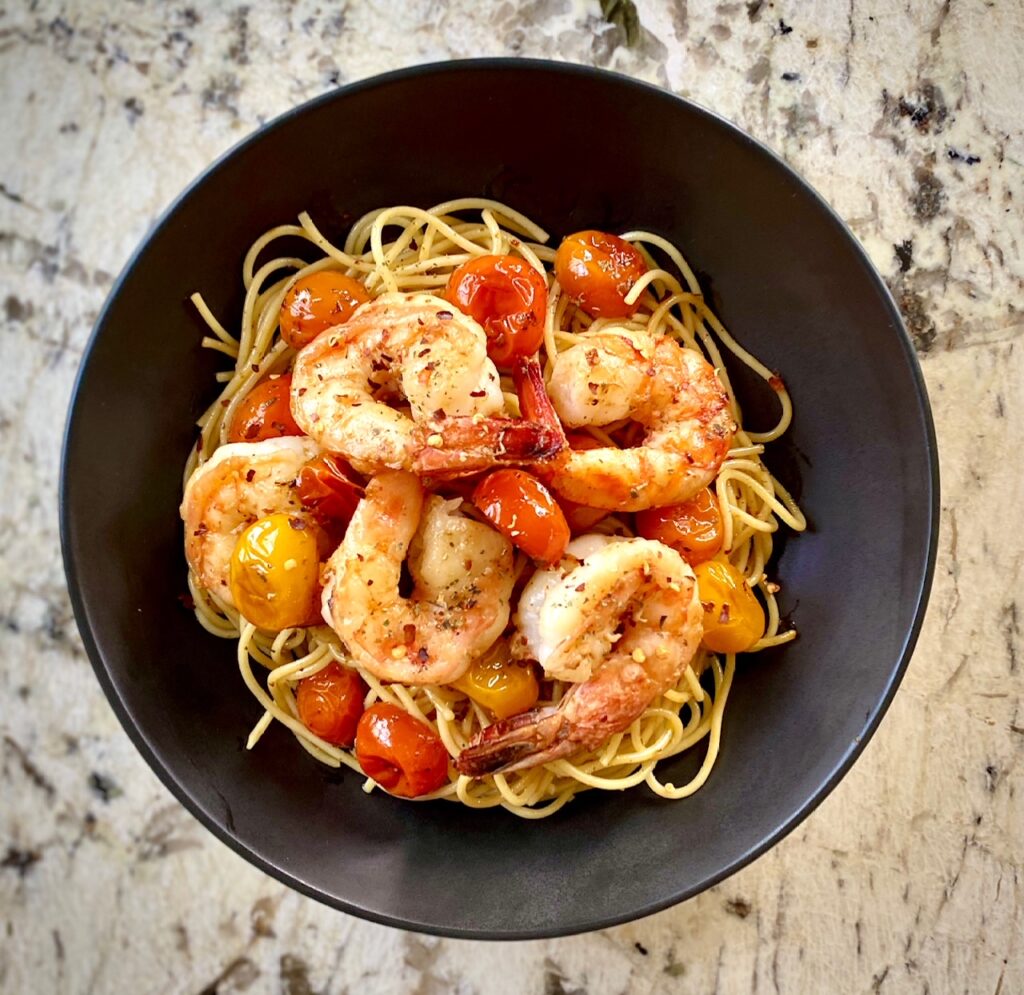
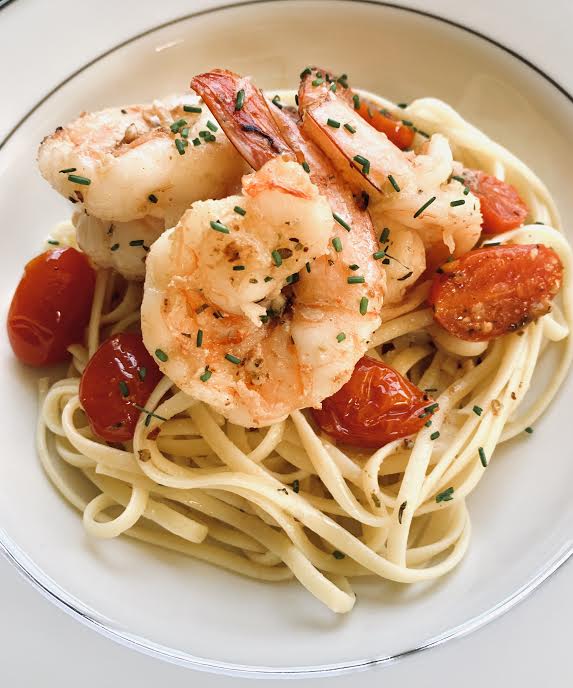
This shrimp is loaded with flavor and is ready in about 30-minutes with ingredients you probably have on hand!
Ingredients needed:
- Cherry Tomatoes
- Extra Virgin Olive Oil
- Garlic
- Italian Seasoning
- Jumbo Shrimp (10-12’s or 16-20’s)
- Butter
- Dry White Wine
- Red Pepper Flakes
- Pasta, such as linguine, fettuccine, or spaghetti
How to Choose Shrimp:
Choose bigger shrimp for this recipe because they always have more flavor. To make the preparation quicker, buy the shrimp peeled and deveined, but leave the tails on.
You can butterfly the shrimp if you want more surface area for the garlic flavor. For this recipe it’s best to use extra-jumbo shrimp, which are either 10-12’s or 16-20’s. The number next to the shrimp, for example, 16-20, means you are buying shrimp that comes 16-20 pieces per pound.
How to make Garlic Shrimp Pasta with Tomatoes:
There are 4 easy steps to this recipe:
- Prepare the pasta, drain and reserve 1/2 cup of the pasta water for later
- Pan roast the tomatoes
- Sauté the garlic shrimp
- Toss all ingredients together and serve
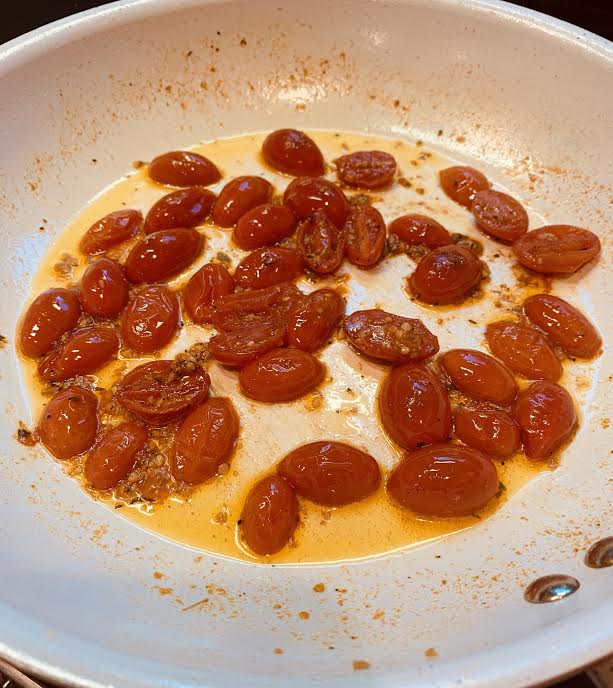
How to Pan Roast Tomatoes:
During the summer there is always an abundance of delicious, beautiful cherry tomatoes. As summer wanes the tomatoes need a little added help, so pan roasting is an easy way to amp up their flavor. It brings back the sweetness, even in the off season.
Sautéing the tomatoes with olive oil and garlic also gives them a deeper flavor. For this dish we will cook the tomatoes first and then re-warm when all the ingredients are combined at the end.
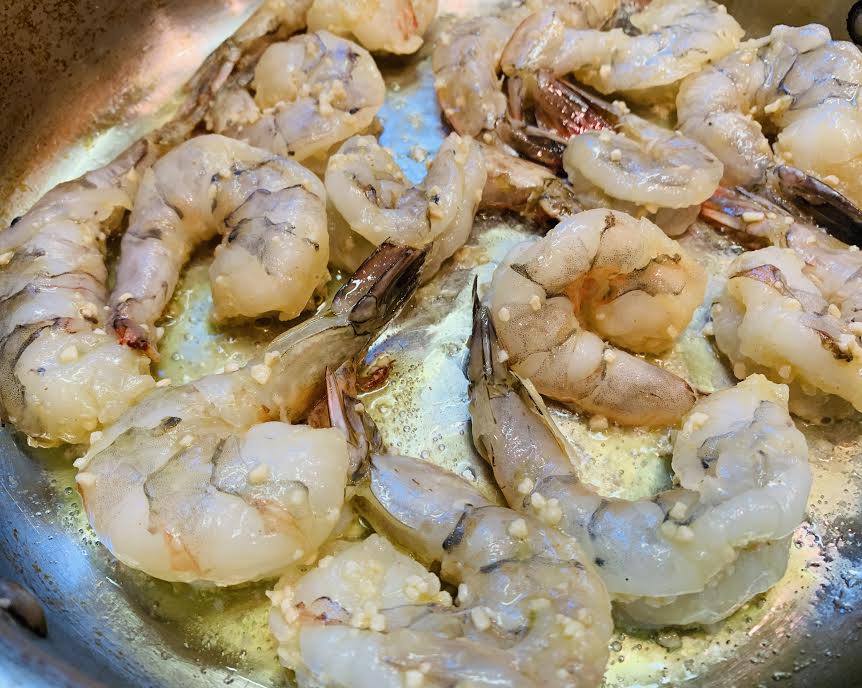
How to Prepare Garlic Shrimp:
Shrimp can overcook very quickly, so be sure to have all of your ingredients ready before you start cooking. Always sauté shrimp at high heat.
- Heat butter and olive oil in a large sauté pan over medium heat
- Add garlic, stir constantly, for about 1-minute
- Add wine and cook until reduced by half
- Add Italian seasonings and red pepper flakes
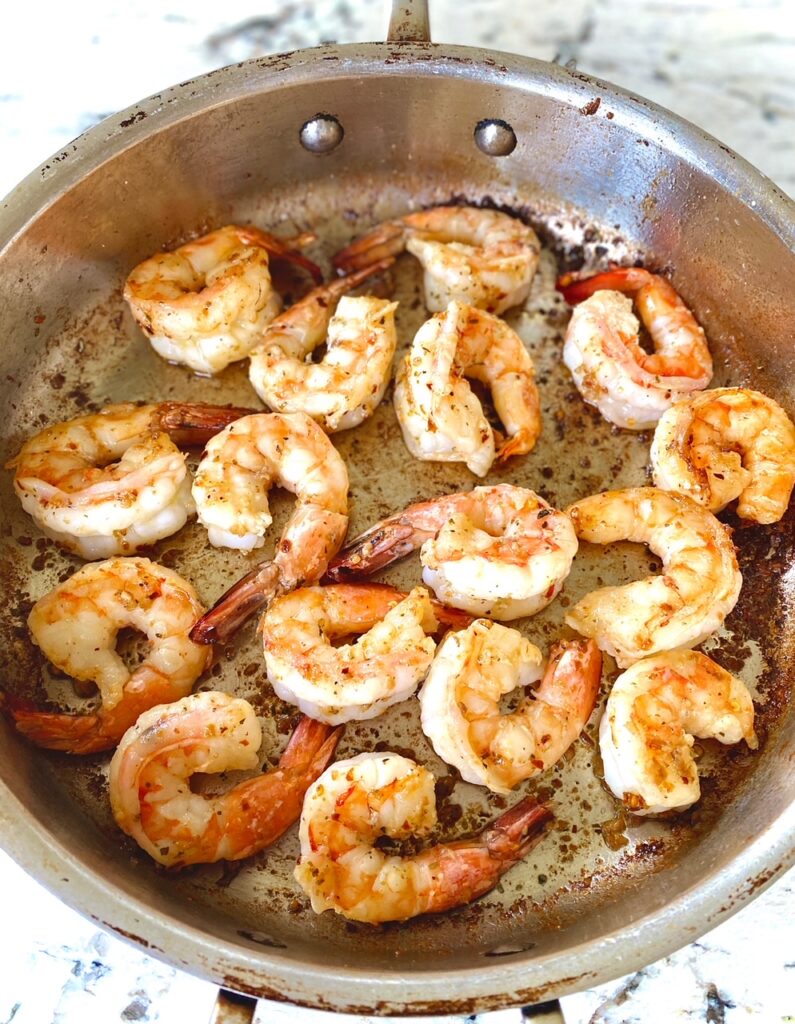
- Increase heat to high and add the shrimp. Sauté for 2-3 minutes per side
- Season with salt and pepper
- Shrimp are done when they are pink are just starting to curl up. Remove from the pan and reserve
Serving Garlic Shrimp with Pan-Roasted Tomatoes:
- Add the cooked pasta to the pan and warm quickly over medium-low heat
- Add a small amount of the reserved pasta water to loosen the sauce
- Add the pan roasted tomatoes and garlic shrimp to the pan and gently toss to combine with the pasta
- If needed add more of the pasta water to create more sauce
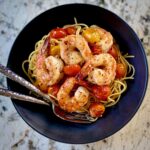
- Serve in four shallow bowls
Other great shrimp or pasta recipes:
- Wake up your taste buds with Shrimp in Chipotle Sauce
- Honey Garlic Shrimp is ready in just 30-minutes
- Garlic Herb Mushroom Pasta is warm and satisfying, yet easy to make
- Super creamy Mac and Cheese is an all-around favorite
Suggestions for wine pairings:
Your weekday wines:
- Louis Latour Pouilly fuisse Maconnais, France (Chardonnay grape)
- Palmina Pinot Grigio, Santa Barbara, California
Your weekend wines:
- William Fevre Estate Chablis, France
- Sauvion Sancerre Sauvignon Blanc, Loire Valley, France
A special occasion wine:
- Chateau Fuisse Pouilly Fuisse Le Clos, France (Chardonnay grape)
- Louis Jadot Chassagne Montrachet, France
Garlic Shrimp with Pan Roasted Tomatoes
Ingredients
- 16 ounces linguine or spaghetti, cooked
Roasted Tomatoes
- 1 Tablespoon Extra virgin olive oil
- 1 teaspoon minced garlic
- 1 cup cherry tomatoes, halved
- 1 teaspoon Italian seasoning
- ¼ teaspoon salt
- ¼ teaspoon black pepper, freshly ground
Sauteed Garlic Shrimp
- 2 Tablespoons butter
- 1 Tablespoon extra virgin olive oil
- 1 Tablespoon garlic, minced
- ½ cup dry white wine, such as Chardonnay or Sauvignon Blanc
- 1 teaspoon Italian seasoning
- 1 teaspoon red pepper flakes
- 1½ pounds jumbo shrimp, cleaned and deveined, (size: 16-20's)
- ½ teaspoon salt
- ½ teaspoon black pepper, freshly ground
Instructions
- Cook pasta according to package directions, drain and reserve 1/2 cup of the pasta water
Pan-Roasted Tomatoes:
- Slice tomatoes in half, lengthwise
- In a large sauté pan, heat olive oil over medium heat. Add garlic and cook for 1 minute, stirring constantly. Add tomatoes, Italian seasonings, salt, and pepper and cook until softened, about 7-10 minutes.
Sauteed Garlic Shrimp:
- In a large sauté pan heat olive oil and butter. Add garlic and cook for 1 minute, stirring constantly.
- Add wine and reduce by about half. Stir in Italian seasonings and red pepper flakes.
- Add shrimp and sauté for about 2-3 minutes, per side. Season with salt and pepper.
- Add roasted tomatoes to the pan of shrimp and warm gently. If cooked pasta (if using) and gently combine. If more sauce is needed add some of the reserved pasta water and mix.
Notes
- Calorie count is for 6 servings without pasta. If using linguine calorie count is 385 calories per serving
- Any size large shrimp will work, but adjust the cooking time according to size.