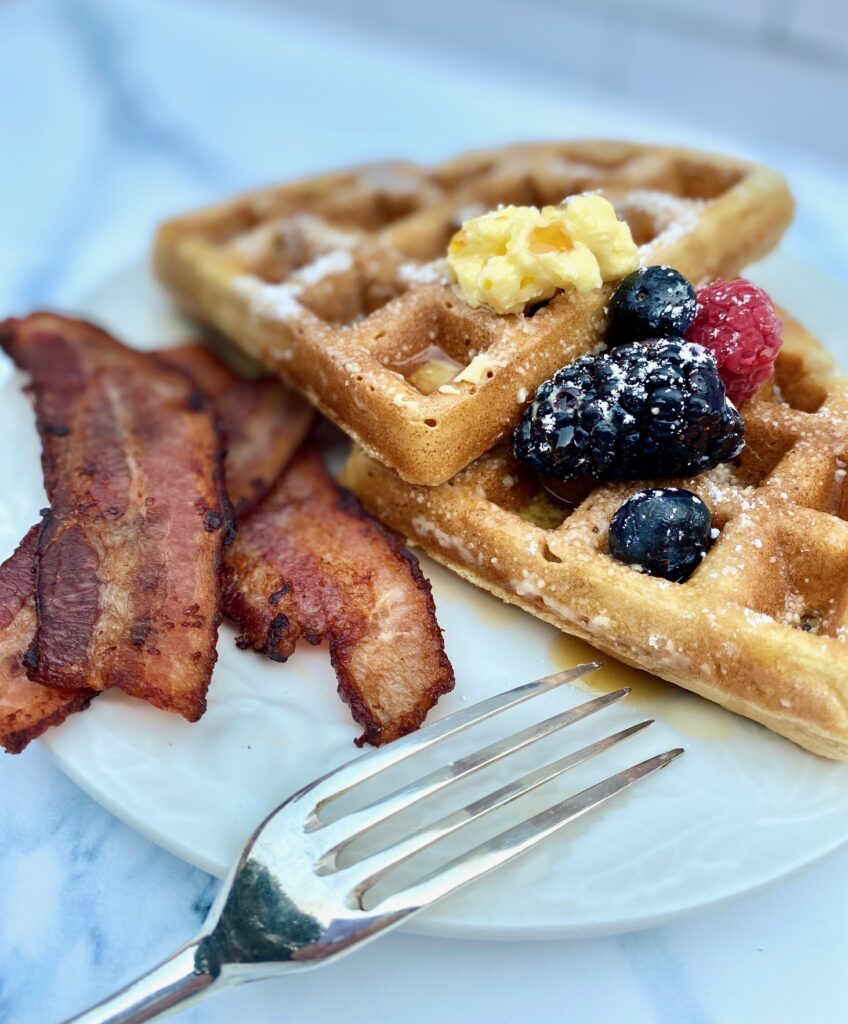
There’s nothing better than a piping hot waffle fresh from the waffle iron. Add toppings and it’s a breakfast made in heaven! Both our Buttermilk Pancakes and these Belgian waffles are true favorites in our house, especially on Sunday mornings
The best part is how easy these buttermilk waffles are to make at home, with a few simple ingredients, and a quality waffle iron. By the way, this recipe will work in both a Belgian waffle iron and a regular waffle iron.
OK, who’s starving? Let’s get cookin’
Ready to get started? Just click on our “jump to recipe” button below to go straight to the recipe card. For tips, processes, and substitutions keep reading.
Jump to RecipeThis post may contain affiliate links. Please see our affiliate disclosure for more details
Ingredients for Homemade Belgian Waffle Mix:
This recipe works best when all of the ingredients are closer to room temperature, so be sure to pull everything out of the refrigerator first, when you are prepping your recipe, to take the chill off.
- All-purpose flour
- Sugar
- Baking Powder – make sure it’s fresh so you’ll have tall fluffy waffles
- Baking Soda and Salt
- Milk – we prefer whole or 2% for this recipe but any type will do
- Buttermilk – if you don’t have buttermilk on hand see our handy tip below to make your own or just use regular milk. Buttermilk gives these waffles a tang and tenderness we love
- Butter – melted and cooled to room temperature
- Vanilla Extract – have you tried making your own? Here’s how – it’s easy with just 2 ingredients!
- Eggs – we’ll separate them and use both the whites and yolks. Did you know, it’s easier to separate eggs when they are cold?

How to make fresh Belgian Waffles from scratch:
- Gather all of your refrigerated ingredients first and give them a chance to warm up
- Melt the butter and let it cool to room temperature (we don’t want to scramble the eggs!)
- Heat your waffle maker to medium, or according to the manufacturer’s suggestion
- Separate the eggs. Reserve the whites in a medium mixing bowl. Blend yolks in a small bowl and set aside
- Whisk dry ingredients together in a large bowl – flour, sugar, baking powder, baking soda, and salt
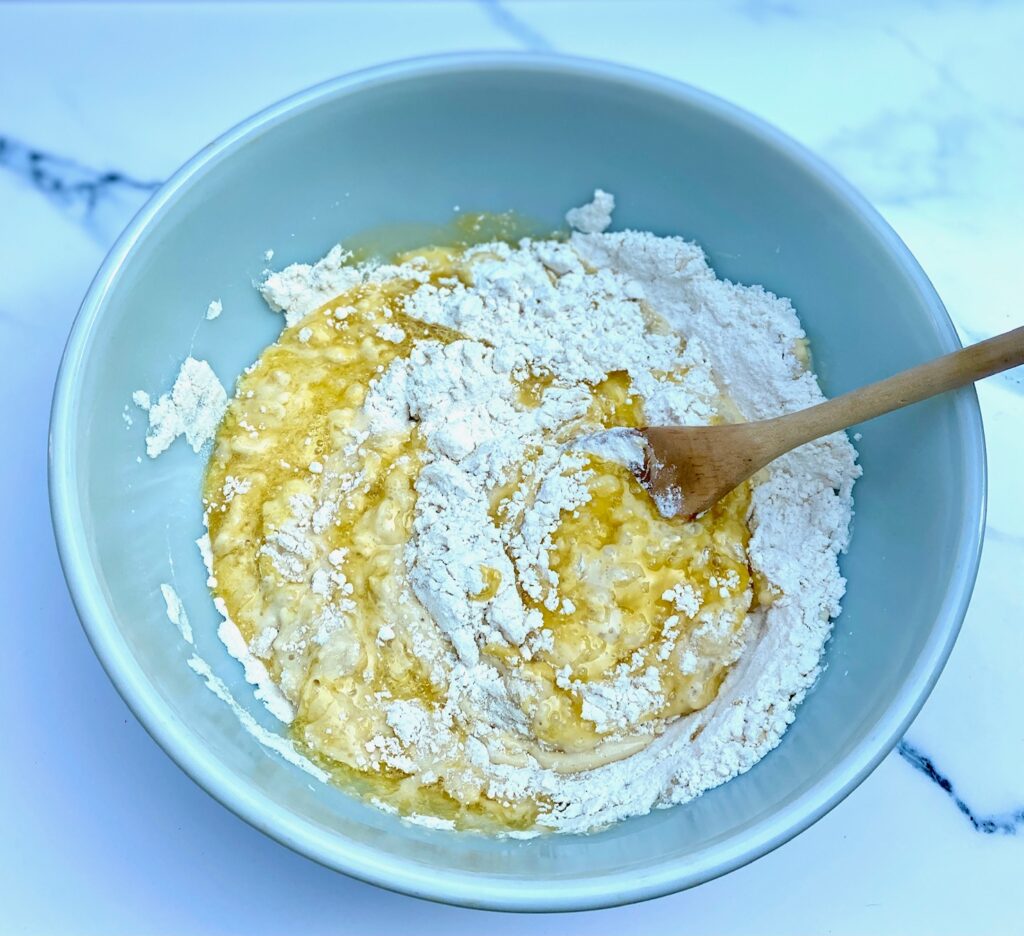
- Create a well in the middle of the dry ingredients and pour in the milk, buttermilk, cooled melted butter, vanilla extract, and blended egg yolks
- Whisk together to combine. The batter will be thick at this point
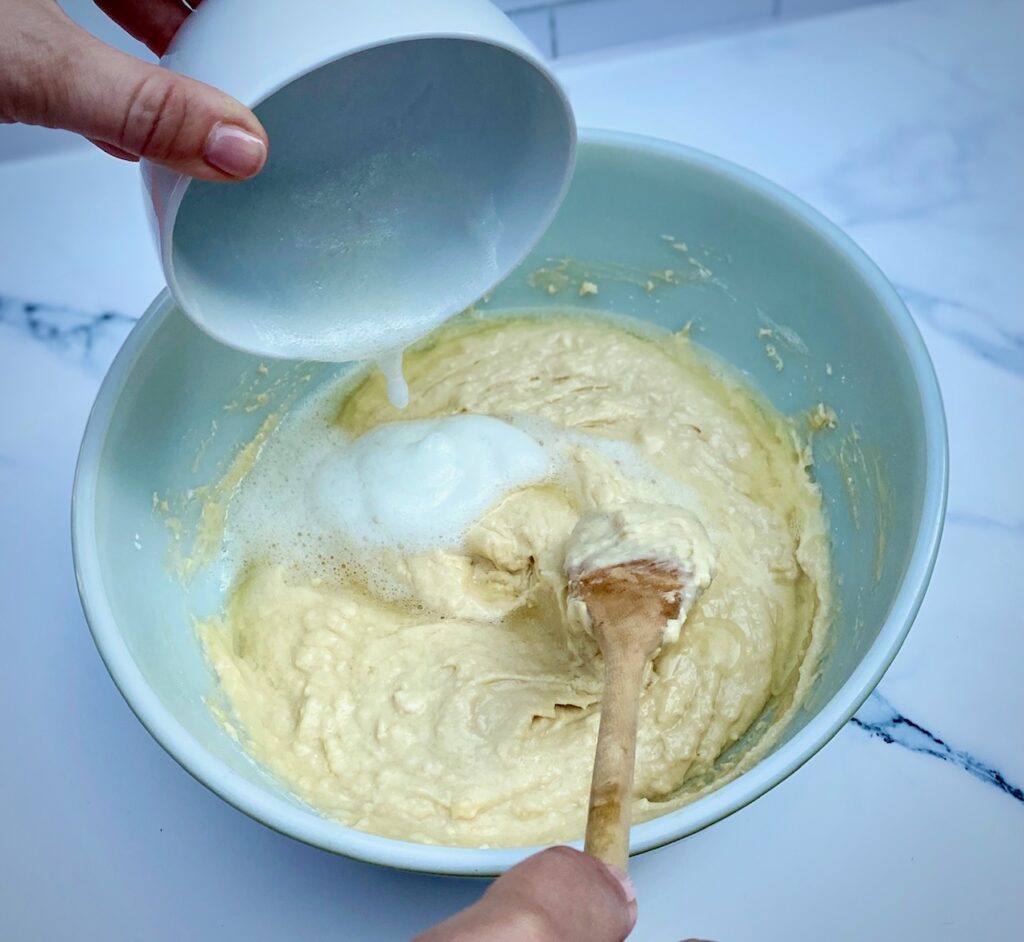
- Vigorously whisk the egg whites until they reach the soft peak stage. Alternately, blend with a mixer but be careful not to over whisk
- Now gently fold the whites into the batter. Be gentle so you don’t deflate the whites. It’s ok if the batter looks a little streaky
- Let batter rest and heat the waffle iron (anywhere between 5 – 30 minutes)
- Pour about 1/2 – 3/4 cup of batter into the center of the Belgian waffle maker. Make sure the batter spreads to the edges. If it doesn’t then give it a quick nudge with a heat-proof spatula. This helps fill in the nooks and crannies all the way to the edge and ensures beautiful full waffles. * Each waffle iron will require a different amount of batter depending on the model
- Close the lid and cook for about 5-6 minutes, or until the waffle iron beeps that your waffles are ready (most models). The waffles should be lightly crisp and golden
- Remove the cooked waffle from the hot waffle iron and place it on a wire rack, on top of a baking sheet. This keeps the waffles from getting soggy on the bottom.
- Continue cooking the rest of the batter
- To keep cooked waffles warm and crispy while finishing the rest of the batch, place the baking sheet in a warm oven (175˚F)

Looking for a good quality waffle iron?
We’ve tested a few and we keep coming back to this silver Cuisinart 4-slice Belgian waffle maker. It heats consistently across all of the surface areas, has a great non-stick texture, and is easy to clean afterward. There are a lot of choices out there but we think this is a reliable waffle maker at an affordable price.

Topping ideas for Homemade Belgian Waffles:
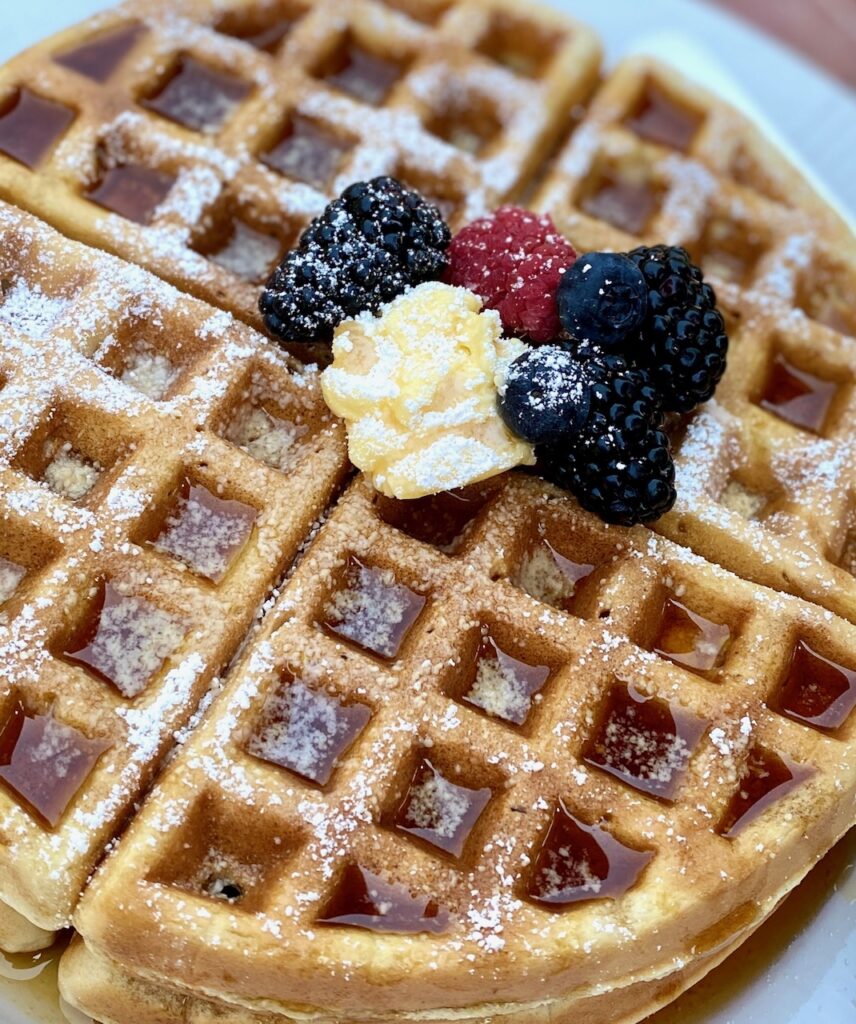
The best thing about waffles is the little pockets that are created because they just beg for toppings! Here are some of our favorites, but it’s easy to get really creative here.
- Whipped butter and Pure Maple Syrup
- All types of fresh fruit or fruit compotes
- A nice dusting of powdered sugar
- Super rich whipped cream
- Nutella, small chocolate chips, or our Easy Salted Caramel Sauce
- Try these with a dollop of our warm Homemade Applesauce, which is loaded with cinnamon!
- Sauteed bananas or strawberries
- How about a classic Waffles and Fried Chicken combo?

Should you let the waffle batter rest?
This simple answer is yes! The minimum resting time is 5 minutes but 30 minutes is ideal to allow the gluten to relax.
If you let the batter rest, you’ll actually get a little more volume than if you cook them right away (up to 1 extra waffle). Additionally, the rested batter will give your waffles a crusty and airy, tender texture. The resting time is a great time to prepare delicious toppings for the warm waffles.
What is the difference between a Belgian waffle and a regular waffle:
Basically, Belgian waffles have deeper pockets than American waffles, which, of course, makes them great for holding little pools of syrup and butter. The texture is also lighter and crispier.
To make a true Belgian waffle, you need a waffle iron with a deep, large grid pattern. Many of the original Belgian waffle recipes use yeast instead of baking powder. The beaten egg whites also help the waffles rise more when they are cooking.
If you have a regular waffle iron you can use this recipe but will need to adjust the amount of batter you use (you will likely use less).
How to freeze Homemade Belgian Waffles
Waffles freeze beautifully! Let them cool completely, wrap them individually, and store them in a resealable plastic bag for up to 3 months. When ready to eat we recommend heating in a low temperature oven. Microwaving isn’t recommended.
How to ensure crispy waffles:
- Make sure the waffle iron is hot enough
- Let the batter rest
- Don’t overwork the batter
- Don’t stack the cooked waffles – this will make them soggy and limp
Need a buttermilk substitute?
In case you don’t have buttermilk on hand it’s easy to make with this substitution formula:
- The ratio: 1 Tablespoon of white vinegar or lemon juice for every 1 cup of regular milk
- Mix together and let stand for a few minutes then mix again

Homemade Belgian Waffles
Equipment
- waffle iron
Ingredients
Waffle Mix
- 2 ¼ cups all-purpose flour
- ⅓ cup sugar
- 2 teaspoon baking powder
- ½ teaspoon baking soda
- ½ teaspoon salt
- 1 cup milk
- ½ cup buttermilk
- ¼ cup butter, melted and cooled
- 1 Tablespoon vanilla extract
- 2 eggs, separated
Garnish Ideas (optional)
- 4 Tablespoons whipped butter
- 4 Tablespoons pure maple syrup
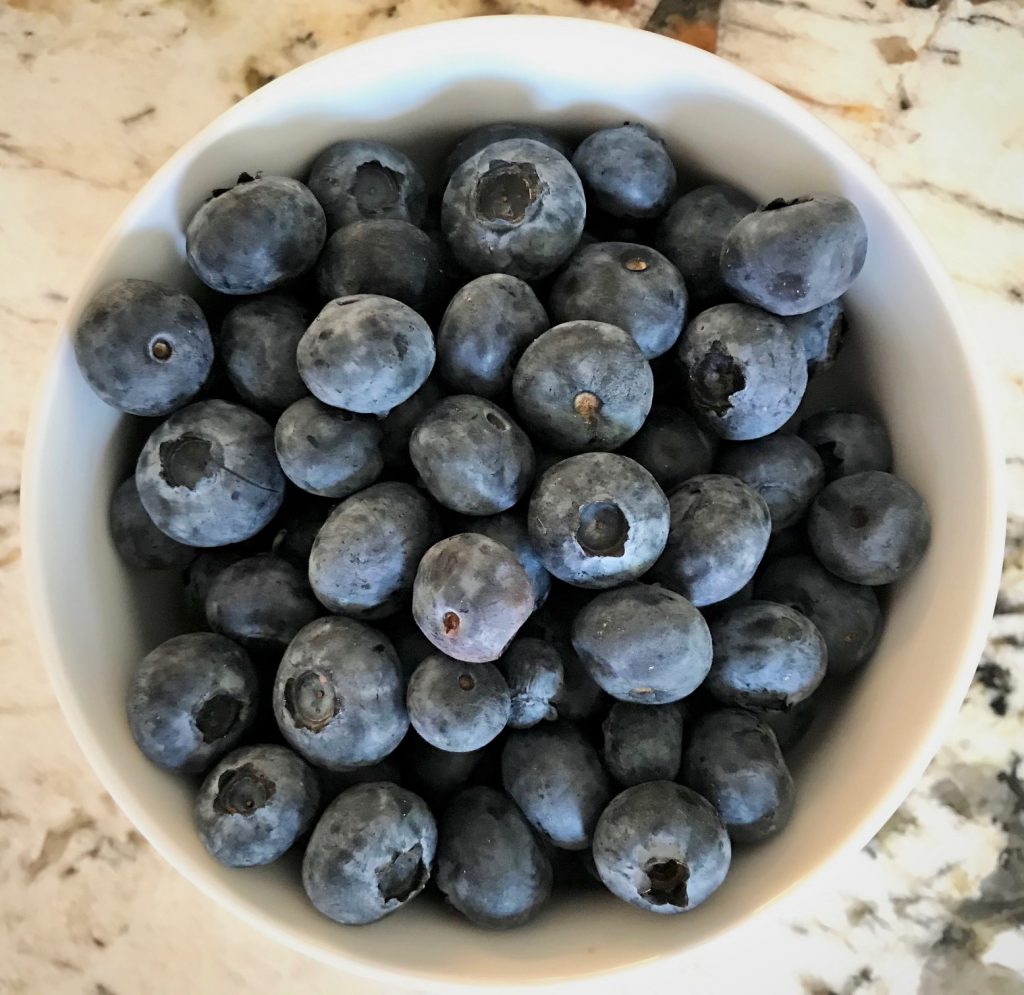
- ¼ cup mixed berries, blueberries, blackberries, raspberries
- 1 Tablespoon powdered sugar
Instructions
Making Belgian Waffles:
- Melt the butter and let cool to room temperature.
- Heat a Belgian waffle iron to medium, or heat according to your specific waffle iron's directions for Belgian waffles.
- Separate the eggs. Reserve the whites in a medium mixing bowl. Blend yolks in small bowl and set aside.
- In a large bowl whisk together the flour, sugar, baking powder, baking soda, and salt.
- Create a well in the center of the flour mixture. Pour in milk, buttermilk, cooled melted butter, vanilla extract, and blended egg yolks. Whisk together to combine. The batter will be thick, but don't over blend.
- Whisk egg whites vigorously until you have soft peaks, either by hand or with a mixer.
- Gently fold egg whites into the batter until combined, but again don't over blend.
- Let batter rest for 5-30 minutes while the waffle iron is heating.
- Pour about 1/2 – 3/4 cup of batter into the center of the Belgian waffle maker. make sure the batter spread to the edges.Close the lid and cook until lightly brown. (FYI: Most waffle makers will beep when ready). *Note: My waffle iron (a round Cuisinart) takes about 1/2 cup of mixture and cooks for 5-minutes but each waffle iron cooks slightly differently so follow your manufacturer instructions
- Remove cooked waffle from the hot waffle iron and place on a wire rack on top of a baking sheet. This keeps the waffles from getting soggy on the bottom. Continue cooking the rest of the batter.
- To keep the cooked waffles warm and crisp, while cooking remaining batches, put the baking sheet in a warm oven (175˚F)
Serving waffles:
- Serve waffles warm with butter and syrup. Garnish with berries and a dusting of powdered sugar, if desired.
Notes
- This recipe works in a traditional waffle iron or Belgian waffle iron
- These waffles freeze beautifully. Cool them completely, wrap in foil, and store in an airtight container or freezer bag
- Topping ideas:
- warm syrup
- powdered sugar
- fruit compote
- fresh fruit
- whipped cream
- Nutella
Nutrition
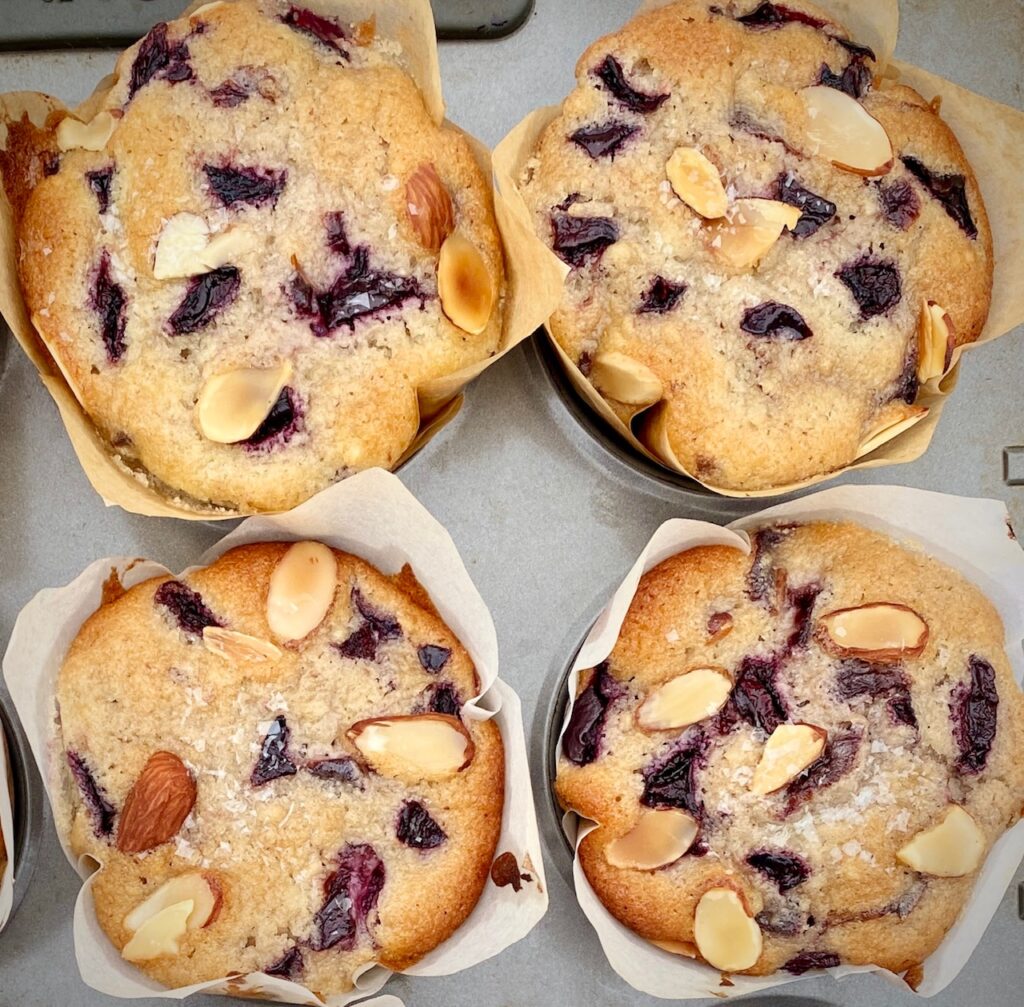
These beautiful muffins are loaded with juicy cherries because everyone loves getting a little cherry in every bite. Almonds and cherries are a well-known match and these delicious cherry almond muffins prove it!
We added a bit of almond extract to the muffin batter and some slivered toasted almonds to the top for a perfect delicious pairing of flavors. The muffins will have you longing for a cherry tree in your backyard.
This post may contain affiliate links. Please see our affiliate disclosure for more details.
Ingredients for Cherry Almond Muffin
The exact ingredients and directions are at the bottom of this post in the printable recipe card.
- Butter – we use unsalted, you can use salted and omit the added salt in the ingredient list
- Sugar – both regular sugar and an optional sprinkling of demerara sugar on the top
- Almond Extract and Slivered Almonds – the extract can be swapped for vanilla and chopped almonds can stand in for slivered
- Eggs – 2 eggs are our binder
- Flour – all-purpose flour works best
- Baking Powder – this is what gives our muffin a tall rise
- Salt – a little bit to balance the sweet flavors
- Cardamom – this is optional, but recommended if you have it on hand
- Whole Milk – or sub in buttermilk for a little tang
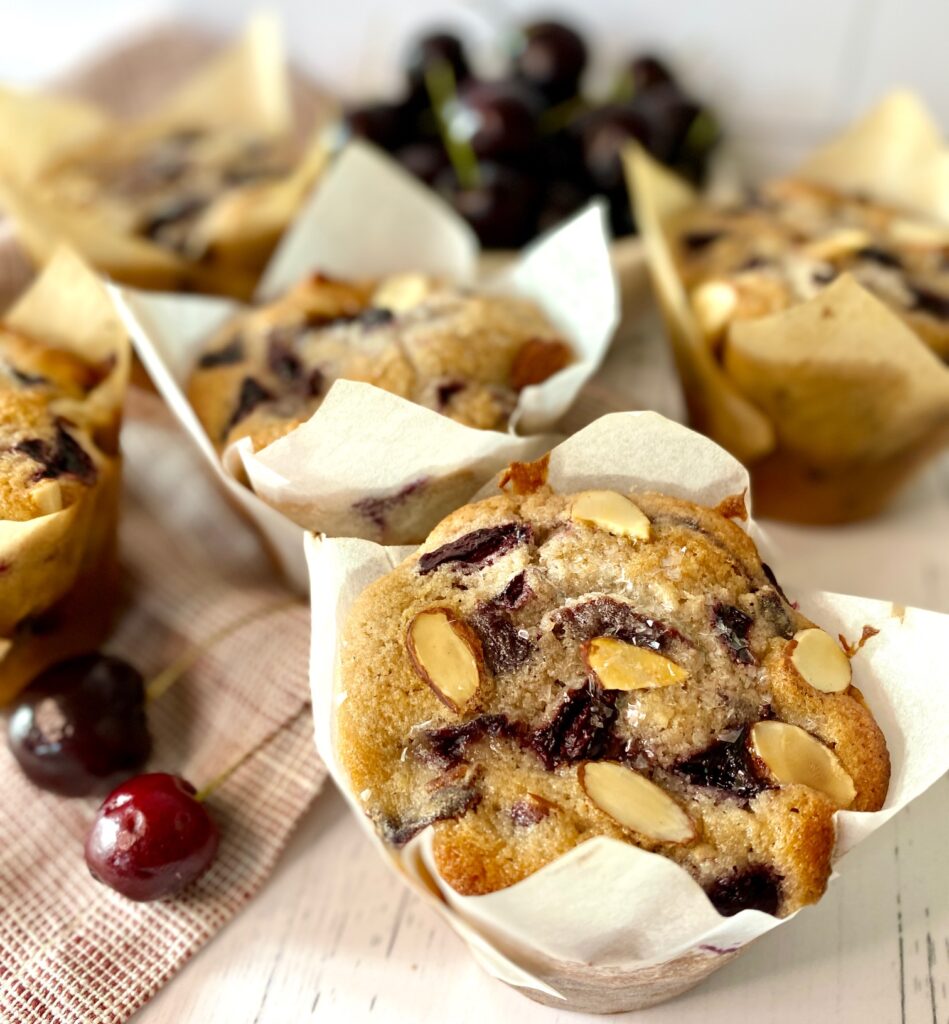
- Cherries – we use frozen dark sweet cherries but tart cherries or sour cherries are a delicious option, as well as fresh cherries (fresh cherry season is May-August in the U.S.)
Also needed:
- Muffin Tins, Muffin Cups, or Muffin Pan – we used a standard 12-cup muffin tin
- Muffin Liners – optional but paper liners will make clean up a breeze

How to make Cherry Muffins:
PREP:
- Preheat the oven to 375˚F. Line your muffin tins with liners or generously grease each muffin cavity.
- Lightly toast the almond slivers (or chopped almonds) in a dry skillet until just fragrant and set aside to cool.
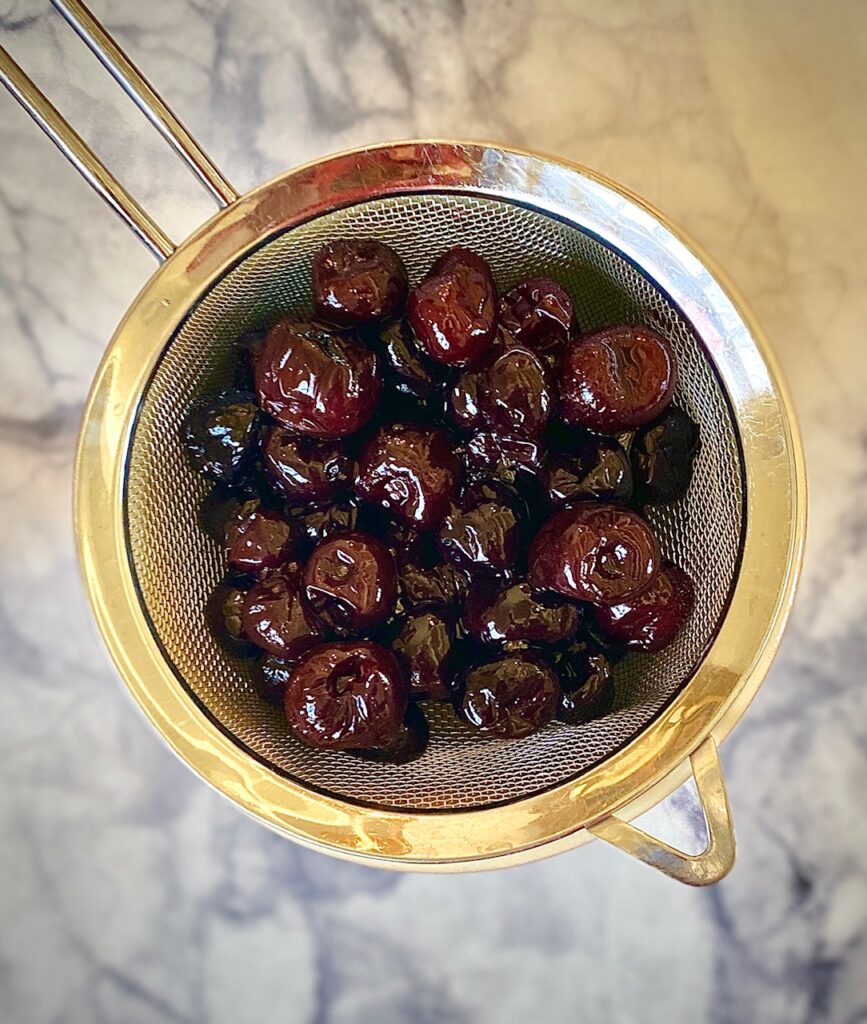
- Cherries: if using frozen, thaw, drain, and roughly chop into quarters. If using fresh, remove stem and pit, and chop (see below for more info on fresh vs. frozen cherries)
- In a large bowl cream the room temperature butter and sugar until light and fluffy, which will take 3-5 minutes (Photo # 1)
- Beat in the almond extract, and add the eggs one at a time. Lightly mix until blended (Photo # 2)


- In a separate bowl sift all the dry ingredients together – flour, baking powder, salt, and cardamom
- Add 1/3 of the flour mixture into the butter mixture along with 1/3 of the milk.
- Blend gently and continue alternately adding all the milk and flour until all is added and evenly combined
- Do not over-mix the muffin batter – this is important for creating a light fluffy muffin (which we all love!). The batter will be thick
- Gently fold in the chopped cherries and lightly blend by hand

BAKE:
- Spoon the batter evenly into the muffin tins until it reaches almost the top of the liners
- Sprinkle a little demerara sugar and slivered toasted almonds on tops of the muffins
- Bake for about 22-25 minutes or until muffins are springy when touched
- Let cool in pan for 5 minutes and then remove to a wire rack to finish cooling

The secret to great muffins
We’ve all had over-baked dry muffins. No thanks! There are a few simple tricks to making moist muffins that turn out delicious, light, and fluffy! These tips are also recommended when making pancakes, waffles, and quick breads.
- Start with room temperature ingredients – butter, eggs, milk
- Mix wet ingredients and dry ingredients in separate bowls before combining
- Add the dry ingredients to the wet ingredients and DO NOT over mix – this is critical because you do not want to overwork the gluten that’s in the flour
- Add your fruit last and gently fold it in by hand so that everything is just combined
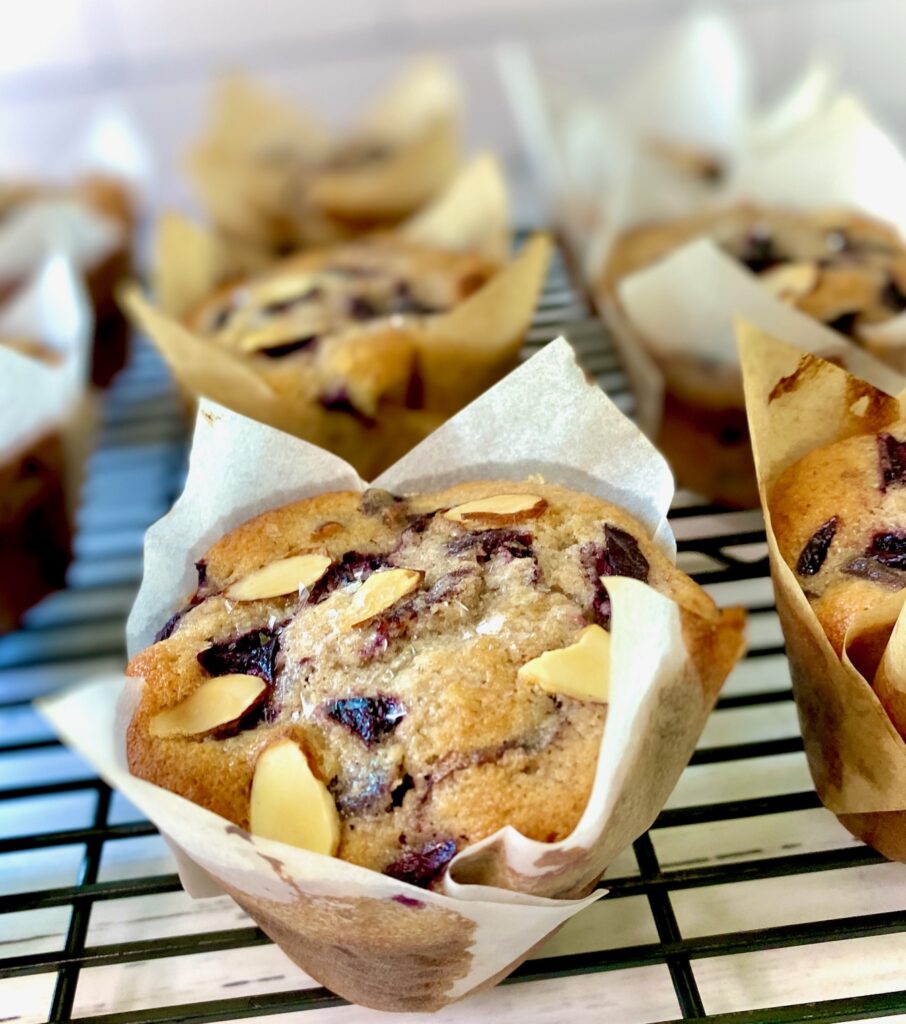
- Line your muffin tins – it really makes everything easier! We love to use a variety of interesting muffin liners and one of our favorites are the parchment tulip liners like the ones in our photos
- Fill the liners evenly – we use an ice cream scoop to make it easier
- Don’t overfill the liners or the muffins won’t rise properly
- Bake immediately
Are Fresh or Frozen Cherries better?
- The simple answer is – both are good!
- If fresh cherries aren’t available in the grocery stores or at farmers markets (or aren’t in season) then choose a quality bag of frozen fruit.
- We used frozen, thawed, organic cherries for this cherry muffin recipe. We roughly cut the pieces into quarters.
- Most fruit is flash-frozen right after being picked to maintain peak freshness. In some cases, frozen fruit is preferred over the fresh variety because it is frozen immediately upon picking.
- If you are trying to save a little time frozen is a great option for cherries because they are already pitted. If you are using fresh then a cherry pitter is a great time saver.
- We’ve used frozen and fresh blueberries in our Blueberry Lemon Scones with equal success, and this is true for most scone or muffin recipes.
Chefs Pro Tip
- If using frozen cherries be sure to thaw them in a strainer over a bowl to capture the amazing cherry juice!
- Save the fruit juice for another use because it is truly delicious. Use the juice in mixed drinks, as part of a vinaigrette, or as flavoring added to cakes and other sweets.
How do you know when muffins are done baking?
- Every oven cooks a little differently so the best and easiest test to determine if muffins are ready is to insert a toothpick into the center of one of the muffins. If it comes out clean or with a few small crumbs clinging to the toothpick then the muffins are done.
- If you have an instant-read thermometer the internal temperature of baked muffins should be 200-205˚F.
How to store Cherry Almond Muffins:
- Let cool completely
- Line an airtight container with paper towels (this will help absorb any moisture), add muffins, and seal the container
- Store at room temperature for up to 4 days
- Do not refrigerate muffins – this will dry them out quickly
- You can easily freeze muffins. Store in a resealable freezer bag or container for up to 3 months. Let them come to room temperature before eating.
- These storage tips also work well with quick breads such as our Buttermilk Banana Bread, Easy Zucchini Bread, Pumpkin Bread, and Blueberry Apple Bread
Substitution ideas and tips:
- Any berry or stone fruit works well in place of cherries – try blueberries or cranberries
- Substitute buttermilk for whole milk for a nice tangy upgrade
- Try adding pecans instead of slivered almonds, or use 2 Tablespoons of chopped almonds to the muffins
- Vanilla Extract works in place of almond extract if needed. Have you tried our 2-ingredient easy homemade Vanilla Extract yet?
- Make 6 Jumbo Muffins or 24 Mini Muffins with this recipe
- Toss in some mini chocolate chips or chunks to make Chocolate Cherry Muffins. Cherries and chocolate are a naturally delicious pairing
- We made this successfully with 1:1 Gluten-Free baking flour (do not use all-purpose gluten-free flour). No other substitutions are needed.
- Sprinkle some Demerara sugar on top of the muffins before baking for an extra sparkly top. Demerara sugar is a large granule sugar that provides a nice, crunchy texture in baked goods.

Cherry Muffins with Almonds
Equipment
- Muffin tin
Ingredients
- 4 ounces butter, softened (8 Tablespoons)
- 1 cup sugar
- 1 Tablespoon almond extract
- 2 eggs
- 8 ounces Flour (2 cups)
- 2 teaspoons baking powder
- 1 teaspoon salt
- ½ teaspoon cardamom (optional)
- ½ cup whole milk
- 2 cups cherries, fresh or frozen drained, pittted and roughly chopped
- 2 Tablespoons toasted slivered almonds
- 2 Tablespoons Demerara sugar or regular sugar (for tops of muffins)
Instructions
- Preheat the oven to 375°F with the rack in the middle of the oven.
- Lightly toast the almonds slivers in a dry skillet and set aside.Lightly grease a 12-well muffin pan, or line with paper liners.
- In a large bowl cream the butter and sugar until light and fluffy, about 3-5 minutes.
- Beat in the almond extract and then the eggs, one at a time, until blended.
- In a medium bowl whisk together the flour, baking powder, salt, and cardamom.
- Add 1/3 of the flour mixture into the butter mixture with 1/3 of the milk, blend lightly and continue adding alternately until all flour and milk is combined.
- Fold in the chopped cherries and blend by hand until combined.
- Spoon the batter into the muffin tins until it reaches almost the top of the liner or tin. Sprinkle a little of the sugar and slivered almonds on the top of each muffin.
- Bake for about 22-25 minutes or until muffins are springy when touched. Let cool in pan for about 5 minutes and then remove to a cooling rack to finish cooling
Notes
- Muffins can be stored, sealed, at room temperature for about 3-4 days
- If freezing: tightly sealed in a freezer-proof container or bag for up to 3 months. Thaw at room temperature.
- Do not refrigerate muffins – this will dry them out quickly
Nutrition
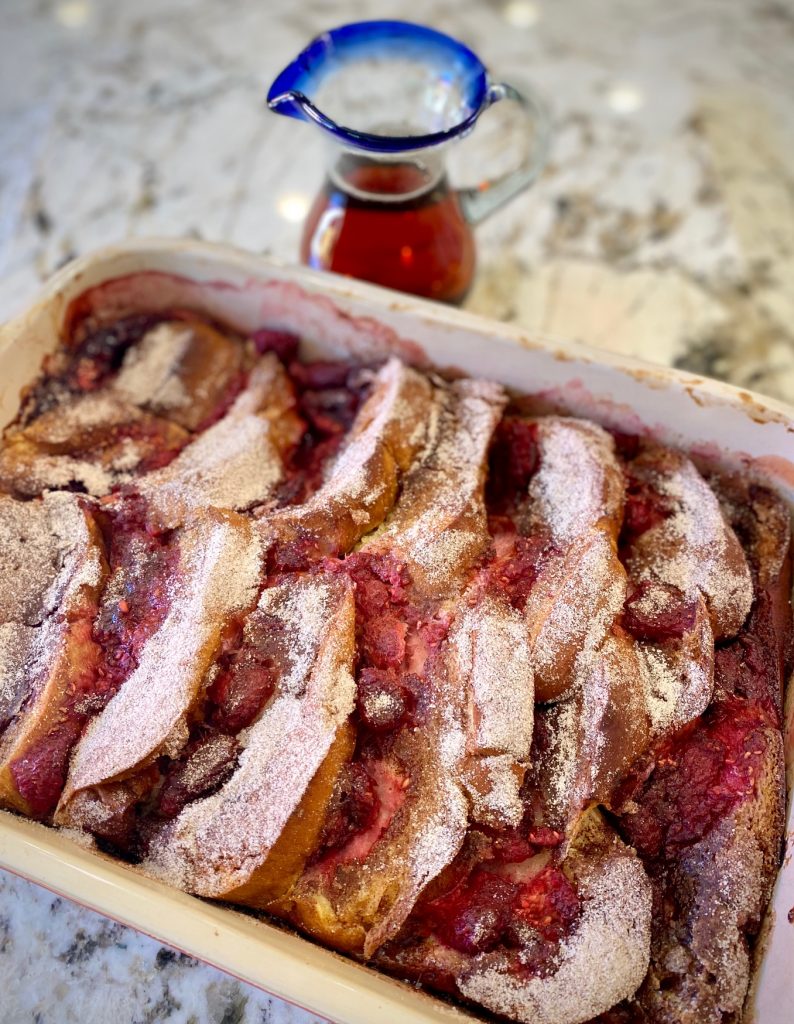
This easy to make French Toast Casserole is amazing for any occasion and especially perfect for a crowd, or brunch, because most of the work can be done ahead of time!
Because this recipe is made early and needs to bake for an hour it allows you time to set your table, cook up some bacon or sausages, and enjoy a Mimosa or Spicy Homemade Bloody Mary with your guests! A win-win in our books!
This post may contain affiliate links. Please see our affiliate disclosure for more details.
French Toast Casserole Ingredients
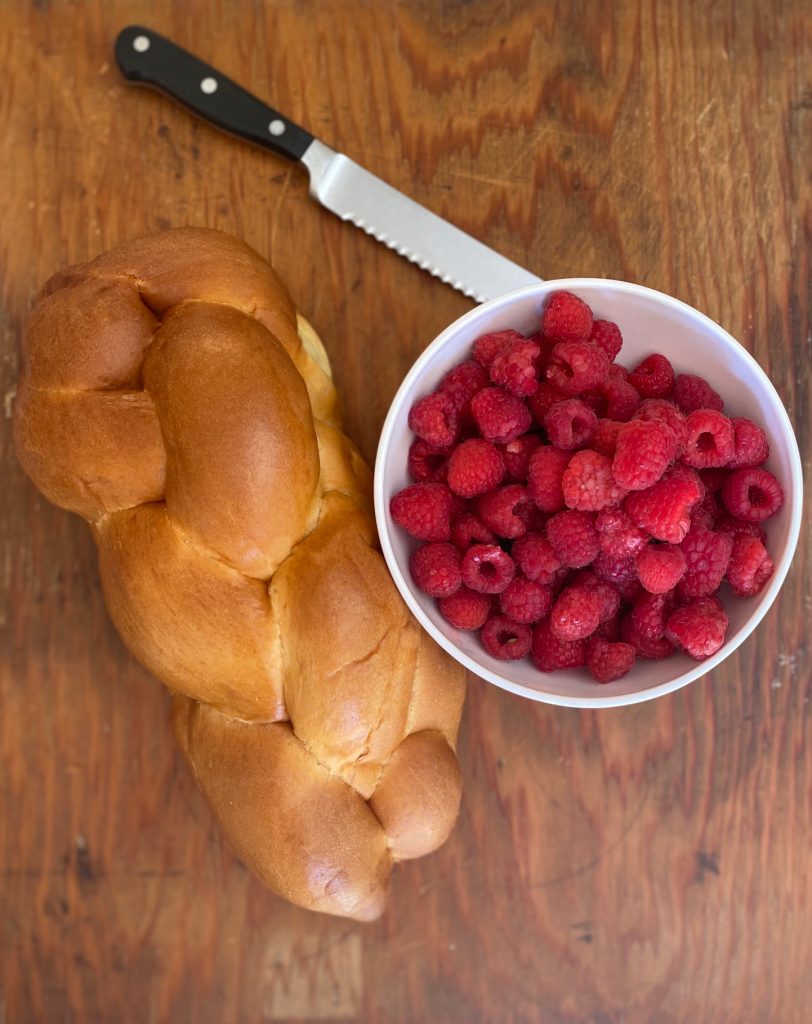
- Challah Bread or Brioche Bread– great bread is the key to this recipe so seek out the best challah or brioche bread you can find. You could also substitute any other thick-sliced bread
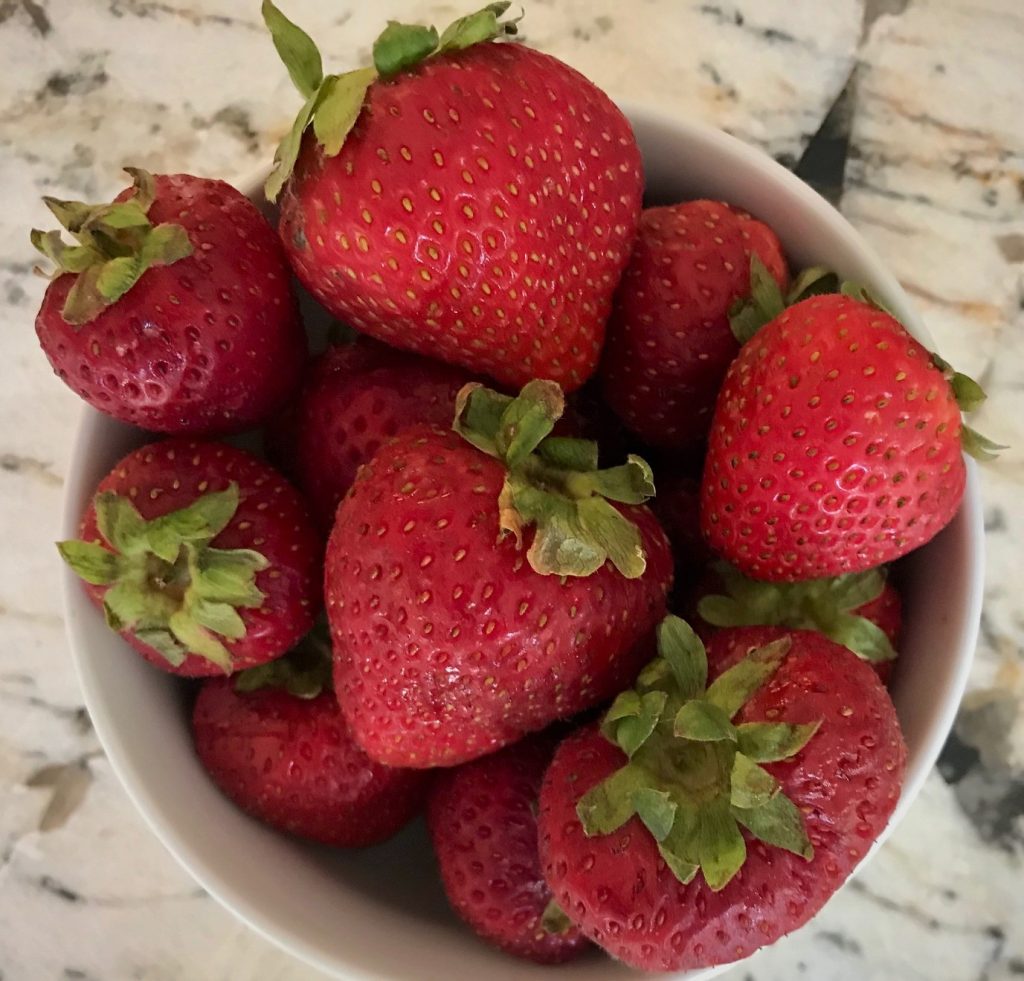
- Fresh Raspberries – strawberries, blackberries, or blueberries will work too. Or try a combo of all of these fruits!
- Eggs – you’ll need 8 whole eggs to create really lovely custardy goodness!
- Vanilla Extract – we love to make our own Vanilla ~ trust us, it’s easy!
- Cinnamon – this is an essential part of any French Toast, and sometimes we add a little more!
- Sugar – this is, after all, a sweet breakfast treat
- Salt – salt helps to balance all the sweet flavors in this recipe
How to make French Toast Casserole
A Step-by-Step Guide:
First Step
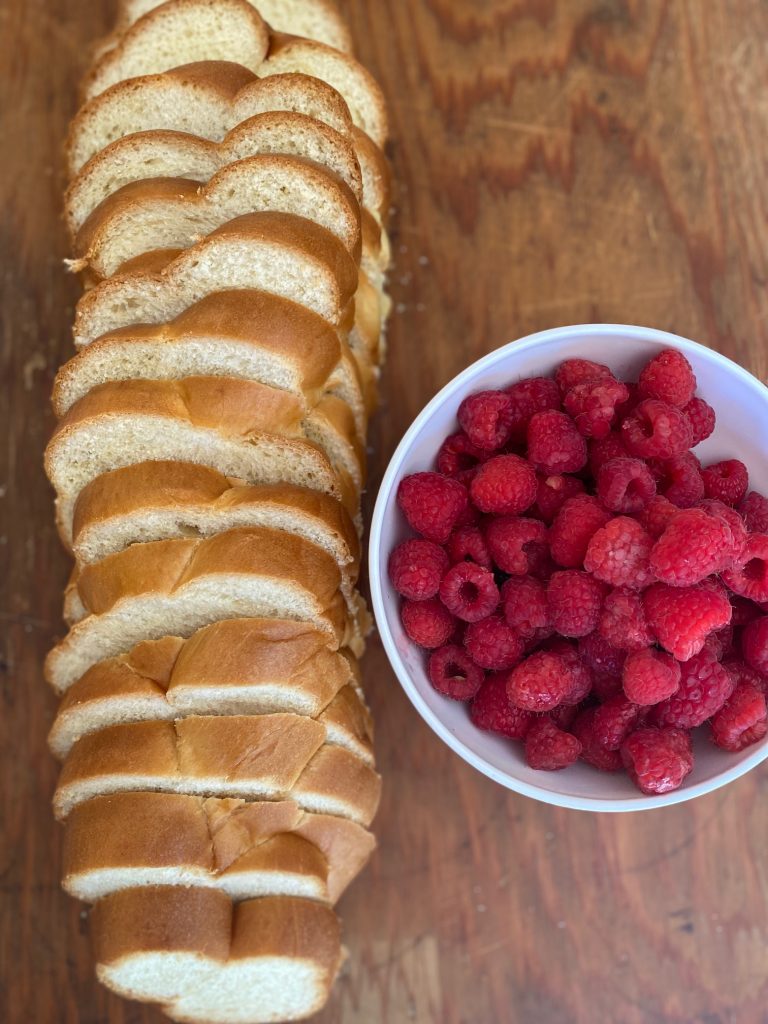
- Cut challah bread into 3/4-inch slices
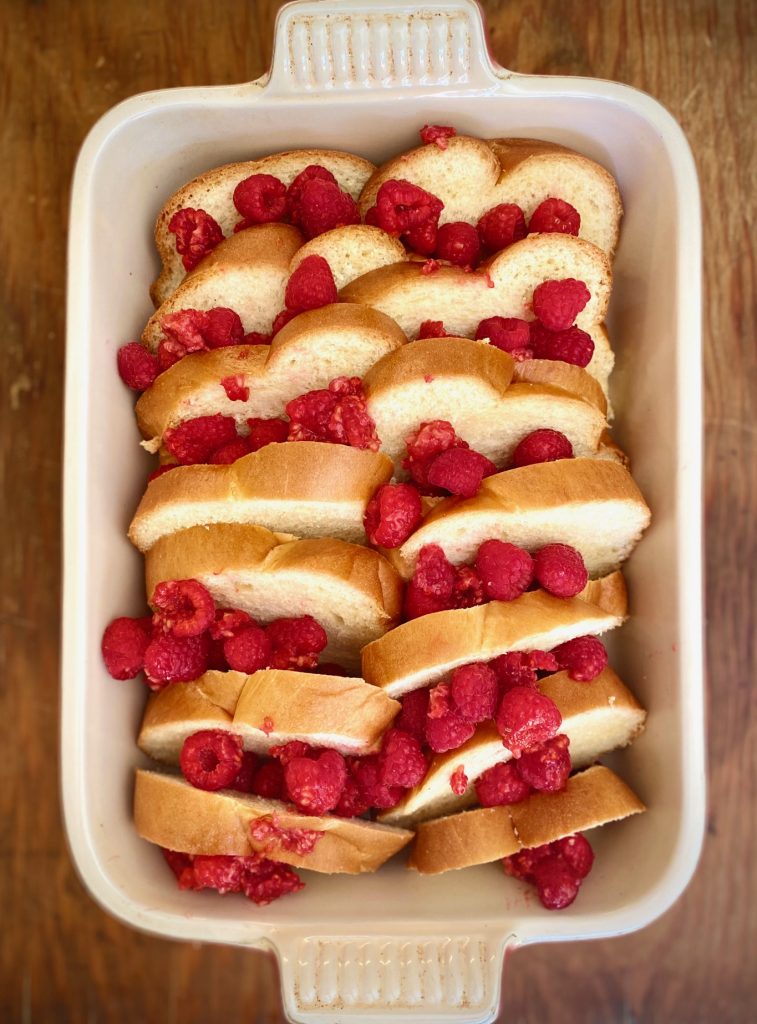
- Arrange sliced bread in a 3-quart baking dish with overlapping layers
- Place fruit evenly in between each layer
- Spread the remaining fruit over the top

Second Step
- In a large mixing bowl combine 1/2 cup of sugar, 2 teaspoons of cinnamon, and the salt, and whisk to blend
- Add eggs, milk, and vanilla extract and whisk again to combine completely
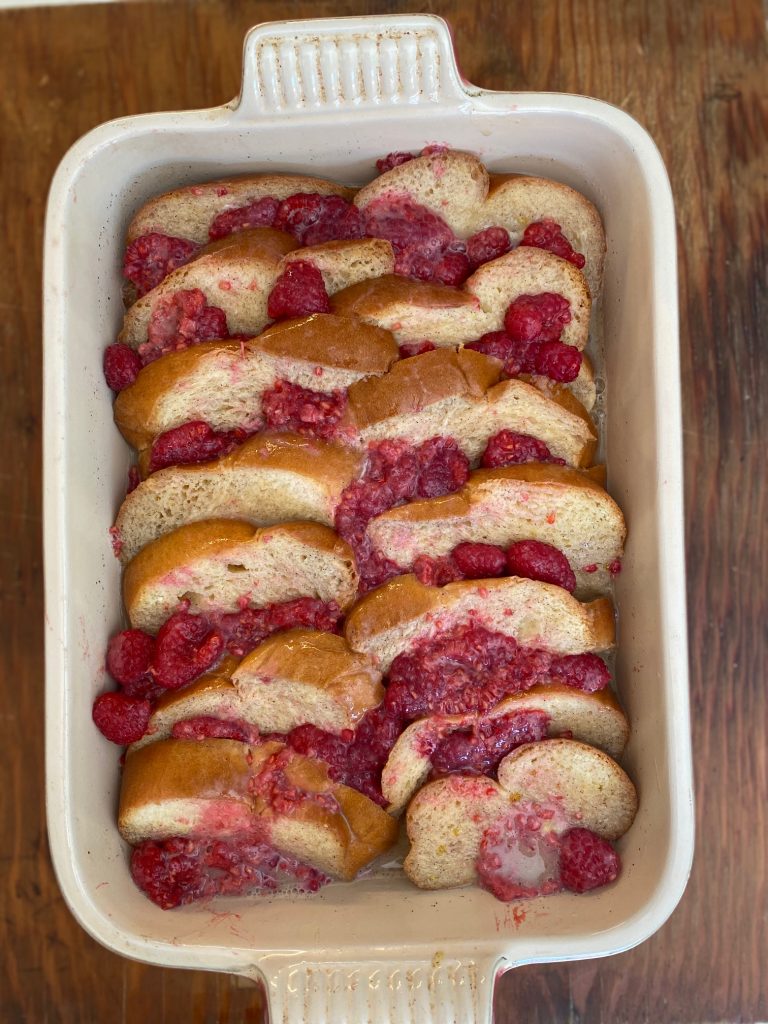
- Pour the mixture evenly over the bread and fruit
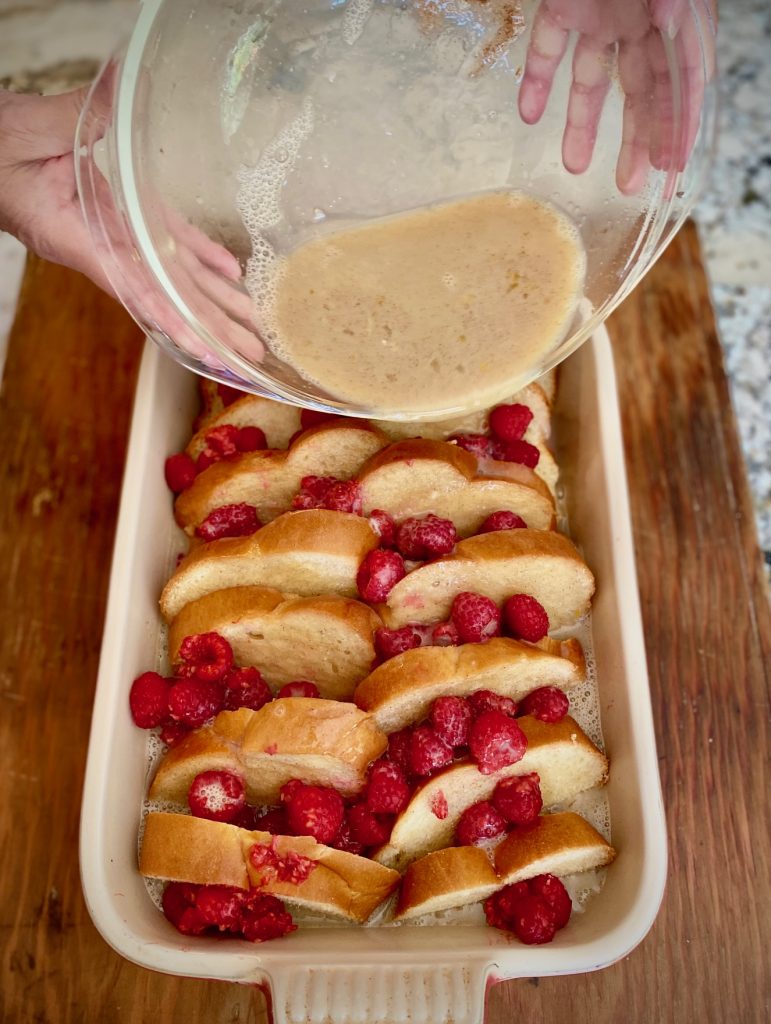
- Press down on the bread and fruit to submerge it in the egg mixture
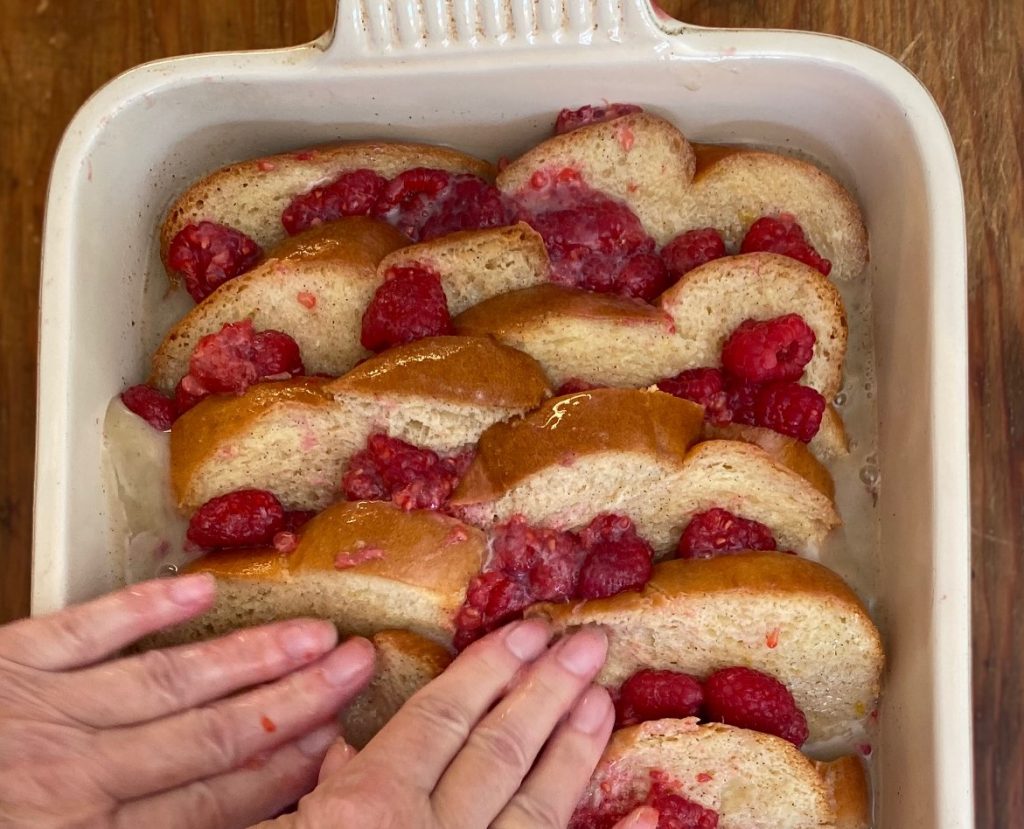
- Allow the French toast to rest, at room temperature, for 1 hour
Third Step
- Preheat oven to 350° F
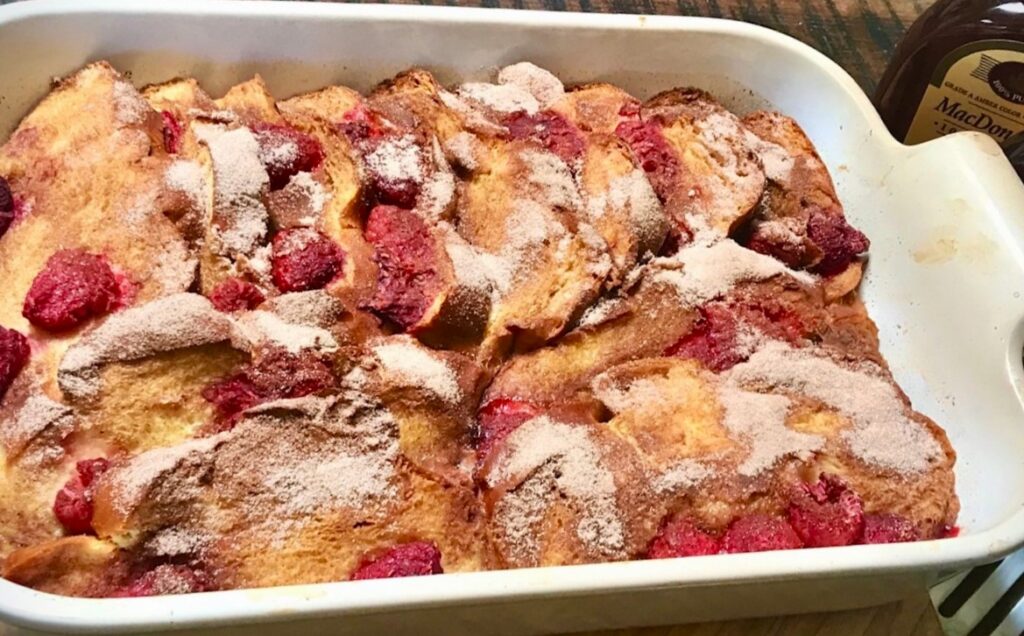
- Mix 1/3 cup of the remaining sugar and 1 teaspoon of the remaining cinnamon
- Evenly sprinkle over the top of the French toast

- Bake for 1 hour. The casserole should be golden brown on the top
- Rest for 10 minutes prior to serving to allow the custard to settle
- Serve with warm maple syrup
Delicious variations for French Toast Casserole
This sweet breakfast favorite will be the hit of your next gathering. It’s an easy, fun recipe with lots of room for variations.
One of the best things about this breakfast bake is all of the flavor variations you can try! Here are just three of our favorites:
- Use blueberries, blackberries, or strawberries for the fruit
- Instead of maple syrup drizzled on top try it with any fruit syrup or sift some powdered sugar on top
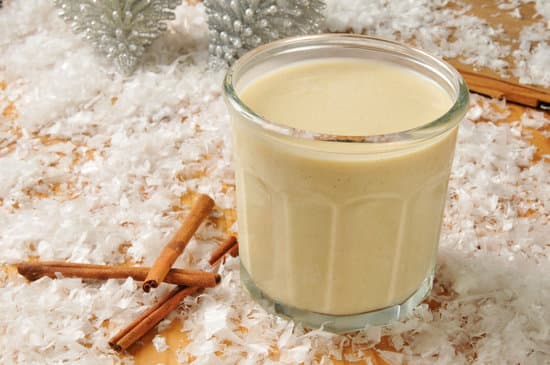
- Replaced the milk 1:1 with egg nog for a delicious holiday twist
Tips and frequently asked questions:
- What caused my French Toast to become soggy?
- Too much milk mixture will prevent the eggs from cooking properly
- If you don’t bake the casserole long enough it can cause the finished toast to be soggy. If it looks at all soupy keep it in the oven longer
- The ideal French toast will be soft on the bottom of the casserole and crisp golden brown on top
- Bread substitute – If you aren’t able to find challah bread we recommend brioche bread as a good substitute
- Warm your maple syrup on the stove or in the microwave before serving. Nothing better than warm syrup!
Fun drinks to serve with your brunch:

Looking for more breakfast & brunch ideas?
- Homemade Fluffy Buttermilk Pancakes
- Crustless Mini Quiche Bites
- Belgian Waffles
- Lemon Blueberry Scones
French Toast Casserole
Equipment
- 9" x 12" Baking Dish
Ingredients
- 1 loaf Challah Bread or Brioche
- 18 ounces Fresh Raspberries, Blueberries or Strawberries
- 8 whole eggs
- 2 cups milk
- 3 tsp vanilla
- ½ cup sugar
- 2 tsp cinnamon
- 1 tsp kosher salt
For Topping
- ⅓ cup sugar – set aside for topping
- 1 tsp cinnamon – set aside for topping
Instructions
- Cut bread into 3/4 inch slices
- Arrange in a 3 quart baking dish with overlapping layers
- Place fruit evenly into each layer and spread remaining fruit over the top
- In a large mixing bowl combine 1/2 cup sugar, 2 teaspoons cinnamon, and 1 teaspoon salt
- Add eggs, milk and vanilla, and whisk thoroughly to combine
- Pour egg mixture evenly over bread and fruit. Press bread and fruit down to submerge in the liquid
- Allow to stand at room temperature for 1 hour
- Preheat oven to 350° F
- Mix remaining 1/3 cup sugar and 1 teaspoon cinnamon together and evenly sprinkle over the top of casserole
- Bake for 1 hour until casserole is golden brown on top
- Rest for 10 minutes prior to serving. Serve with warm maple syrup
Nutrition
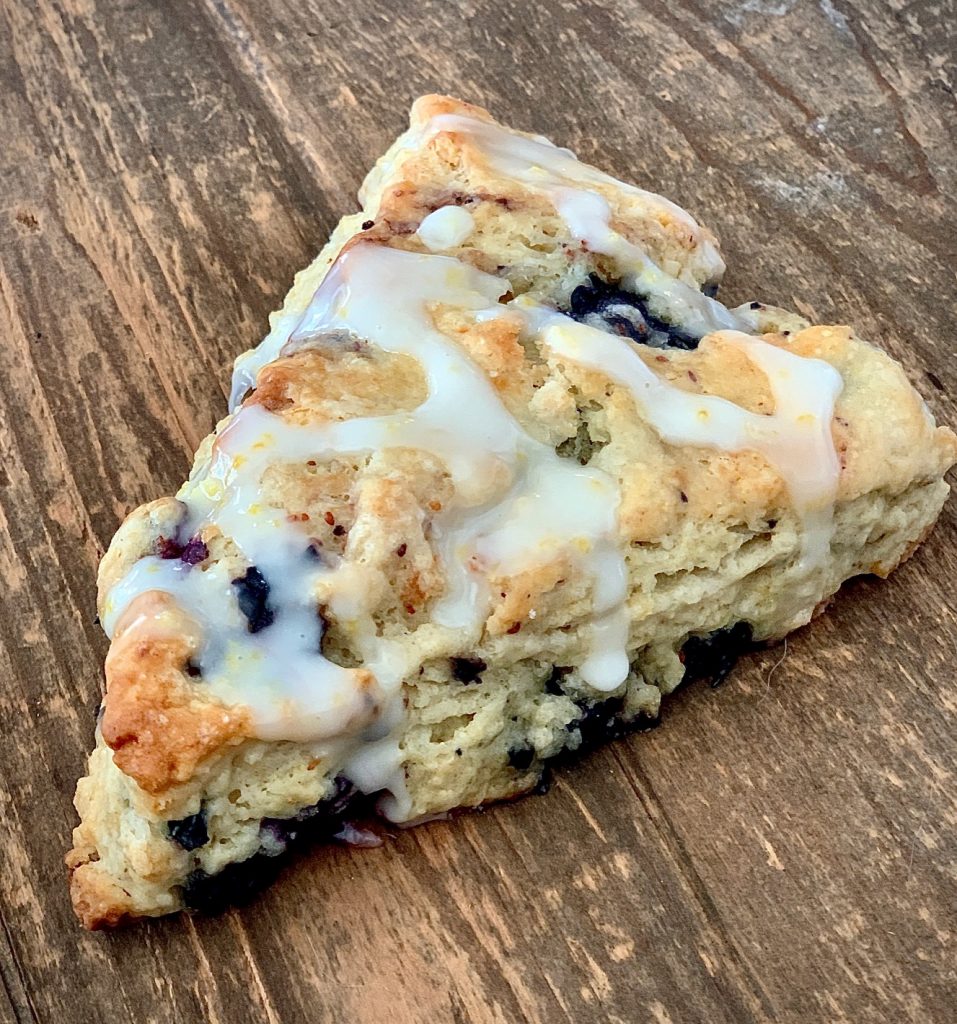
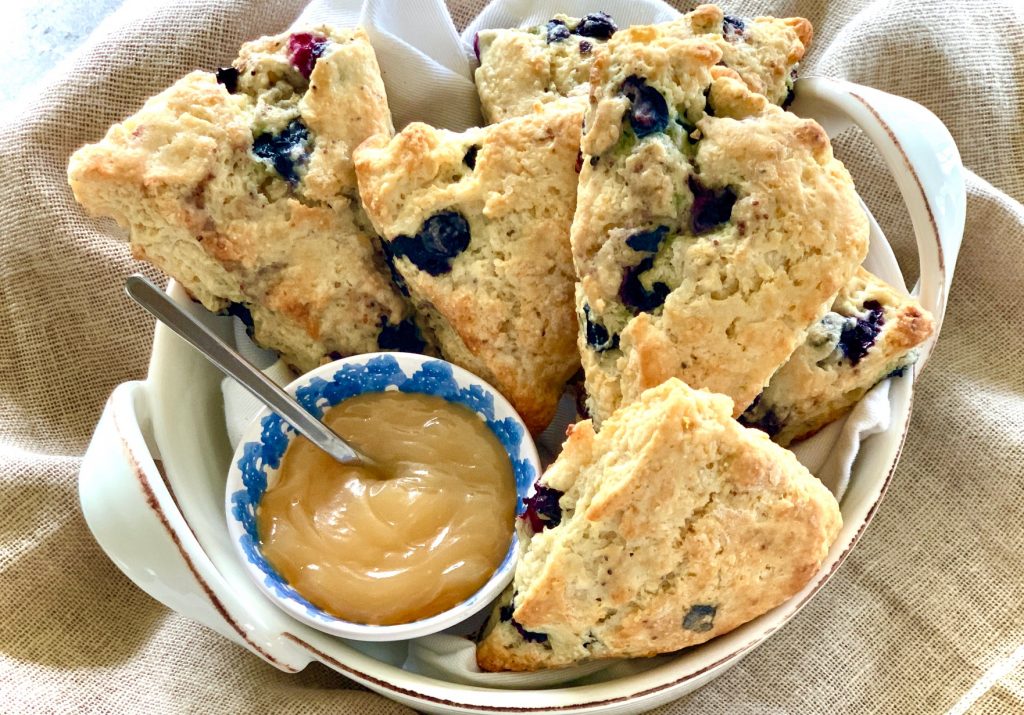
Blueberry Lemon Scones are soft, crumbly, and bursting with flavor!
Most scones tend to be dry so we’ve developed a recipe that is perfectly moist and tender, as well as easy
Blueberries and lemon pair perfectly together, however this recipe is very flexible, so you can use almost any fruit you have on hand. Sprinkle with coarse sugar or drizzle with zesty lemon glaze
This post may contain affiliate links. Please see our affiliate disclosure for more details.
Ingredients Needed
DRY INGREDIENTS:
- Flour and Sugar – the basics for any great baked good
- Baking Powder and Baking Soda – brings the lift and the rise to these scones
- Salt – to balance the sweetness in these scones, and any baked goods
- Lemon Zest – provides a bright burst of flavor
OTHER INGREDIENTS:
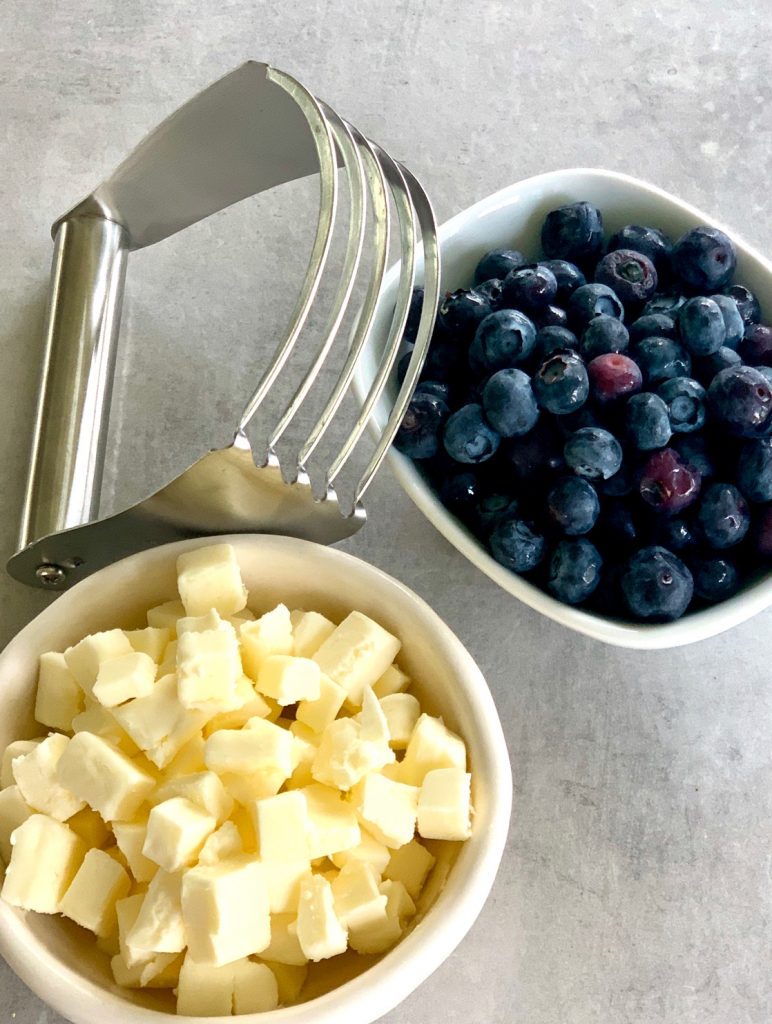
- Butter – unsalted is best but salted will work too
- Lemon Juice – fresh lemon juice will give the best flavor
- Buttermilk – we think this is the secret to tender baked goods
- Blueberries – fresh berries are preferred
- Heavy Cream – just a touch for brushing to top of the scones
- Coarse Sugar – a sprinkling gives the scones a sweet finish and a sparkly top
OPTIONAL LEMON GLAZE – this glaze is optional but an added bonus!
- Powdered Sugar – also called confectioners sugar
- Lemon Juice – fresh and sunny lemon juice makes the glaze zesty
- Vanilla Extract – we love to make our own – give it a try!

Qualities of the best buttermilk scones
- Soft and a bit crumbly
- Golden brown tops and edges
- Moist and soft on the inside
- Slightly sweet and packed with flavor

How to make Lemon Blueberry Scones
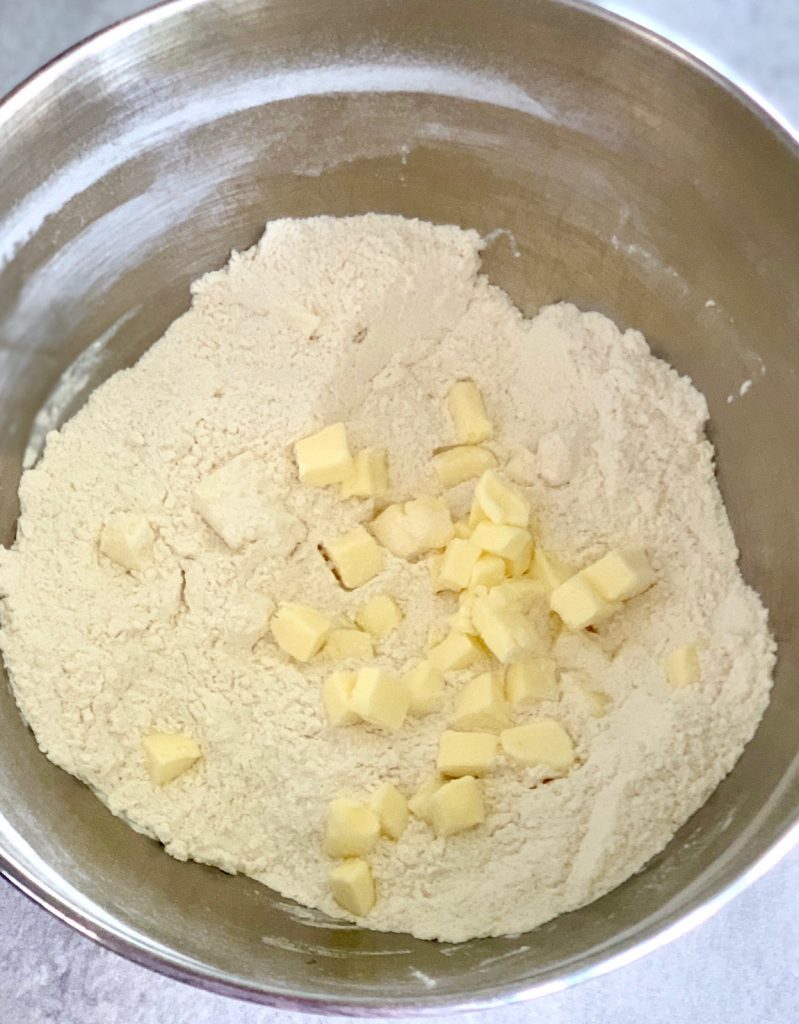
- Whisk all dry ingredients together, including the lemon zest.
- Scatter cold butter pieces into the flour mixture and mix together with a pastry blender or the back of two forks. (I don’t recommend using your hands to blend because the temperature of your hands is too warm and it will cause the butter to start softening.)
- Blend in the butter until the pieces are the size of peas. Be careful not to overmix because too much blending will develop the gluten and make the scones less tender.
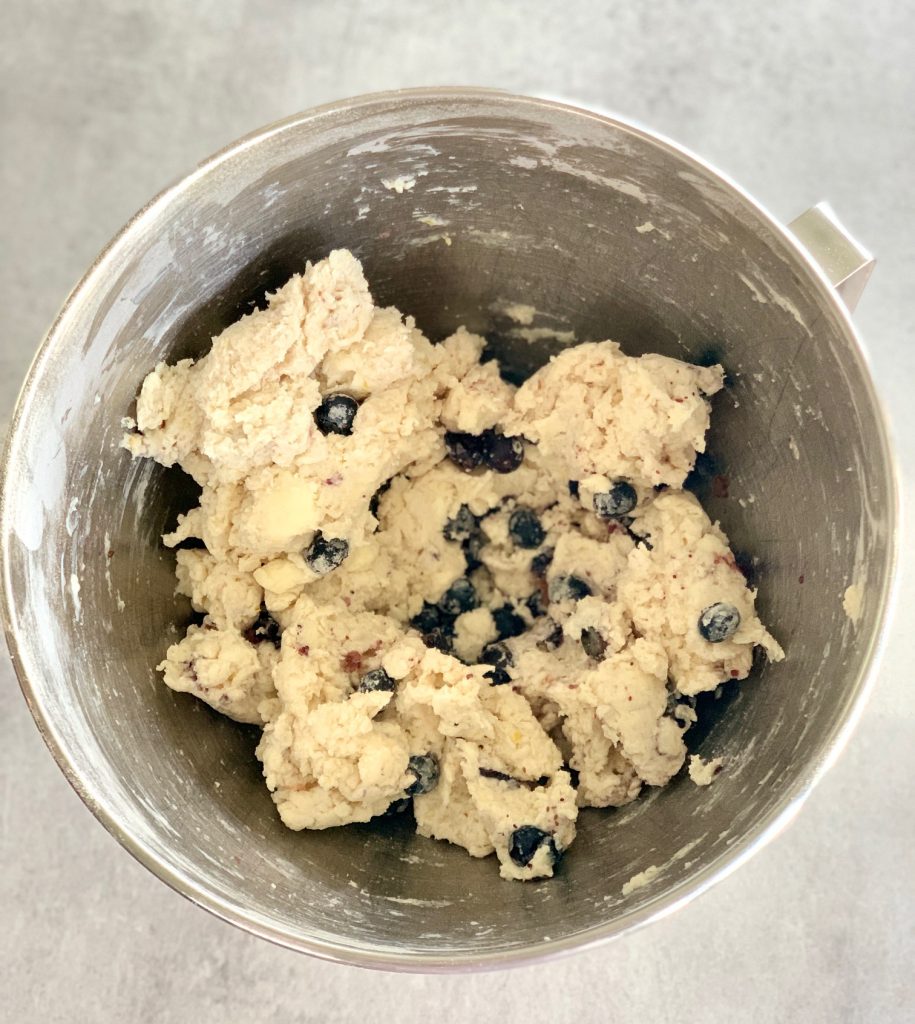
- Add in the cold buttermilk, lemon juice, and blueberries and blend very gently. The dough will still be shaggy, which is OK.

- Lightly flour your work surface, turn the dough out, and gently knead for about 30-seconds,
- Shape dough into a large 1 1/2″ thick disk.
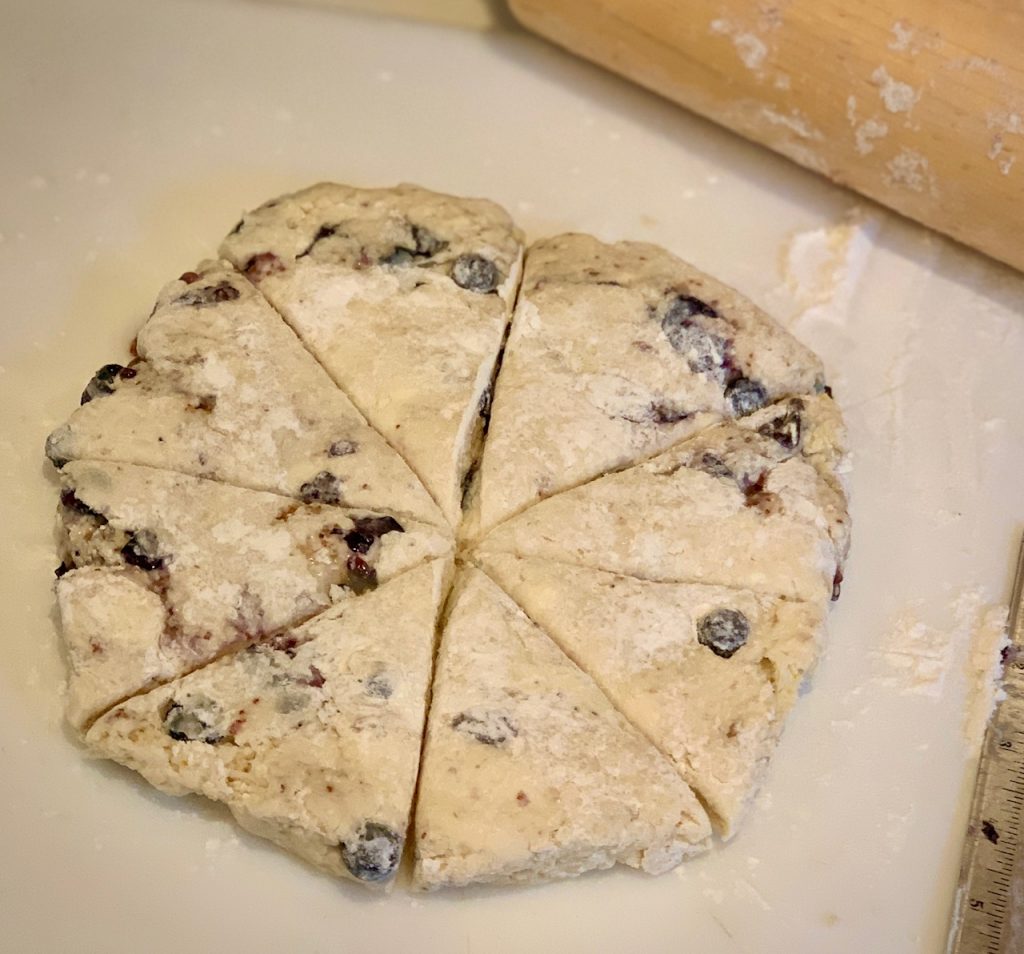
- Cut scones into 8 triangle wedges.
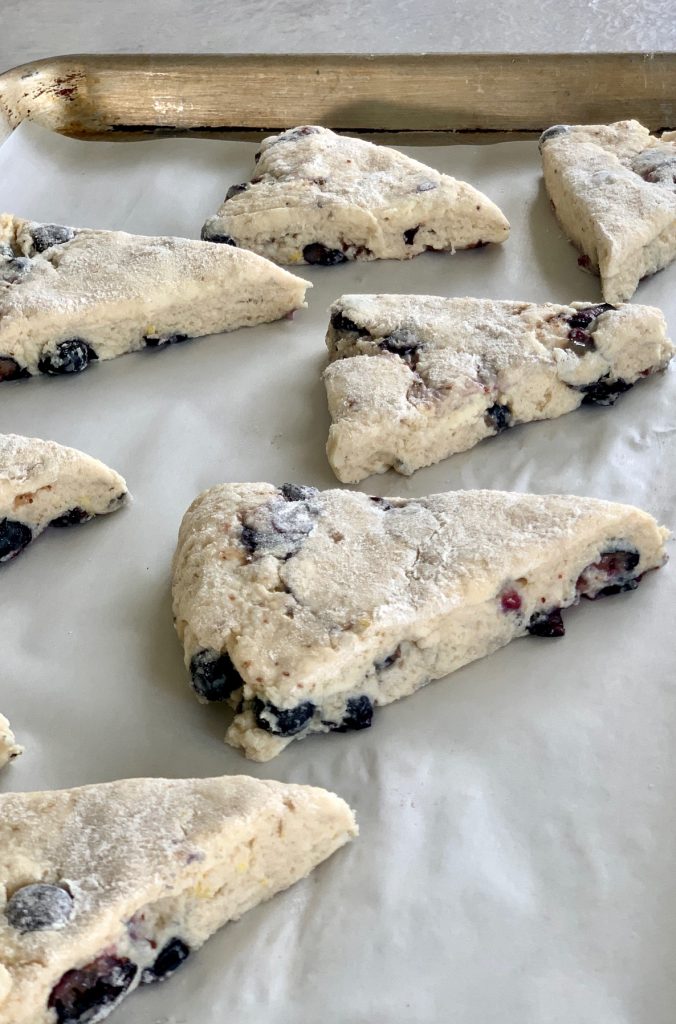
- Place onto a baking sheet, brush with cream, sprinkle with coarse salt and place the tray in the refrigerator for 15-minutes before baking
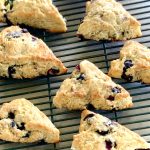
- Bake about 25 minutes. Scones should be lightly browned and easy to pull up off the baking tray and cool completely.
- If making lemon glaze prepare while the scones are cooling.
- Whisk together the powdered sugar, lemon juice and vanilla until smooth.
- Once scones are cool drizzle them with icing.

Tips for perfect lemon blueberry scones
Scones are easy to make but there are lots of small tricks that go into making the best scones.
- The colder the ingredients the better the results, so keep your scone dough cold.
- Start with frozen butter because it helps make the scones flaky. If it’s very warm in your kitchen you may want to refrigerate all of your ingredients before you start.
- Use very cold buttermilk
- Gently mix the dough by hand. The butter should be pea-sized after mixing the flour. The key to flaky scones is do not over blend the butter.
- The dough shouldn’t be too wet and should be able to stand up on its own.
- If you use frozen blueberries (or any fruit) do not thaw them before adding. Blending the berries with a teaspoon of flour will help them keep their shape during baking.
- Use fresh lemon juice and zest for a bright tangy flavor
- Chill the scones for 15-minutes before baking to get fluffy scones and avoid the chance of them overspreading in the oven.
- Make scone dough ahead of time, cut into shapes and freeze. Add about 3-5 minutes to the cooking time.
- If you want smaller scones, form dough into a rectangle, and cut into smaller wedges
Use this as your master scone recipe
Use the basic on the recipe card below and add or omit flavors for any type of buttermilk scones. The process for making the scones will be the same each time. Some favorite combinations:
- Cherries and almonds – we use this combo in our Cherry Almond Muffins
- Strawberries, raspberries, or blackberries
- Currants
- Dried ginger and rosemary
- Dried apricots, pineapple, cranberries
- Chocolate chips or chocolate chunks
Need a buttermilk substitute?
In case you don’t have buttermilk on hand it’s easy to make a substitution:
- The ratio: 1 Tablespoon of white vinegar or lemon juice to every 1 cup of regular milk.
- Mix together and let stand for a few minutes
More breakfast and brunch ideas
- Buttermilk Pancakes
- Buttermilk Banana Bread
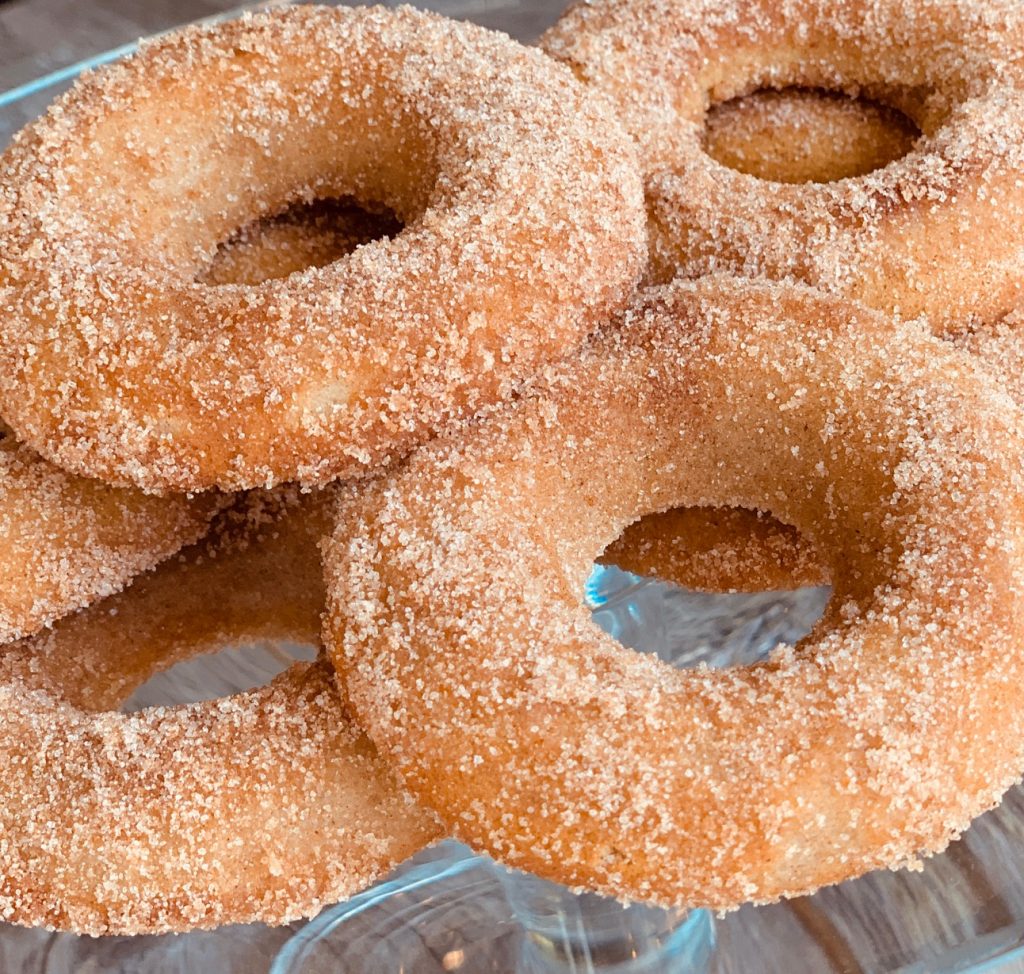
- Baked Churro Donuts
- Fresh Cherry Almond Muffins
- Cinnamon Coffee Cake with Apples
- Crustless Mini Quiche Bites
Blueberry Lemon Scones
Ingredients
Scone Ingredients
- 2 ⅓ cups All-purpose flour, plus 1 teaspoon for blueberries
- ¼ cup sugar
- 2 tsp baking powder
- 1 tsp salt
- 1 tsp lemon zest
- ¼ tsp baking soda
- ½ cup unsalted butter (4 ounces), very cold, Cut into ½" pieces
- 1 Tbsp lemon juice, freshly squeezed
- ¾ cup buttermilk, very cold
- 1 cup blueberries
- 2 Tbsp heavy cream
- 2 Tbsp coarse sugar, optional
Lemon Glaze, optional
- ½ cup powdered confectioners sugar
- 1 Tbsp lemon juice, freshly squeezed
- ¼ tsp vanilla extract
Instructions
Scones:
- Preheat oven to 400°F. Line a baking sheet with parchment paper, Silpat liner or grease lightly.
- Whisk together flour, sugar, baking powder, salt, lemon zest, and baking soda.
- Scatter the butter pieces over the flour mixture. Using a pastry cutter, or the back of 2 forks, cut the butter into the flour until the butter is dispersed throughout, and butter is about the size of peas. Be careful not to overwork because you want the butter to stay very cold.
- In a small bowl toss cold blueberries with 1 teaspoon of flour to coat
- Add the buttermilk, lemon juice, and flour-coated blueberries to the dough and gently mix until just combined. The dough should be combined but rough and shaggy, and should hold together.
- Dust a work surface lightly with flour and turn the dough out onto the floured surface. With floured hands knead the dough for about 30-seconds. Shape the dough into a large disk about 1½" thick. Cut into 8 equal wedges.
- Place wedges onto prepared baking sheet, brush with cream and sprinkle with coarse sugar.
- Chill in refrigerator for about 15-minutes. Bake for about 25 minutes, or until tops are lightly browned.
- Remove scones from baking sheet and cool for about 15-minutes.Drizzle with lemon glaze and serve.
Lemon Glaze
- In a small bowl whisk confectioners sugar to remove any lumps. Slowly drizzle in vanilla and enough lemon juice to make a smooth glaze. If too thick add more lemon juice.
Nutrition
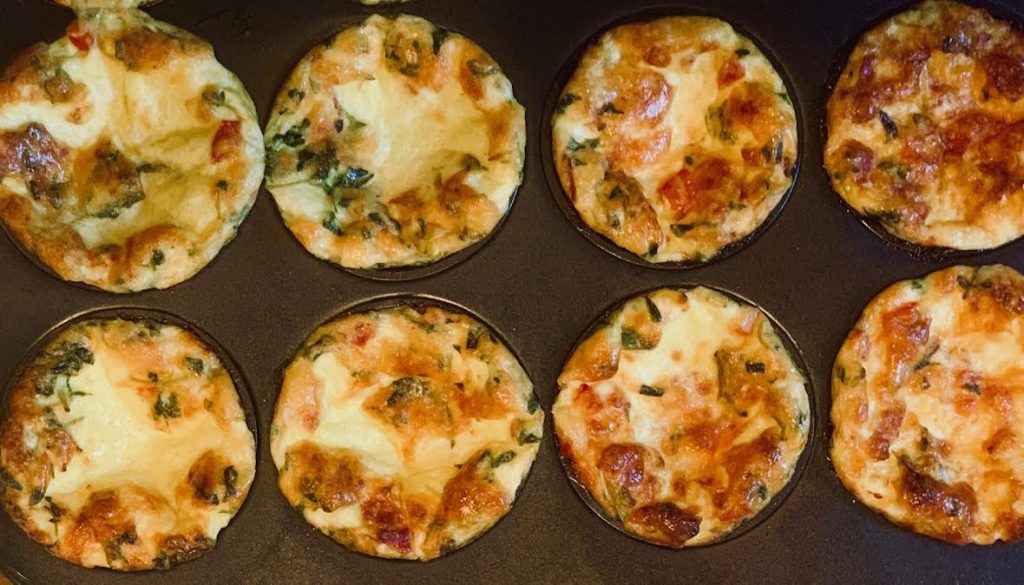
This is a perfect recipe to make on Sunday because you will have enough left over for breakfast on Monday and Tuesday, as well! Trust me, nobody will miss the crust!
Crustless mini quiche are similar to traditional quiche as far as ingredients, but without the crust. These are great if you are eating gluten-free or keto. Because there’s no crust they are just a pure hit of protein, which we all need in the morning. These are delicious for a quick lunch, as well, with a salad.
Ingredients for crustless quiche bites:
While there are basic ingredients you need to get started the rest is a blank slate for you to add your favorites – or whatever is in your produce drawer that day!
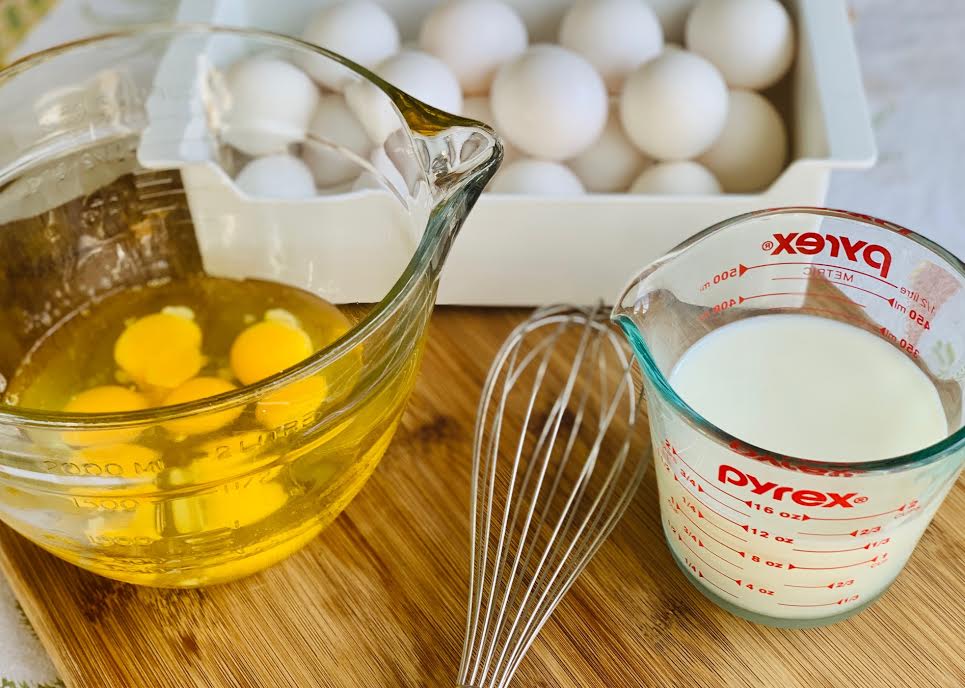
- Eggs – I use large eggs for this recipe so if yours are smaller or larger adjust accordingly
- Milk or Cream – If you want super creamy quiche use cream or half & half instead of milk
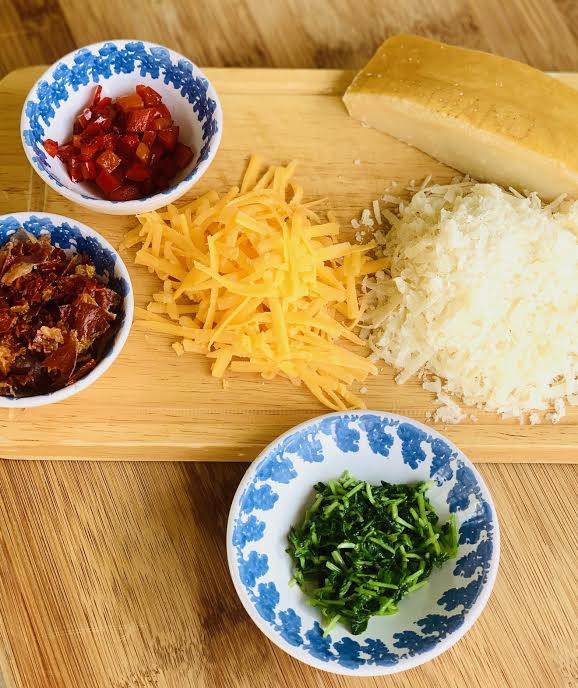
- Cheese – I love Gruyere because it has a nuttier flavor than Swiss cheese and it melts perfectly, but Swiss is a good substitute. Add some cheddar for color and flavor. Parmesan is a perfect add on, as well
- Salt and Pepper – don’t skip these two important ingredients to add to the flavor of the finished quiche
- A basic muffin tin. Nonstick works best. Here is the link to the muffin tin I use
Add-ins for mini quiche are the key to flavor!
Beyond cheese, the add-in options are endless, so choose a variety. For this recipe, I recommend a quantity of 1 cup total to keep the ratio of egg to add-ins accurate.
Always cook any meat ahead of time since the cooking time will not allow enough time to fully cook the meat.
Some uncooked vegetables can be cooked inside the quiche, however, if you want them softer then briefly steam or saute ahead of time. Frozen vegetables work well but thaw them first otherwise you can end up with watery quiche.
Add-in ideas:
- Bacon, Proscuitto, sausage crumbles, turkey crumbles, chopped ham, chopped pancetta pieces
- Red, green, yellow or orange peppers
- Fresh chopped tomatoes
- Softened sun-dried tomatoes
- Broccoli, cut very small
- Asparagus pieces, peas
- Any green, wilted or fresh, but chopped. Spinach works well, but try kale, dandelion greens, chard, or parsley
How to make crustless mini quiche:
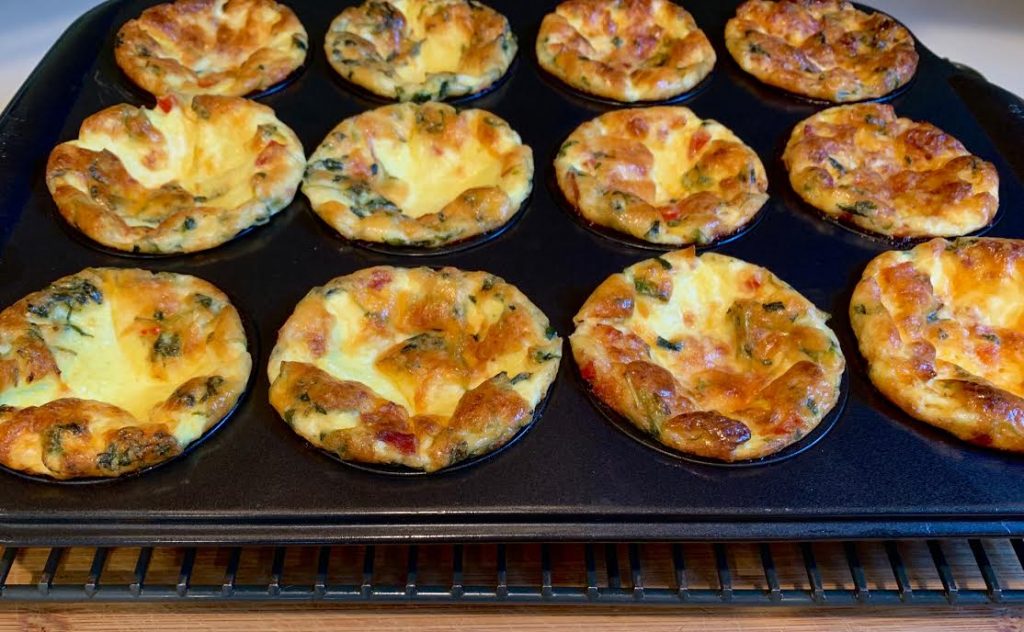
- Preheat oven to 385°F and grease a mini muffin tin, or line with paper liners
- Prep any of your add-in proteins or vegetables
- Grate the cheese
- In a large bowl whisk together eggs and milk until well combined
- Stir in cheese, salt and pepper, and any add-in ingredients
- Fill each muffin tin 3/4 full
- Bake for 17-19 minutes. A knife inserted in quiche should come out clean
- Remove from oven and let rest about 5 minutes then remove quiche from muffin tins
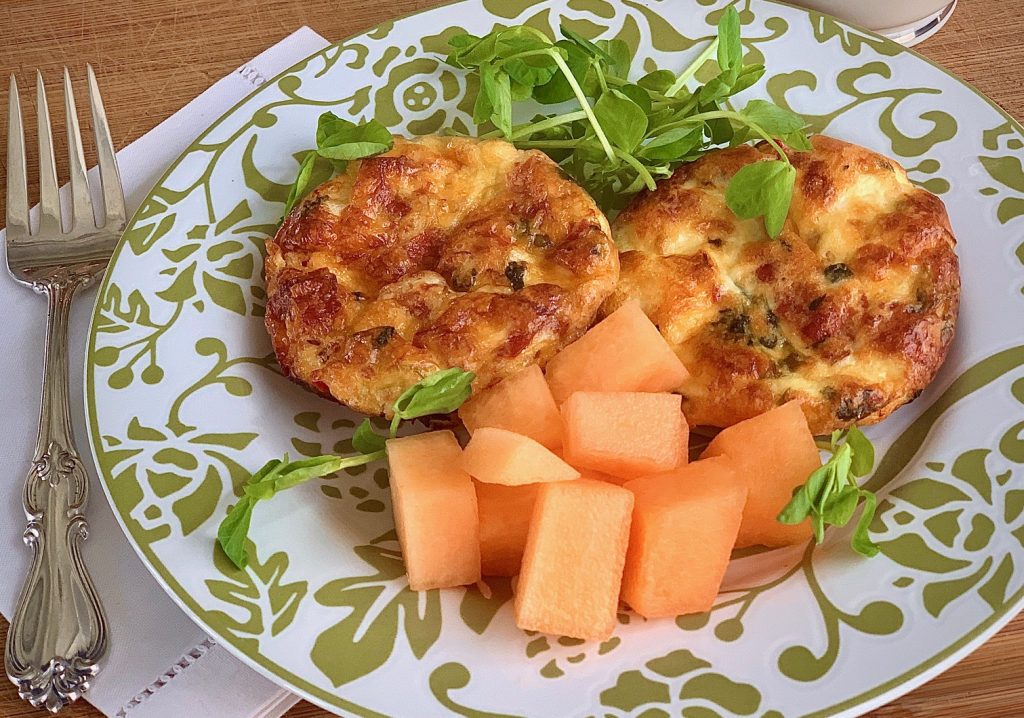
- Serve warm or room temperature
- Mini quiche can be stored in the refrigerator for about 3 days
Serving Ideas:
No need to limit yourself to breakfast with these little bites. They make great appetizers for a brunch or party.
- Add a side of fruit for a perfect breakfast
- Add a side of roasted potatoes for lunch
- A lunch side salad with mixed greens makes the perfect contrast to the richness of the eggs. Try our easy lemon vinaigrette to dress your salad
- Pair with our Homemade Buttermilk Pancakes and warm syrup
How to freeze mini quiche bites:
Mini quiche freezes really well. Cool completely and then freeze on a tray for about an hour, or until frozen through. This will prevent them from sticking together in the freezer later. Store them in a sealed container for up to 3-months. To reheat cook about 6 – 8 minutes at 350°F, or microwave about 45 seconds.
Tips to avoid watery quiche:
- Be sure to thaw any frozen vegetable ahead of time, especially frozen spinach or peas
- Don’t add too much dairy. If extra milk or cream is added to the eggs, there will not be enough proteins to set the mixture and the result will be a watery quiche. Be sure the egg to dairy ratio is accurate

Crustless Mini Quiche Recipe
Equipment
- Muffin tin
Ingredients
- 7 eggs
- ½ cup milk or cream
- ¼ cup tomatoes, fresh or softened
- ½ cup cooked bacon pieces, chopped
- ¼ cup spinach, cooked and chopped
- ¼ cup cheddar cheese, shredded
- ½ cup Gruyere, Swiss or Parmesan cheese, shredded
- ½ teaspoon salt
- ½ teaspoon black pepper, freshly ground
Instructions
- Preheat oven to 385°FHeavily grease 12 hole muffin tins
- In a large bowl whisk the eggs and milk until well combined, but don't whip.
- Add remaining ingredients and gently mix together.
- Fill each muffin cavity ¾ full
- Transfer to the oven and bake 17-19 minutes or until a knife tip inserted comes out clean.
- Rest for 5 minutes and remove from muffin tins. Serve.
- If not eating all of the quiches right away, let cool and store the remainder in a sealed container in the refrigerator for up to 3 days.
Notes
- Any of the ingredients are optional – so get creative and use what is in your refrigerator. Any meat (like bacon or ham) or super crunchy vegetables should be precooked
- Want a to-go version? Just add muffin liners before baking for easy transport.
Nutrition
This version is quick to put together because, unlike traditional beignets, they do not require yeast. The added bacon is optional but highly recommended!
A trip to New Orleans requires a stop at the famous Cafe du Monde for original beignets. It is a must! Beignets are basically a bite-sized piece of dough, fried, covered with a hearty dose of powdered sugar, and served warm. Scrumptious!
Cafe du Monde makes their famous, fluffy beignets with yeast which is always a bit of a project! Traditionally, you’ll need to wait for the yeast to rise, roll out the dough, cut it, and fry it. Our easy recipe is my go-to with no rise time ~ because when we want beignets I know they’ll be ready quickly!

Ingredients needed for no-yeast Beignets
(See the recipe card below for the exact measurements)
- Flour – We use all-purpose flour
- Baking Powder – This gives the beignets their fluffy texture
- Sugar – Contrasts well with the bacon and helps activate the baking powder
- Salt – We use fine sea salt but any salt will work
- Milk – We use 2% milk
- Egg – This is what binds the mixture together. Room-temperature eggs always work best
- Bacon – Optional, but it really adds flavor! See substitution ideas below for other options
- Powdered Sugar – A must! Because you can’t have beignets without them!
- Pure Maple Syrup – For dipping the beignets, but again, it’s optional
- Canola Oil – For frying the beignets to golden goodness
How to make Beignets with Bacon
- Prepare the dough and prep for frying
- Saute 3 pieces of bacon, let cool, and crumble or chop into small pieces. Set aside.
- Prepare a deep fat fryer with 3-4 inches of canola oil and heat to 375˚F while preparing the dough. If you don’t have a fryer use a heavy-bottomed, deep pot or Dutch oven instead.
- Line a baking sheet or platter with paper towels.
- In a large bowl combine flour, baking powder, sugar, and salt. Whisk to combine.
- In a small bowl whisk the milk, water, and eggs together. NOTE: It’s important to combine this part separately so that you don’t overwork the dough once it’s added to the flour.
- Add to the flour mixture, along with cooled, chopped bacon, and gently combine until completely mixed.
2. Frying the beignets
- Drop dough by heaping Tablespoons carefully into the deep fryer and cook for 3 minutes. Turn the beignets over and finish cooking on the other side.
- Don’t crowd the beignets. It’s best to cook 4-6 pieces at a time. This helps the oil maintain the proper temperature.
- The beignets should be light golden brown and they will float toward the top when ready.
- Carefully remove with a slotted spoon and place on prepared paper towels to cool.
- Repeat with all the batter.
- Roll the beignets in a bowl of powdered sugar to coat and remove with a slotted spoon to a plate or platter. Again you will likely want to work in batches and you can do this as they cool and others are frying.
- Serve with warm maple syrup for dipping and plenty of napkins!


Tips for making beignets:
- Because these beignets do not include yeast this will be a soft dough, and the best way to drop the dough into the fryer is with a cookie scoop or two spoons.
- I use a small fryer but it’s just as easy to use a heavy dutch oven or tall pot. You will need to fill either about 3 inches deep with vegetable or canola oil.
- It’s crucial that the oil is hot enough. Start at 375˚F because the oil will drop in temperature as you add beignet dough.
- The beignets will rise to the surface of the oil as soon as they begin to puff up and if they do not your oil is not hot enough. I like to cook one test beignet first to make sure my oil temperature is just right.
Finish beignets with powdered sugar
Once the beignets have cooled a bit add to a bowl of powdered sugar and gently coat.

Easy substitutions:
One of my favorite ways to prepare beignets is by adding an unexpected ingredient, such as smoky bacon. This recipe is a basic, easy, no-yeast beignet recipe, and can be prepared without any additions, but bacon really elevates this treat.
Other delicious additions and combinations to try:
- Shredded crab
- Finely chopped shrimp and scallions
- Finely shredded Parmesan or crumbled blue cheese
- Finely chopped jalapenos or red peppers
- Mini Chocolate chips for a sweeter treat
Here’s what’s left after we devoured a batch!

More sweet treats to try
- Baked Churro Donuts
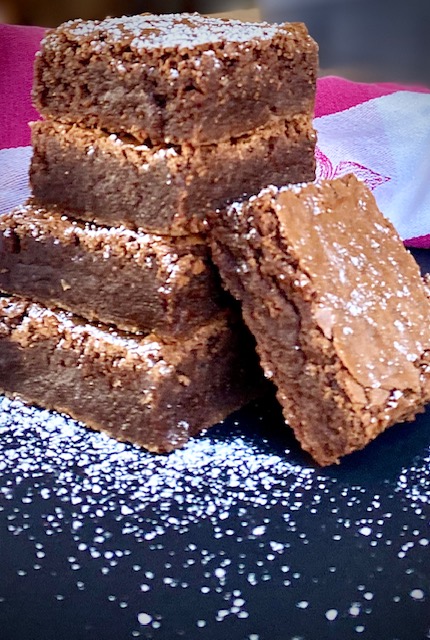
- One Bowl Espresso Brownies
- Orange Olive Oil Cake
- Chocolate Chip Skillet Cookie (also called a Piezookie)


Easy Beignets with Bacon
Equipment
- Deep Fryer, optional
Ingredients
- 3 cups all-purpose flour
- 2 Tbsp baking powder
- 2 tsp sugar
- 2 tsp salt
- 1 cup milk
- 1 cup water
- 1 large egg
- 3 pieces bacon, chopped
- 2 cups powdered sugar
- ½ cup pure maple syrup, optional
- 4-6 cups canola oil
Instructions
- Saute 3 pieces of bacon, cool and chop into small pieces
- Prepare a deep fryer with 3-inches of canola oil and heat to 375°F, or heat oil in a deep pot.
- Line a baking sheet or large platter with paper towels.
- In a large bowl combine flour, baking powder, sugar, and salt.
- In a small bowl whisk together milk, water, and the egg. Add to the flour mixture and mix well. Fold in the chopped bacon and combine.
- Drop about 1 heaping tablespoon of mixture carefully into the deep fryer. Add about 4-5 more but do not crowd the fryer or pot. Turn after about 3 minutes and finish cooking on the other side. Cook until lightly golden.
- Remove beignets with tongs or a large slotted spoon and place on prepared paper towels to cool. Repeat with all batter.
- Place powdered sugar in a medium bowl and add beignets a few at a time and roll to coat.
- Serve with warm maple syrup.
Nutrition
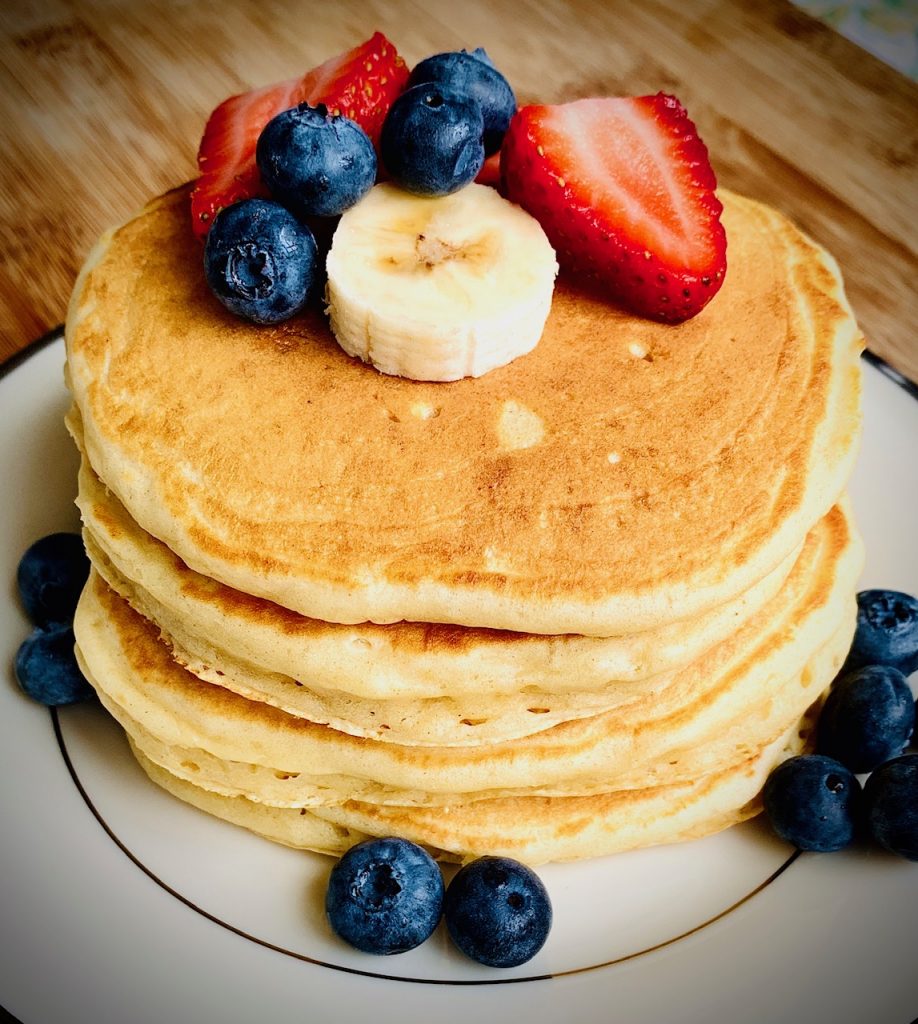
These fluffy pancakes are a staple in our house. Every weekend should start with these pancakes and a warm cappuccino!
In full disclosure, this is my husband’s secret recipe and he graciously agreed to share the recipe with us. He has been refining the steps and ingredients for over 15 years.
Jump to RecipeIngredients for the best buttermilk pancakes:
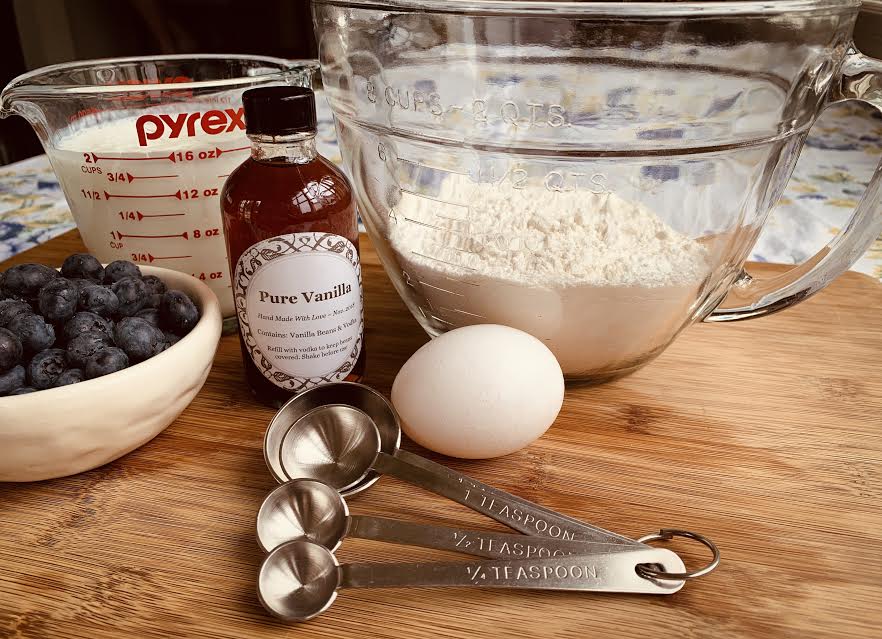
Fluffy homemade pancakes from scratch are so easy and the ingredients are pantry and refrigerator staples. Even if you are out of buttermilk you can quickly make your own (see directions below). Here’s what you will need:
- All-purpose flour
- Sugar
- Baking Powder – make sure yours is fresh because this is what makes baked goods fluffy!
- Baking Soda
- Salt
- Butter
- Eggs
- Buttermilk
- Vanilla Extract – try our homemade version
How to make homemade Buttermilk Pancakes from scratch:
- Combine all dry ingredients together and whisk with a fork: the flour, sugar, baking powder, baking soda, and salt.
- Melt the butter and let it cool for 5-minutes before adding to the pancake batter.
- Beat eggs in a small bowl and set aside.
- Slowly add buttermilk, then cooled butter and vanilla to the flour mixture.
- Stir lightly with a rubber spatula or spoon until just combined.
- Add the beaten egg. Again, use a light hand to blend.
- The batter will have some small lumps – this is what you want.
- DO NOT OVERMIX or the pancakes will not puff up as well.
- Let pancake batter rest for 10-15 minutes before cooking. This allows the acid in the buttermilk to activate the baking powder, which makes your pancakes fluffy.
What can you do with leftover Buttermilk?
Buttermilk keeps in the refrigerator for 2 weeks. but you can freeze leftover buttermilk. Just pour it into ice cube trays and, once frozen, pop the cubes out and store them in a sealed container in the freezer for up to 3 months. Let thaw in the refrigerator overnight or at room temp for 30 minutes. Whisk to recombine as some settling will naturally occur.
If you find yourself with leftover buttermilk try these delicious recipes:
- Buttermilk Banana Bread
- Buttermilk Fried Chicken
- Blueberry Lemon Scones
- Mixed Berry Cobbler
- Easy Homemade Waffles
How to make a buttermilk substitute:
Don’t have buttermilk on hand? It’s easy to make a substitution:
- The ratio: 1 Tablespoon of white vinegar or lemon juice to every 1 cup of regular milk
- Mix together and let stand for a few minutes then stir well
Make your own Homemade Vanilla Extract:
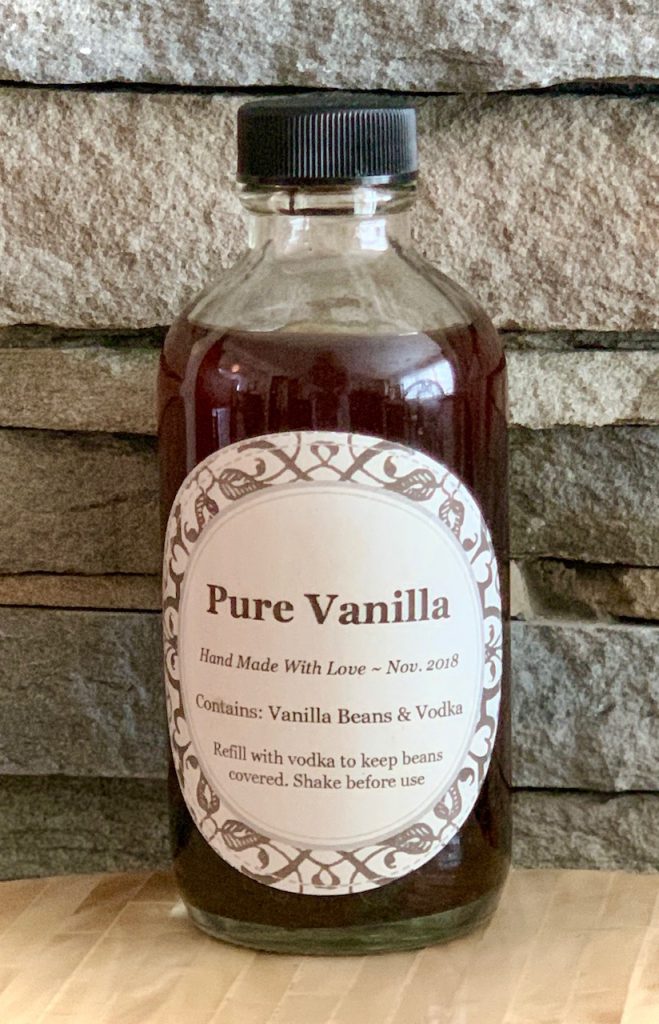
Homemade Vanilla Recipe
If you haven’t started making your own 2 ingredients homemade vanilla now’s the time to get started!
Click over for full directions. It’s easy to make and great to have on hand.
Pro Tips for Buttermilk Pancakes:
We have found the best size is about 5″ round. Here’s the best way to achieve this:
- Use 1/4 cup batter for each buttermilk pancake
- If you want full-size pancakes then use about 1/2 cup of batter
- Set the griddle to 325°F or use a large nonstick pan on medium heat
- Cook until the bottom half looks dry and then flip just once and cook on the other side until light golden brown
- Warm up pure maple syrup in a heatproof container for 10-15 seconds in the microwave to help keep pancakes warm when serving
- Stack on a wire rack to ensure the pancakes don’t get soggy on the bottom while you are cooking the next batch
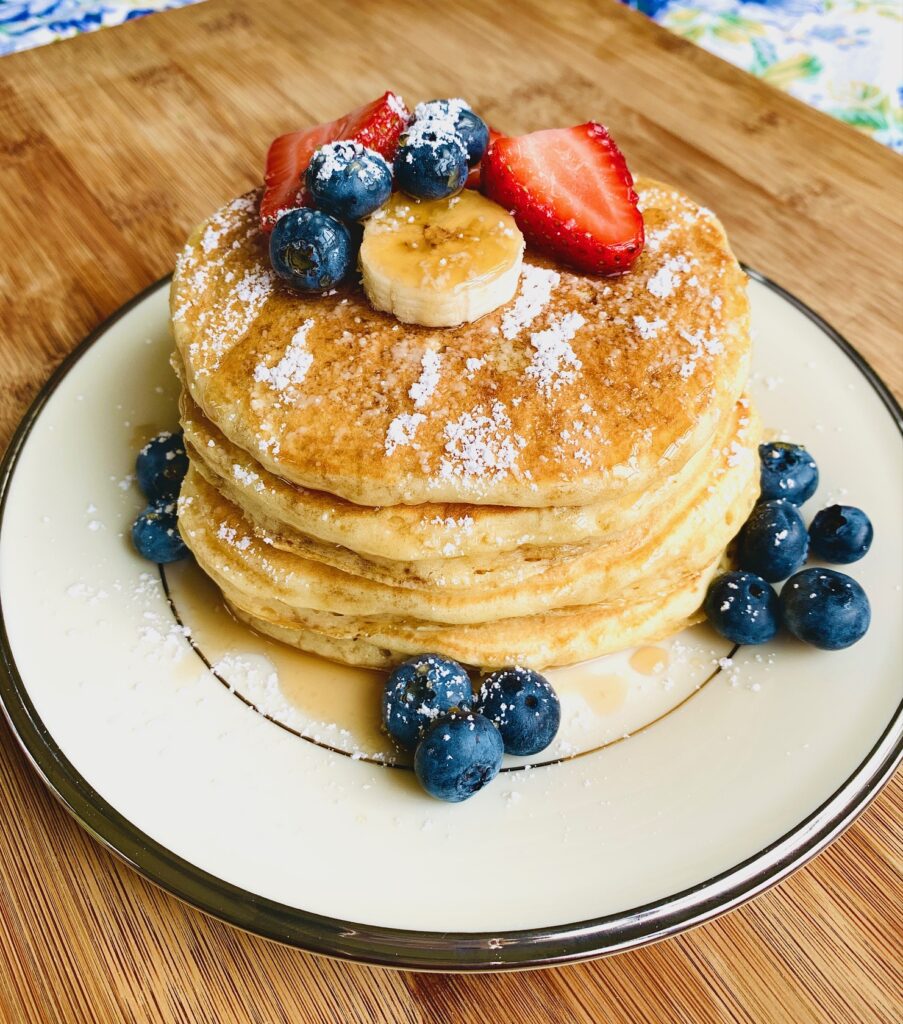
- Serving ideas: Add cut fruit and dust with powdered sugar then top with warm maple syrup
Make-Ahead and How to Freeze Pancakes
If you are planning to freeze the extra pancakes be sure to let them cool to room temperature and then wrap, separating each with waxed paper or foil, so they don’t stick together when you pull them out.
Store in a large ziplock bag or freezer-proof container, tightly sealed. Pop them in a toaster oven or regular toaster to heat them up for an easy breakfast.

Looking for a brunch drink?
Homemade Buttermilk Pancakes Recipe
Ingredients
- 2 cups all-purpose flour
- ⅓ cup sugar
- 2 tsp baking powder
- 1 ½ tsp baking soda
- ¼ tsp salt
- 2 tbsp butter, melted and cooled
- 2 eggs, lightly beaten
- 2 cups buttermilk
- 2-3 tsp pure vanilla extract
Instructions
- In a large bowl lightly combine flour, sugar, baking powder, baking soda, and salt. Set aside
- In a small bowl melt butter and let cool for about 5-minutes. Lightly beat eggs in a small bowl.
- Add buttermilk, melted butter, and vanilla to the flour mixture and use a spoon or rubber spatula to lightly combine. Add the beaten egg and mix just until combined. Batter should still have small lumps. Let batter rest for 10-15 minutes.
- Heat a griddle to 325°F or a large non-stick pan to medium.
- To make 5" pancakes add 1/4 cup batter to griddle or pan. Cook in batches and do not overcrowd pancakes. Cook until bubbles appear on the surface, about 2 minutes, and then flip and cook an additional 1 minute.
Notes
- The ratio: 1 Tablespoon of white vinegar or lemon juice to every 1 cup of regular milk. Mix together and let stand for a few minutes.
Nutrition
Like many baked goods the addition of buttermilk is the secret ingredient
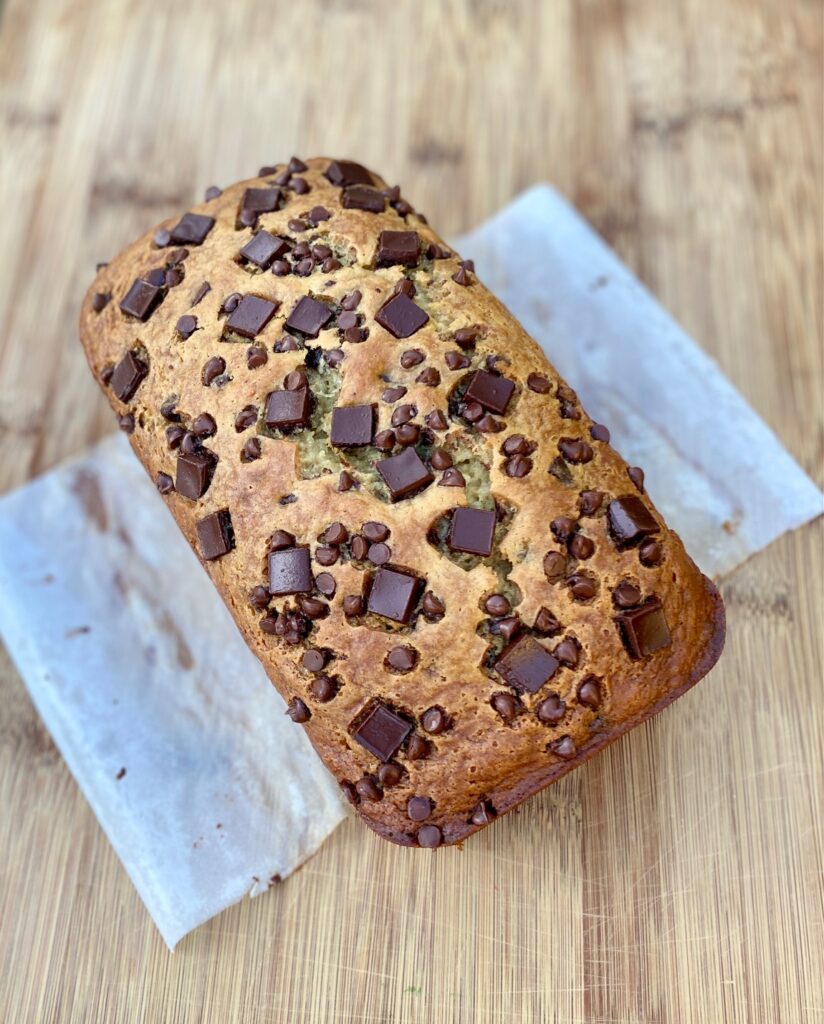
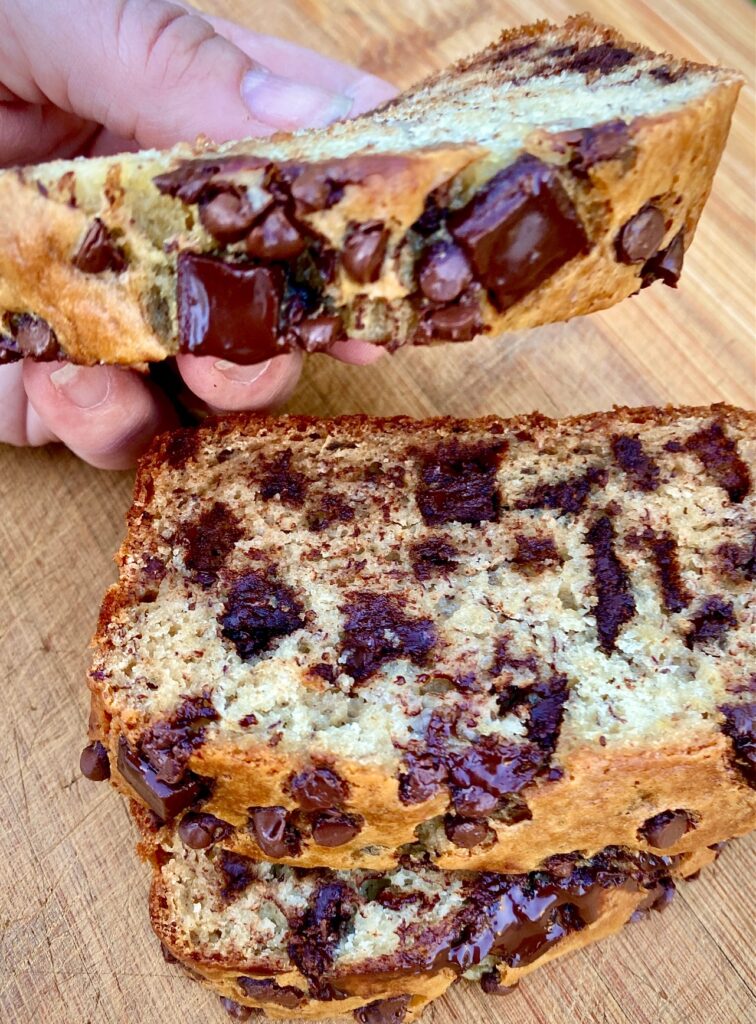
There are so many banana bread recipes out there but this one is my all-time favorite go-to recipe because it’s easy, super moist, and full of flavor. This perfect banana bread stays moist for days, although it’s usually eaten sooner in my house!
This post may contain affiliate links. Please see our affiliate disclosure for more details.
Ingredients for Buttermilk Banana Bread
Banana bread is a “quick bread”, meaning no yeast or rise is necessary. The addition of buttermilk in this recipe makes a moist banana bread but is also necessary because the acid in the buttermilk reacts with the baking soda and baking powder to give the bread a lift. The tang of the buttermilk gives it extra flavor, as well.
- Sugar – we use white sugar, but you can sub in brown sugar too
- Eggs (2) – room temperature eggs work best
- Bananas (3) – use ripe, spotty bananas because overripe bananas have more flavor
- Buttermilk – none on hand? No problem because you can make your own (see below)
- Vegetable Oil – just 1 Tablespoon is all you need – you can also use coconut oil
- Vanilla Extract – every baked good is better with pure vanilla extract, right? We make our own homemade vanilla with just 2 ingredients
- All-purpose Flour – gluten-free 1:1 works if needed
- Salt – just a pinch but it helps balance the sweetness
- Baking Powder and Baking Soda – both for a lighter fluffier bread
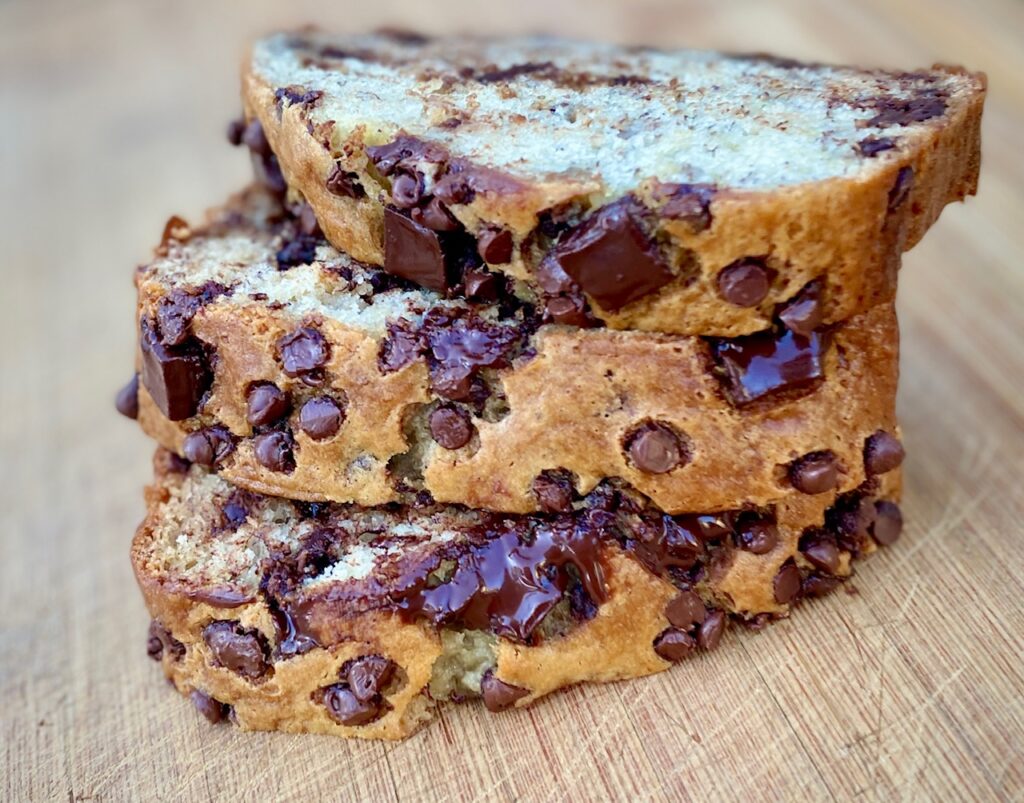
- Chocolate Chips or Chunks – or both! Optional, but delicious!
- Pecans or Walnuts – optional
How to make Banana Bread
- The key to making fluffy quick breads is do not overmix or overbake. Mix just enough to combine all of the ingredients. Otherwise, you will develop too much gluten, which can result in less tender bread.
- When adding extras, like nuts or chocolate chips, add them at the end and gently mix to combine.
The steps for quick bread recipes are nearly always the same and this bread is no exception:
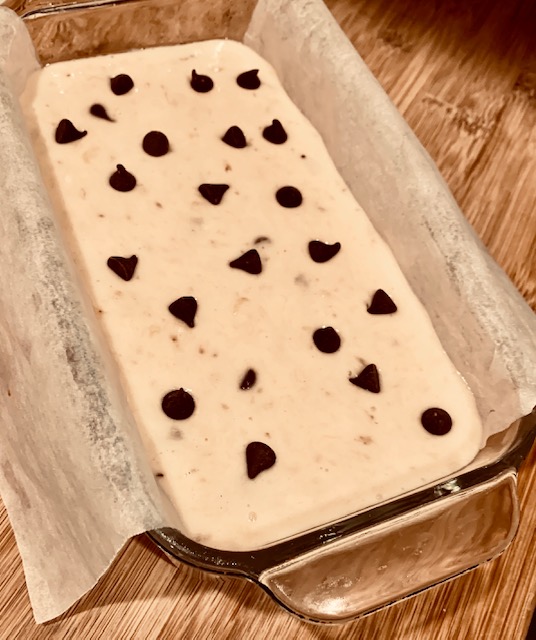
- PREHEAT OVEN: Preheat oven to 325°F. Lightly grease a 9″x5″ loaf pan. Line with parchment paper with sides overlapping, if desired.
- MIX: Combine sugar and eggs in a large bowl and beat until light and creamy with an electric mixer. This will take about 5 minutes and it’s important that you don’t skip this step
- DRY INGREDIENTS: Sift all of the dry ingredients together in a separate bowl
- BLEND: To the butter-sugar mixture add mashed bananas, buttermilk, oil, and vanilla extract
- FOLD: Gently fold in the dry ingredients into the wet ingredients and mix just until blended
- OPTIONAL CHIPS AND NUTS: Add in additional optional ingredients
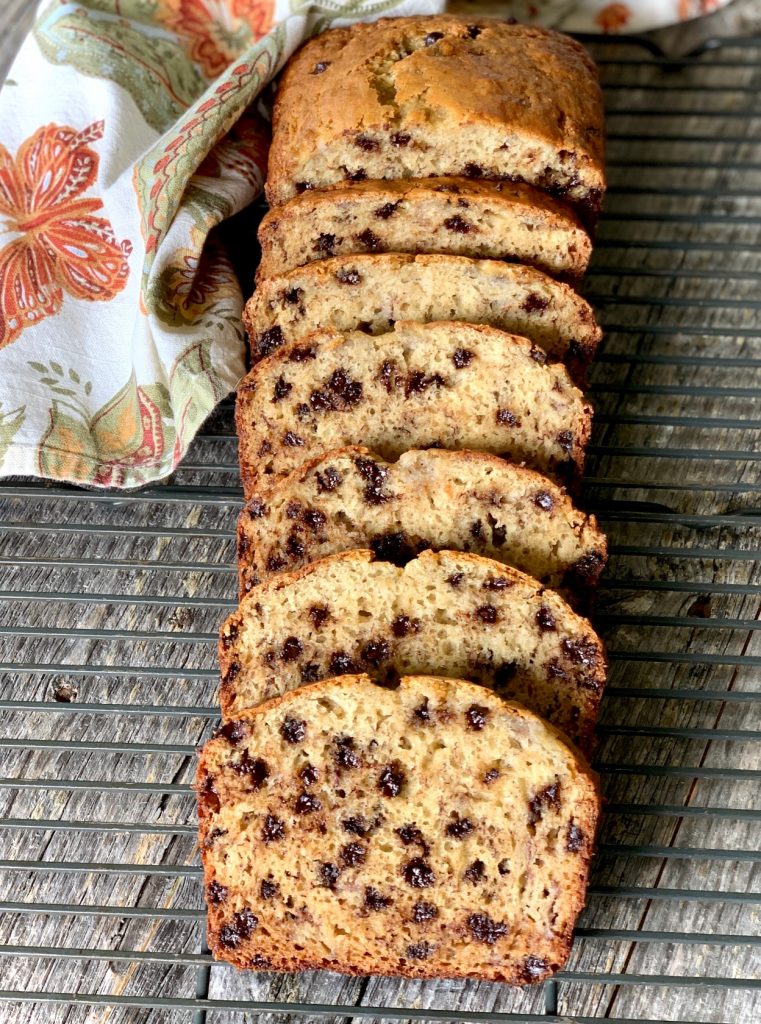
- BAKE: Pour batter into the prepared bread pan and bake until the top springs back when touched and a skewer inserted in the middle of the bread comes back clean, about 55-65 minutes. The top should be golden brown.
- COOL: Allow the bread to cool in the pan on a wire rack for 30 minutes before removing it. If the pan was lined with parchment it’s easy to remove by grasping the parchment paper handles and gently pulling the bread out. Let cool completely before slicing
Tips for prepping the pan
- Lining the pan makes it easy to remove the cooled bread. Use a strip of non-stick parchment paper to line the pan and overlap it to use as a handle. You can easily pull the whole loaf out once cooled. See below for example.
- If you don’t have parchment paper generously grease the pan with non-stick spray, canola oil, or coconut oil.
Add-In Ideas for Banana Bread
- Chocolate Chips or Chunks – regular or mini chips, chocolate chunks, or a combo of all of these for variety
- Walnuts or Pecans – lightly chopped
When my kids were small I started adding chocolate chips as an enticement to get them to try my original recipe for banana bread and it was an instant hit. Even though my boys are teenagers now they still want chocolate chip banana bread, so the chips aren’t really optional in our house!

Need a buttermilk substitute?
In case you don’t have buttermilk on hand it’s easy to make a substitution:
- The ratio: 1 Tablespoon of white vinegar, cider vinegar, or lemon juice to every 1 cup of regular whole milk.
- Mix together and let stand for a few minutes to make 1 cup buttermilk
The best type of bananas to use
- SPOTTY, RIPE, BROWN BANANAS: One of the great things about buttermilk banana bread is that you can use up bananas that have passed their prime. In fact, the bread is better with overripe spotty bananas because they mash perfectly and have a deep sweet banana flavor.
- CHEFS TIP: peel and freeze bananas when they’ve reached the spotty stage and defrost before using them. I store them in quantities of 3 so they are already ready for this recipe.
Tips for making the best banana bread
- Do not over-mix the batter. The more you mix the more the gluten develops. Overmixing will result in a dense, rather than a fluffy loaf.
- Test for doneness by inserting a skewer in the center of the bread. If the skewer comes back clean the bread is cooked. If you have an instant-read thermometer the bread should have an internal temperature between 200-205℉.
- If the top begins to brown too quickly loosely cover it with aluminum foil as it finishes baking.
- Let the bread rest for 30 minutes before removing it from the pan to let it cool completely.
- Most “quick breads” will crack on the top during baking, which is OK!
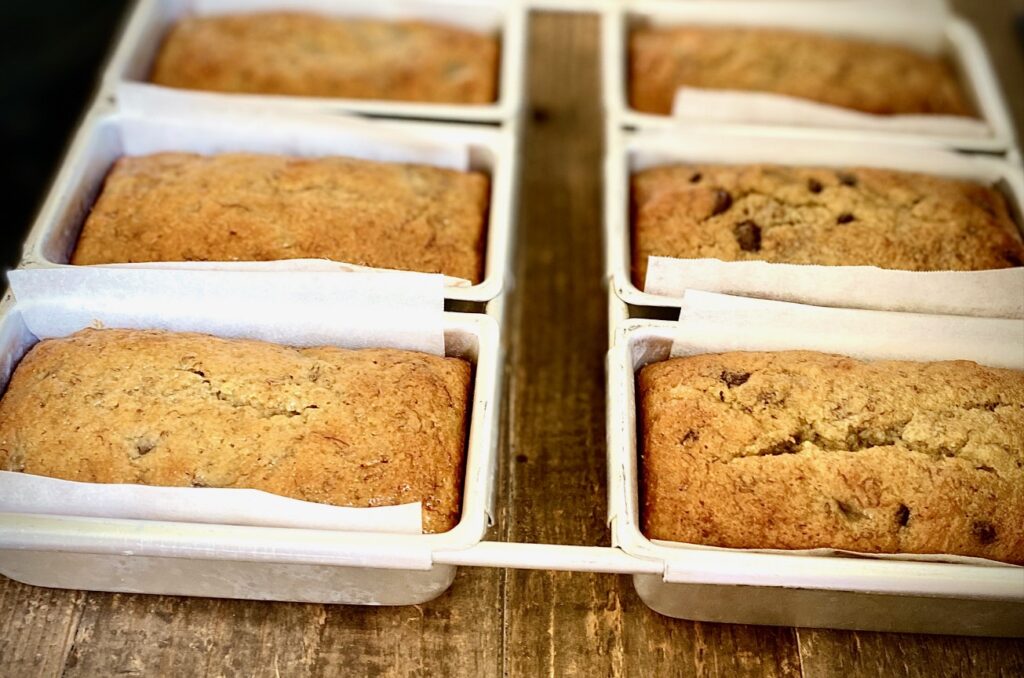
How to make small Banana Bread loaves
- All “quick breads” are perfect for mini loaf pans. The only adjustment you will need to make is the baking time.
- We used a pan that makes 6 small loaves and the baking time is 30-35 minutes.
- Mini bread loaves freeze beautifully (see below for freezing instructions)
How to Store Banana Bread
- Cool the bread completely
- Wrap tightly in plastic wrap
- ROOM TEMPERATURE: Store on the counter for up to 4 days
- FREEZE: tightly wrap and store in a sealed bag or airtight container, for up to 6 months. Allow bread to thaw on the counter before slicing and serving
- We don’t recommend storing it in the refrigerator, as that will dry the bread out quicker
Looking for other quick bread recipes to try?
- Blueberry Apple Bread
- Classic Zucchini Bread
- Pumpkin Nut Bread
- 4 Ingredient Beer Bread & Dinner Rolls
Buttermilk Banana Bread with Chocolate Chips
Equipment
- 9" x 5" Loaf pan
Ingredients
- ¾ cup sugar
- 2 large eggs
- 3 medium ripe bananas, well mashed
- ⅓ cup buttermilk (room temperature)
- 1 Tablespoon vegetable oil
- 4 teaspoons vanilla extract
- 1 ¾ cups All-purpose flour
- 2 teaspoons baking powder
- ½ teaspoon baking soda
- ¼ teaspoon salt
- ¾ cup chocolate chips or chunks
- ½ cup pecans, roughly chopped, optional
Instructions
- Preheat oven to 325°F. Lightly grease a 9"x5" loaf pan. Optional: Line with parchment with sides overlapping.
- Sift together flour, salt, baking powder, and baking soda. Set aside
- In the bowl of an electric mixer; add sugar and eggs and beat for about 5 minutes until thick and light in color.
- Mix in mashed bananas, buttermilk, oil, and vanilla. Blend until well combined.
- Add flour mixture and mix until just combined. Do not overmix. Gently fold in chocolate chips and nuts, if using, with a rubber spatula.
- Transfer batter to prepared pan. Bake bread on the middle rack of the oven, until golden brown on top, for about 1 hour. Test for doneness by inserting a toothpick into the center. If it comes out clean the bread is done. If you have an instant-read thermometer the bread should have an internal temperature between 200-205℉.
- Let the bread cool on a cooling rack for about 1 hour. Lift the bread from the pan by using the parchment paper as handles. Cut into 12-14 slices.Store, covered, at room temperature for up to 3 days.
Notes
- Calorie count does not include optional nuts
- Use chocolate chunks, chips, and mini chips for a variety
- This bread blends best if the buttermilk is close to room temperature
- Store at room temperature for up to 4 days, or freeze, tightly wrapped for up to 6 months
- If making mini loaves be sure to adjust the baking time accordingly